Workflow Plugin - Custom Node
It refers to using the plugin capabilities to encapsulate commonly used code blocks, API requests, etc., in a workflow as a custom node for use by all members of the organization.
Custom nodes are similar to packaged business processes, but they are not used to handle specific business processes. They are only used to encapsulate single data processing steps. They can internally use branch, AIGC, send API request, code block, and JSON parsing nodes.
Users can set the node's name, icon, and input parameters. After configuration is complete, the same effect as using the system-provided nodes can be achieved. Developers can encapsulate complex code blocks and API requests as custom nodes, greatly simplifying the use for ordinary users, and better achieving no-code empowerment.
Use Case
Example Scenario
When integrating external APIs in the workflow, data often needs to be encrypted in different ways. Previously, users had to handle this themselves through code blocks, which was not very convenient, and users who are not familiar with code found it difficult to manage. At this time, you can encapsulate a custom node in the workflow to implement selecting an encryption method (MD5, sha1, sha256, HMAC) to encrypt the input data, and providing it for use by all users in the organization.
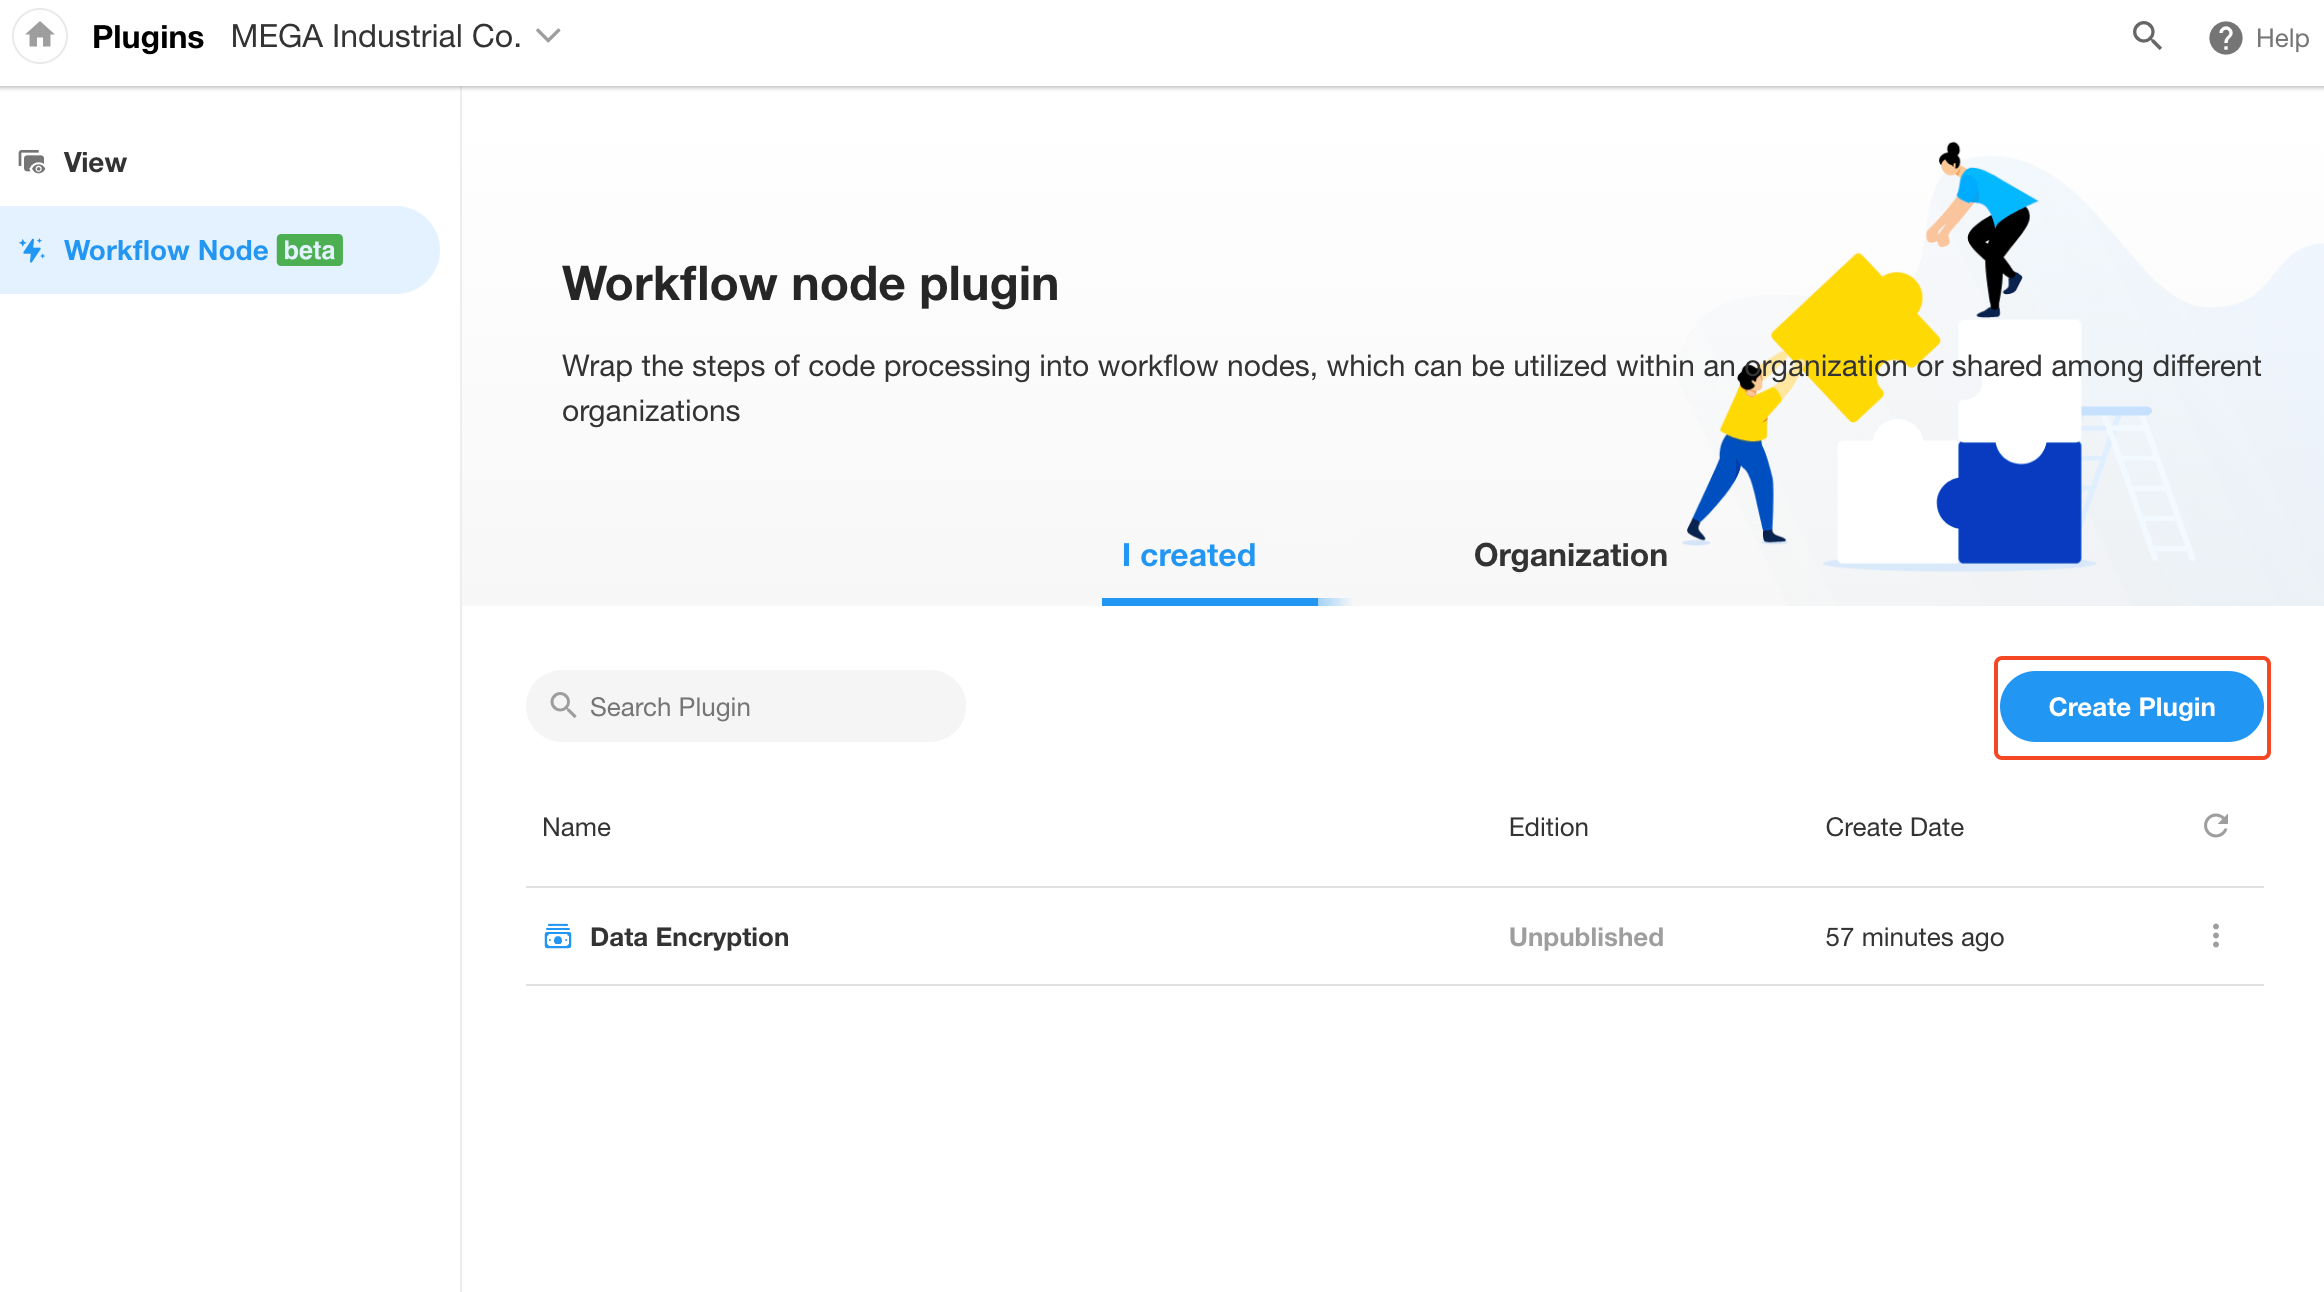
Entrance to create custom nodes
Go to [Plugin] > [Workflow Node], and click [Create Plugin] to start developing a new node plugin.
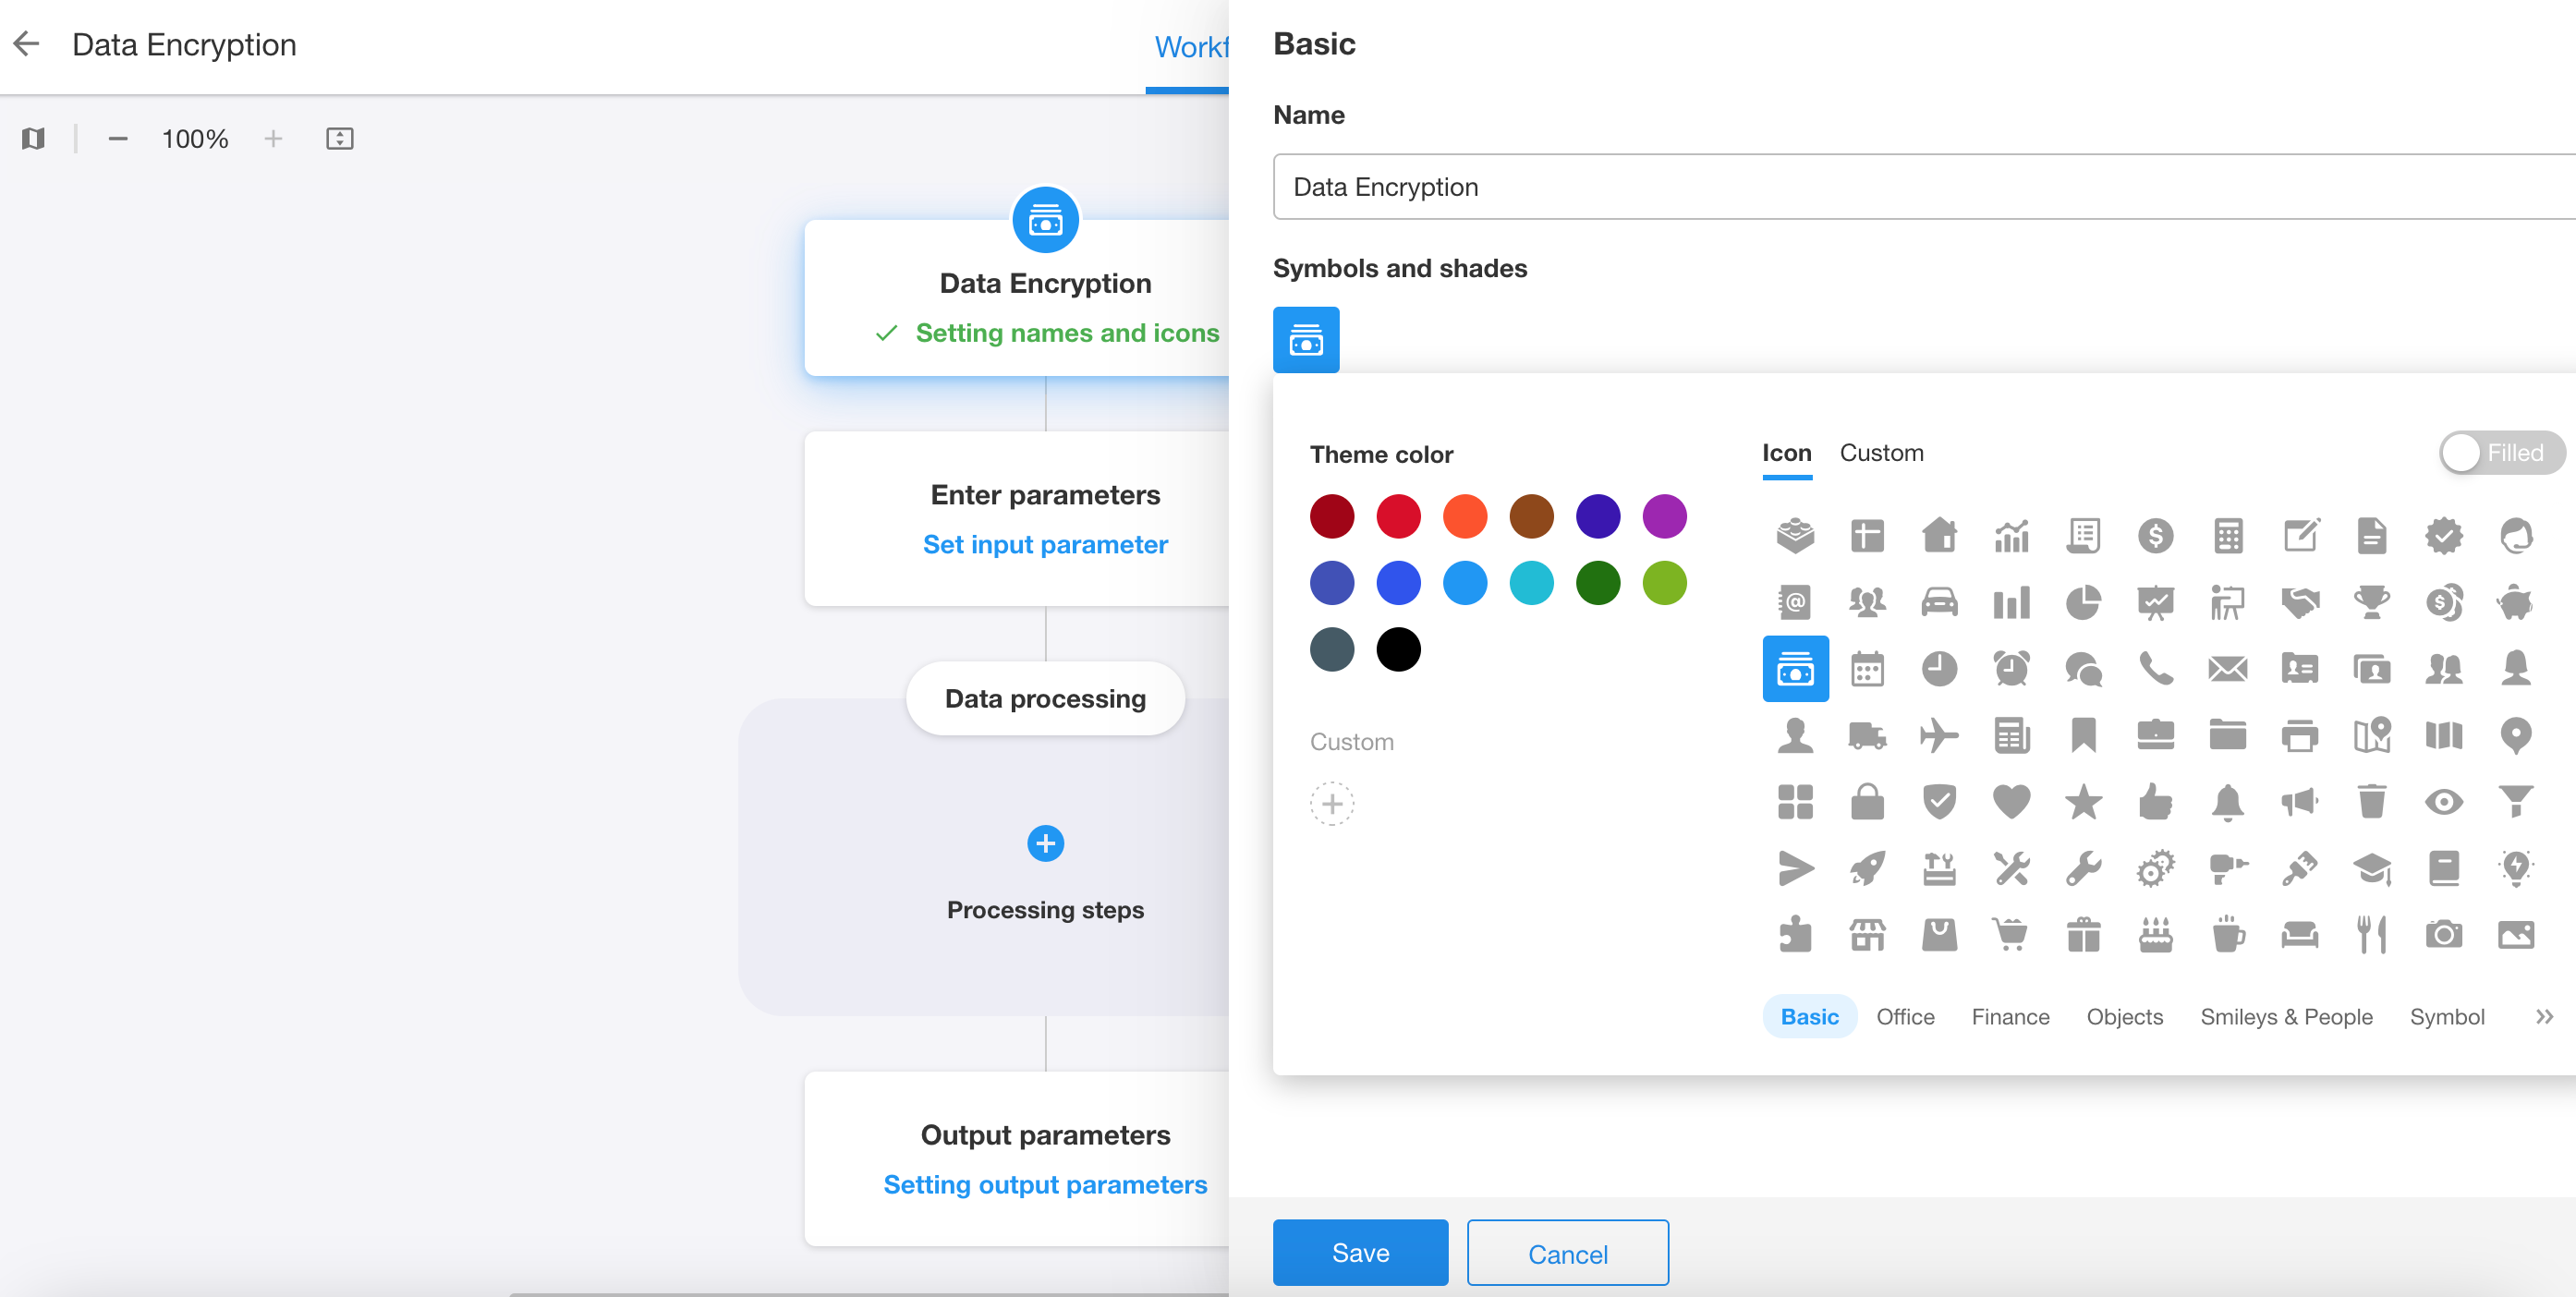
Set the node name/icon/description
The description will be displayed when users use the node.
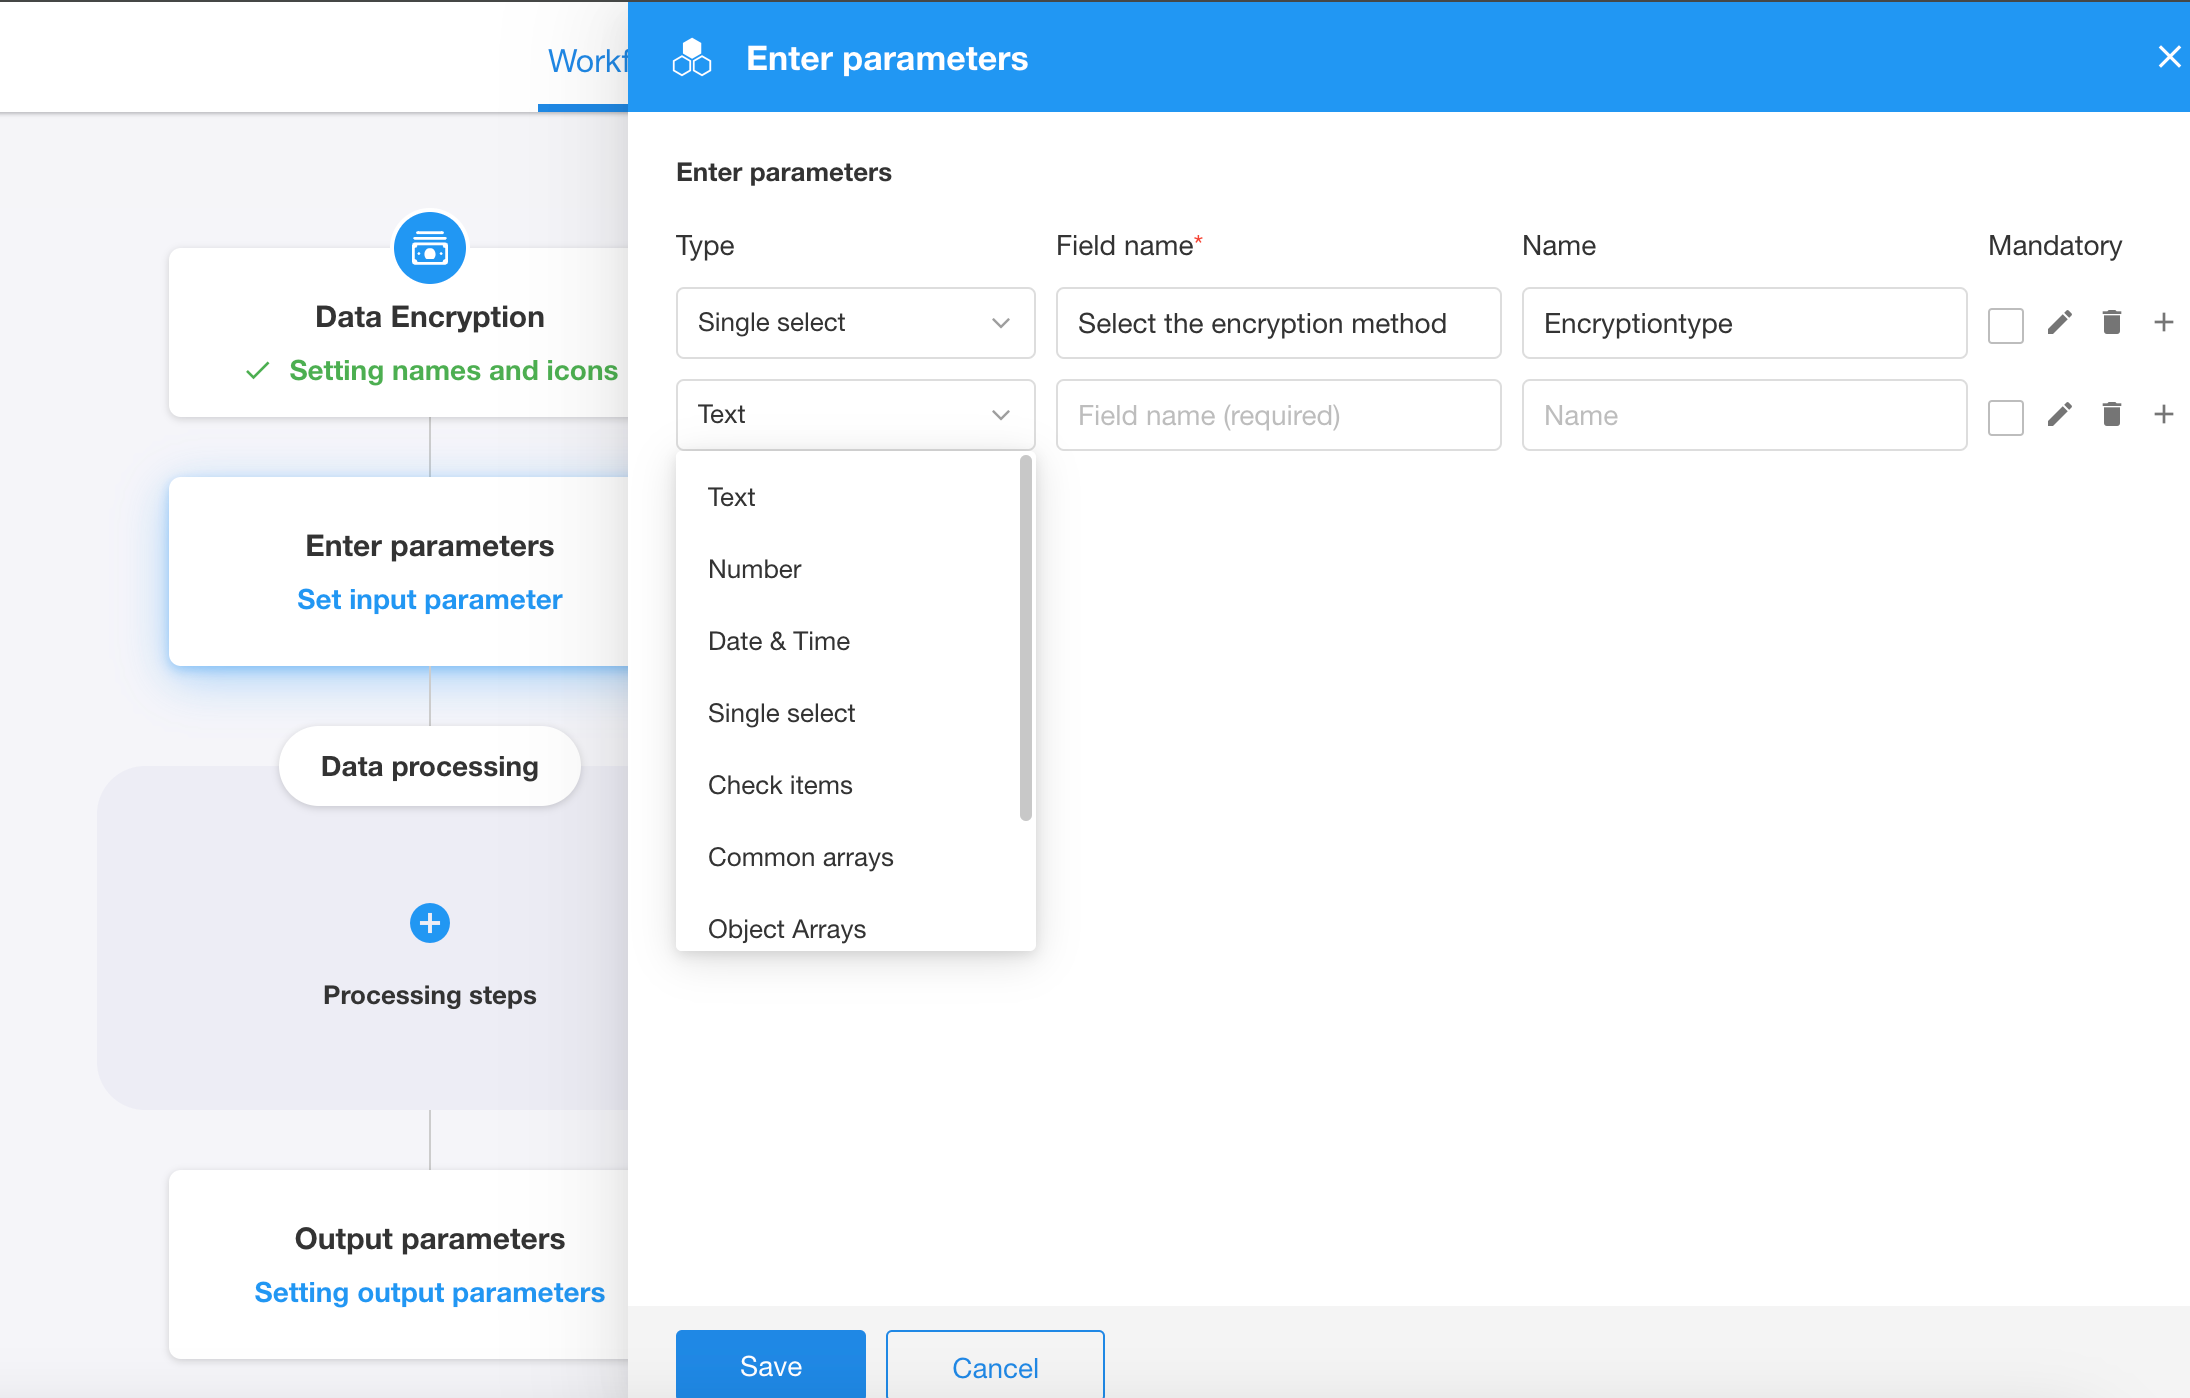
Set input parameters
Additional single select and check item types of input parameters, and group titles can be set to facilitate user input.
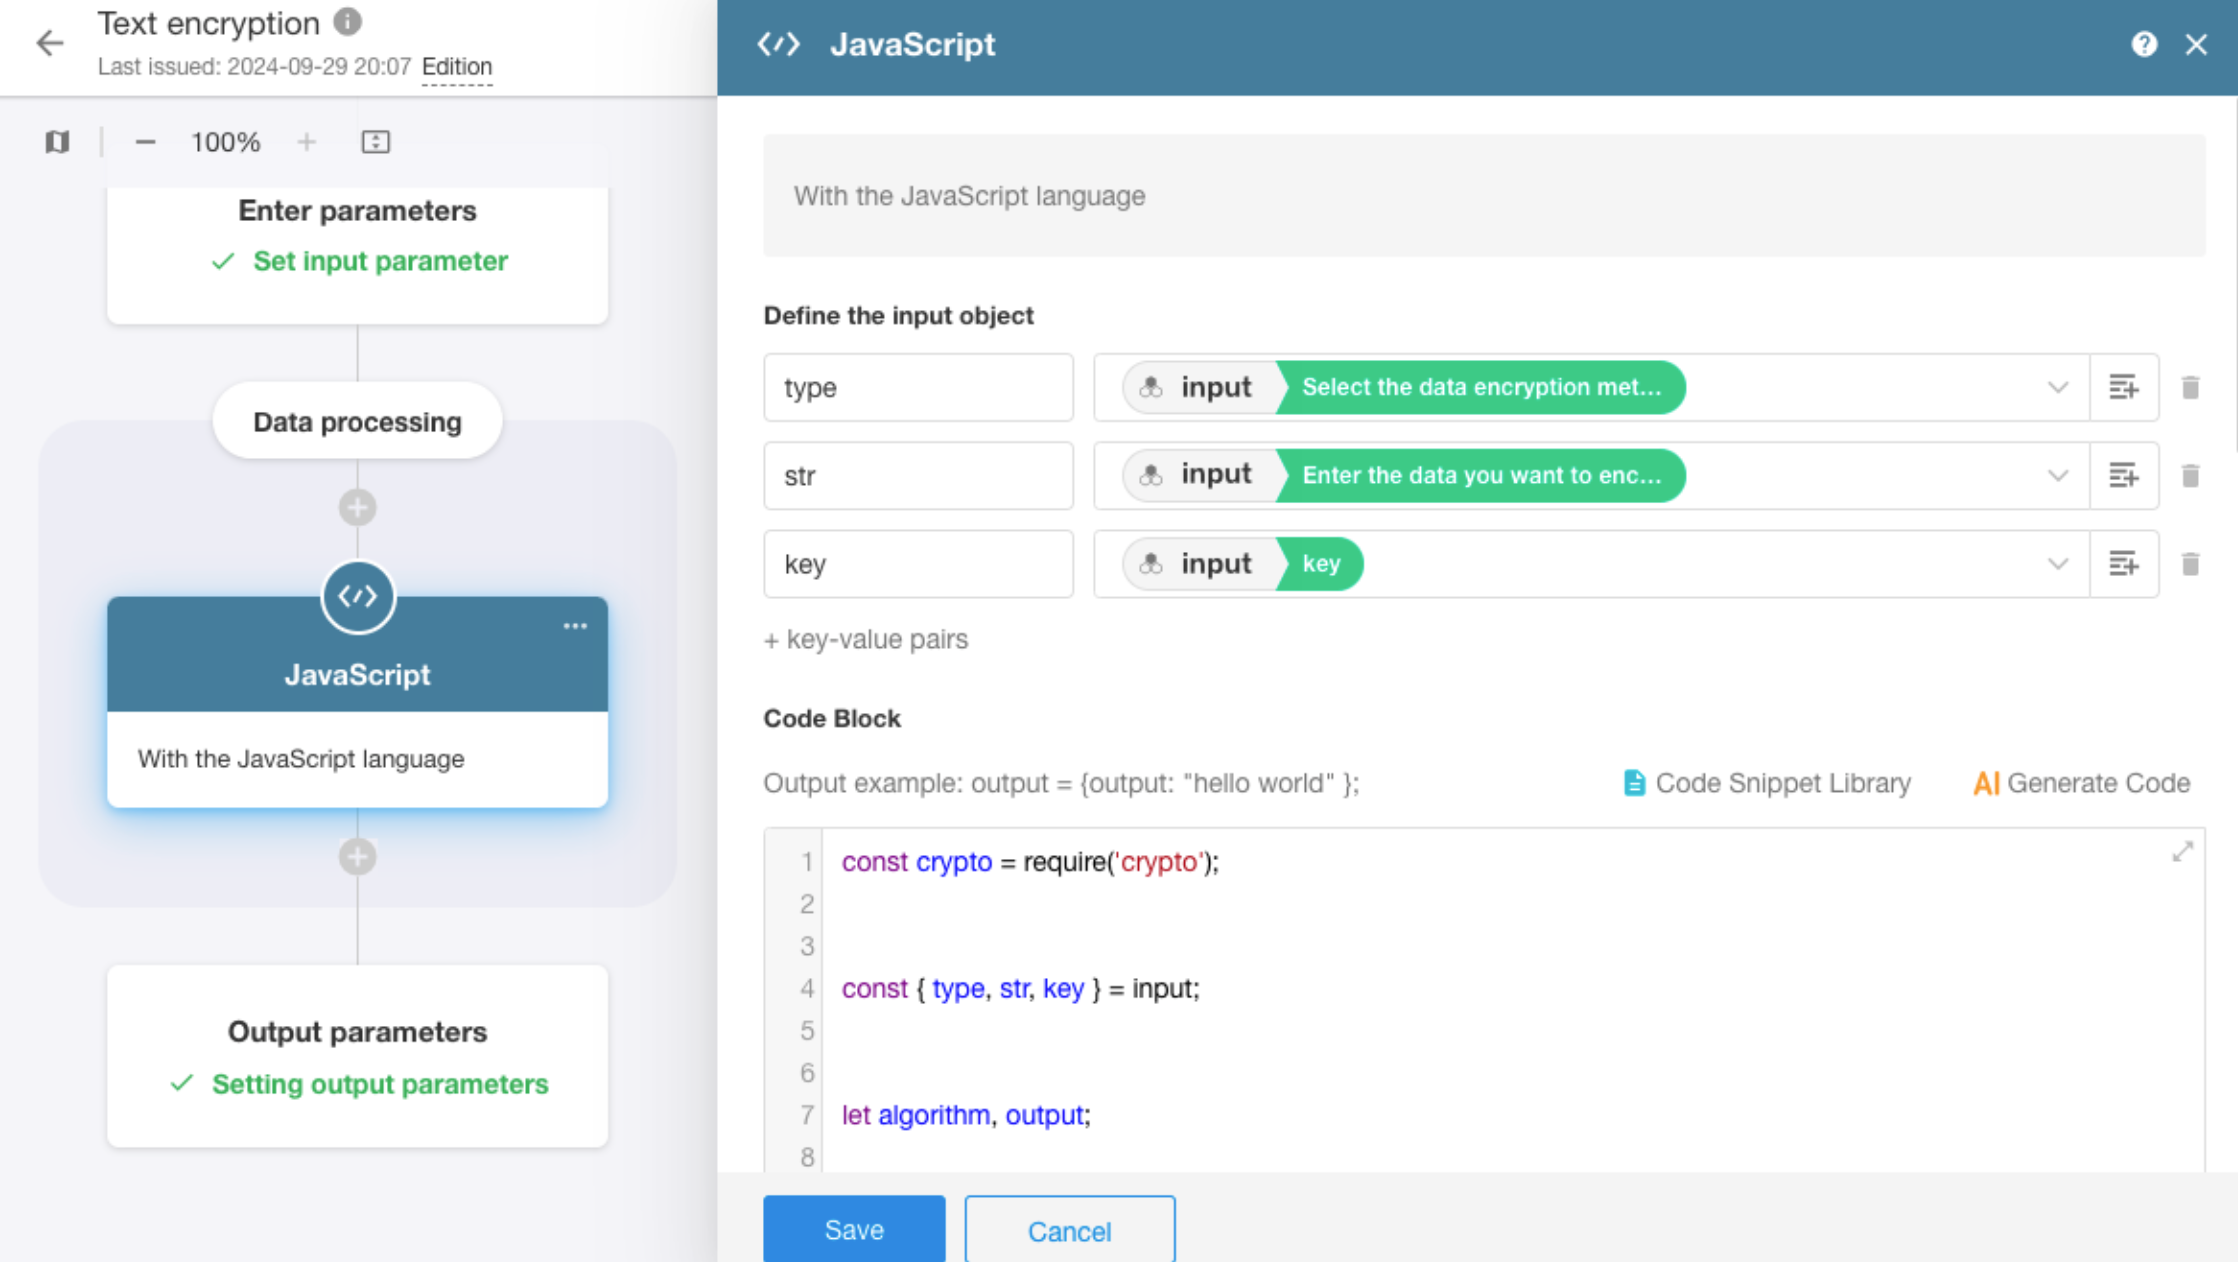
Set data processing
In the data processing node block, add and configure the required data processing nodes.
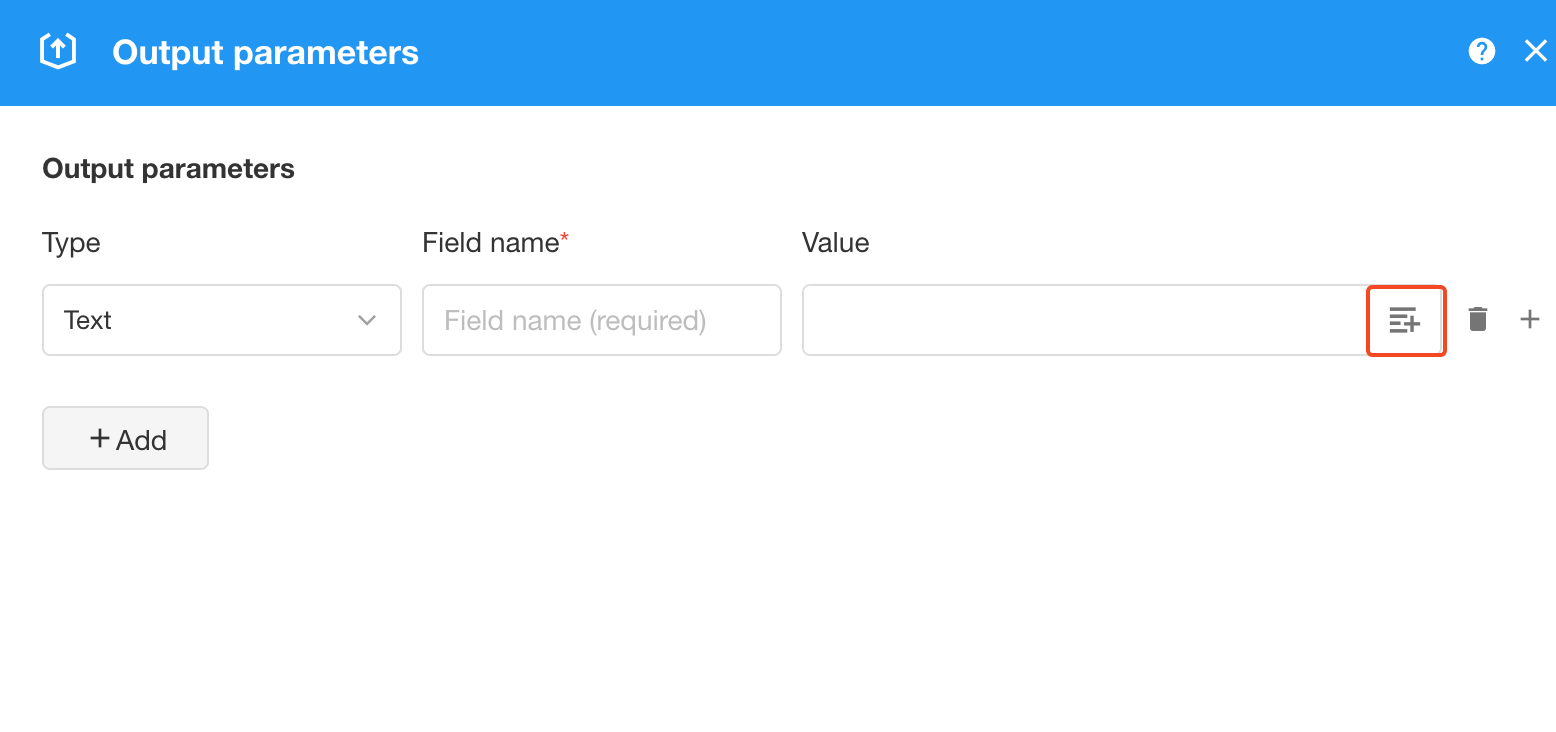
Set output parameters
Add output parameters, where parameter values can be selected from the output values of data processing nodes.
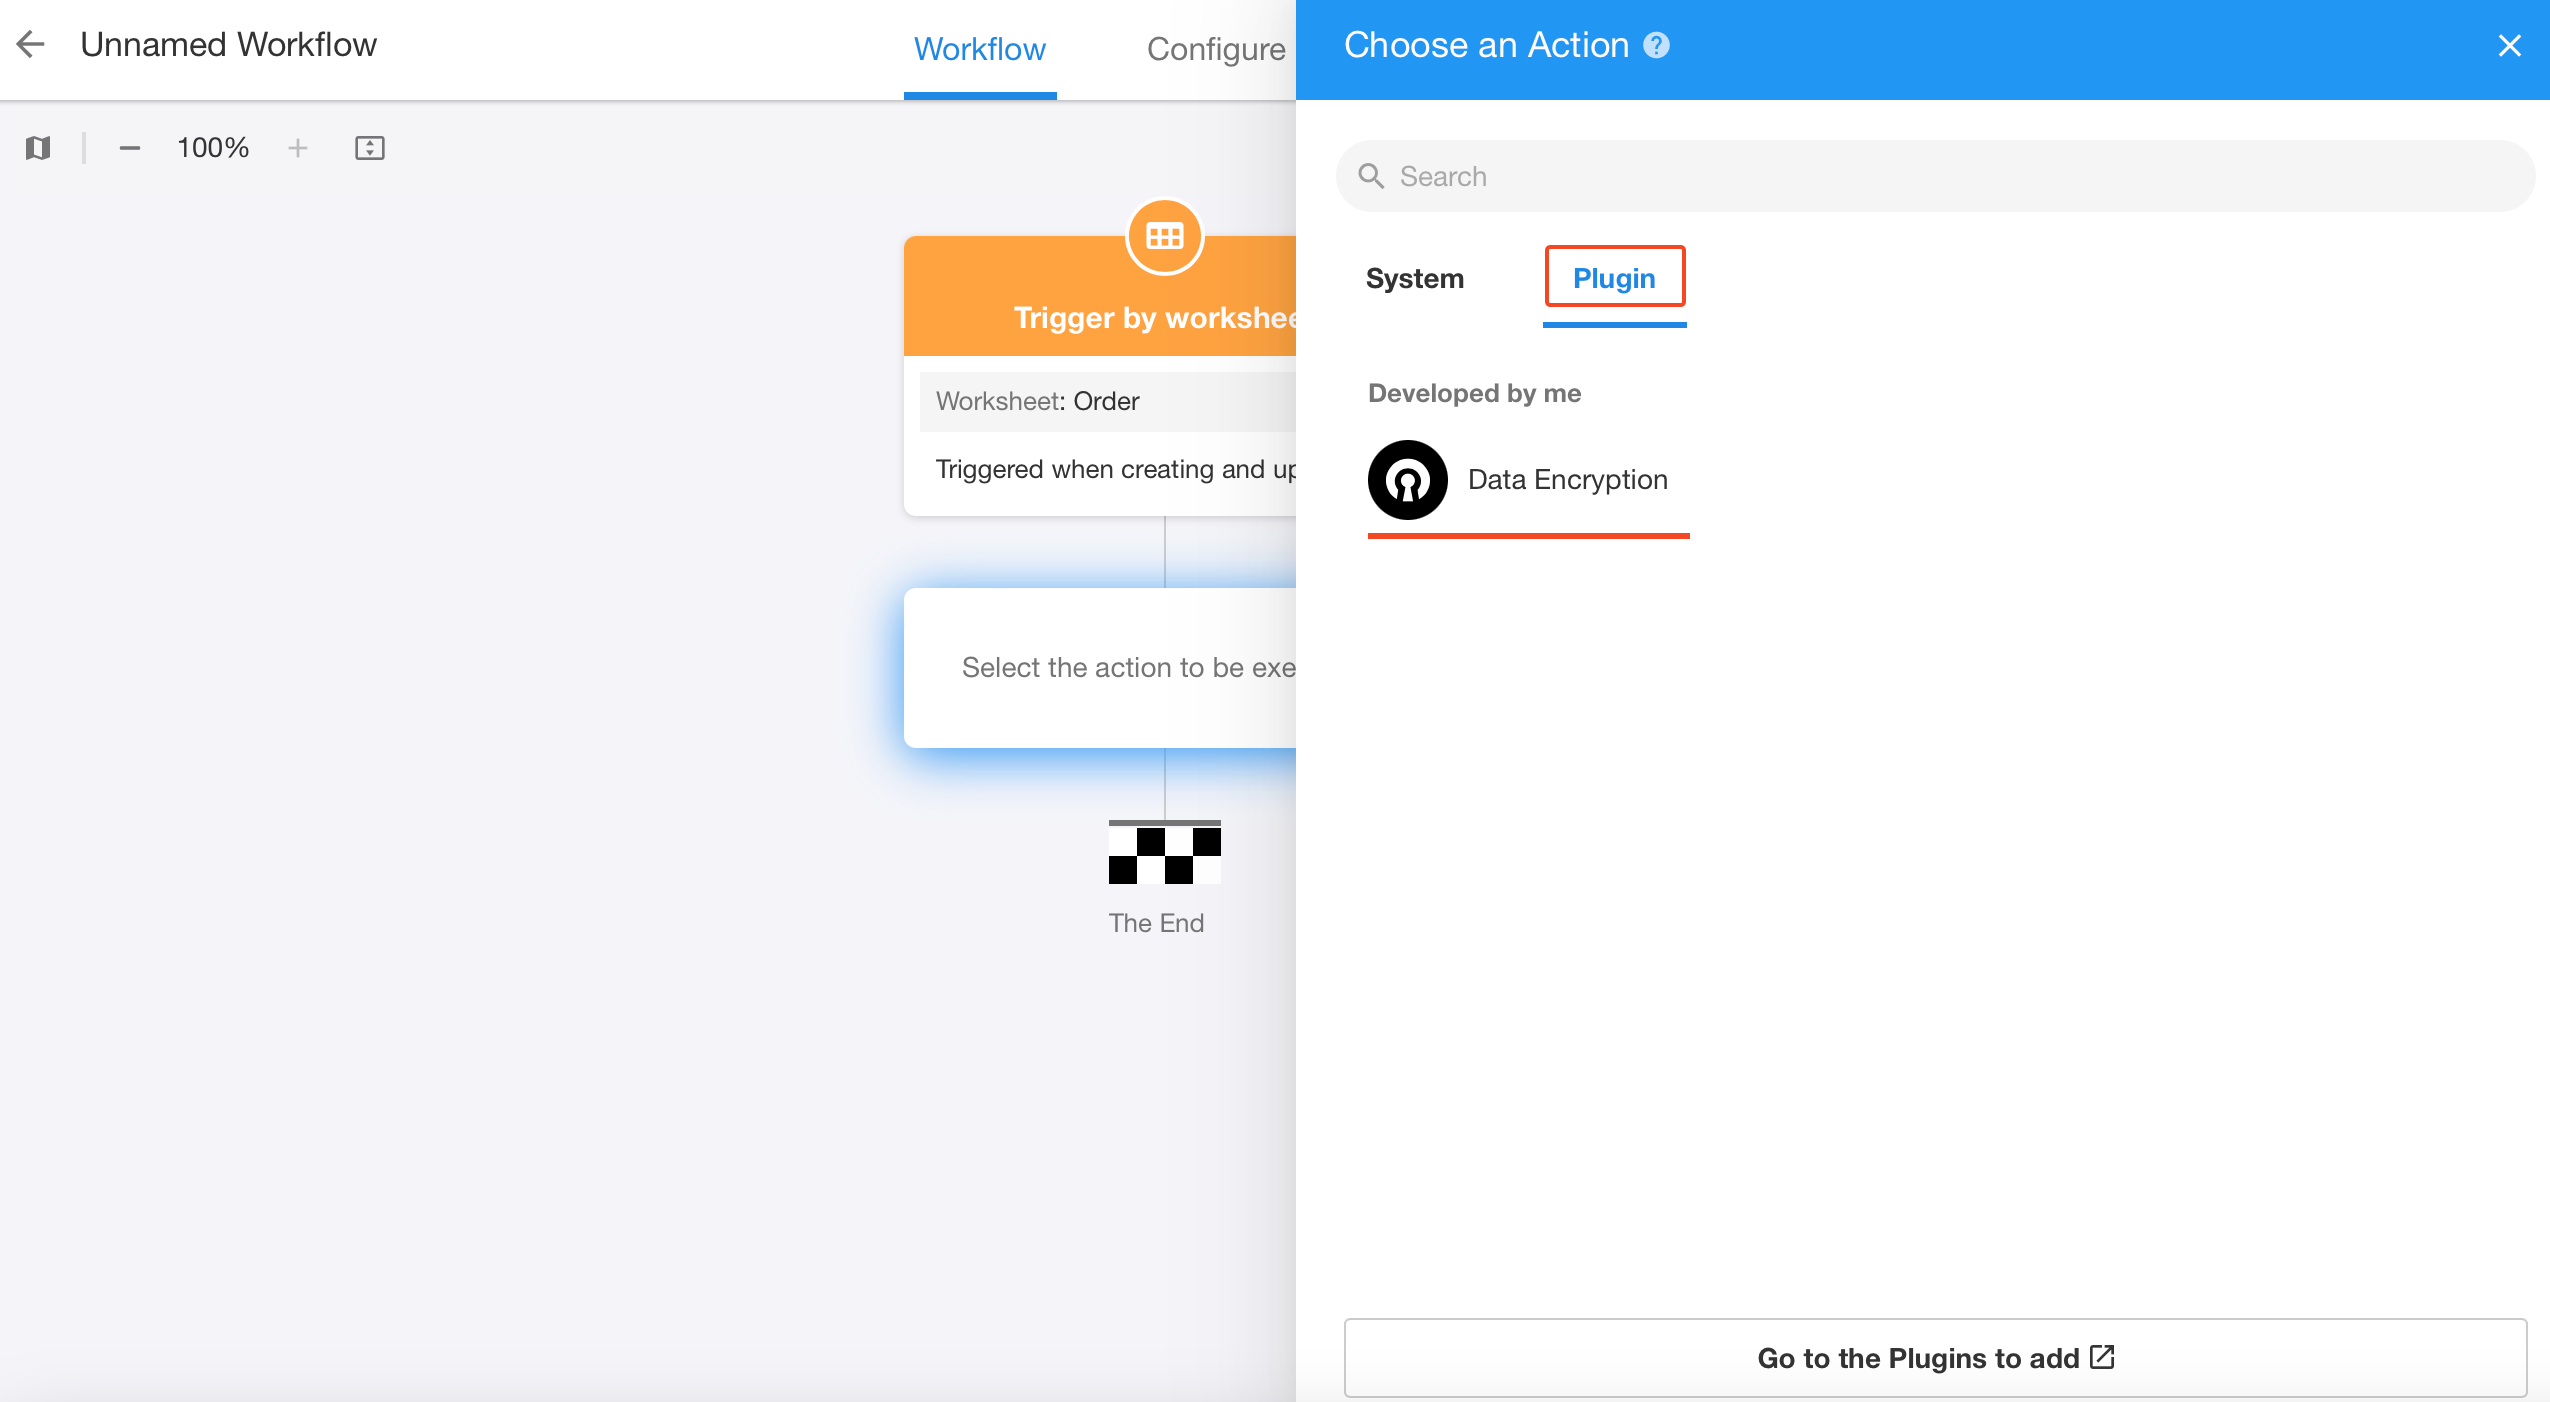
Publish and test
Click the publish button to publish this custom node. After publishing, when adding nodes in the workflow, you can see this node in the plugin part. At this point, you can use this node in your workflow.
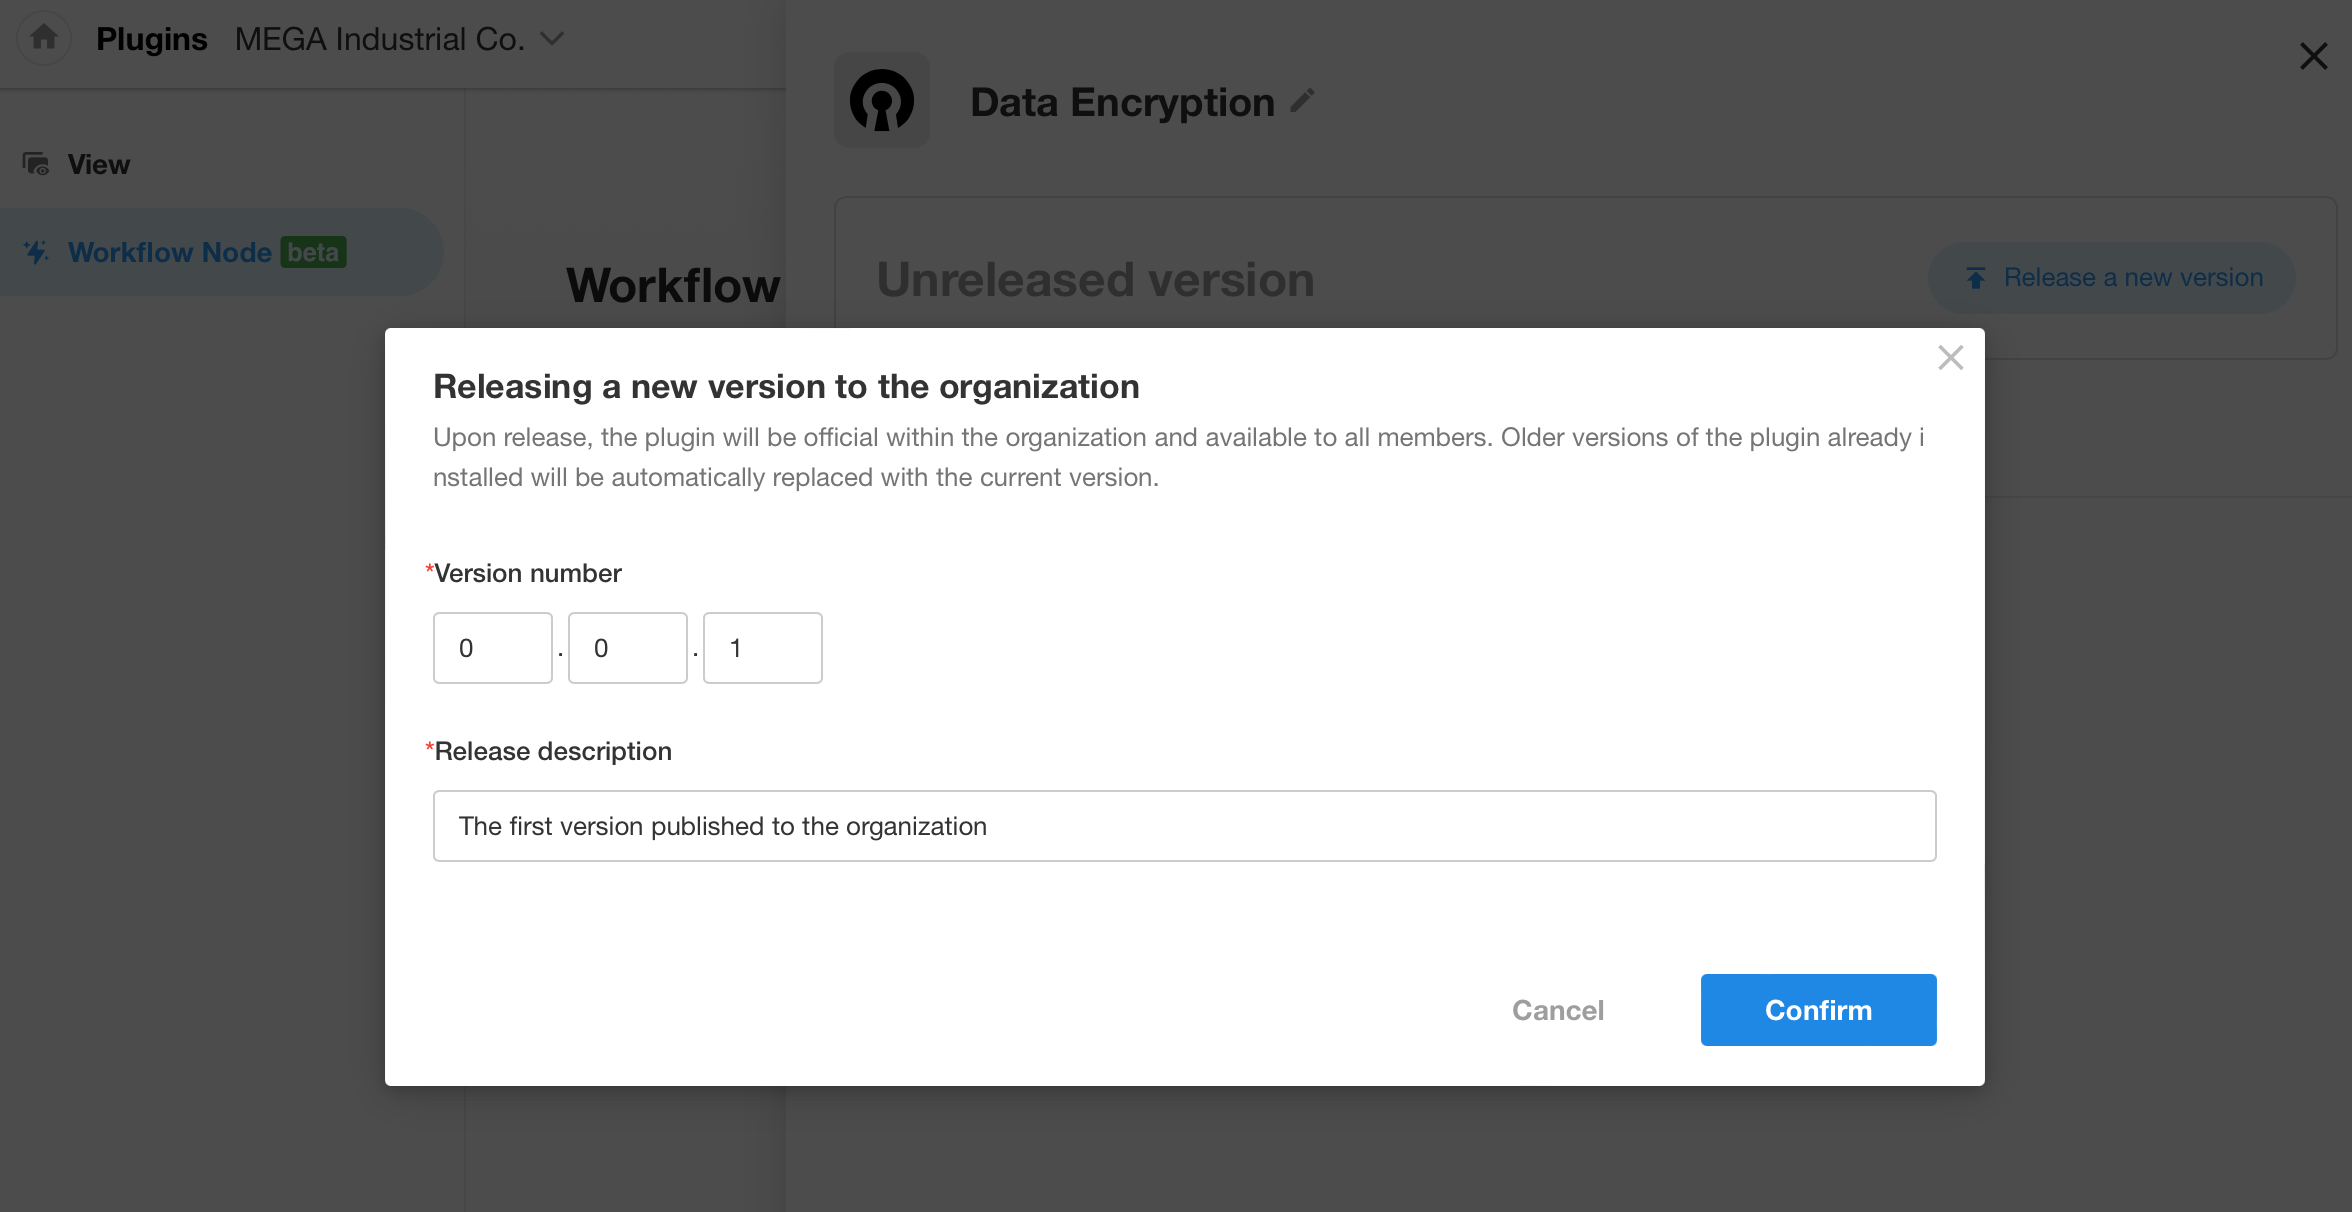
Publish the plugin to the organization
Once you have tested it yourself and confirmed that there are no issues, you can publish the plugin to the organization in the plugin center. After publishing, all users in the organization can use this node.
Manage plugins
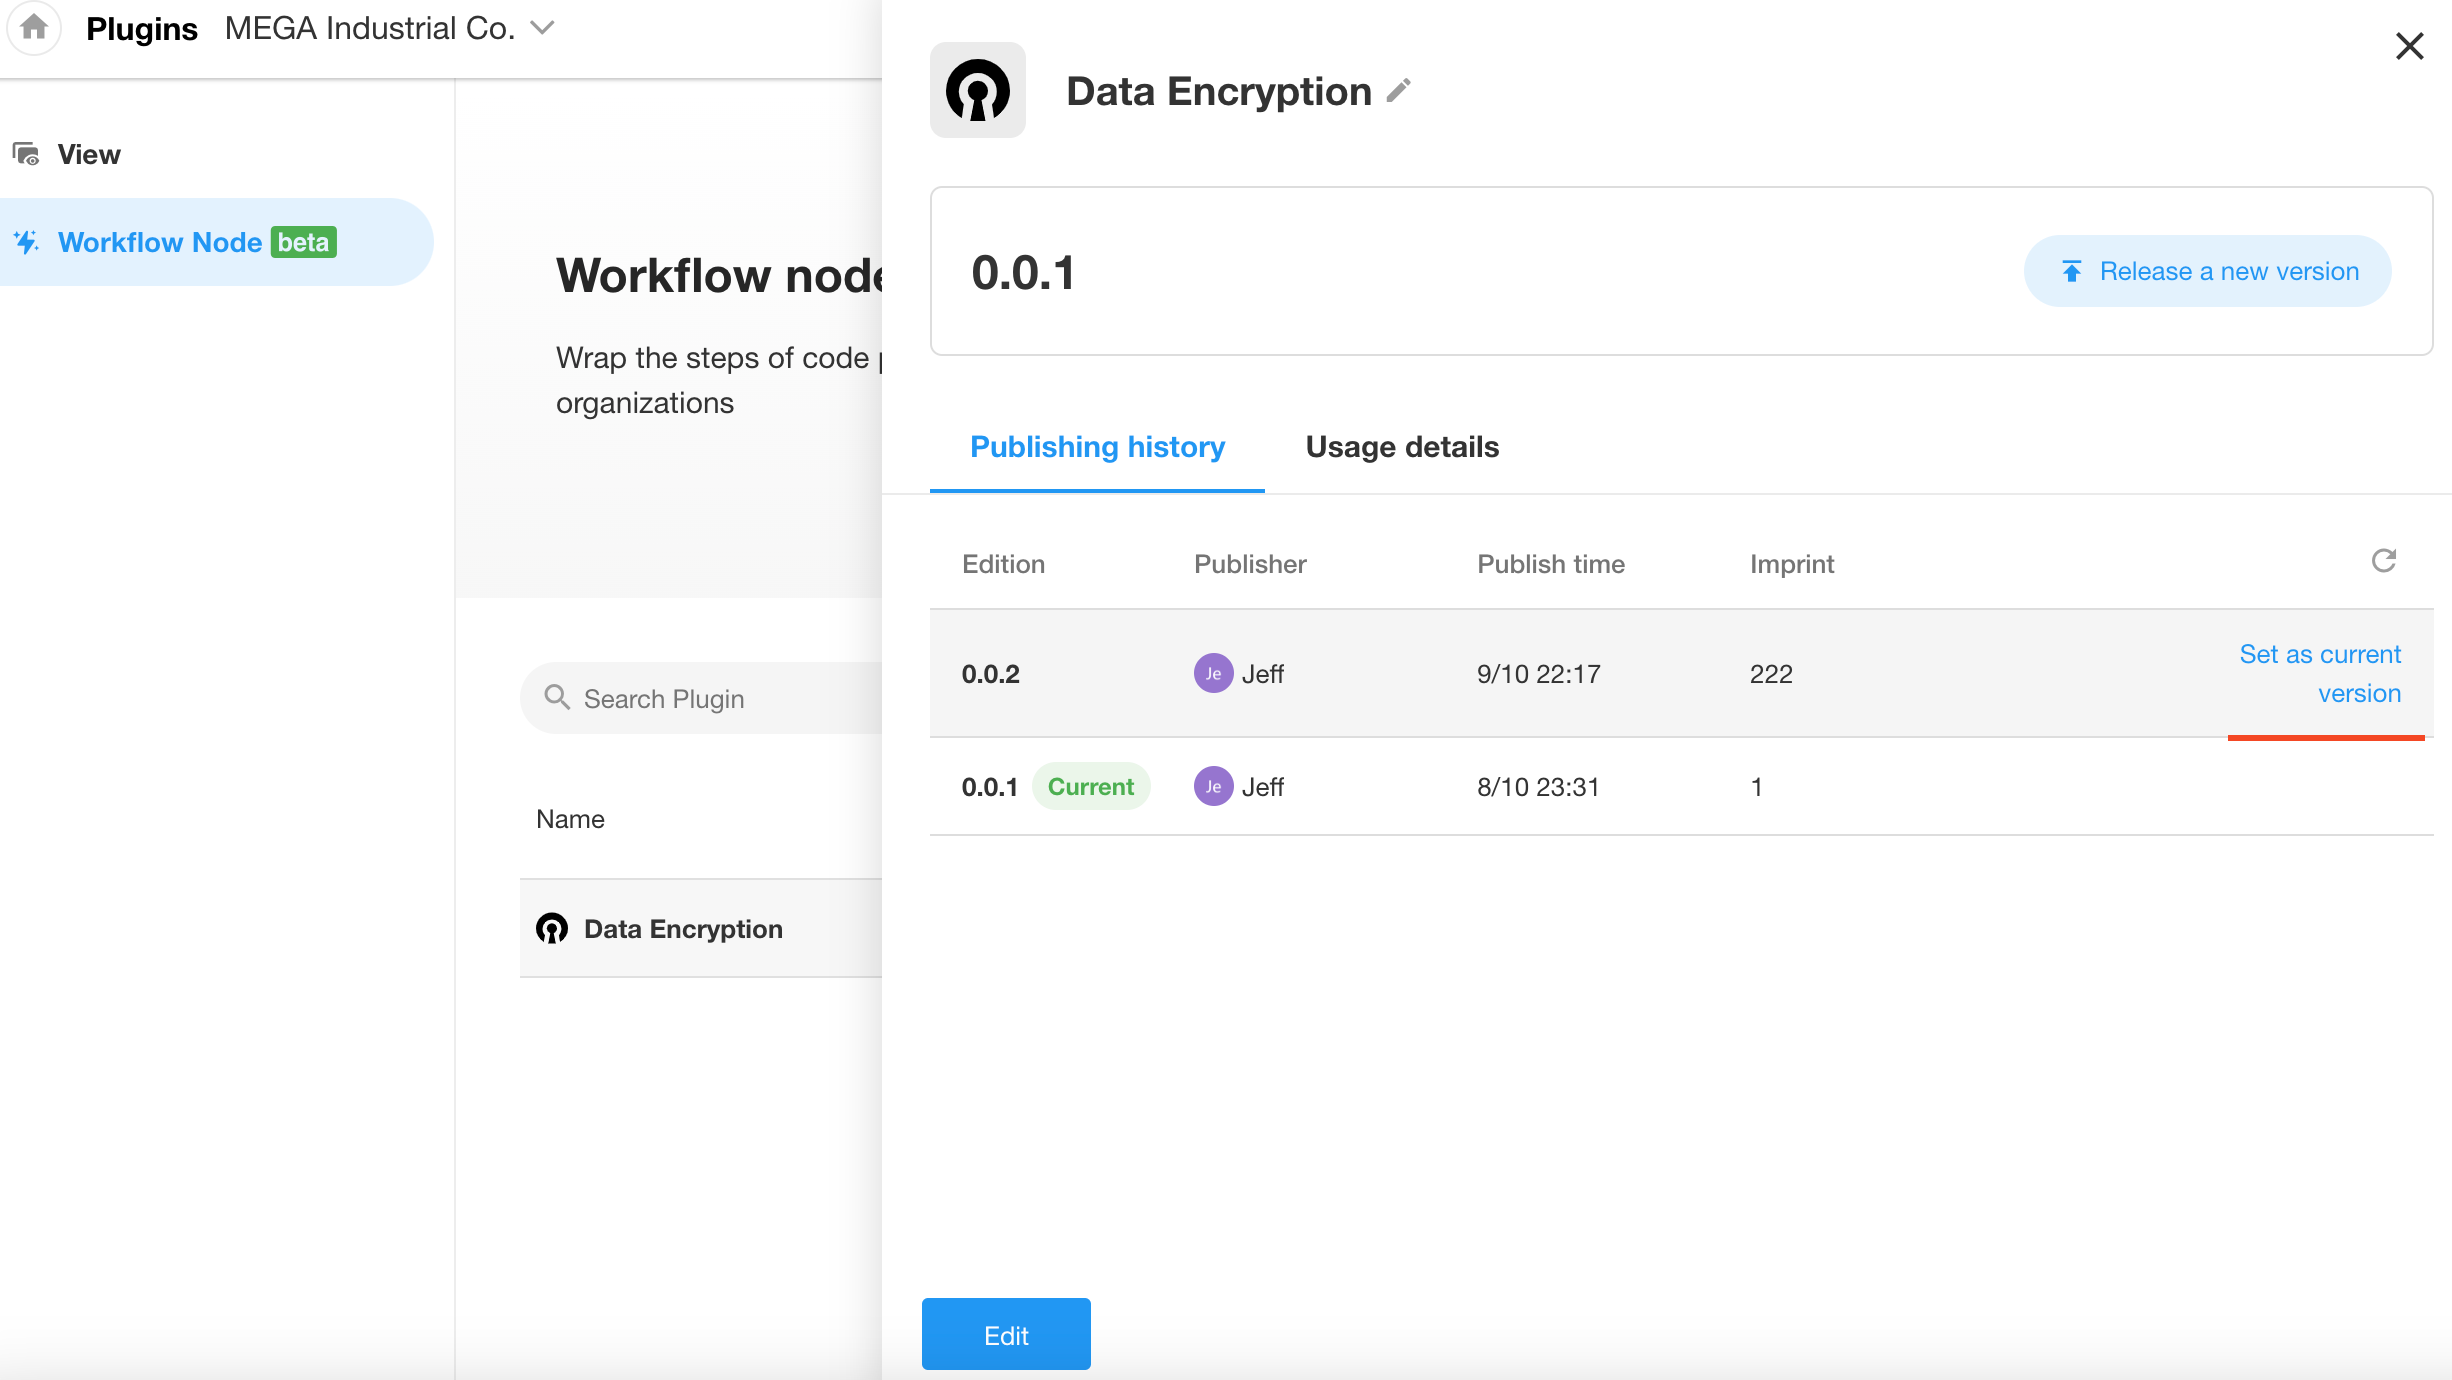
Users can edit, delete, and update the plugins they have developed.
Click the plugin name in the plugin list to modify the name, icon, etc.; clicking the edit button allows for reconfiguring the data processing steps in the plugin. After making modifications, a new version can be published.
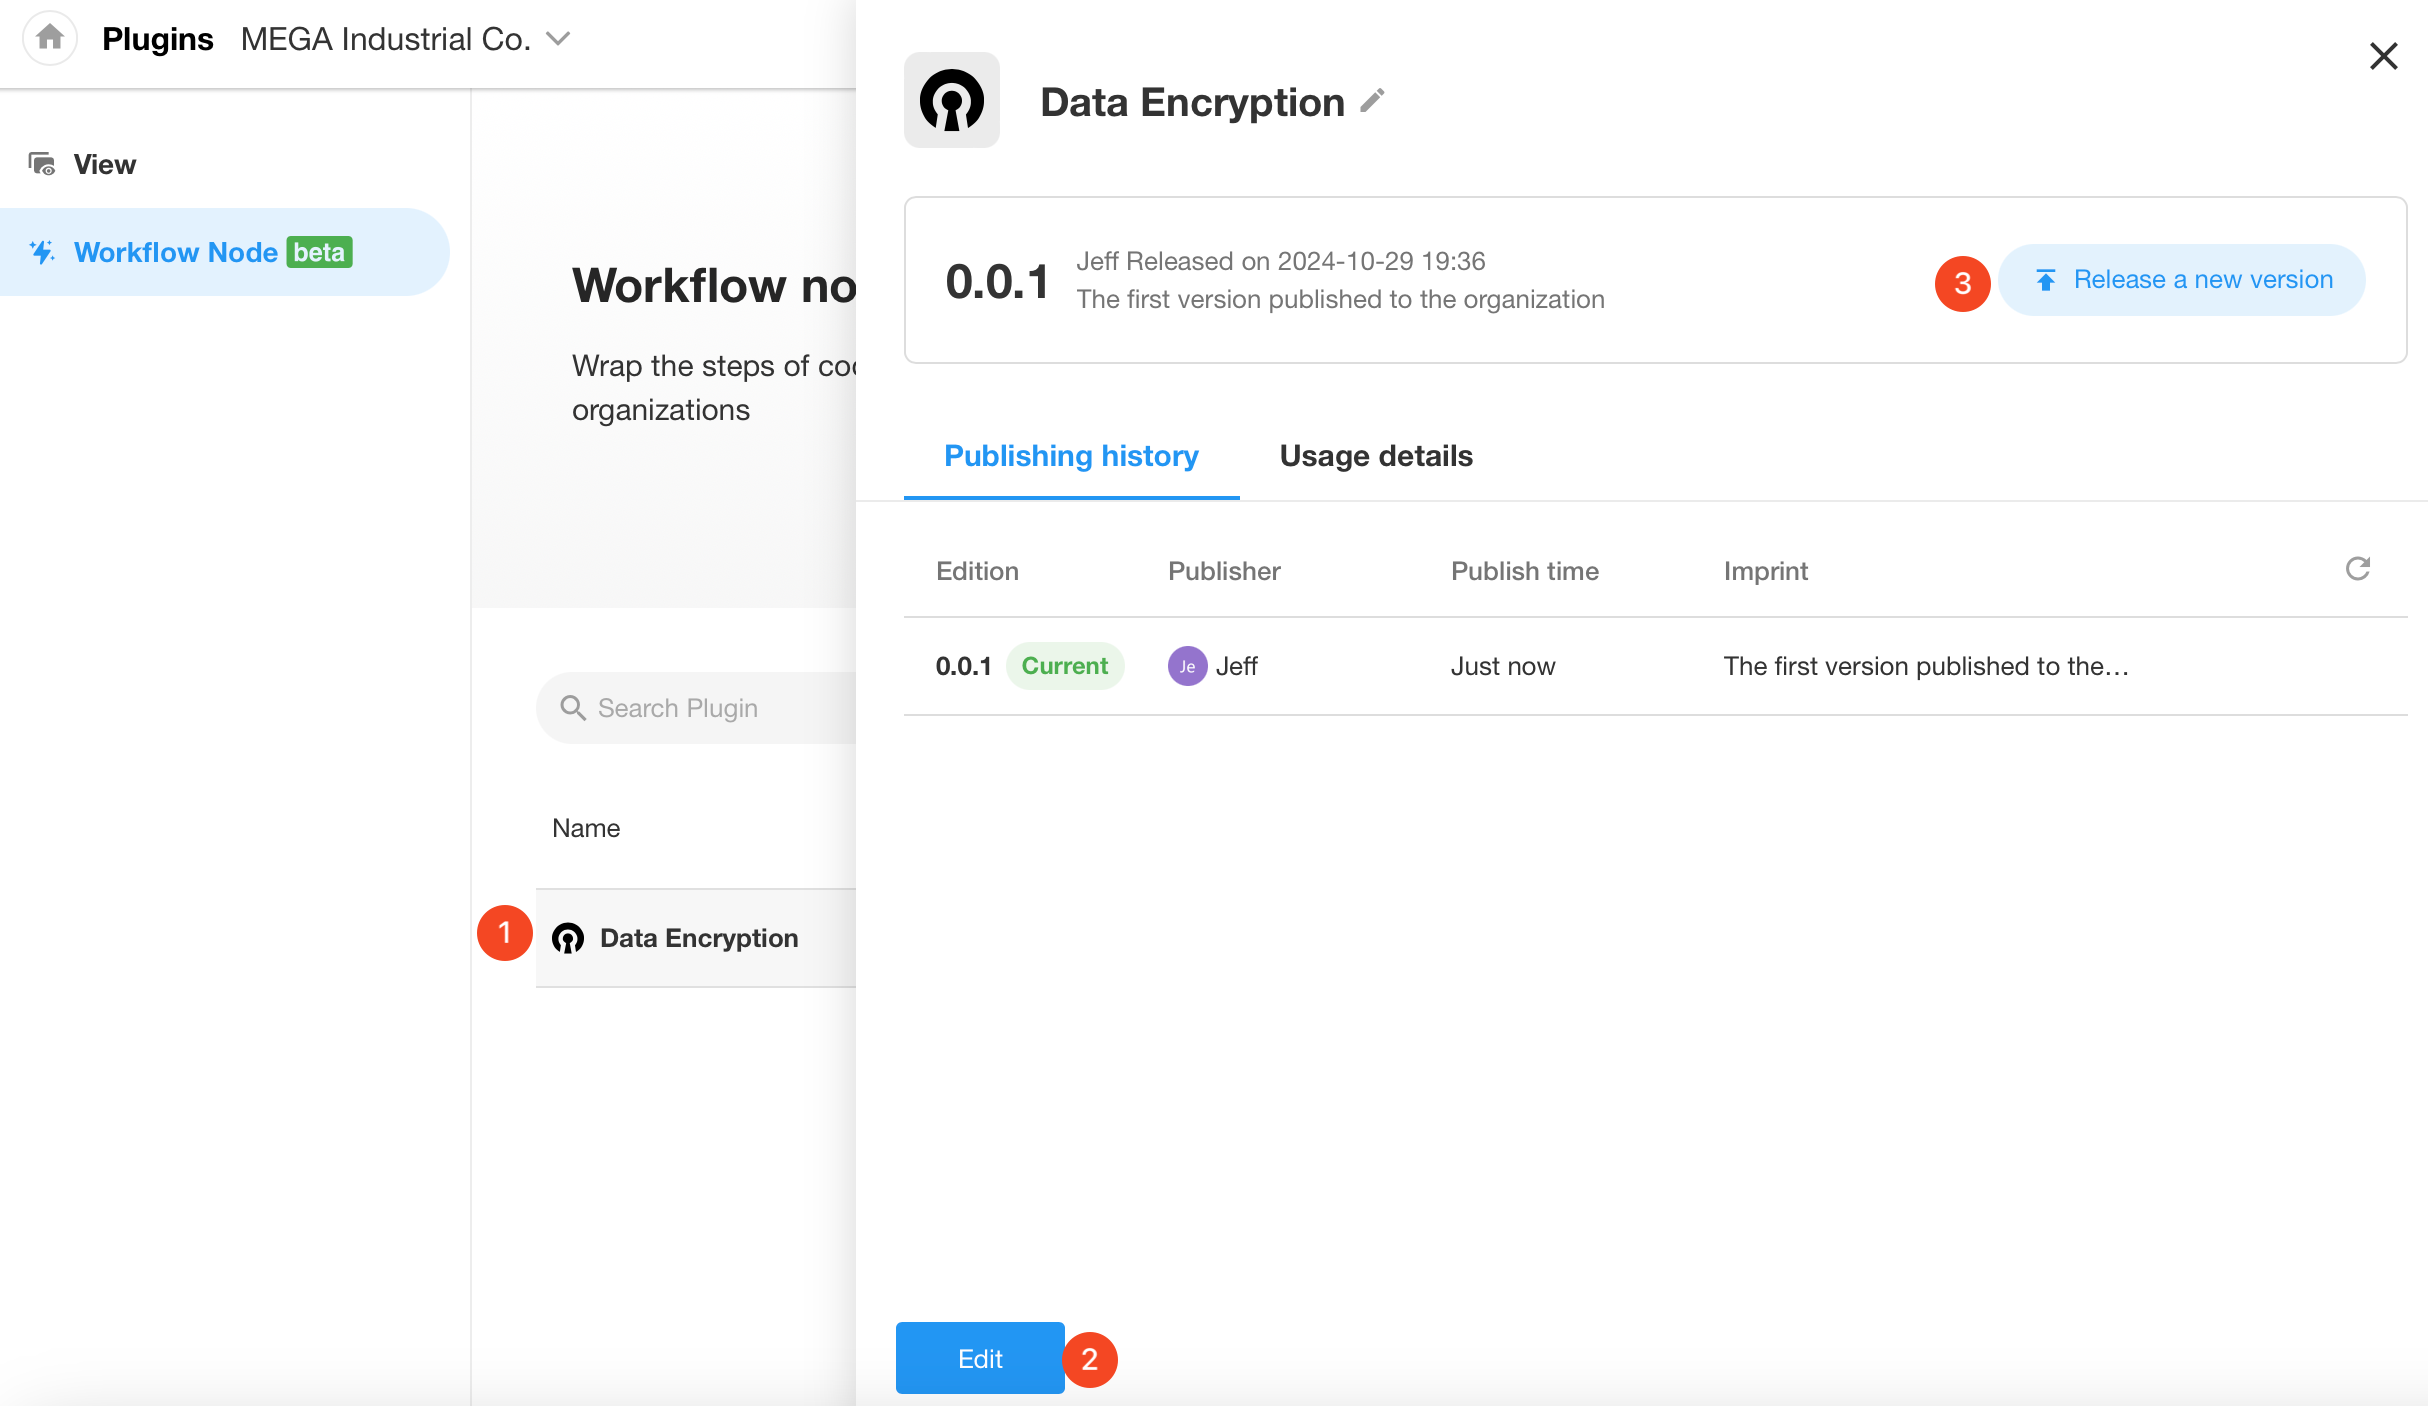
The latest version may not necessarily be the publicly published version; any version can be selected as the "current version".
