API Integration
Feature Overview
The API Integration module in the Integration Center enables centralized management of third-party API authentication and request configurations. Once configured, authorized applications can directly invoke these APIs to either retrieve or push data.
In addition to supporting custom API configurations, the platform provides a library of over 200 prebuilt API templates. Organization administrators can also add custom APIs to the organization-level API library for wider use.
You can call the configured APIs and authentication credentials directly in the following scenarios:
- API Query and OCR fields in a worksheet
- Call Integrated API action in control events
- Call Integrated API node in workflows
- API Authentication & Connection node in workflows
Access Entry
From the HAP home page, go to [Integrate] > [API Integration] via the left sidebar to open the management interface.
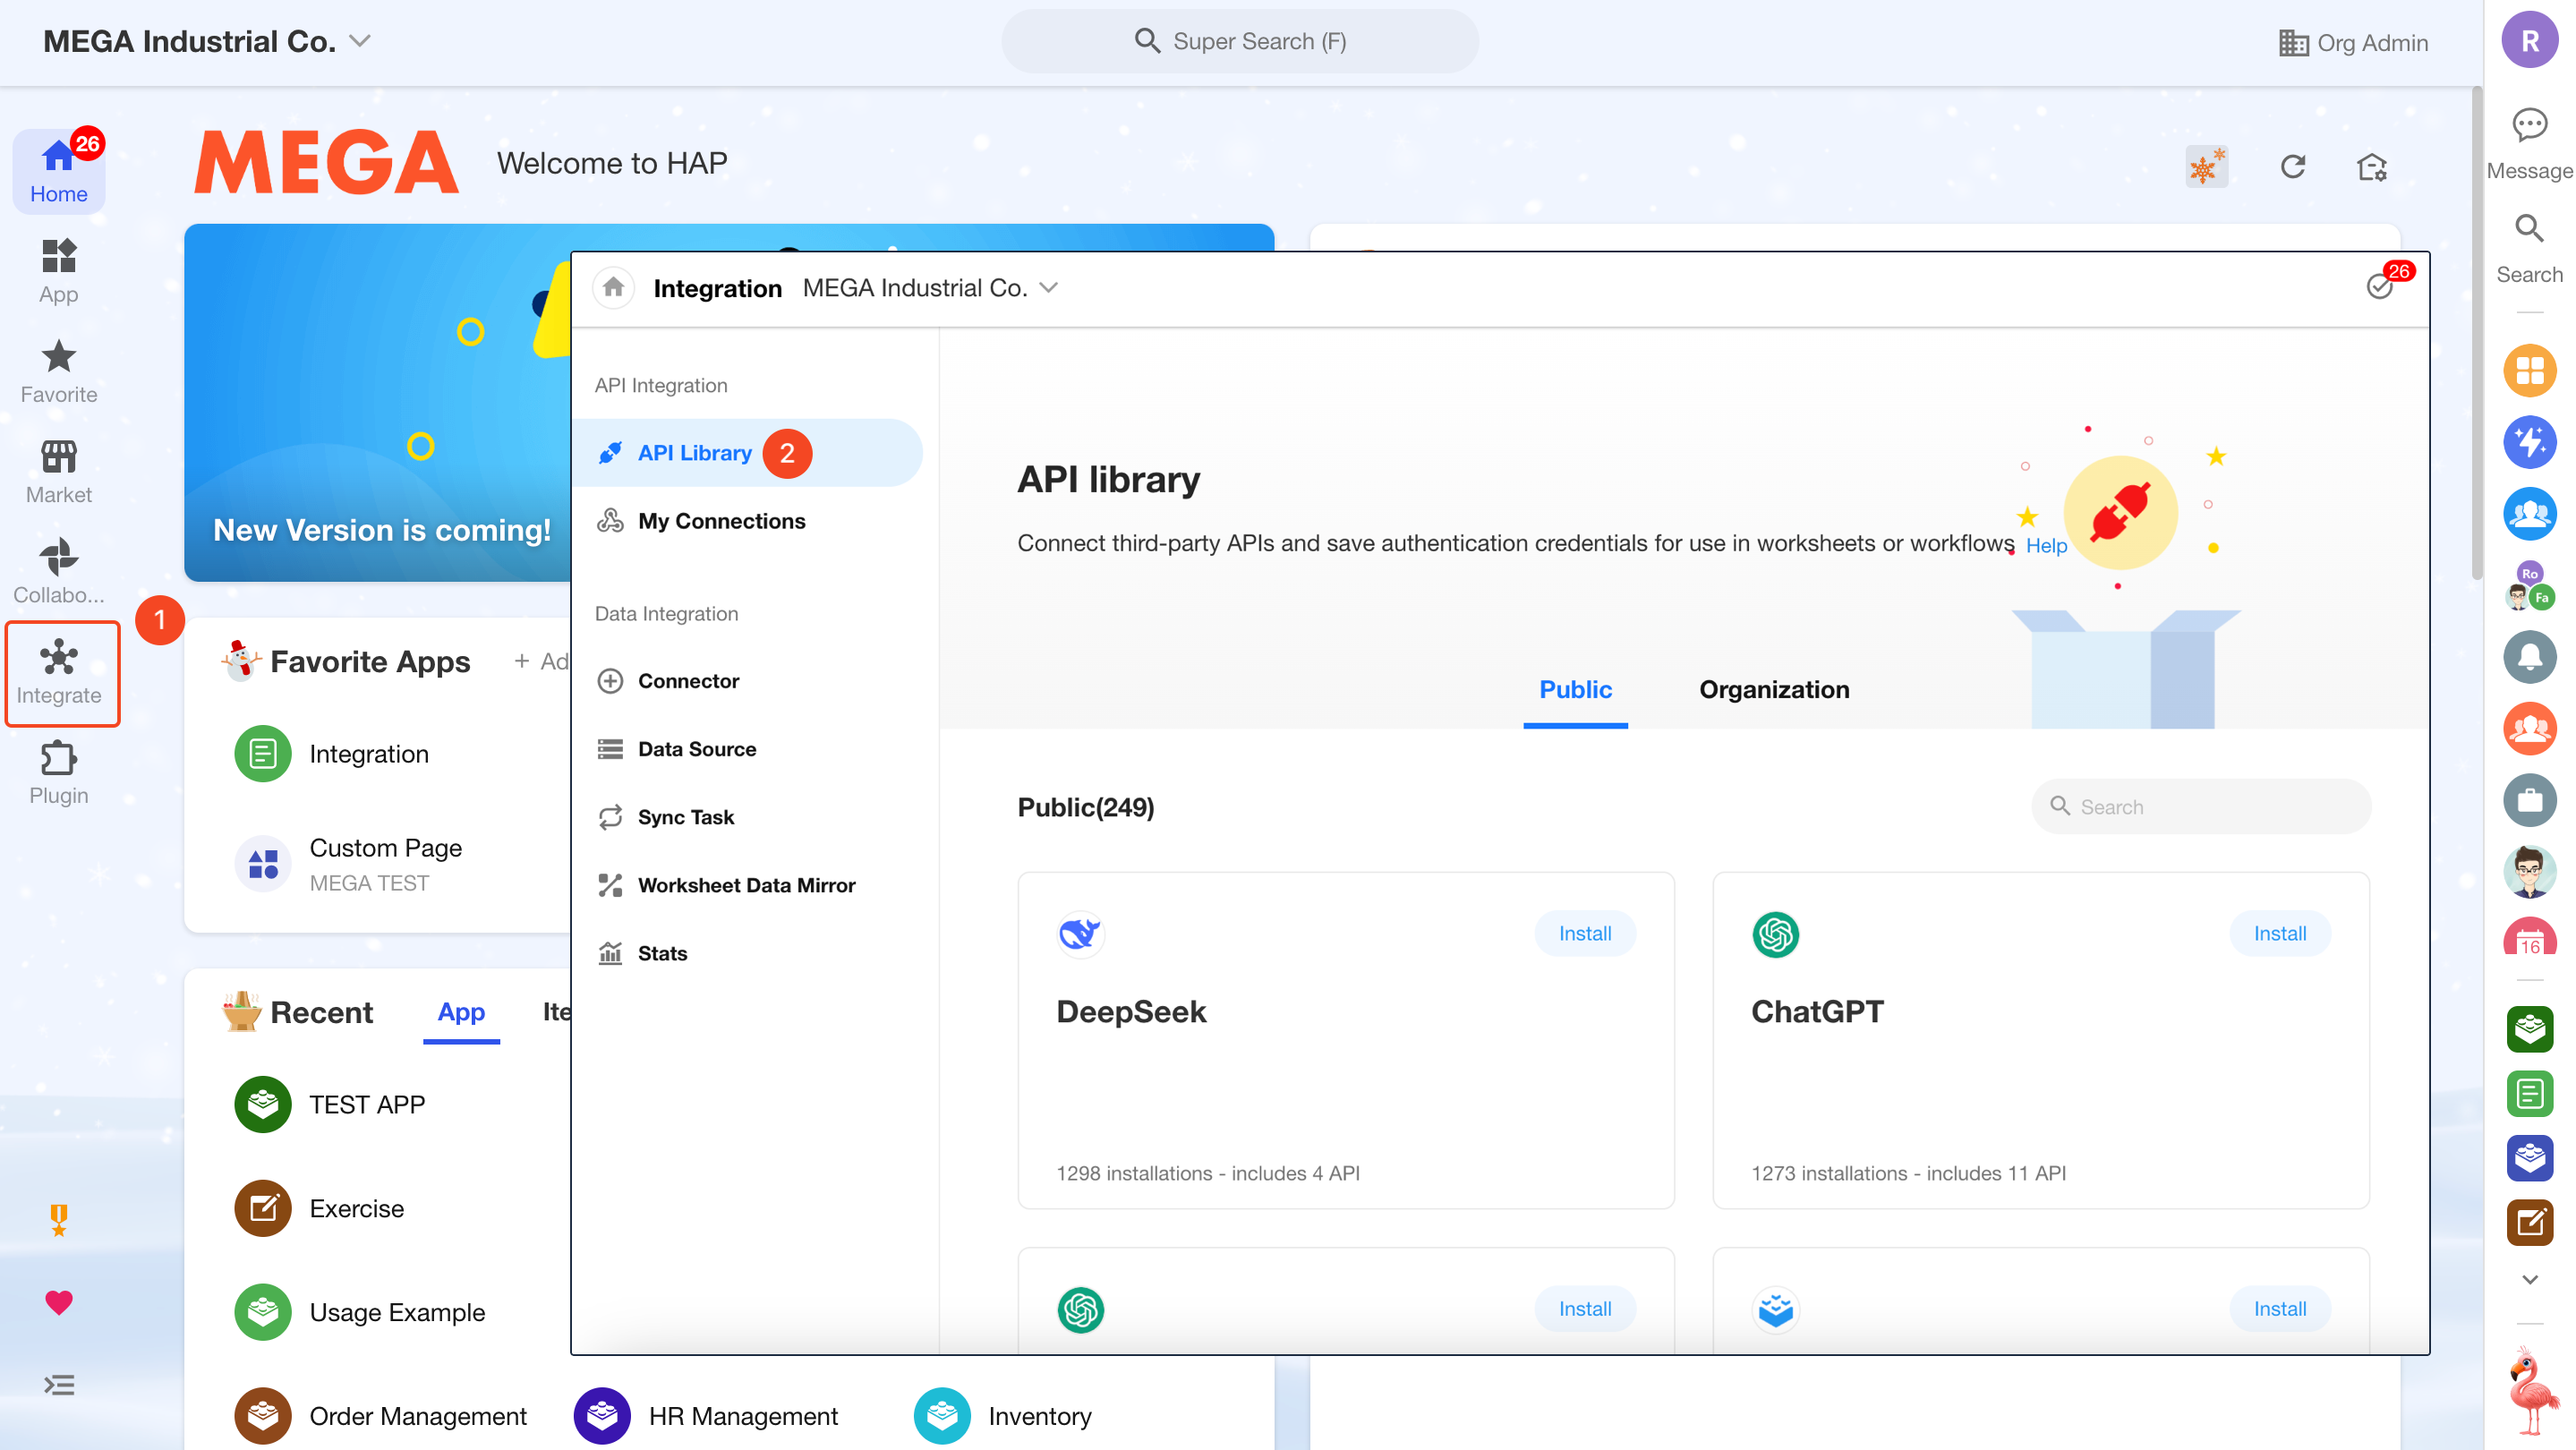
Two Modules: “My Connections” and “API Library”
-
My Connections
Here, you can:
- Create and manage third-party API connections
- Save authentication details and request configurations
- Assign usage permissions to specific applications
-
API Library
The API Library contains two parts:
-
Public Library: Prebuilt API templates provided by HAP. These can be installed and used directly, but the connection settings are read-only—you only need to input the required parameters.
-
Organization Library: Admins can publish internally created API connections to the organization library. Other users may request access and use them accordingly.

-
Quickly Get Started by Installing a Prebuilt API
The API Library includes over 200 frequently used API services. Once installed, authentication and request details are pre-configured—you only need to supply the required parameter values.
Below is an example of how to install and use the Tianyancha API.
1. Install the Target API
In the Integration Center, search for “Tianyancha,” click to view the API description, and then click Install.

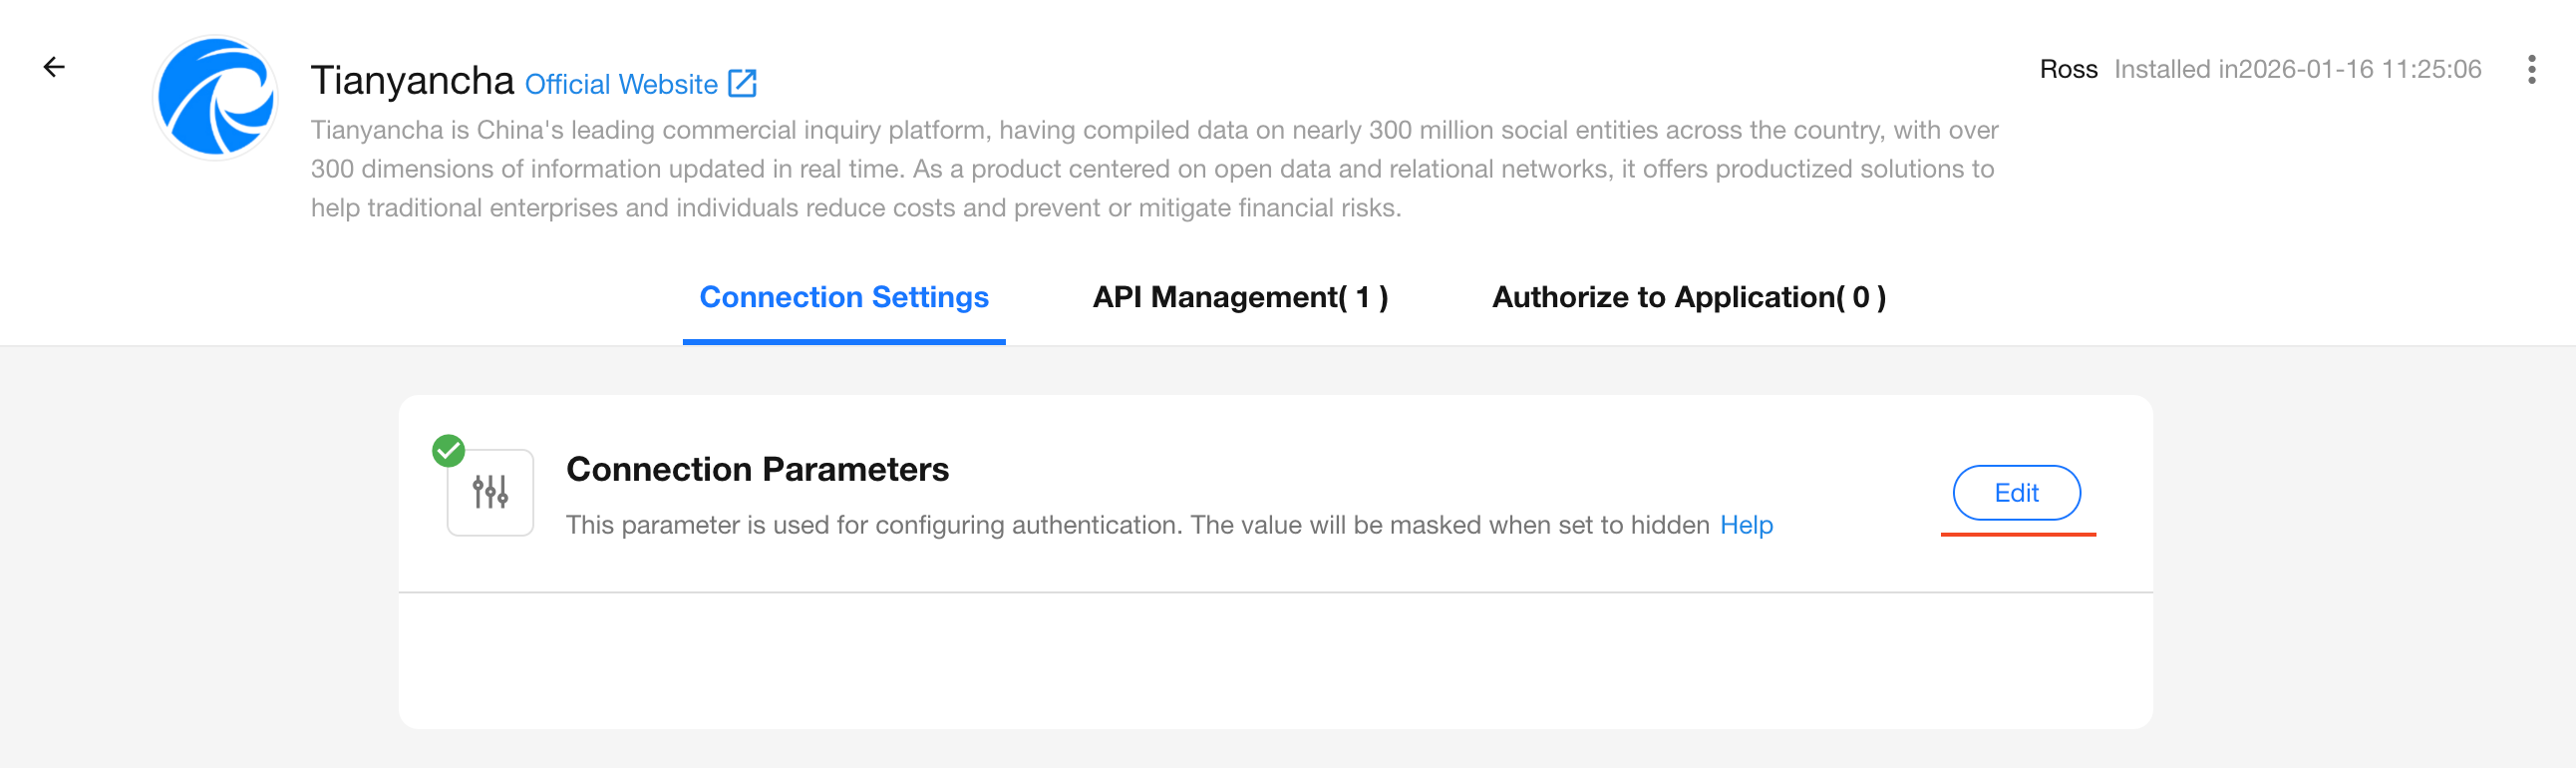
2. Configure the Connection
The system will prompt for a token. Visit the API provider’s website, register for an account, apply for the API, and copy the token into the configuration. Save to proceed.
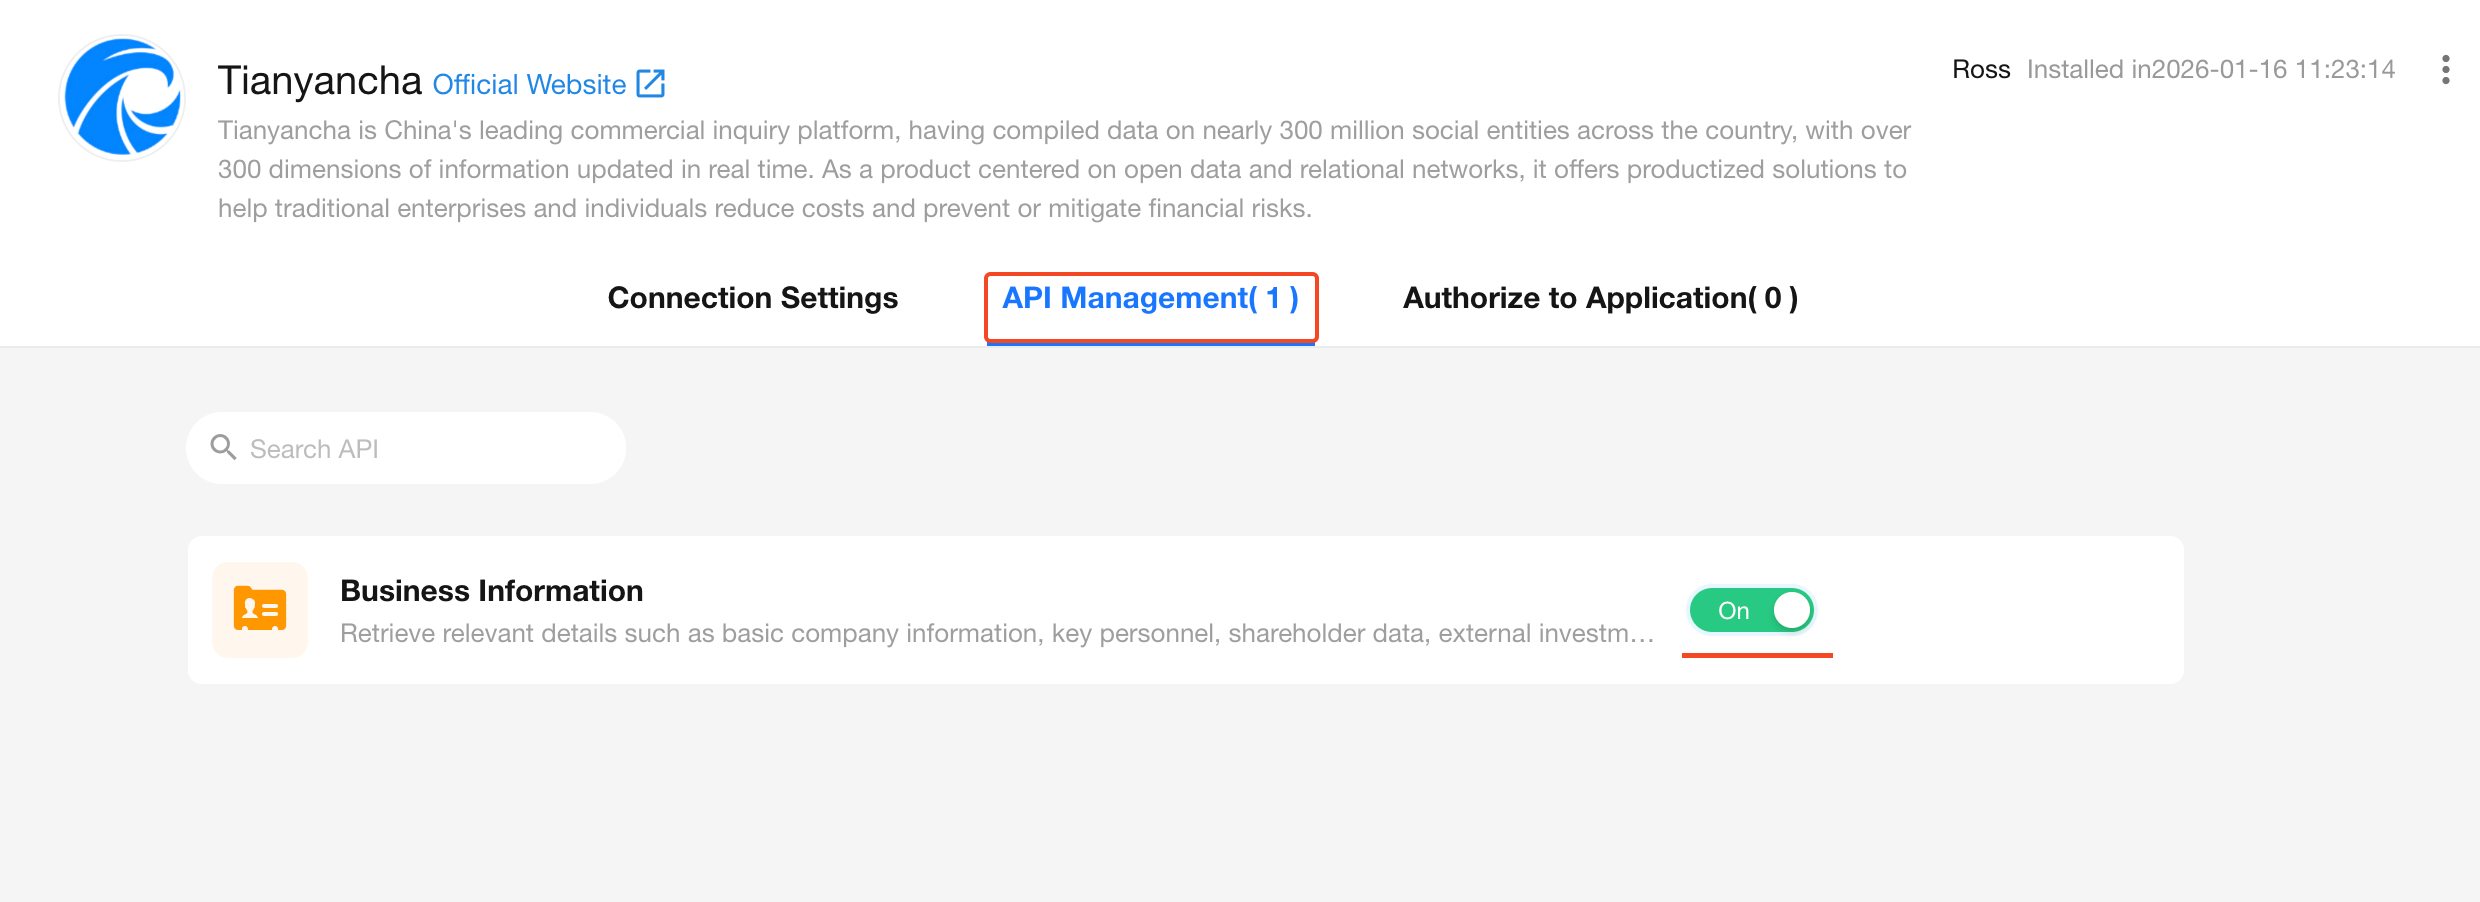
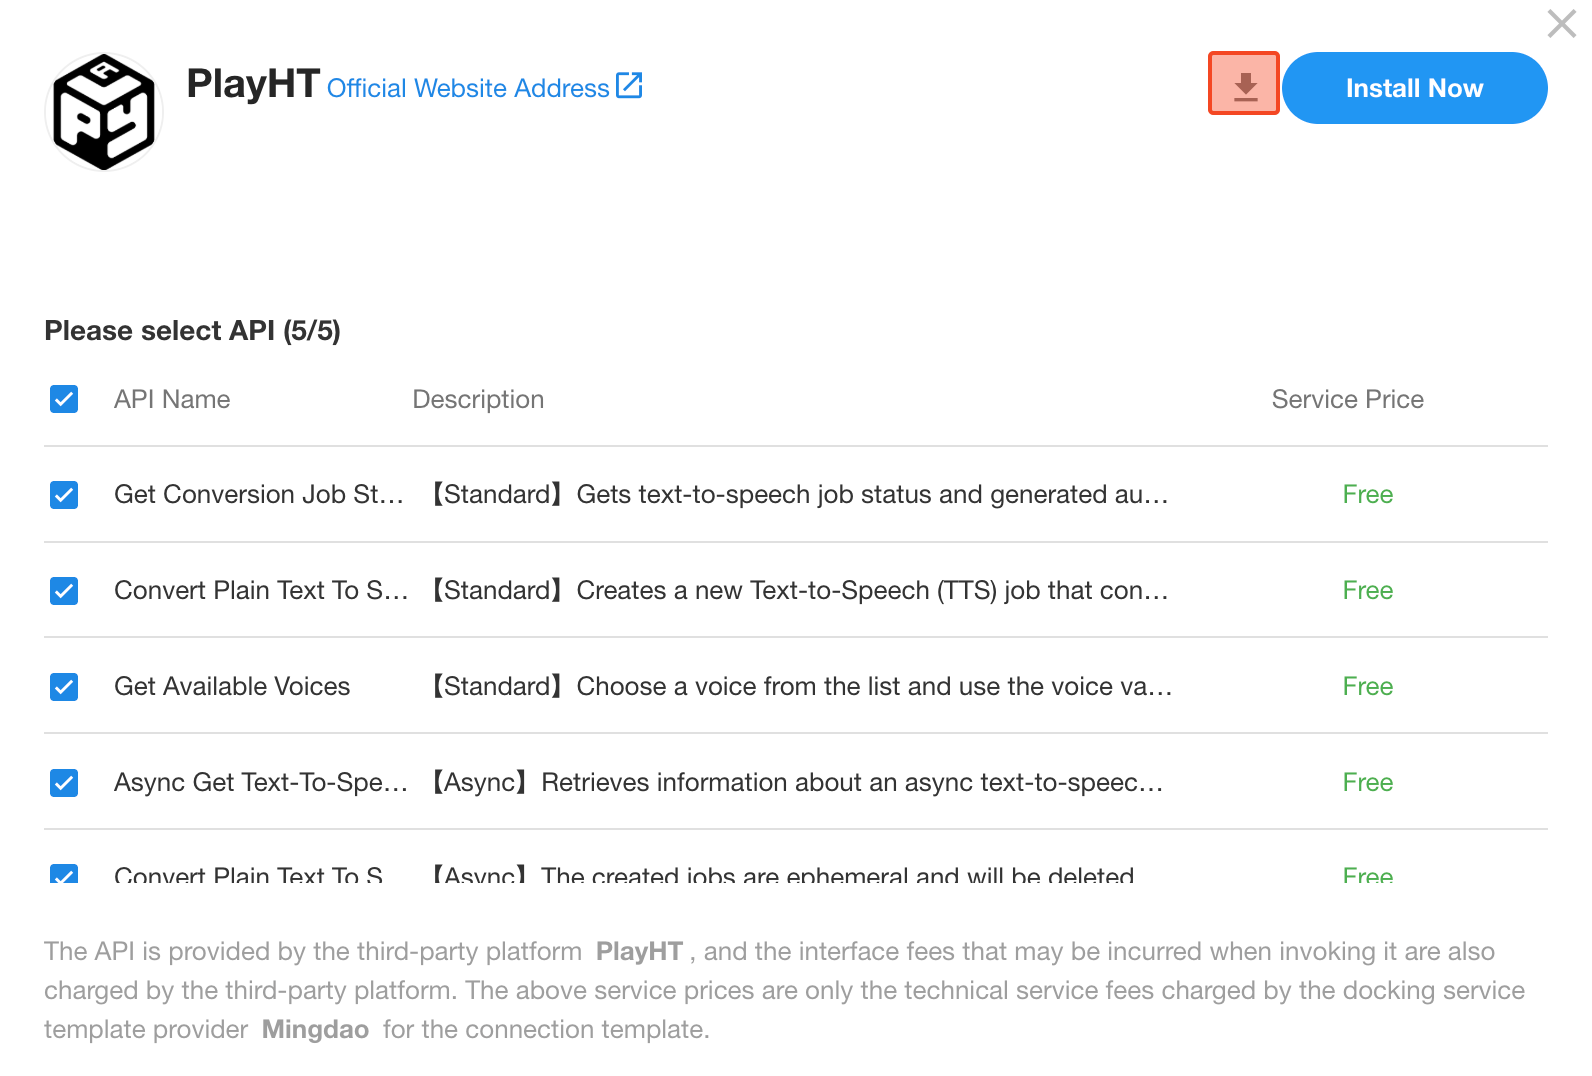
3. Enable the Required APIs
A service provider may offer multiple APIs. Enable the specific ones you need.
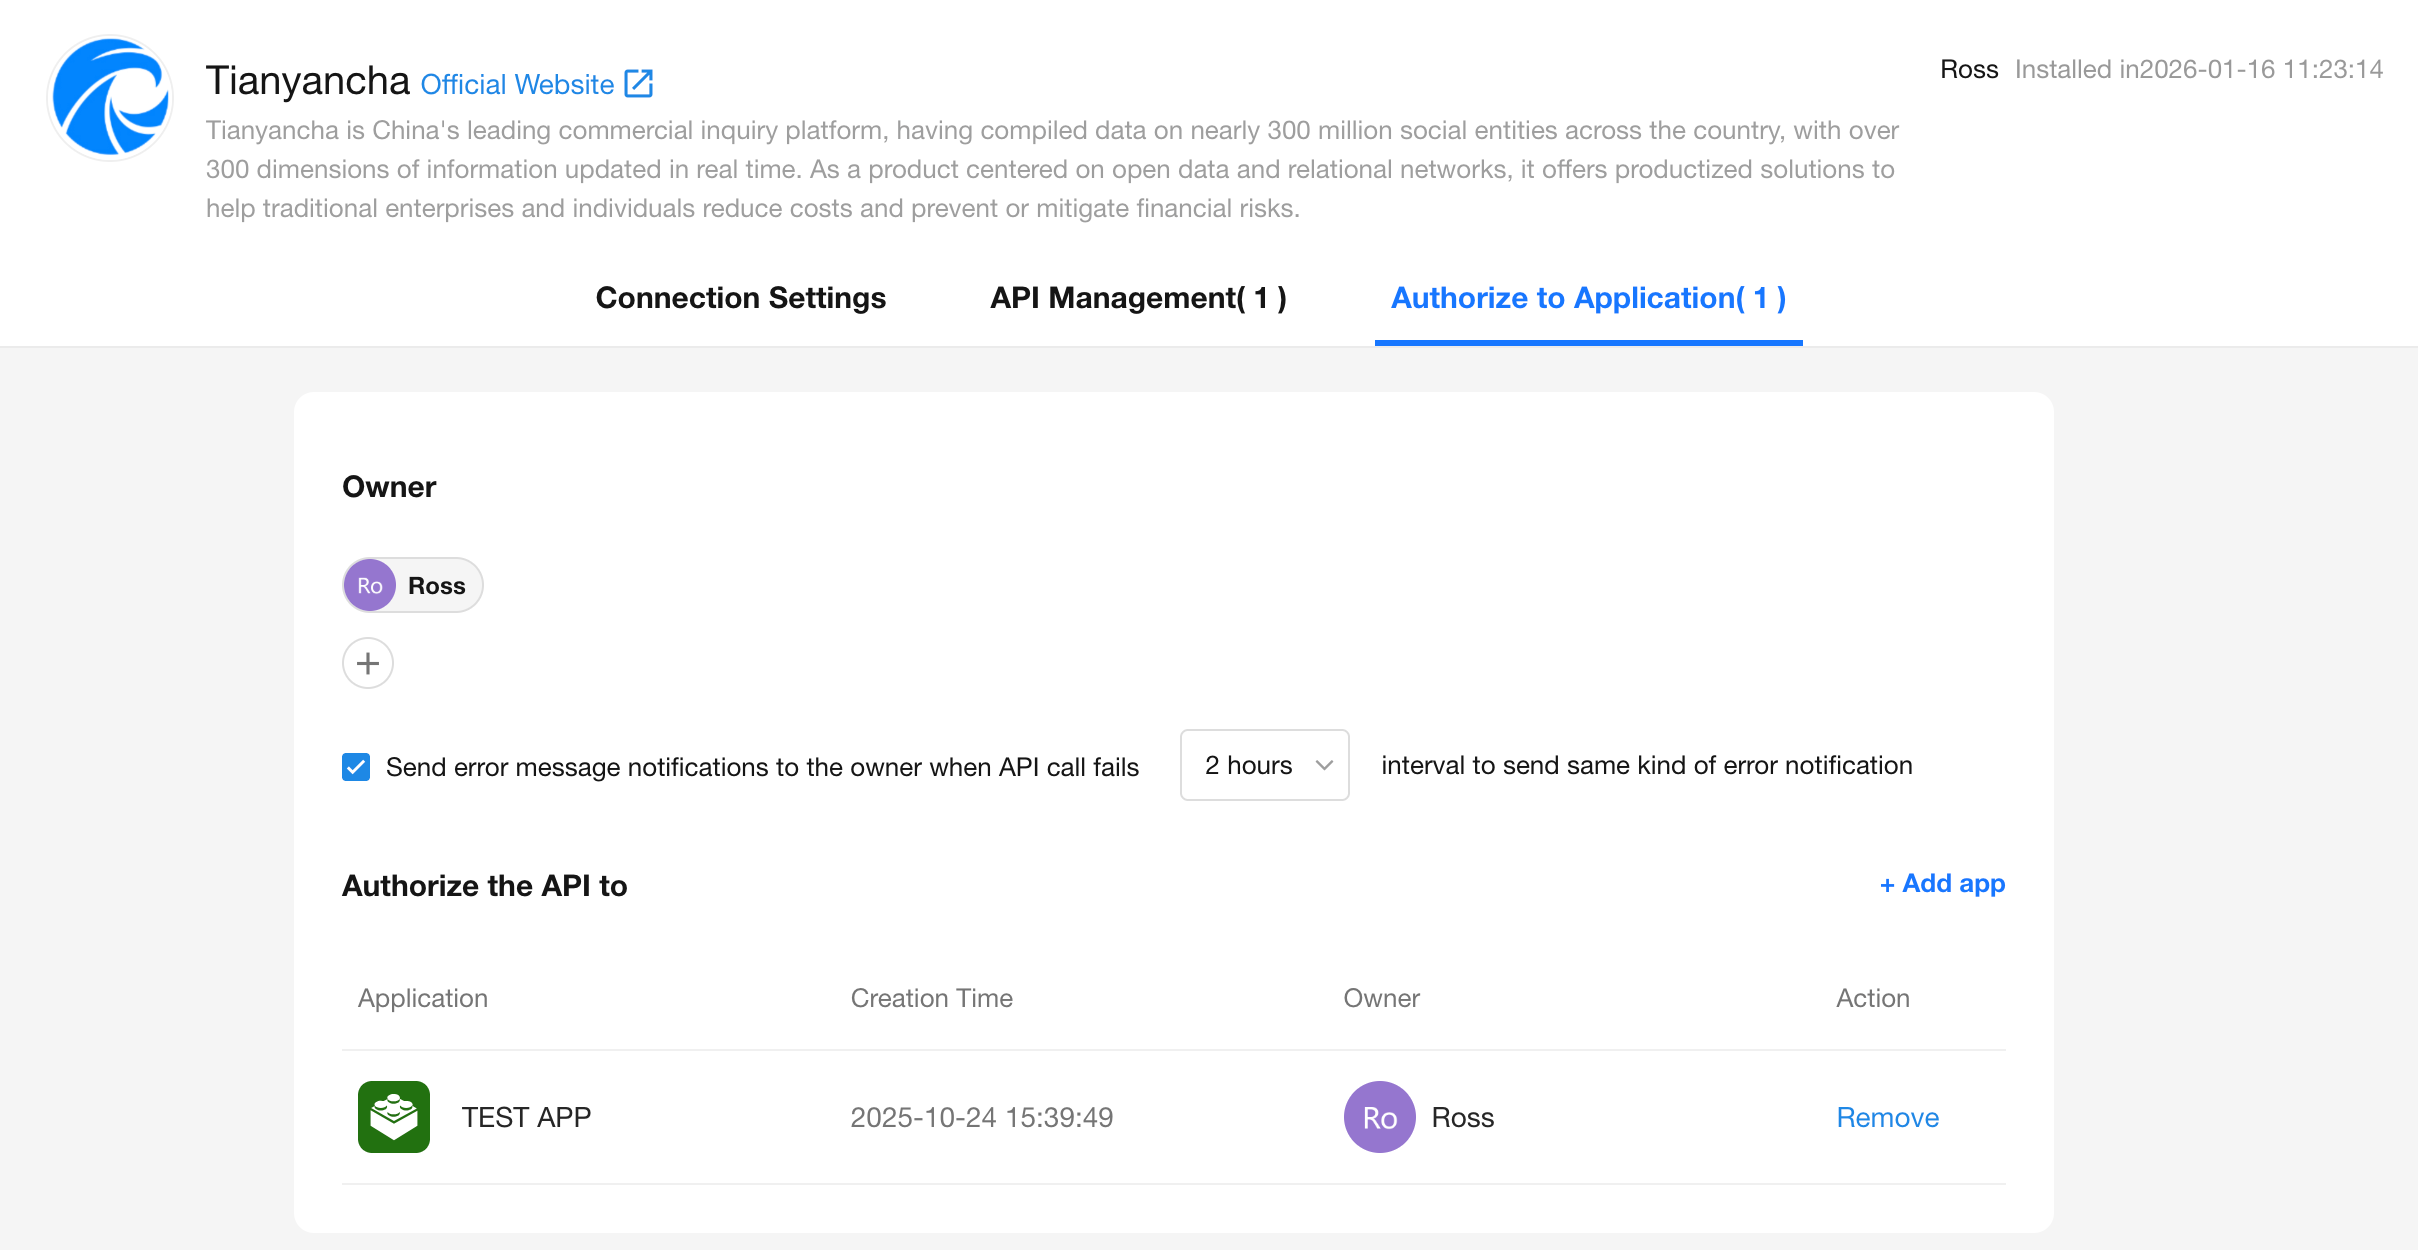
4. Authorize Applications
Only applications that are explicitly authorized can access this API connection and use the associated functionality.
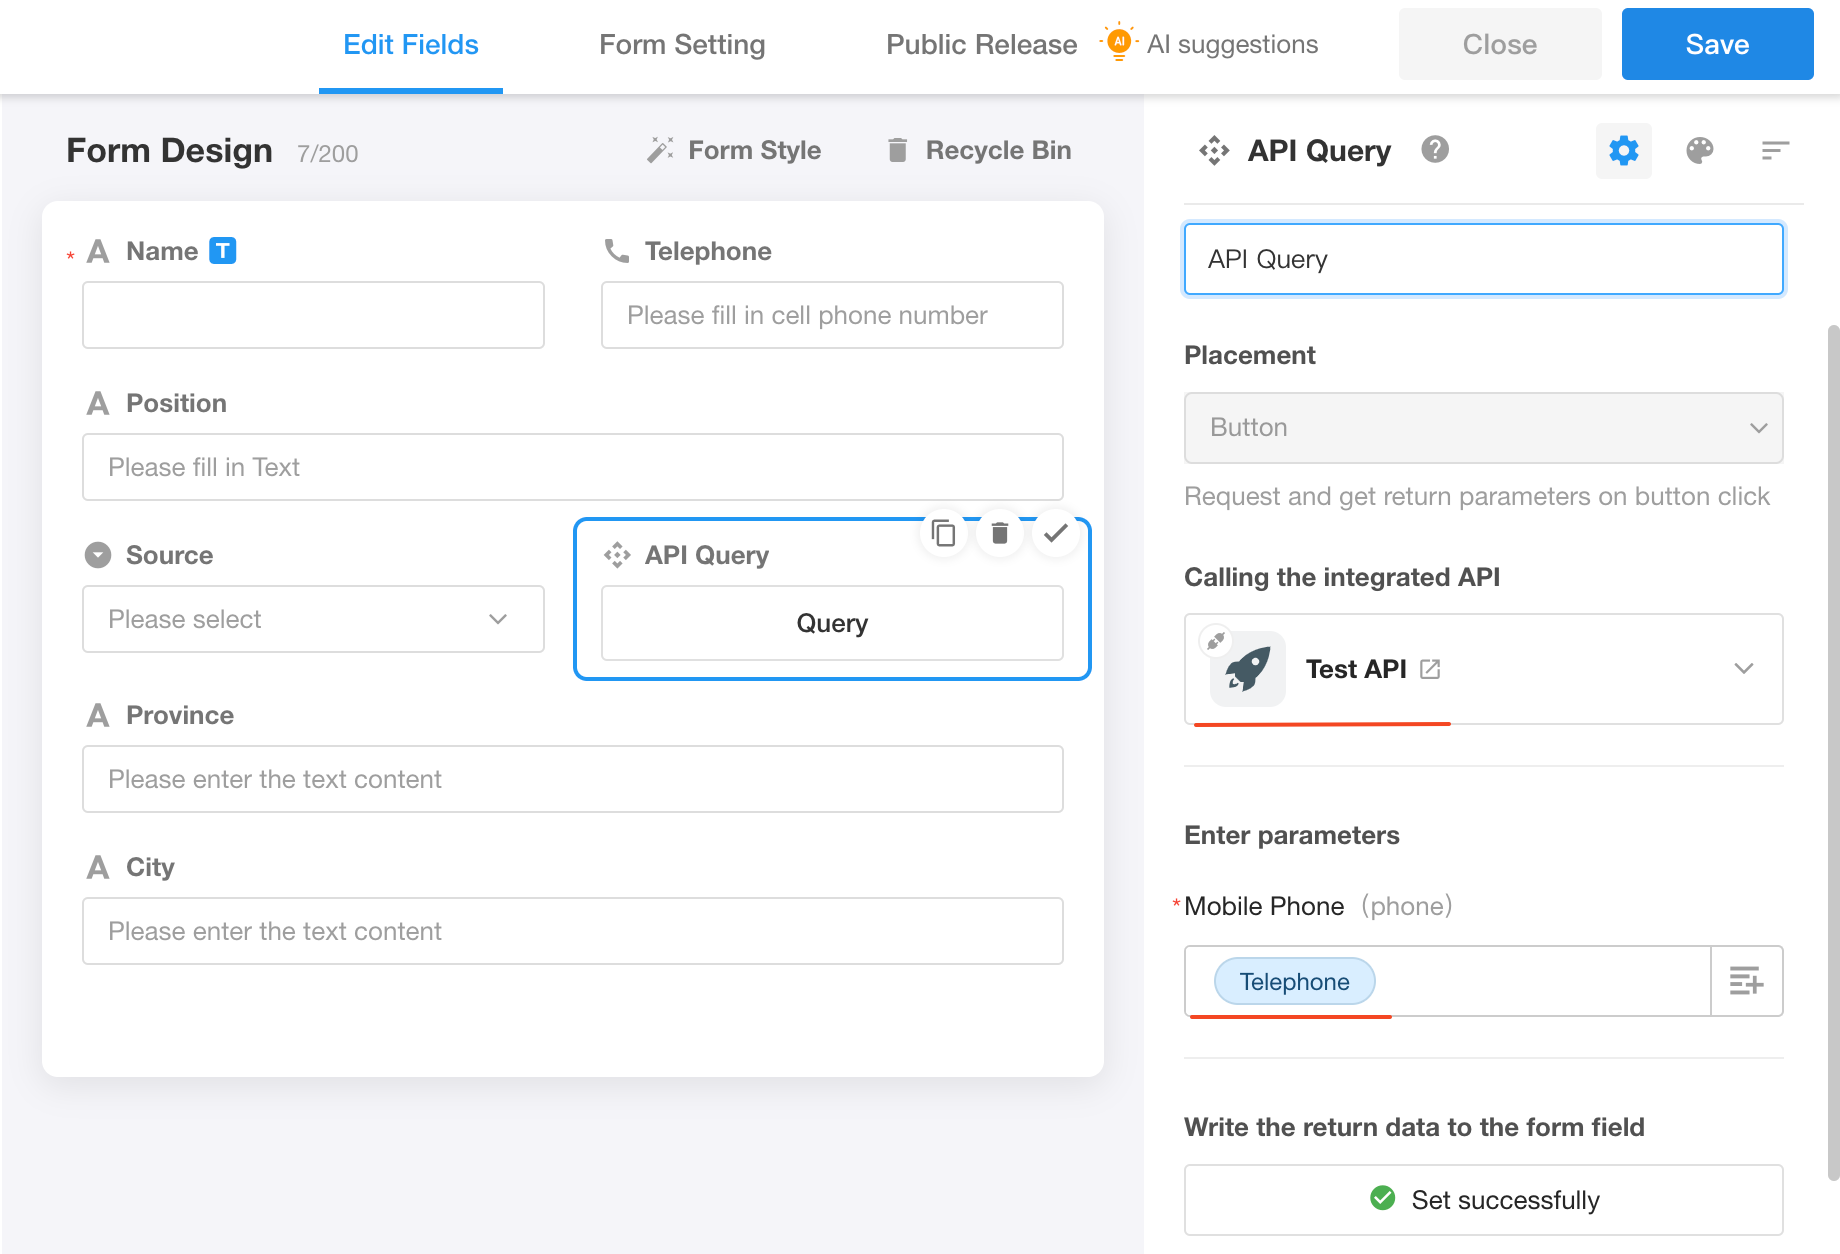
5. Use the Integrated API in a Worksheet
In the target application, add an API Query field and other related fields for business data such as company registration details.
Step 1: Connection & Authentication
Previously, we walked through installing a prebuilt API template. Now let’s dive into how to configure a custom connection from scratch.
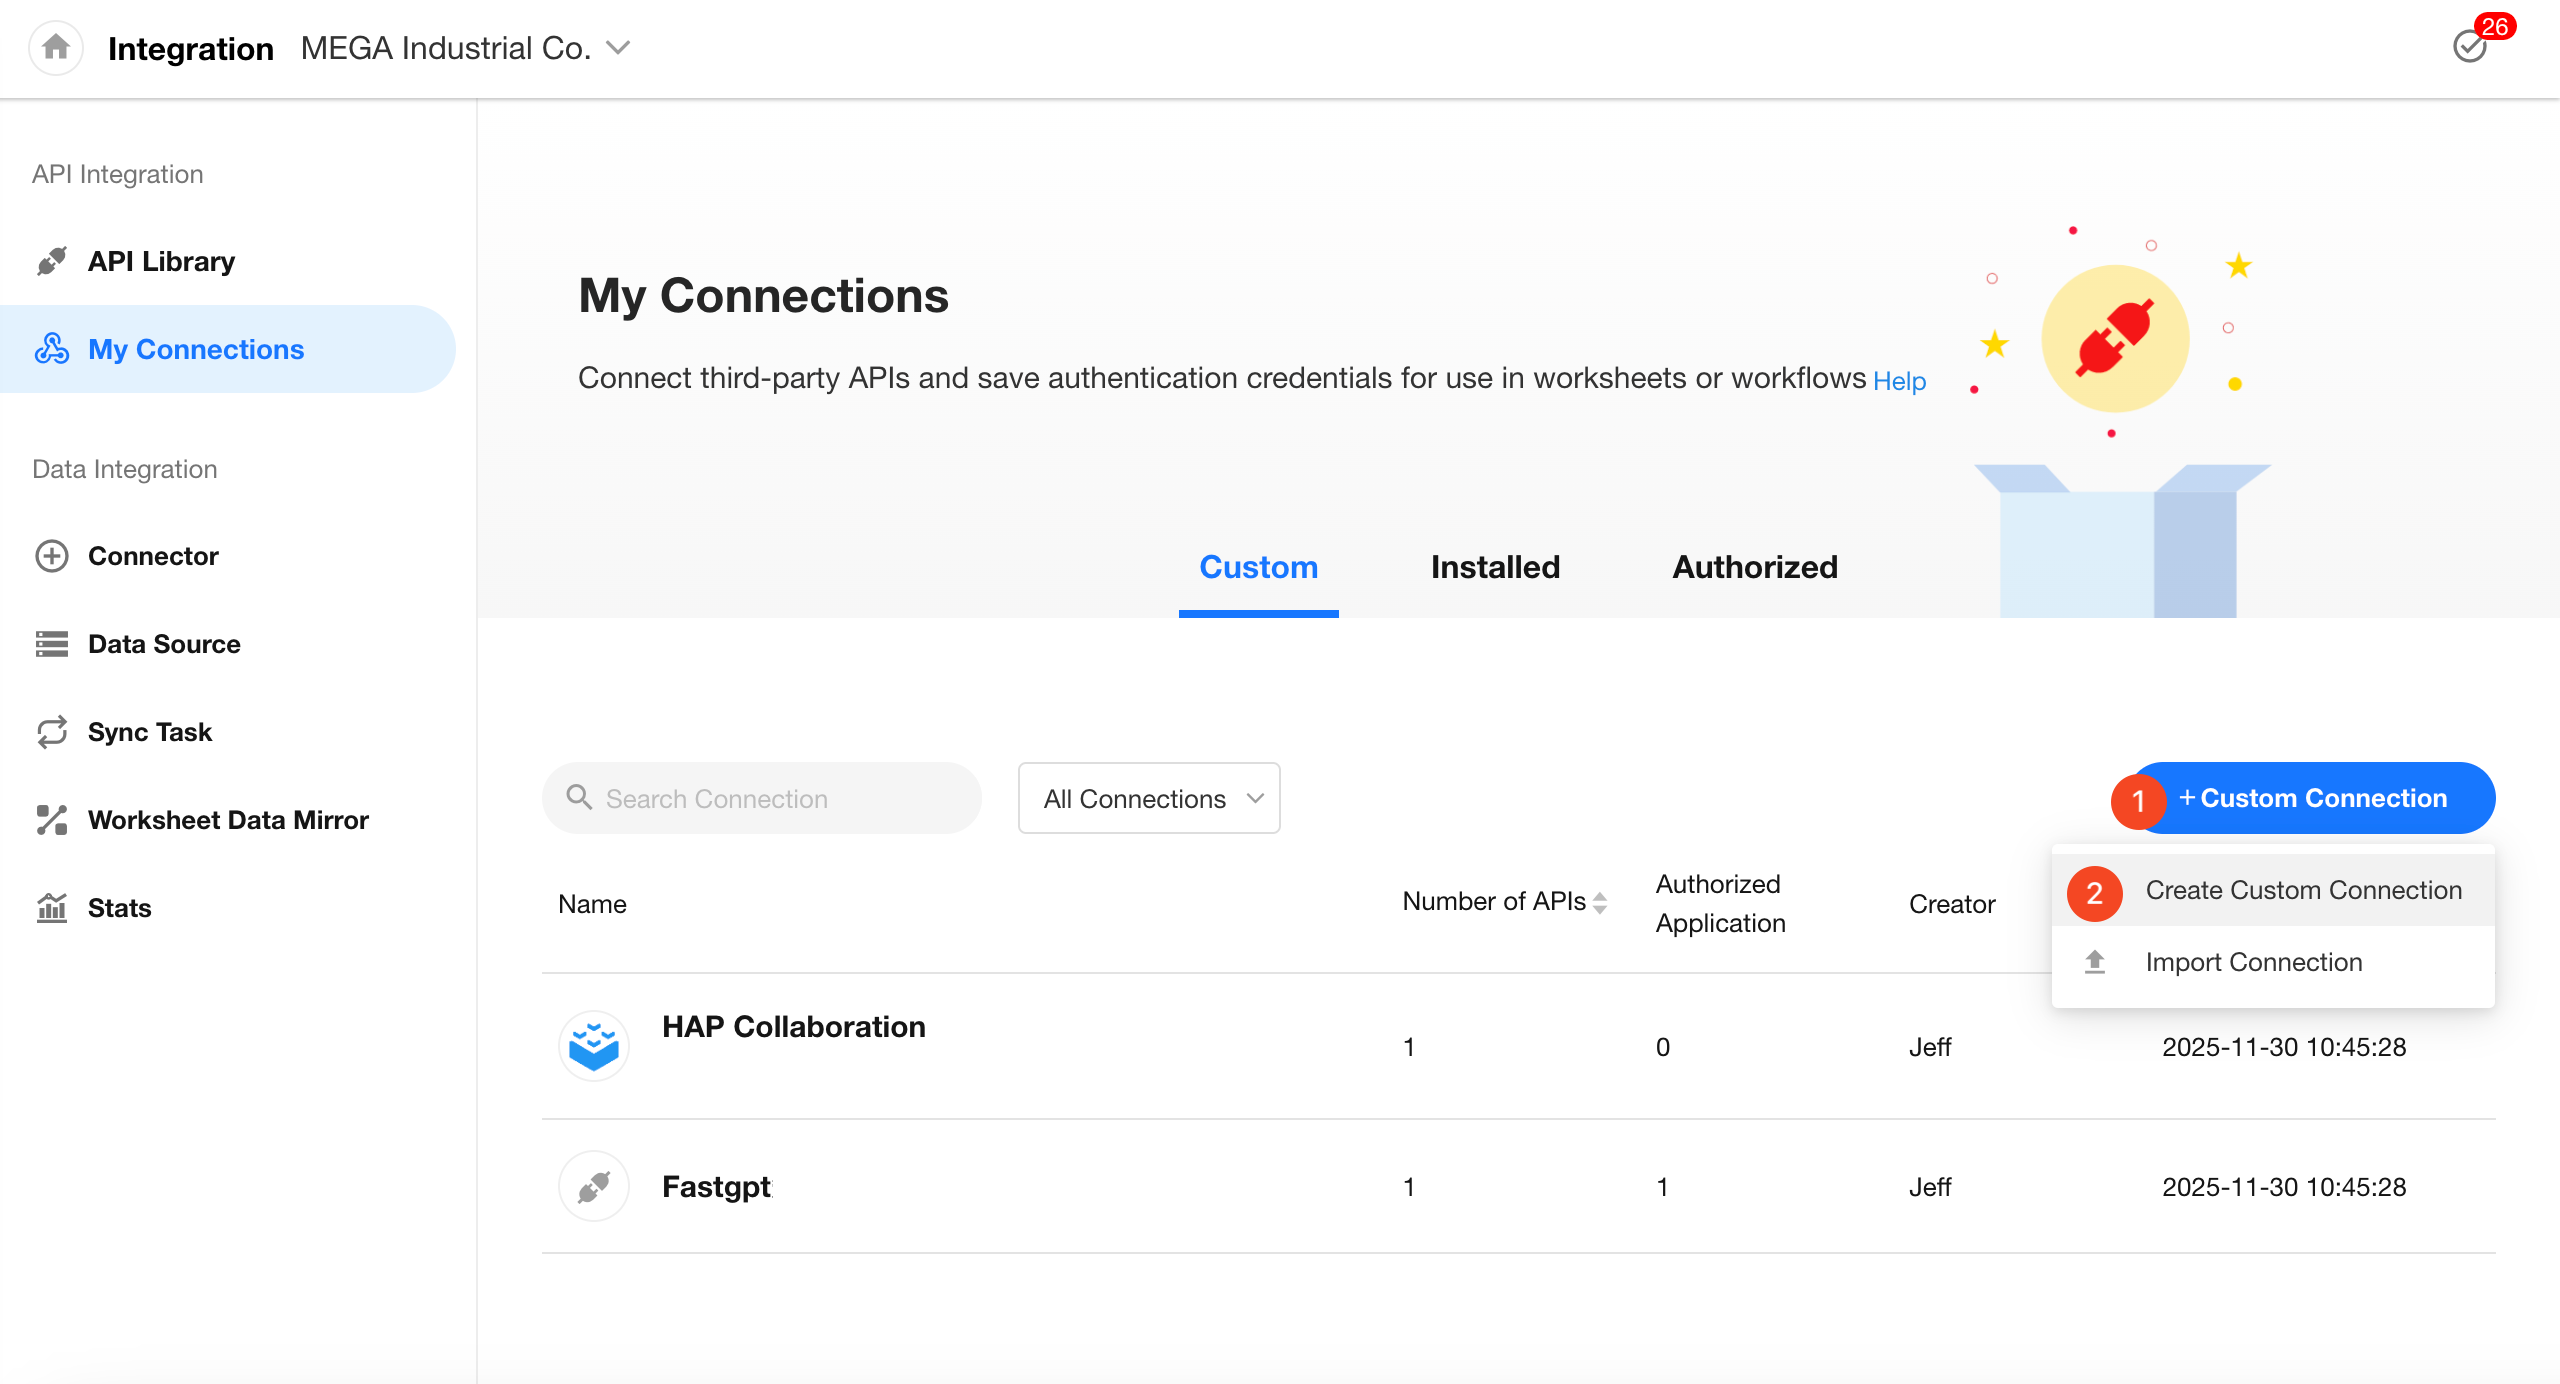
Add a Custom Connection
Go to the Integration Center, switch to the My Connections tab, and click [+ Custom Connection] > [Create Custom Connection].
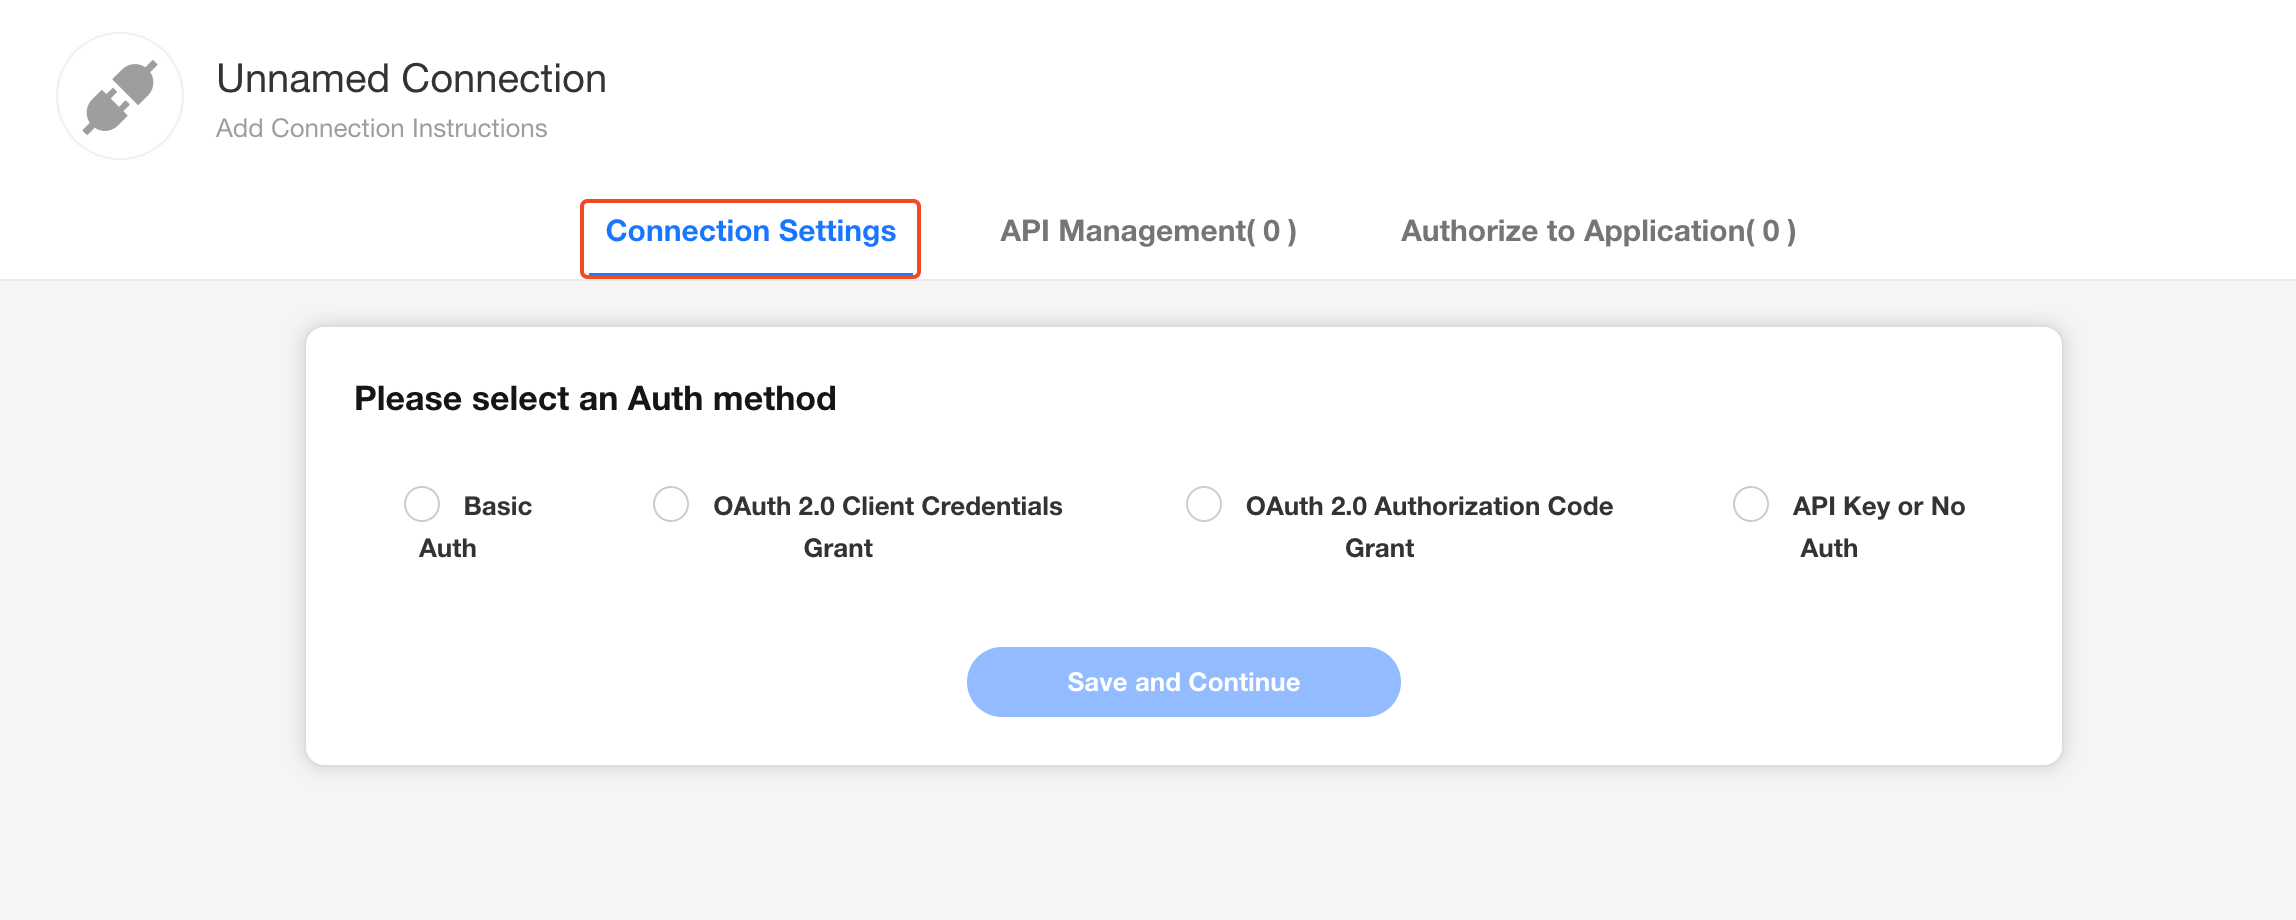
Choose an Authentication Method
Select the appropriate authentication method based on the API service provider’s requirements. If no authentication is needed or the API key is passed directly in the request URL, choose [API Key or No Authentication], then click Save and Continue.
Connection Parameters
Connection parameters are typically required for authentication—for example, corpid and corpsecret are needed to get a token in WeCom. These parameters are assigned by the API provider; simply paste them into the form. If no parameters are needed, this section can be skipped.
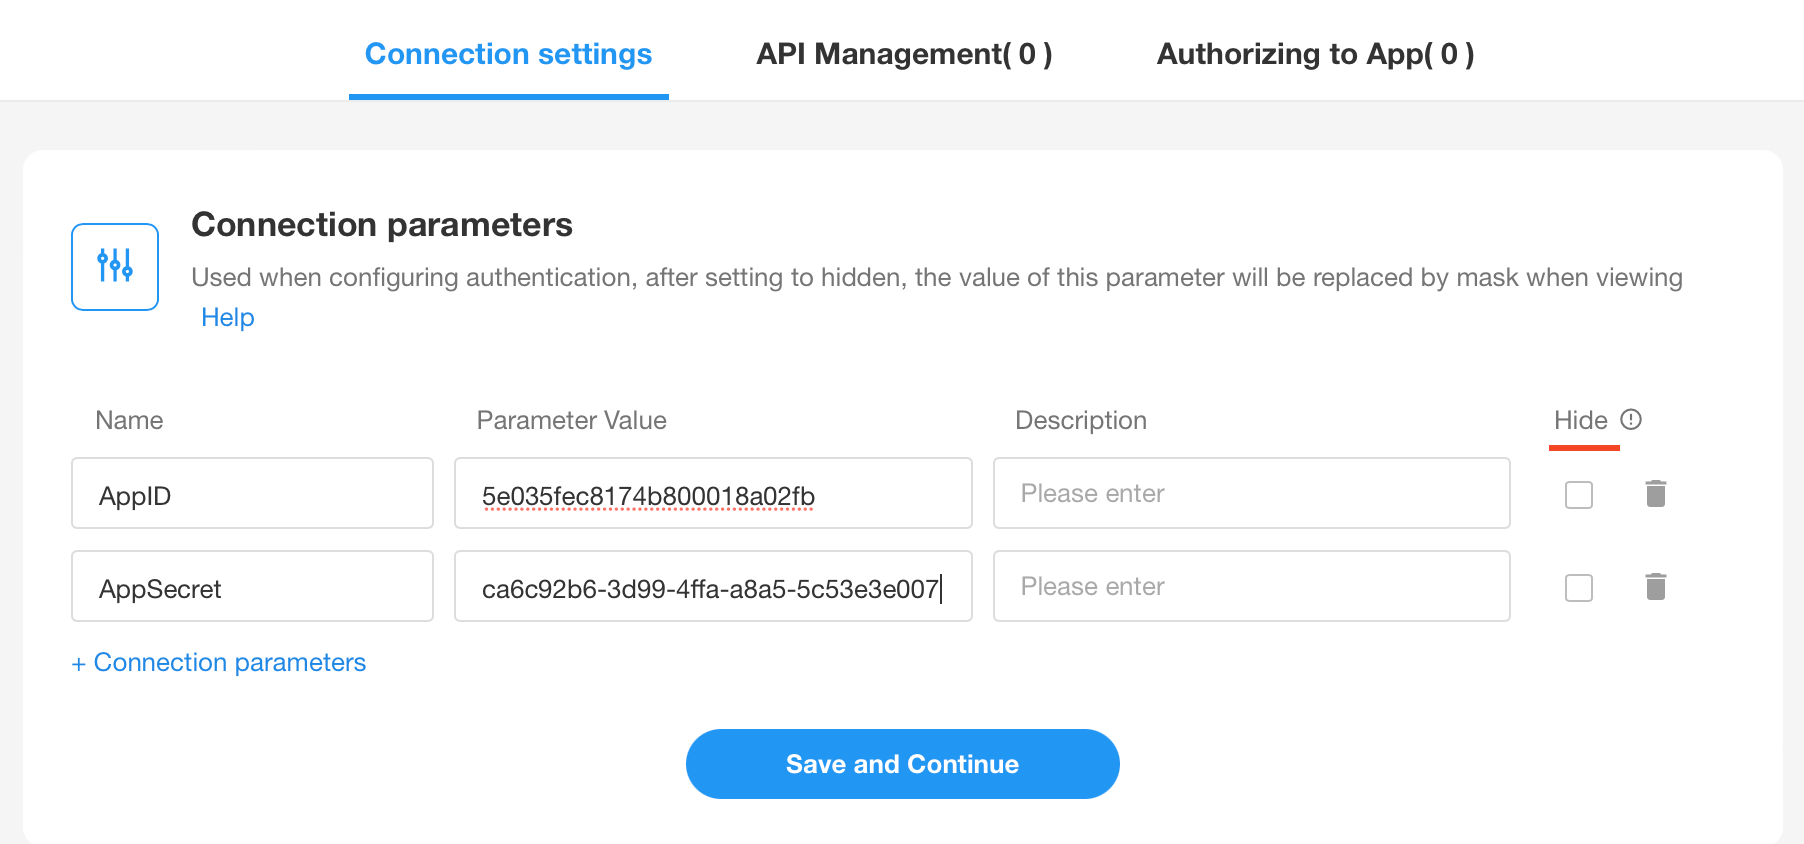
- You can choose whether each parameter value is hidden or visible. Hidden values are encrypted and cannot be unmasked later.
- Hidden values can be modified but not revealed once saved.
These parameters can also be referenced in the request payload when invoking the API, not just for authentication.
Basic Auth
This method requires providing a username and password with every API request.
You may enter fixed values or reference previously defined connection parameters.

OAuth 2.0 (Client Credentials Grant)
This method retrieves an Access Token for API requests.
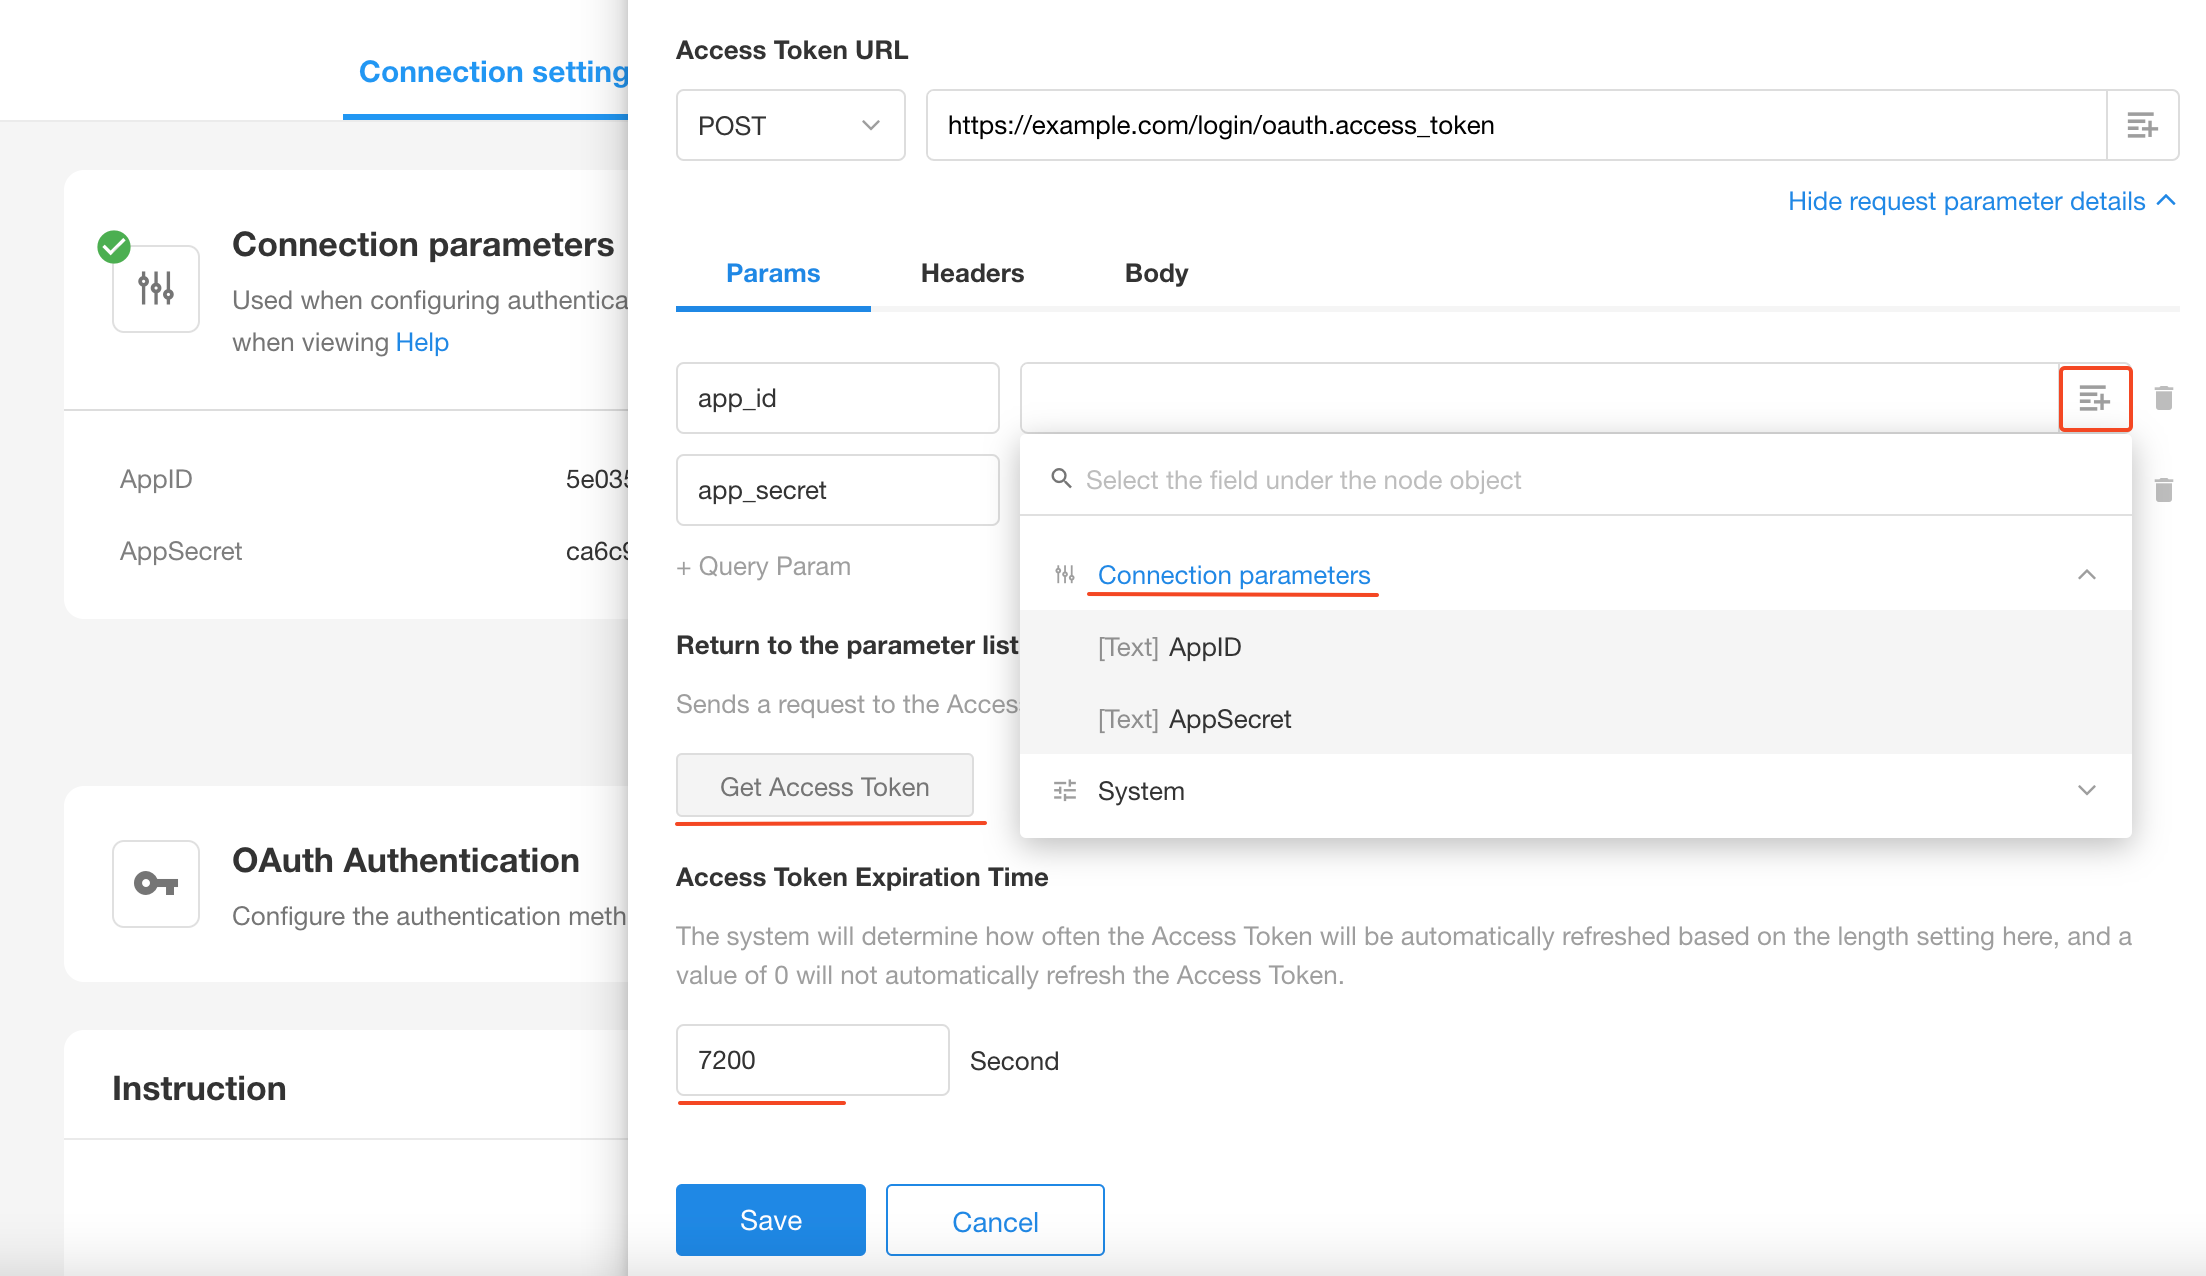
- Default parameters
app_idandapp_secretare generated. You can rename or remove them as needed. - Parameter values can be selected from the connection parameters.
- Click [Get Access Token] to test the configuration.
- Token expiration time can also be set for automatic refresh.
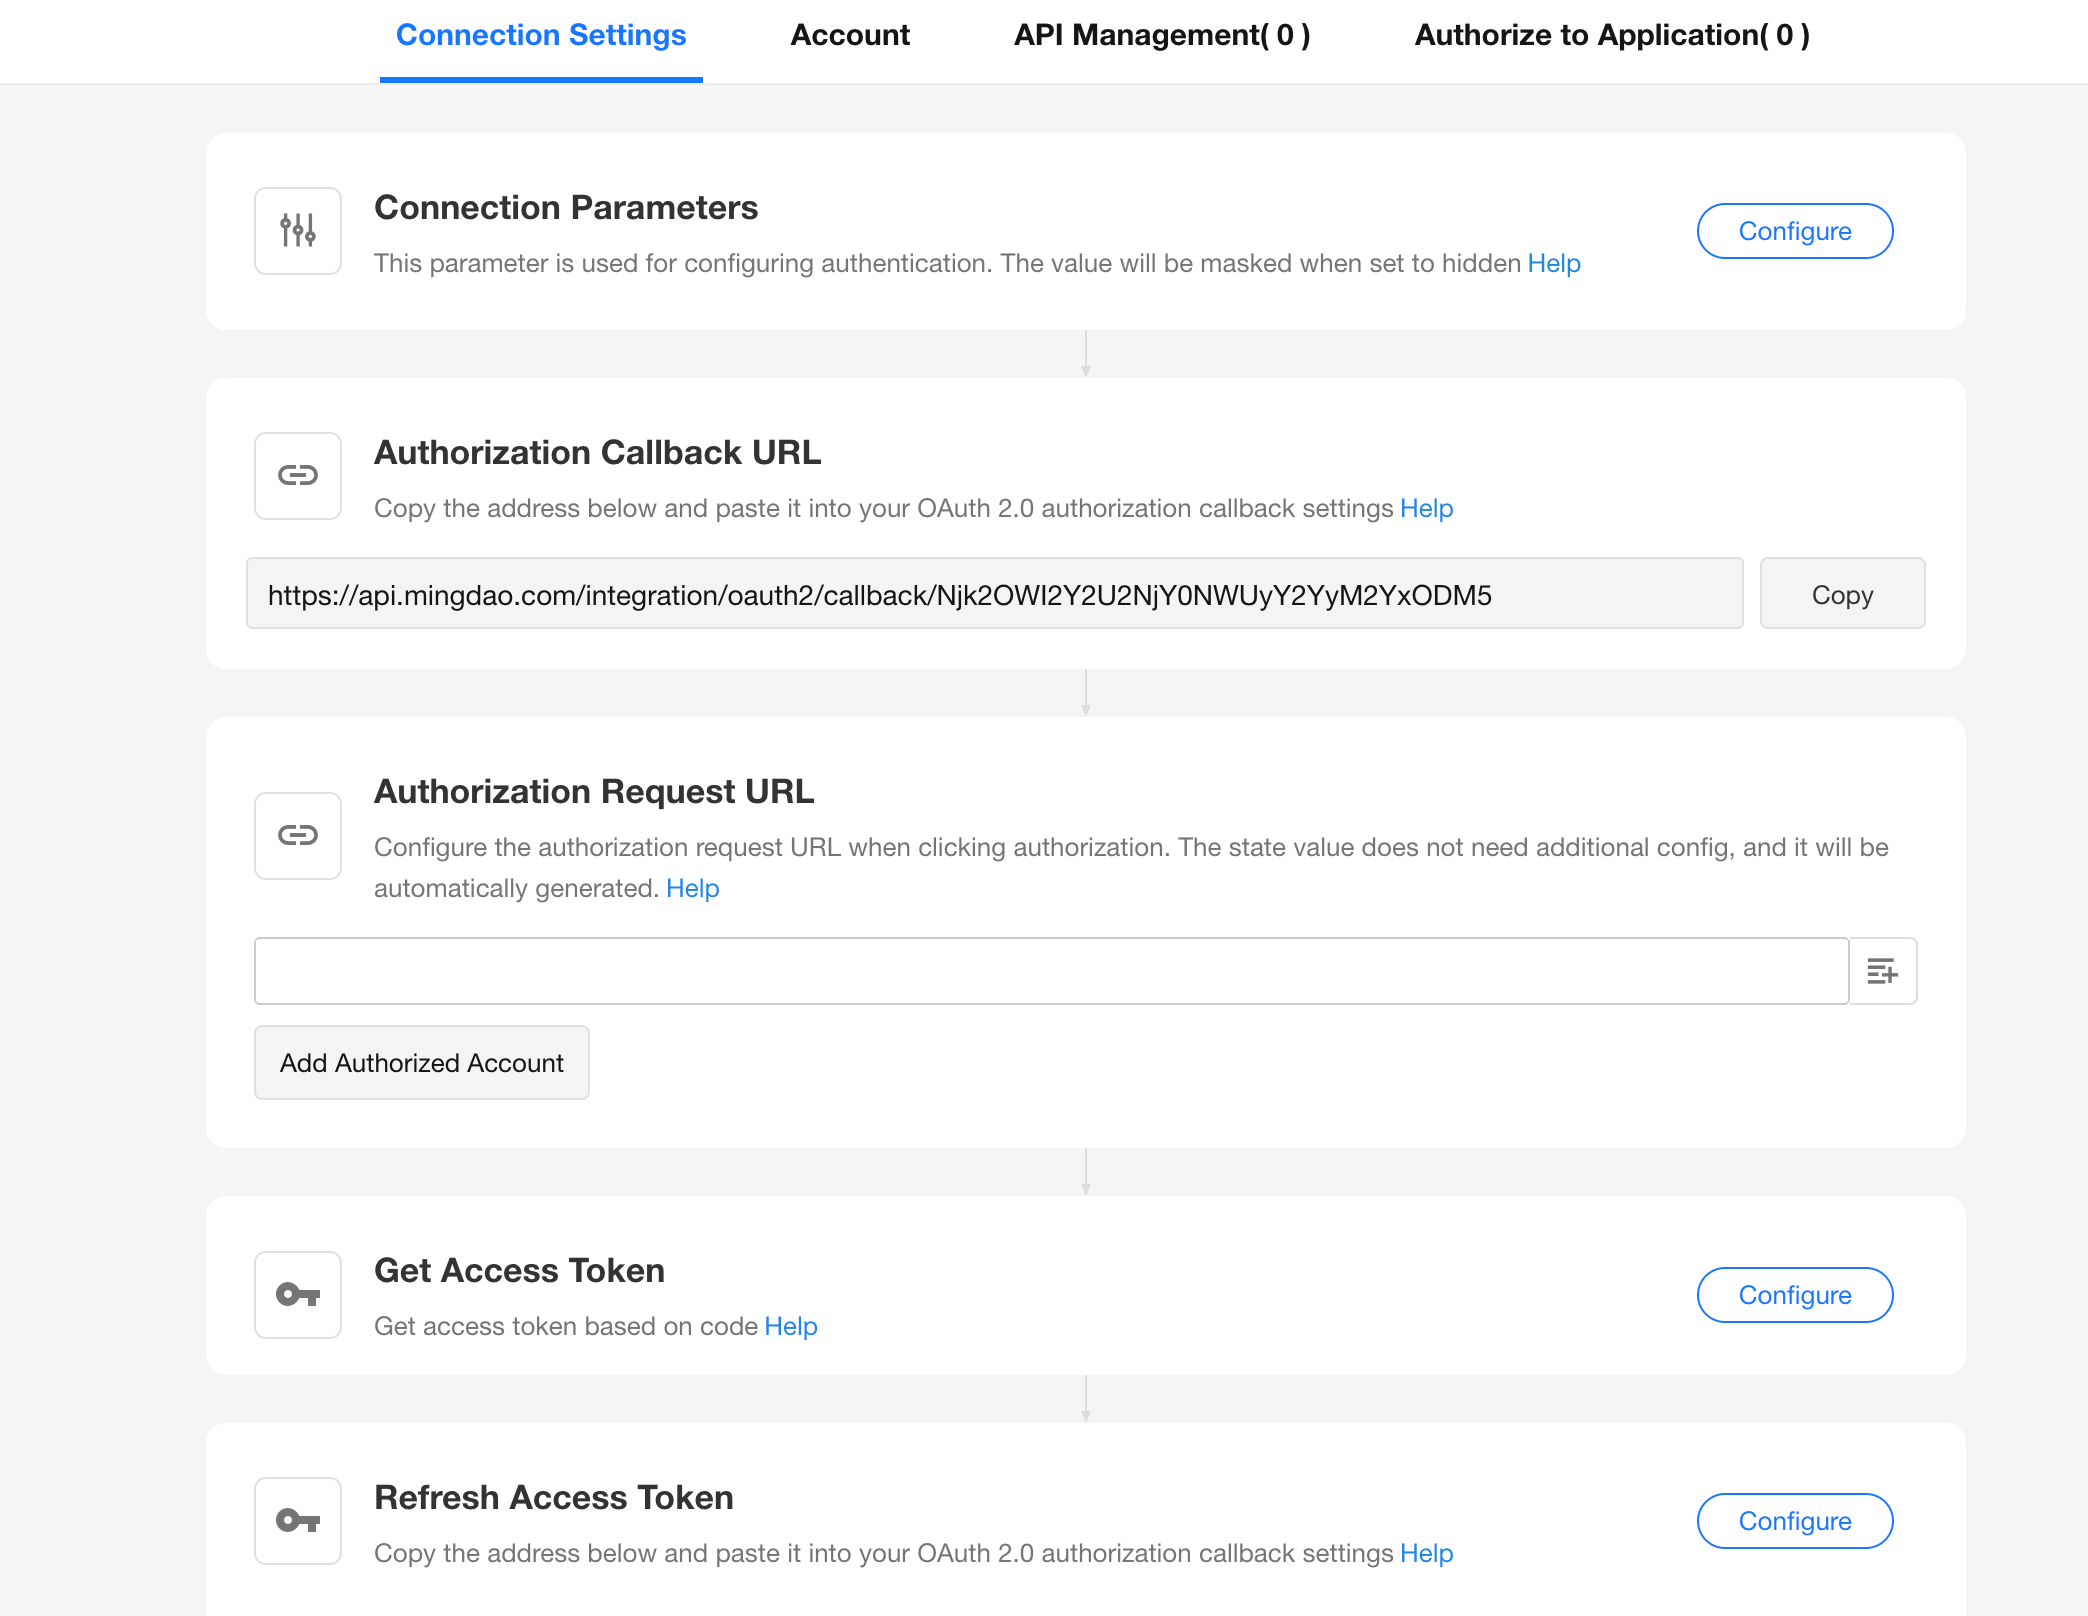
OAuth 2.0 (Authorization Code Grant)
-
Redirect URI: Generated by HAP and used to receive the callback after authorization.
-
Authorization URL: The endpoint that handles user login and authorization requests.
-
Token URL: Used to obtain or refresh the access token, according to the provider’s API documentation.
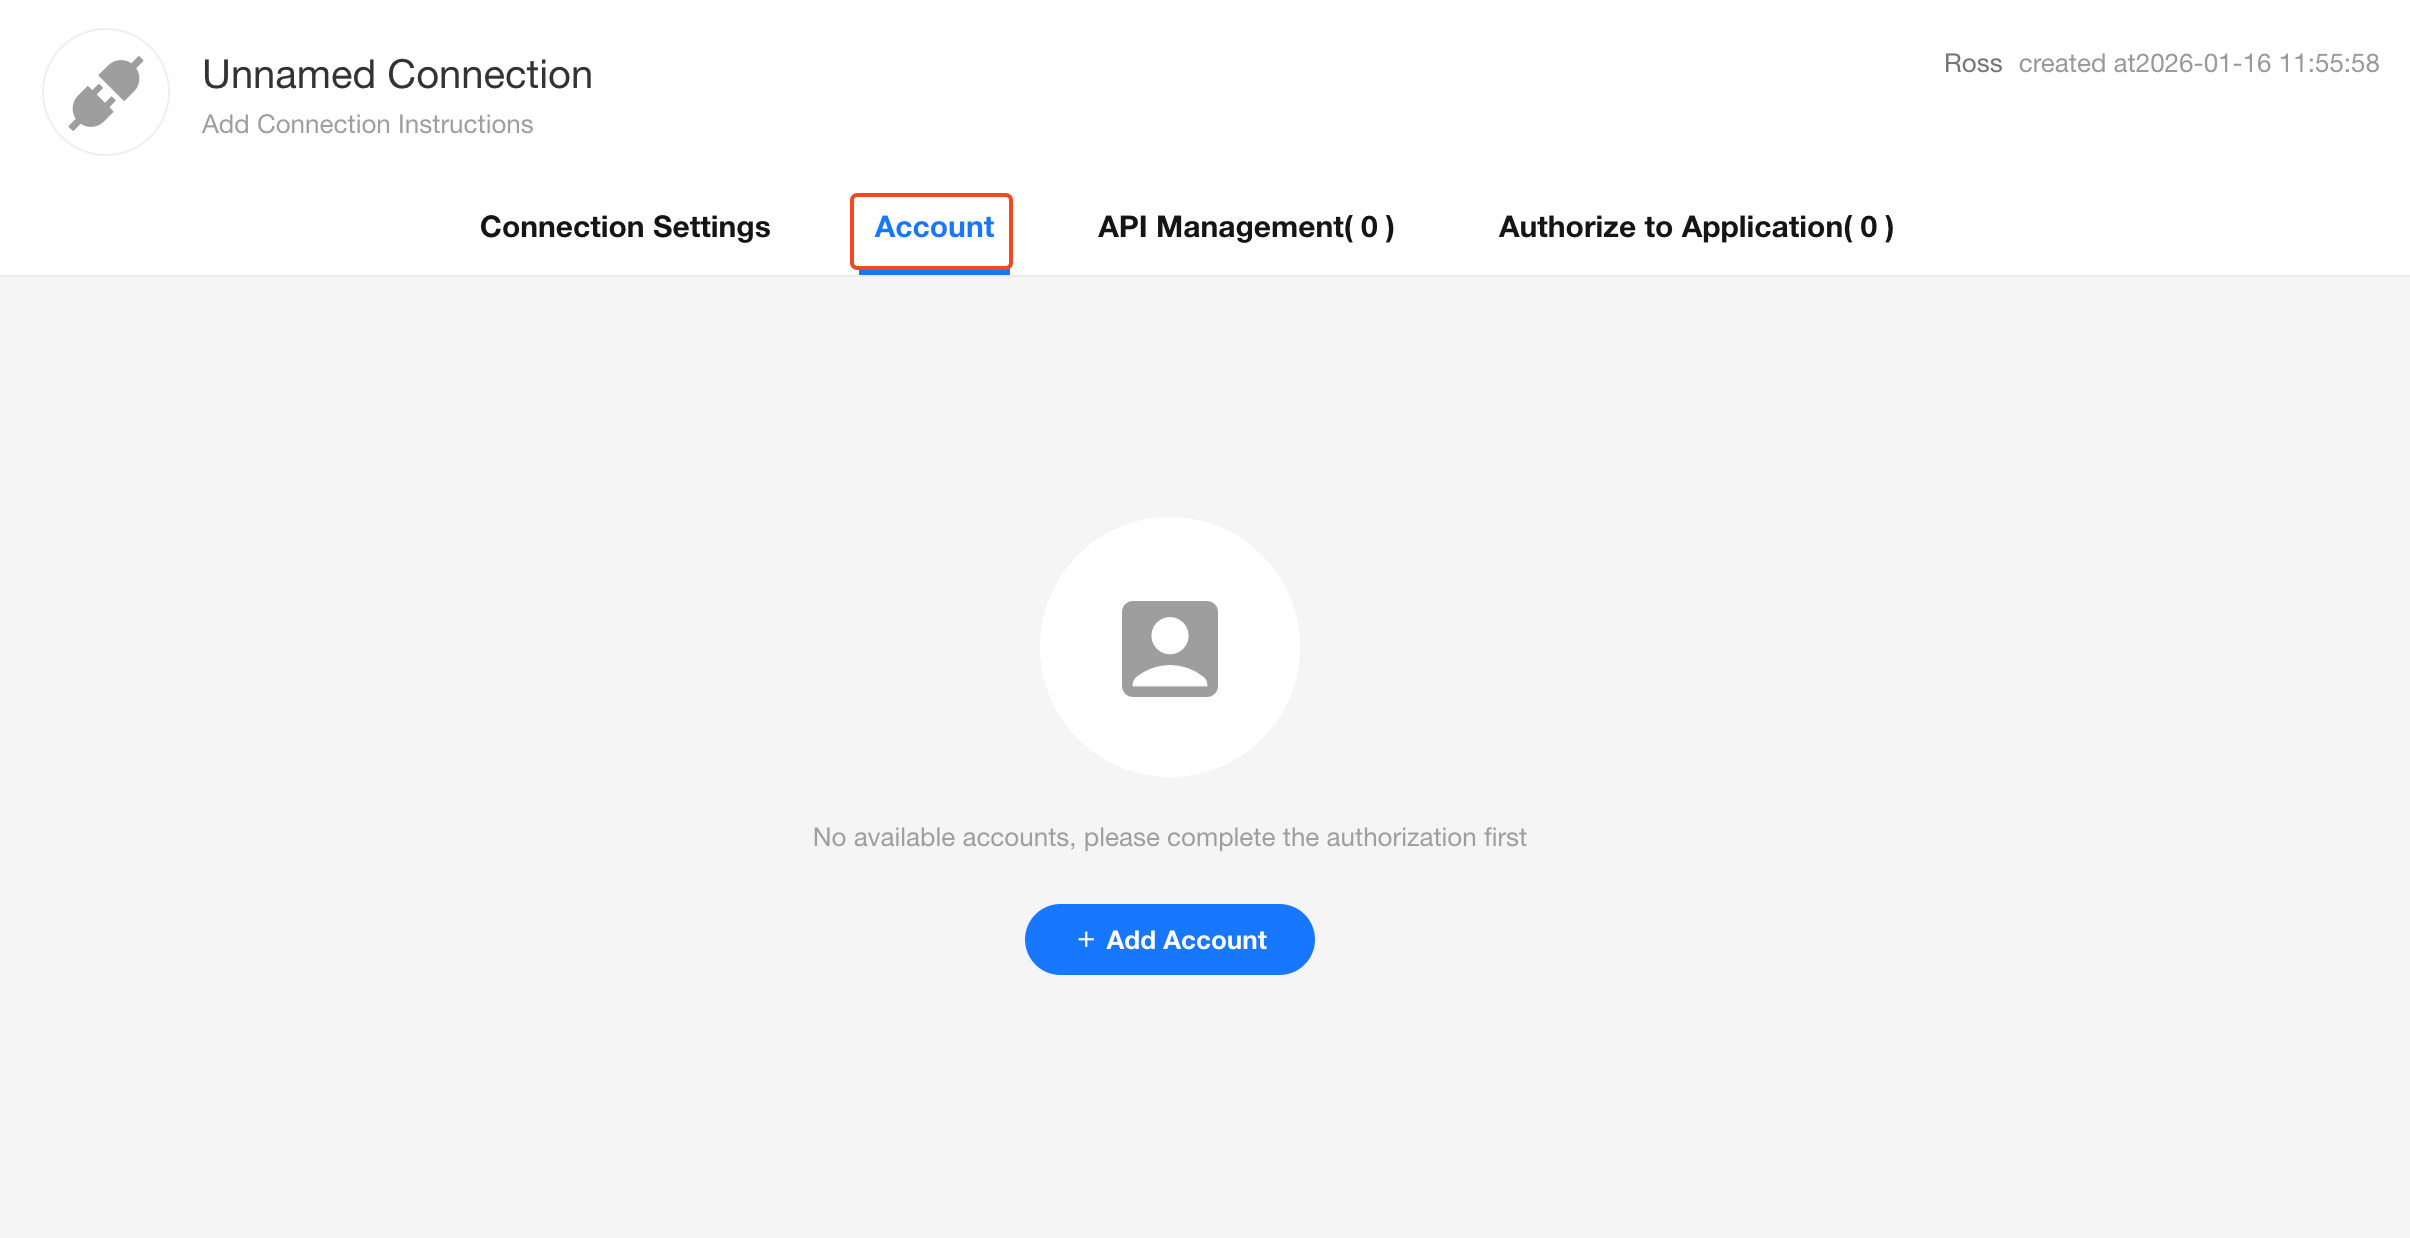
For authorization code-based APIs, the identity is user-specific. You can manage accounts under the Account section—rename, delete, reauthorize, or manually refresh the token.
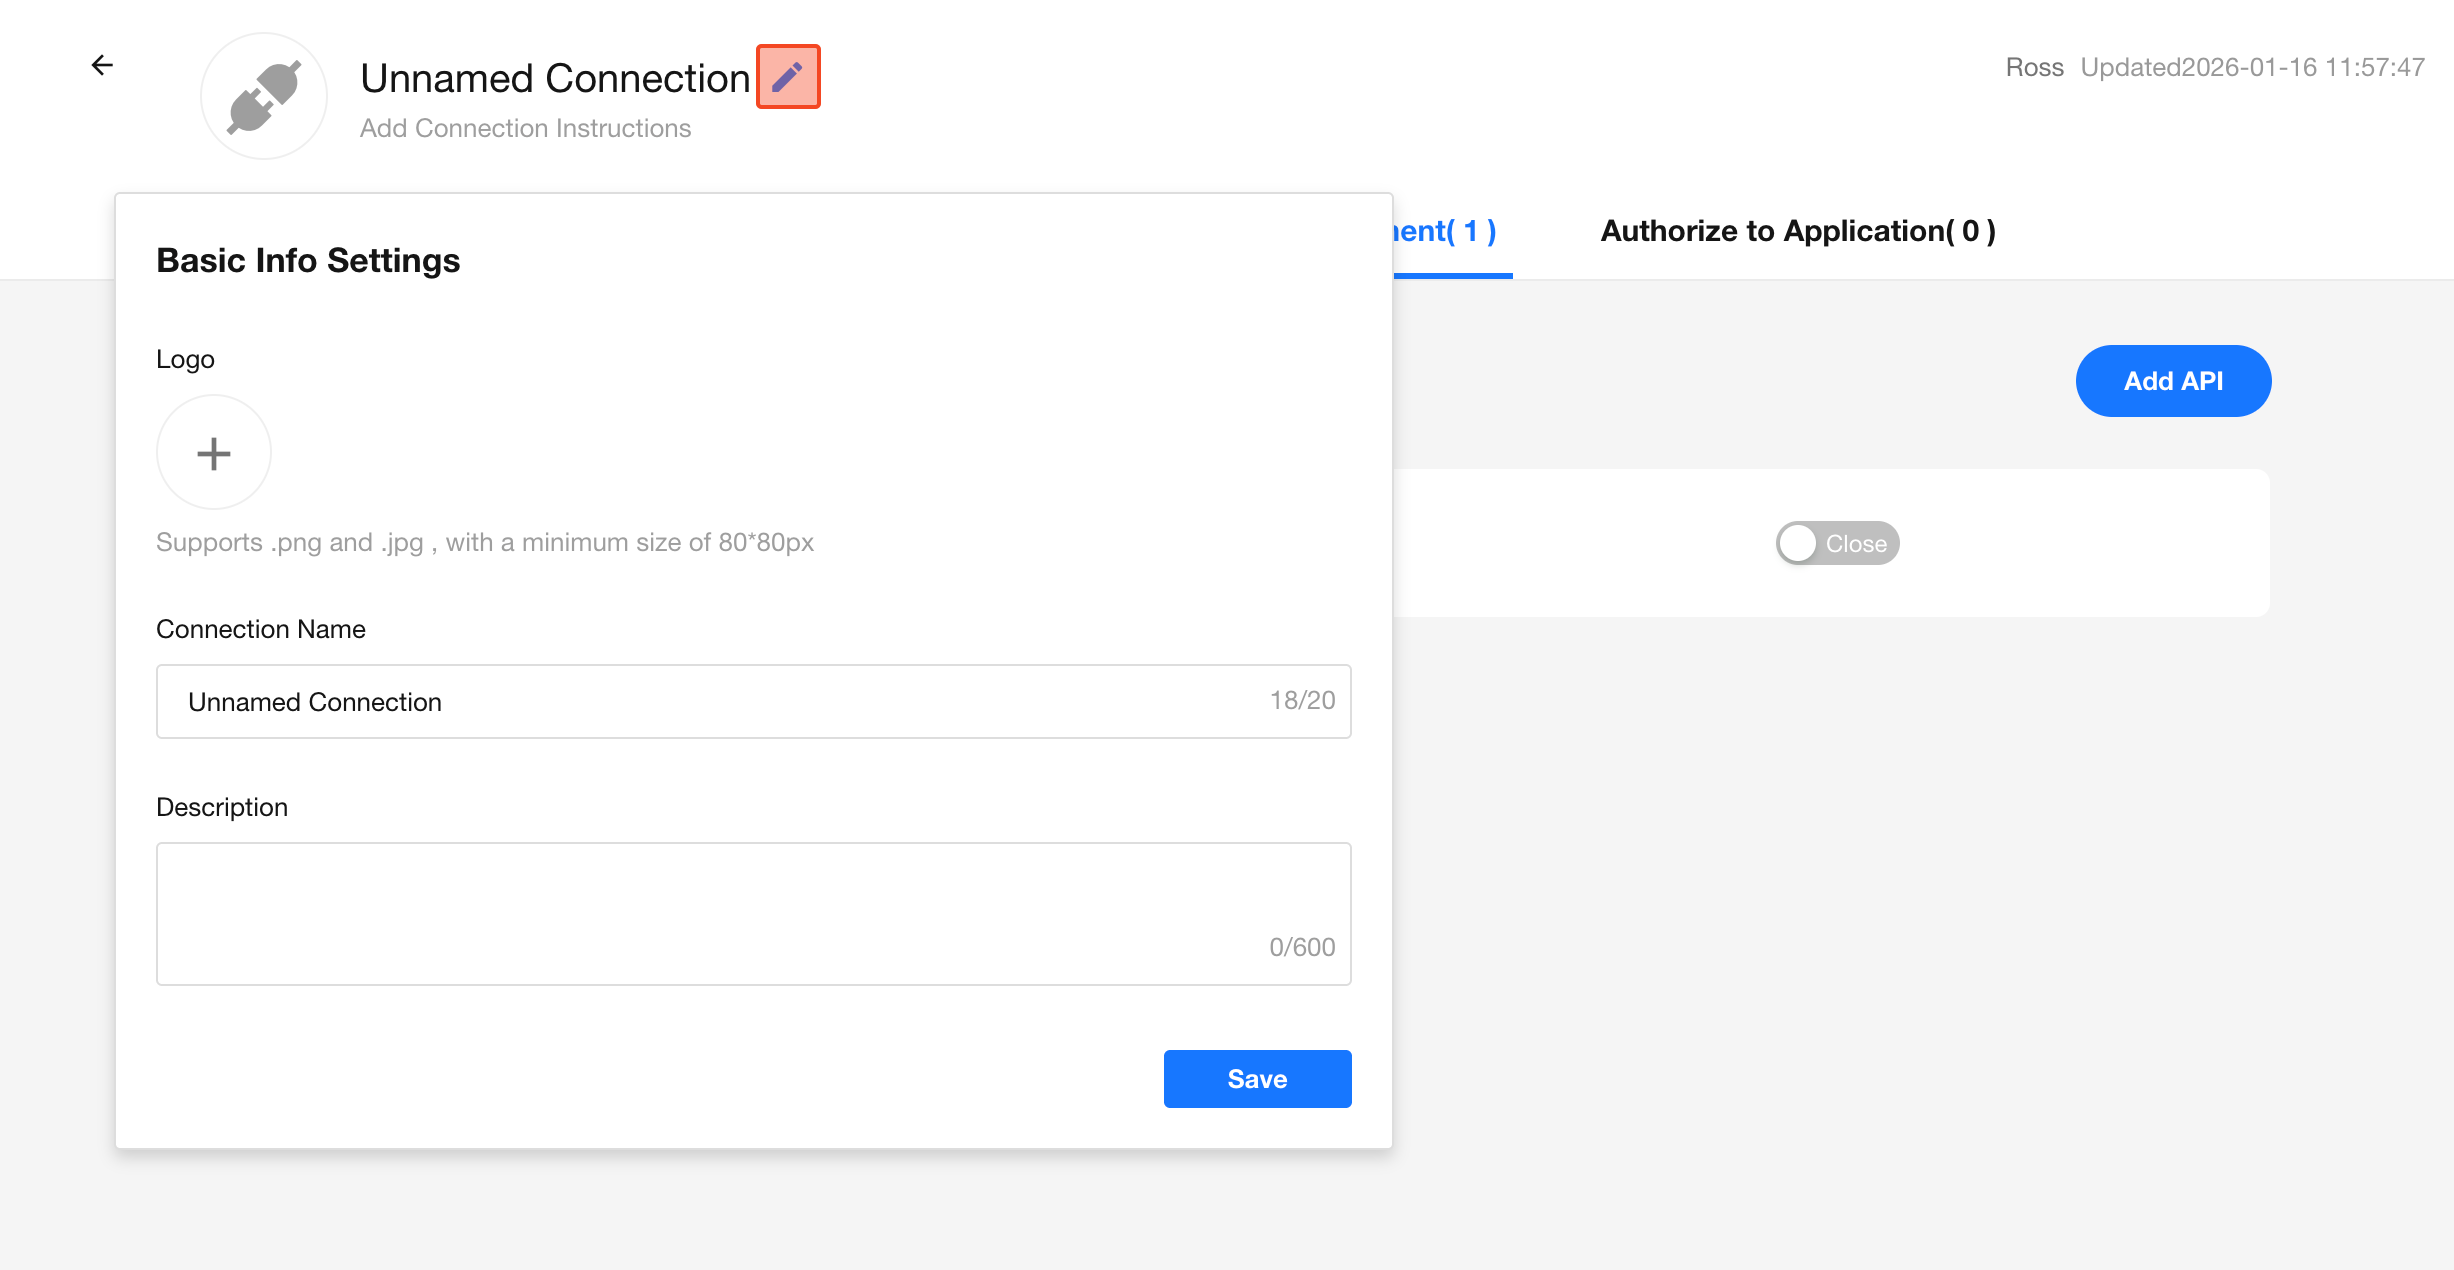
Configure Basic Connection Information
You can define the connection's name, logo, and description.
Step 2: API Request Configuration
After configuring the connection and authentication, you can begin defining your API requests. Go to the API Management tab and click Create API to start.
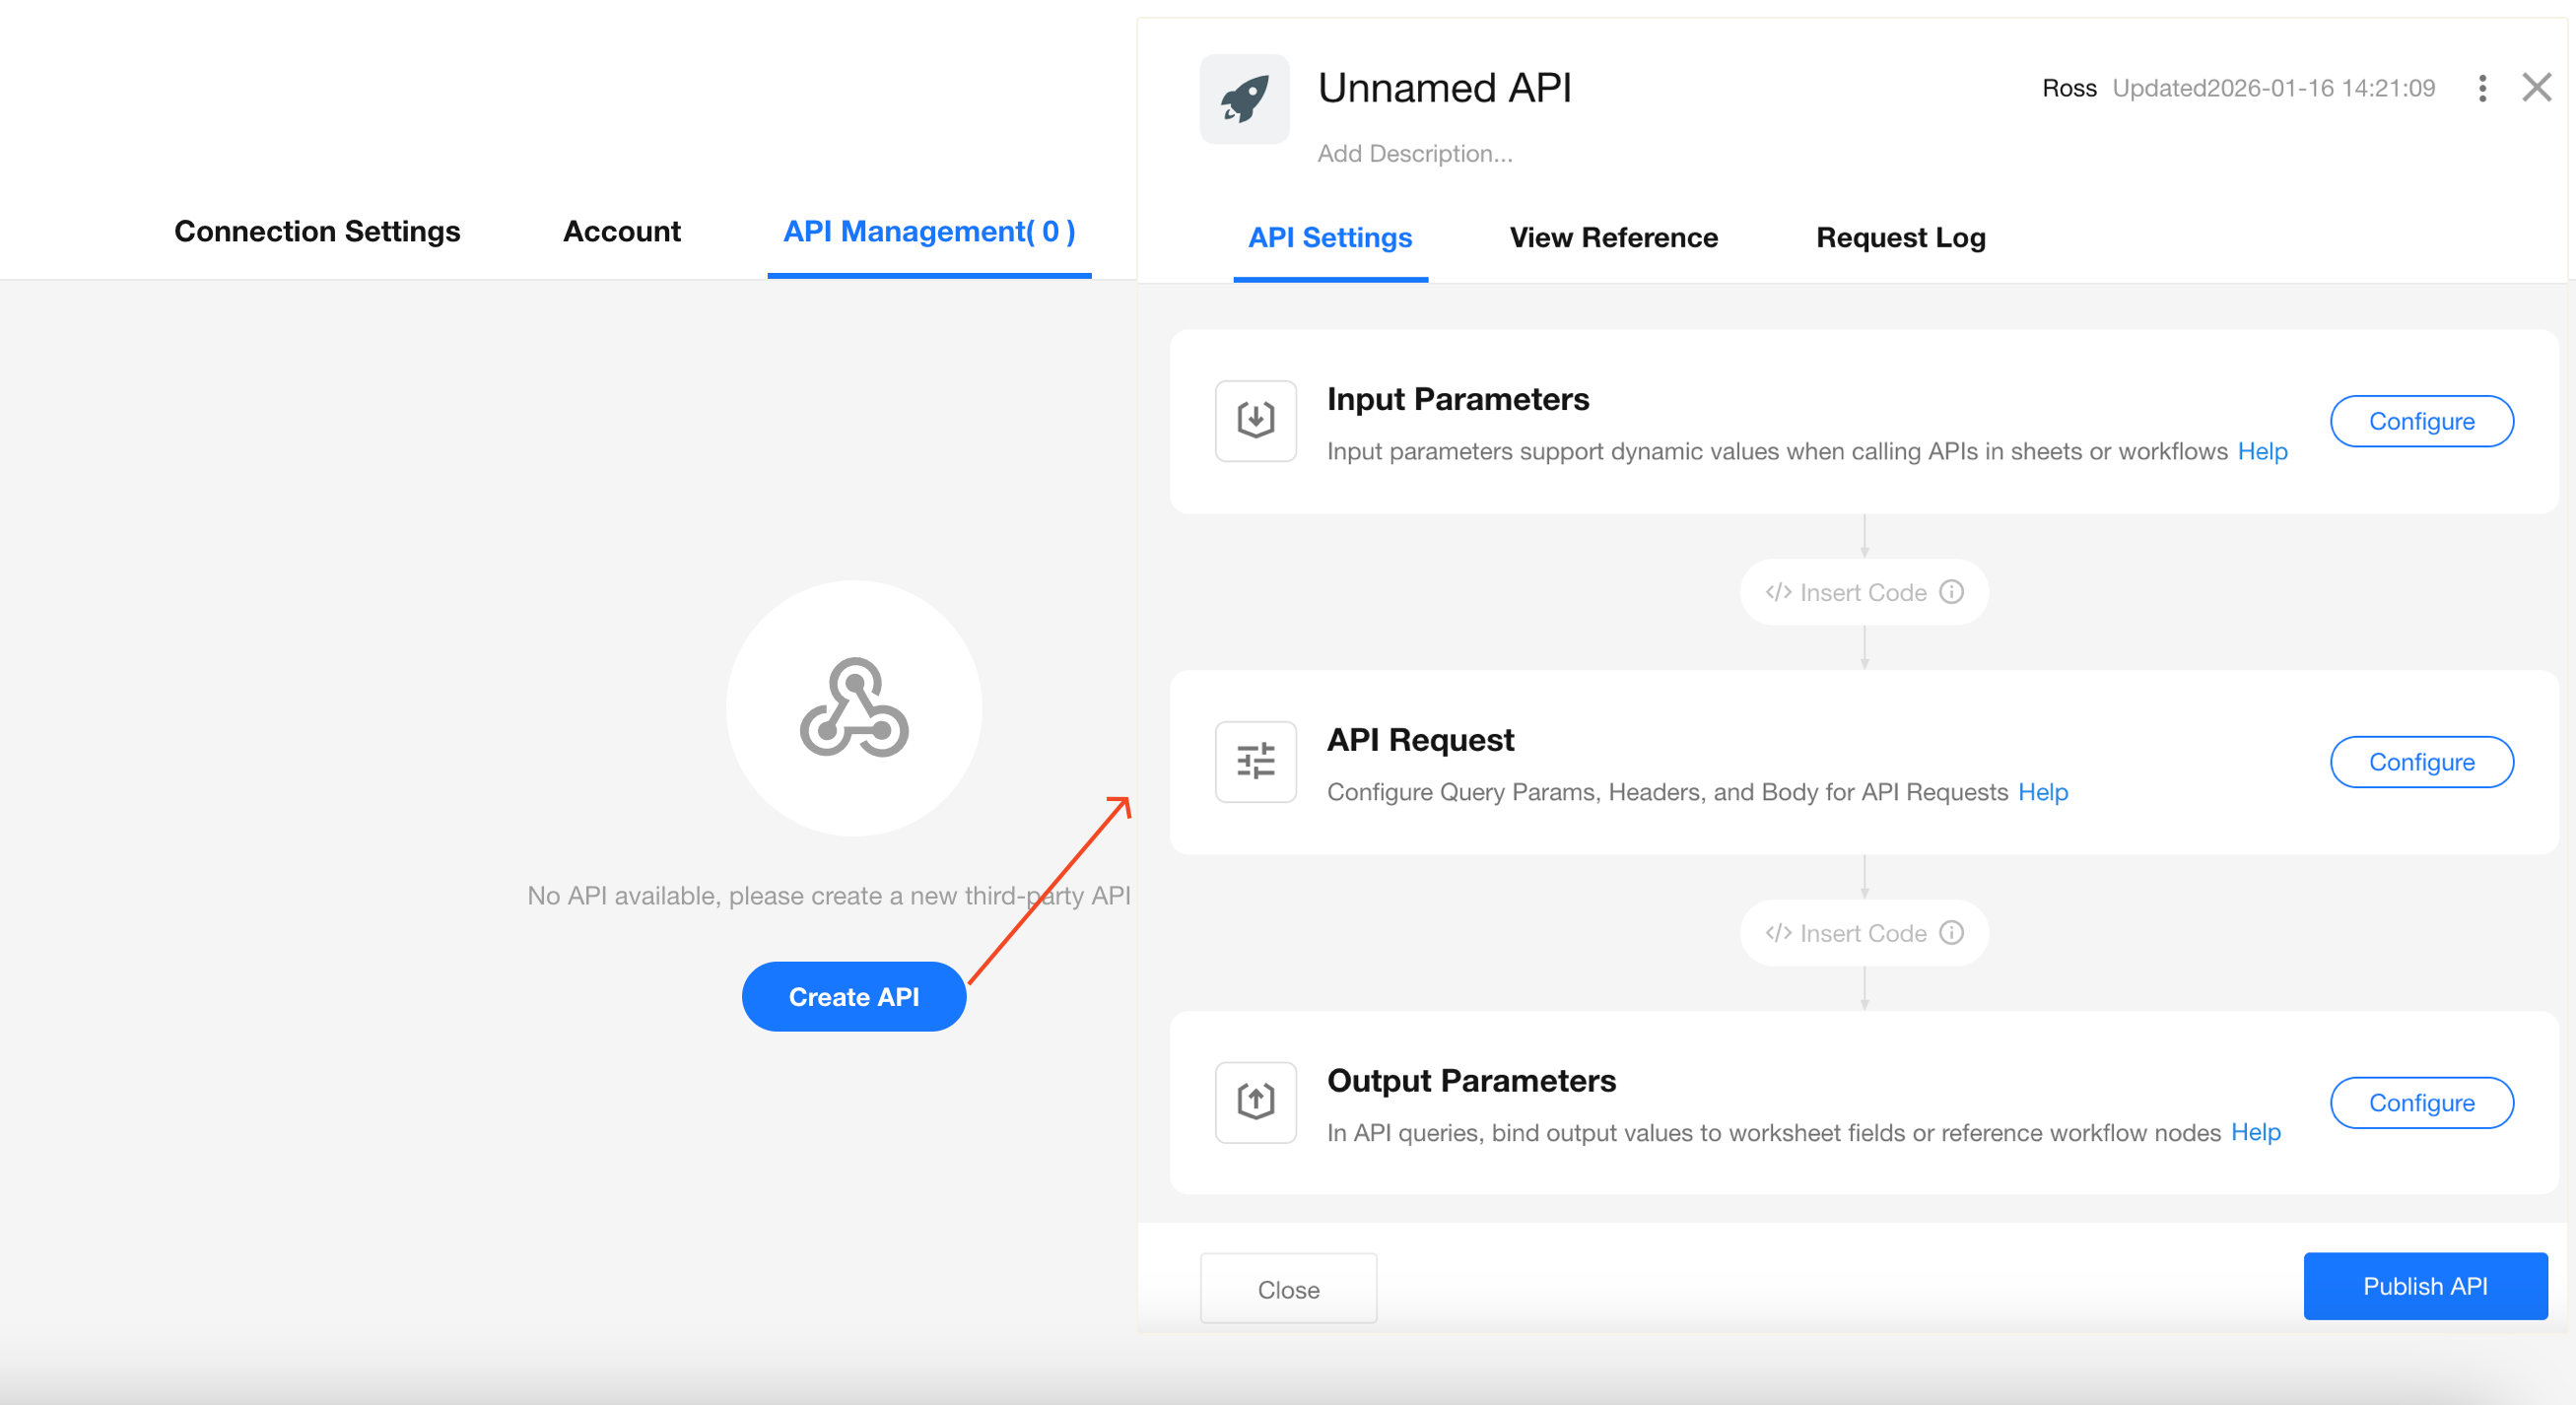
You’ll be configuring the following:
- Basic API details
- Input parameters
- API request parameters
- Output parameters
- Optional custom code blocks for advanced input/output handling
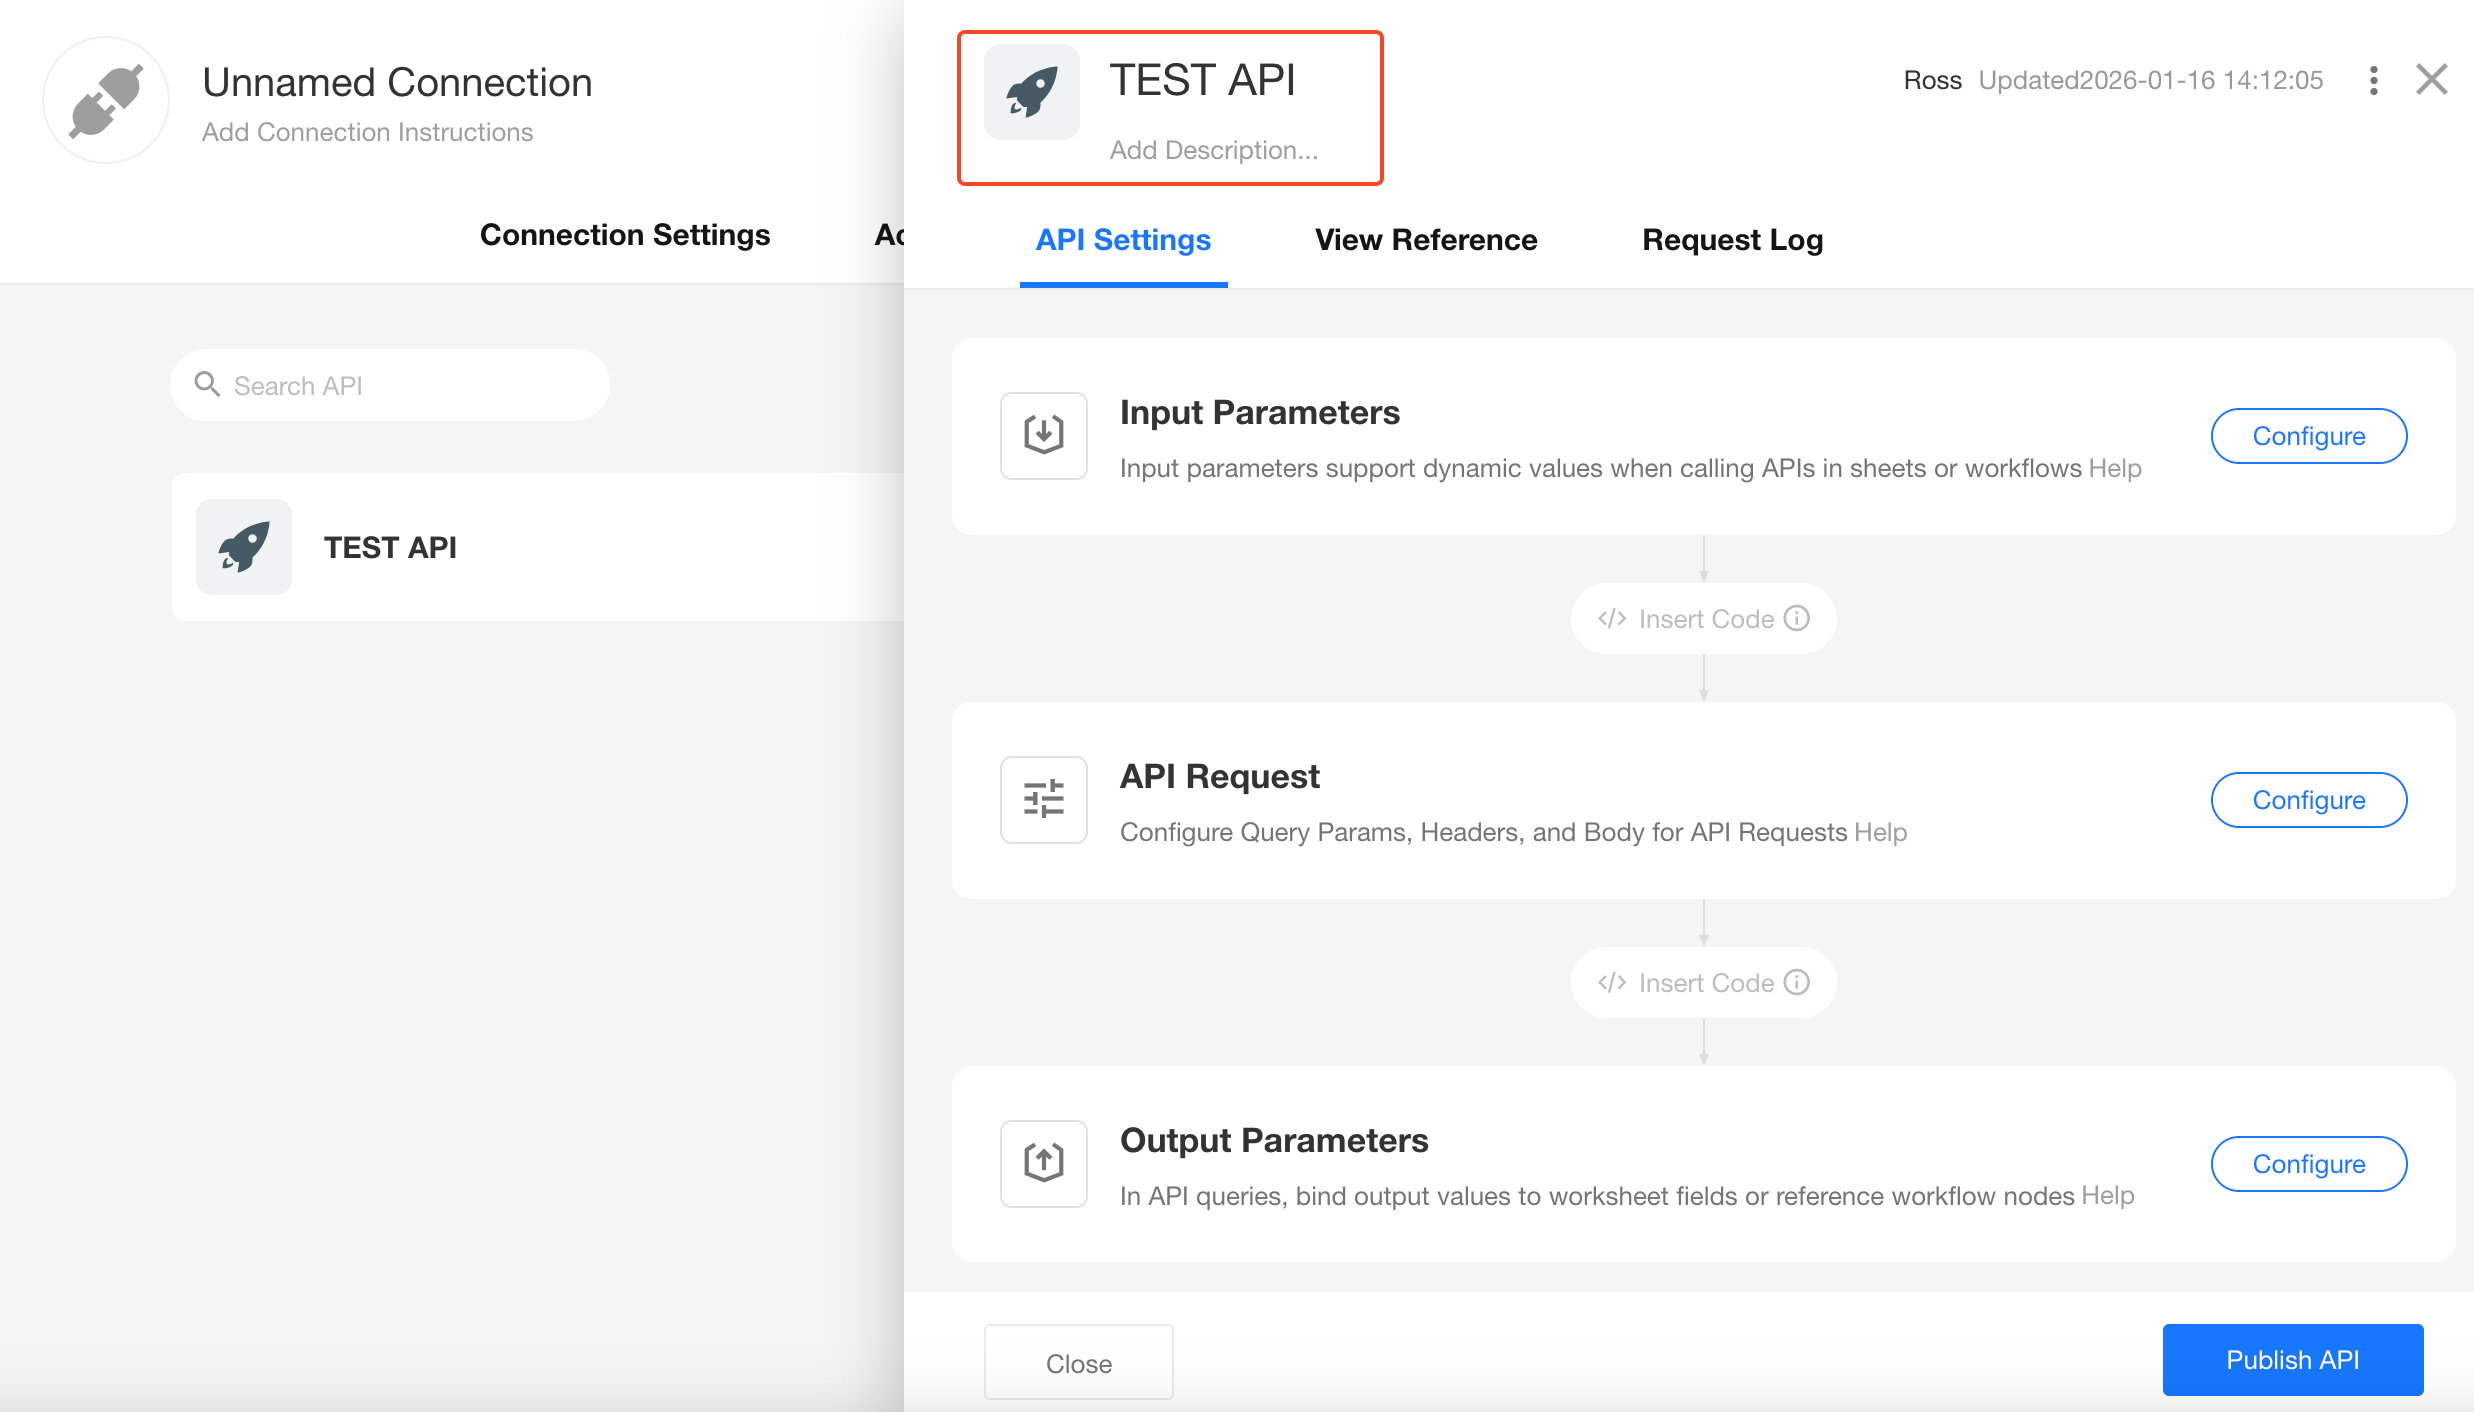
Basic API Information
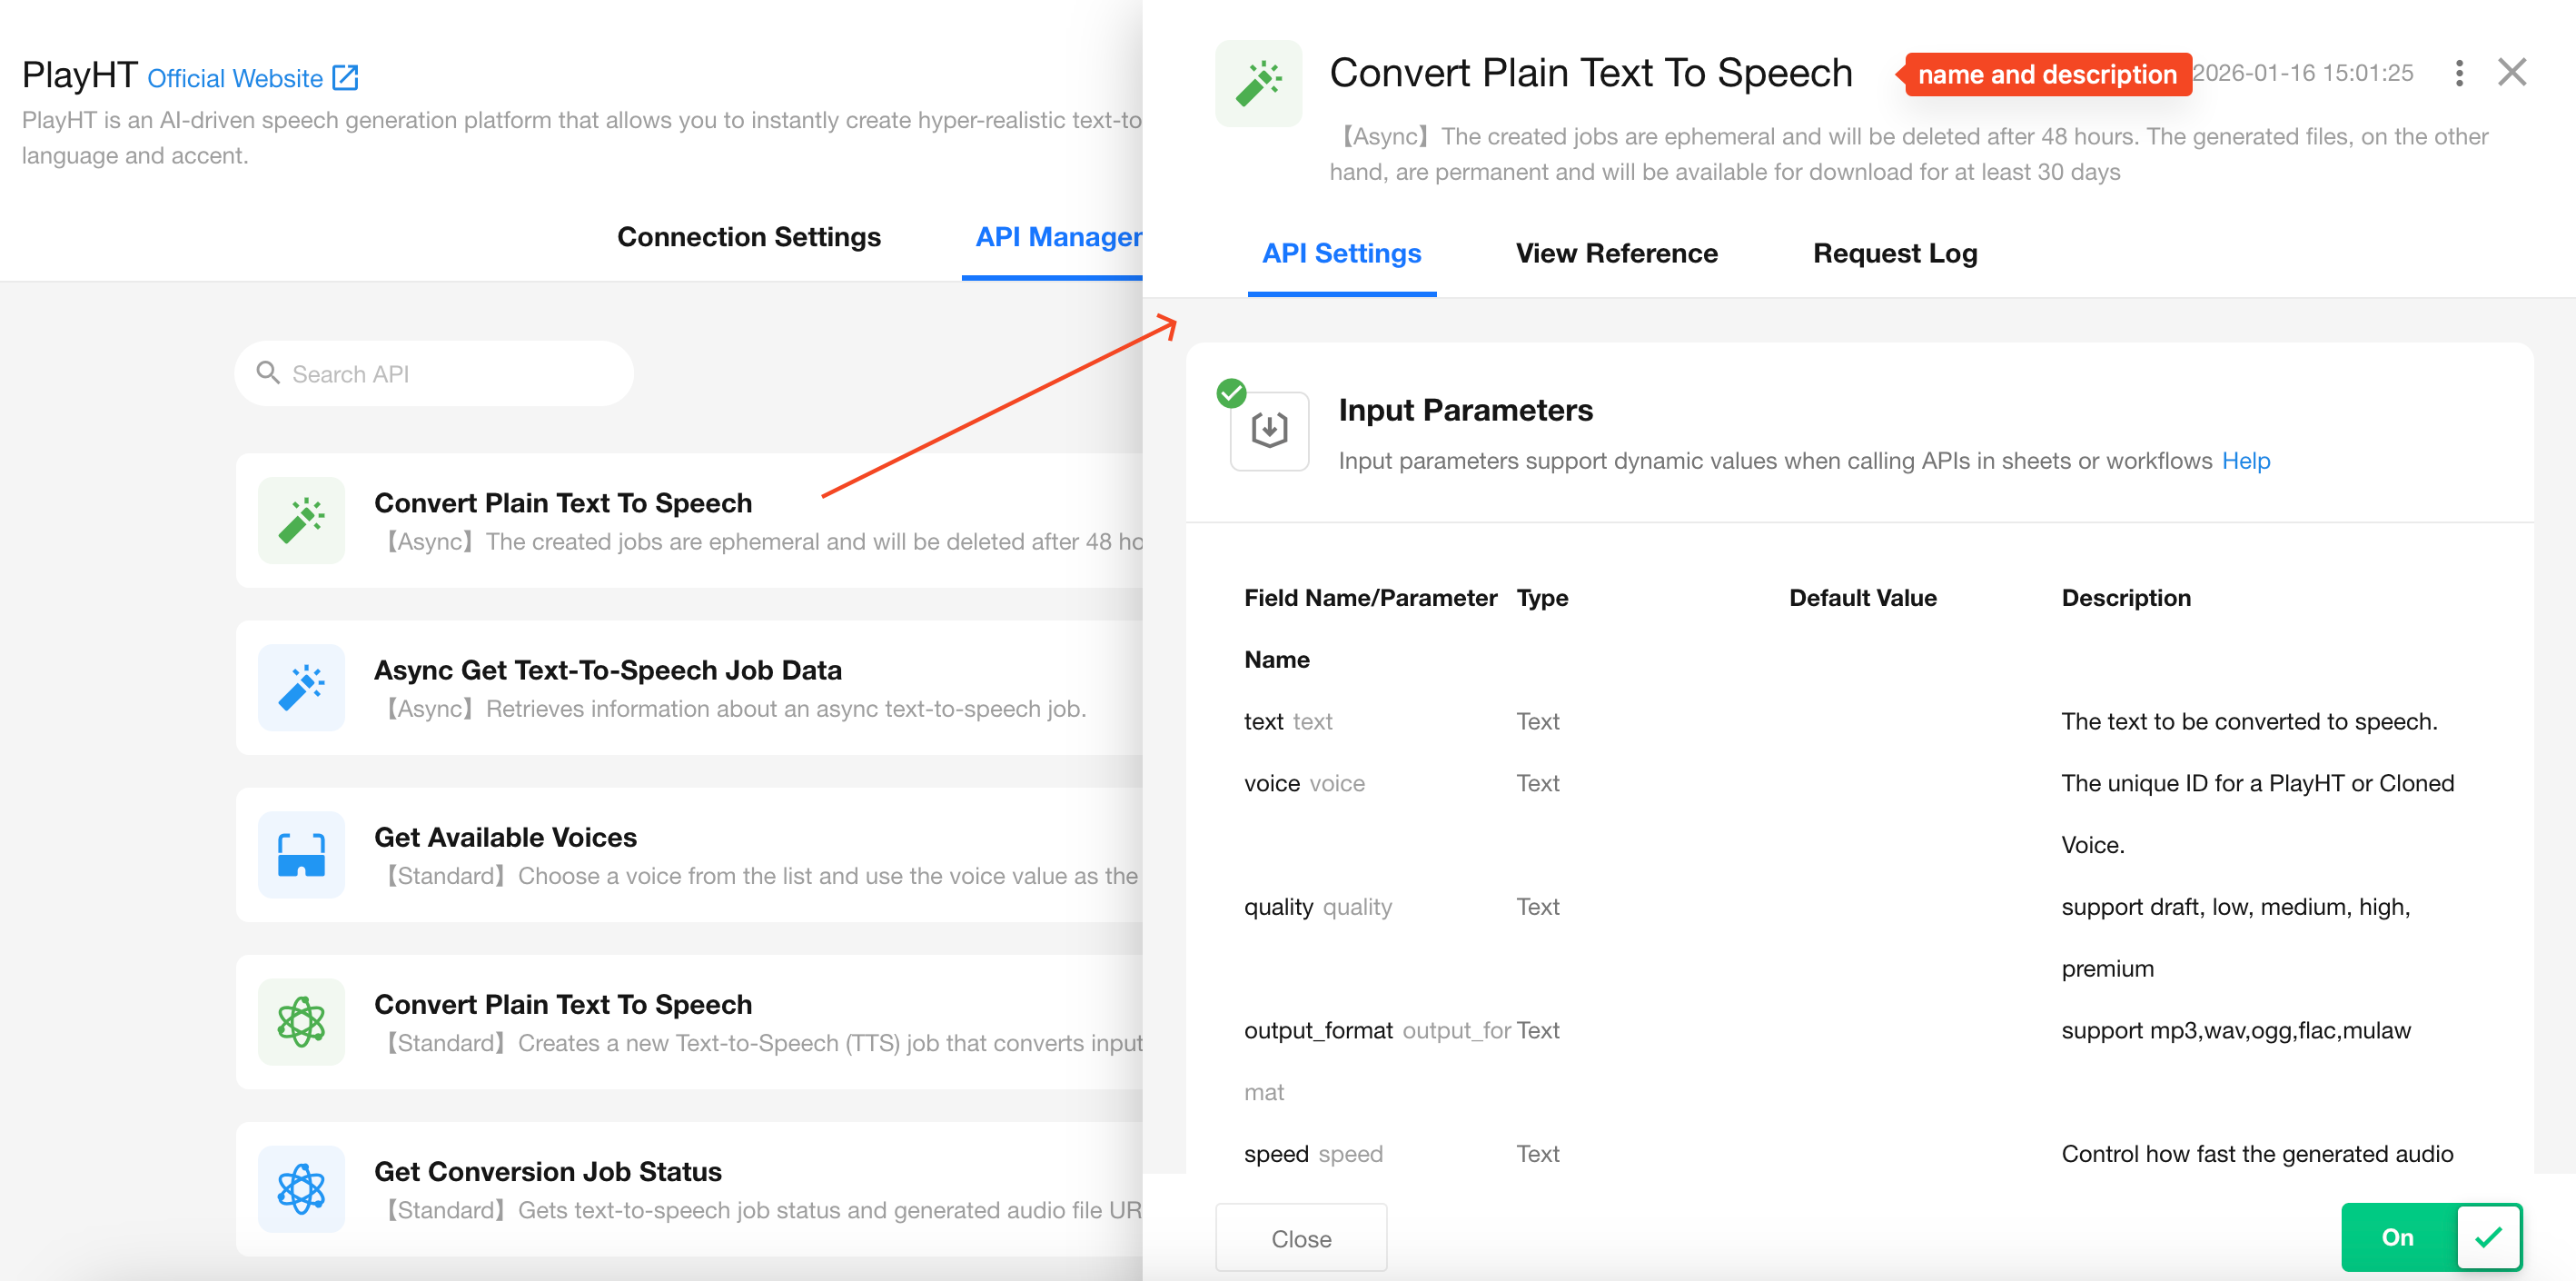
Click the respective fields to set the API’s name, description, icon, and color.
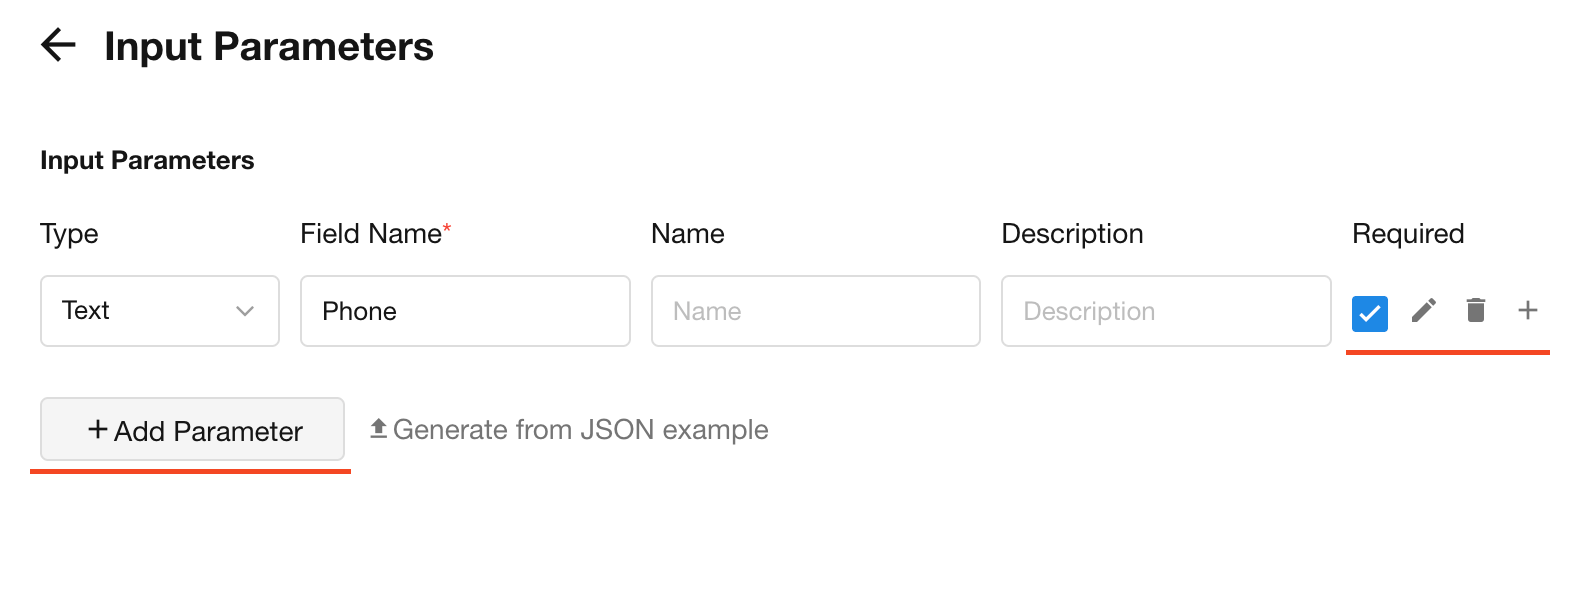
Input Parameters
Input parameters allow you to pass dynamic values from a worksheet or workflow when using the API query. These values can then be mapped to the API request payload.
Default Values
- If the parameter is optional and the value is empty, the default value (if provided) will be used.
- Required parameters will always have a value passed in, but you can still define a default (used if the field is later set as optional).
Format and Rules
-
Parameter Types: Text, Number, DateTime, Members, Department, Attachment, Array, Object Array.
-
Attachment Fields: Regardless of how many files there are, the input array should follow this format: ["URL1","URL2","URL3"...]. If a URL string is required, process it using a code block before passing it into the API request parameters.
-
Required Parameters: When using this API in a worksheet or workflow, the parameters marked as required cannot be empty.
-
Required Validation Rules for Object Arrays:
- If an object array is required, it must be passed when in use. If it is not required, the array may be omitted.
- If an object array is required but its sub-elements have no required fields, the array passed in can be empty.
- If an object array is required and its sub-elements have required fields, the values of the passed sub-elements will be validated.
- If an object array is not required but its sub-elements have required fields, validation of the sub-elements' values will not occur if the array is not passed. However, if the array is passed, the required sub-elements must have values.
-
Alias Rules: Only letters, numbers, underscores, and hyphens (minus signs) are supported.
-
In API Requests: Sub-elements of array objects will use aliases as keys.
-
Parameters support default values
Custom Code Blocks
If the format or content of your input parameters doesn’t match what the API expects, use a code block to transform it before passing it on. You can also process the API response before outputting it.
Supported languages: JavaScript and Python.
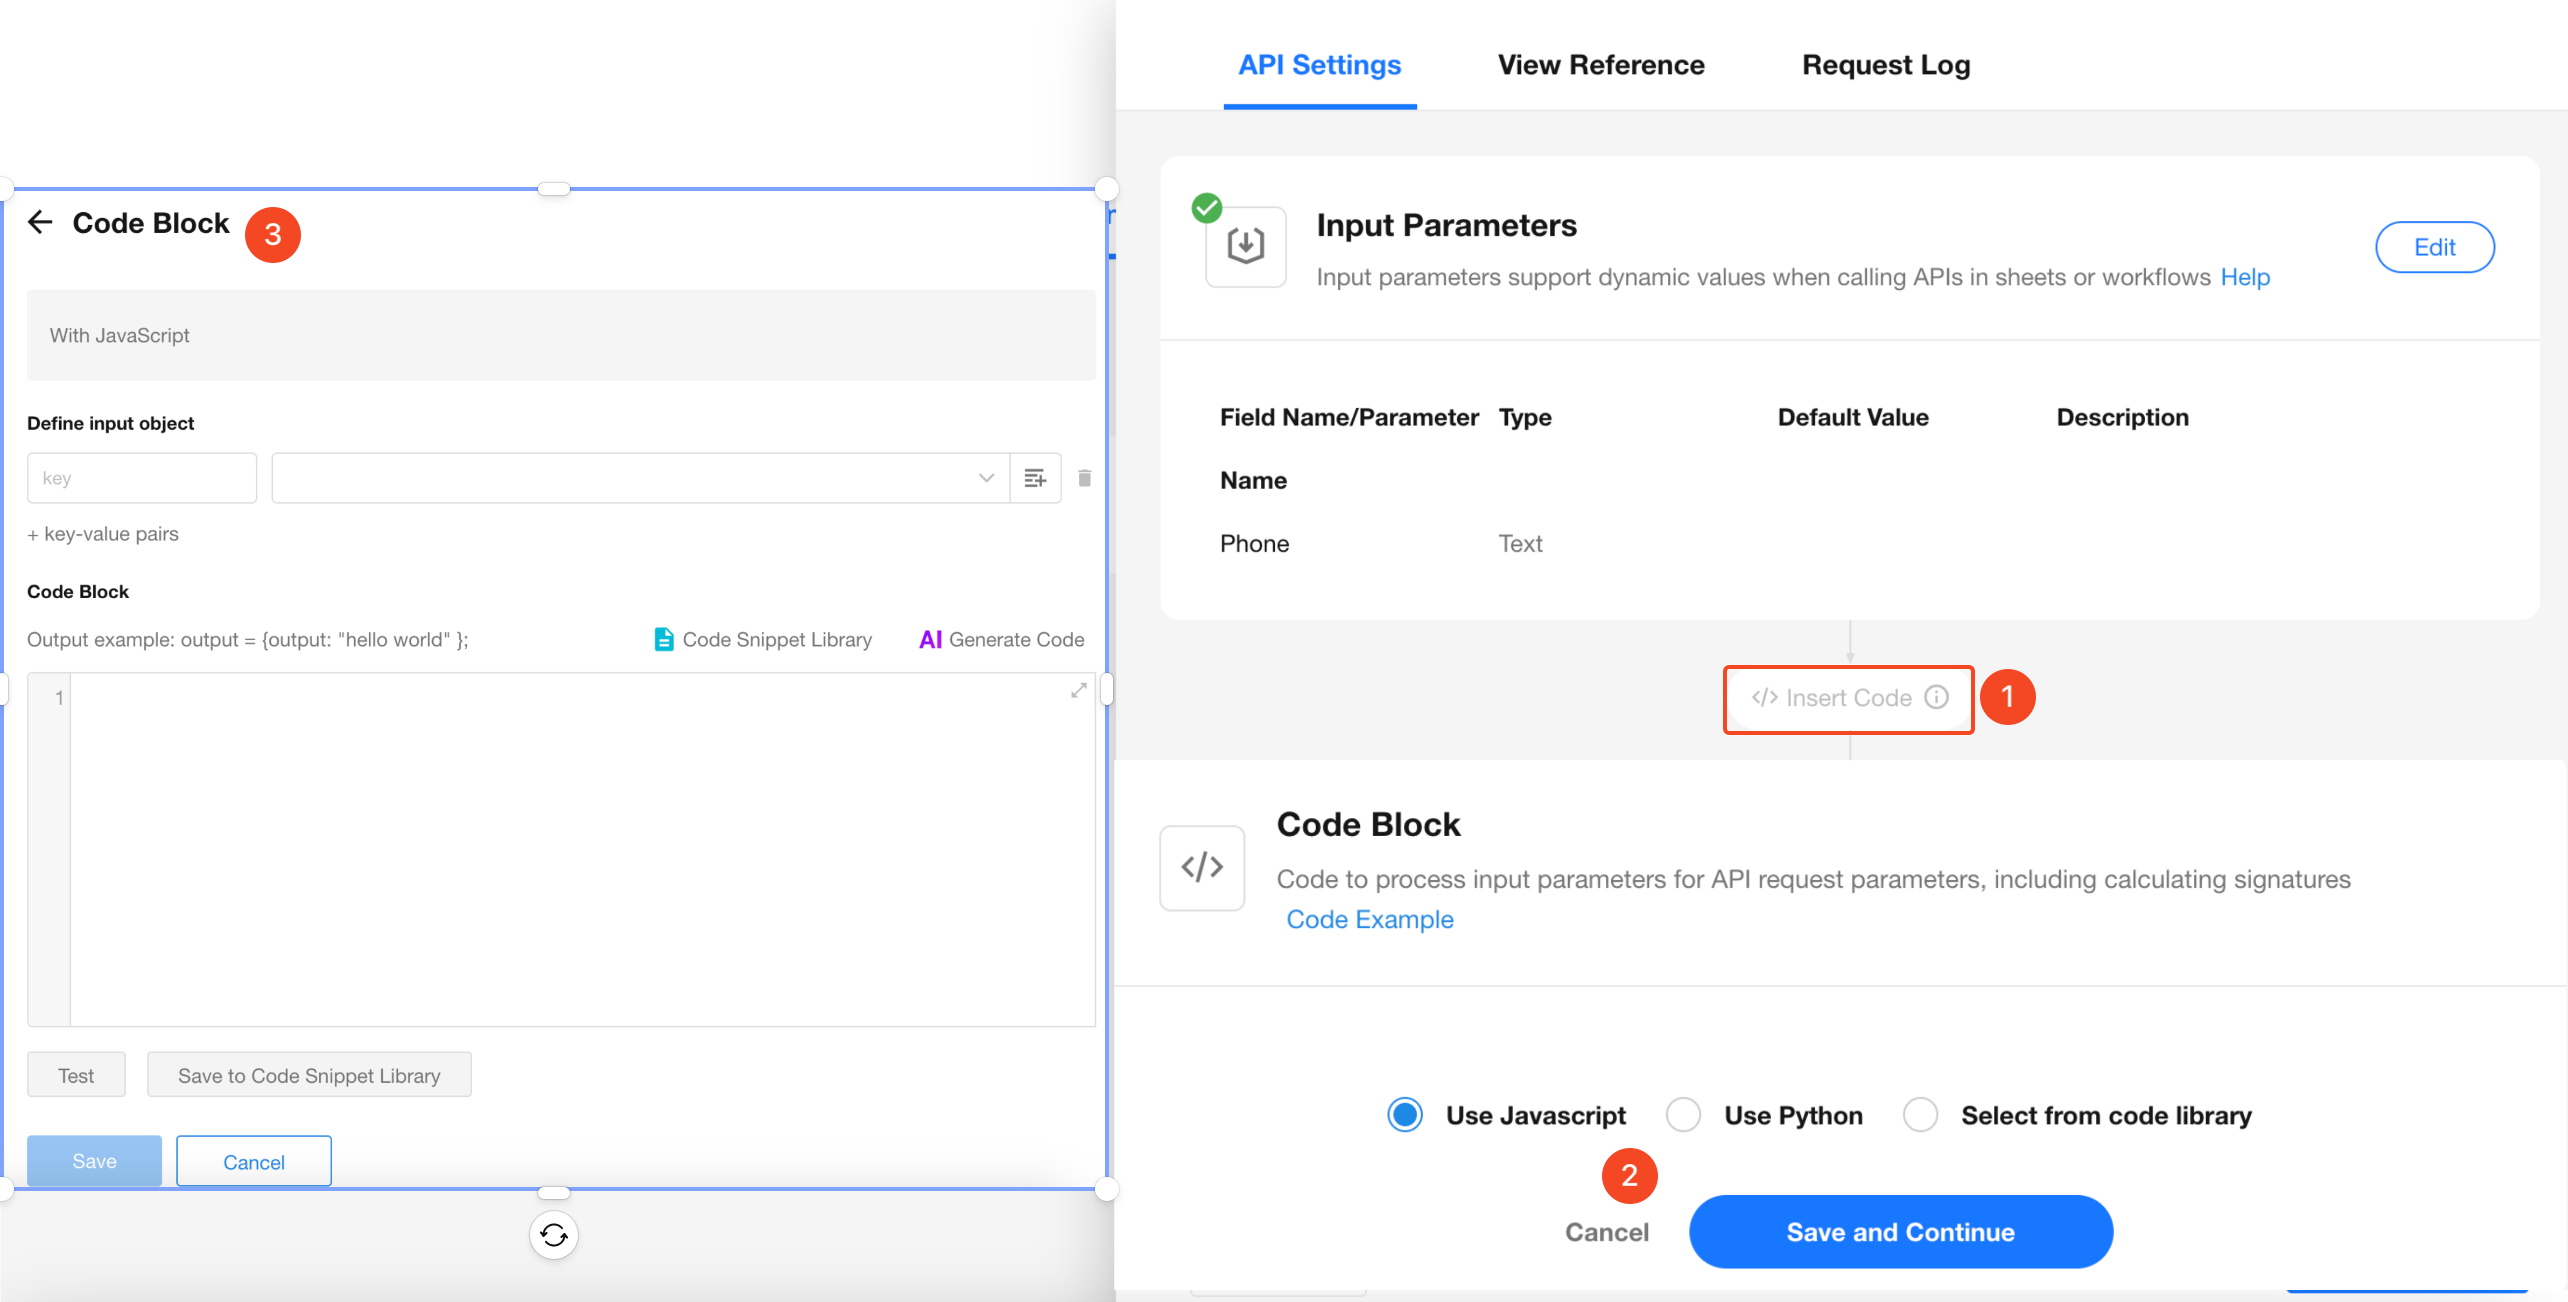
Common use cases:
-
Generate tokens using timestamp + secret key encryption
-
Strip "+86" from phone numbers
-
Wrap response data into a JSON array for output
-
Parse and restructure JSON responses
API Request Configuration
Define how the API request is constructed: URL, Query Params, Headers, Body, etc.
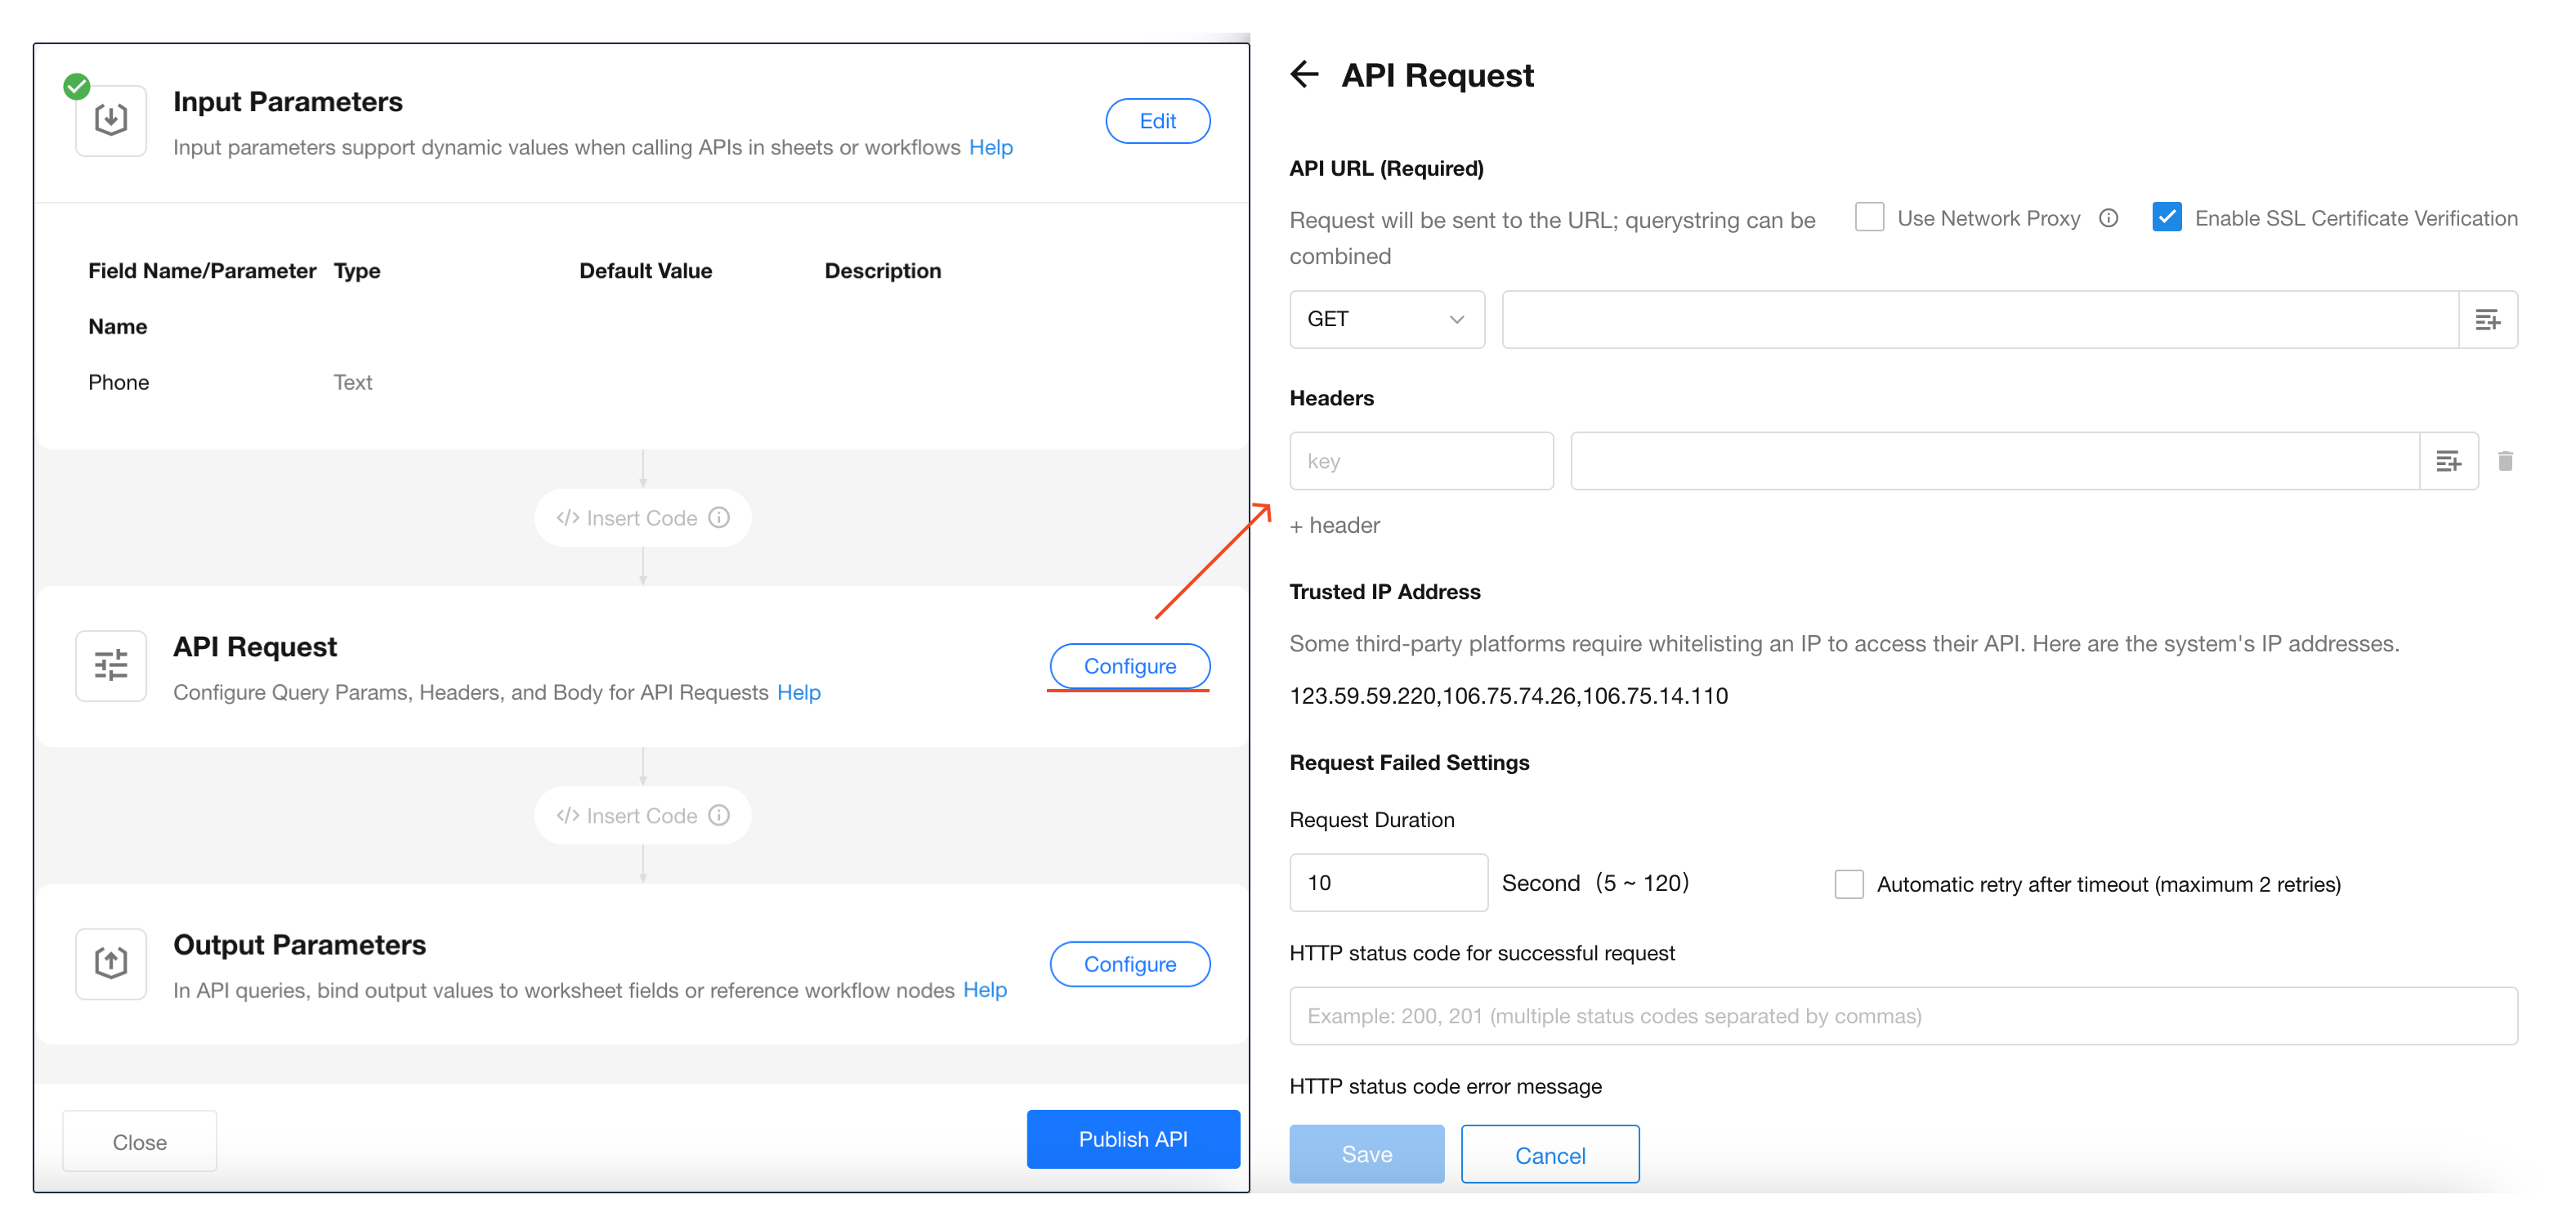
You can use values from Connection Parameters, Input Parameters, Authentication.
Once complete, click "Test API", enter test values, and view the response.

See Sending API Requests for more details.
Output Parameters
After the API call is made, you can format the returned data into structured output so it can be referenced by worksheet fields or workflow nodes.

See JSON Parsing for more details.
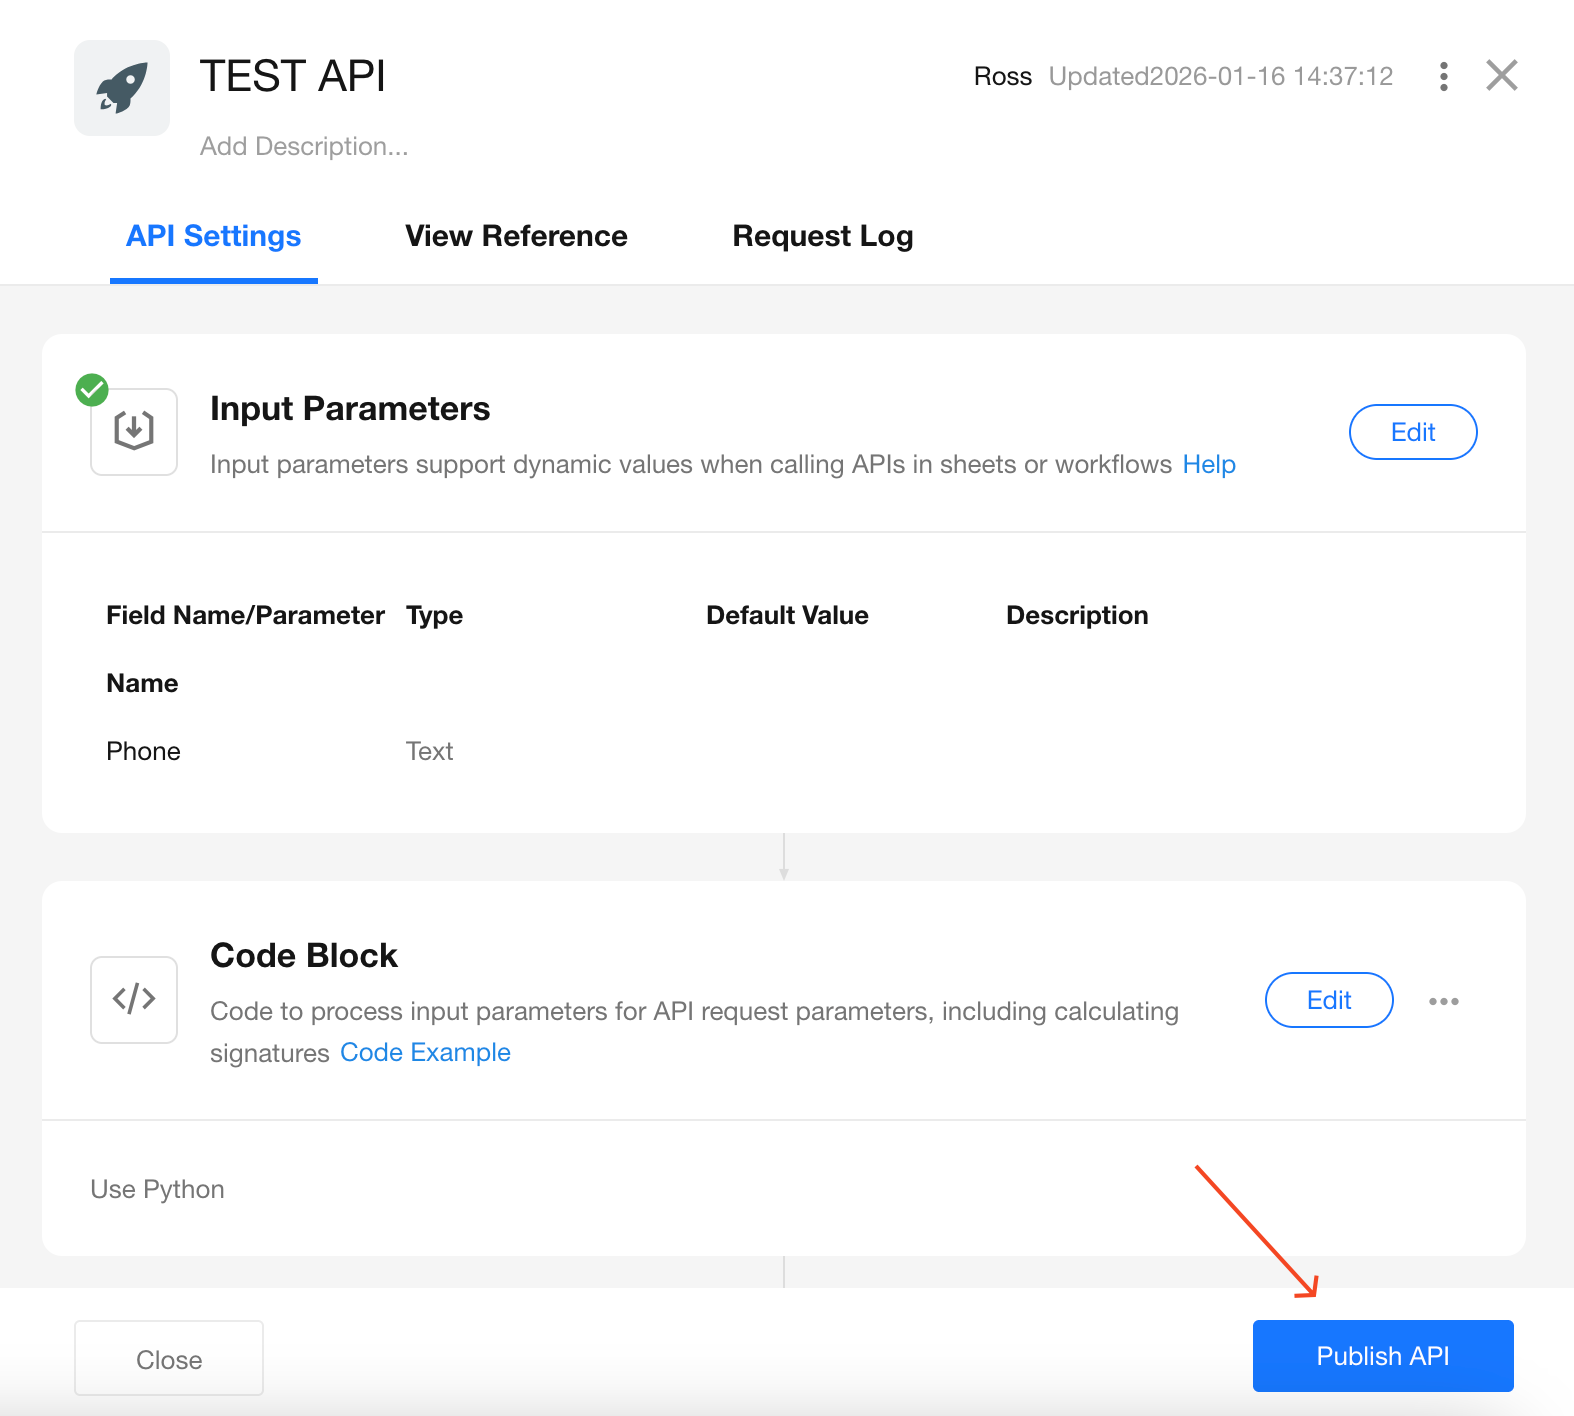
Publish the API
Once output parameters are configured, you can publish the API. Only published APIs can be used in worksheets and workflows.
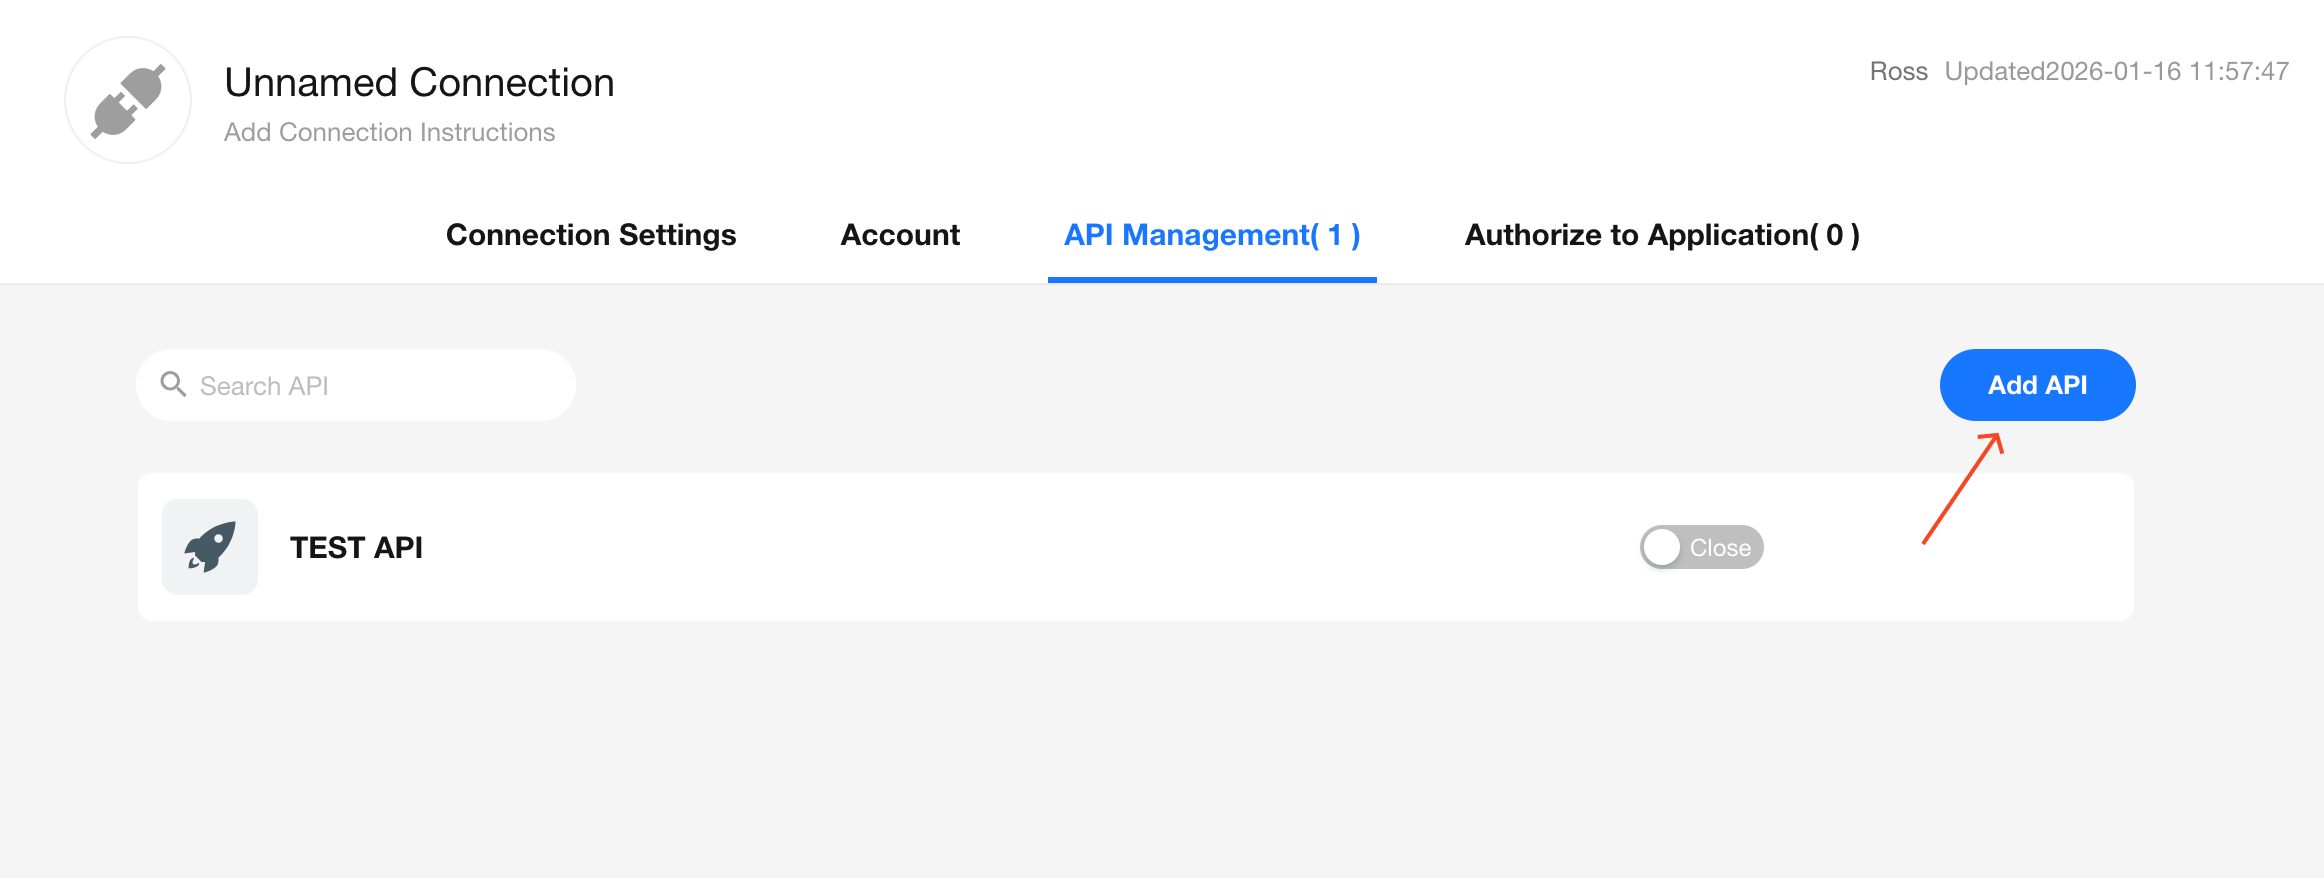
Add Additional APIs
You can configure multiple APIs under a single connection. All APIs under the same connection share the same authentication credentials.
Step 3: Grant Access to Applications
After configuring an API in the Integration Center, you need to define the connection owner, enable error notification settings, and authorize applications before the API can be used.
Go to the "Authorize to Application" tab to perform these actions.
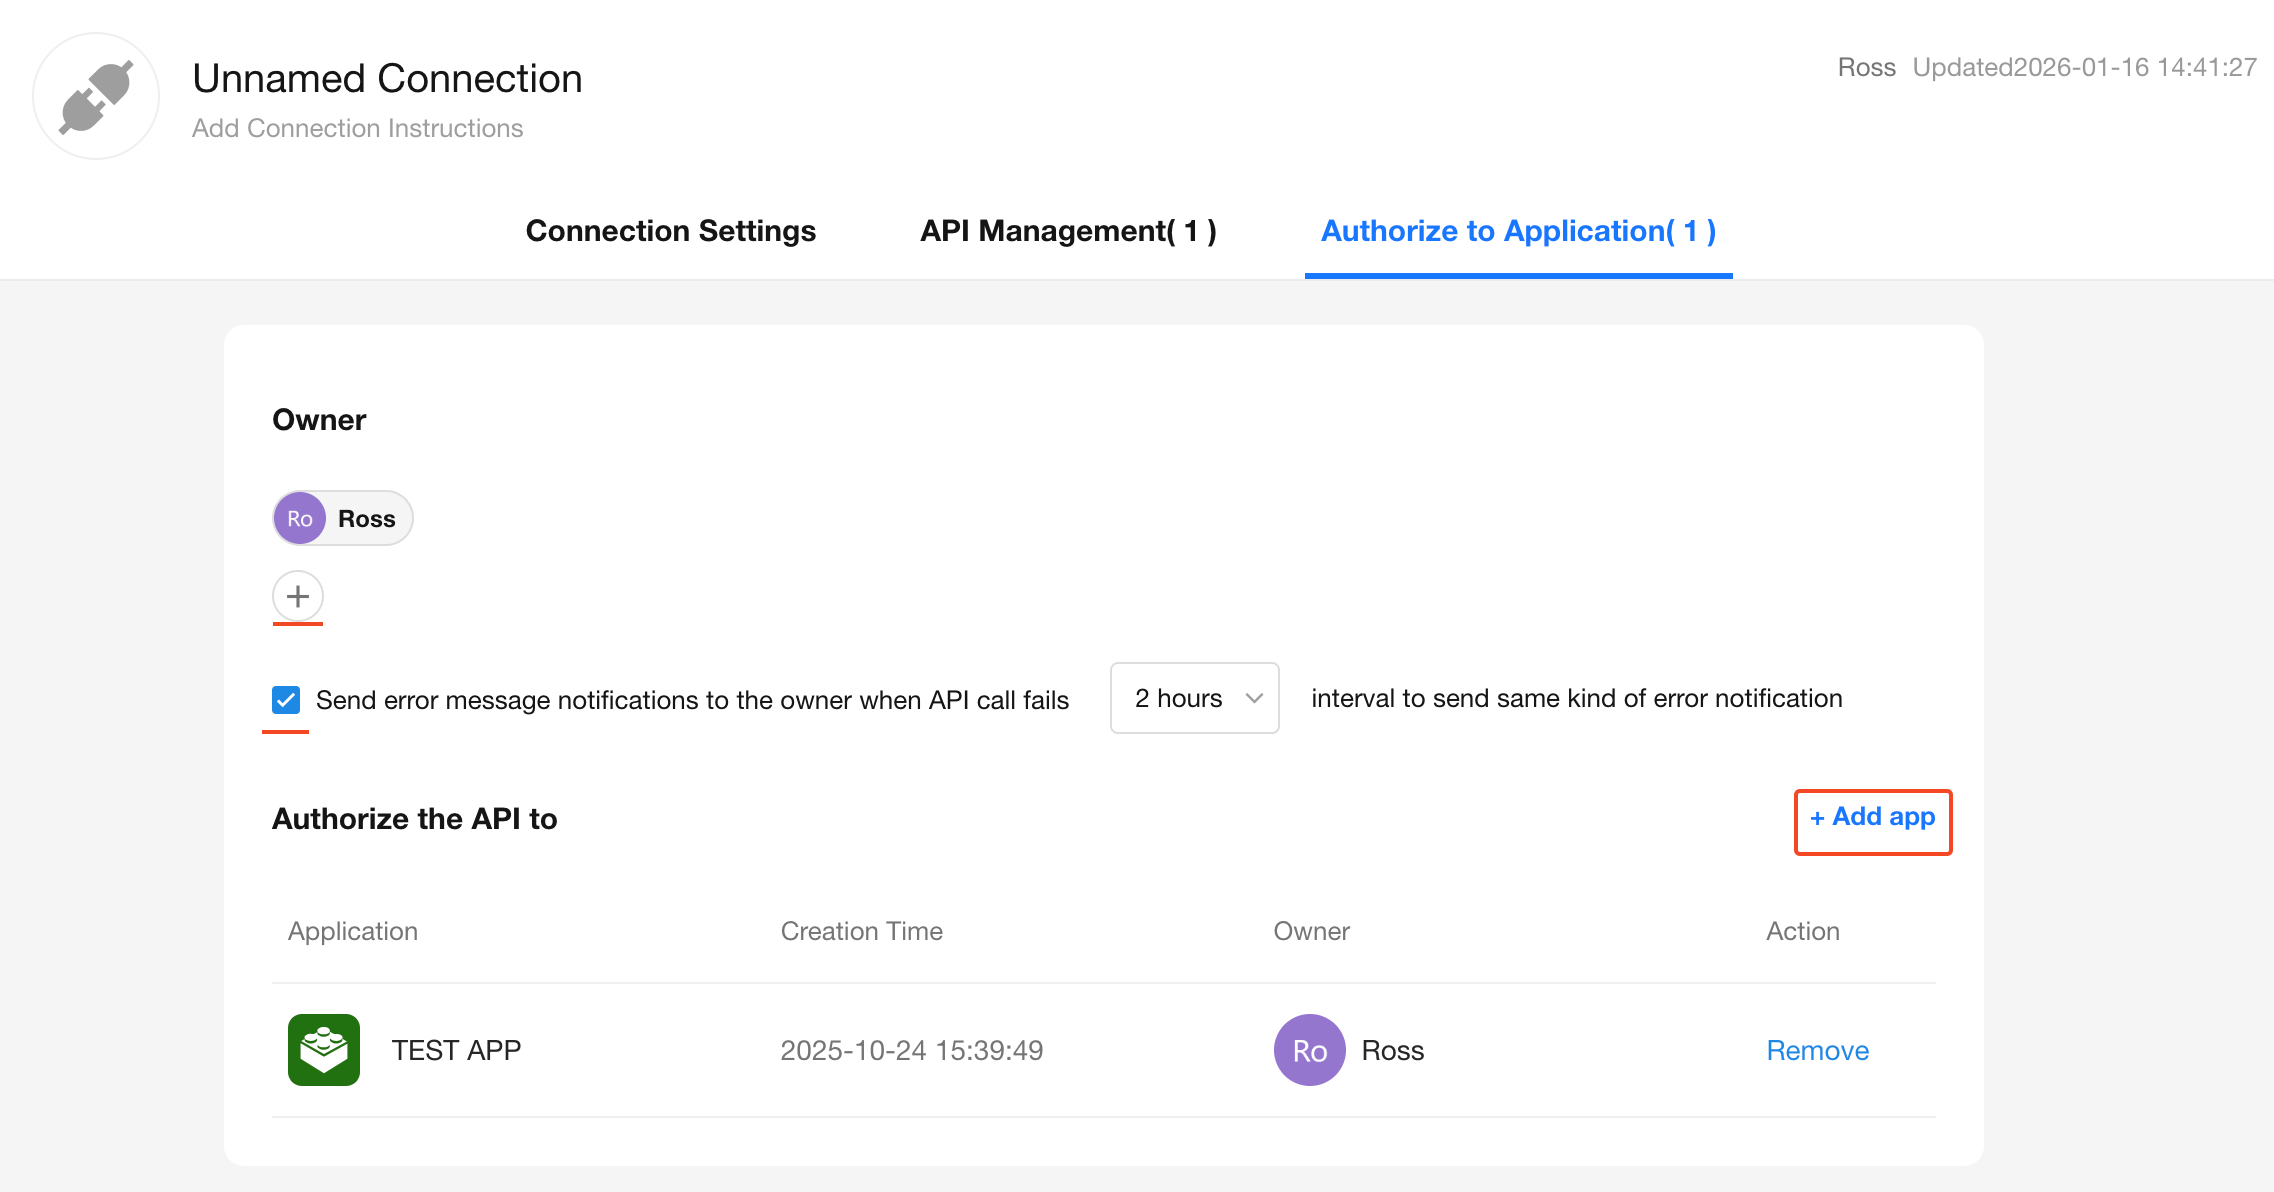
Connection Owner
The owner of the connection has permission to view and modify its settings. They will also receive notifications about API errors, if enabled.
Error Notification Settings
If API calls fail, you can choose whether to send error alerts to the connection owner.
You may configure:
- Alert frequency: to avoid excessive notifications for repeated error types, set a minimum time interval between alerts
Authorize Applications
Only applications within the same organization can be authorized to use a connection.
Once authorized, the application's worksheets and workflows can access and invoke the configured API.
Step 4: How to Call Integrated APIs
To learn how to use configured APIs in your applications, please refer to the following guides:
Managing Connections and APIs
Export/ Import / Upgrade Connections
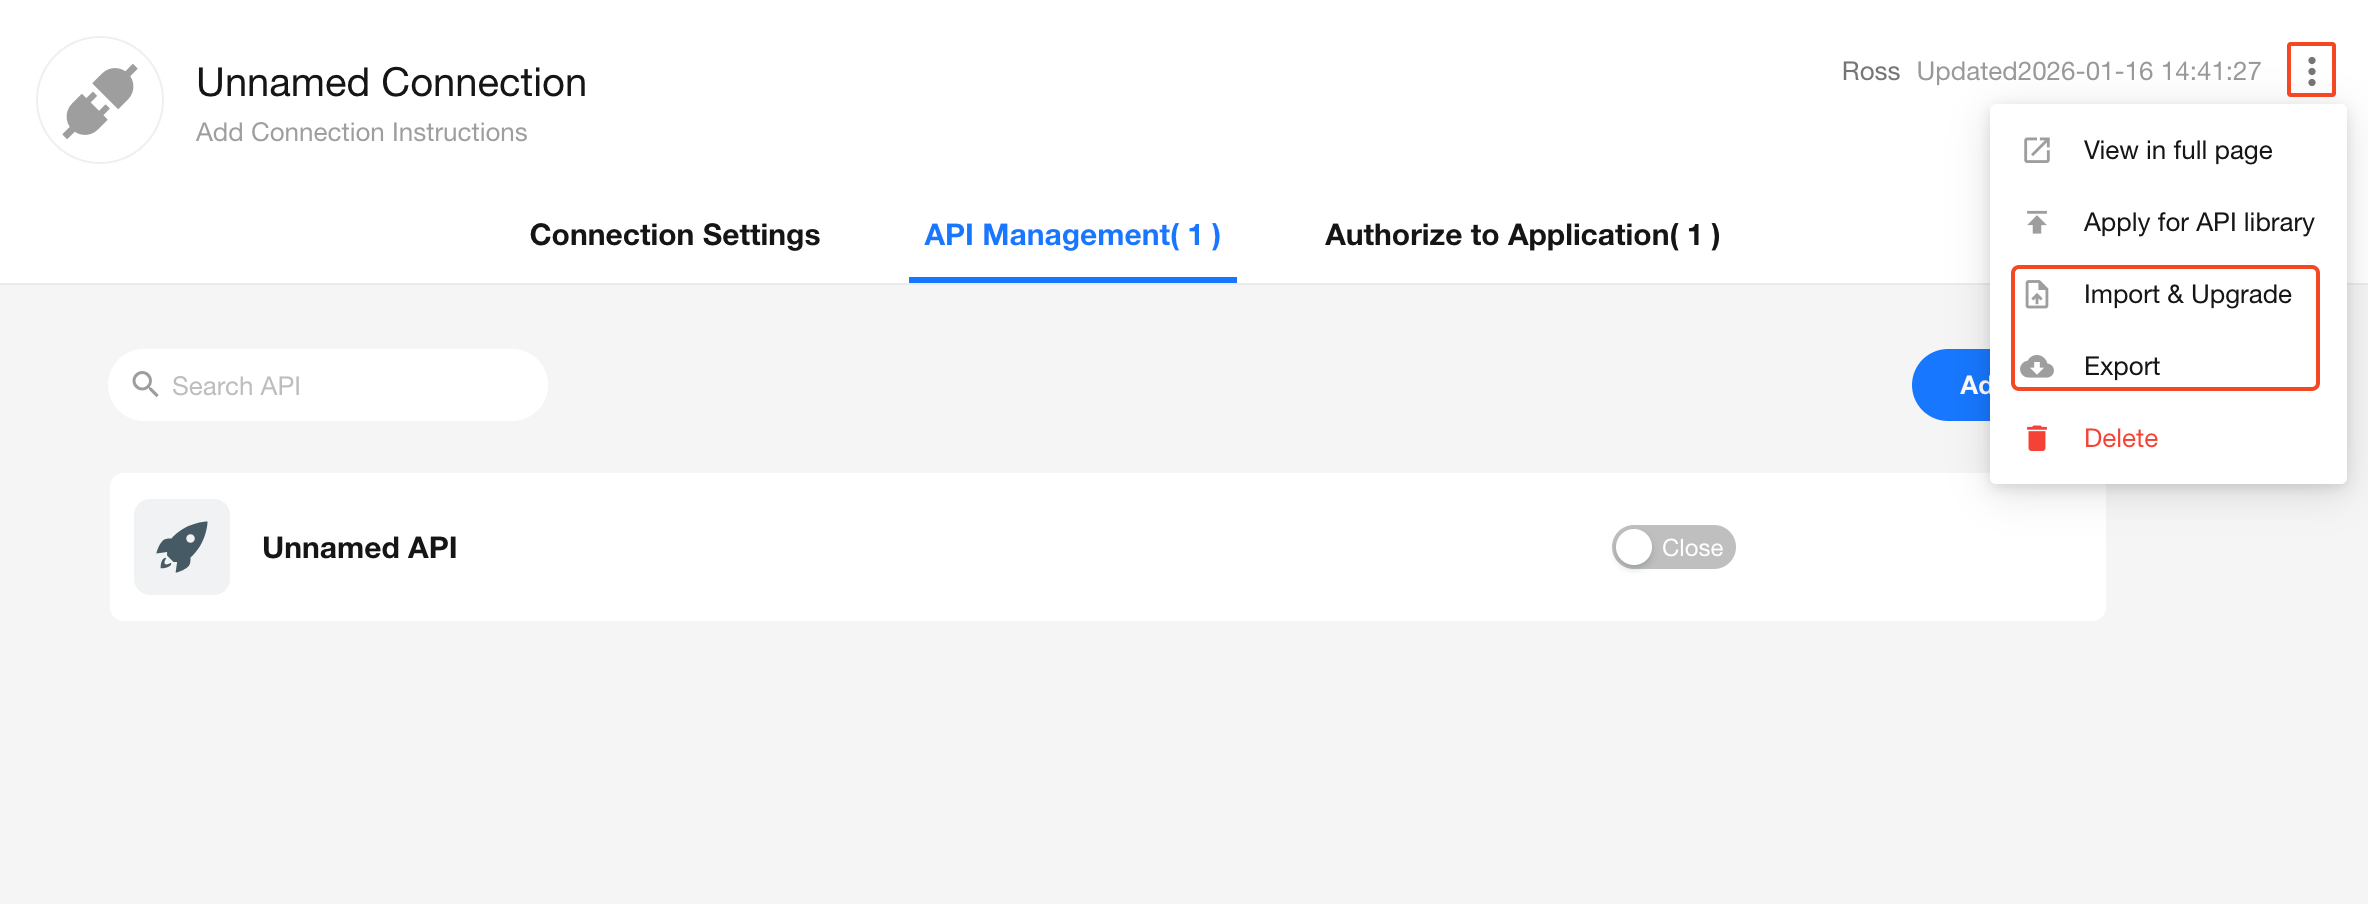
You can export, import, or upgrade API configurations to enable fast migration between environments.
From the connection details page, click the More button in the top right corner to access export or import/upgrade options.
Note: Upgrading a connection will not alter the visibility settings of its connection parameters.
You can also export connections directly from the API Library:
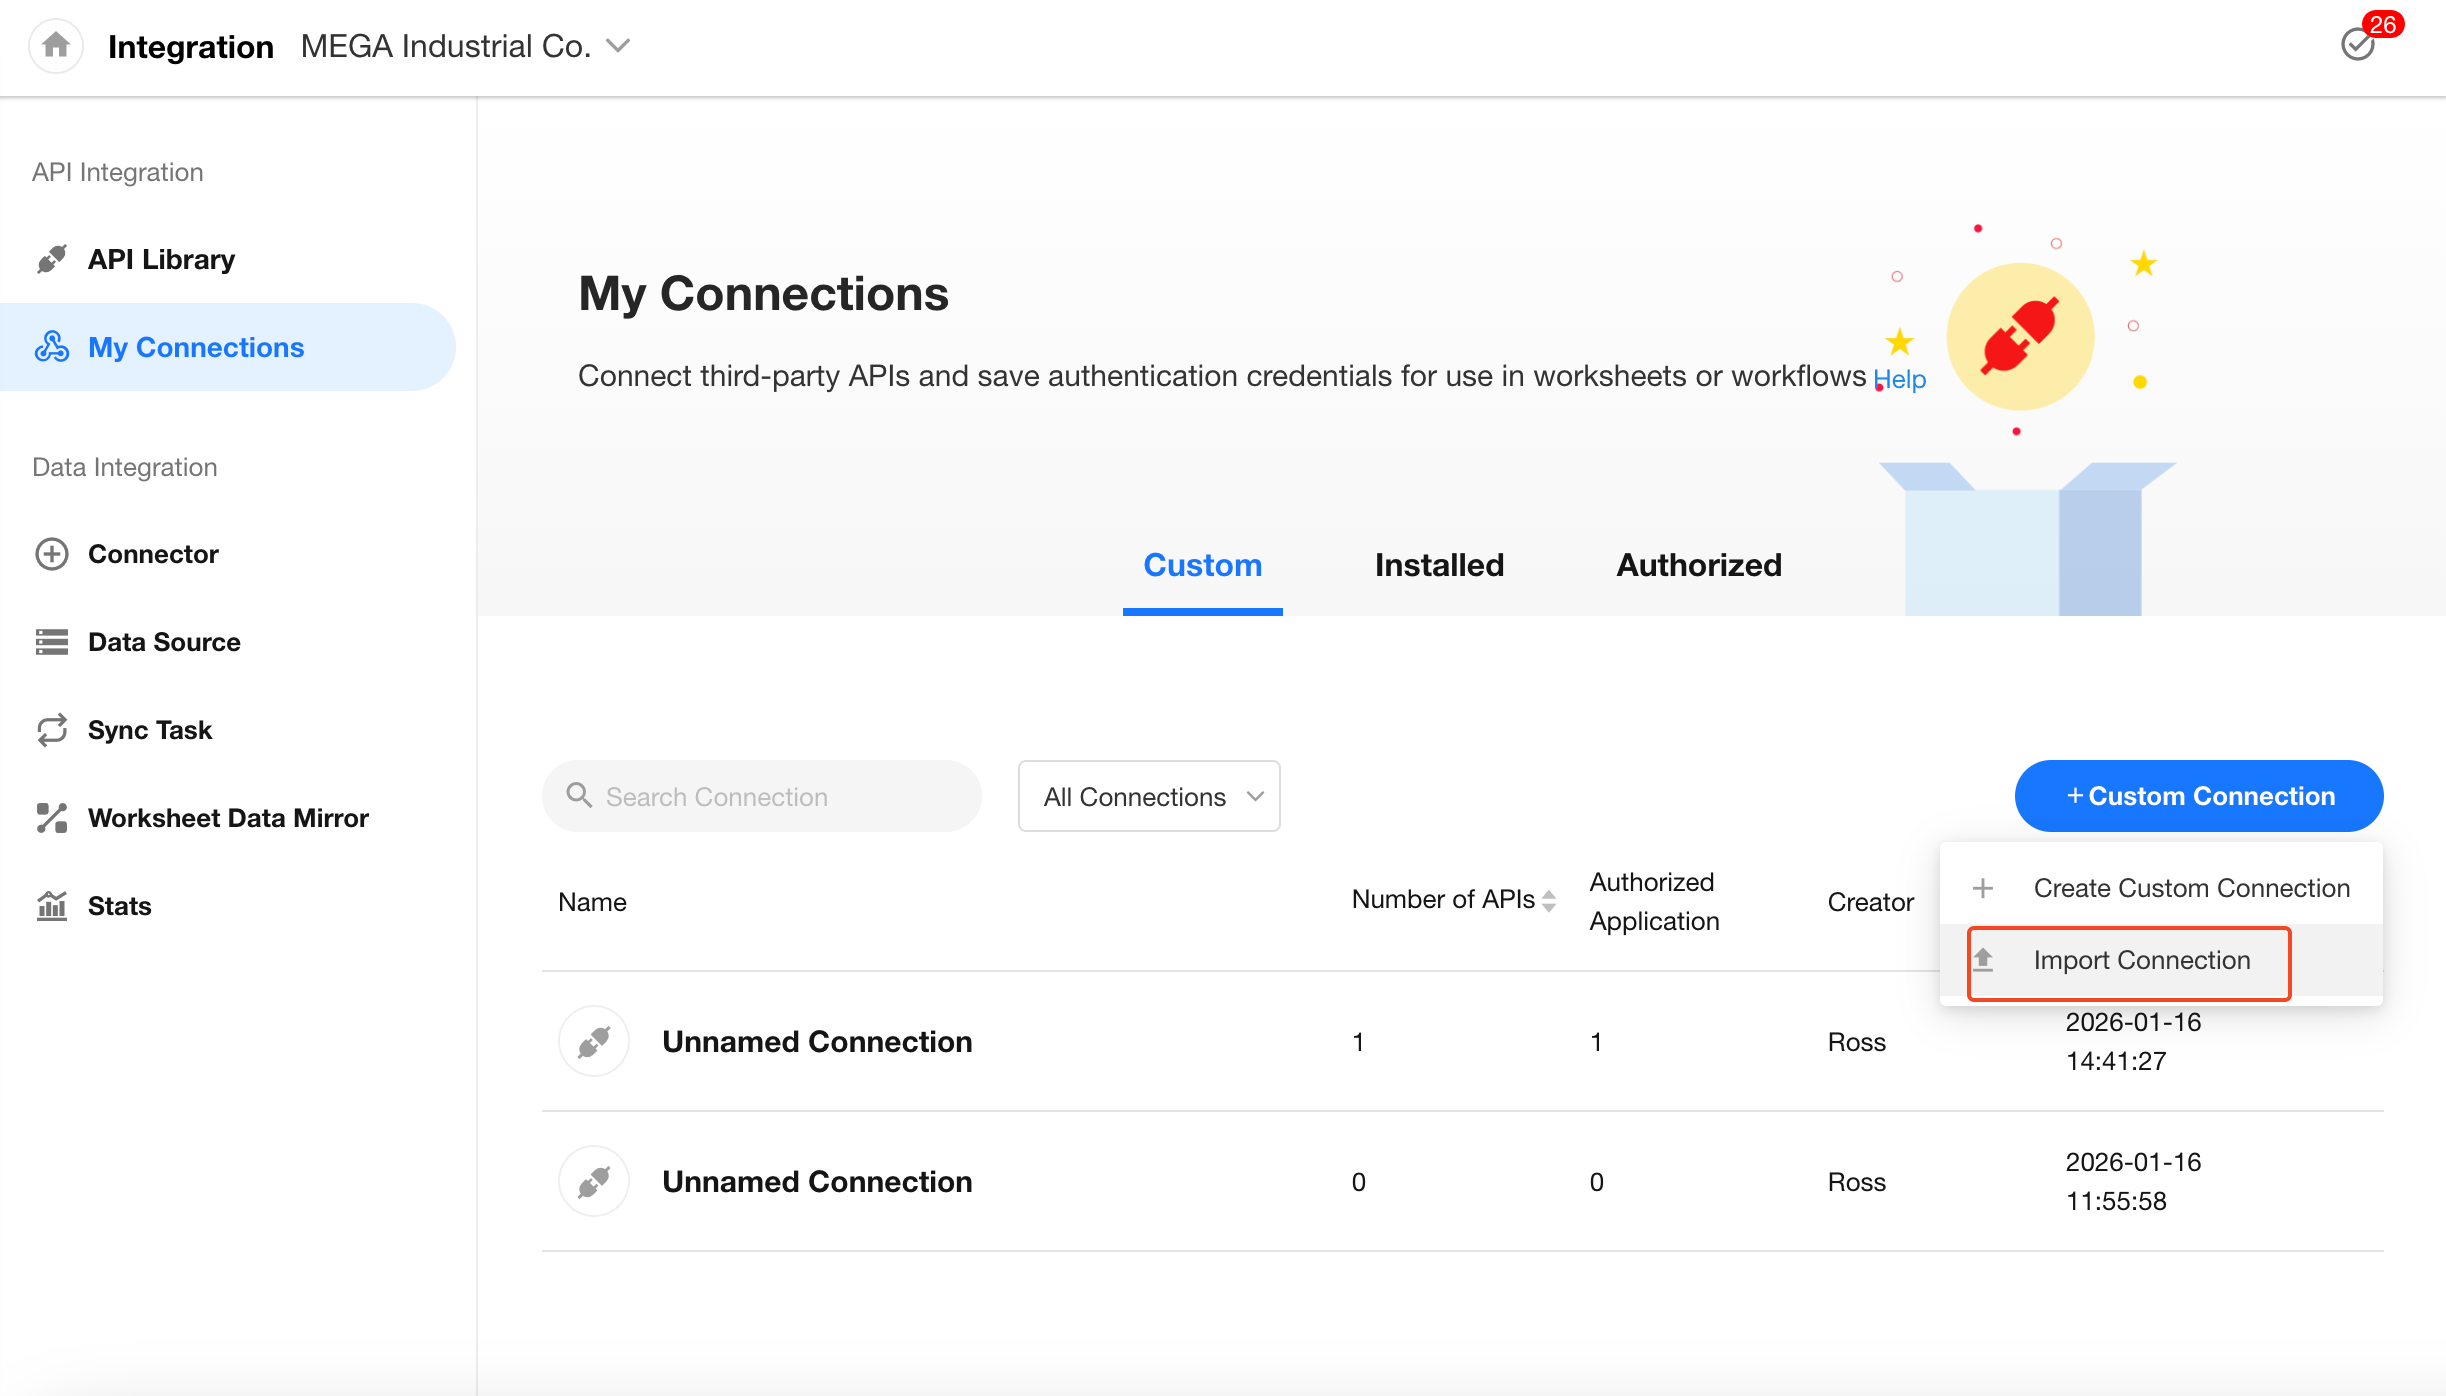
When creating a new custom connection, you can choose to import an existing one:
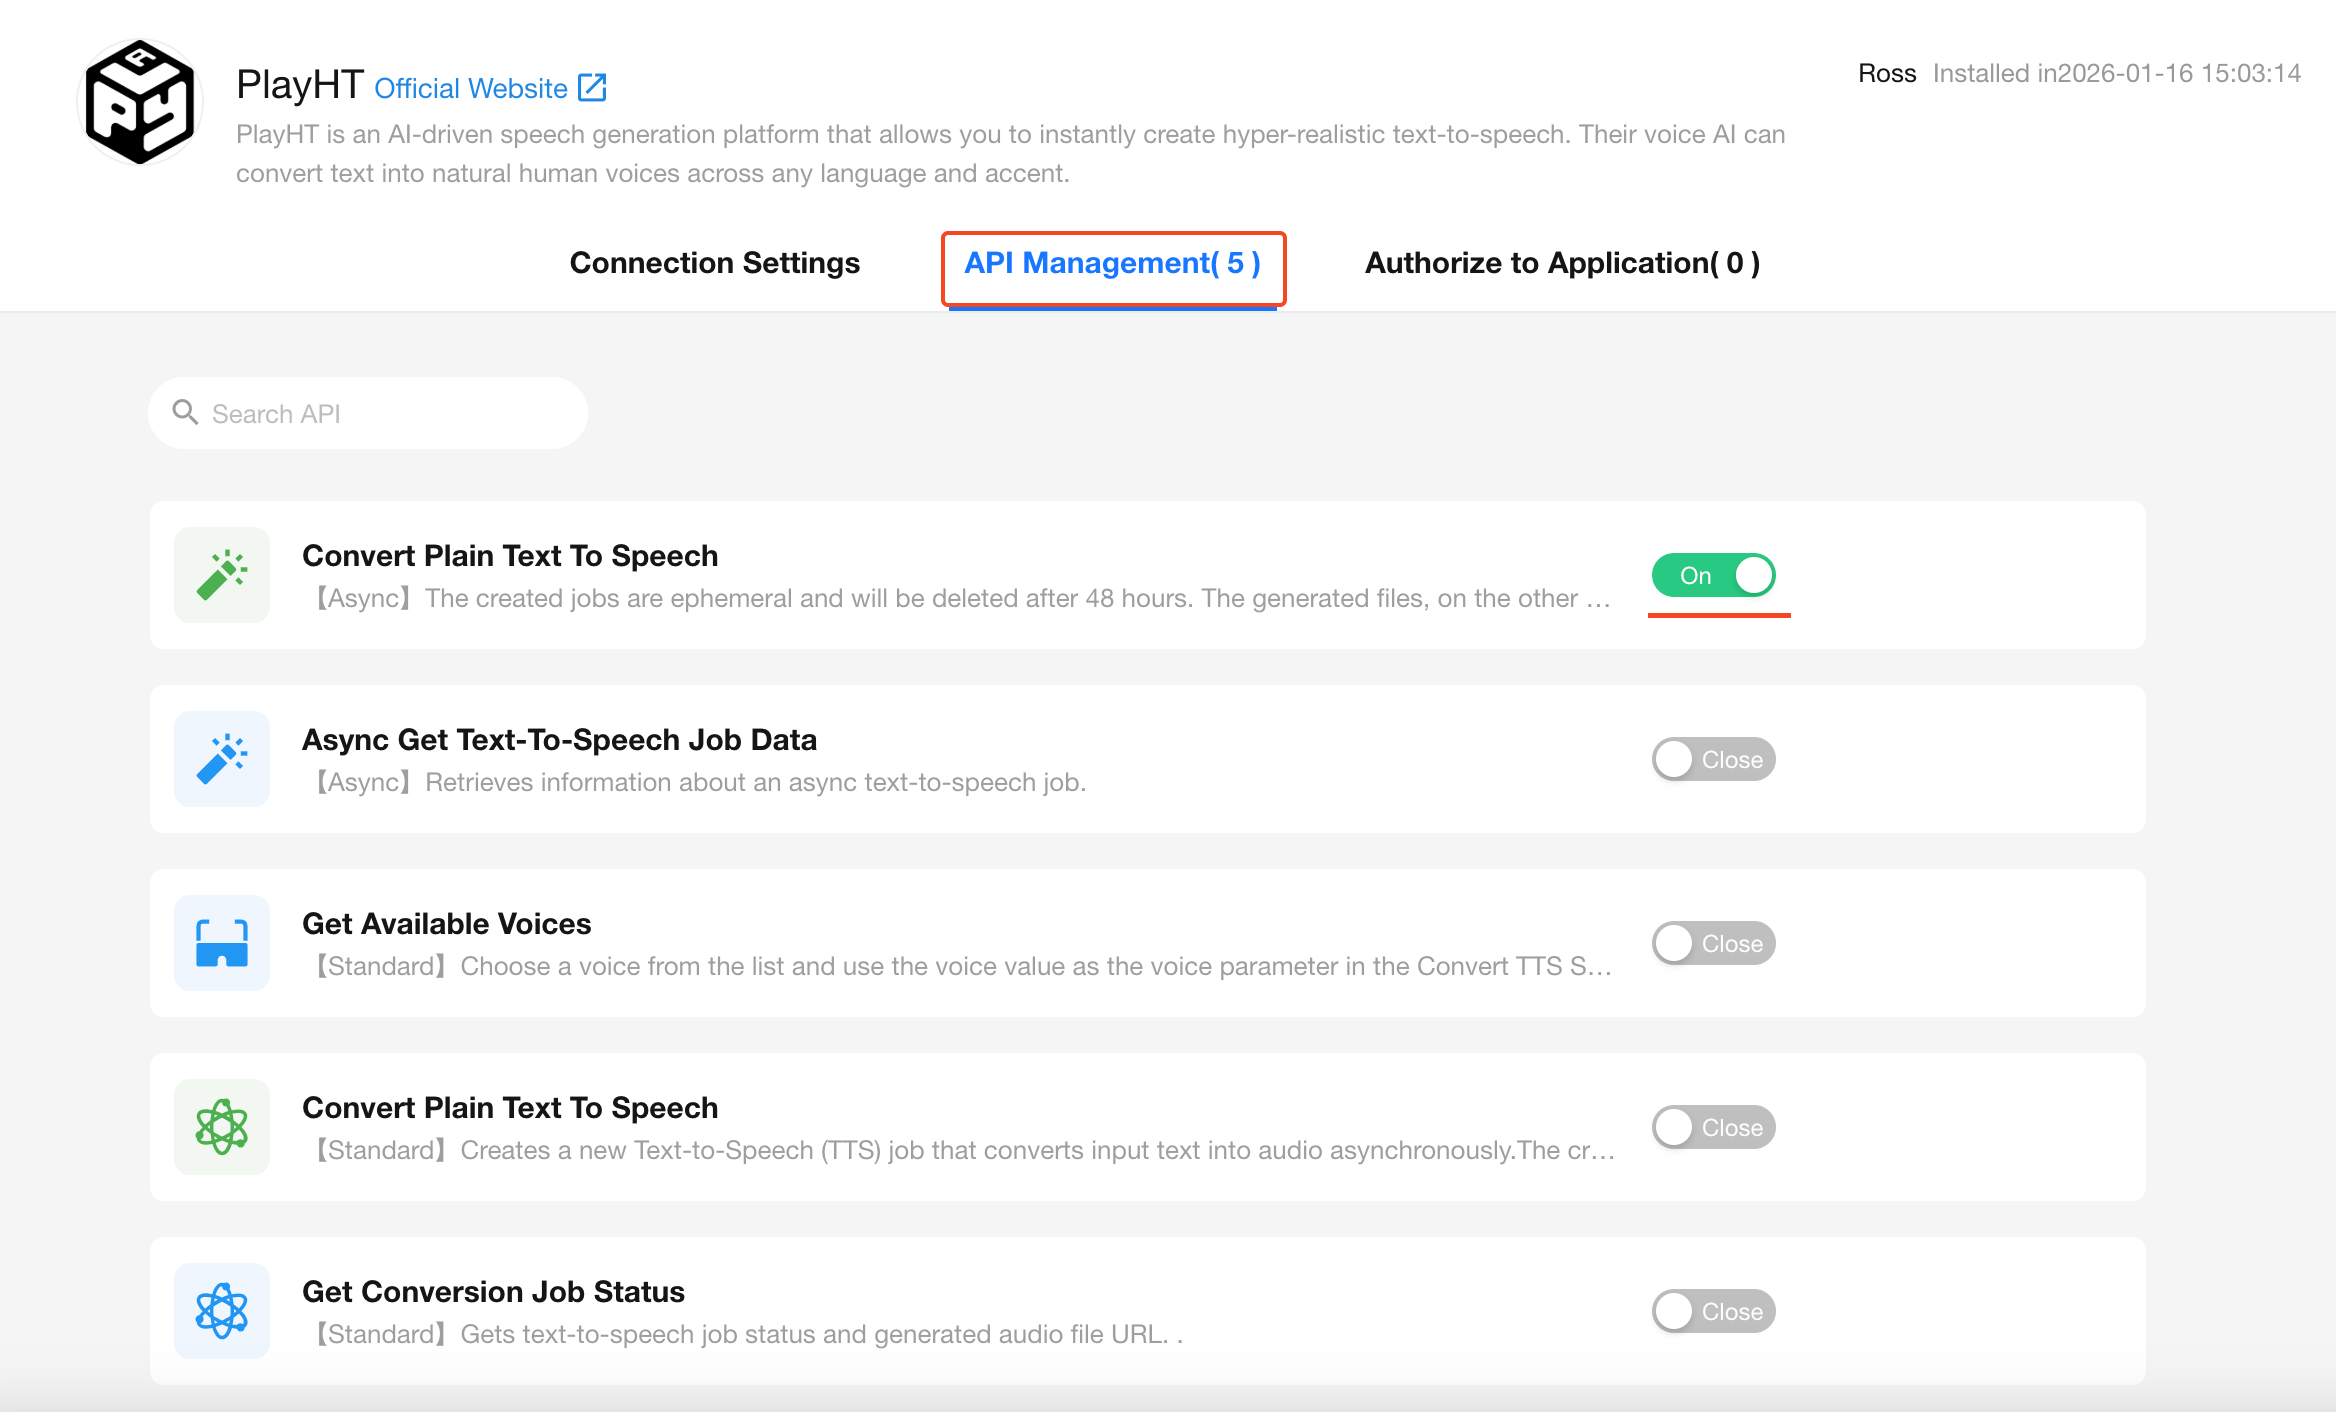
Manage APIs Within a Connection
Under the "API Management" tab in a connection, you can view and manage all APIs associated with that connection.
You may enable or disable individual APIs as needed.
Click on an API to view and modify its configuration.
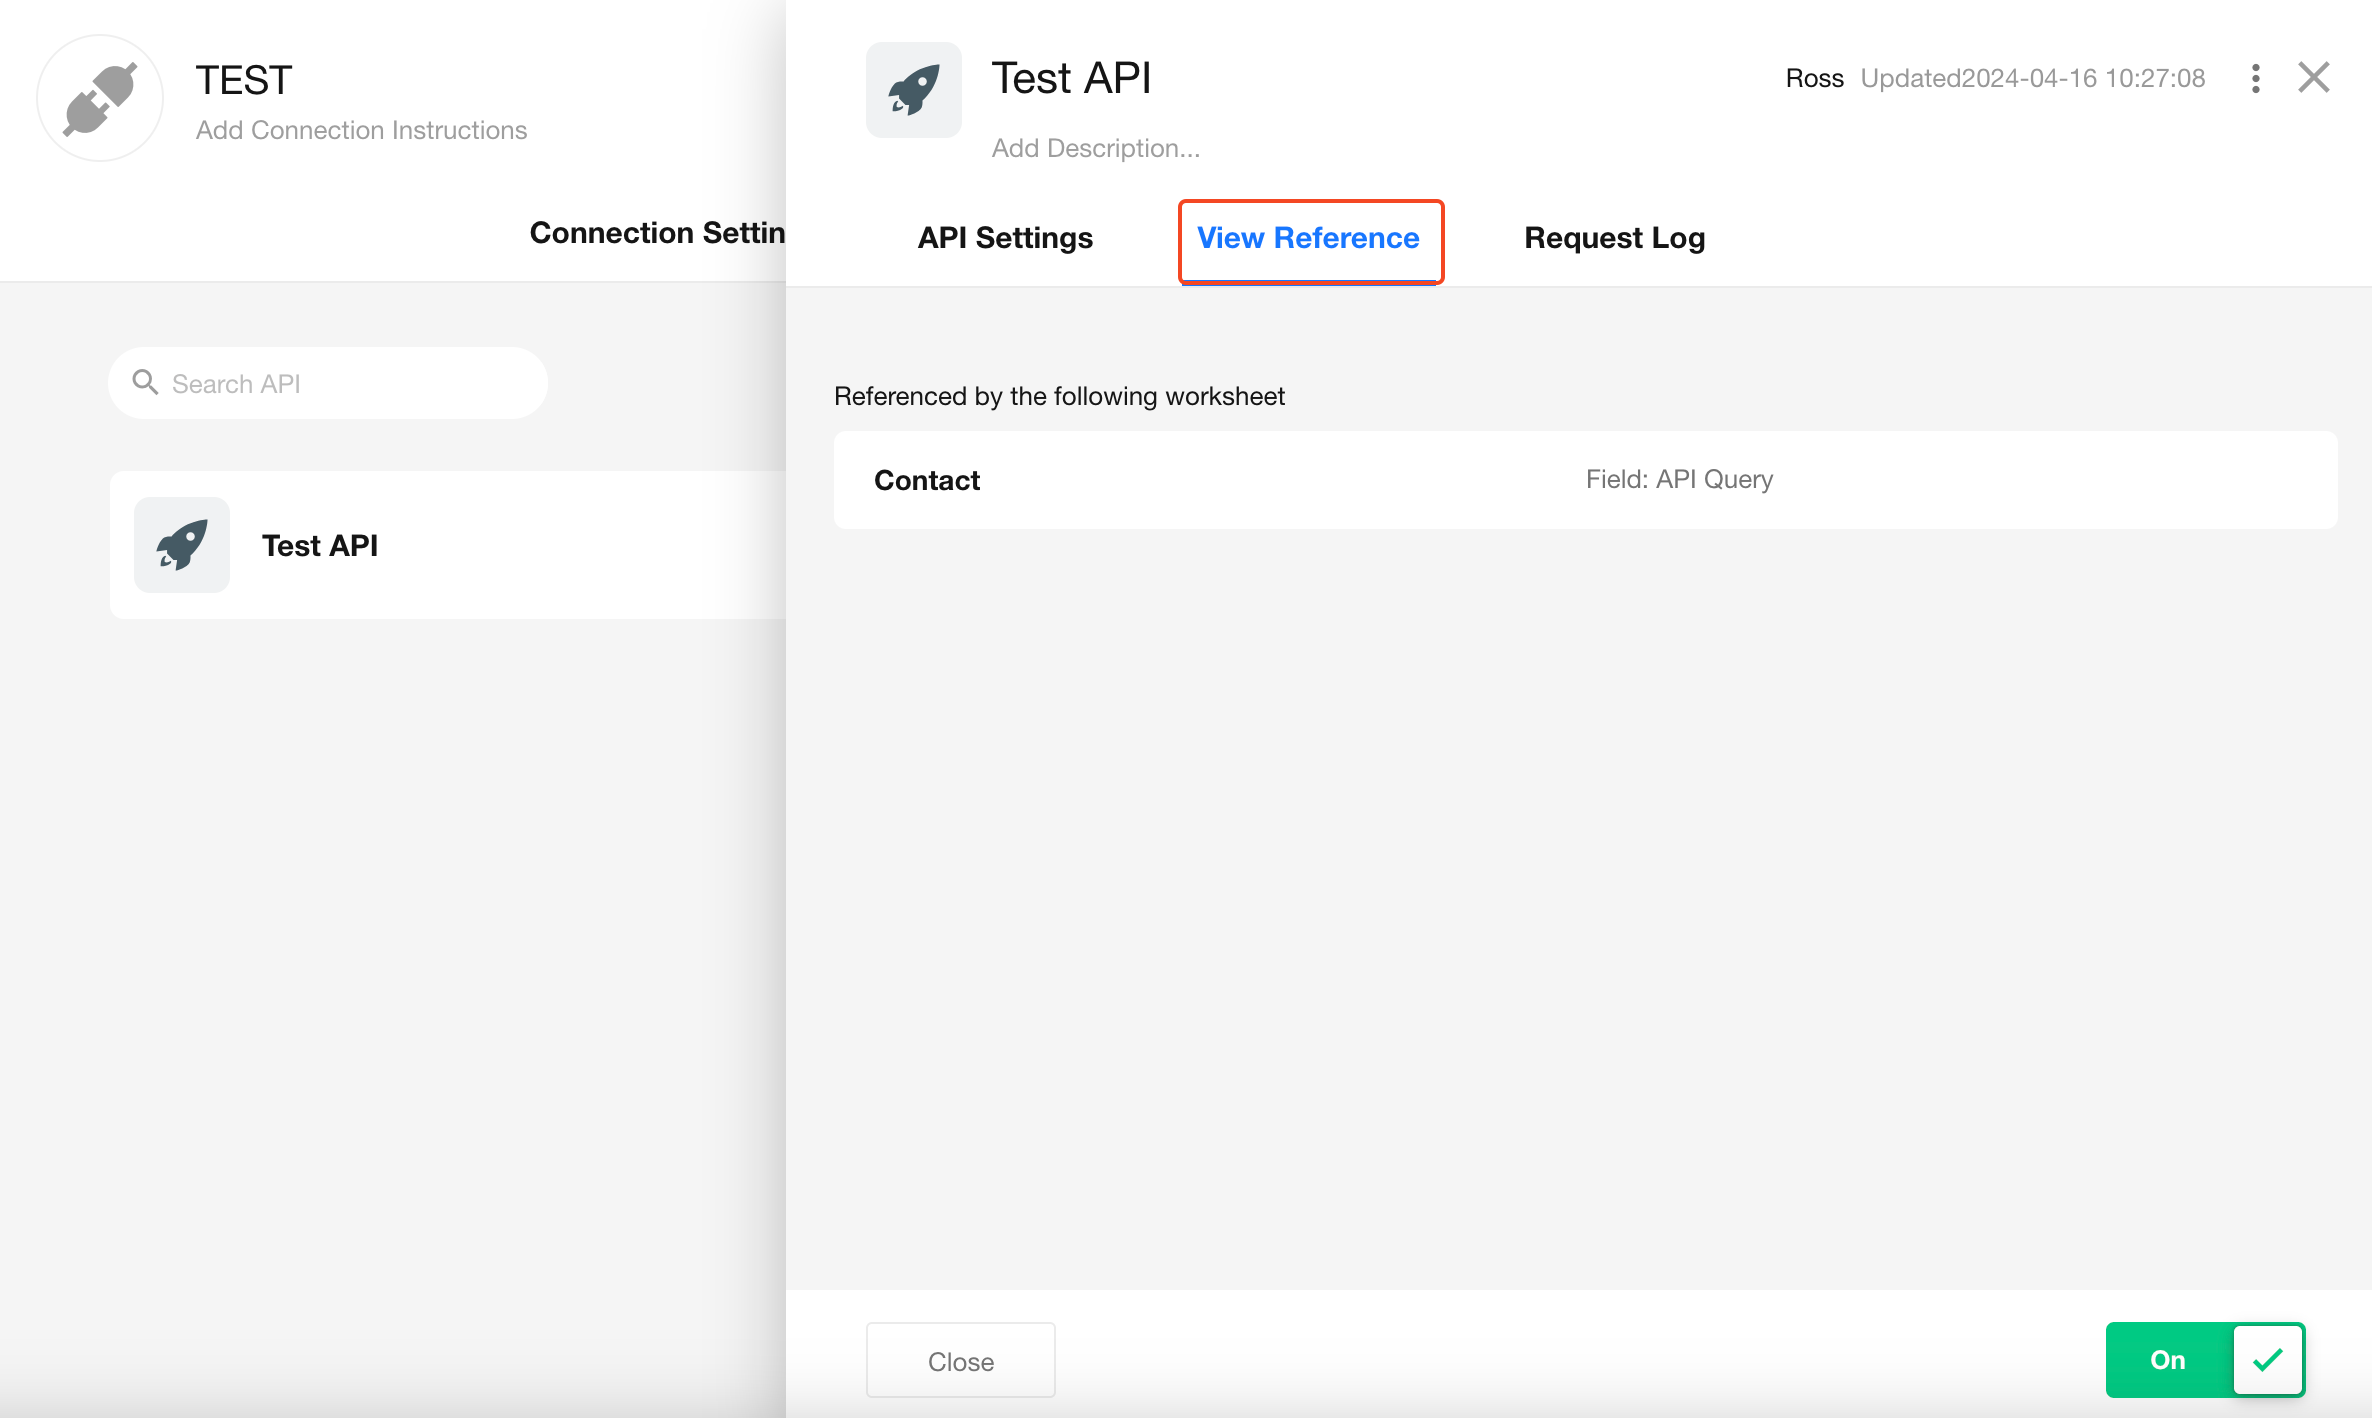
View API Usage References
You can view all worksheets and workflows that reference a given API.
Click the name of a worksheet or workflow to directly navigate to its configuration page.
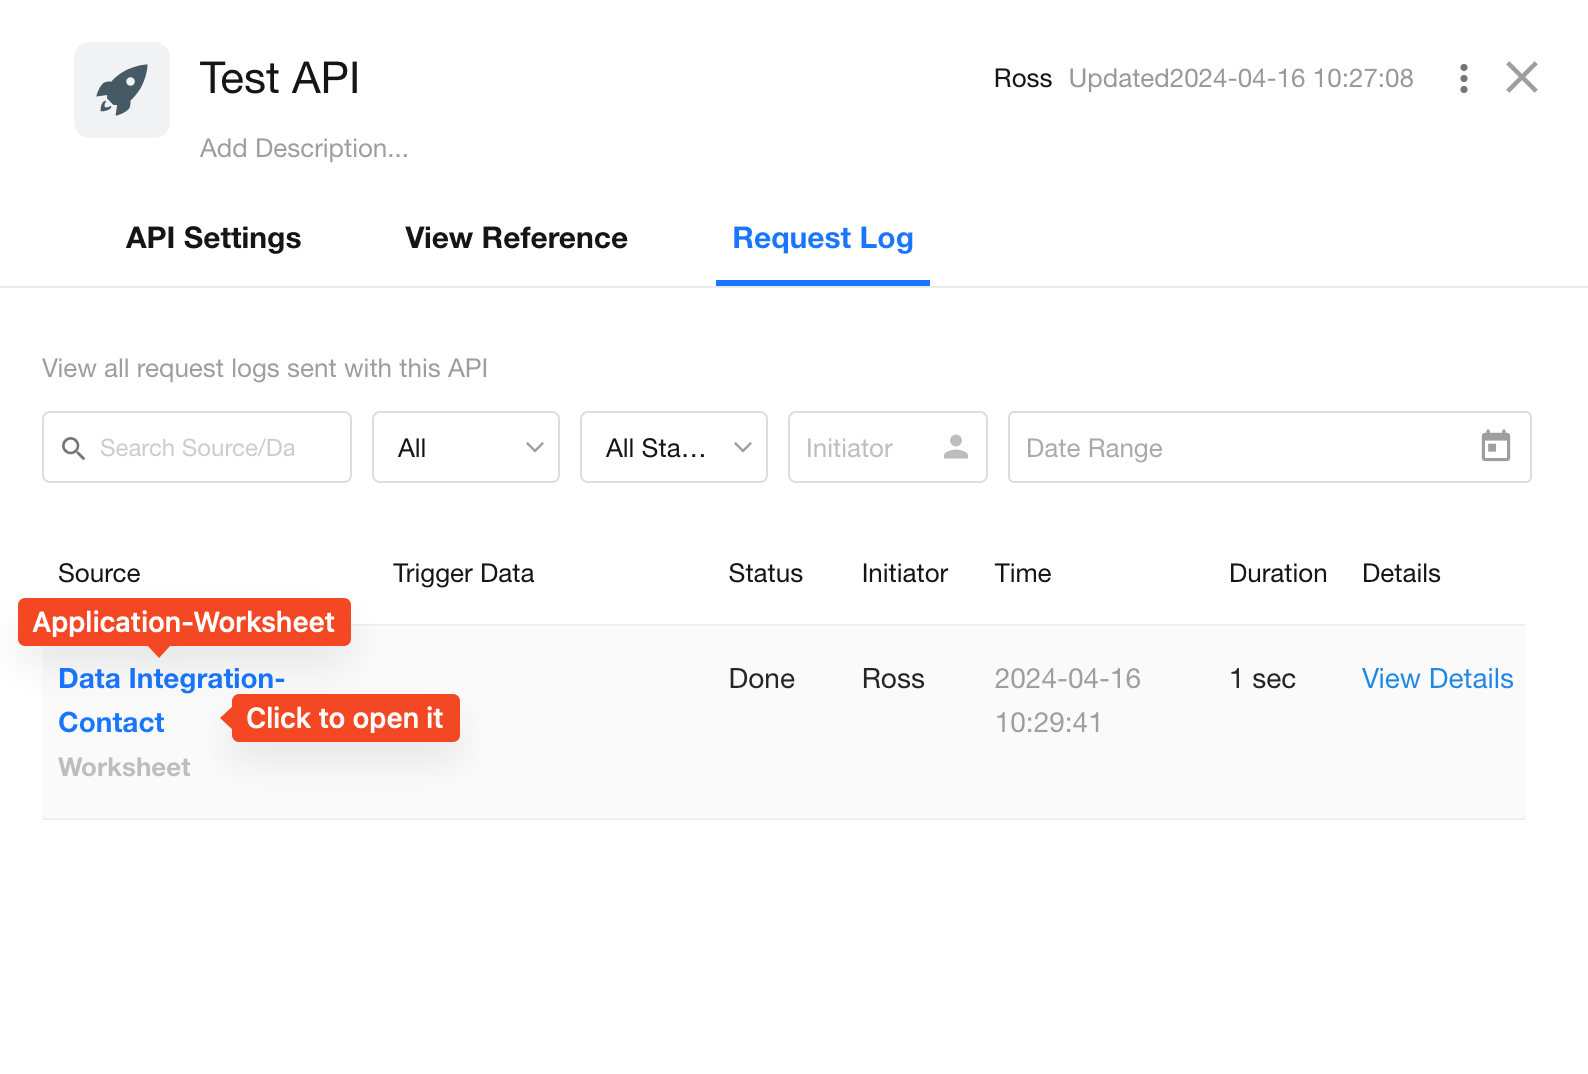
Request Logs
View the full log of all requests made through this API.
Access to logs is restricted based on user permissions.
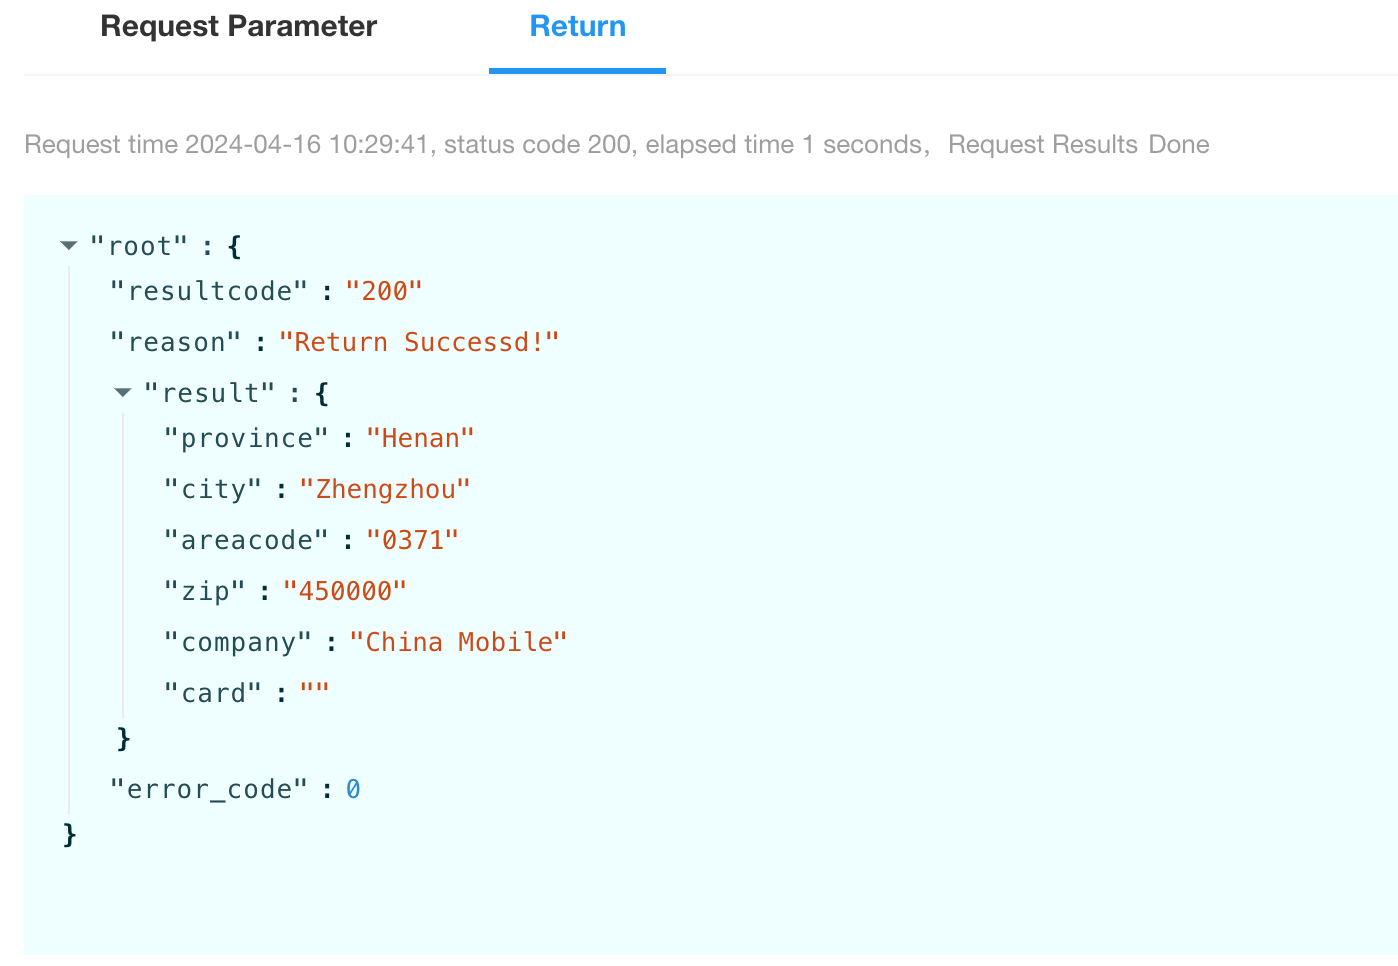
Example of request parameters:

Example of returned result:
How to Submit a Custom Connection to the API Library
In the Integration Center, you can apply to publish your custom connection to the API Library, making it available to other users. Once submitted, your application will be reviewed within 1–3 business days.
Submission Guidelines
To avoid rejection during the review process, please ensure the following requirements are met before applying:
- Complete all connection details including logo, basic information, connection description, API names, and API descriptions.
- Avoid meaningless placeholders such as
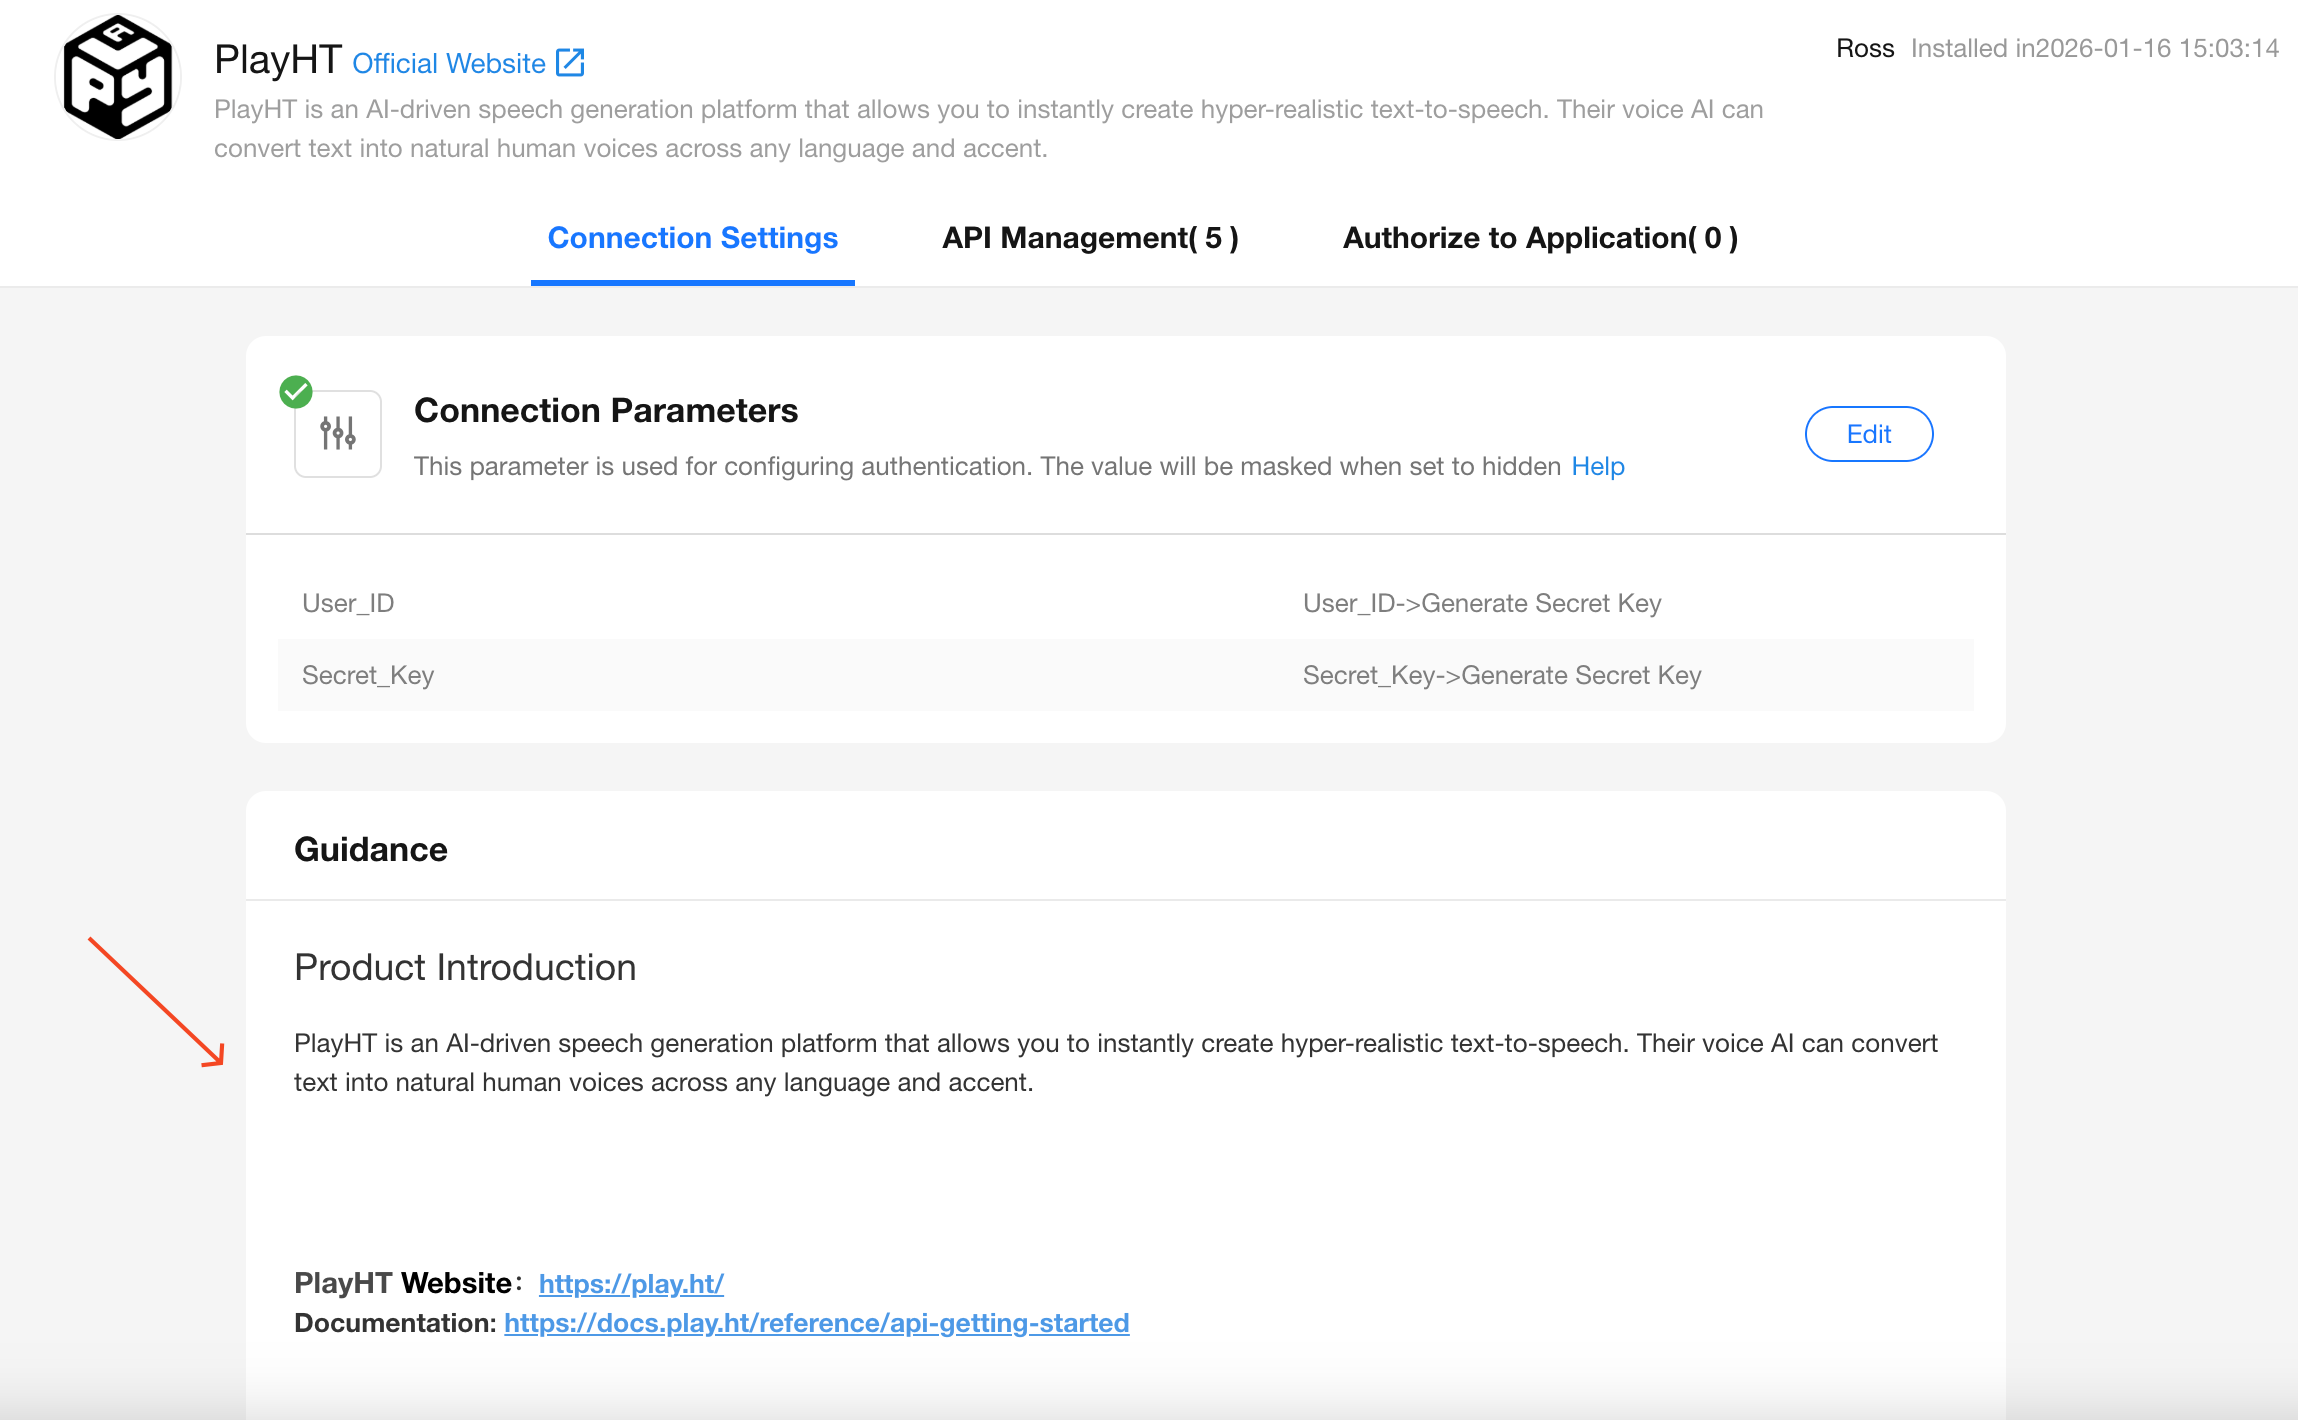
test,123, or similar identifiers. - The connection description must include:
- Product Introduction
- Official Website
- Integration Overview (API documentation link is optional)
- If you require expedited review, contact your HAP sales or implementation specialist.
Tip: It is strongly recommended to include your contact information in the product description. This allows users to reach you in case of API errors or integration issues.
Example connection submission templates (you can also reference officially listed APIs in the API Library):
Steps to Submit Your API to the Library
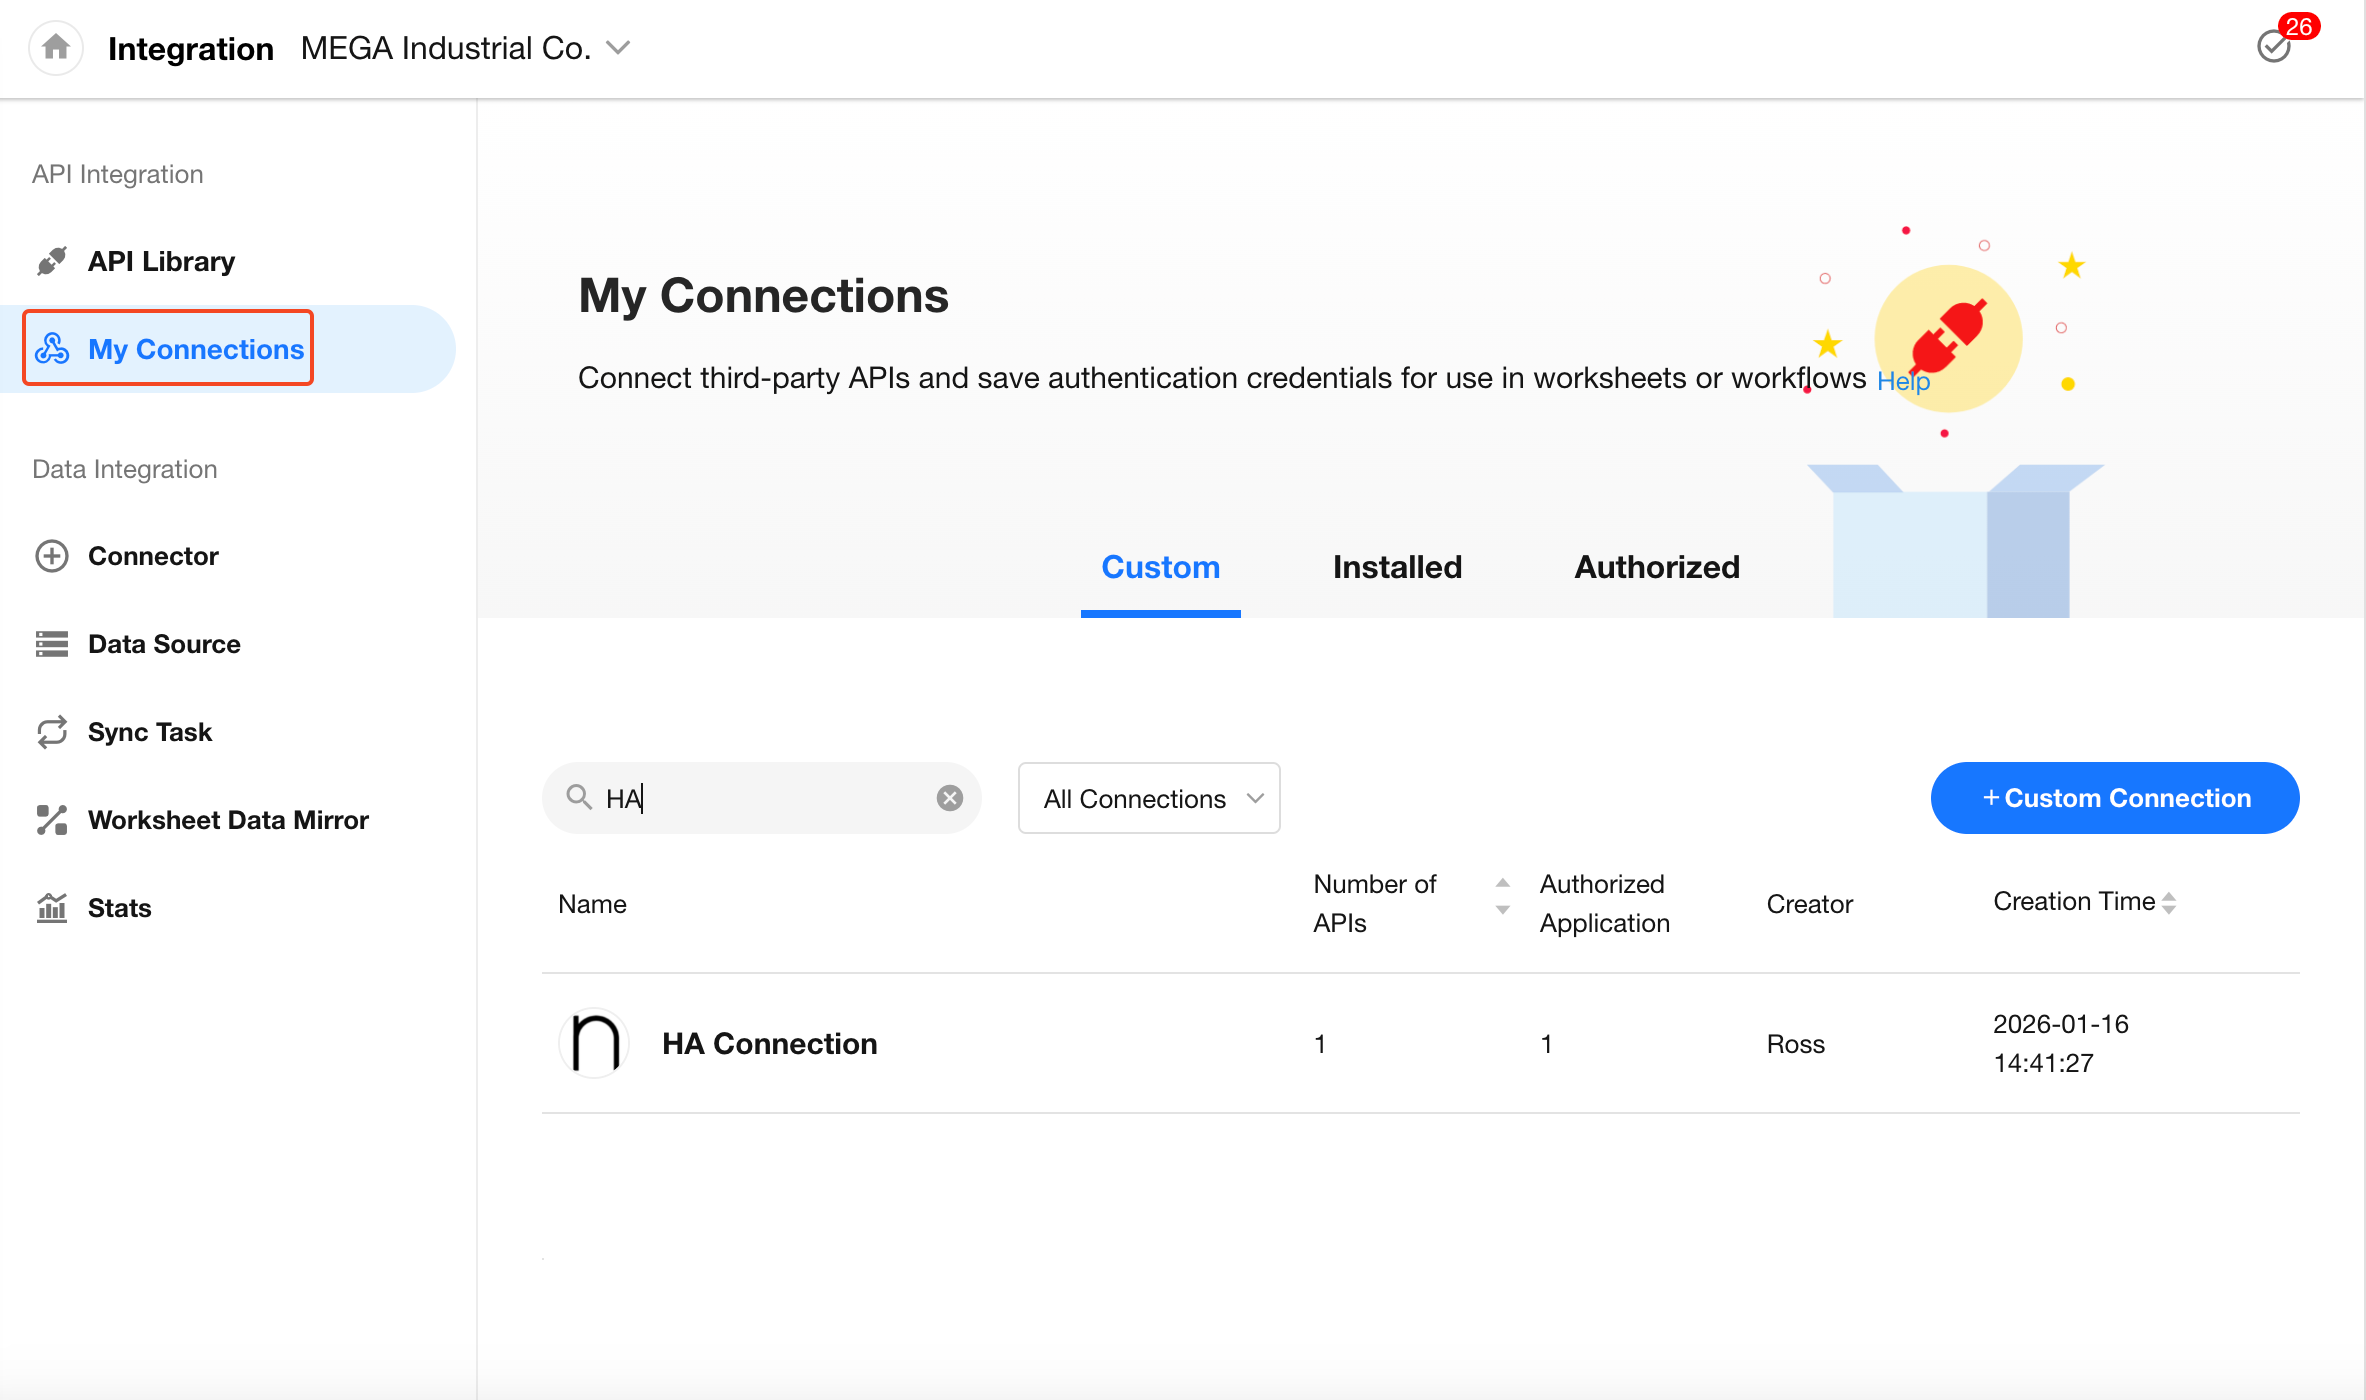
Step 1: Locate Your Connection
Go to [Integration Center] > [My Connections] and select the connection you want to publish.
Step 2: Complete the Usage Guide
Add a clear description including:
- Product Introduction
- Official Website
- Integration Process (API docs optional)
- Your contact information (recommended)

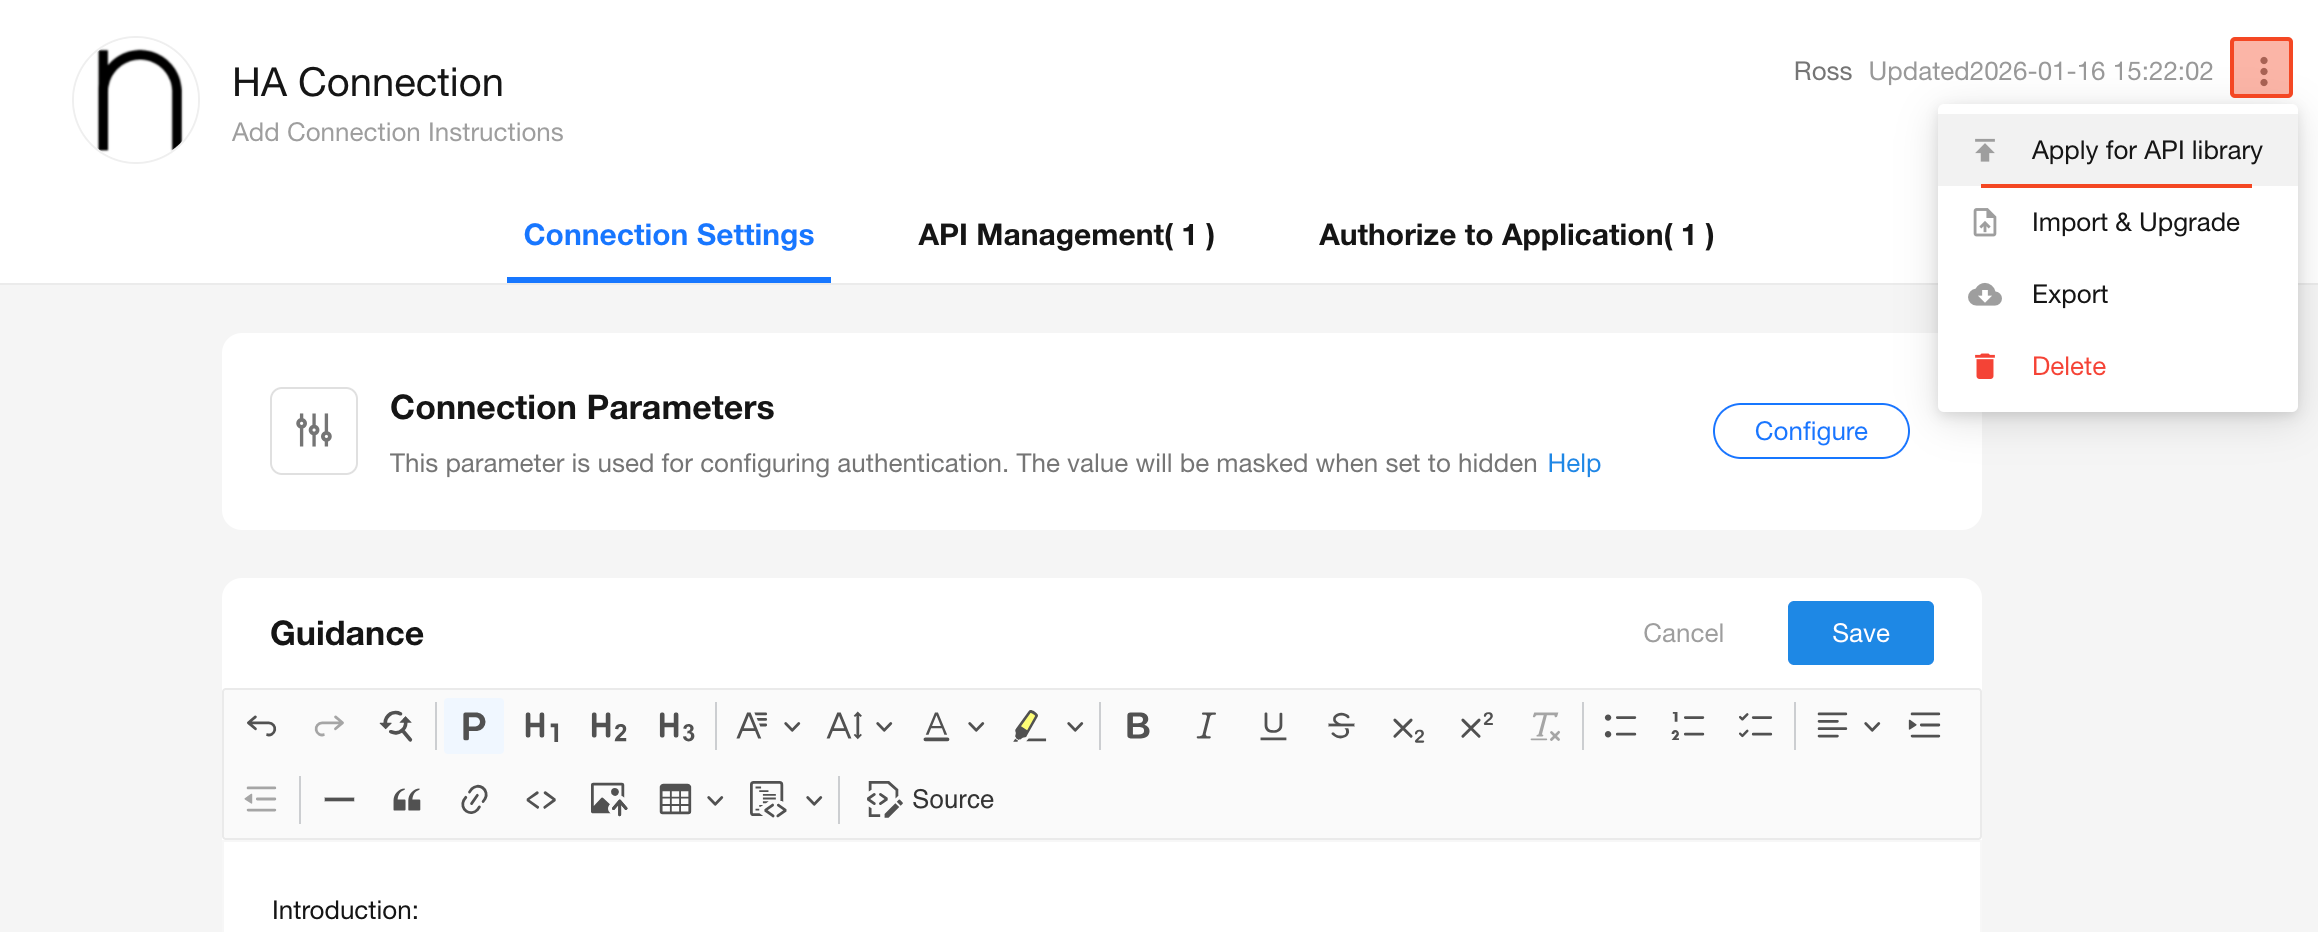
Step 3: Submit for Review
Click the "⋮" (More) button in the top-right corner, then select “Apply for API Library”.
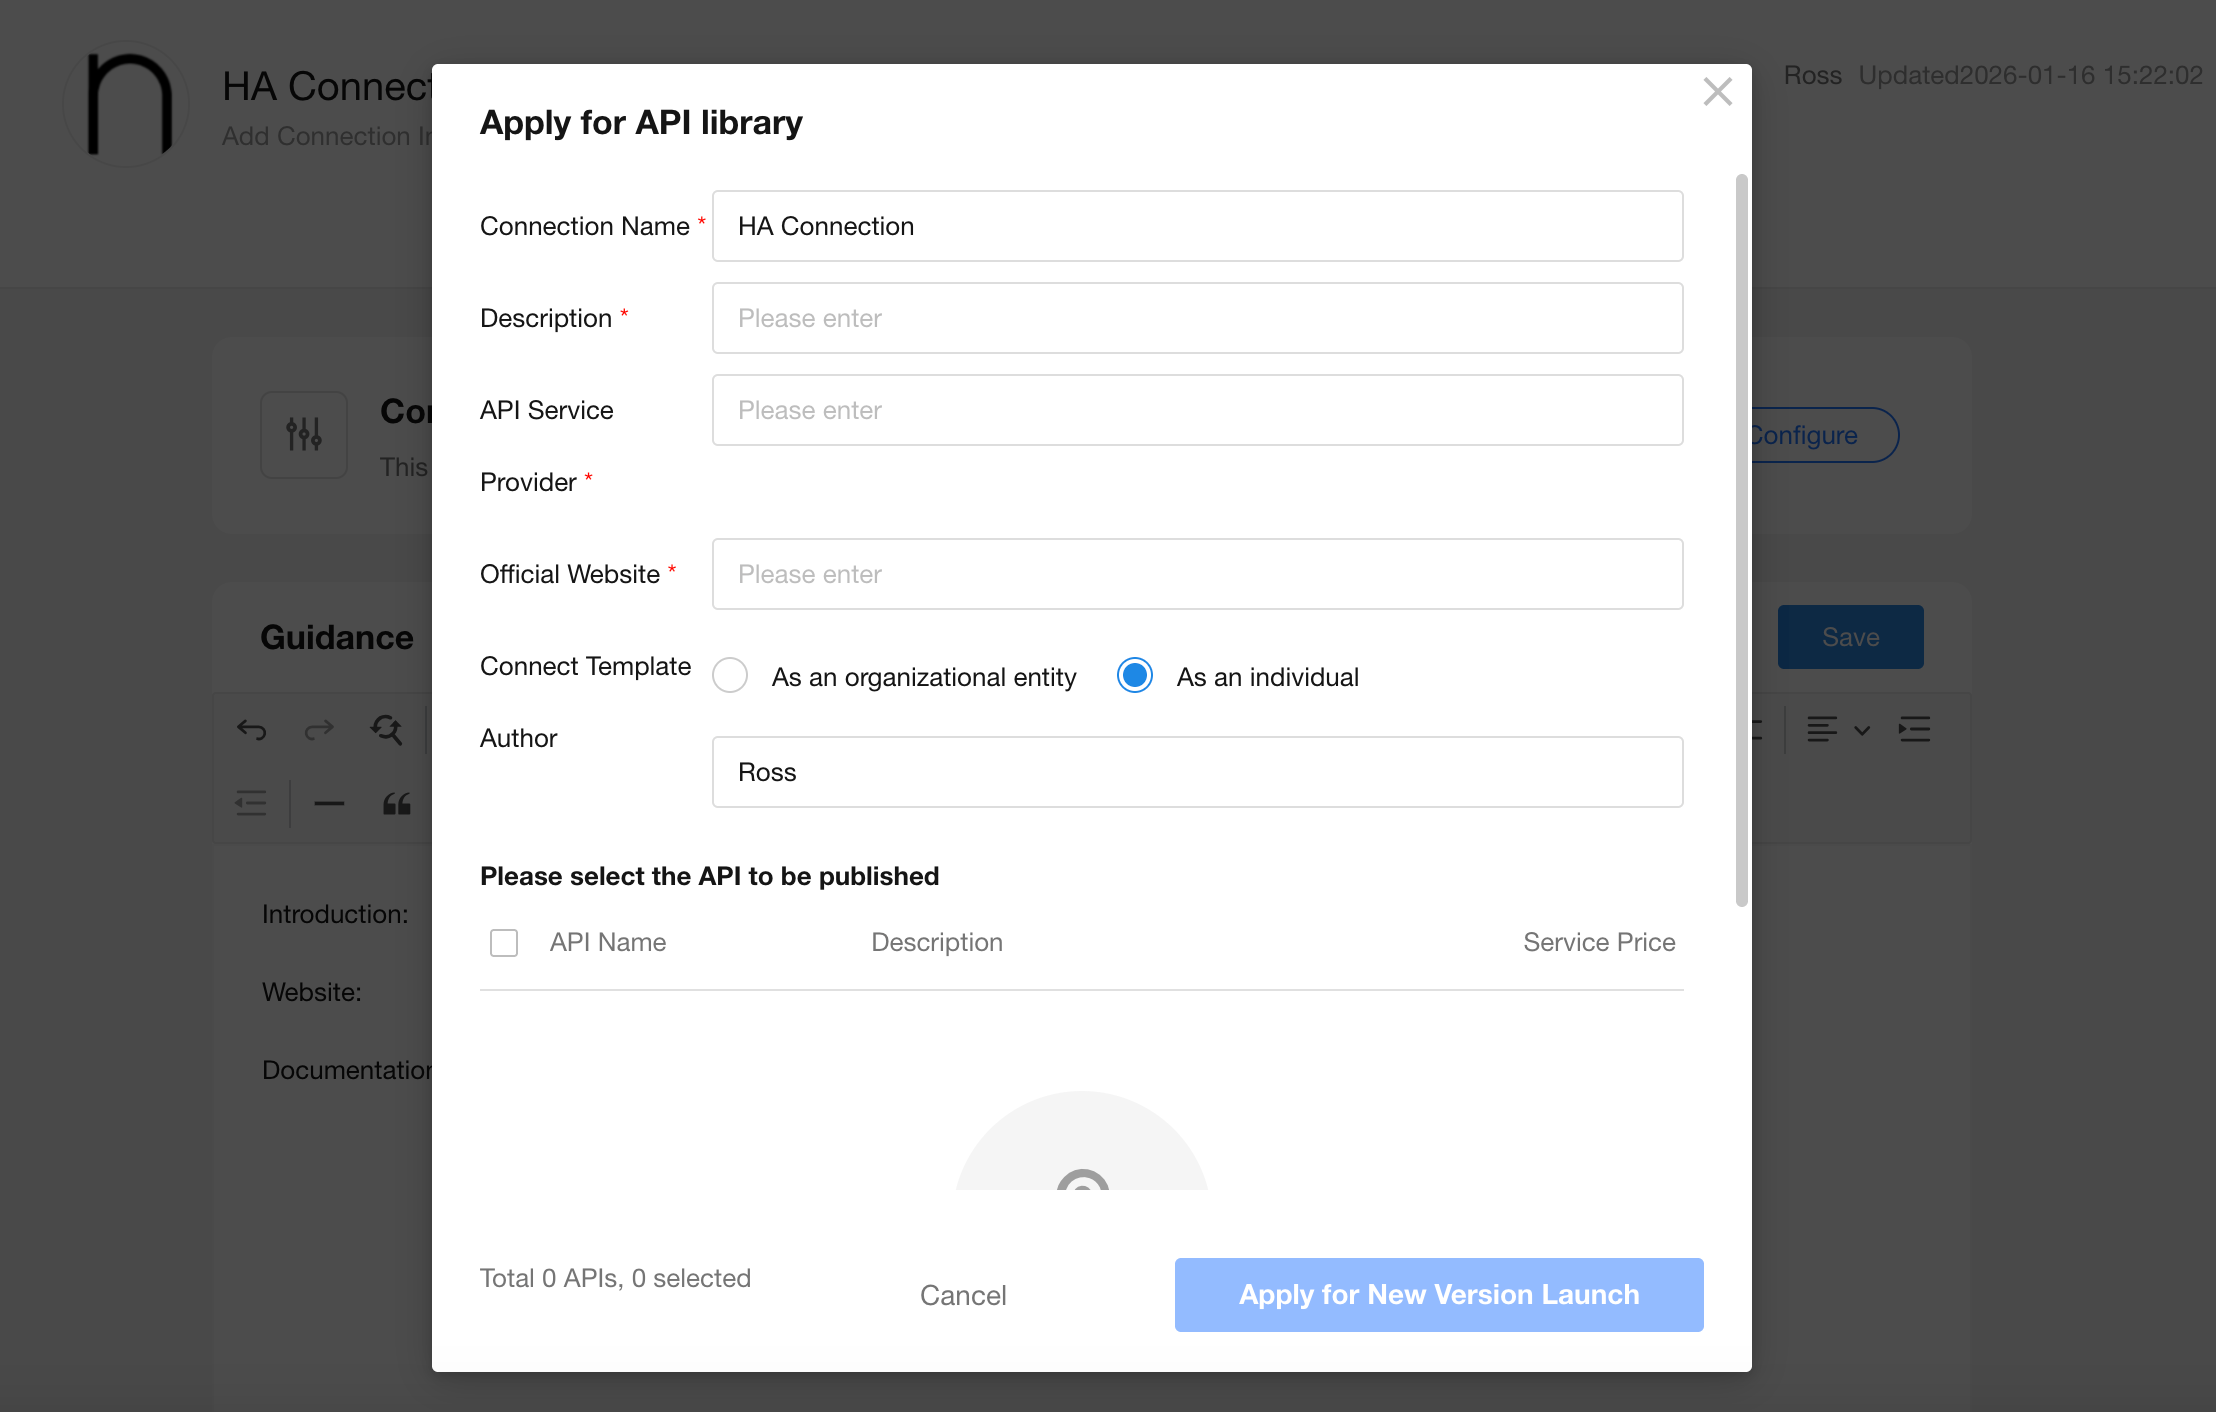
Step 4: Fill Out Submission Info
Complete the submission form with any required details.
Click “Apply to publish new version” to submit.
A reviewer will process your application within 1–3 business days.
How to Update an Existing Published API
-
Navigate to the custom connection you'd like to update.
-
Click the "⋮" button and select “Apply to publish new version”
-
By default, existing product details remain unchanged. If necessary, update the product information accordingly, then click “Apply to publish new version”
Add or Install the Latest API Version
If you update an API and want users to access the new version:
- You must duplicate the updated API and disable the old one before resubmitting for publication.
- Otherwise, existing users will not receive the updated version automatically.
How End Users Install Updated APIs
-
HAP SaaS:
Click “Add API”, and newly published APIs will be shown in the list.
-
HAP Server:
Users will need to reinstall the connection from the API Library.
Was this document helpful?