Introduction to ETL Functionality
ETL (Extract, Transform, Load) is an advanced feature of data integration. It refers to the complete process of extracting data from one source, transforming it as needed, and then loading it into another destination.
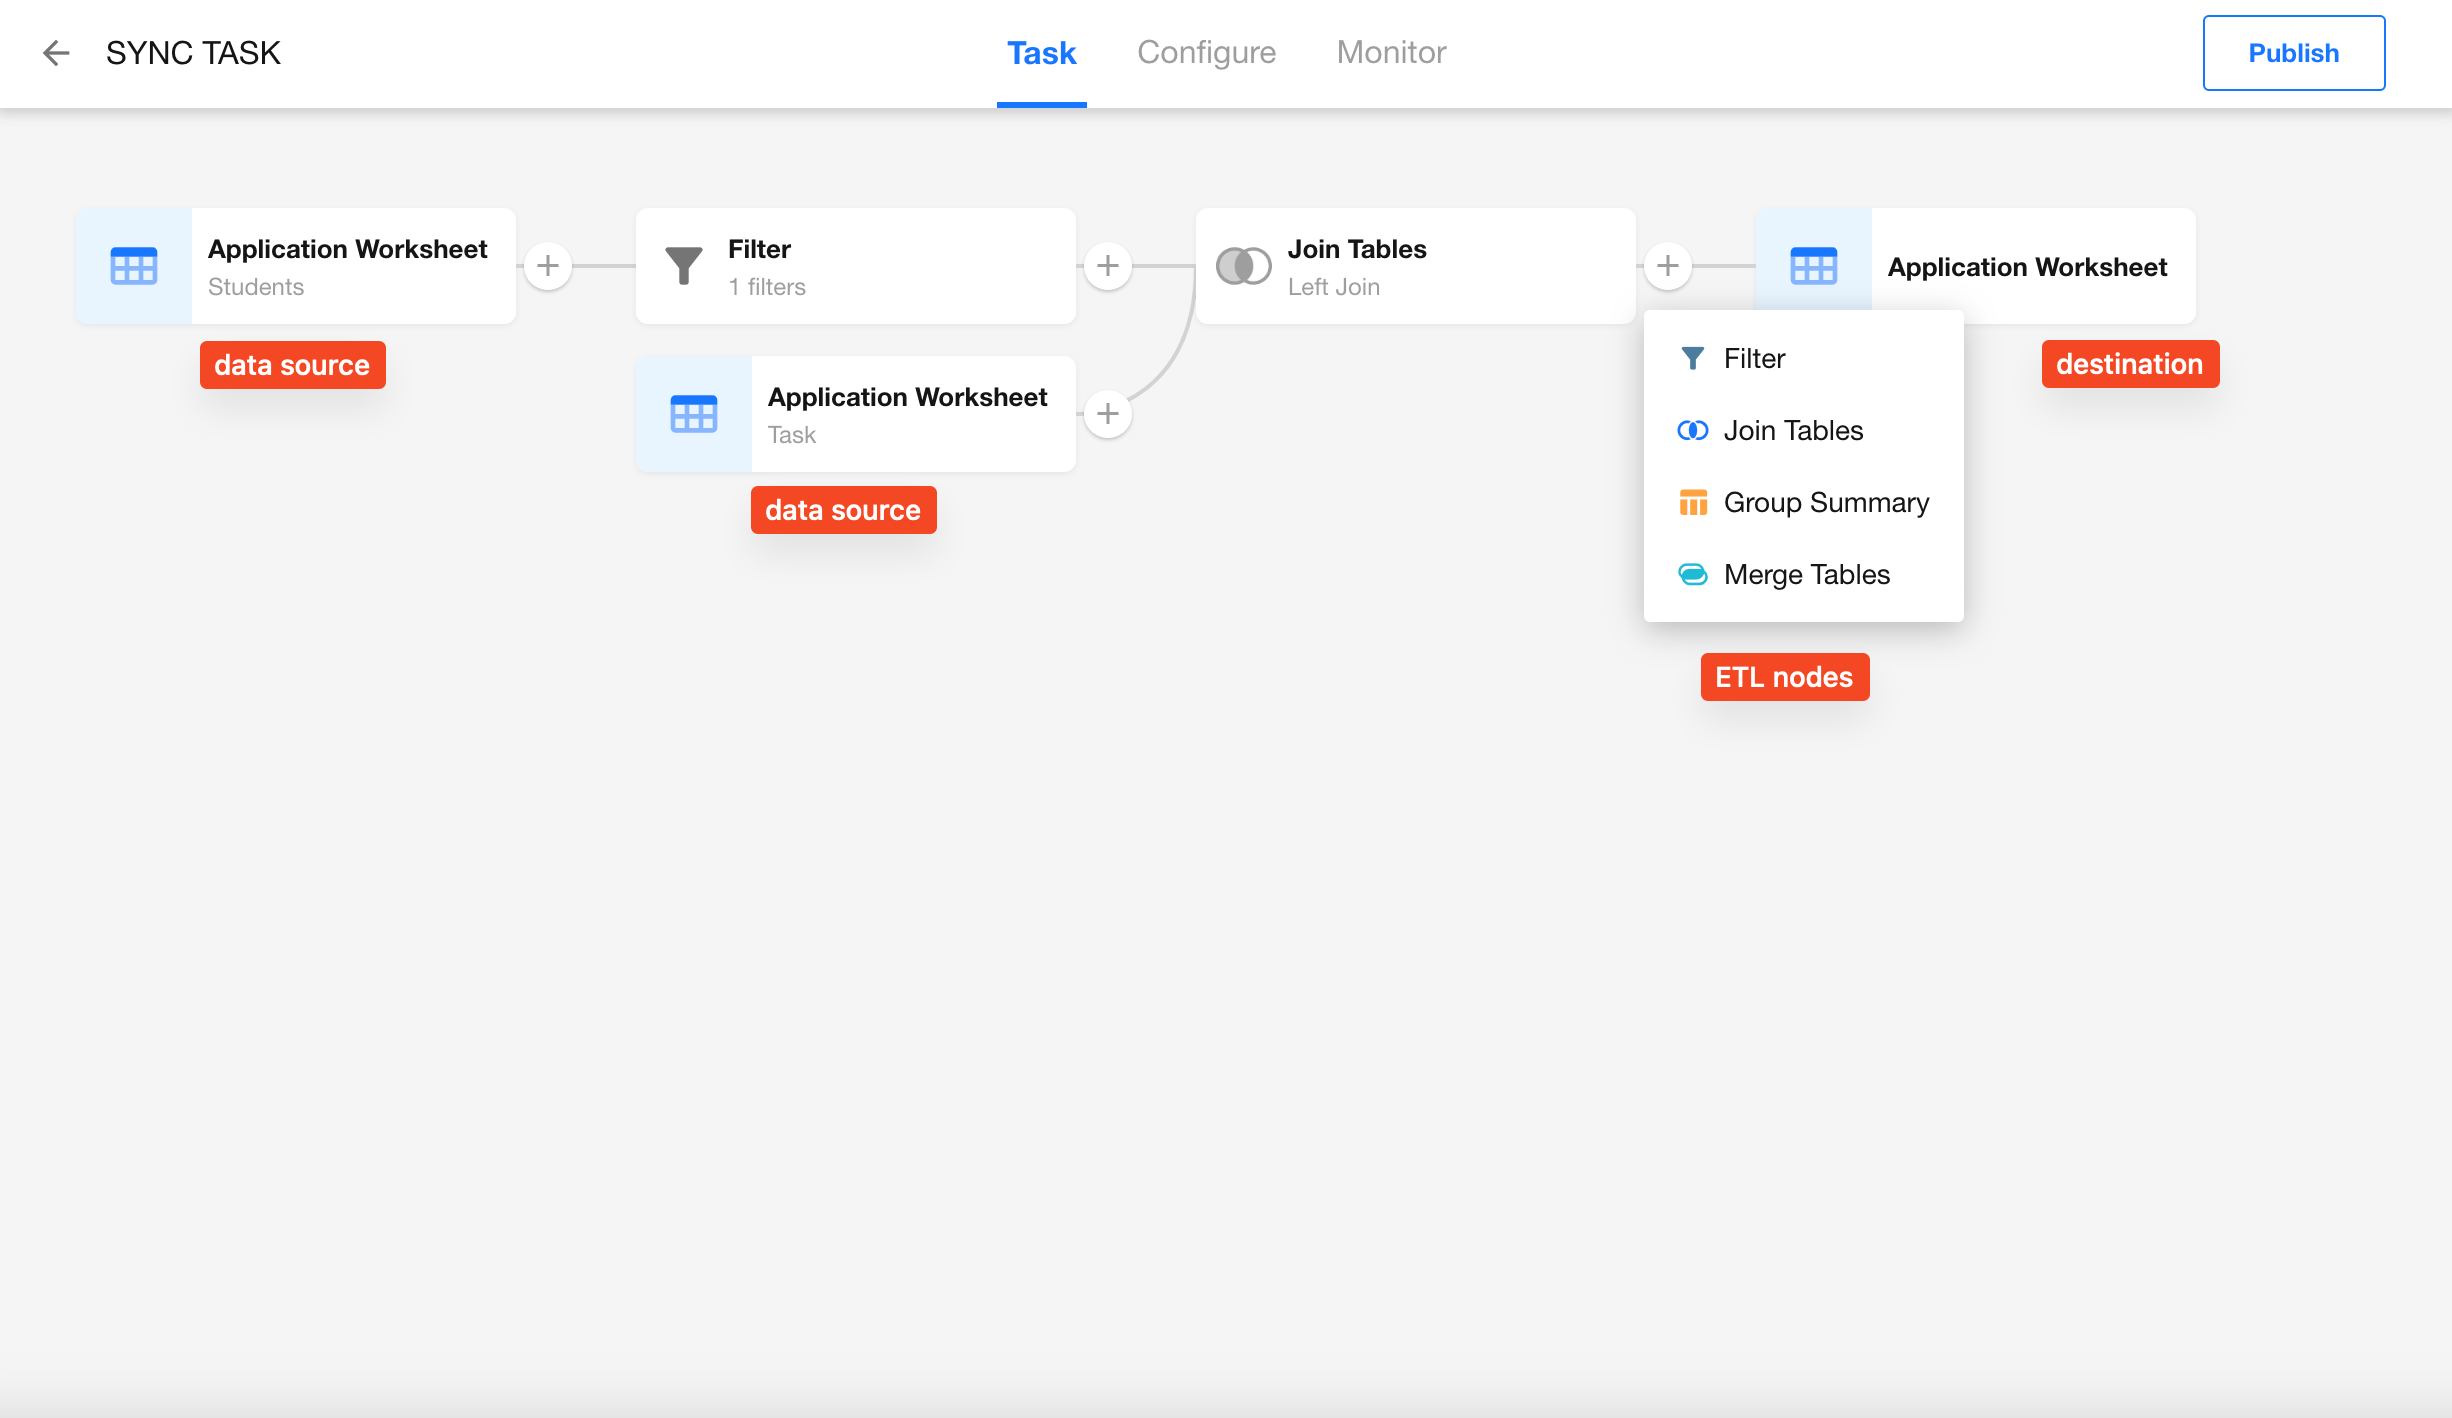
In addition to source and destination nodes, the ETL tool provides four functional nodes for enhanced data processing. Each of them is explained in detail below.
-
Data Source
This node is used to configure how data is read. A single sync task can include multiple source nodes, such as for multi-table joins or data merging scenarios. -
Data Destination
This node is used to configure how data is written. Each sync task can only include one destination node.
Filter
The Filter node allows you to screen data during the sync process. Only the filtered data will be processed and passed to the next node.
You can insert a Filter node between any two nodes. Filters can consist of multiple conditions or condition groups.
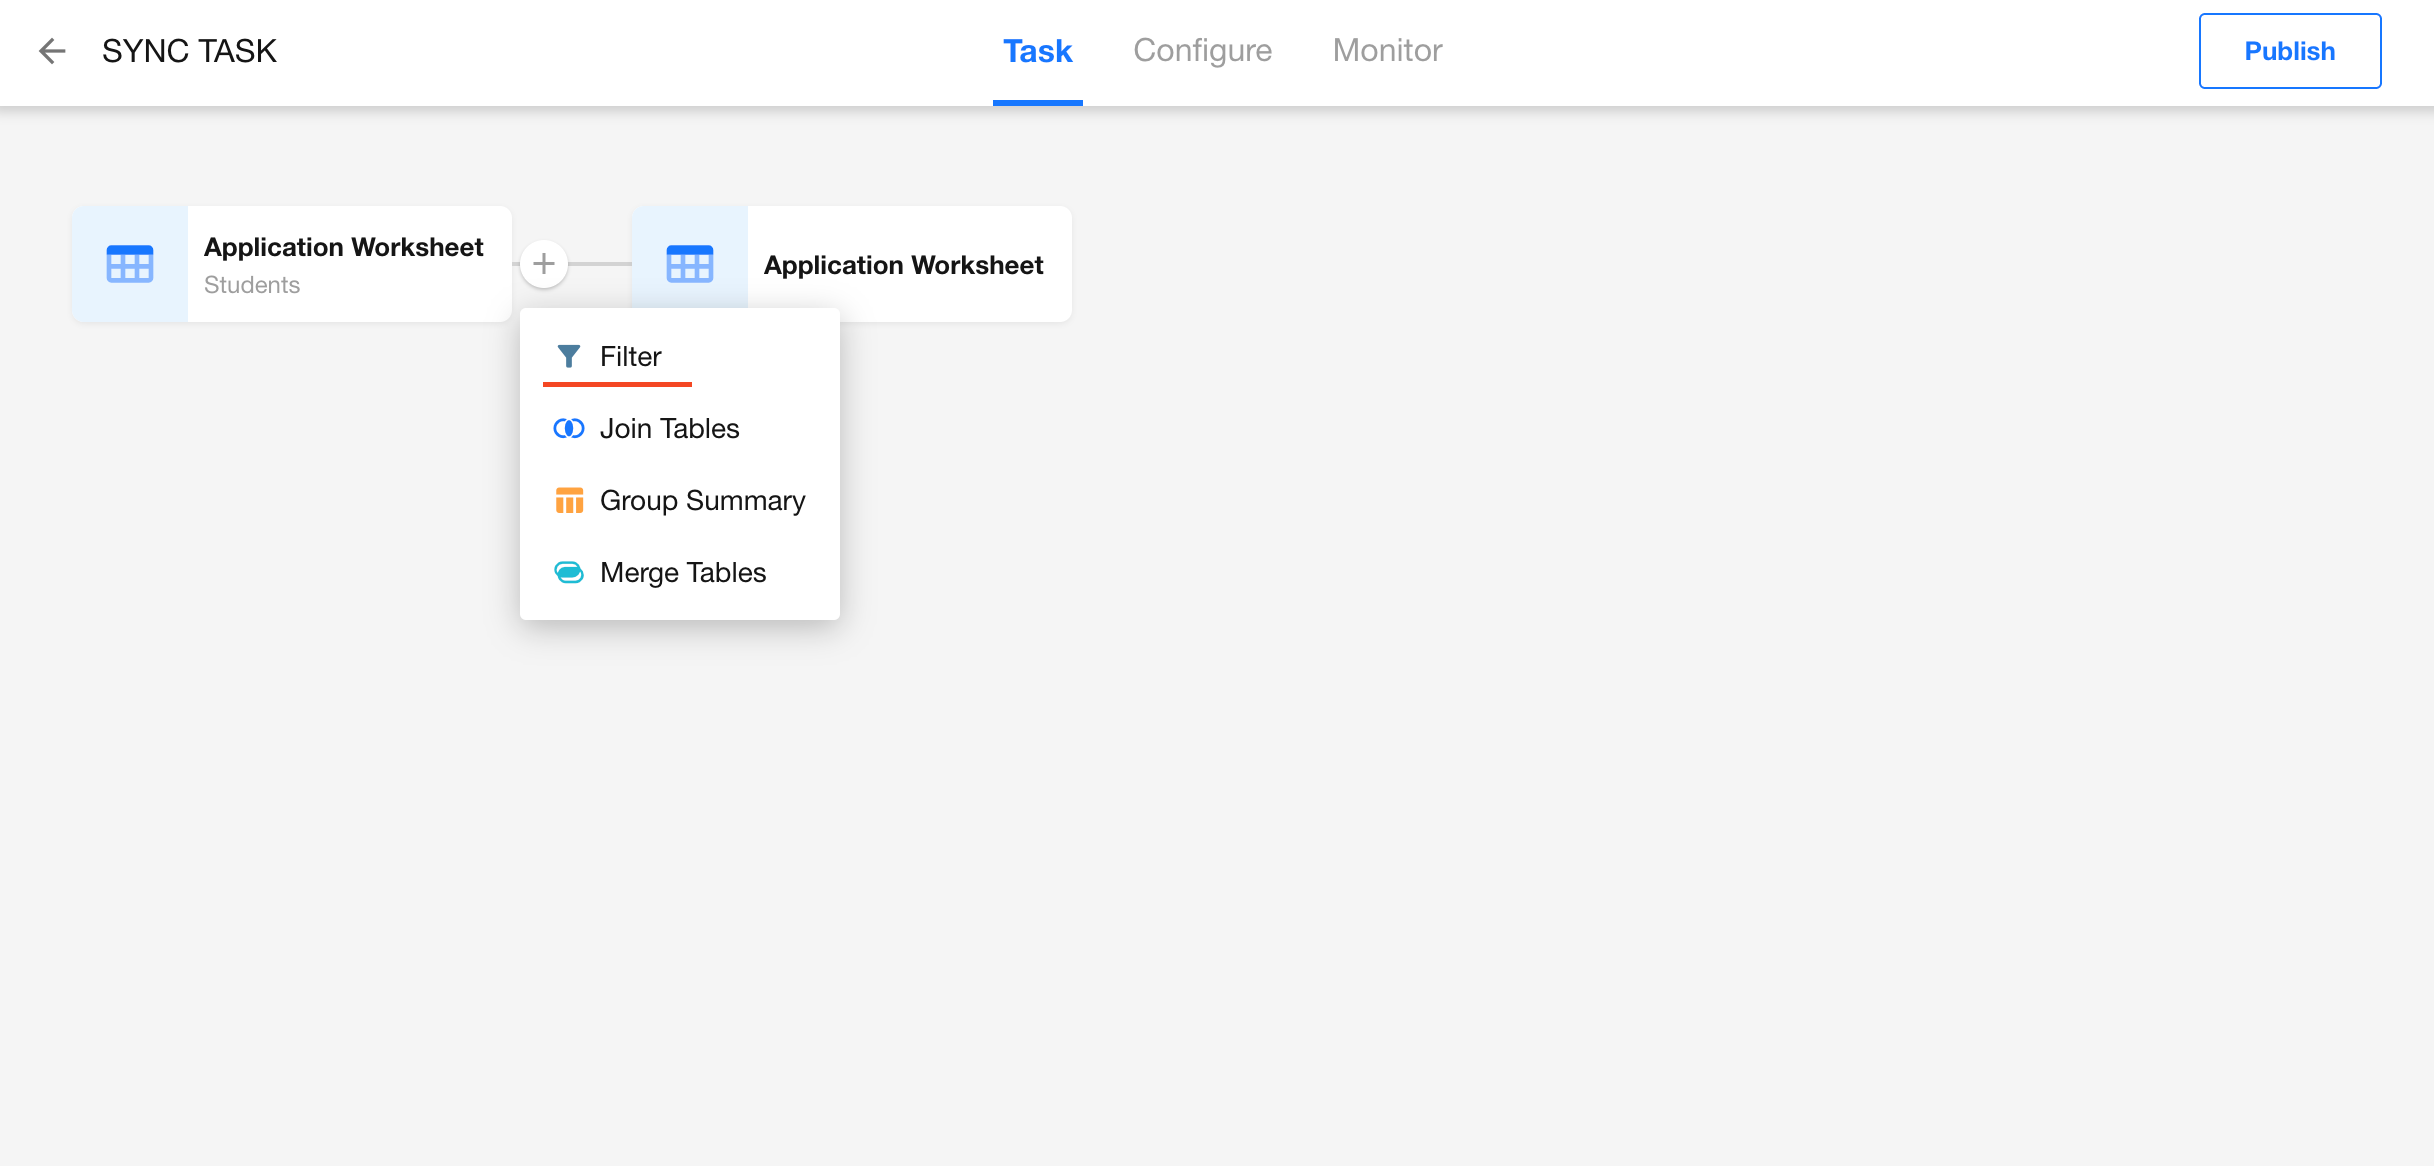
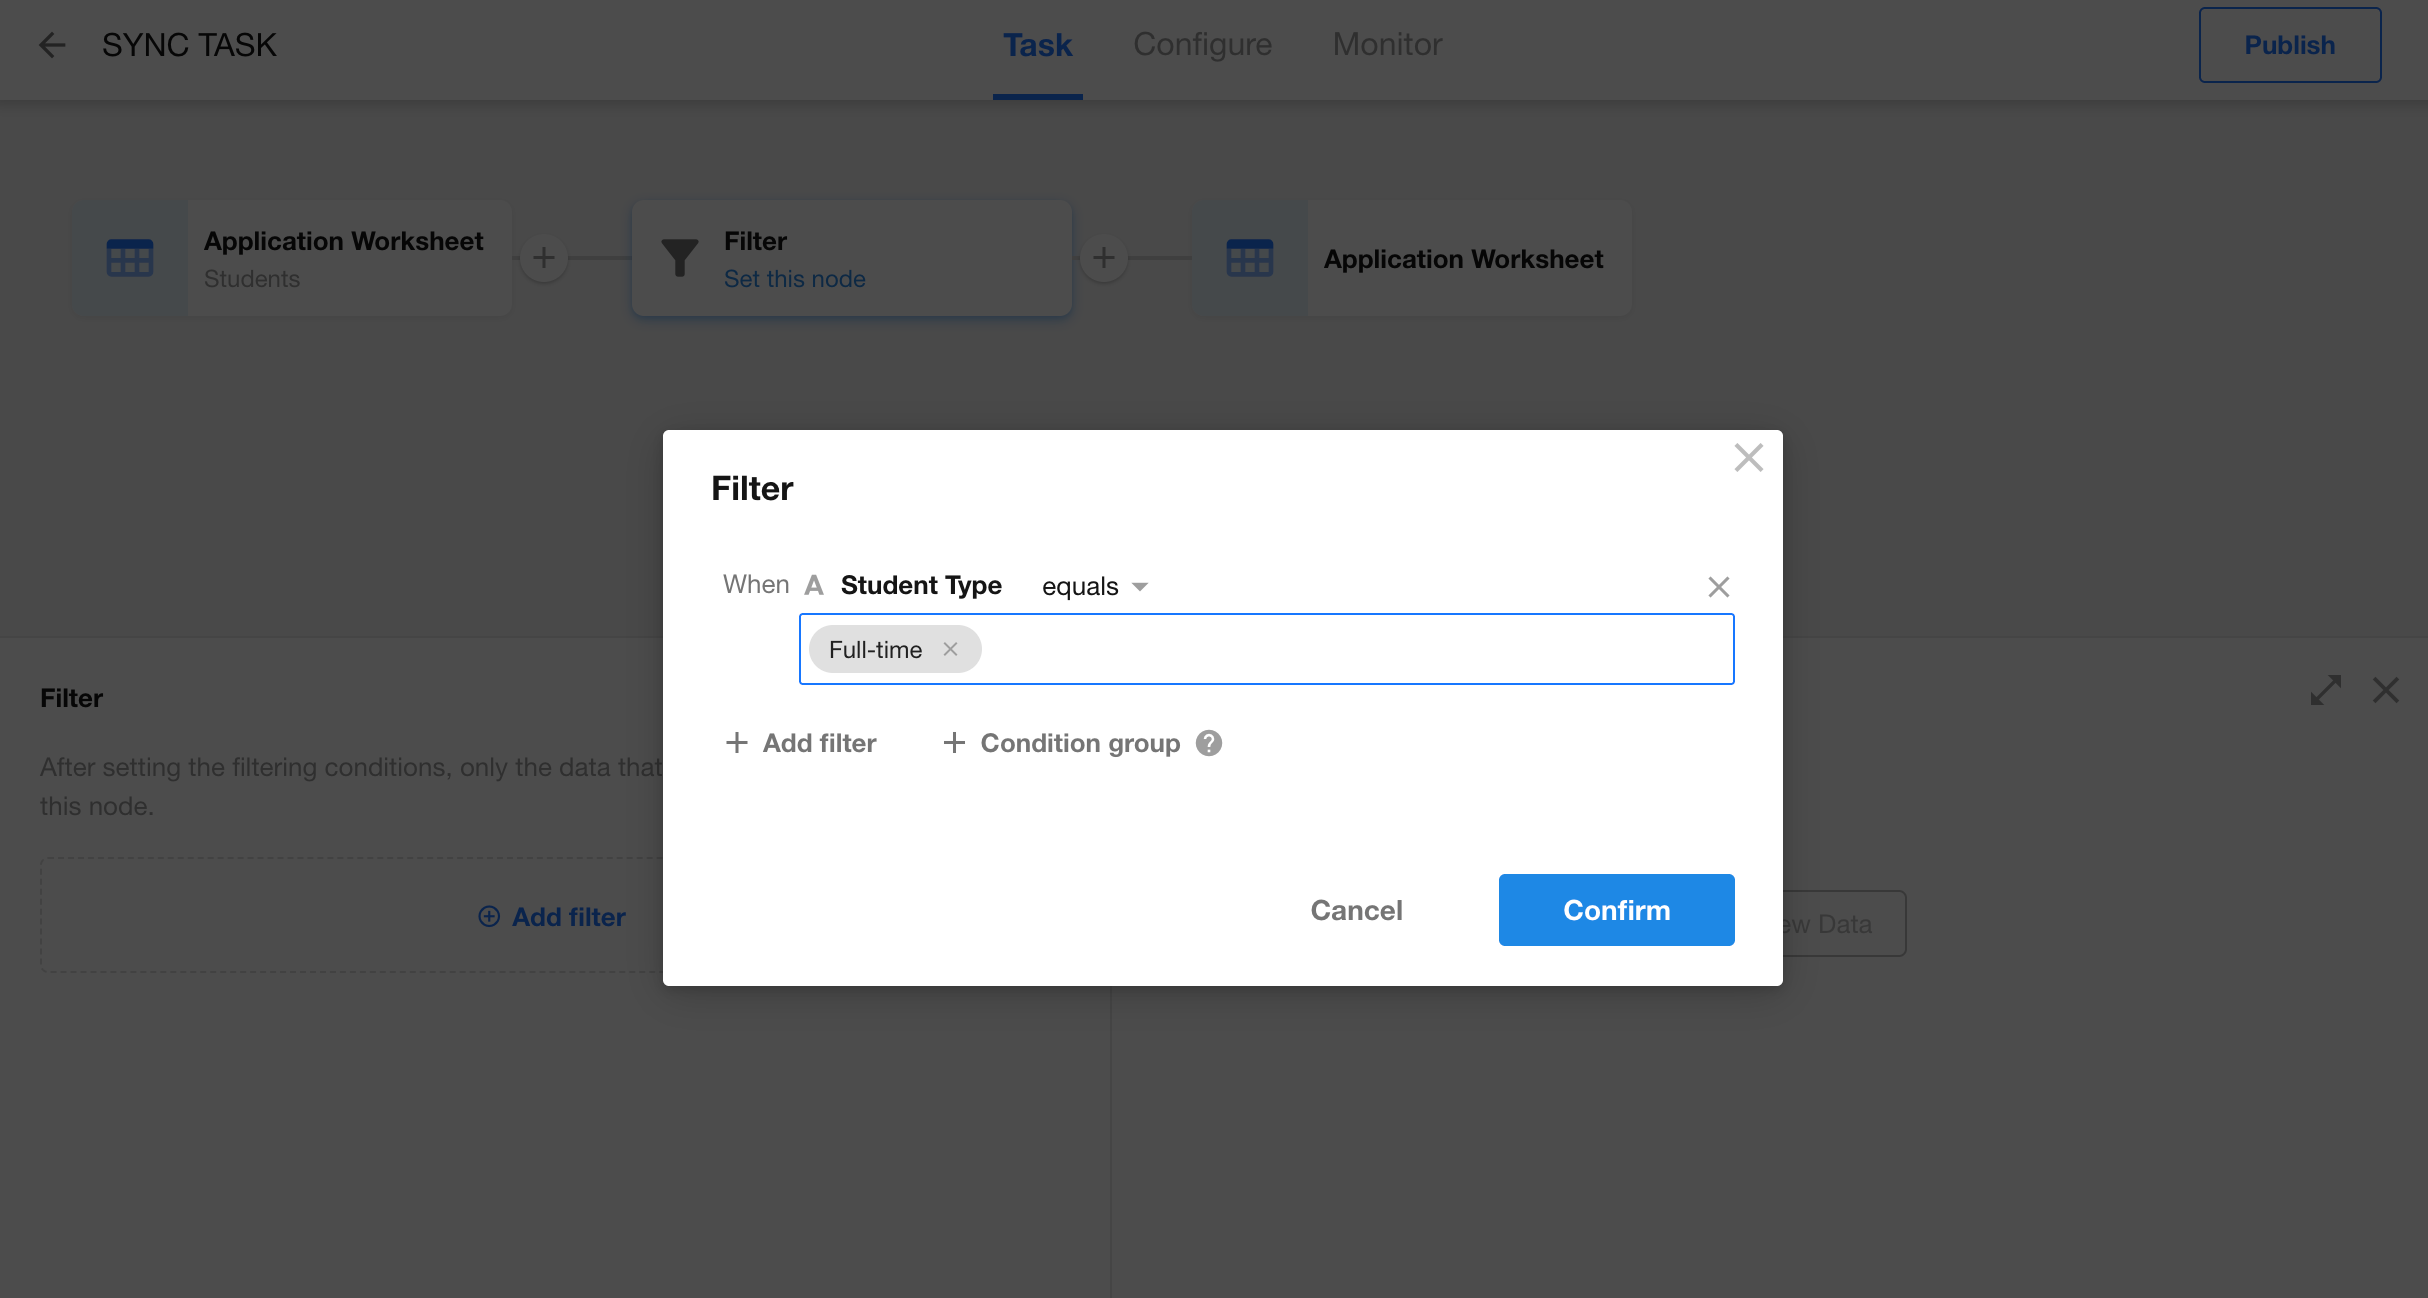
Add a Filter Node
Configure Filter Conditions
Join Tables
The Join Tables node enables cross-database table joins, supporting both HAP and external databases. By joining multiple tables based on defined conditions, you can obtain a more complete and enriched dataset.
This is especially useful for solving data silos between business systems, allowing data to become a truly valuable asset.
-
Comprehensive data: Join operations consolidate scattered information into a unified, complete dataset, enabling richer and more detailed data insights.
-
Multidimensional analysis: By establishing different relationships between tables, you can analyze data from multiple perspectives and dimensions.
How to Use
-
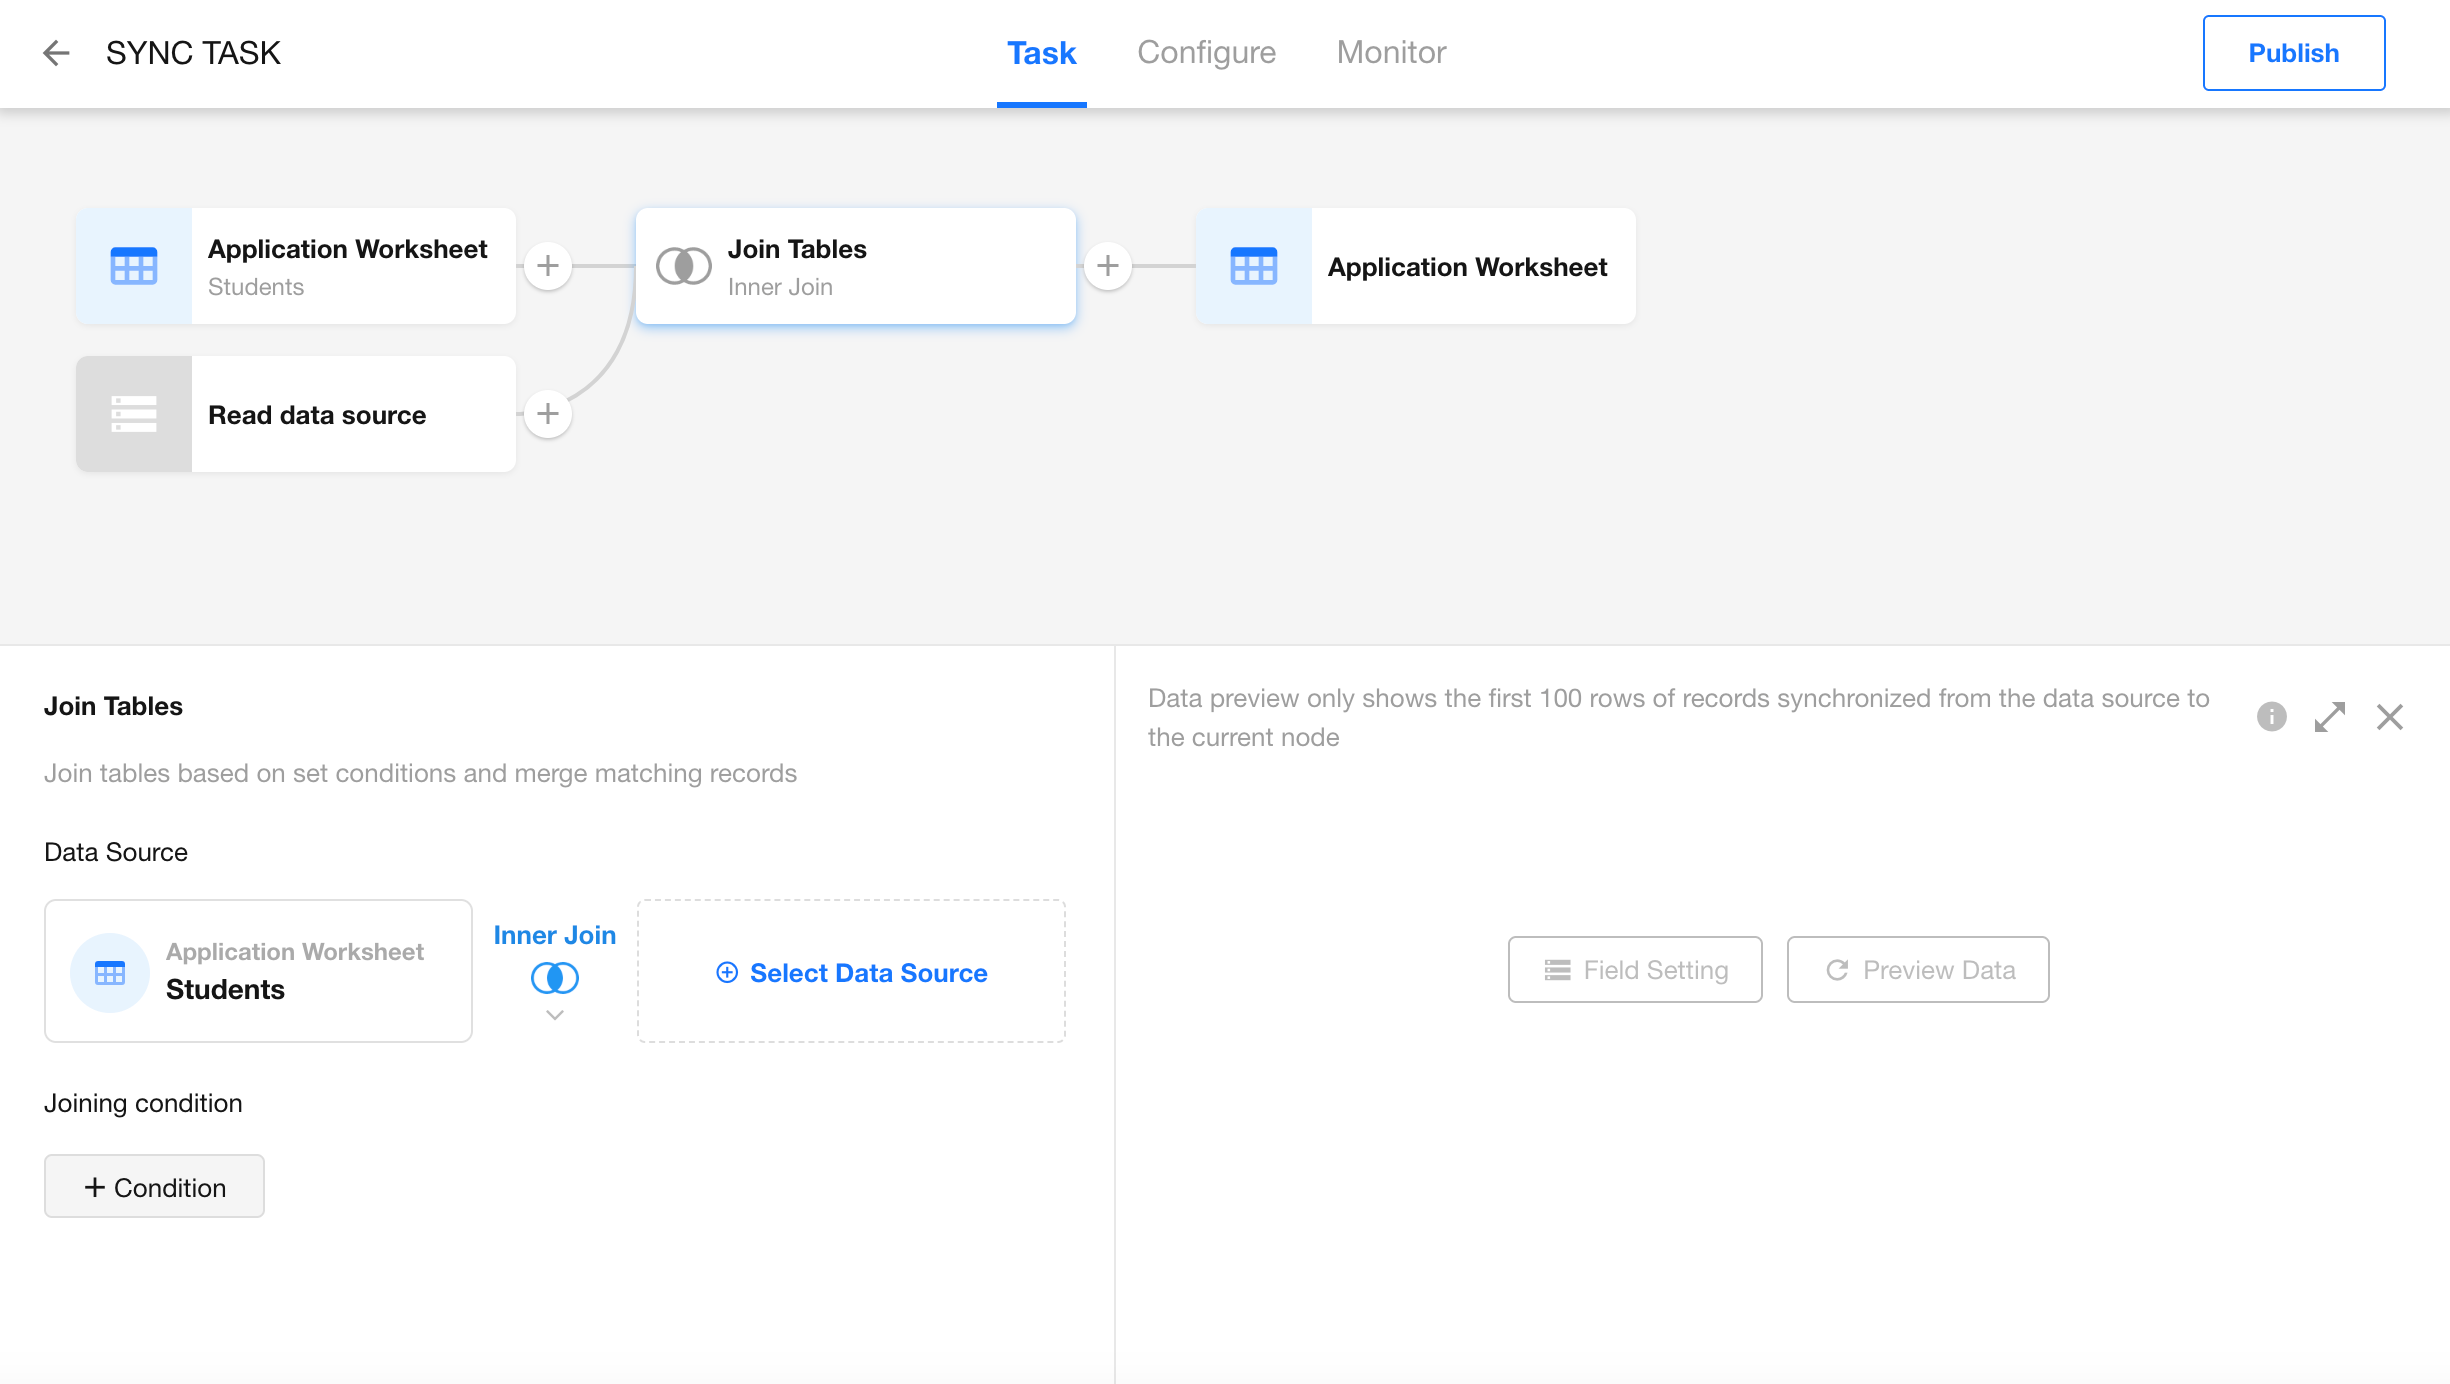
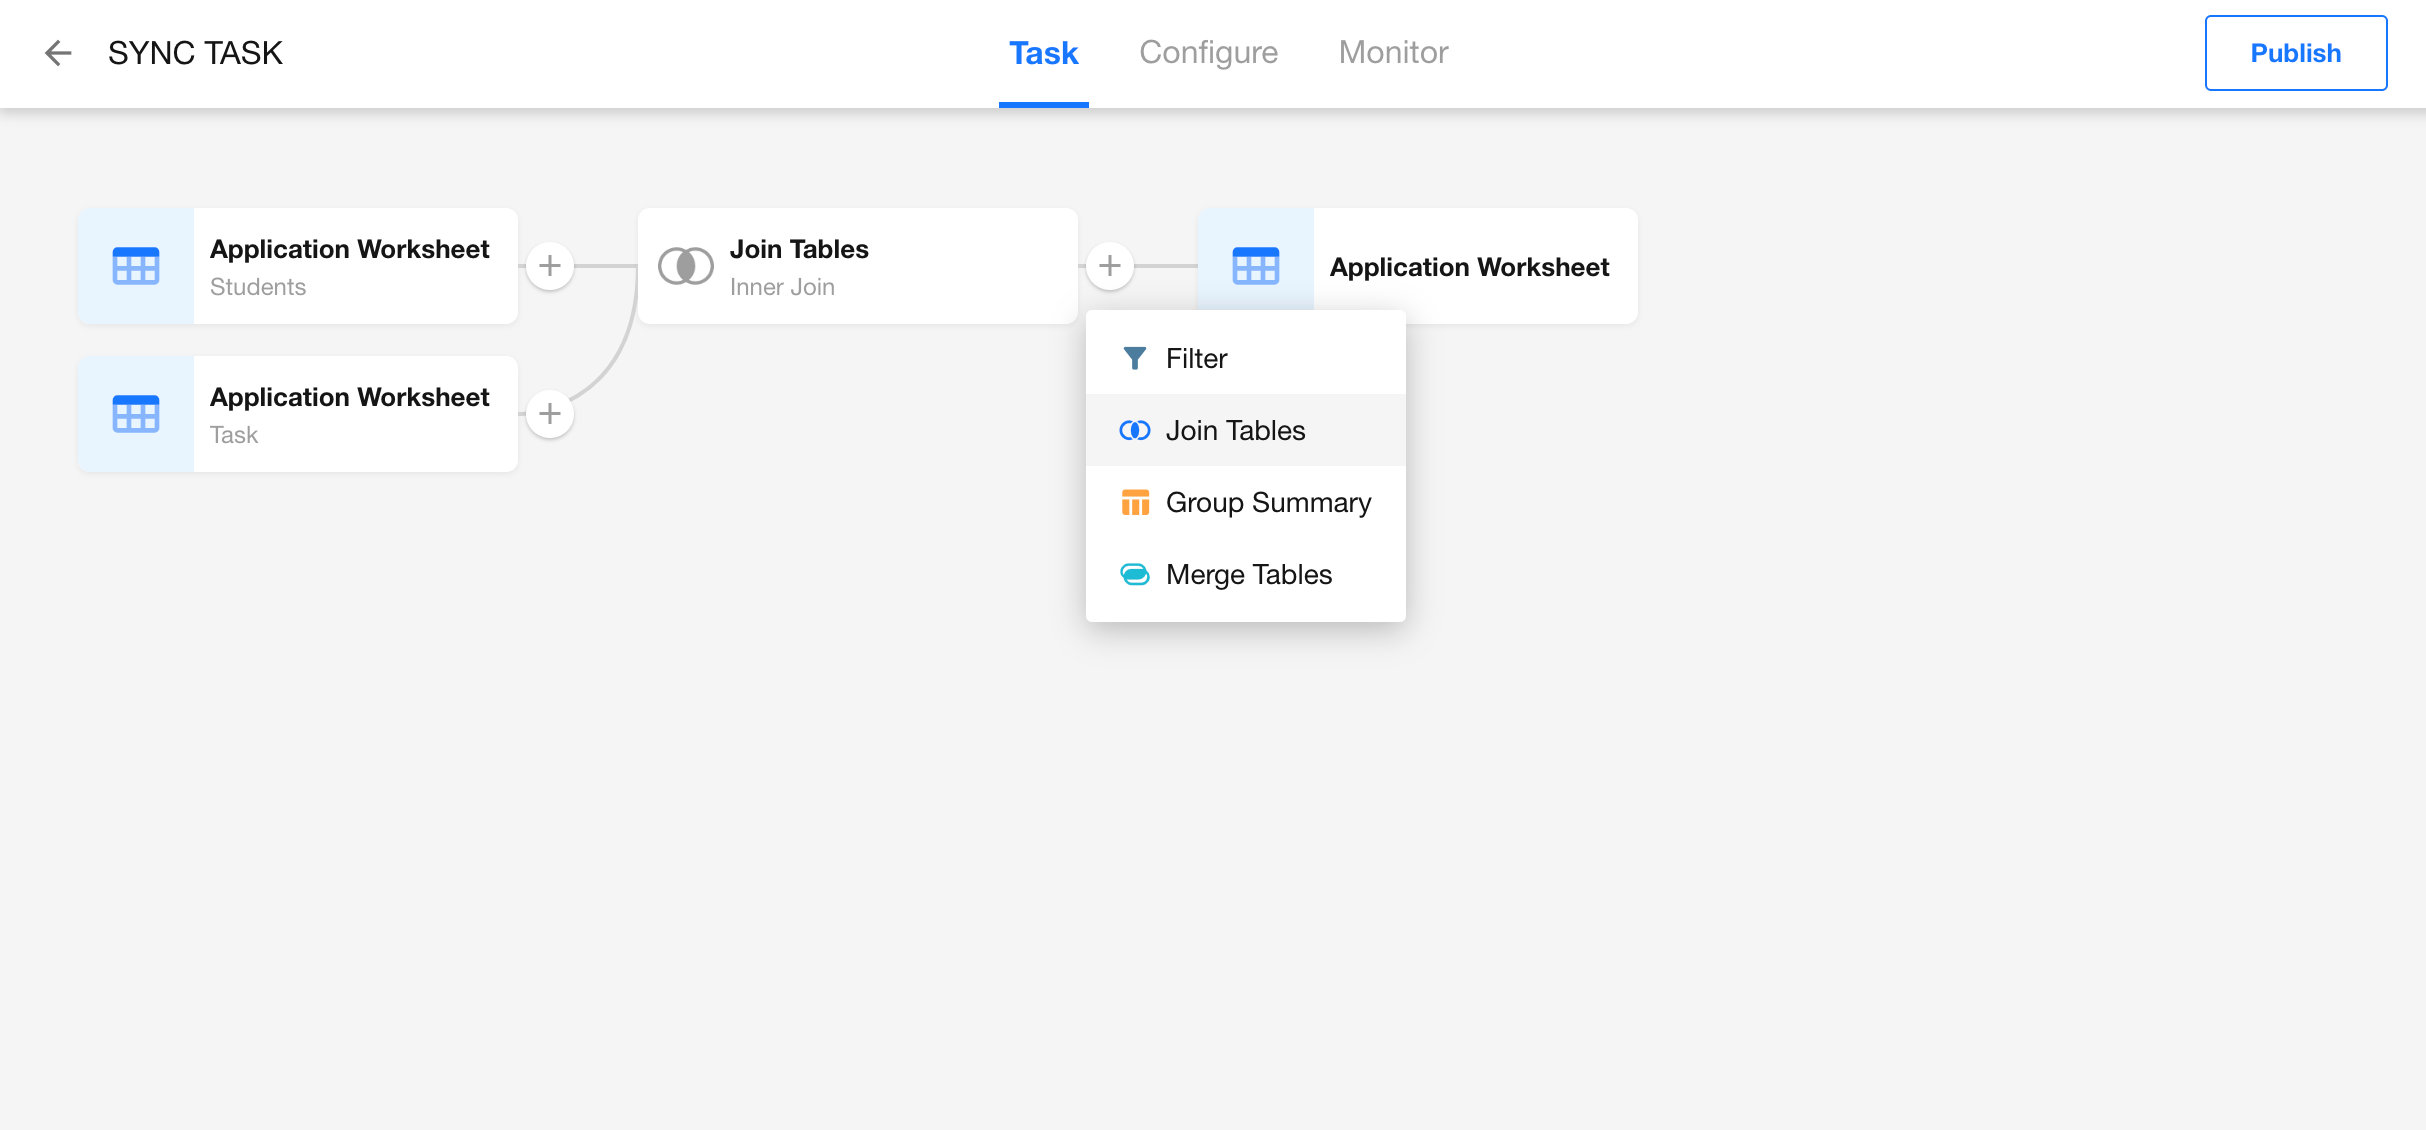
In any data sync task, hover between two nodes and click the “+” button to insert a Join Tables node.

-
After insertion, two nodes will appear: Read Data Source and Join Tables.
- Read Data Source: Select the data source you want to join — this can be a worksheet or an external database table.
- Join Tables: Configure join type and conditions.
If the app name, worksheet name, or field name contains special characters, it may cause selection errors or sync failures. The following characters are not allowed:
'~!@#$%^&*()-+=<>?:"|,./;'[]·!¥…()—《》?:“”【】、;‘,。『』「」 — spaces are also disallowed.
-
Configure Join Conditions
First, select the data source. Then return to the Join Tables node to set up the join fields and conditions.
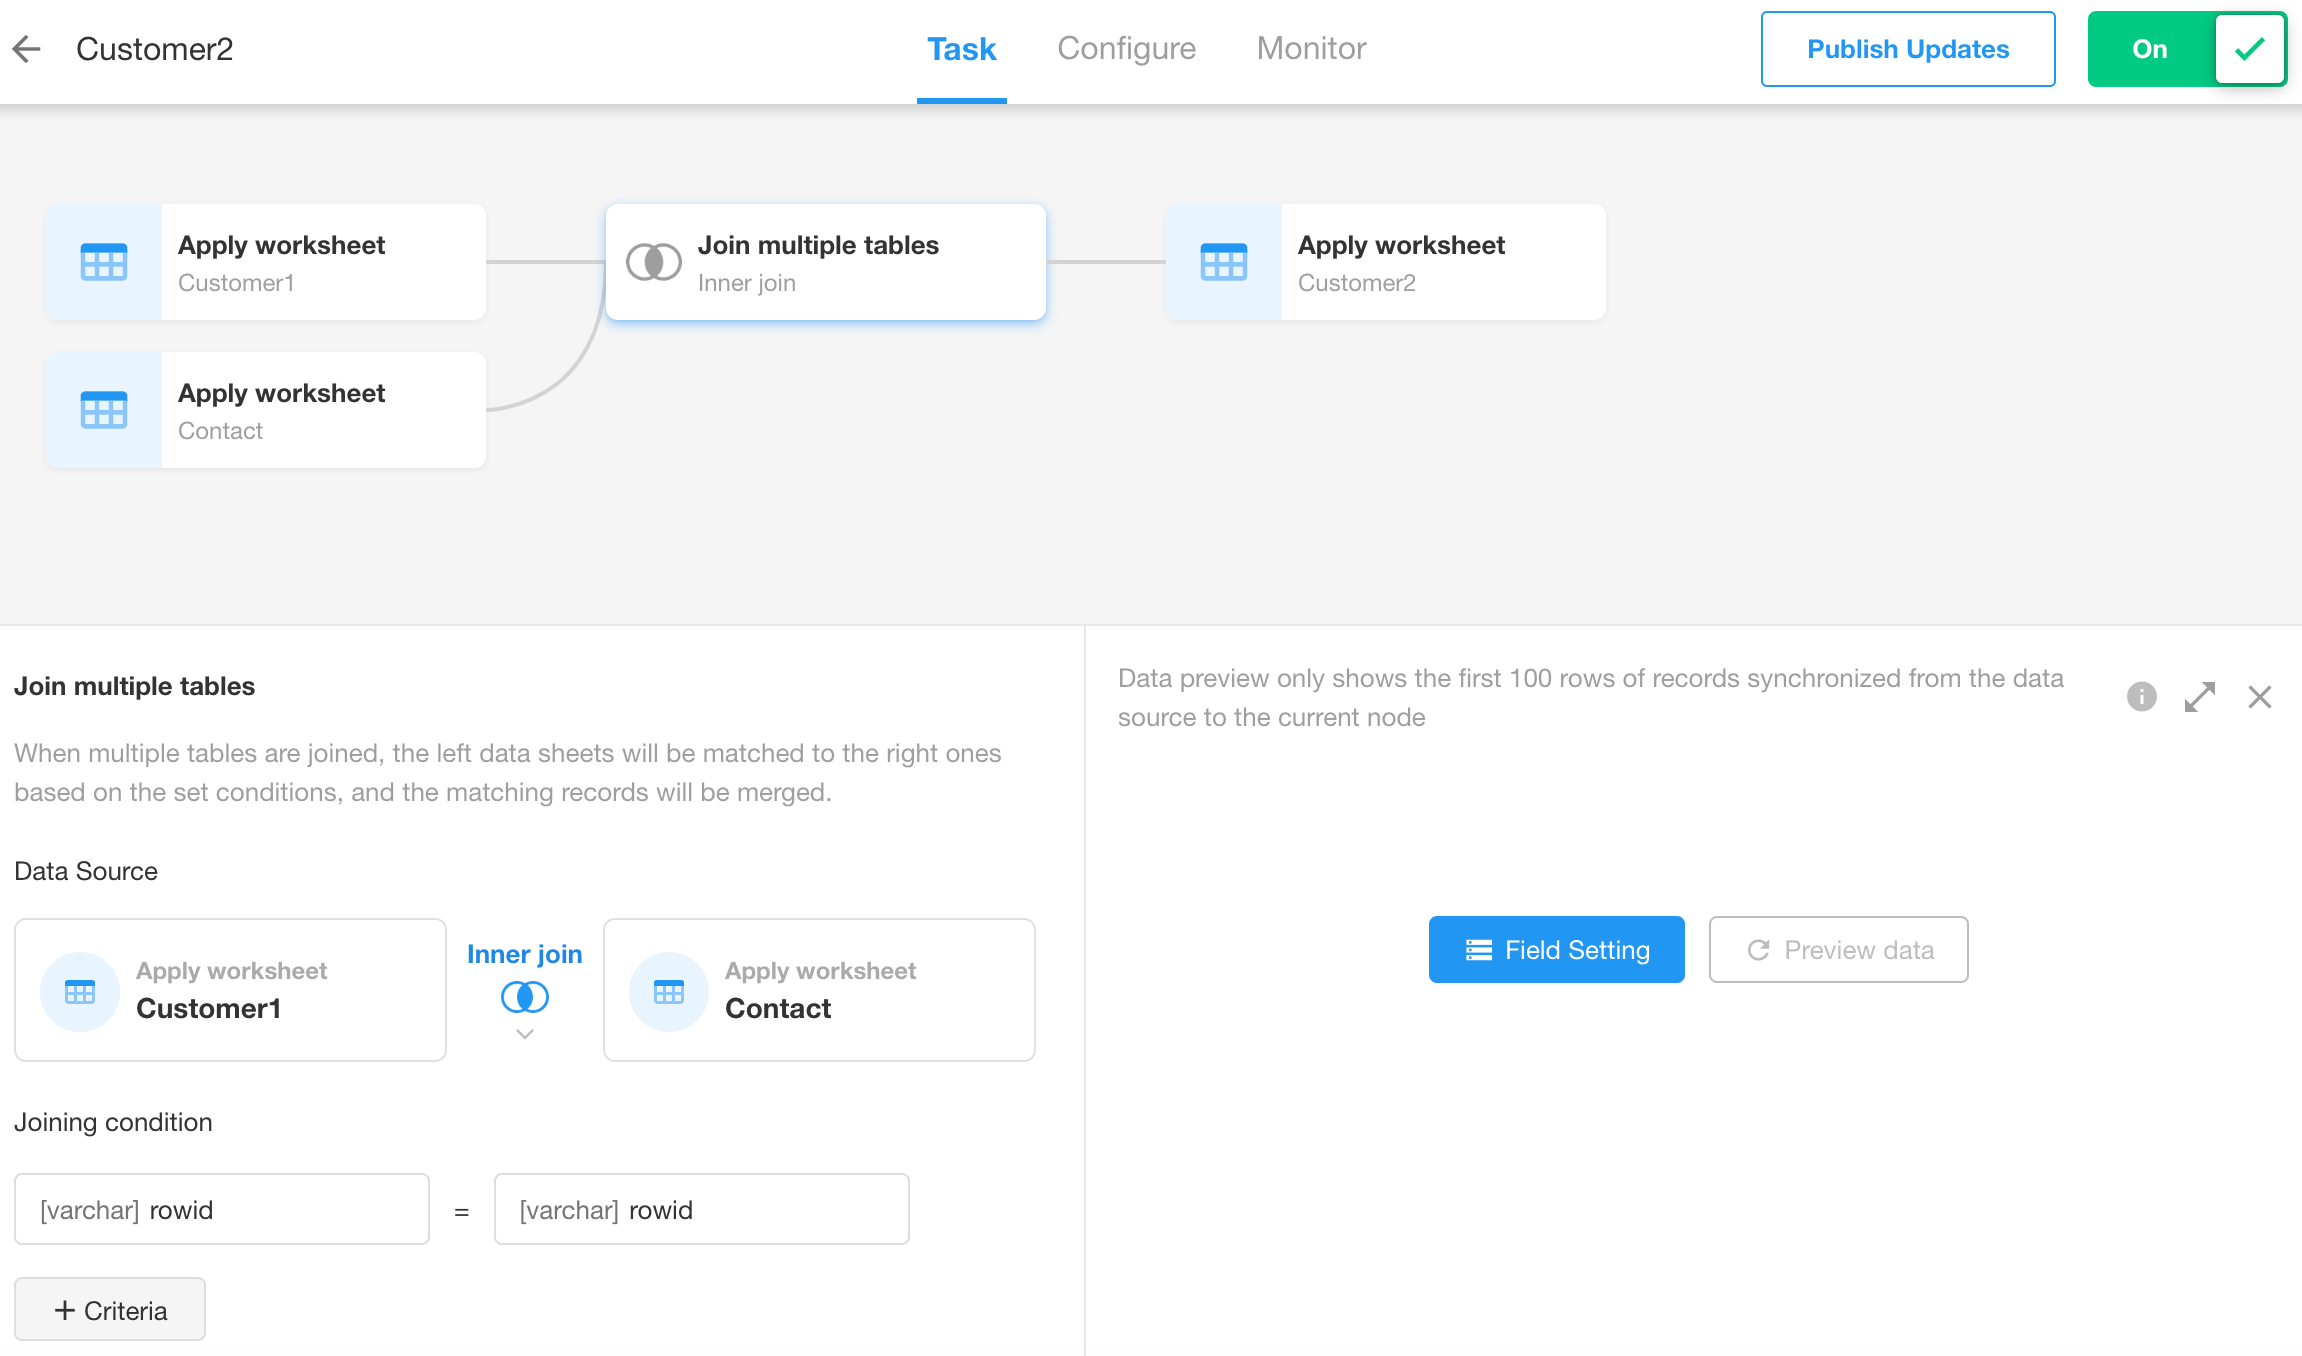
-
If you need to join more tables, simply add additional Join Tables nodes after the current one.
Types of Joins
-
Inner Join
Returns only the records that exist in both tables (1-to-1 match).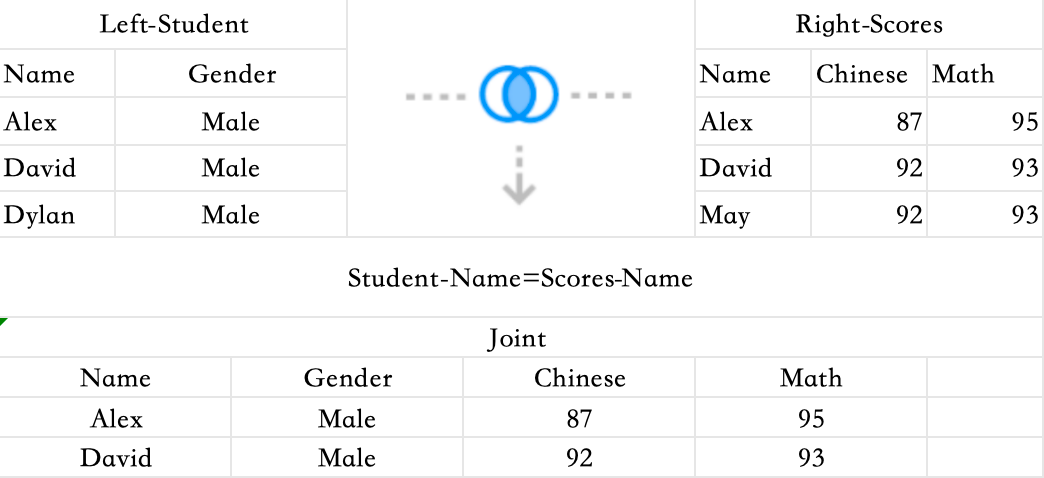
-
Left Join
Returns all records from the left table, and the matched records from the right table. If there's no match, the result isNULL.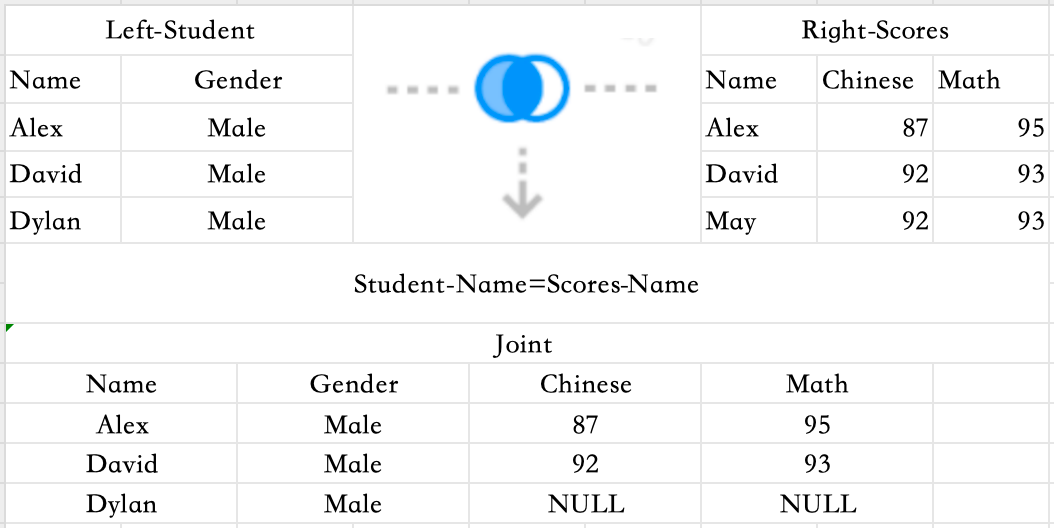
-
Right Join
The opposite of a Left Join — all records from the right table are returned, with matched data from the left.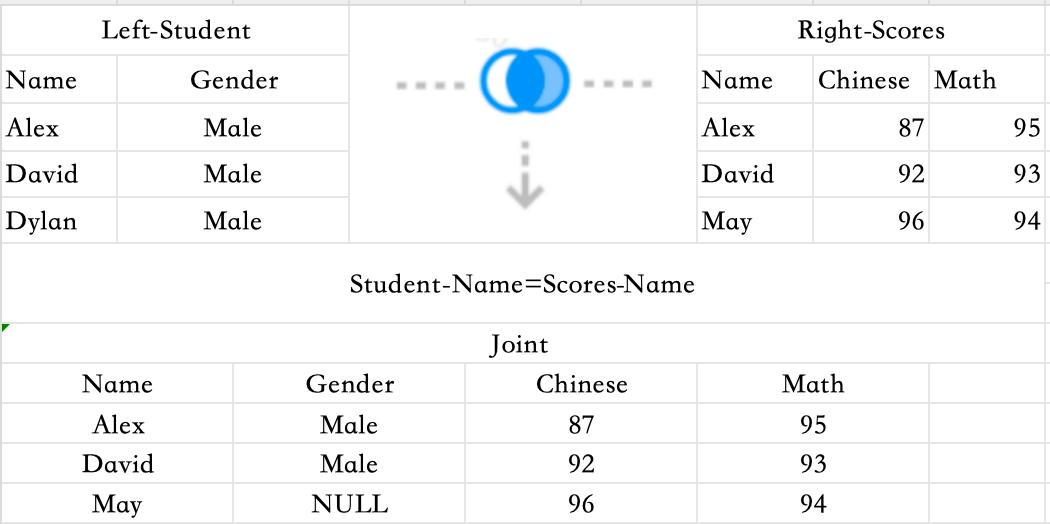
Join Limitations
- Join Tables nodes can be added between any nodes.
- The same data source, database, or table cannot be joined multiple times.
- Field names from both tables must be unique — rename fields if conflicts occur.
- If joining from a database, the primary key column must be selected; if joining from a worksheet, the row ID is required.
Use Case Example
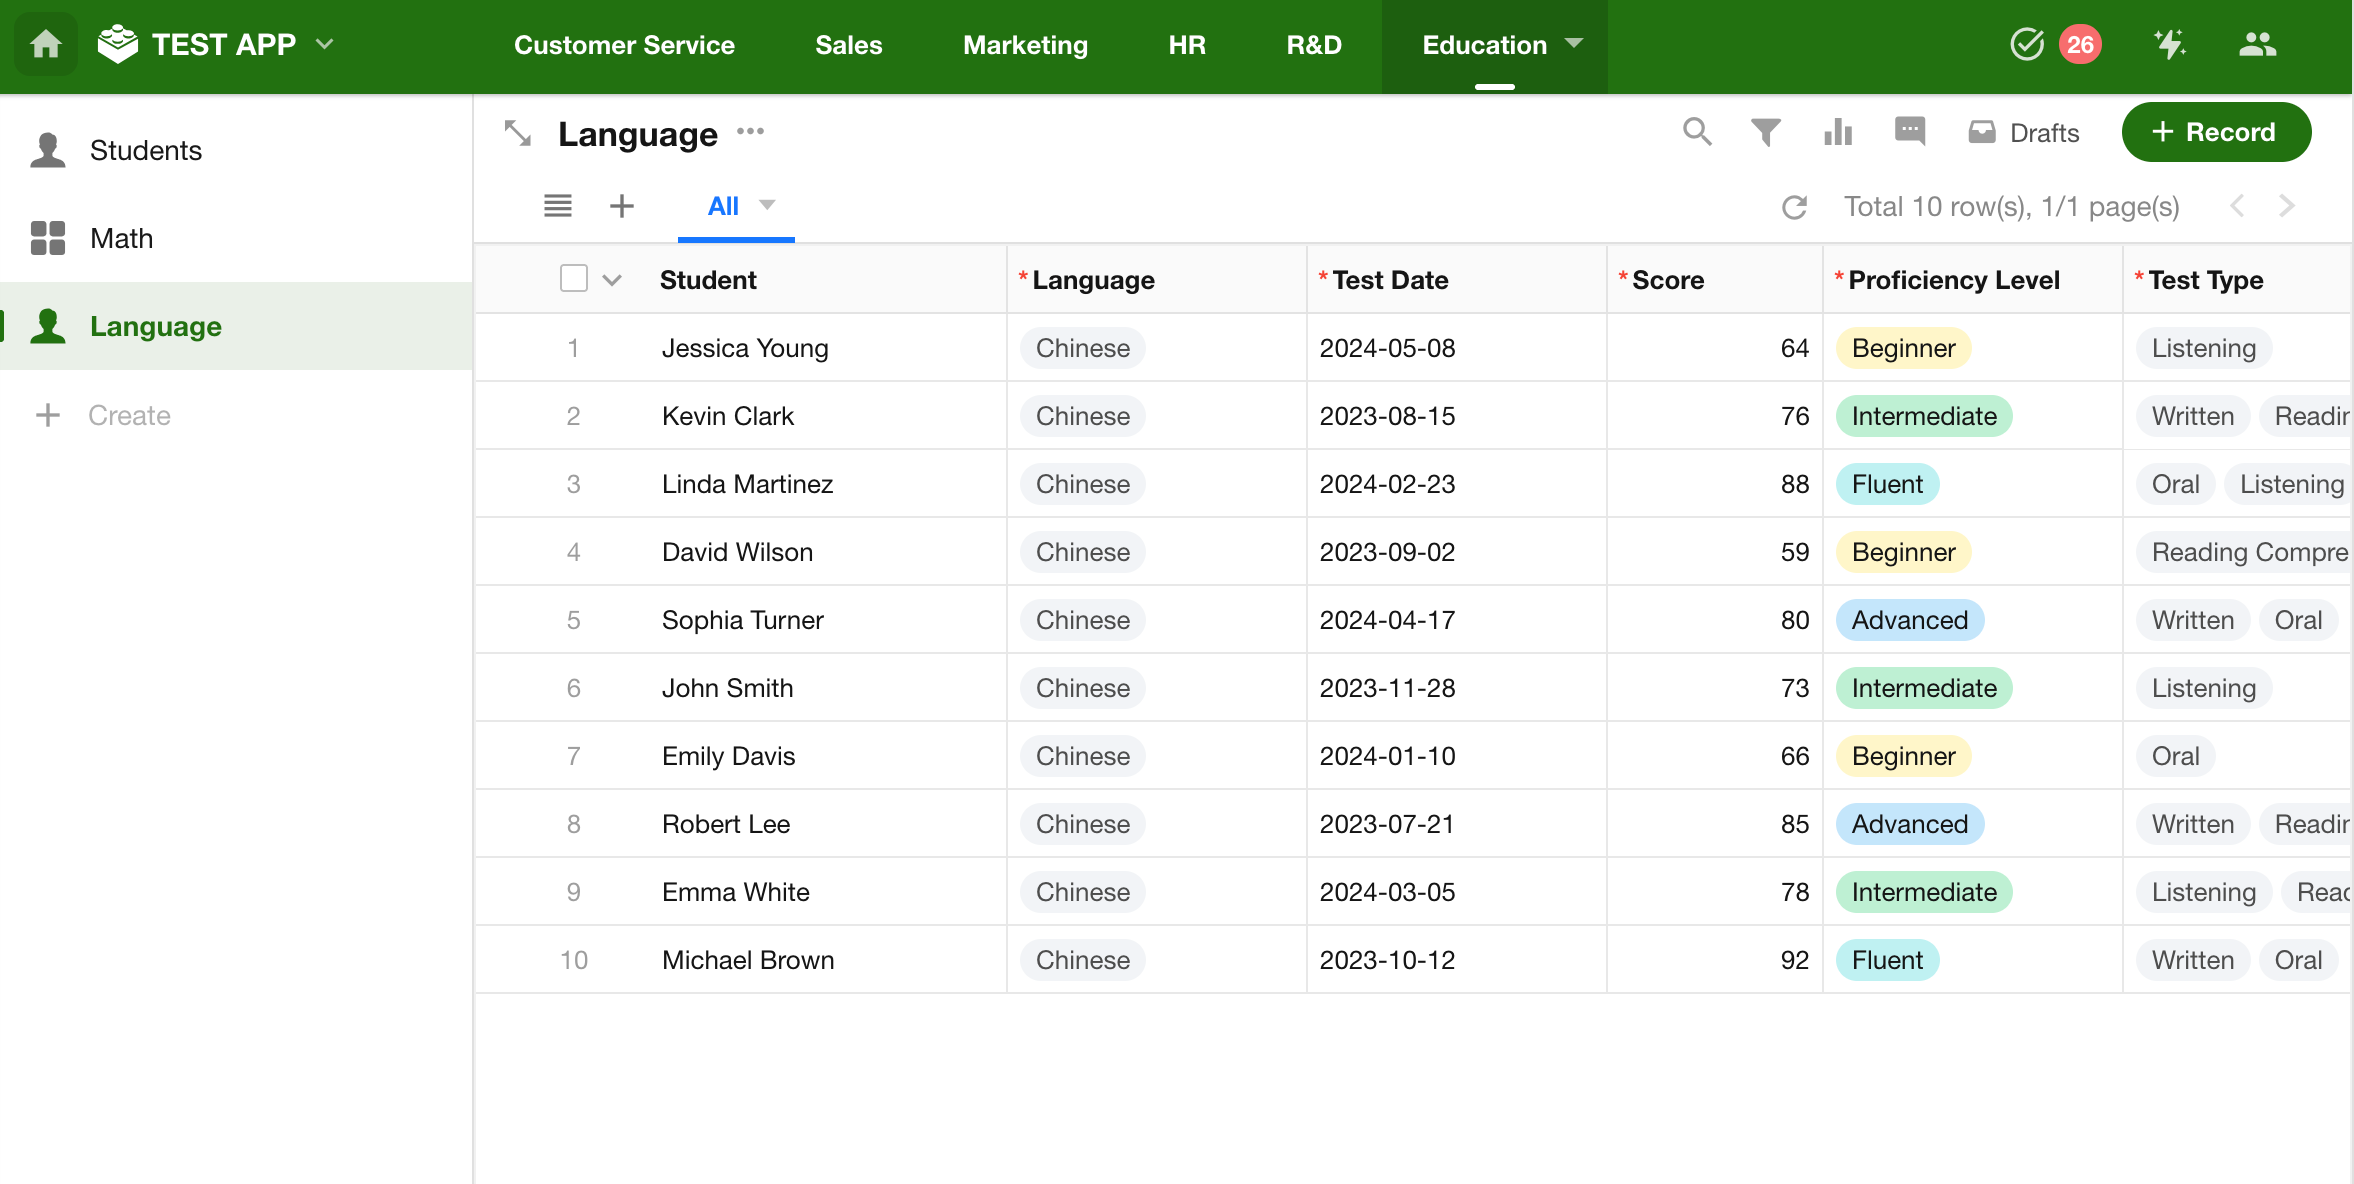
Assume you have three worksheets: Students, Math Scores, and Language Scores. If you want to display the scores for each subject in a single table for every student, you can use the Join Tables node to merge the data from all three worksheets into one.
-
Prepare Your Data
-
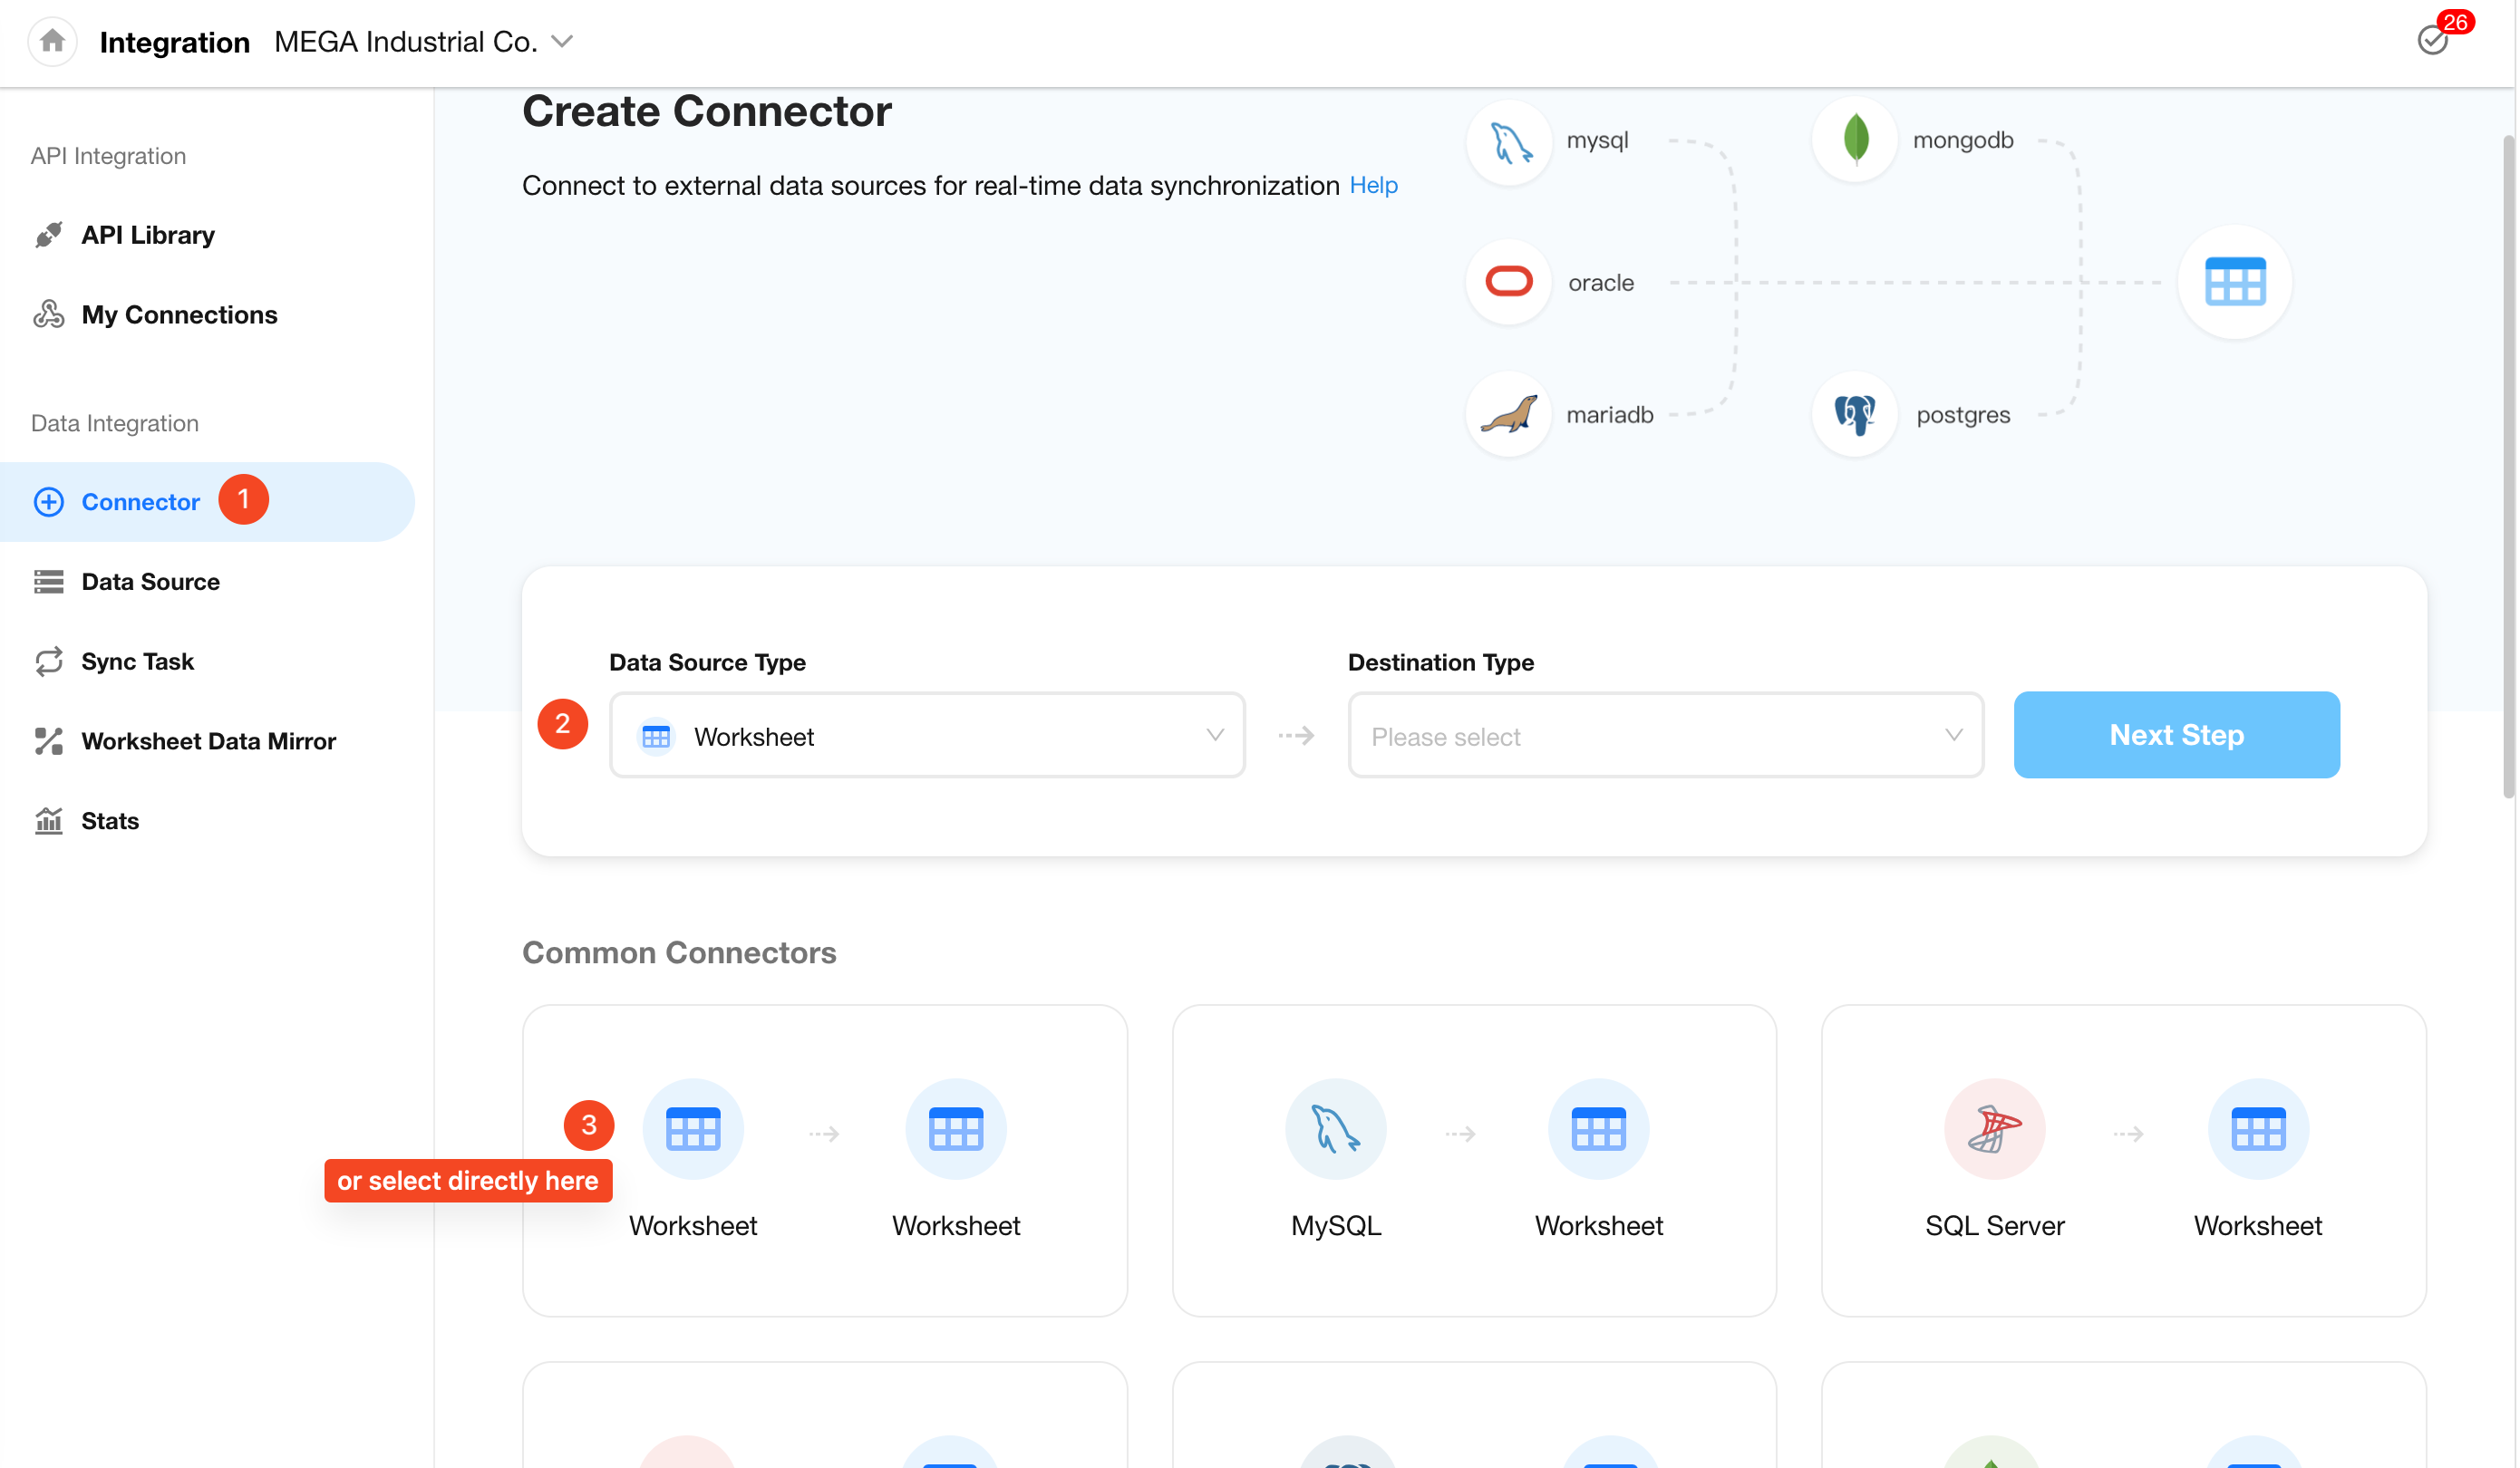
Create a Sync Task
-
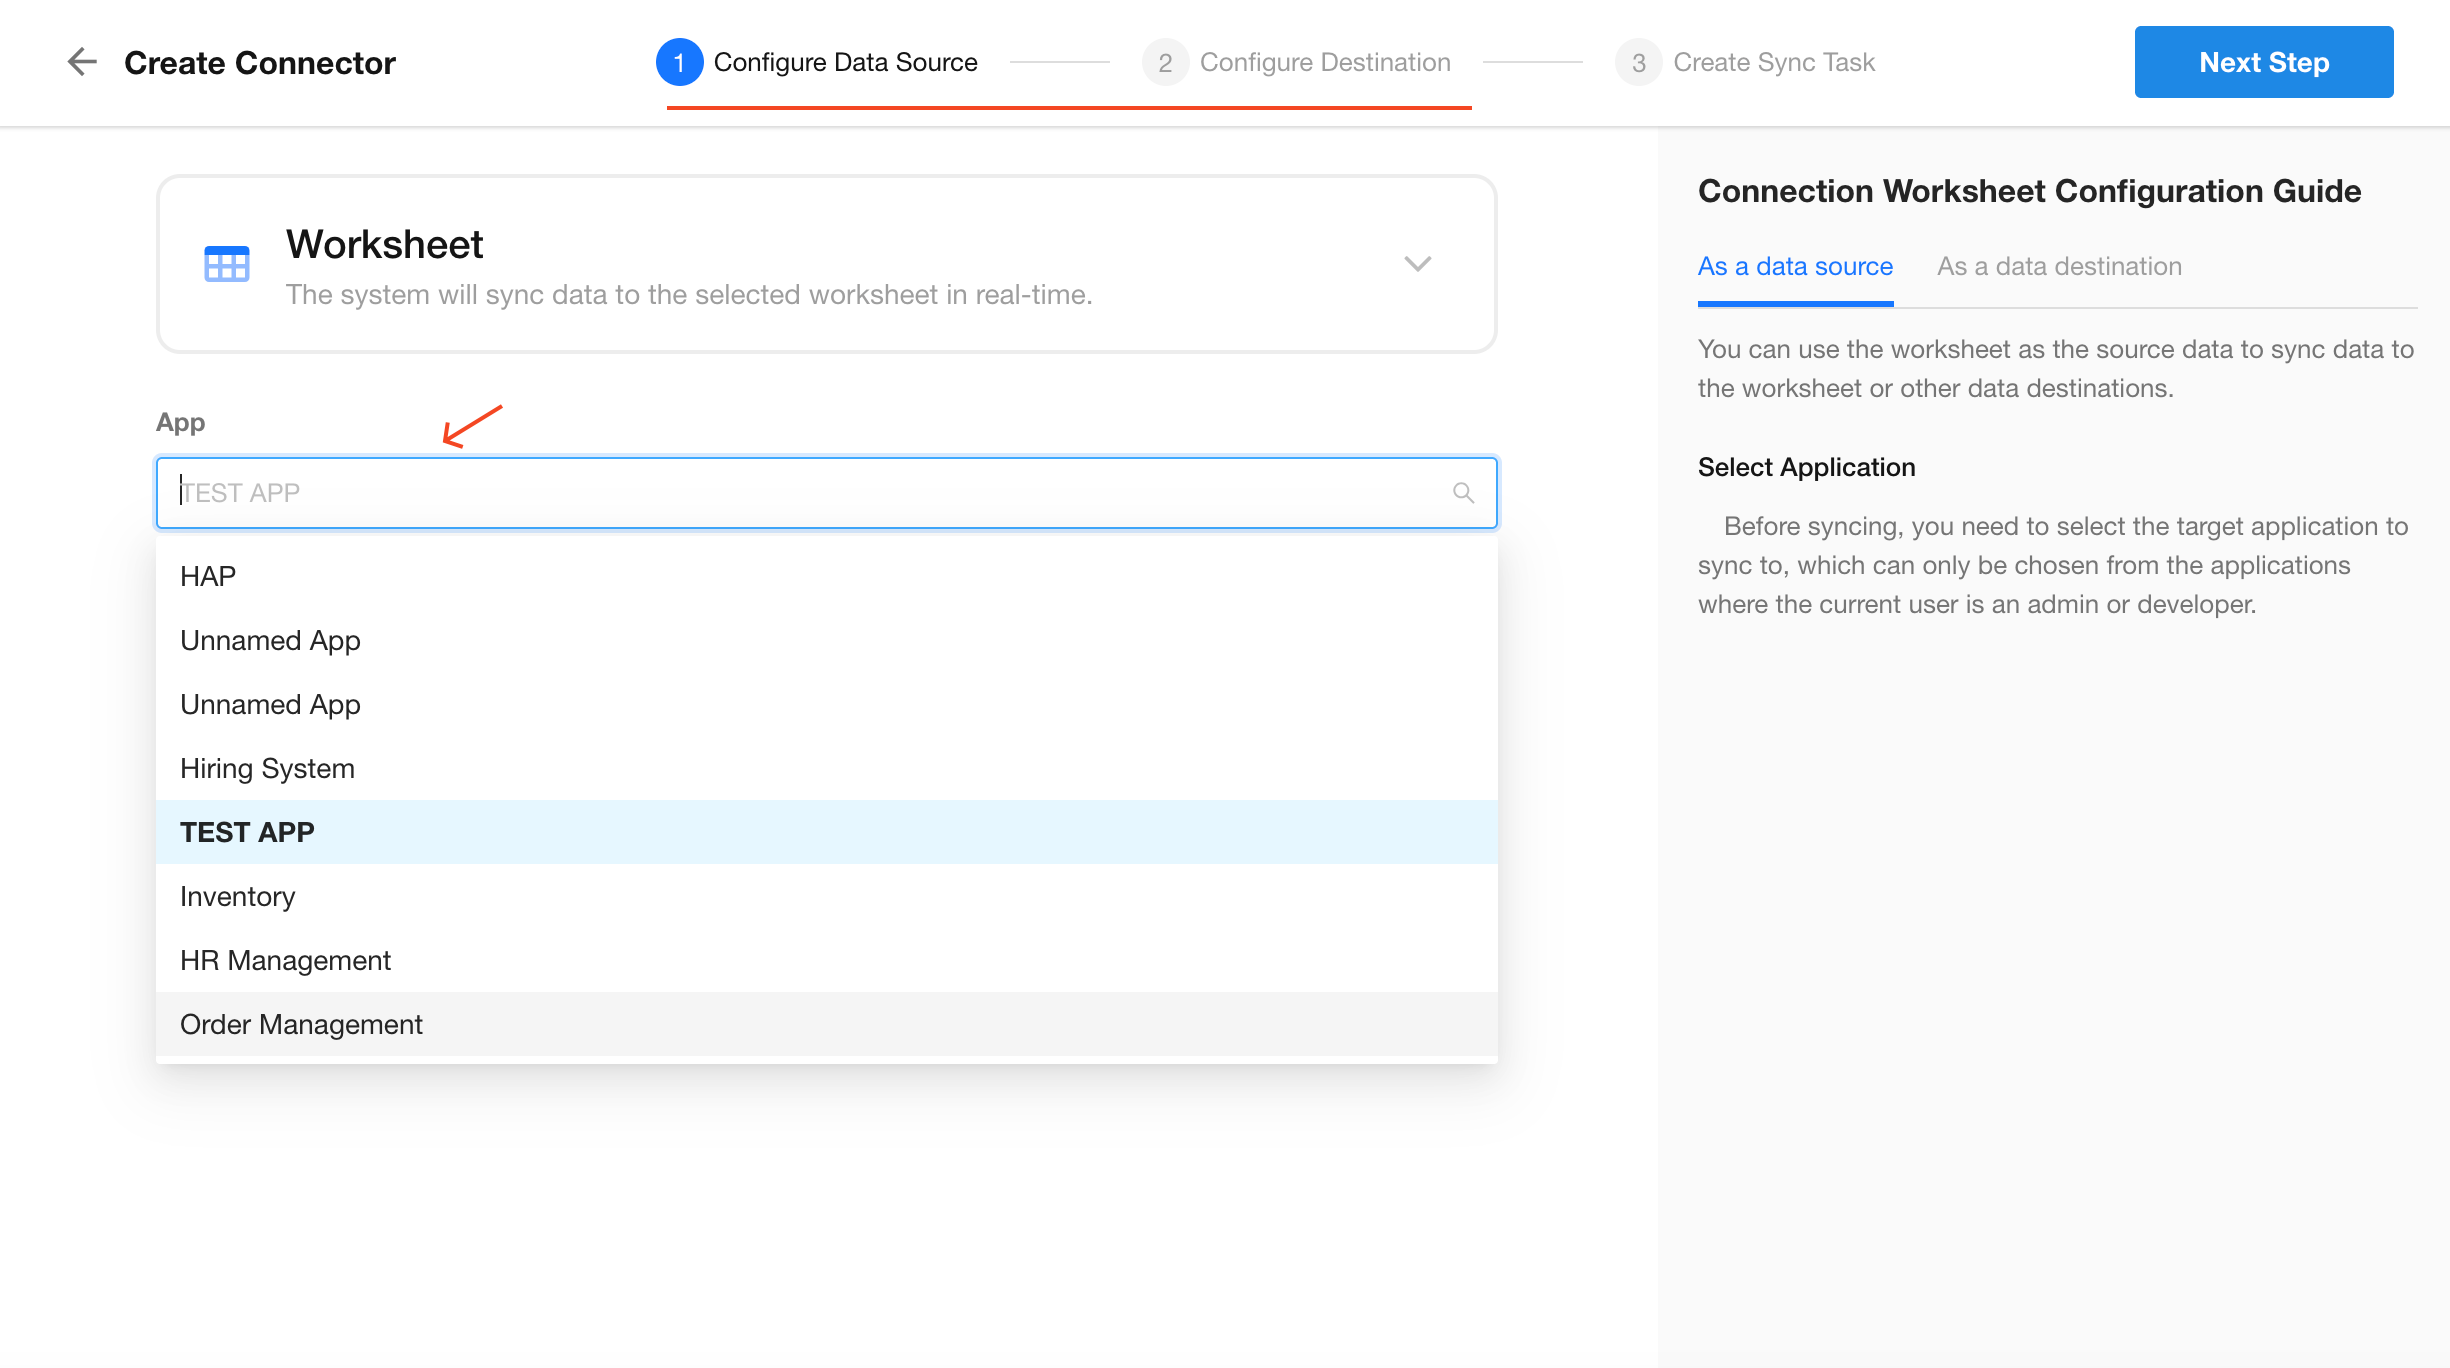
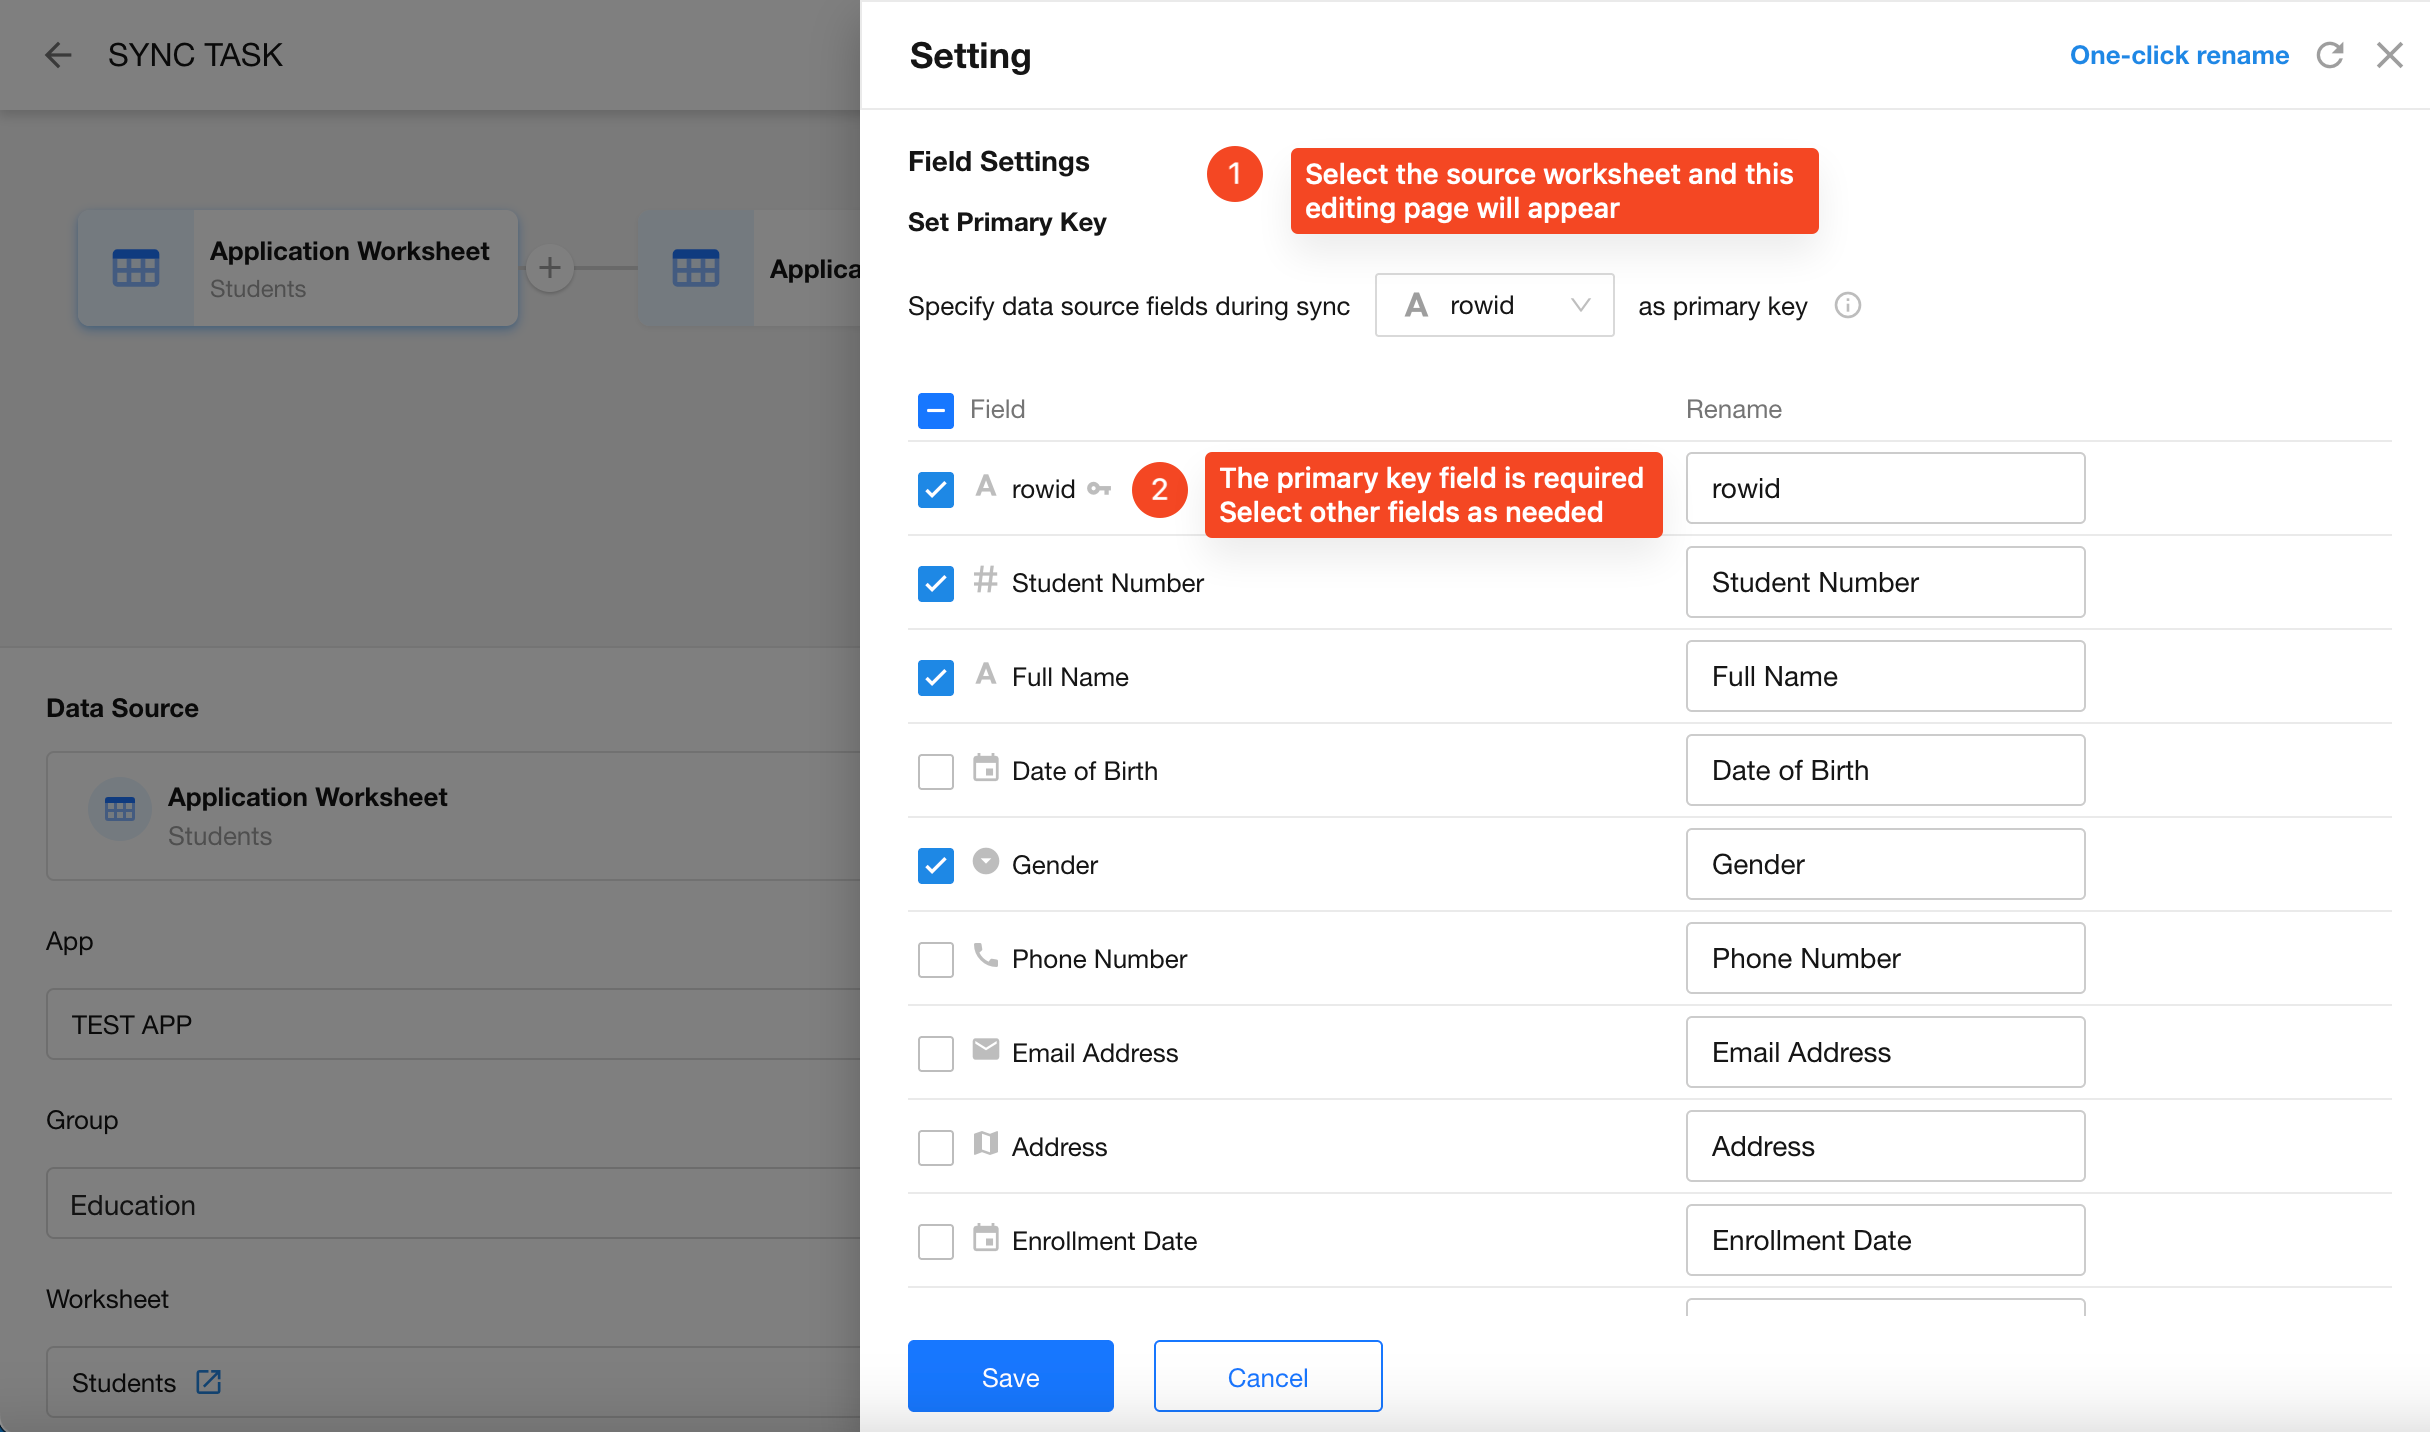
Configure Data Sources and Destination
-
Choose Sync Mode: "Require Data Processing While Synchronizing"
If the task only syncs raw data without transformation, you can select "Sync Data Only".
-
Add a Join Tables Node
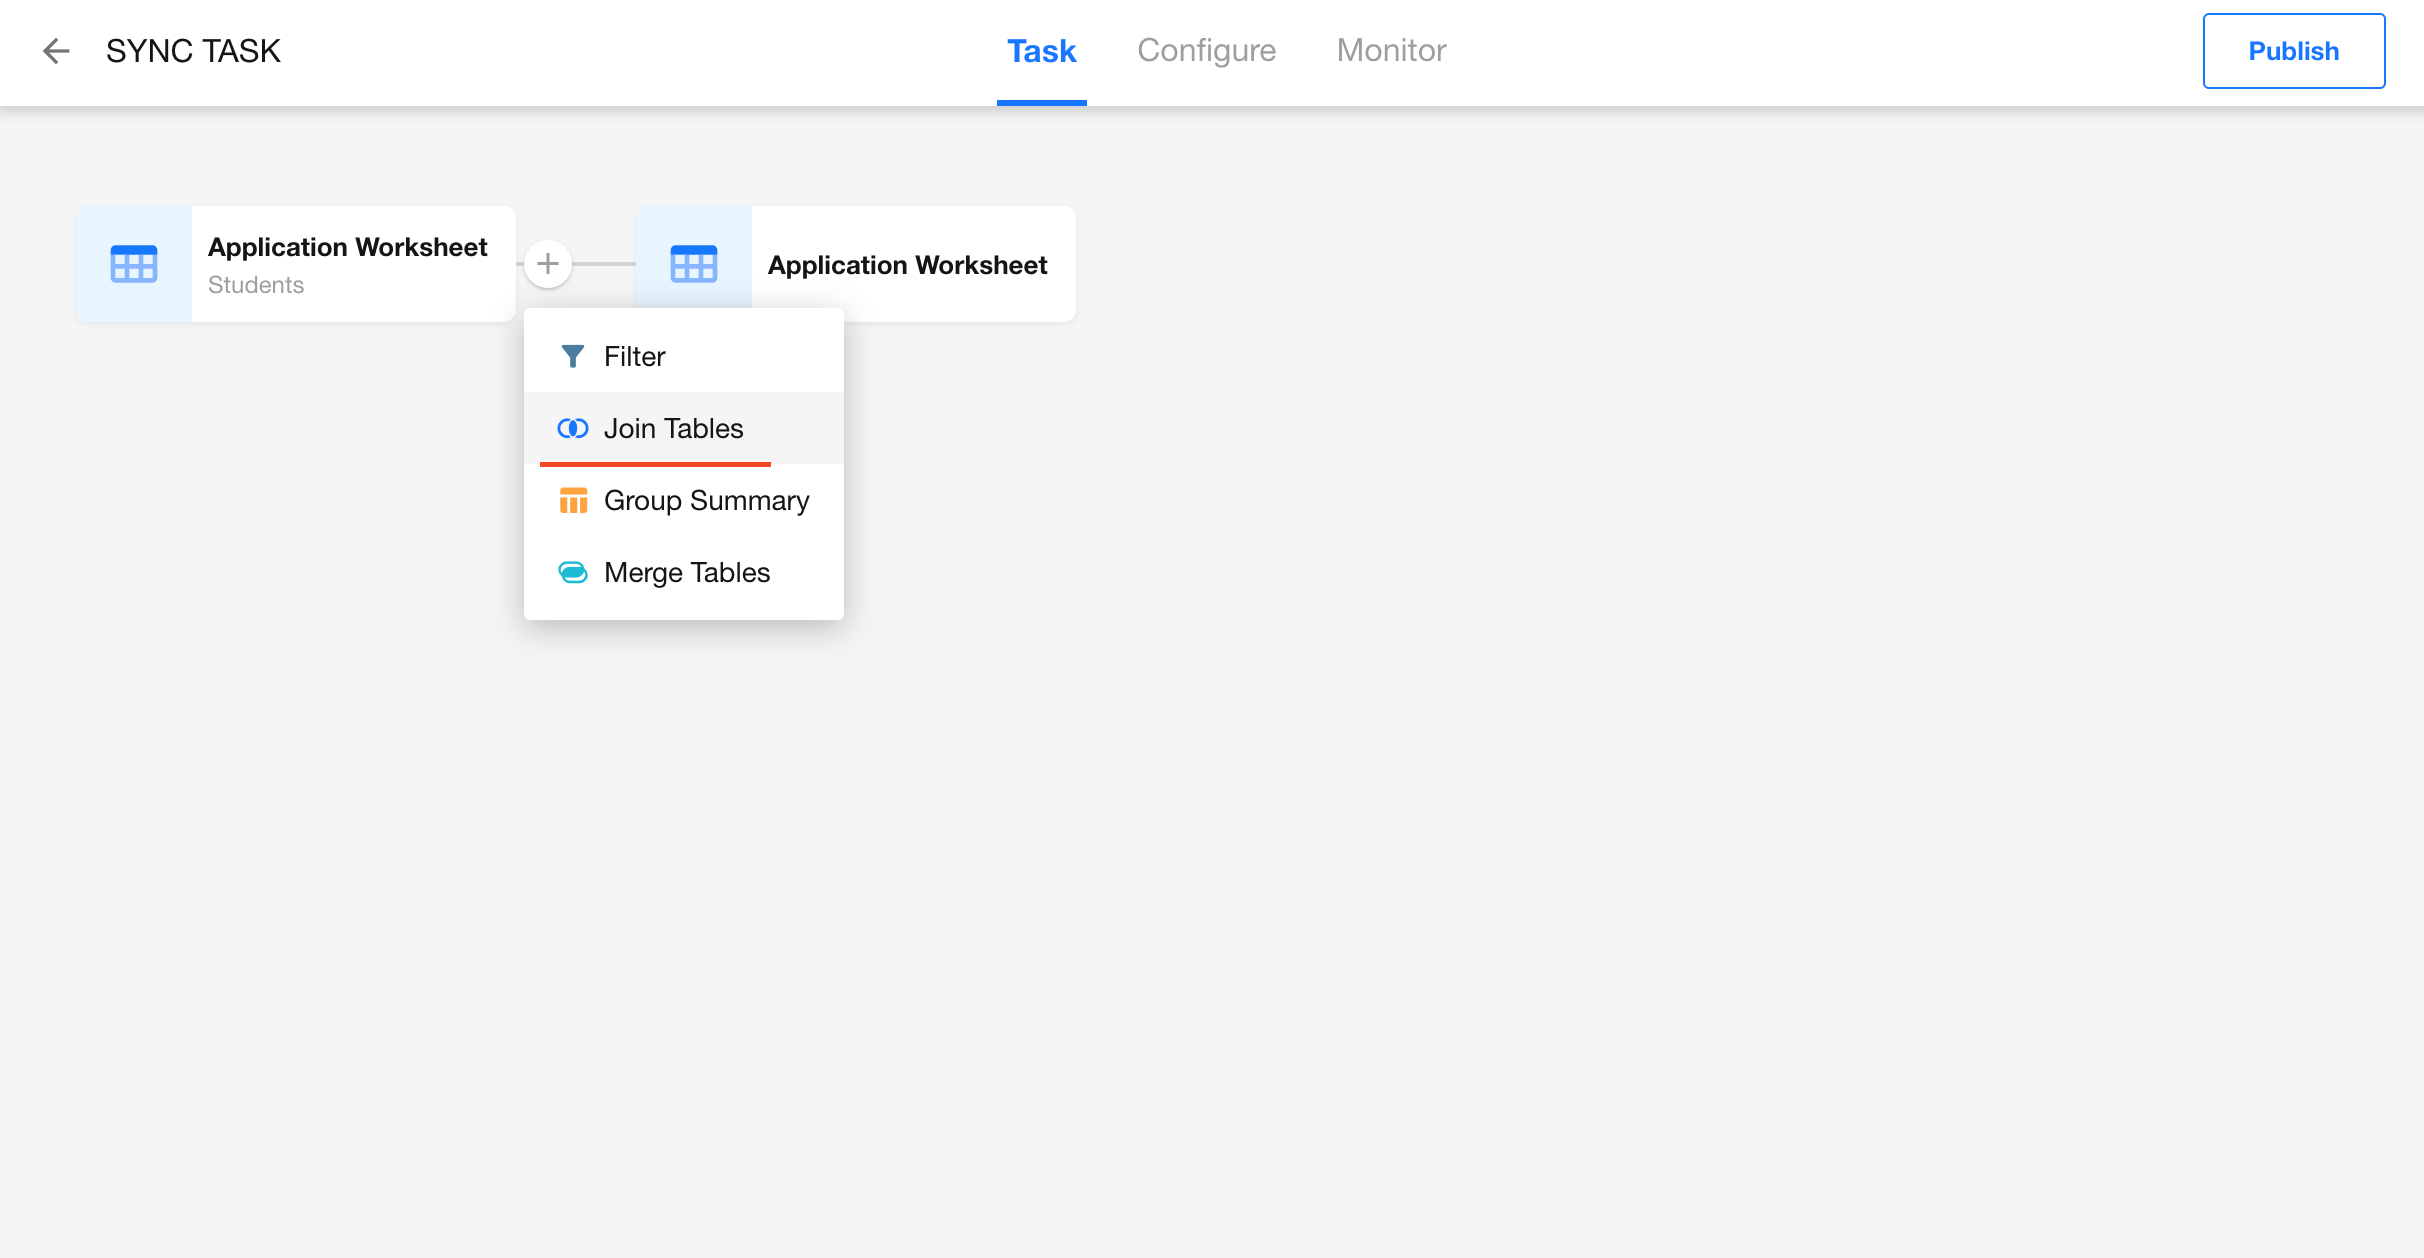
-
Configure Data Sources for Join
After adding a Join Tables node, you’ll see two nodes appear:
- Read Data Source: Select the second worksheet, e.g., Language Scores. To distinguish the field source, rename the score field as Language Score.
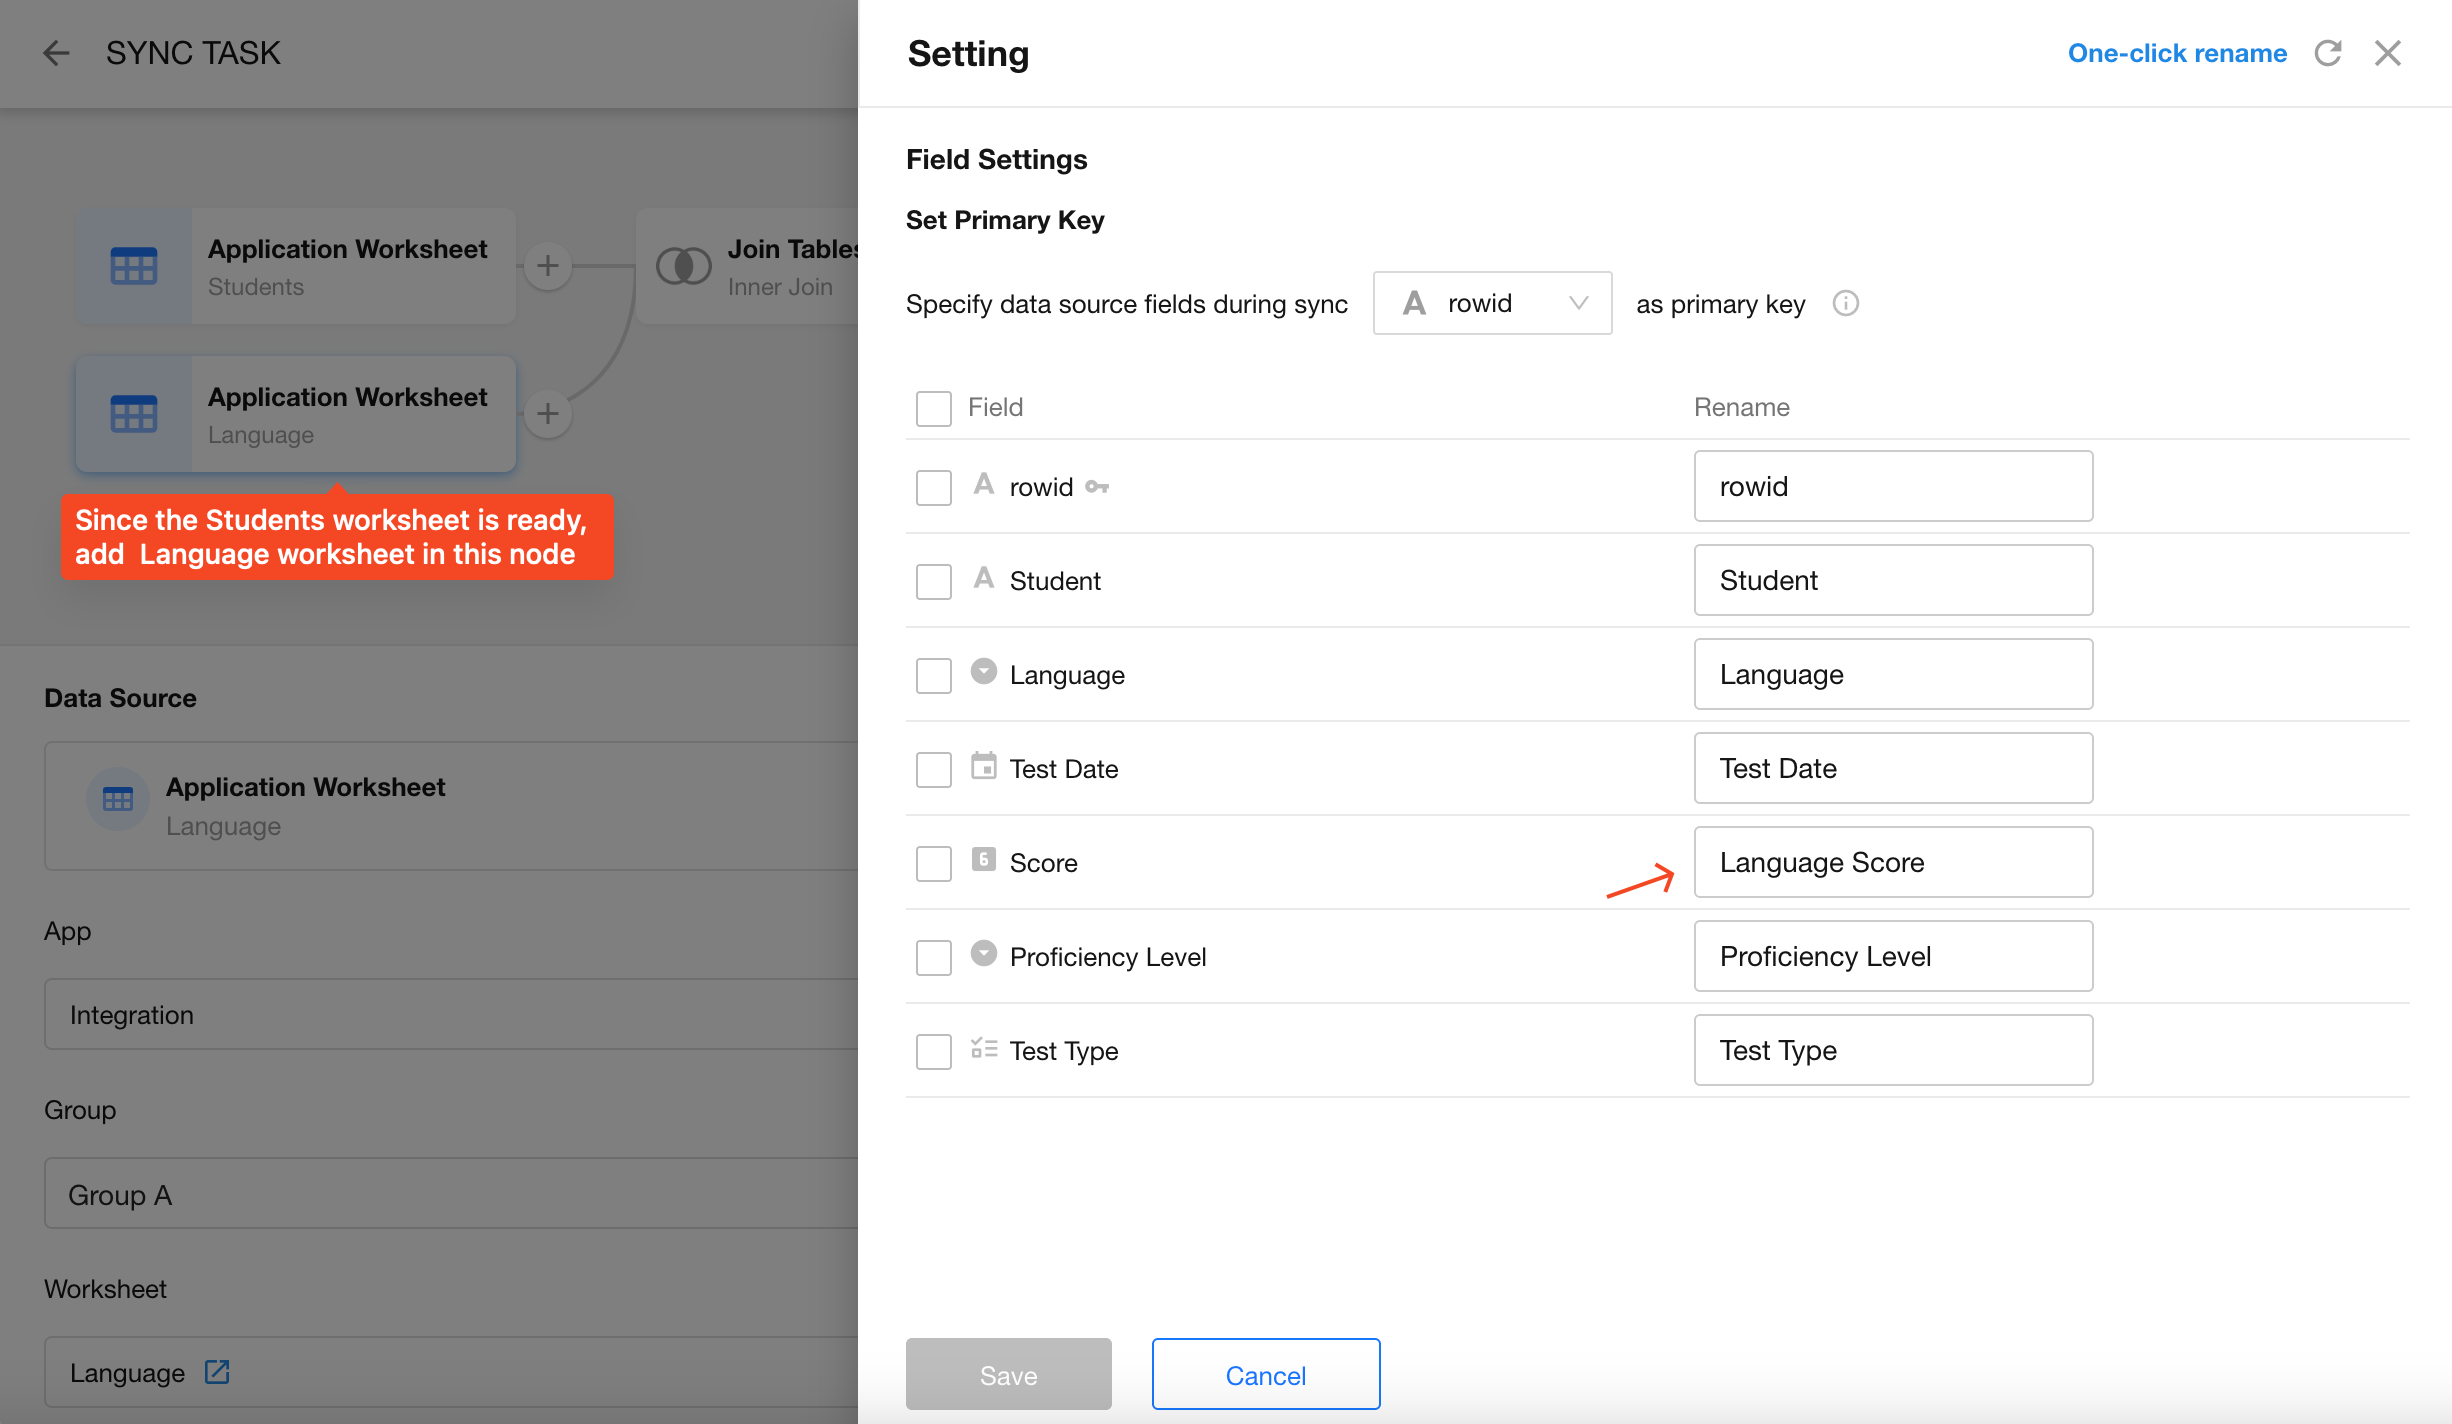
- Join Tables: Configure a Left Join between the Students worksheet and the Language Scores worksheet.
Why Left Join? Because the Students worksheet contains all students, while not every student may have a language score. Using Left Join ensures no students are excluded.
-
Join Condition: You may define multiple conditions; in this example, we use only the Name field.
-
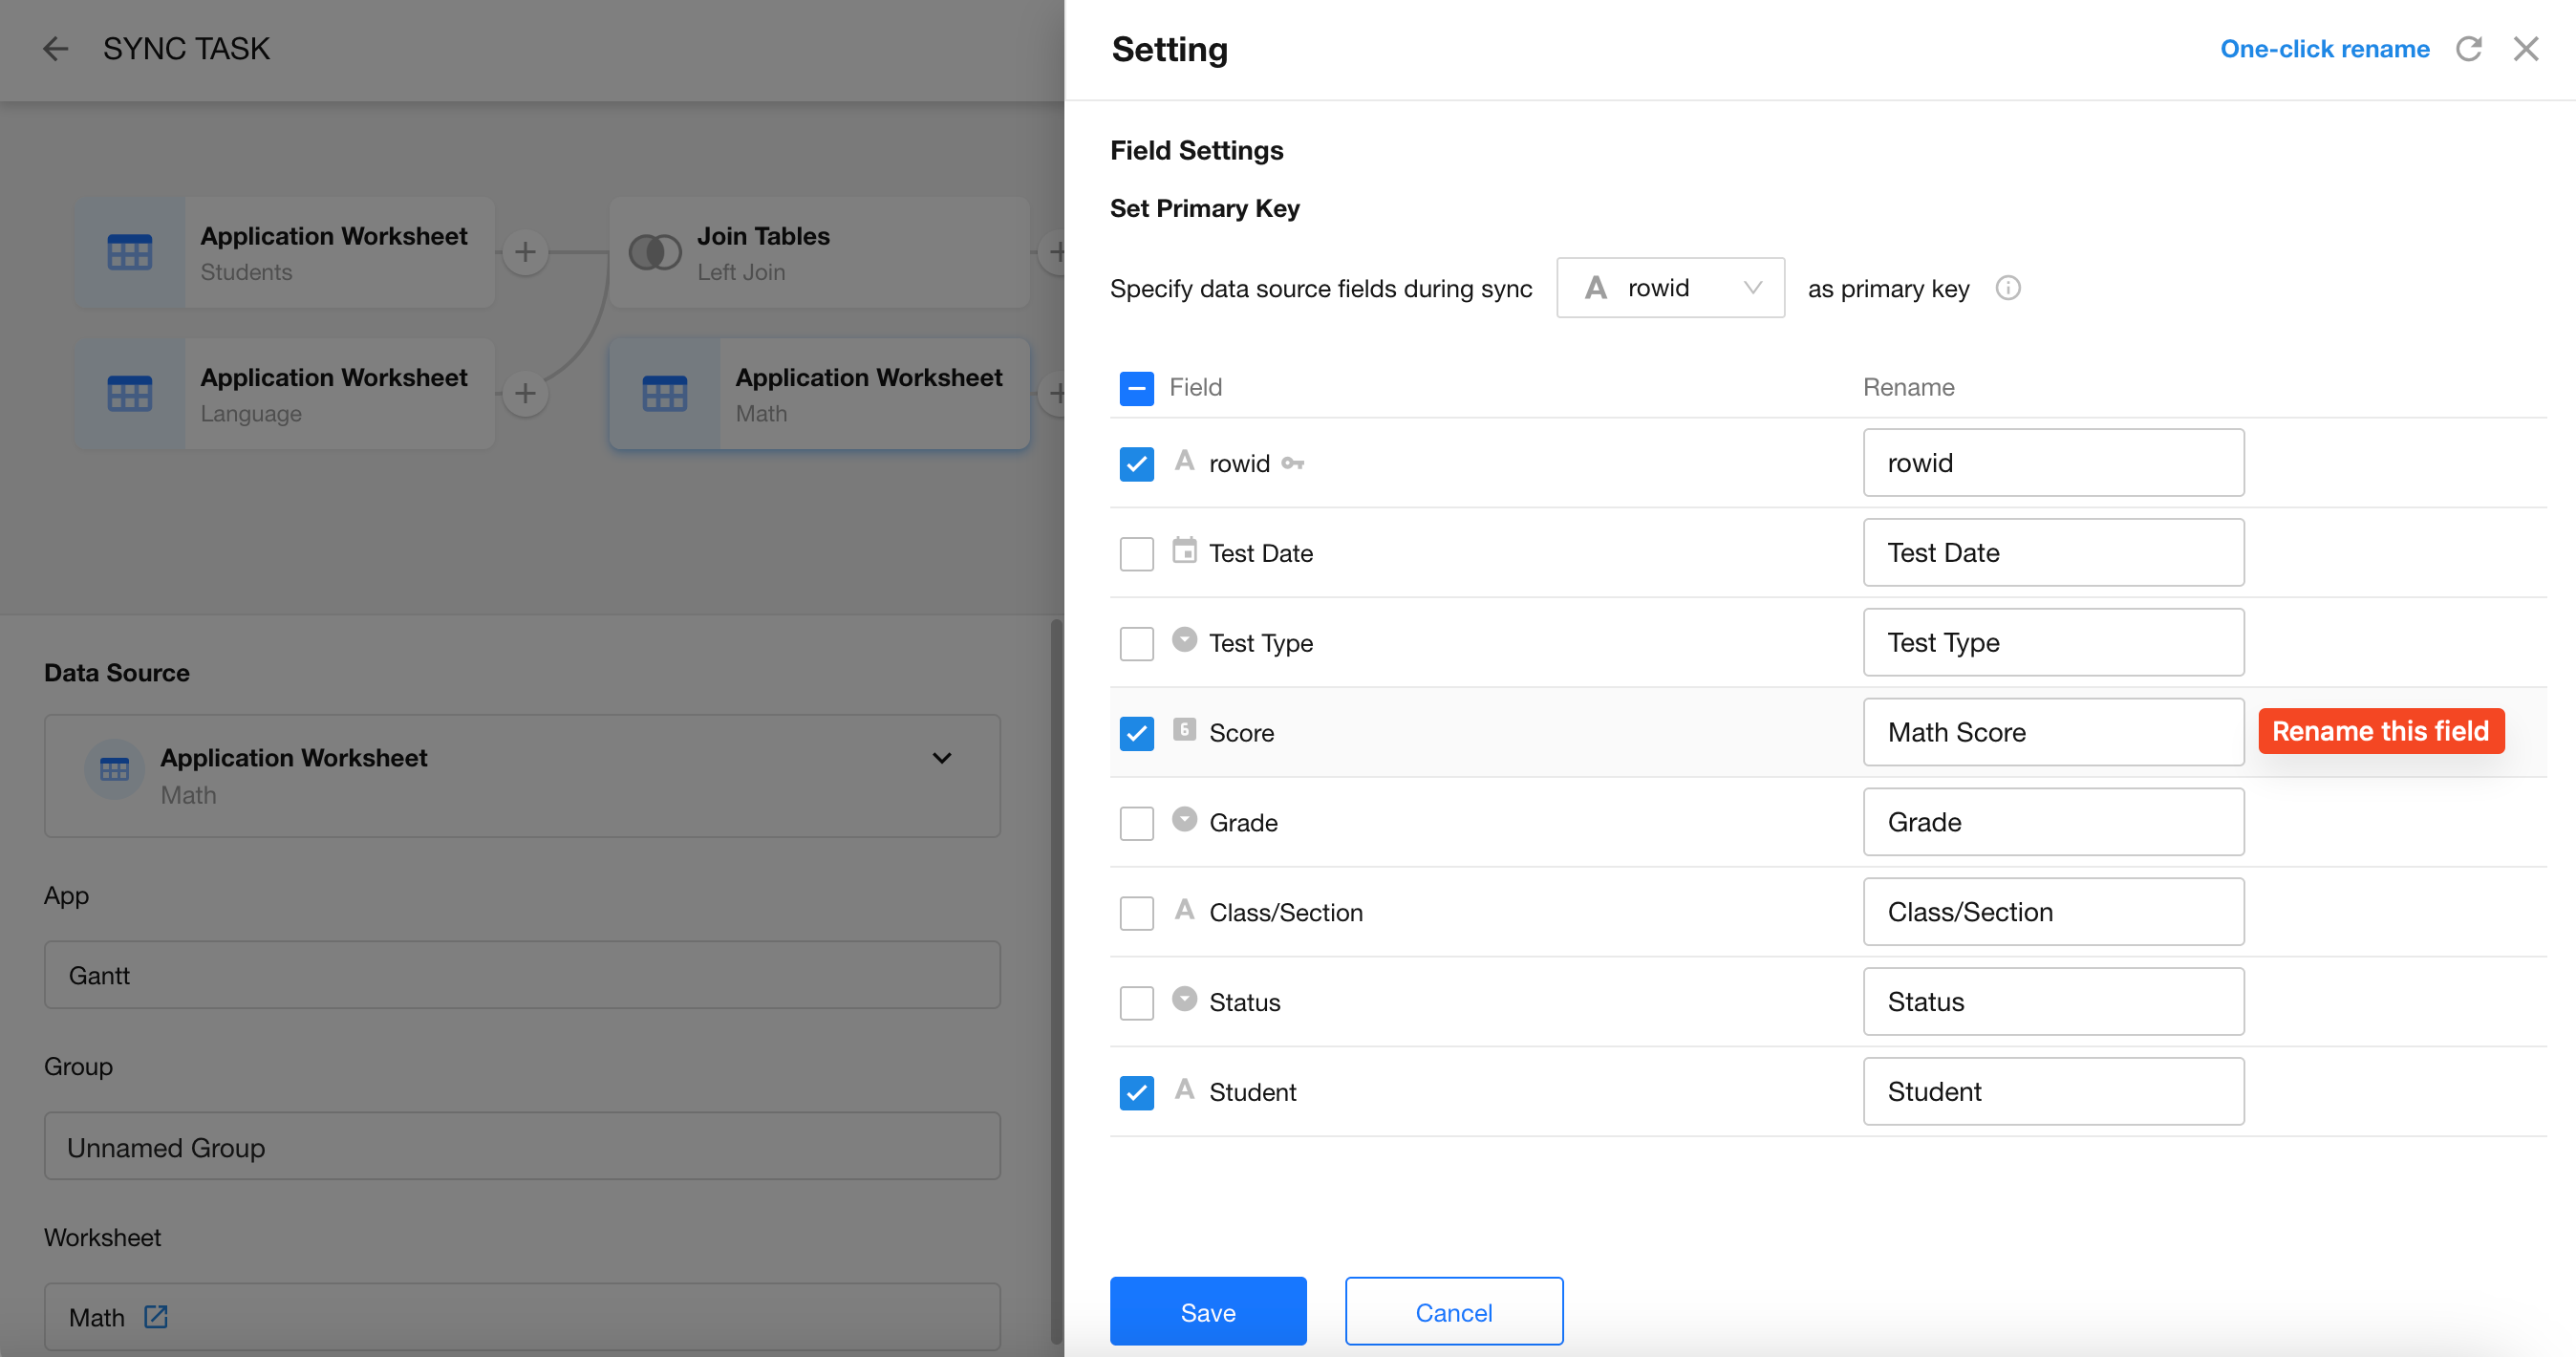
Edit Fields: Select the fields to carry forward. For example, we can deselect the Name field from the Language Scores worksheet since it's redundant.

-
Join the Math Scores Worksheet
ETL nodes can be inserted between any nodes. Add a second Join Tables node to join the Math Scores worksheet.
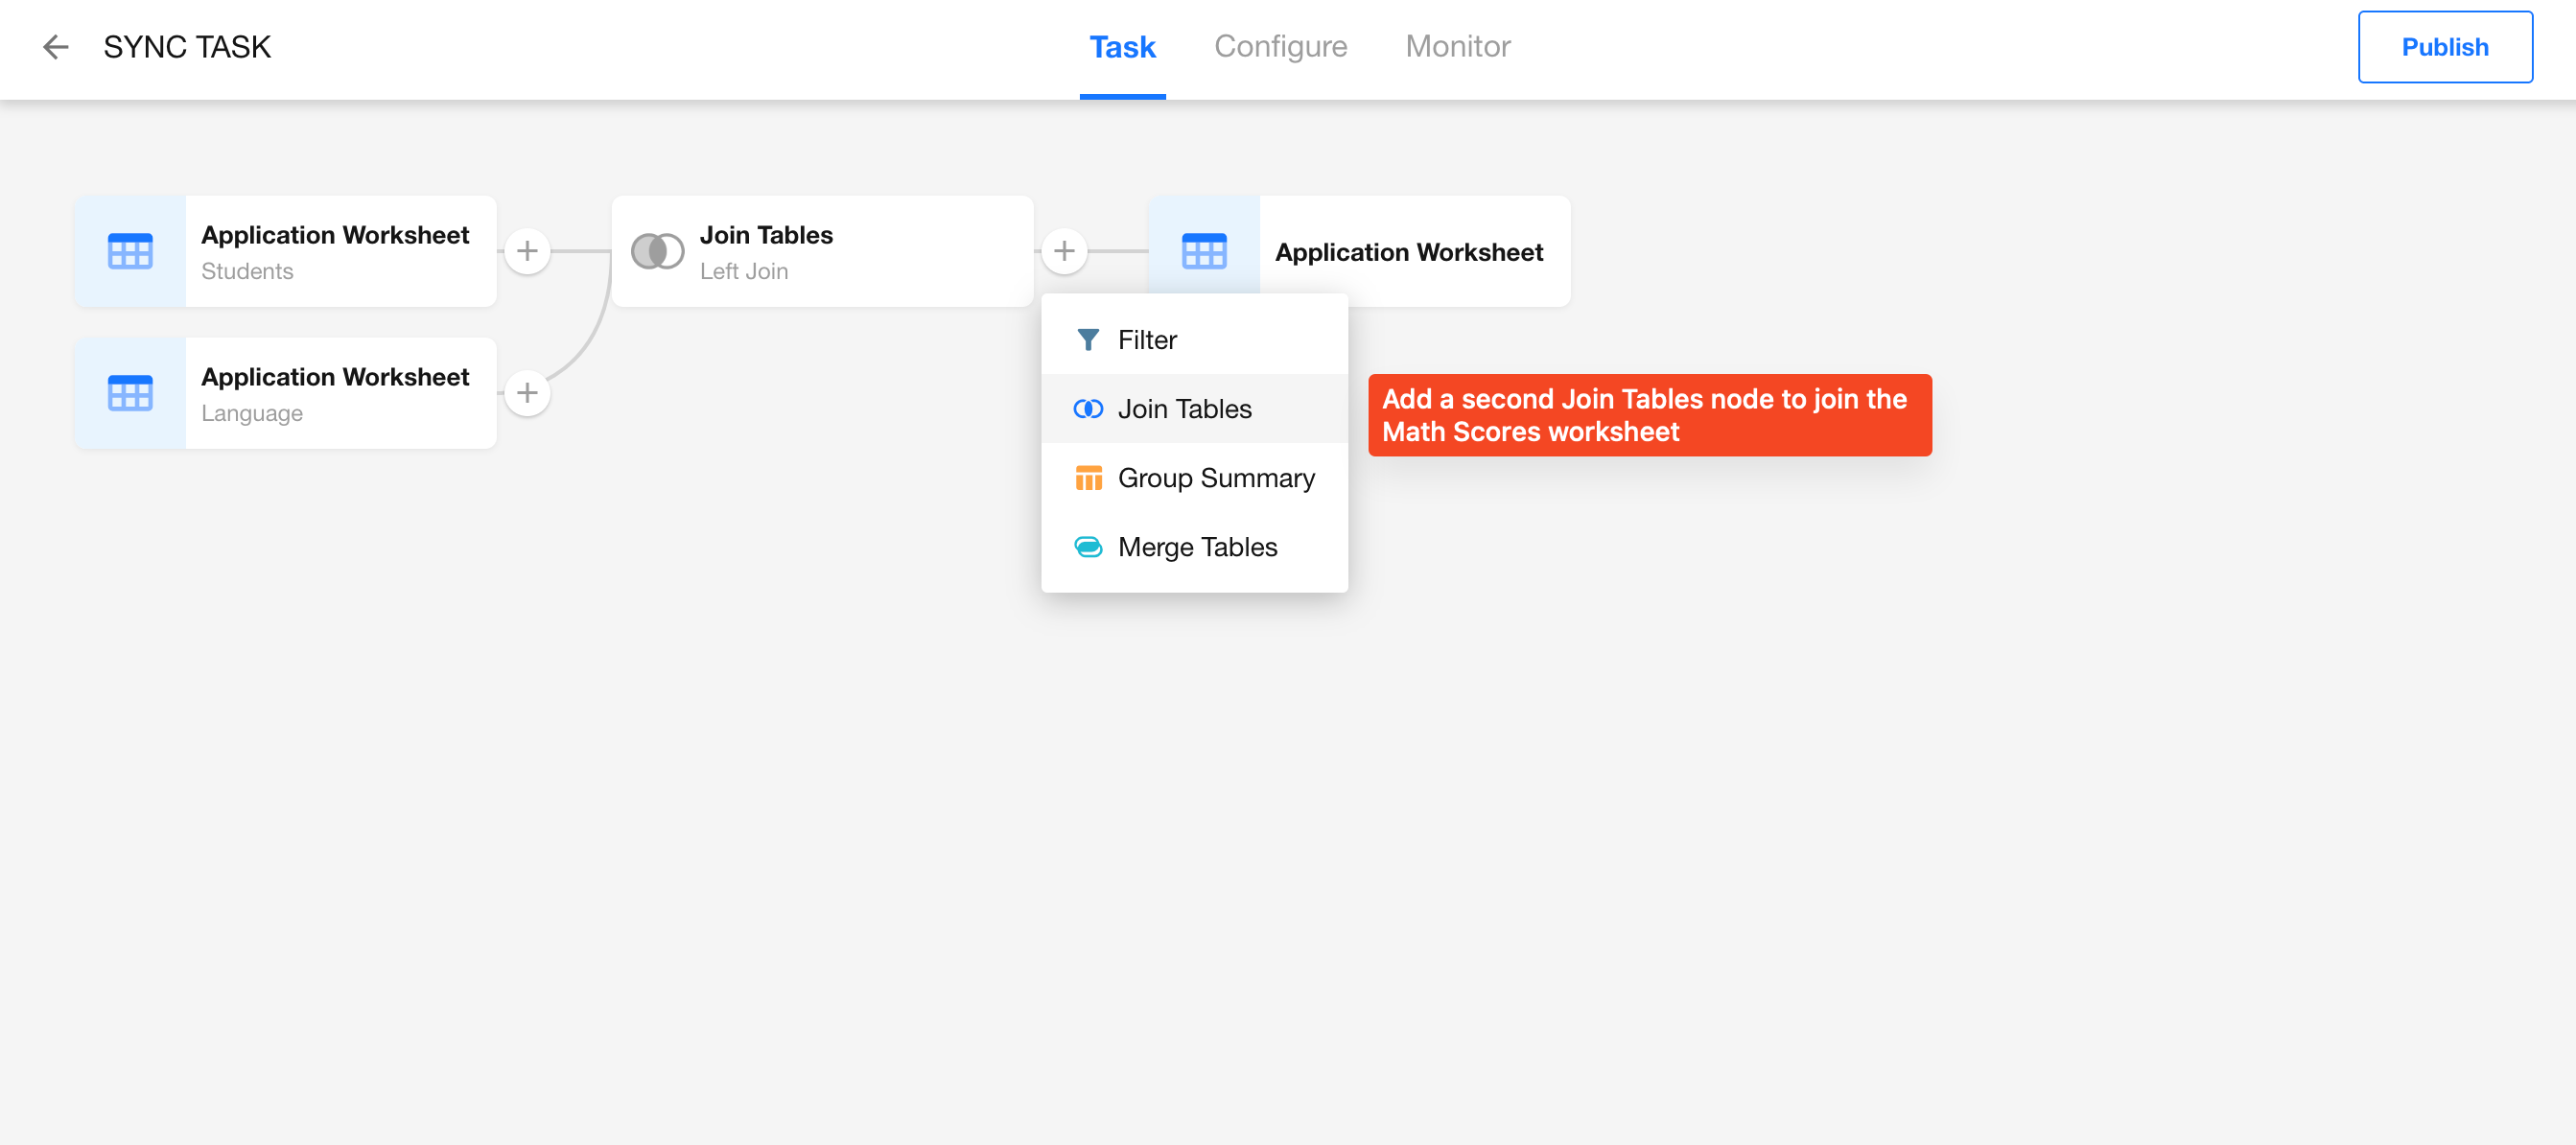
Use the same configuration logic as the previous step:
- Join Type: Left Join
- Join Condition: Choose the Name field from the Students worksheet (via the previous Join).
- Edit Fields: Deselect the Name field from the Math Scores worksheet if it's not needed.

-
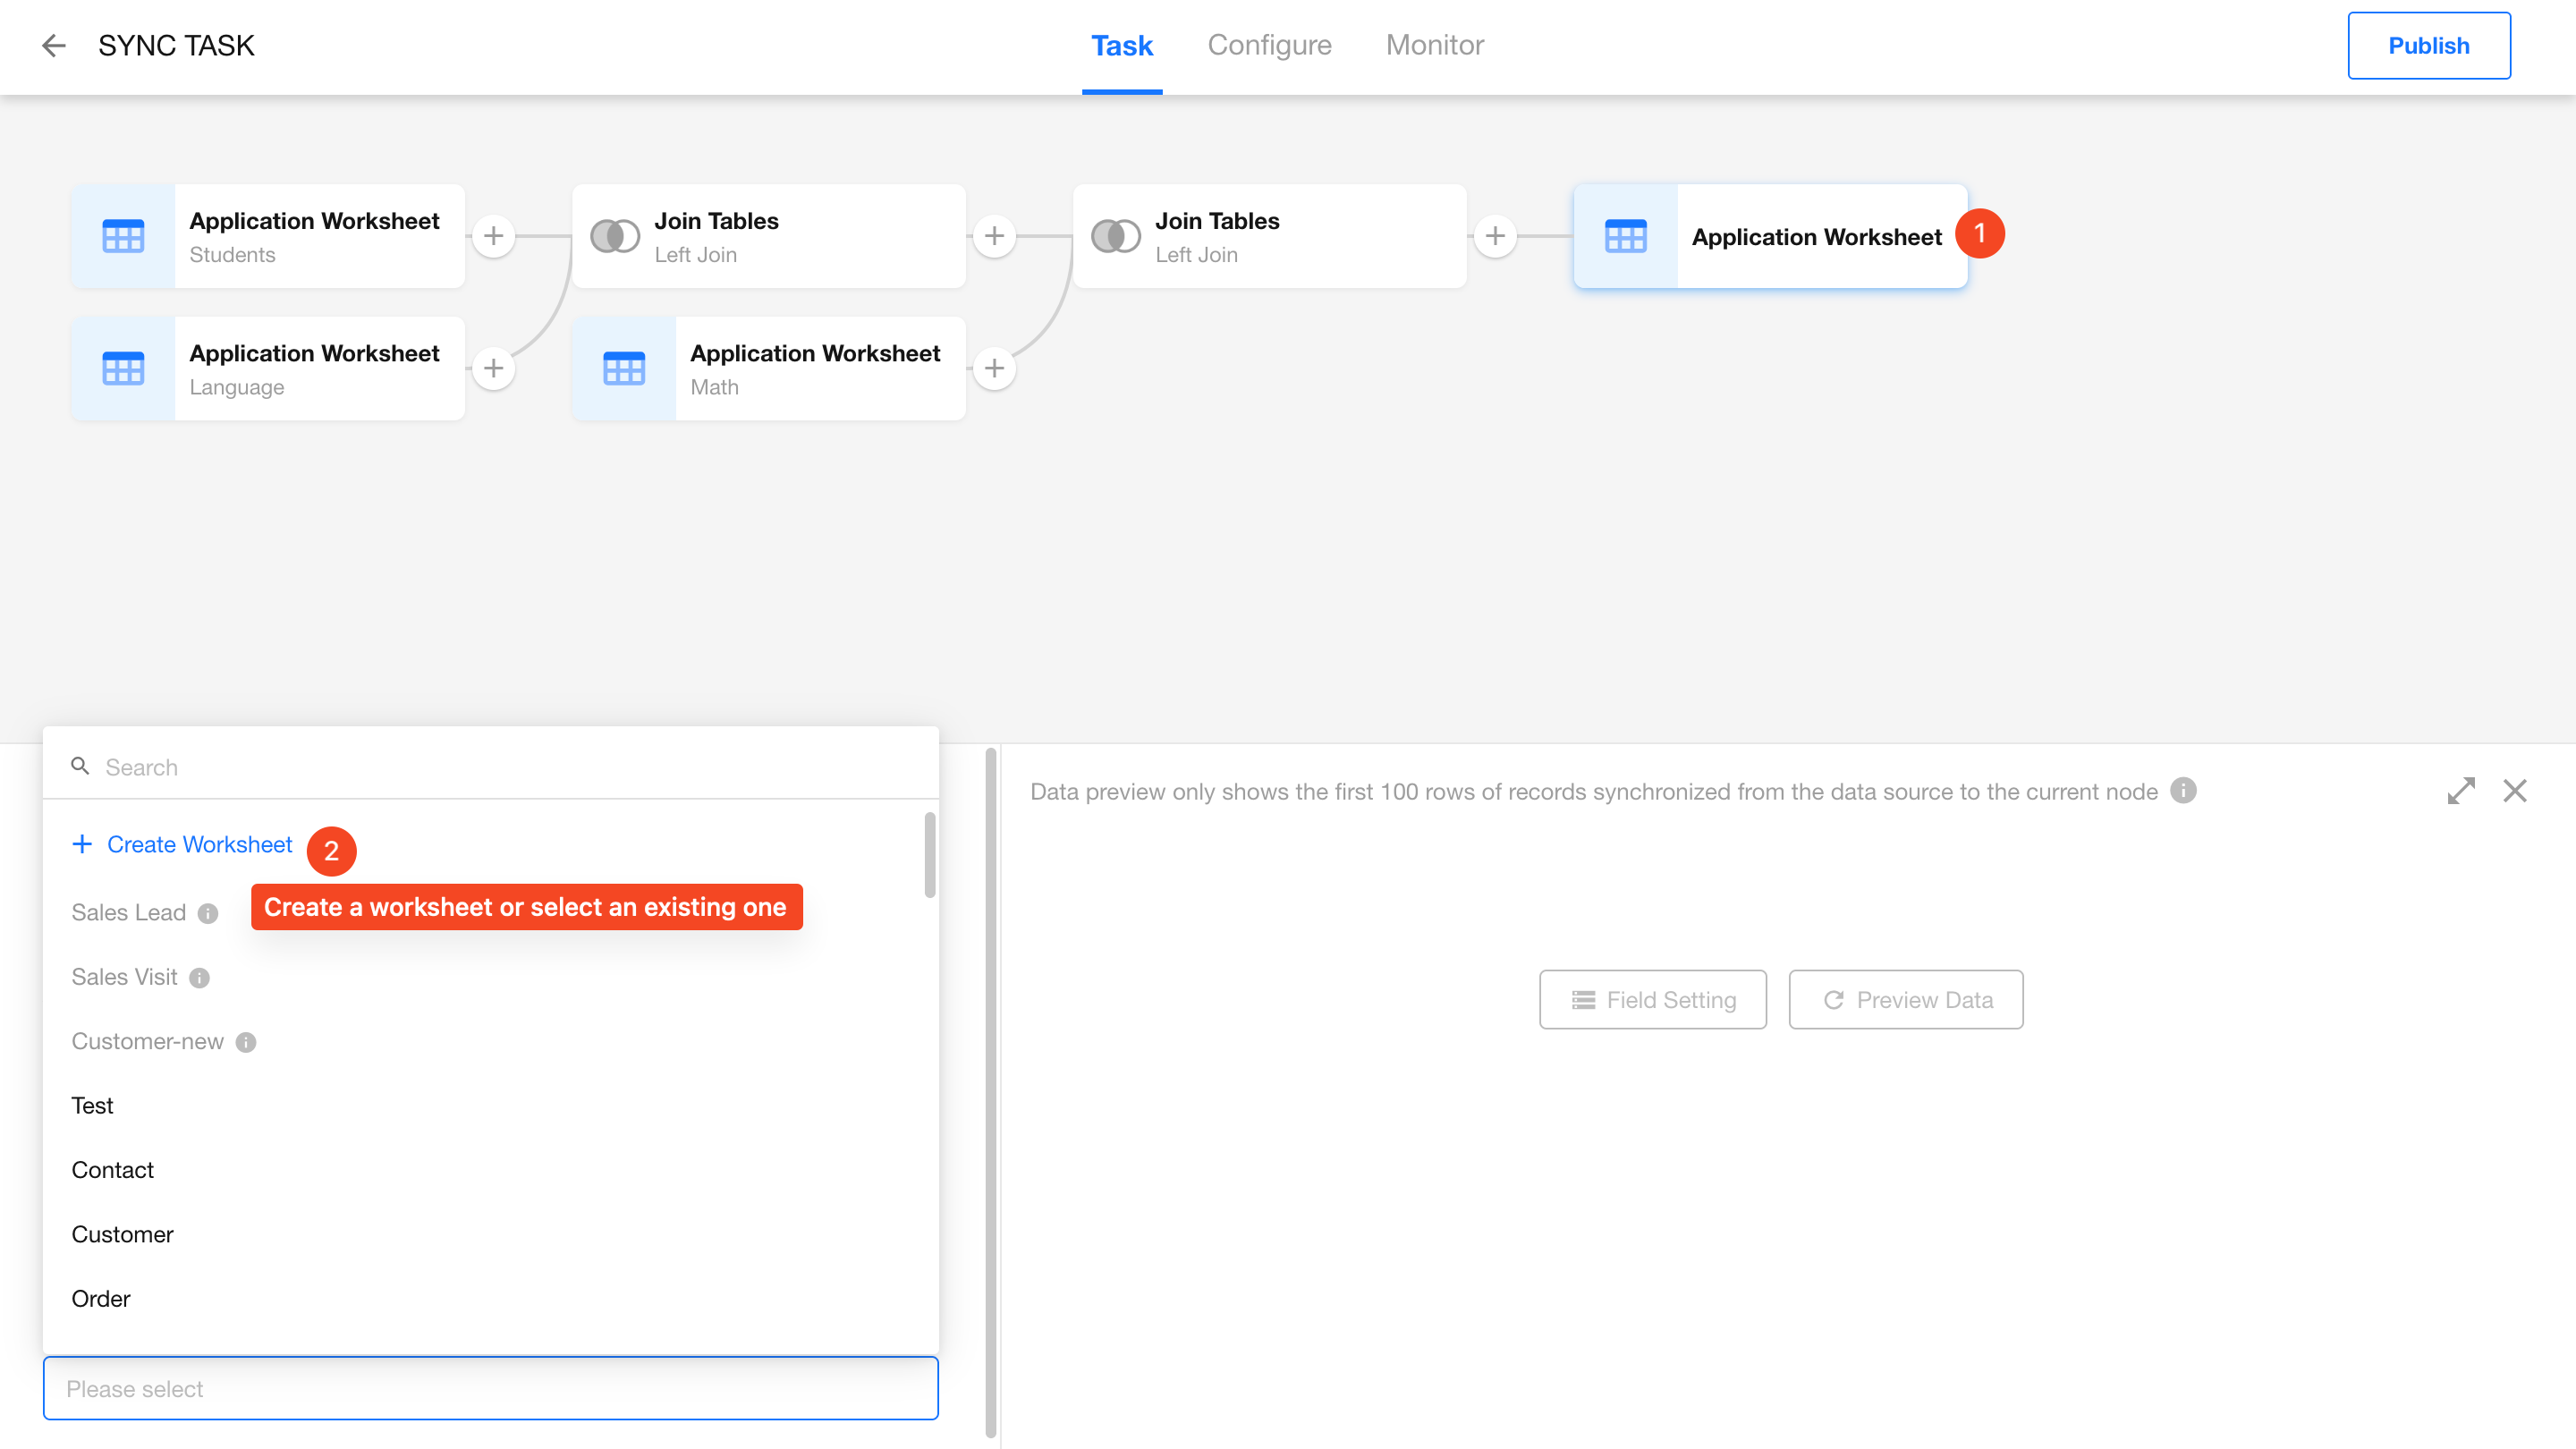
Configure the Destination Worksheet
Now that the Students, Language, and Math worksheets are joined, it’s time to configure the destination worksheet.
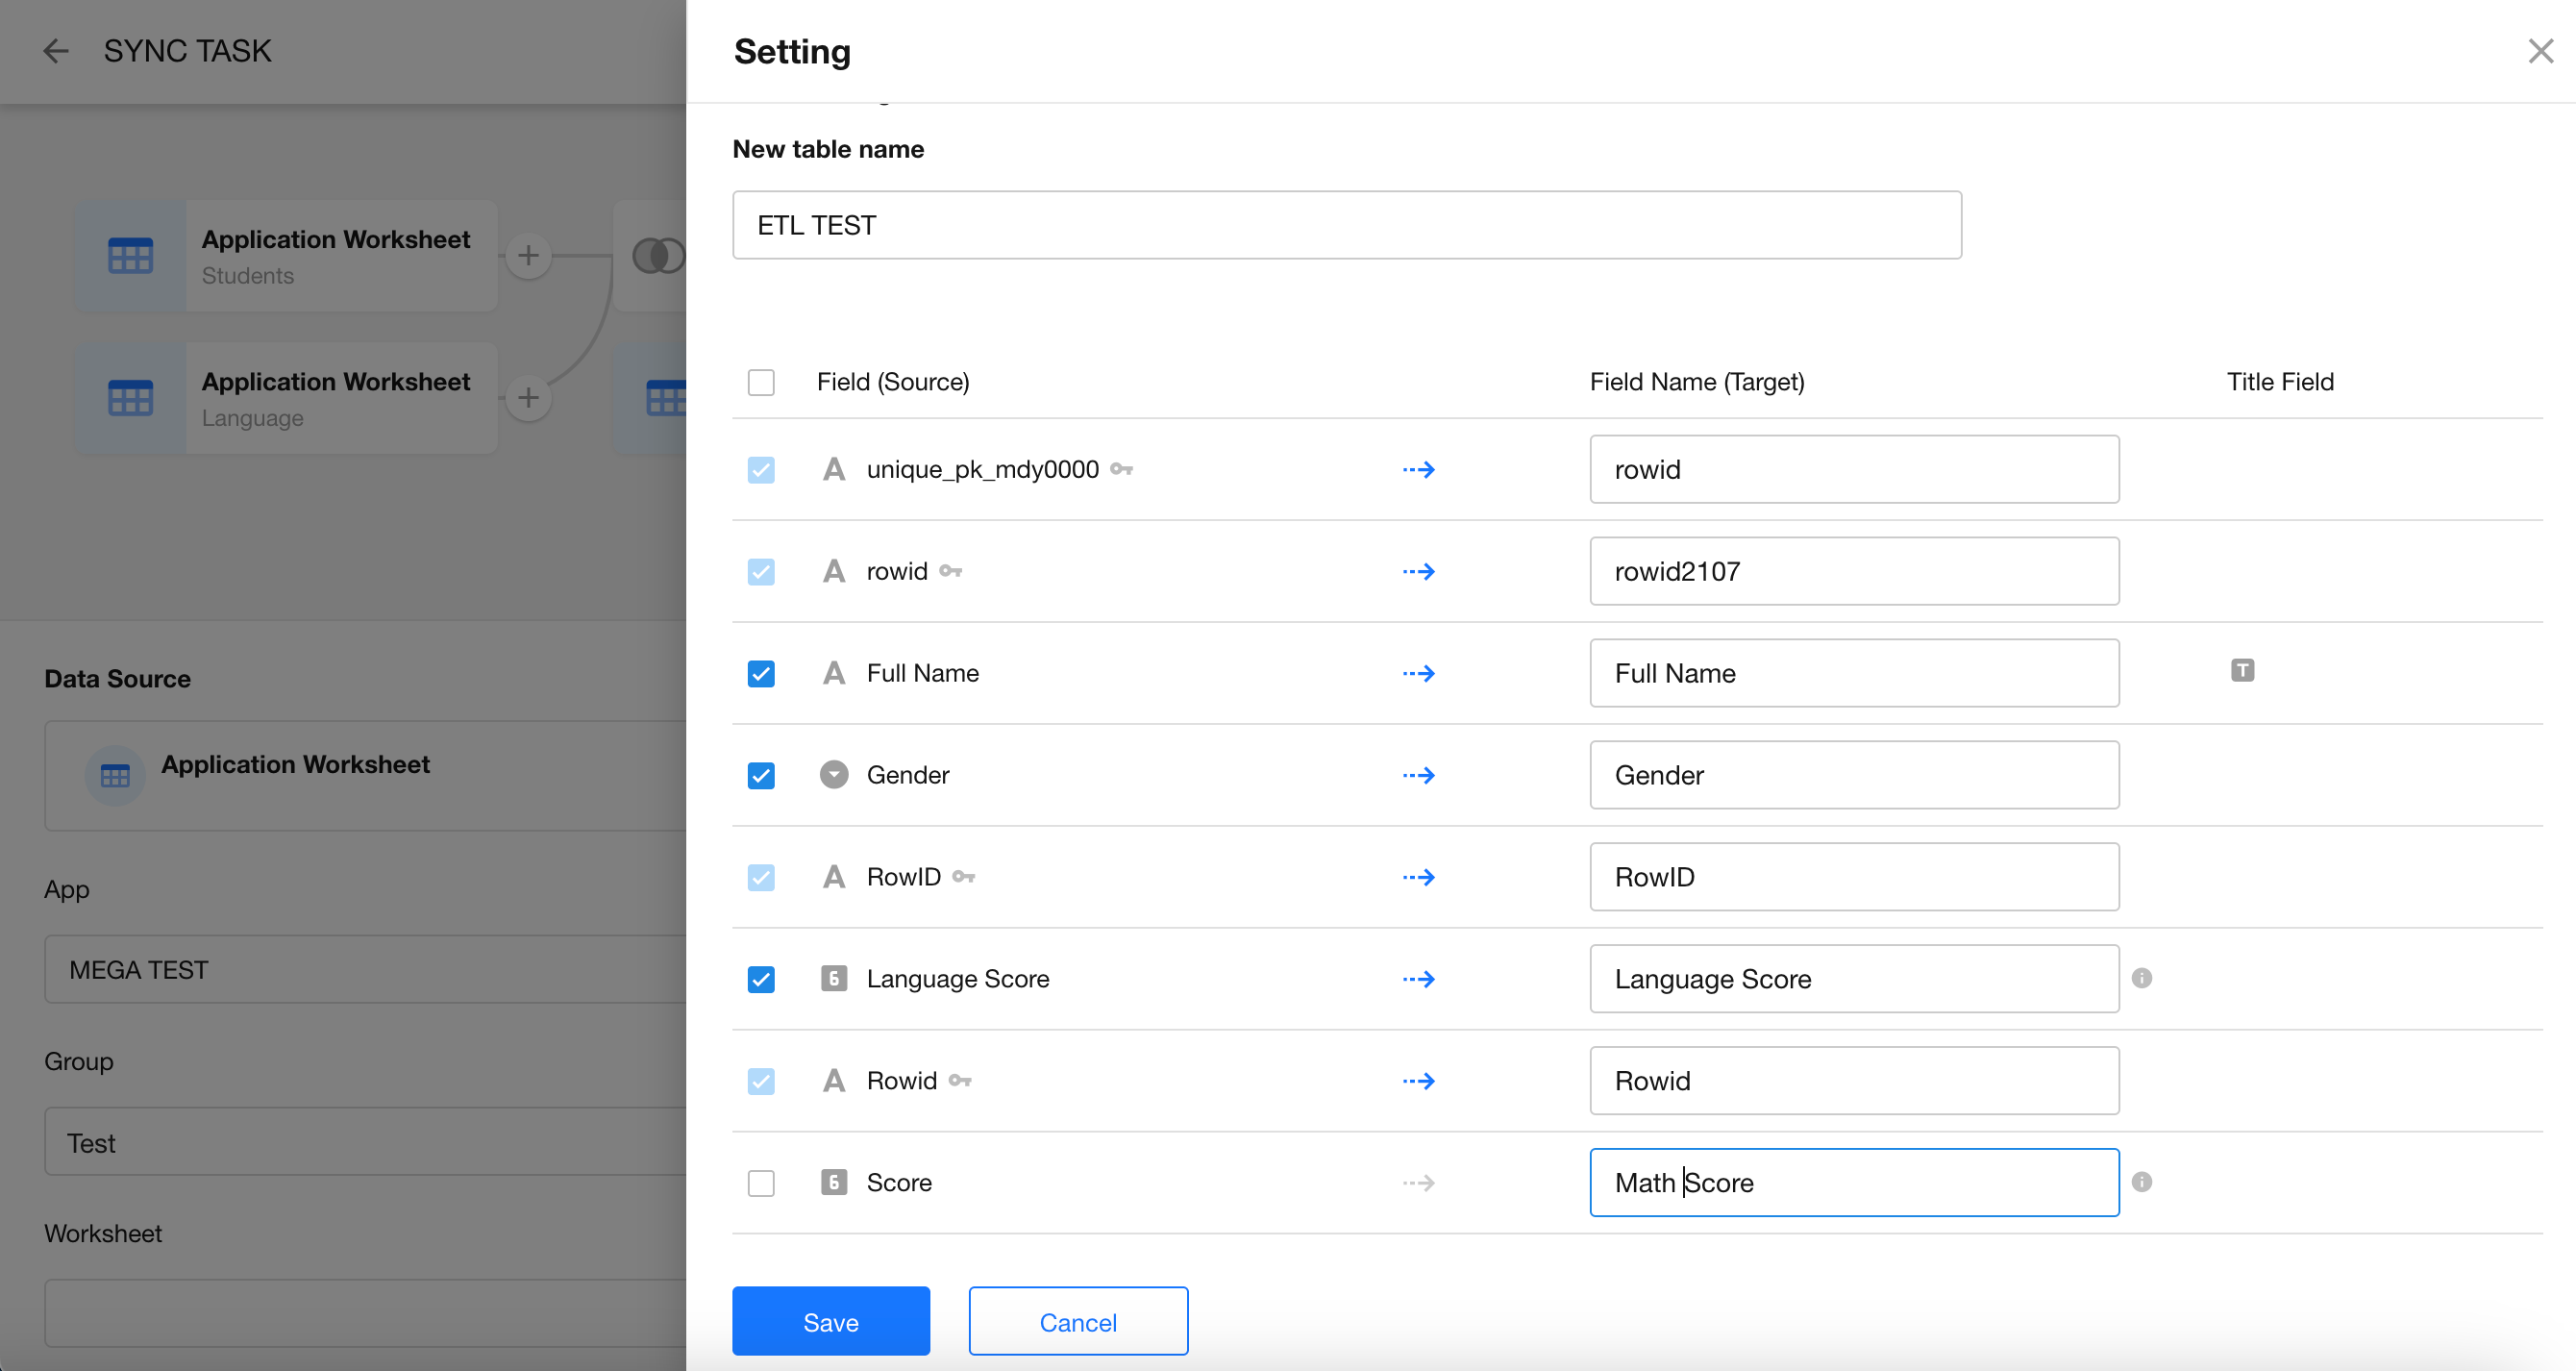
You can either create a new worksheet or select an existing one. Here we’ll demonstrate creating a new worksheet.
- Worksheet Name: The name of the new worksheet in your database or application.
- Primary Key Field: Fields marked with a "key" icon are required. A primary key must always be mapped for synchronization, but the mapping target is flexible.
-
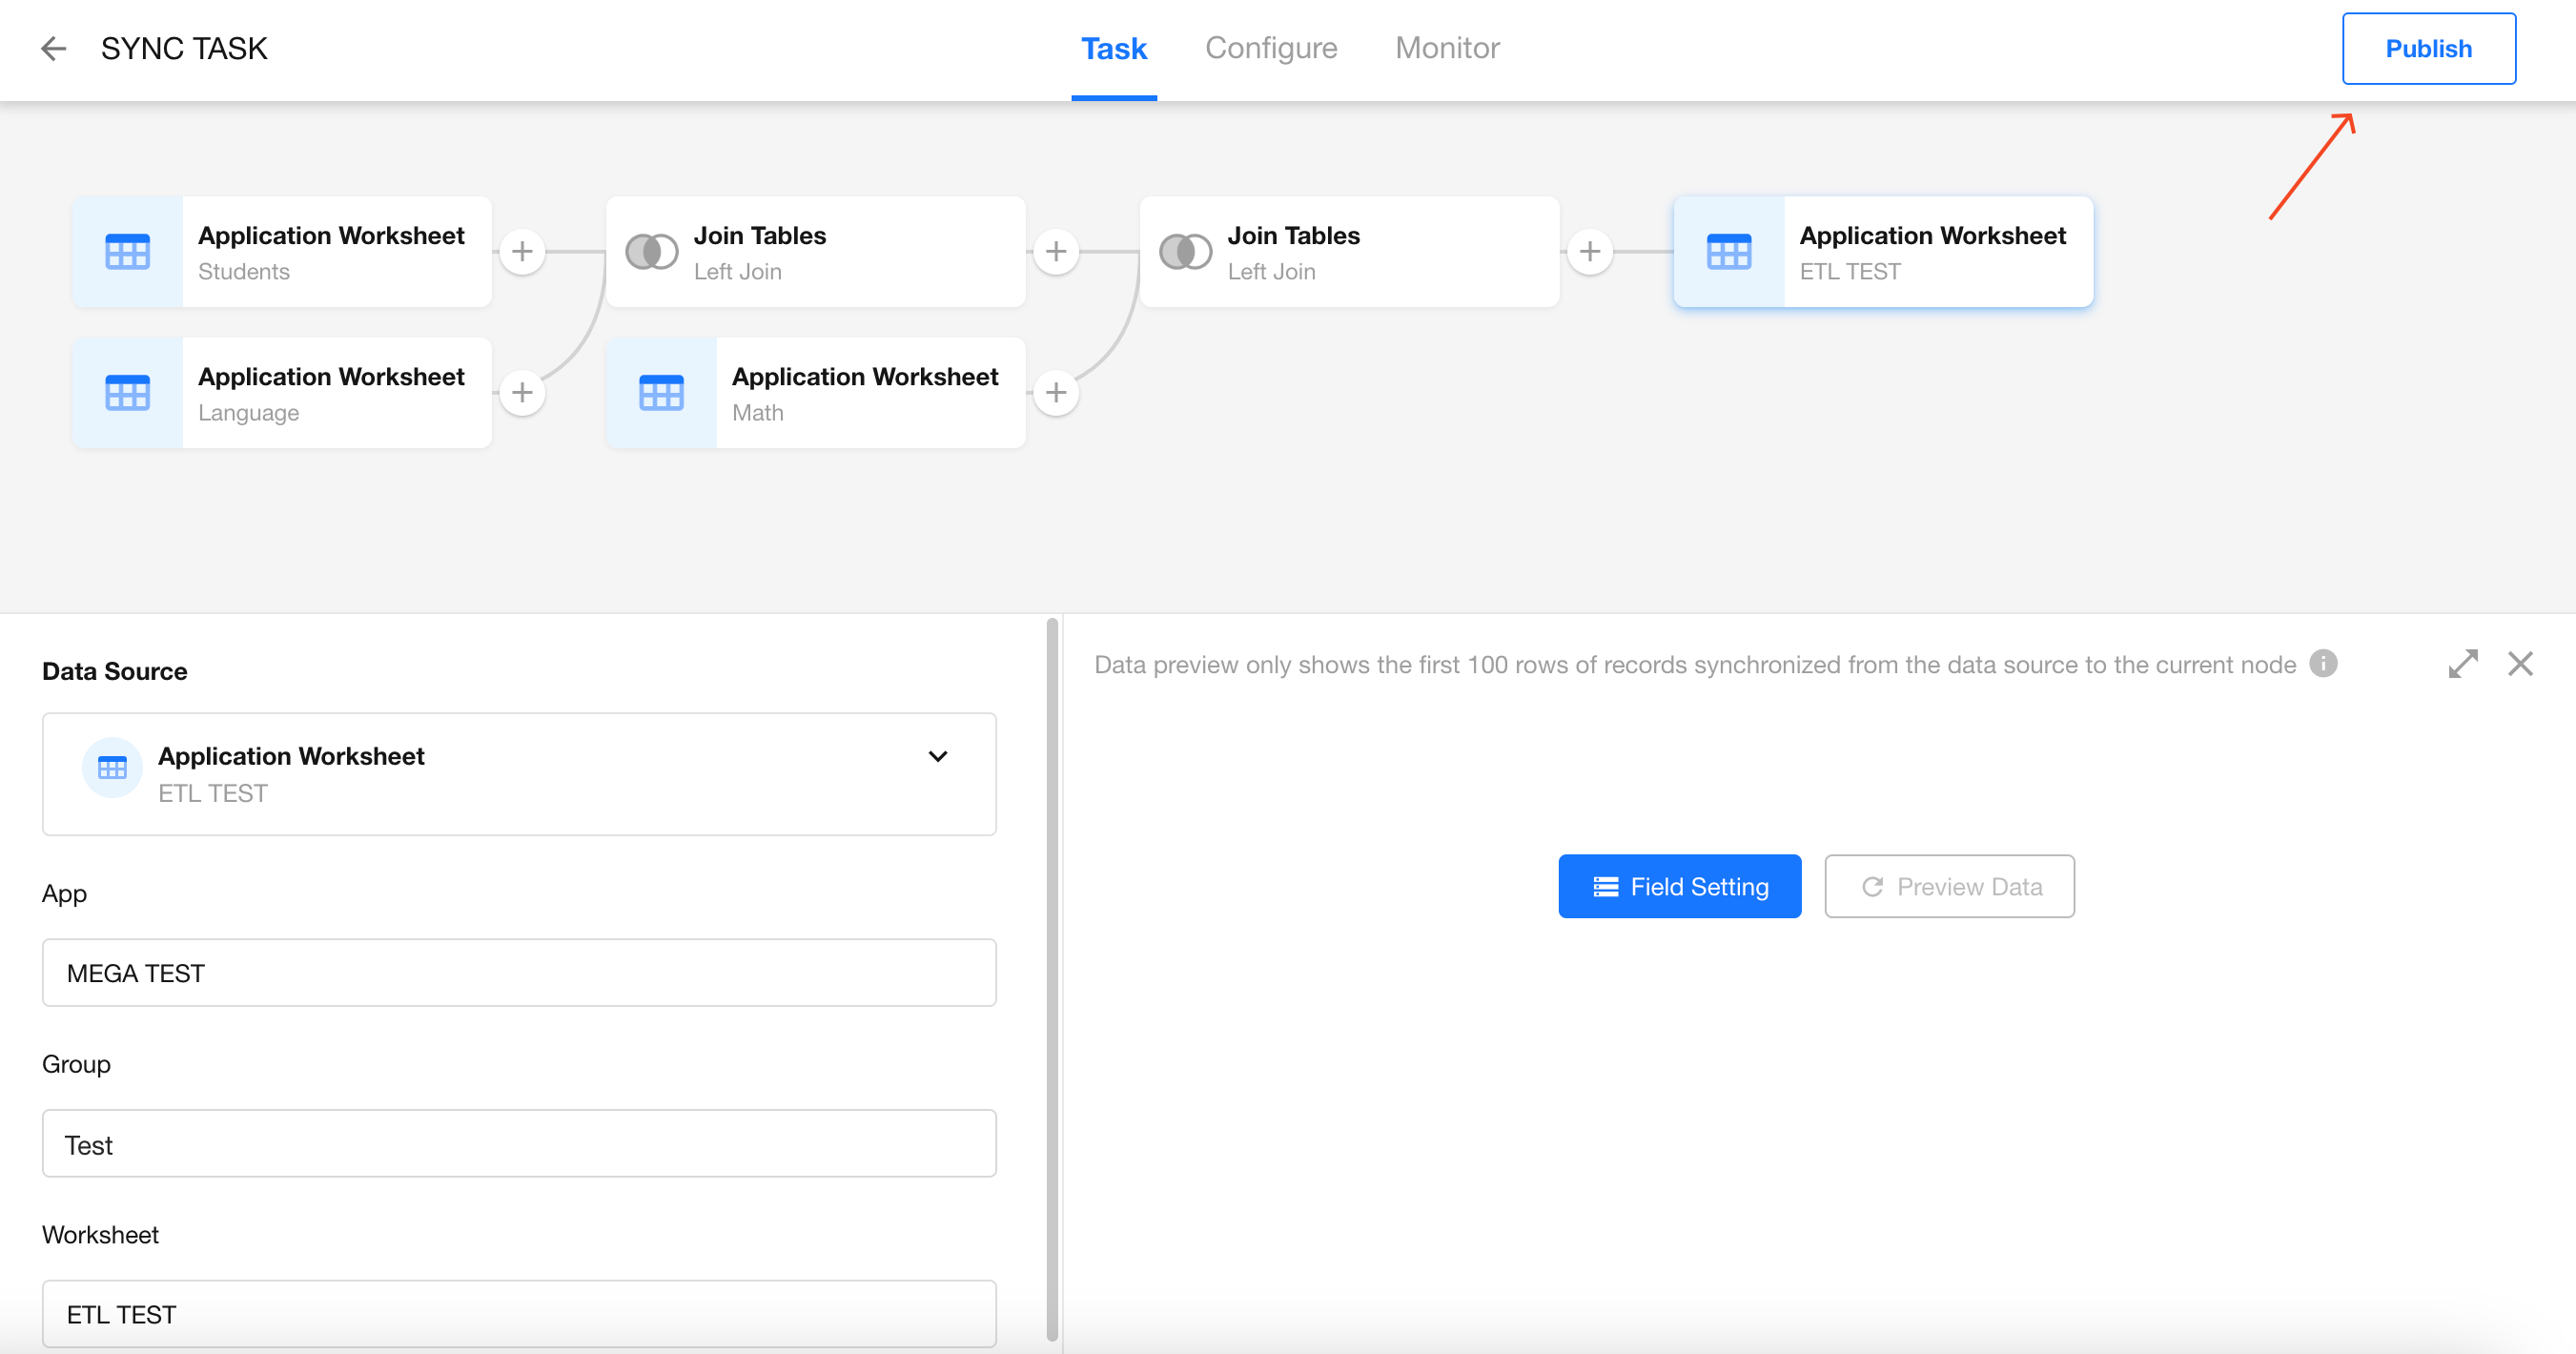
Publish the Sync Task and View the Results
Group Summary
The Group Summary node is used for analytical purposes, enabling you to identify patterns, anomalies, and trends in data. It helps monitor and respond to issues effectively by aggregating and summarizing data based on specific fields.
-
Data Analysis & Decision-Making
Grouping and summarizing raw data provides valuable insights, helping you make informed business decisions. -
Report Generation
Easily create structured reports or visualized data based on grouped summaries. -
Monitoring & Feedback
When used in conjunction with workflows, summary results can help monitor business KPIs and trigger timely feedback or actions.
How to Use
-
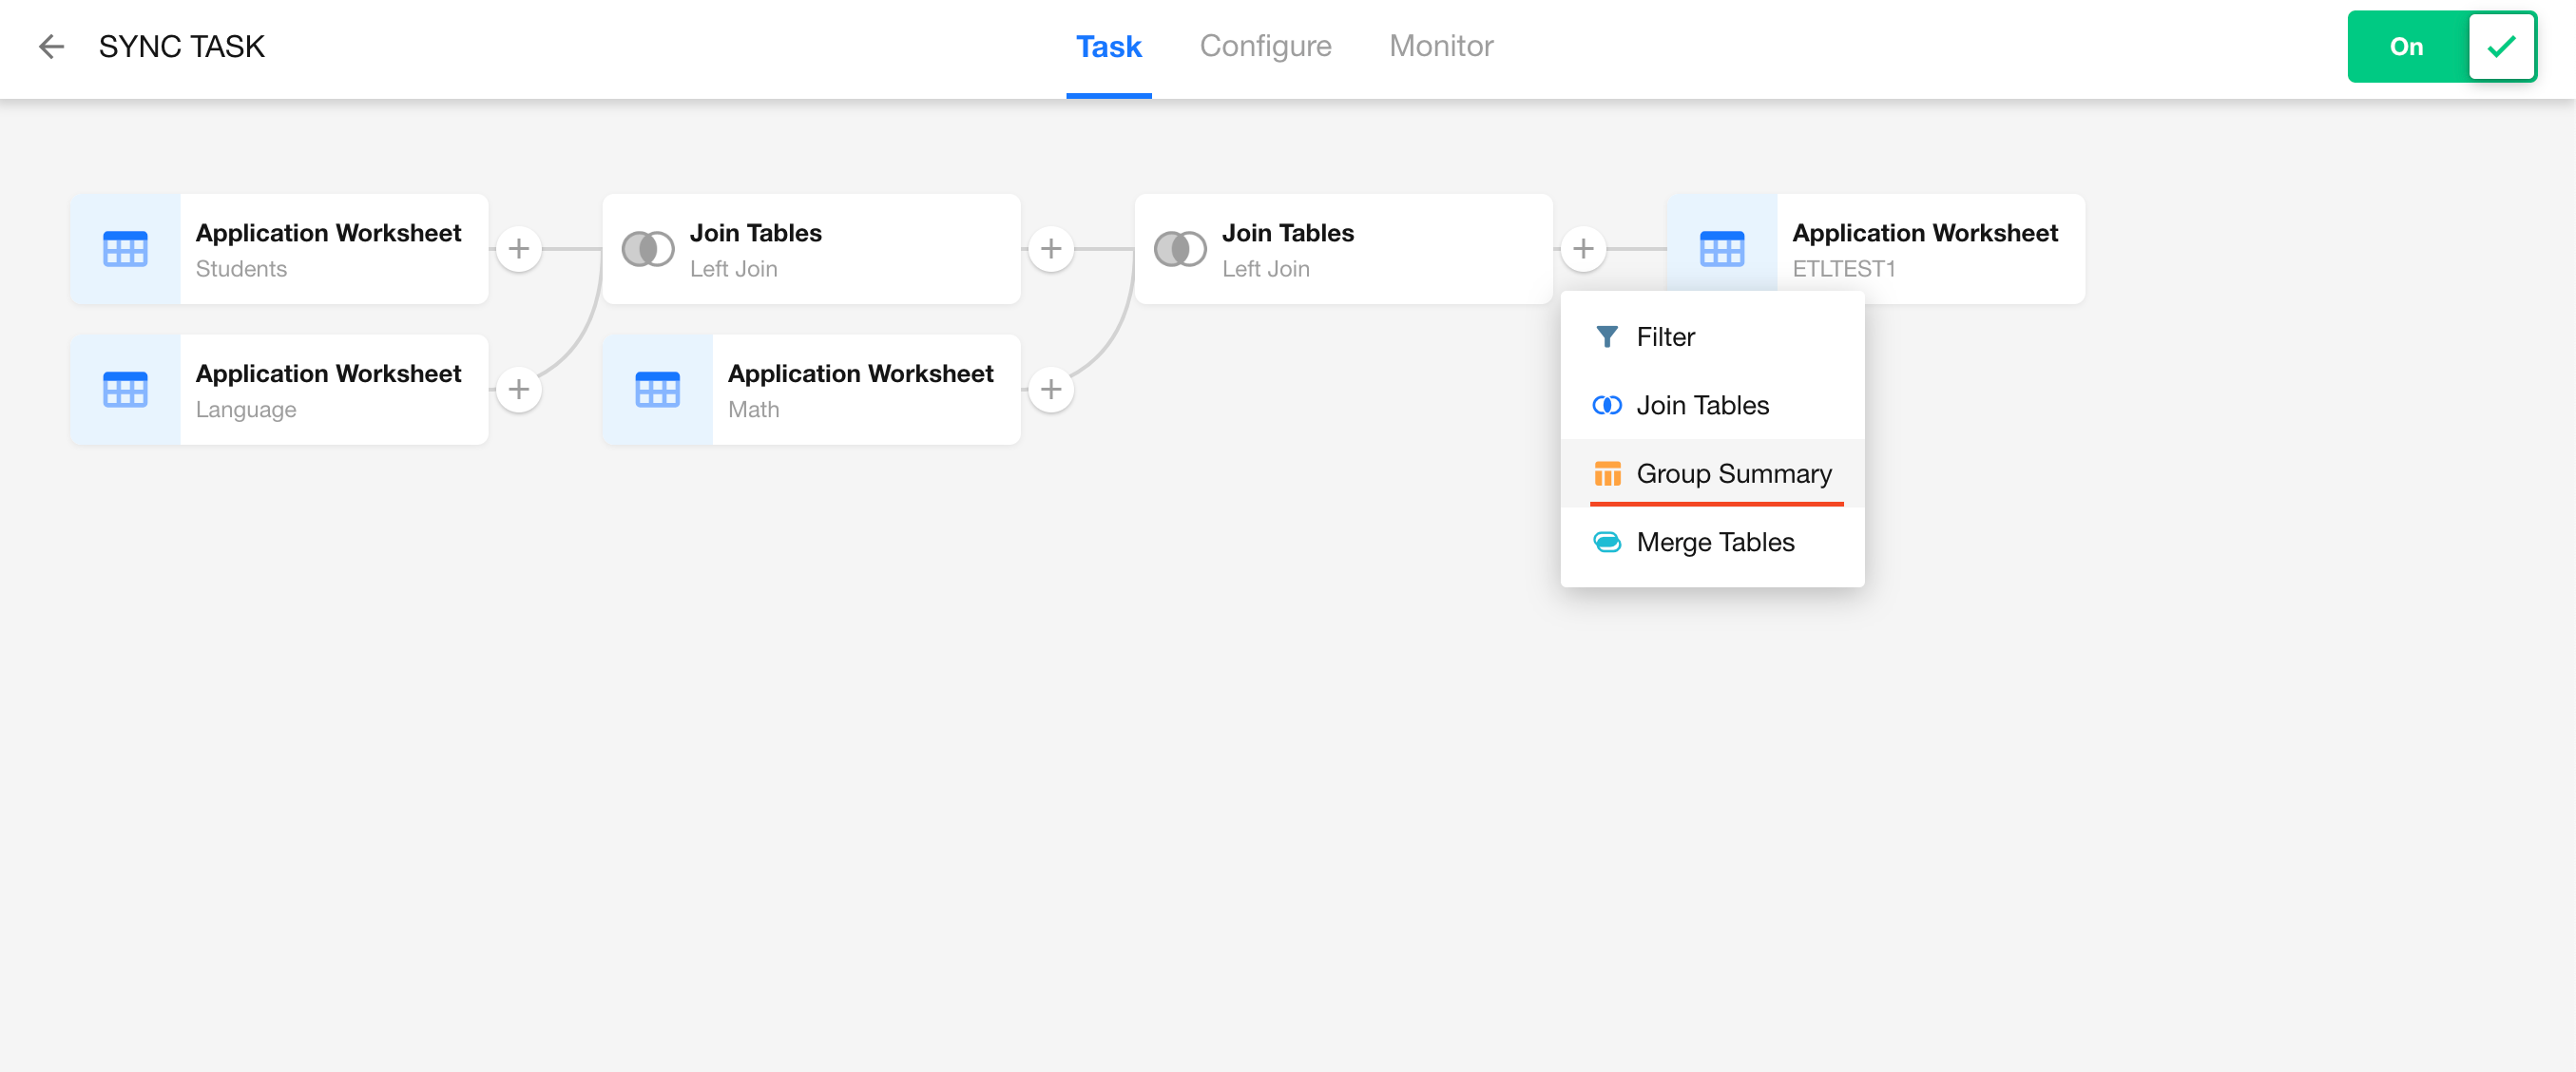
From any data sync task, hover between two nodes and click “+” to add a Group Summary node.

-
Configure Grouping Fields and Summary Fields.
- Grouping fields: You can choose any field to group records.
- Summary fields: Function availability depends on field type:
- Text: Max / Min
- Number(Date): Sum, Avg, Max, Min
- Count: Only supports counting rows (*)
Limitations
- Only the selected group fields and summary fields will be passed to the next node.
- Summary fields must be assigned a specific function (e.g., AVG, MAX).
Use Case Example
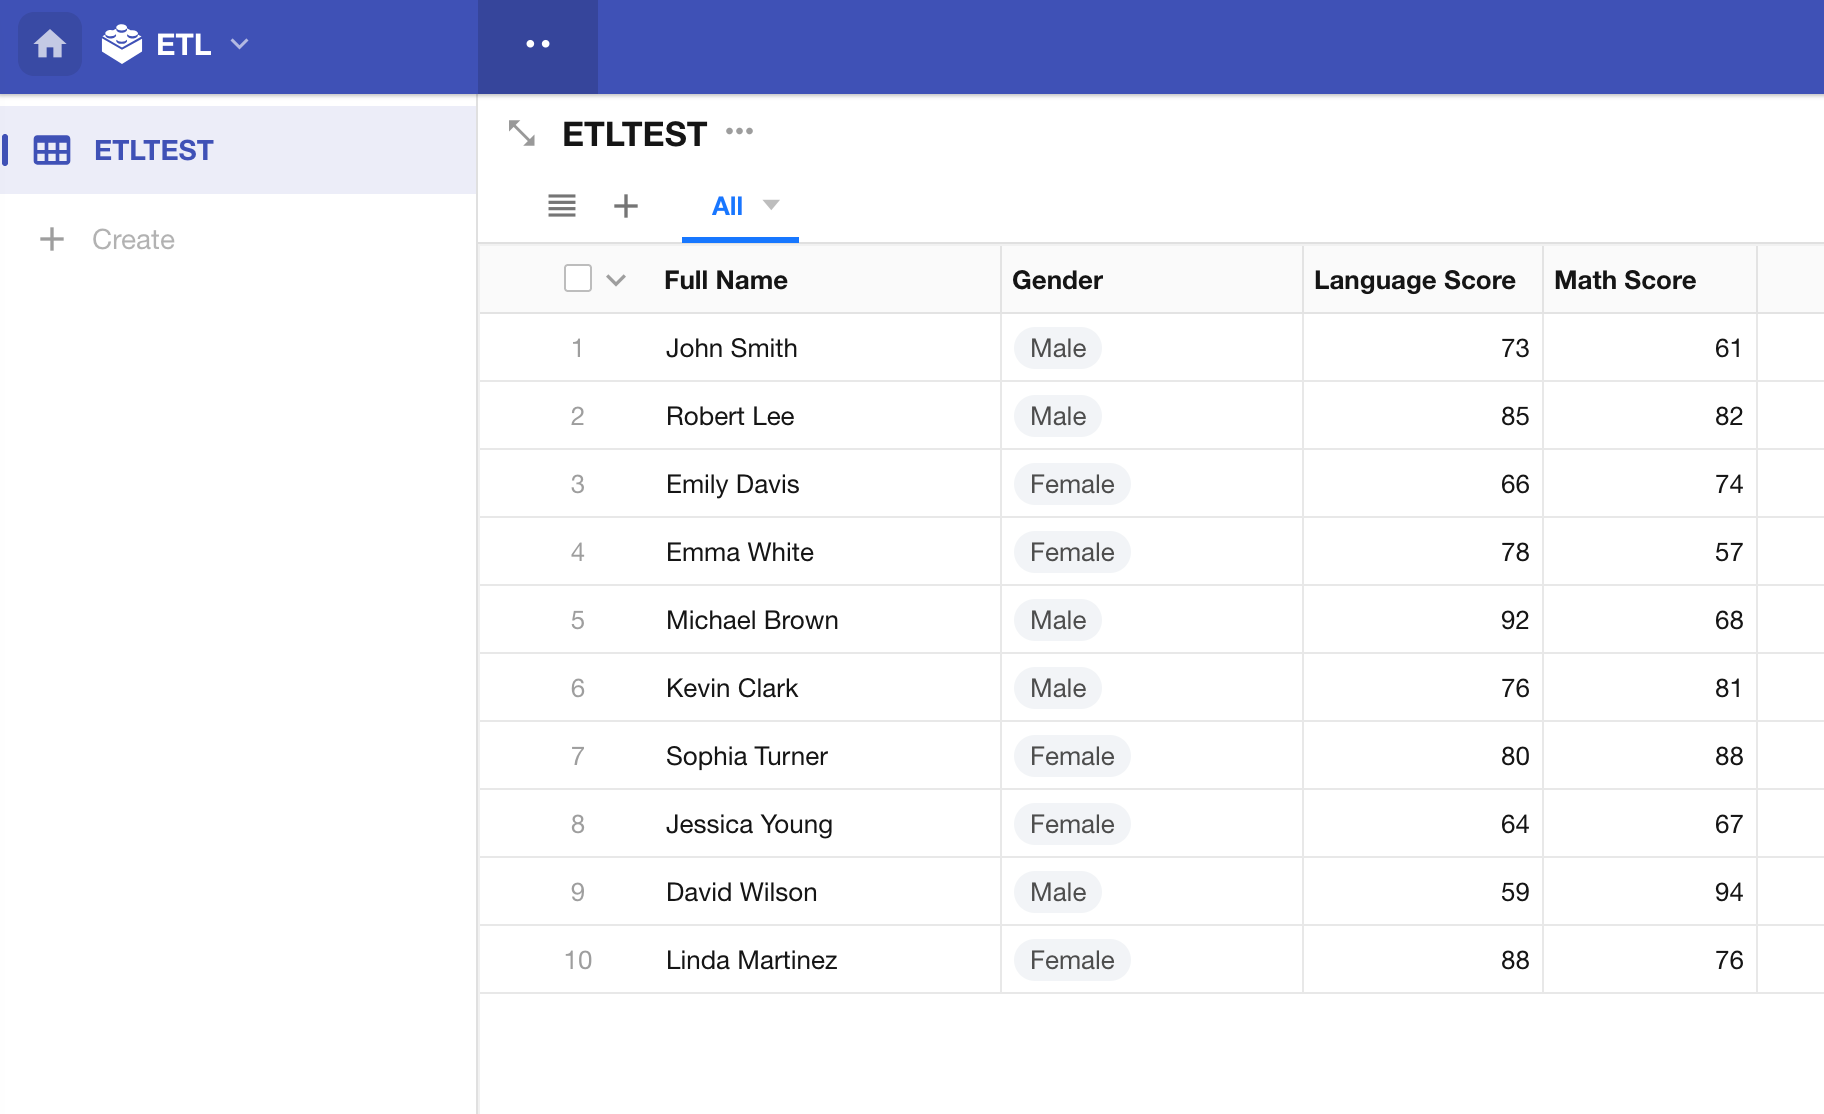
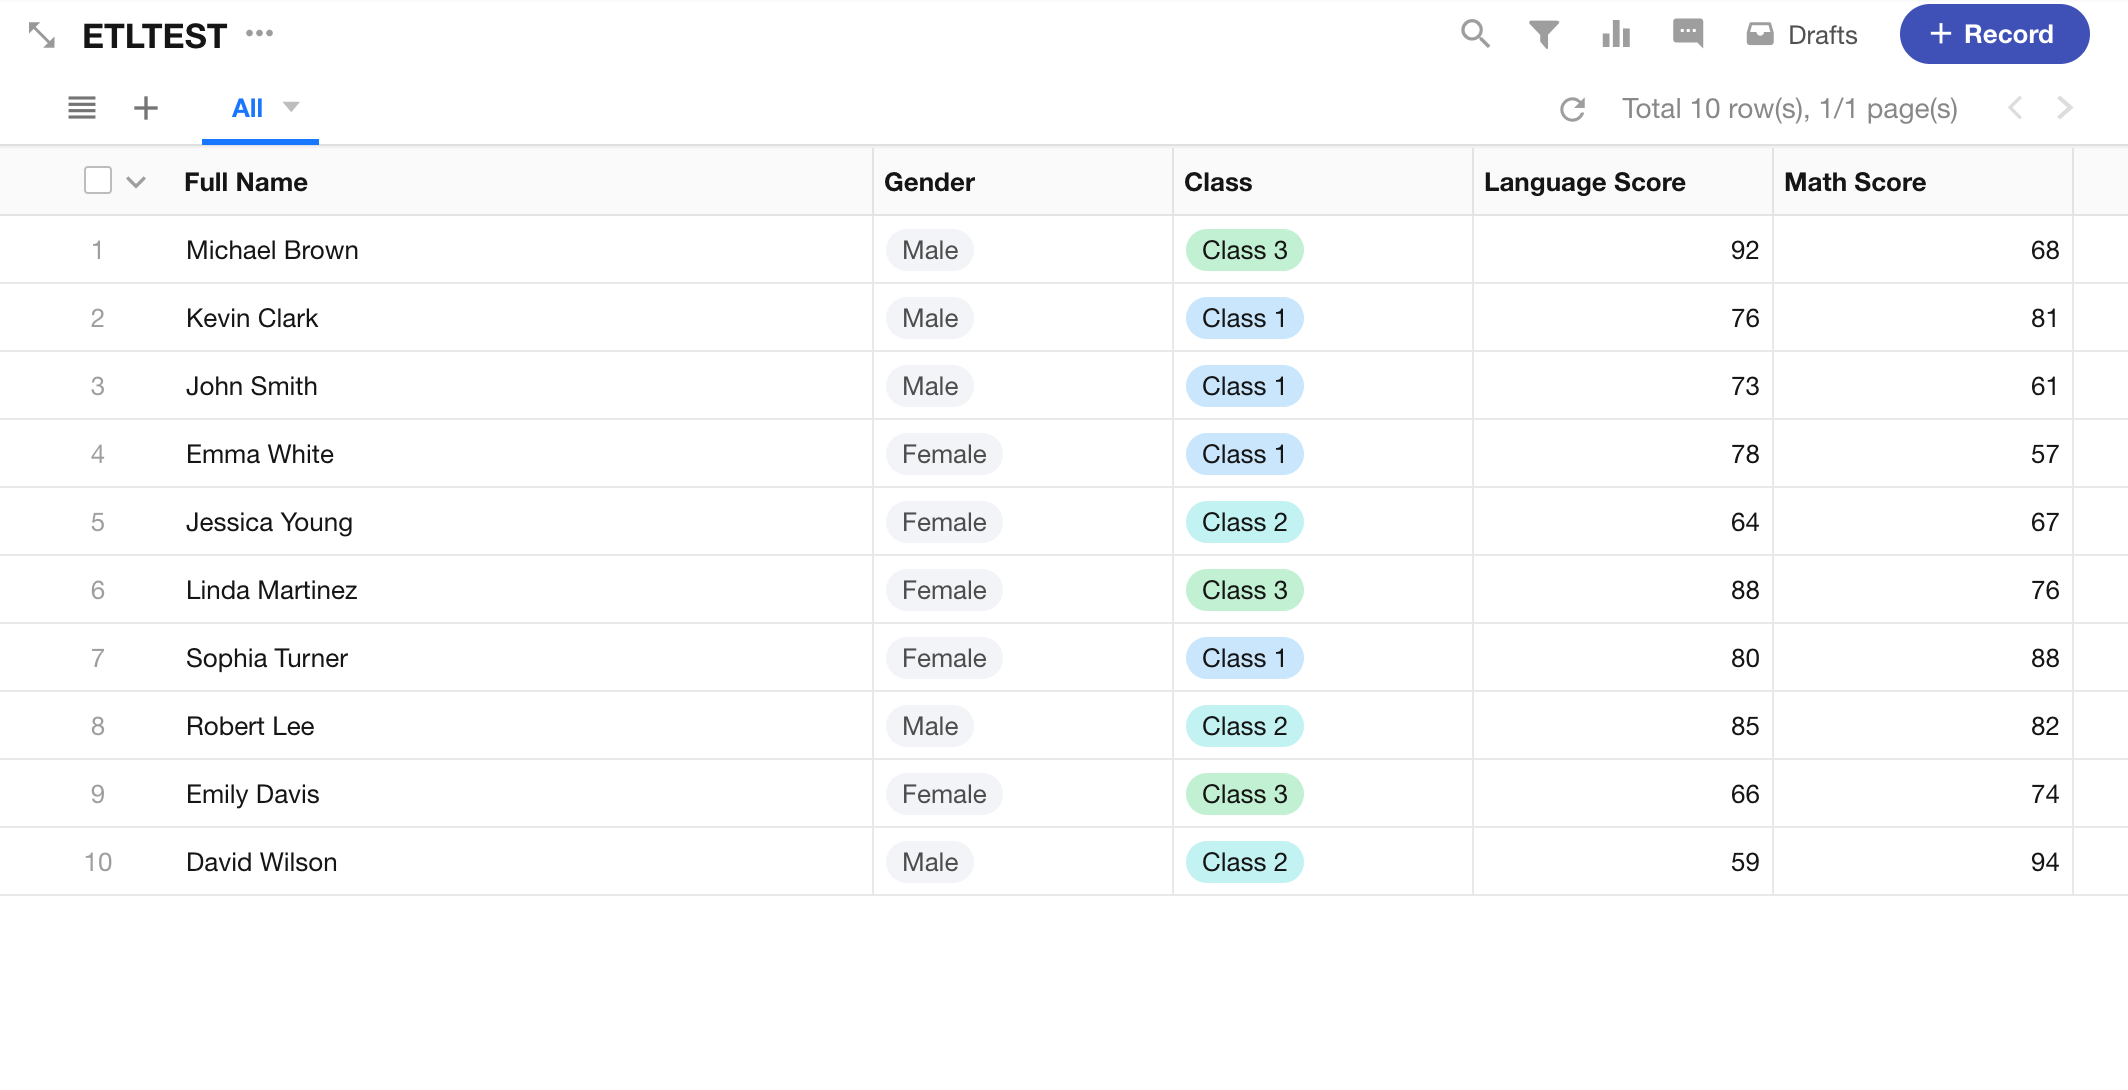
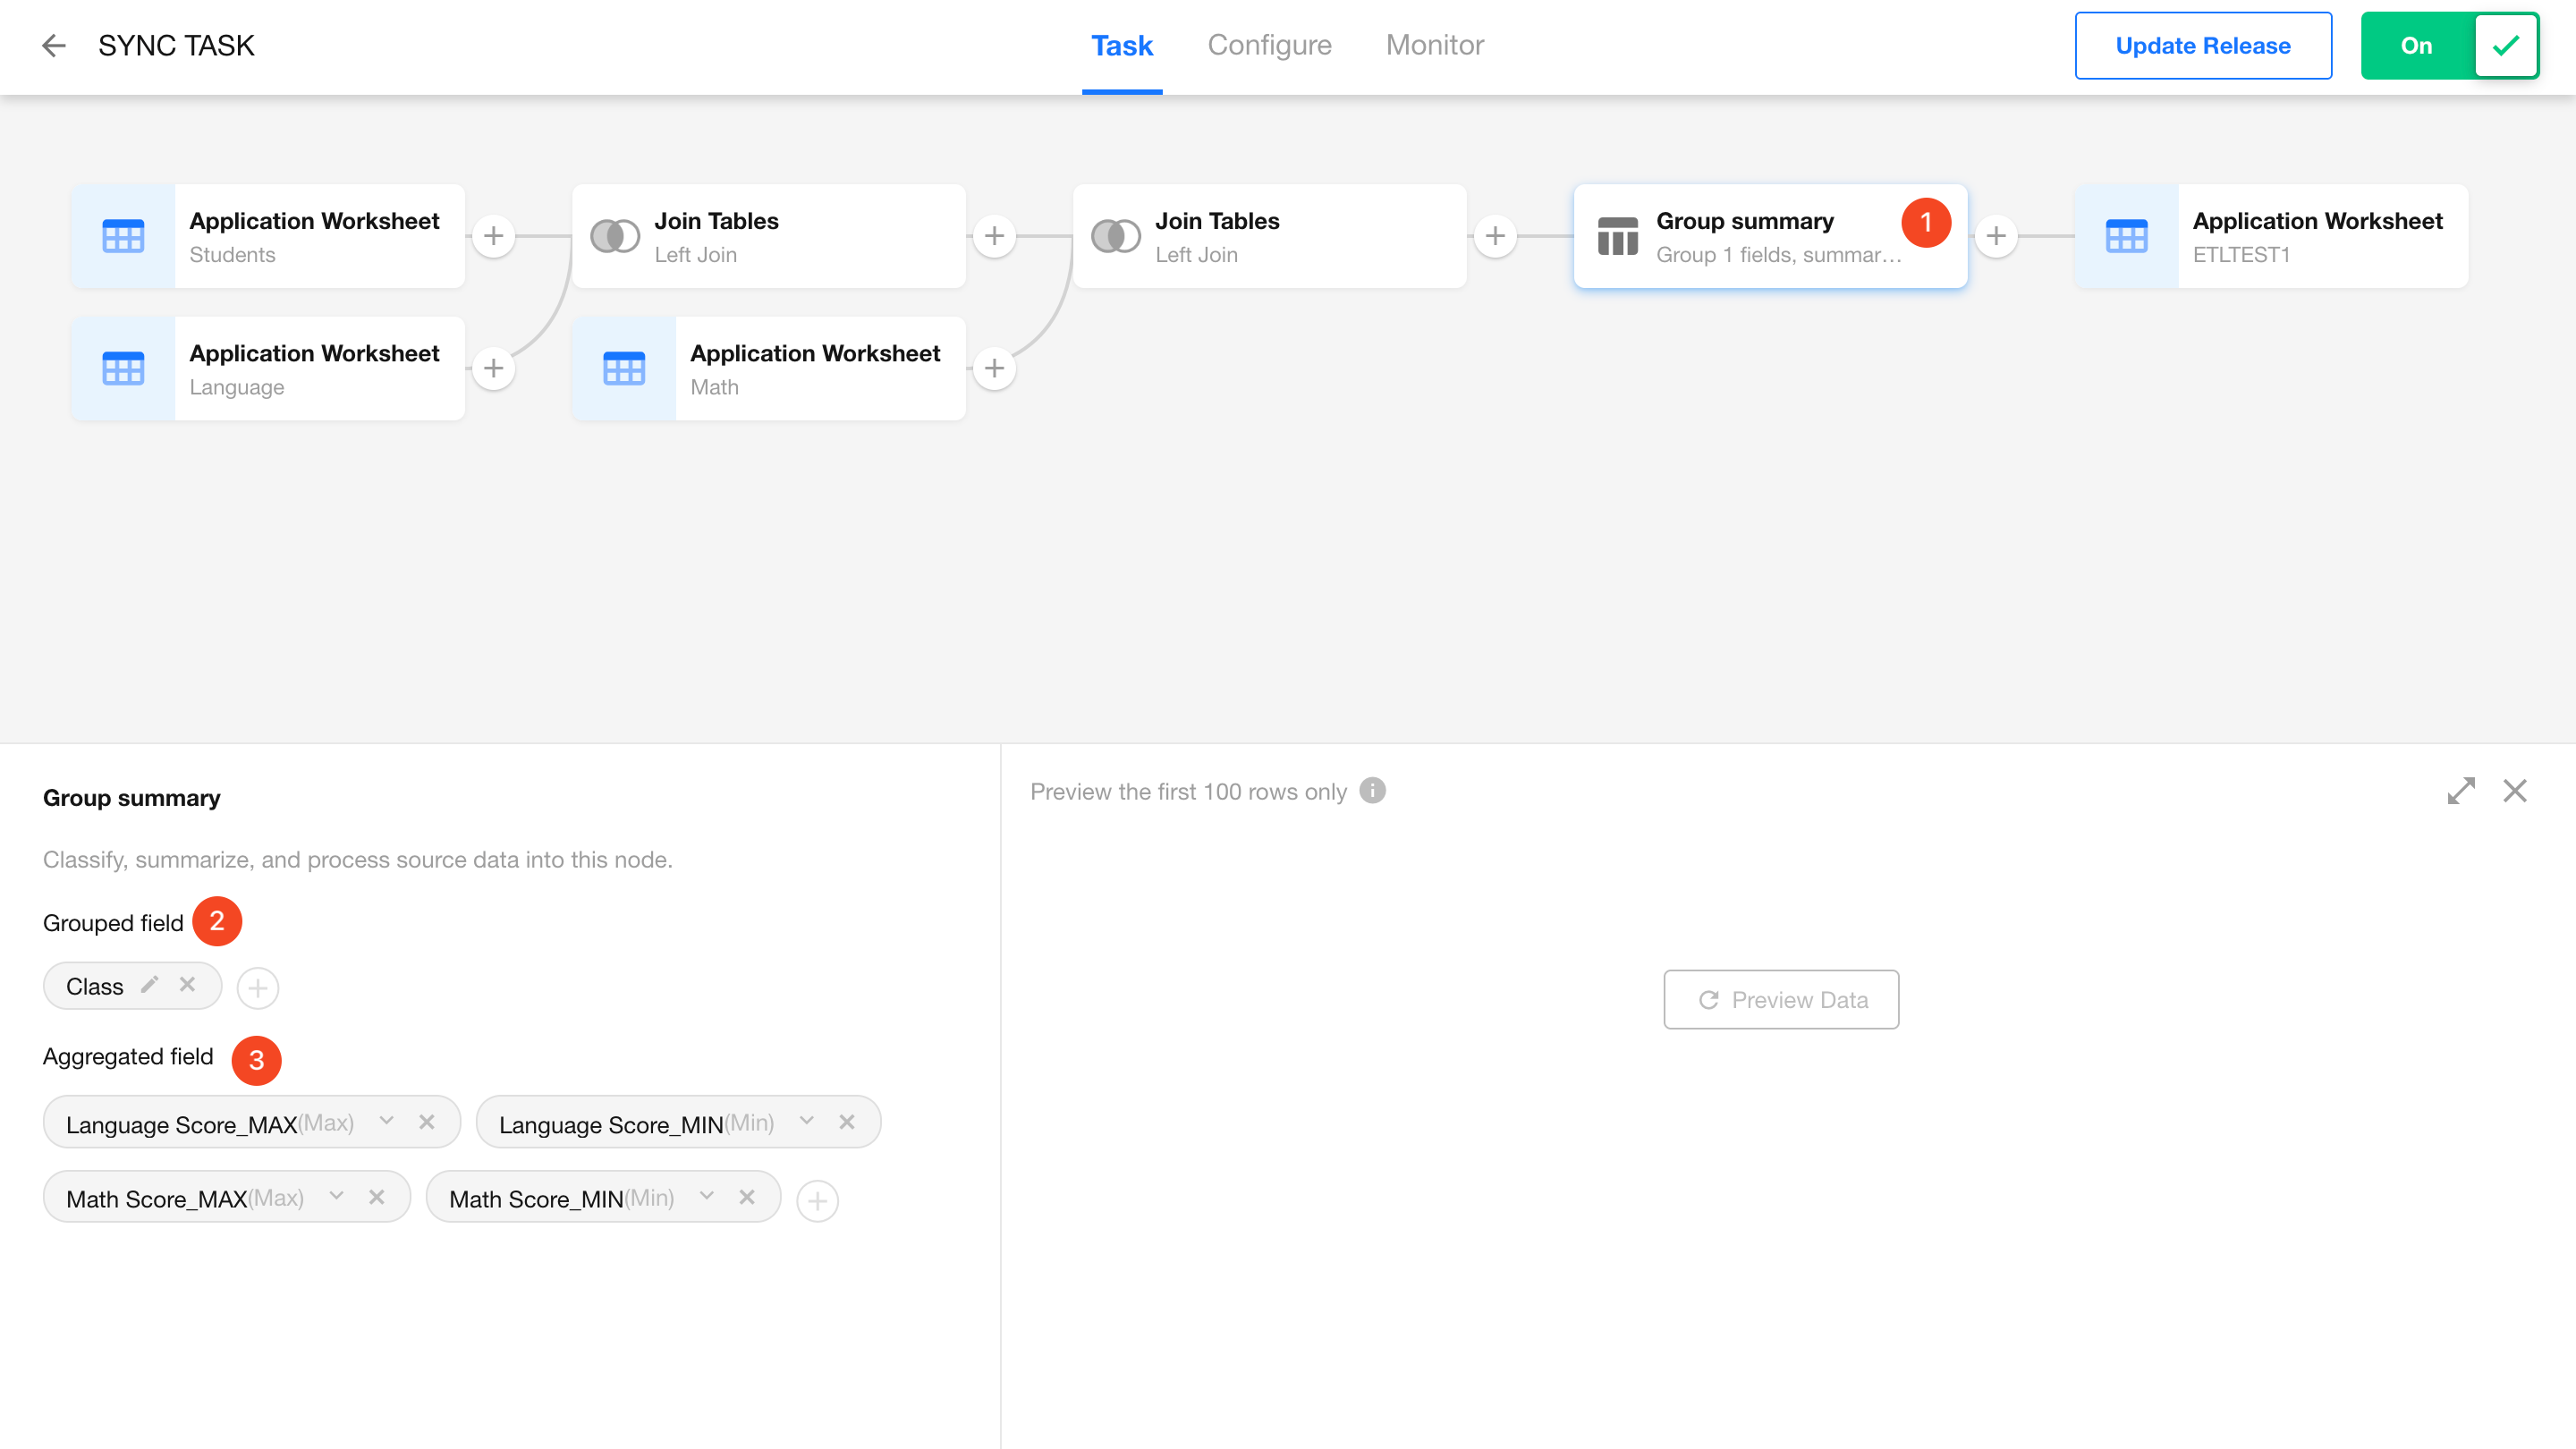
Using the result from a previous join operation, suppose we’ve added a Class field to the dataset. Now we want to group records by class and calculate the highest, average, and lowest scores for Language and Math.
-
Prepare the Data
-
Add a Group Summary Node
-
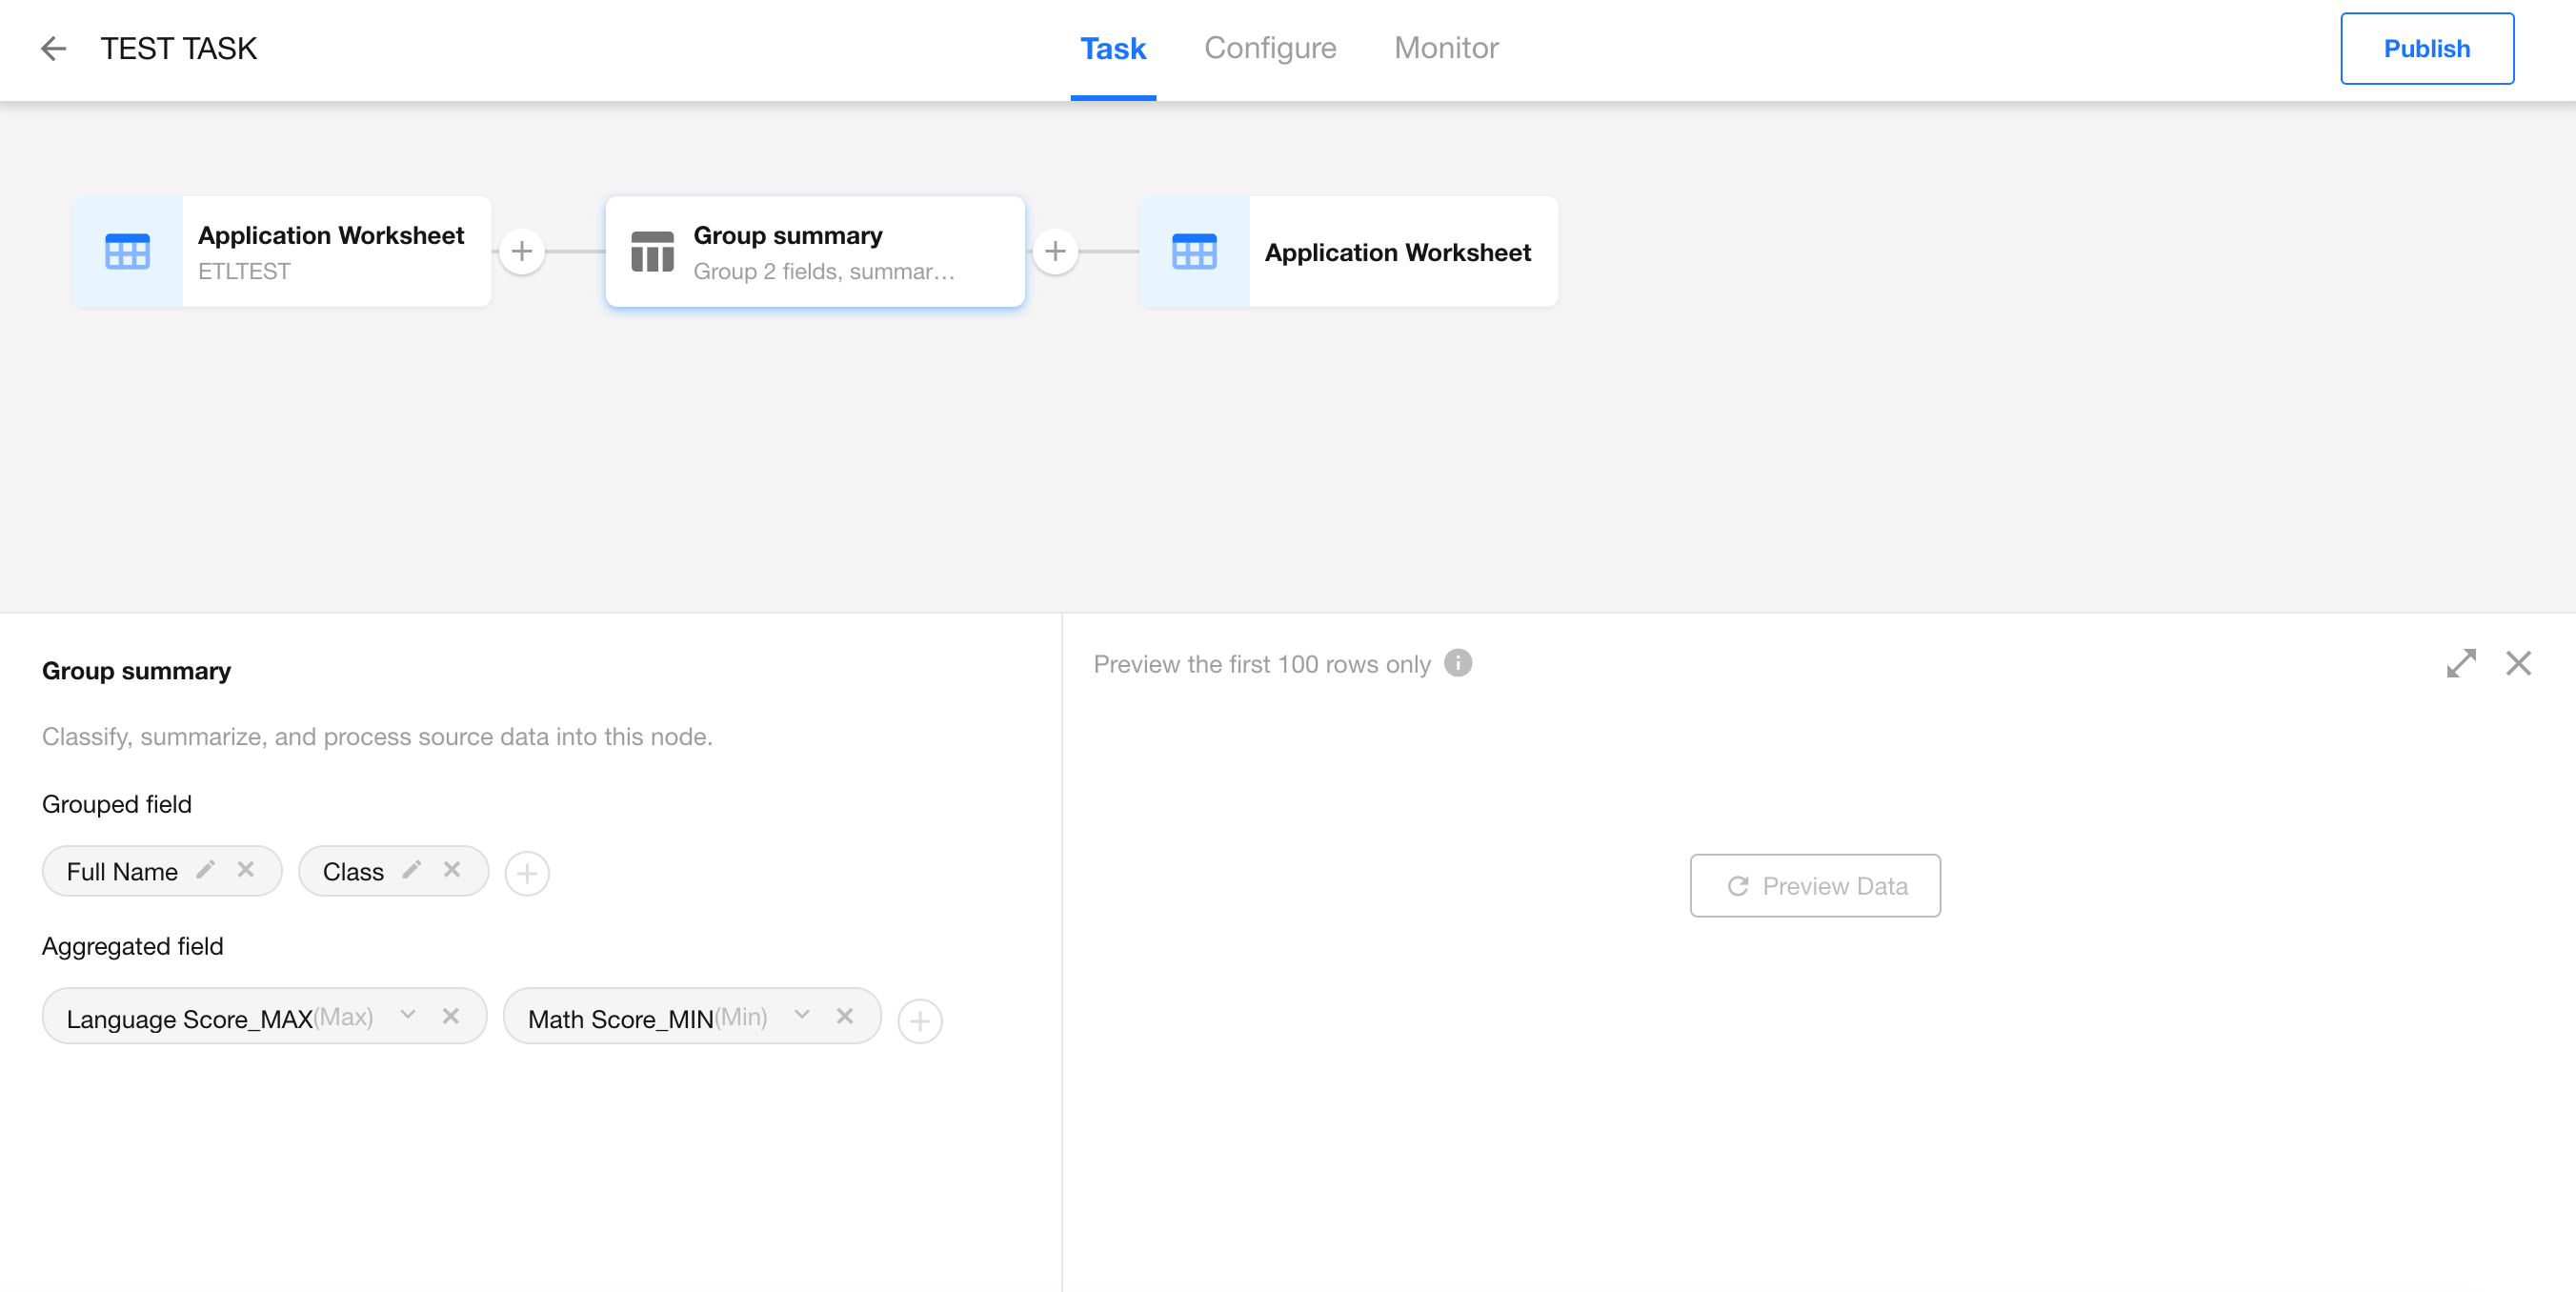
Configure the Group Summary Node
- Group by: Class
- Summary fields: Select Language Score and Math Score with the following functions:
- Max
- Min
- Avg
-
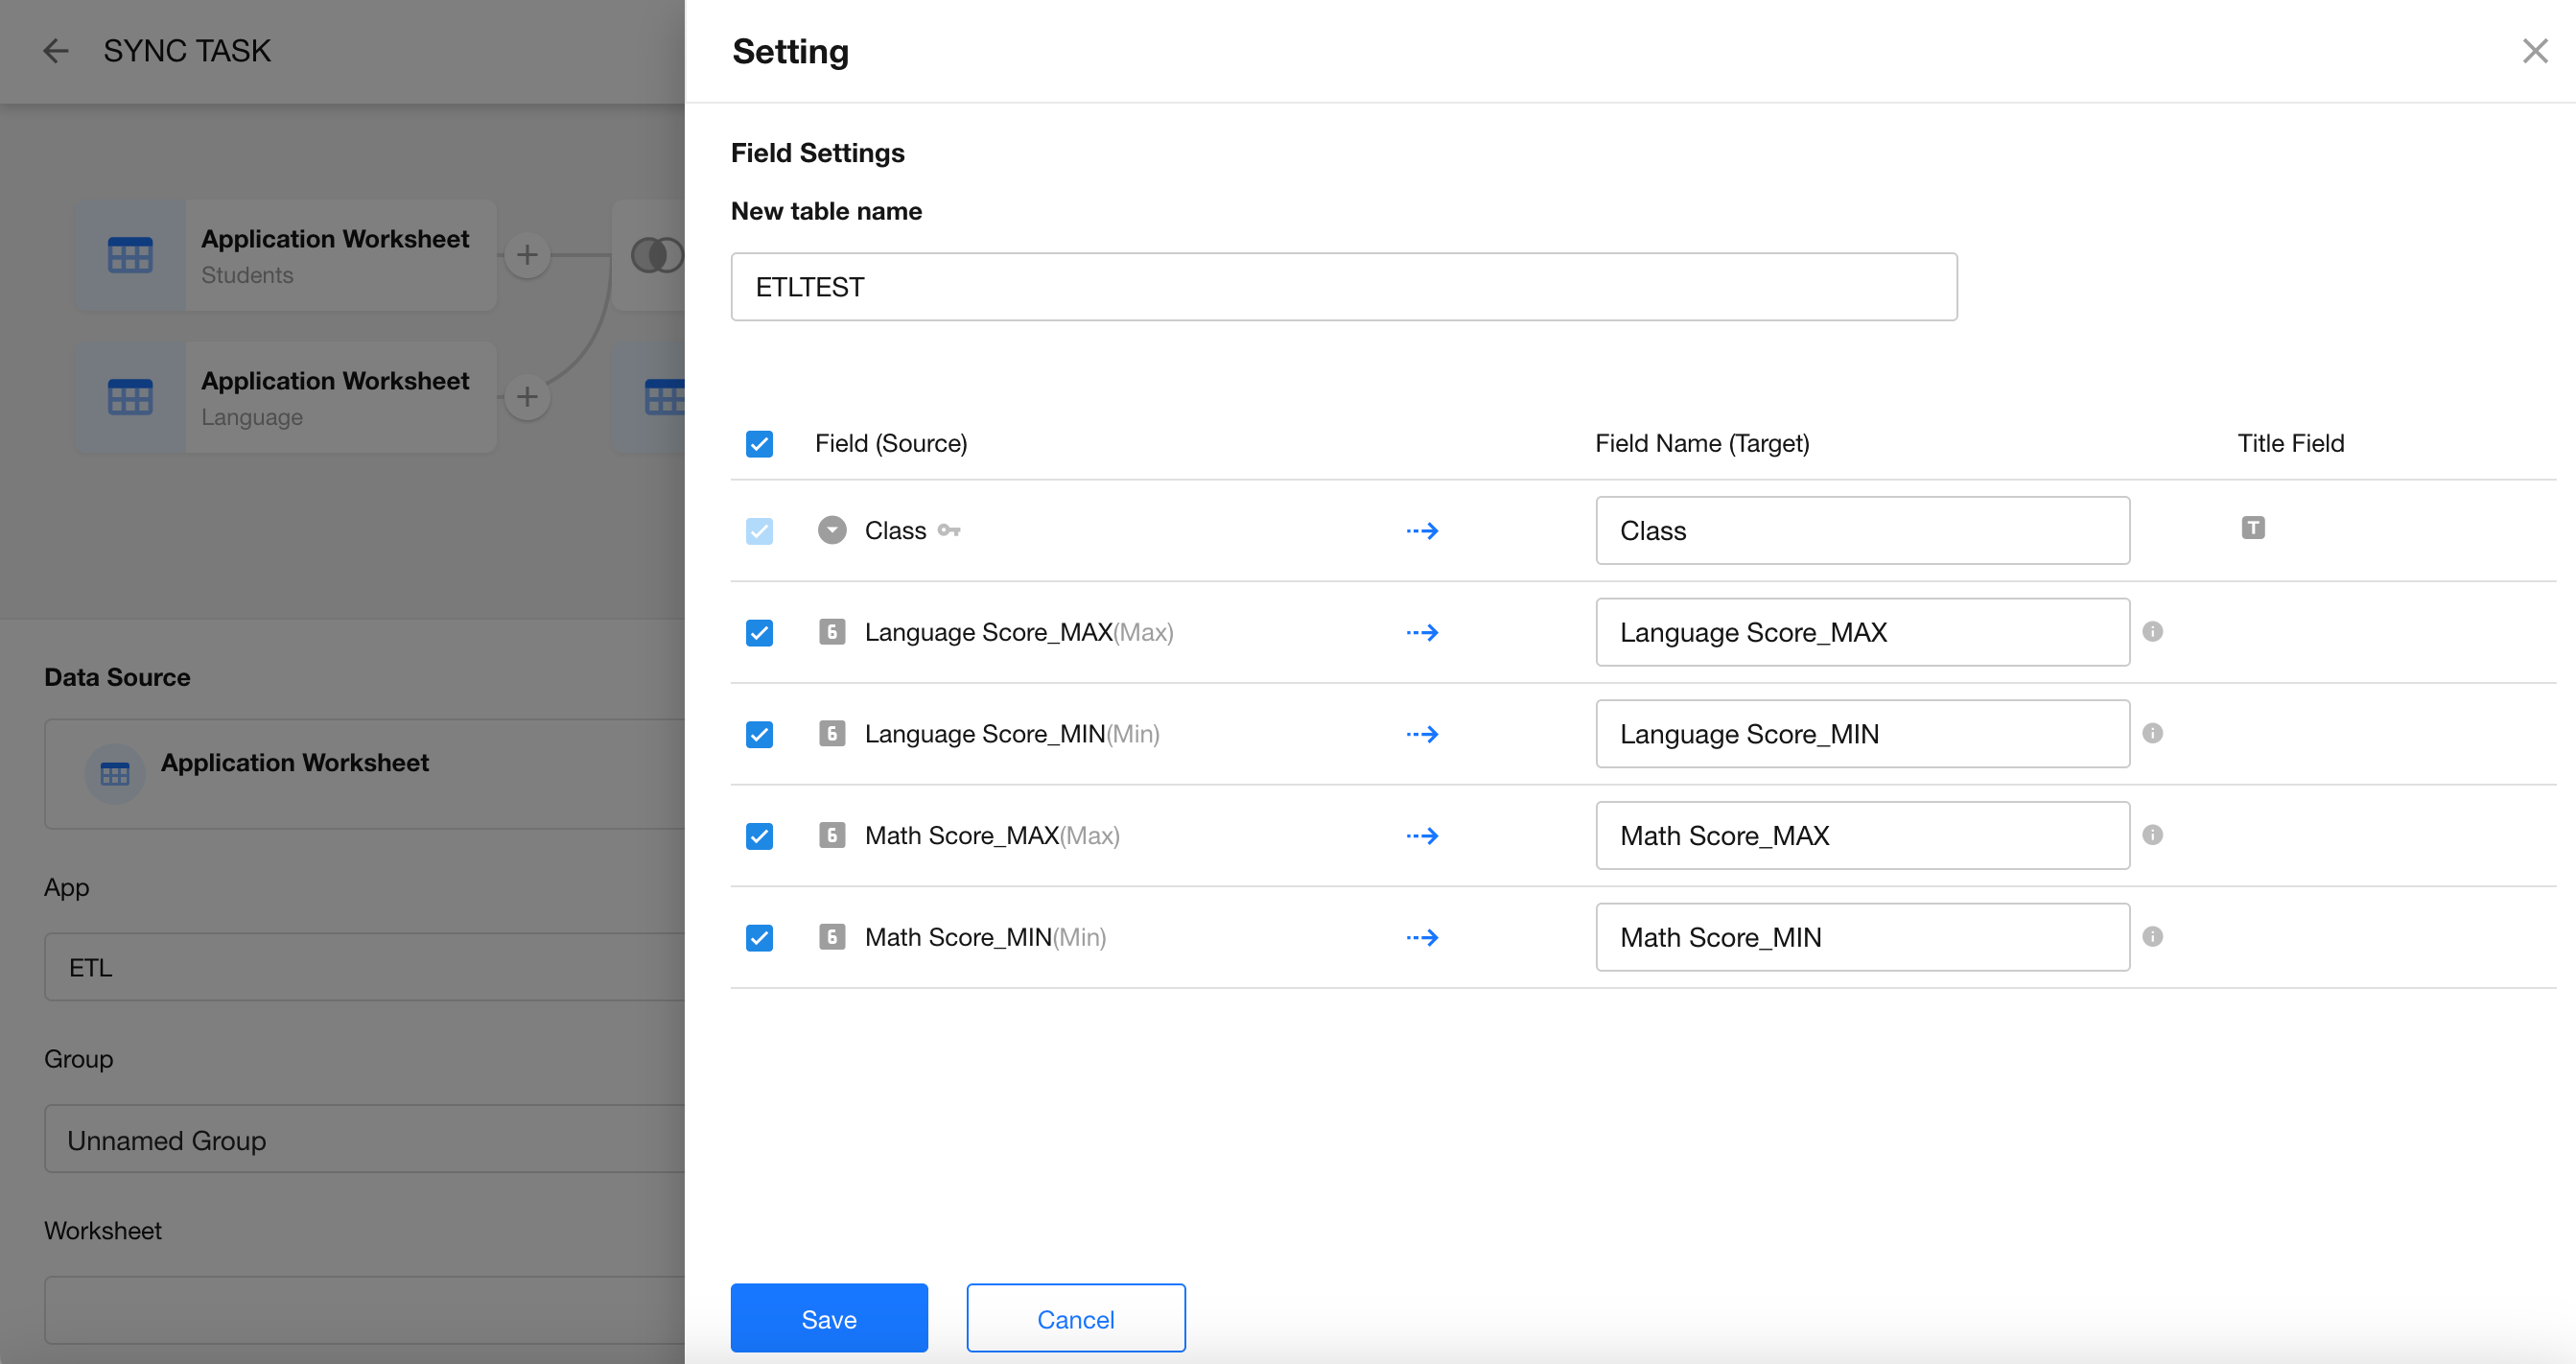
Set the Destination
Create a new worksheet to store the grouped and summarized results.
-
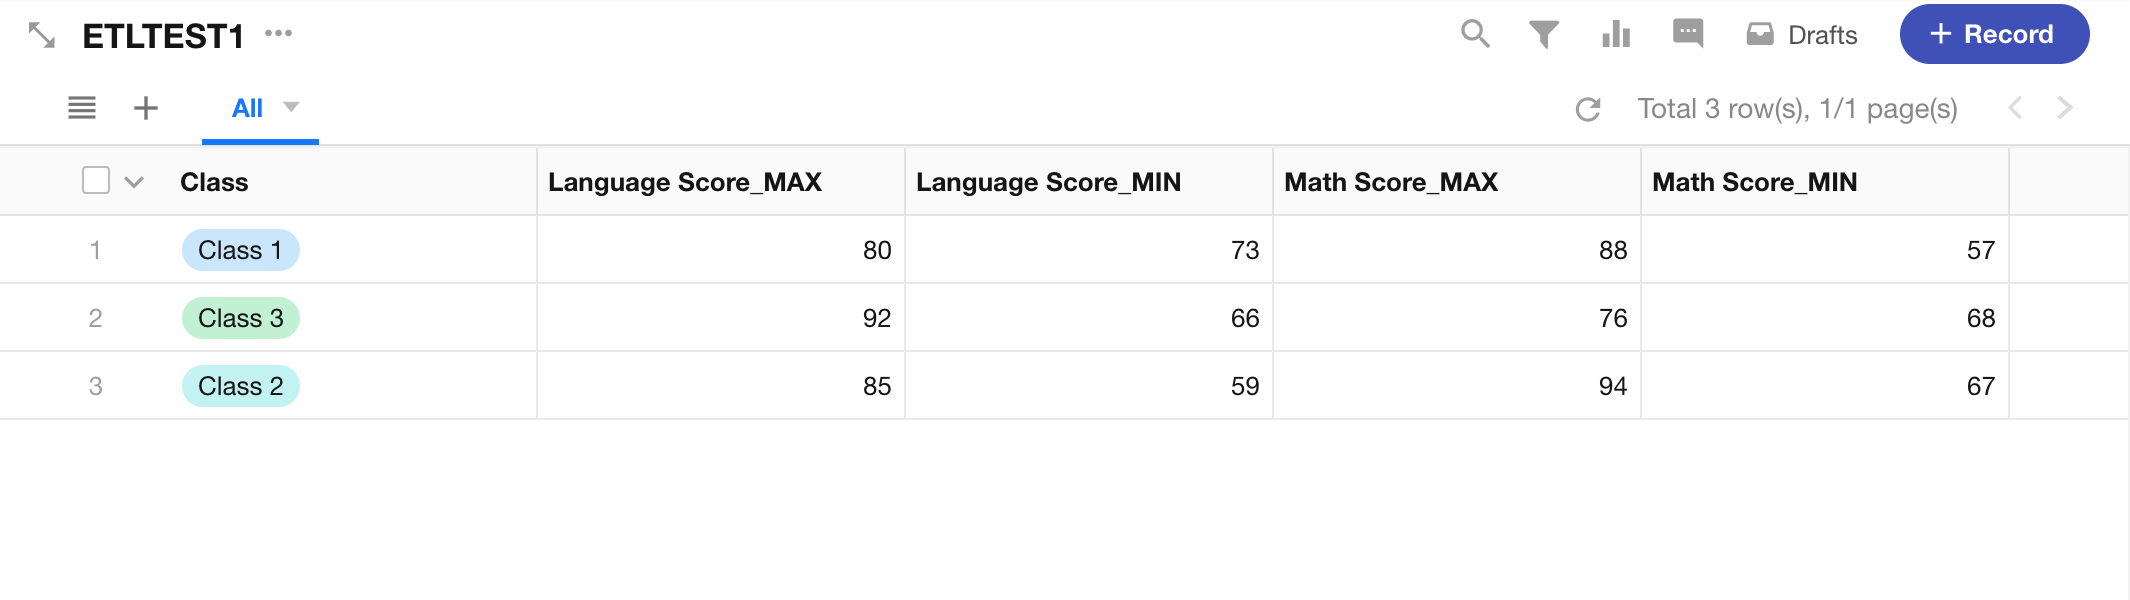
Publish and Run the Sync Task
Once executed, the task will output the grouped data by class along with calculated statistics for each subject.
Merge Tables
The Merge Tables node allows you to combine the result sets of two tables into a single dataset using one of six supported set operations.
By using the Merge Tables node in a data sync task, you can simplify the process of merging data from multiple sources. This eliminates the need for separate queries and complex post-processing, increasing efficiency and maintainability for large-scale data integration tasks.
How to Use
-
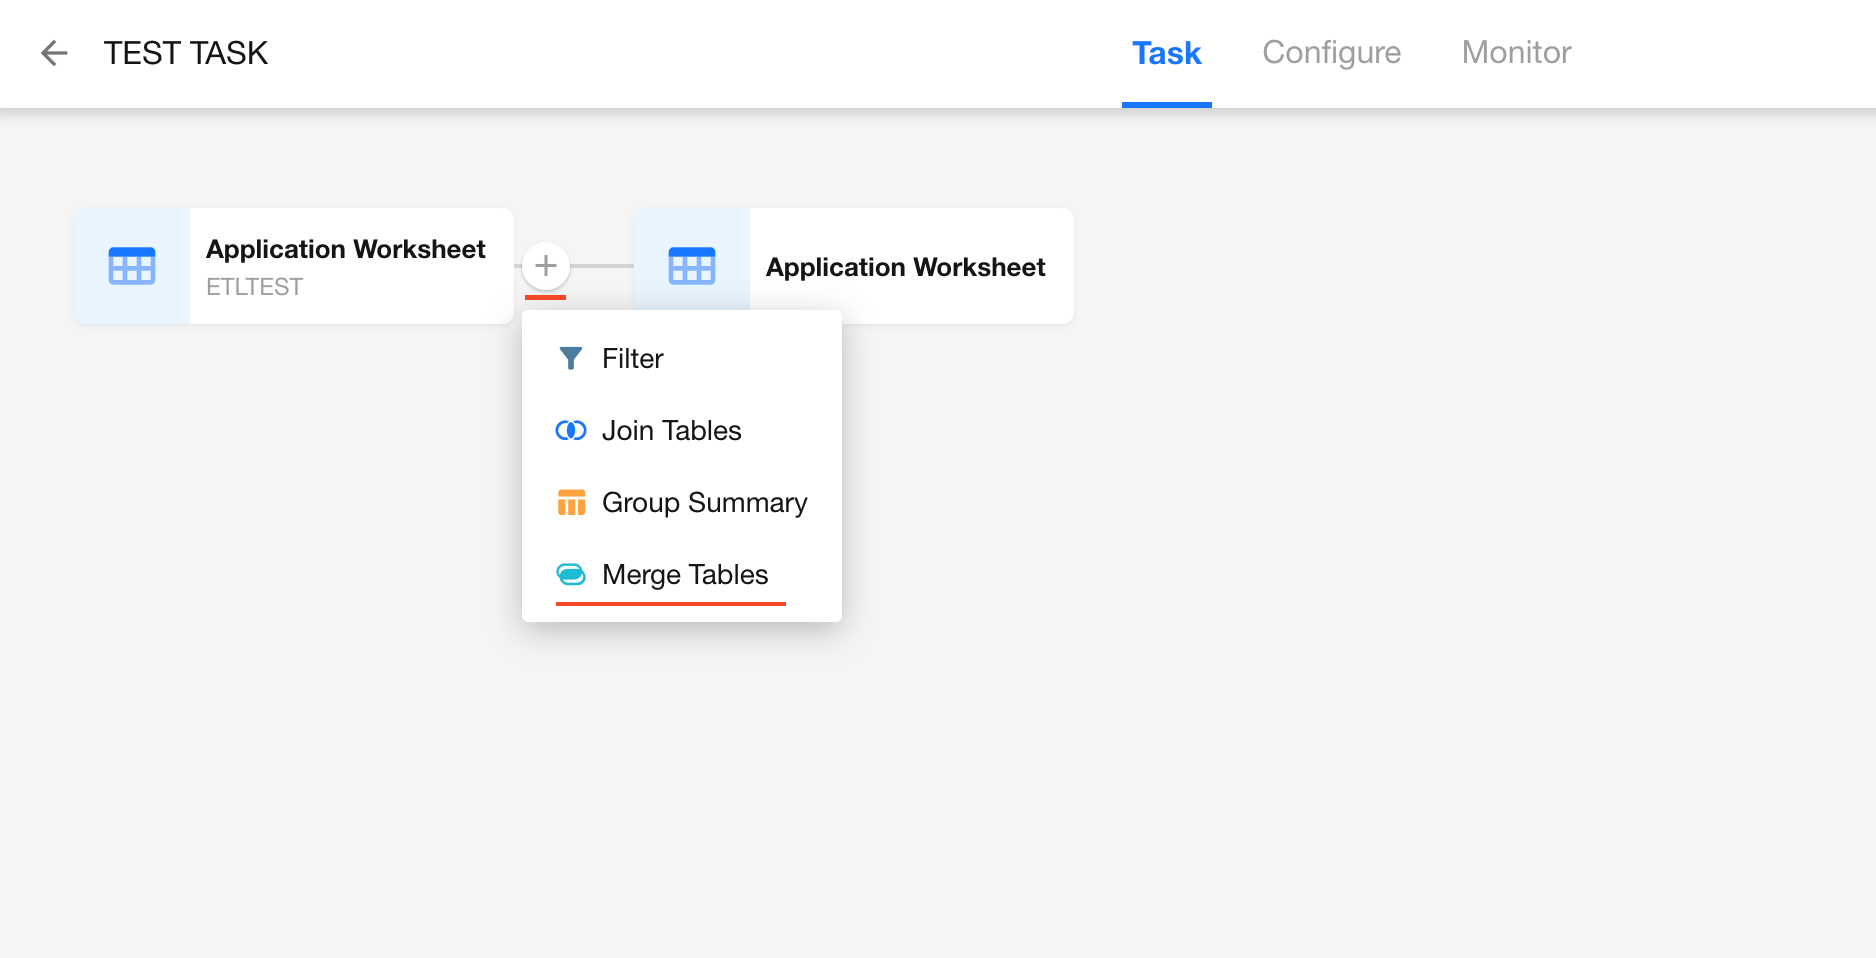
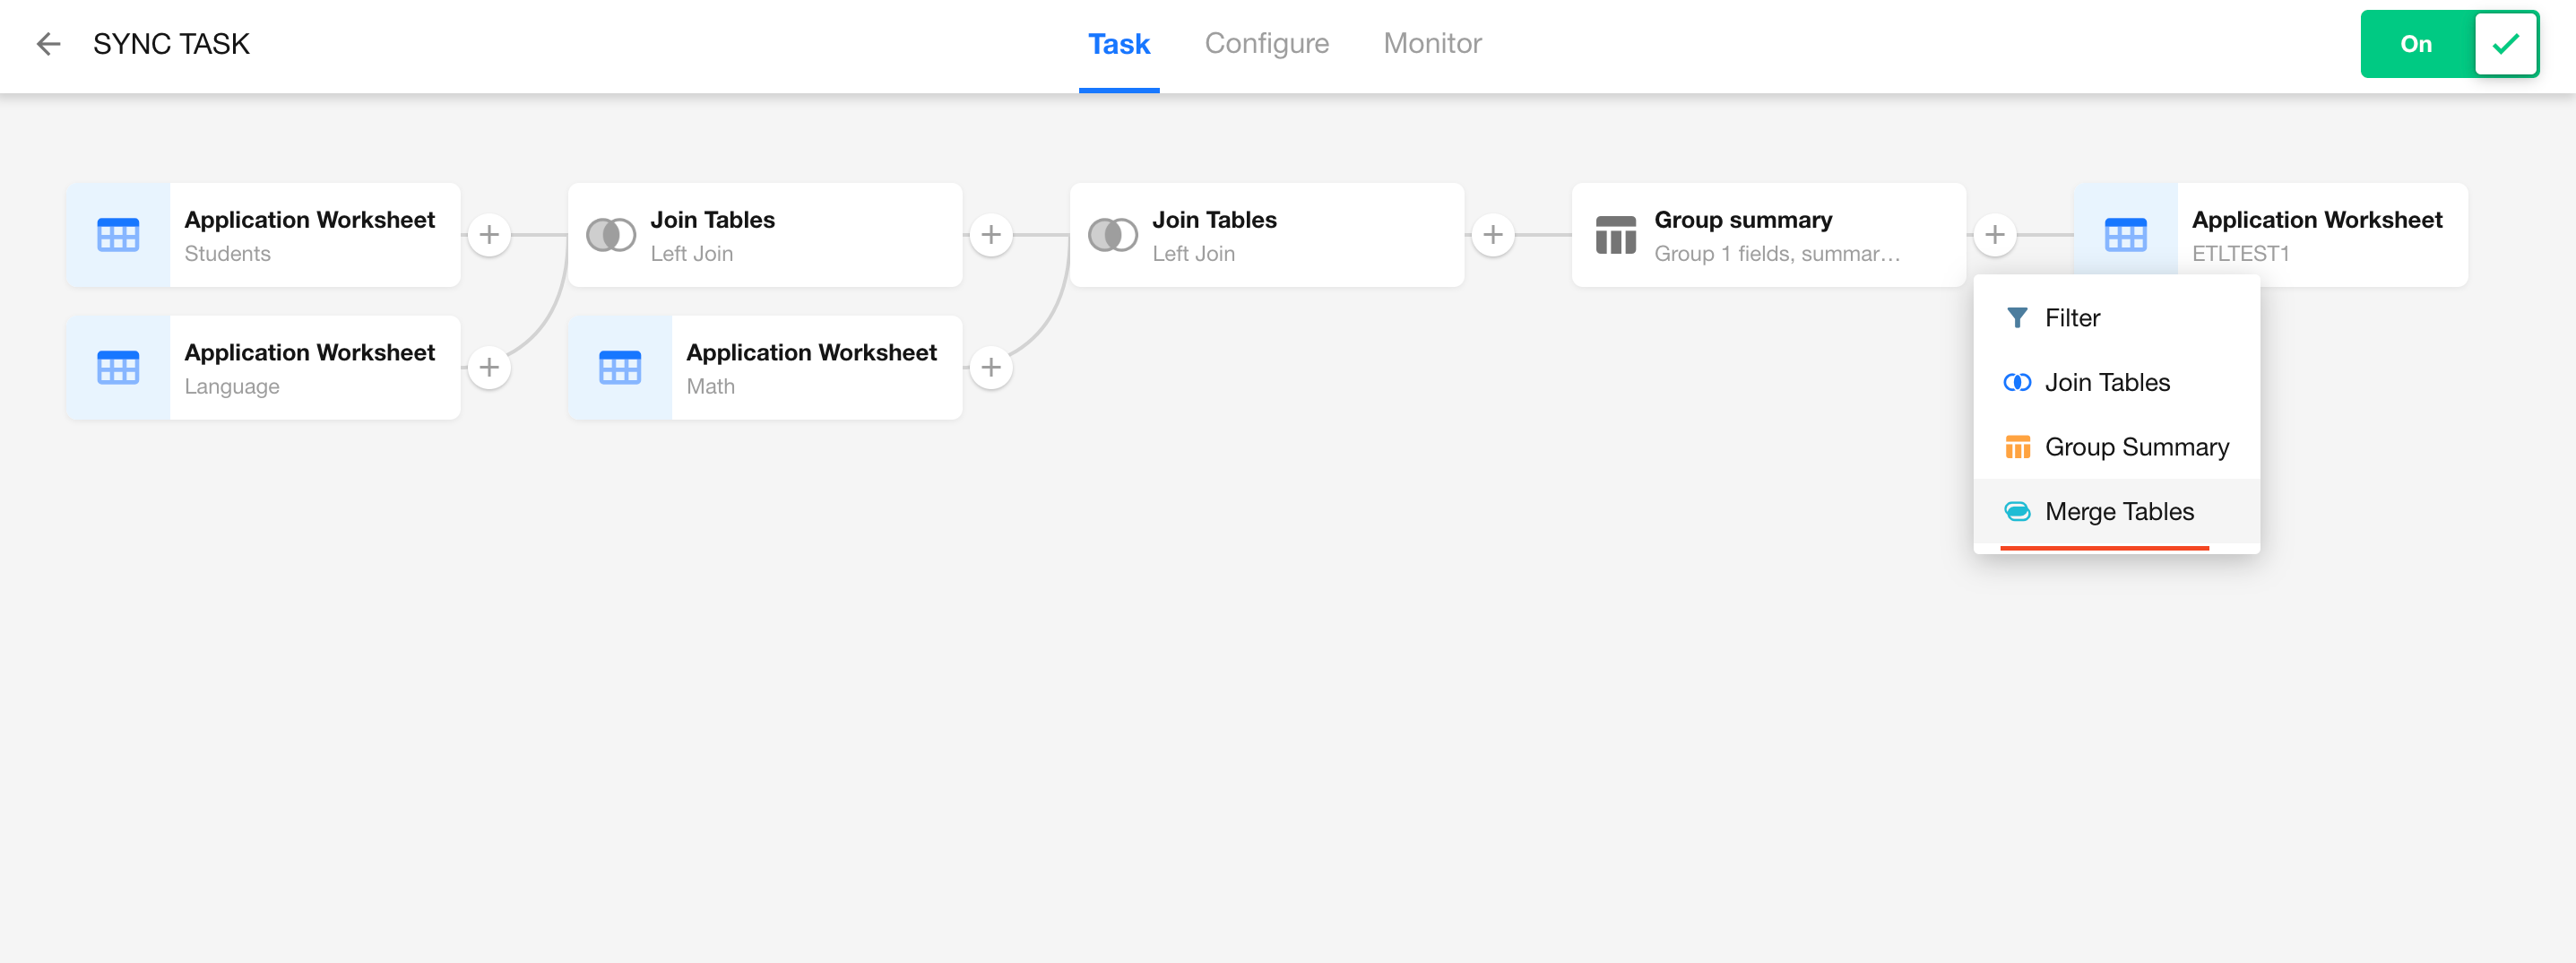
In any data sync task, hover between two nodes and click “+” to add a Merge Tables node.
-
Once added, you’ll see two nodes:
- Read Data Source: Used to select the source dataset, which can be either a worksheet or an external database.
- Merge Tables: Used to configure the merge operation.
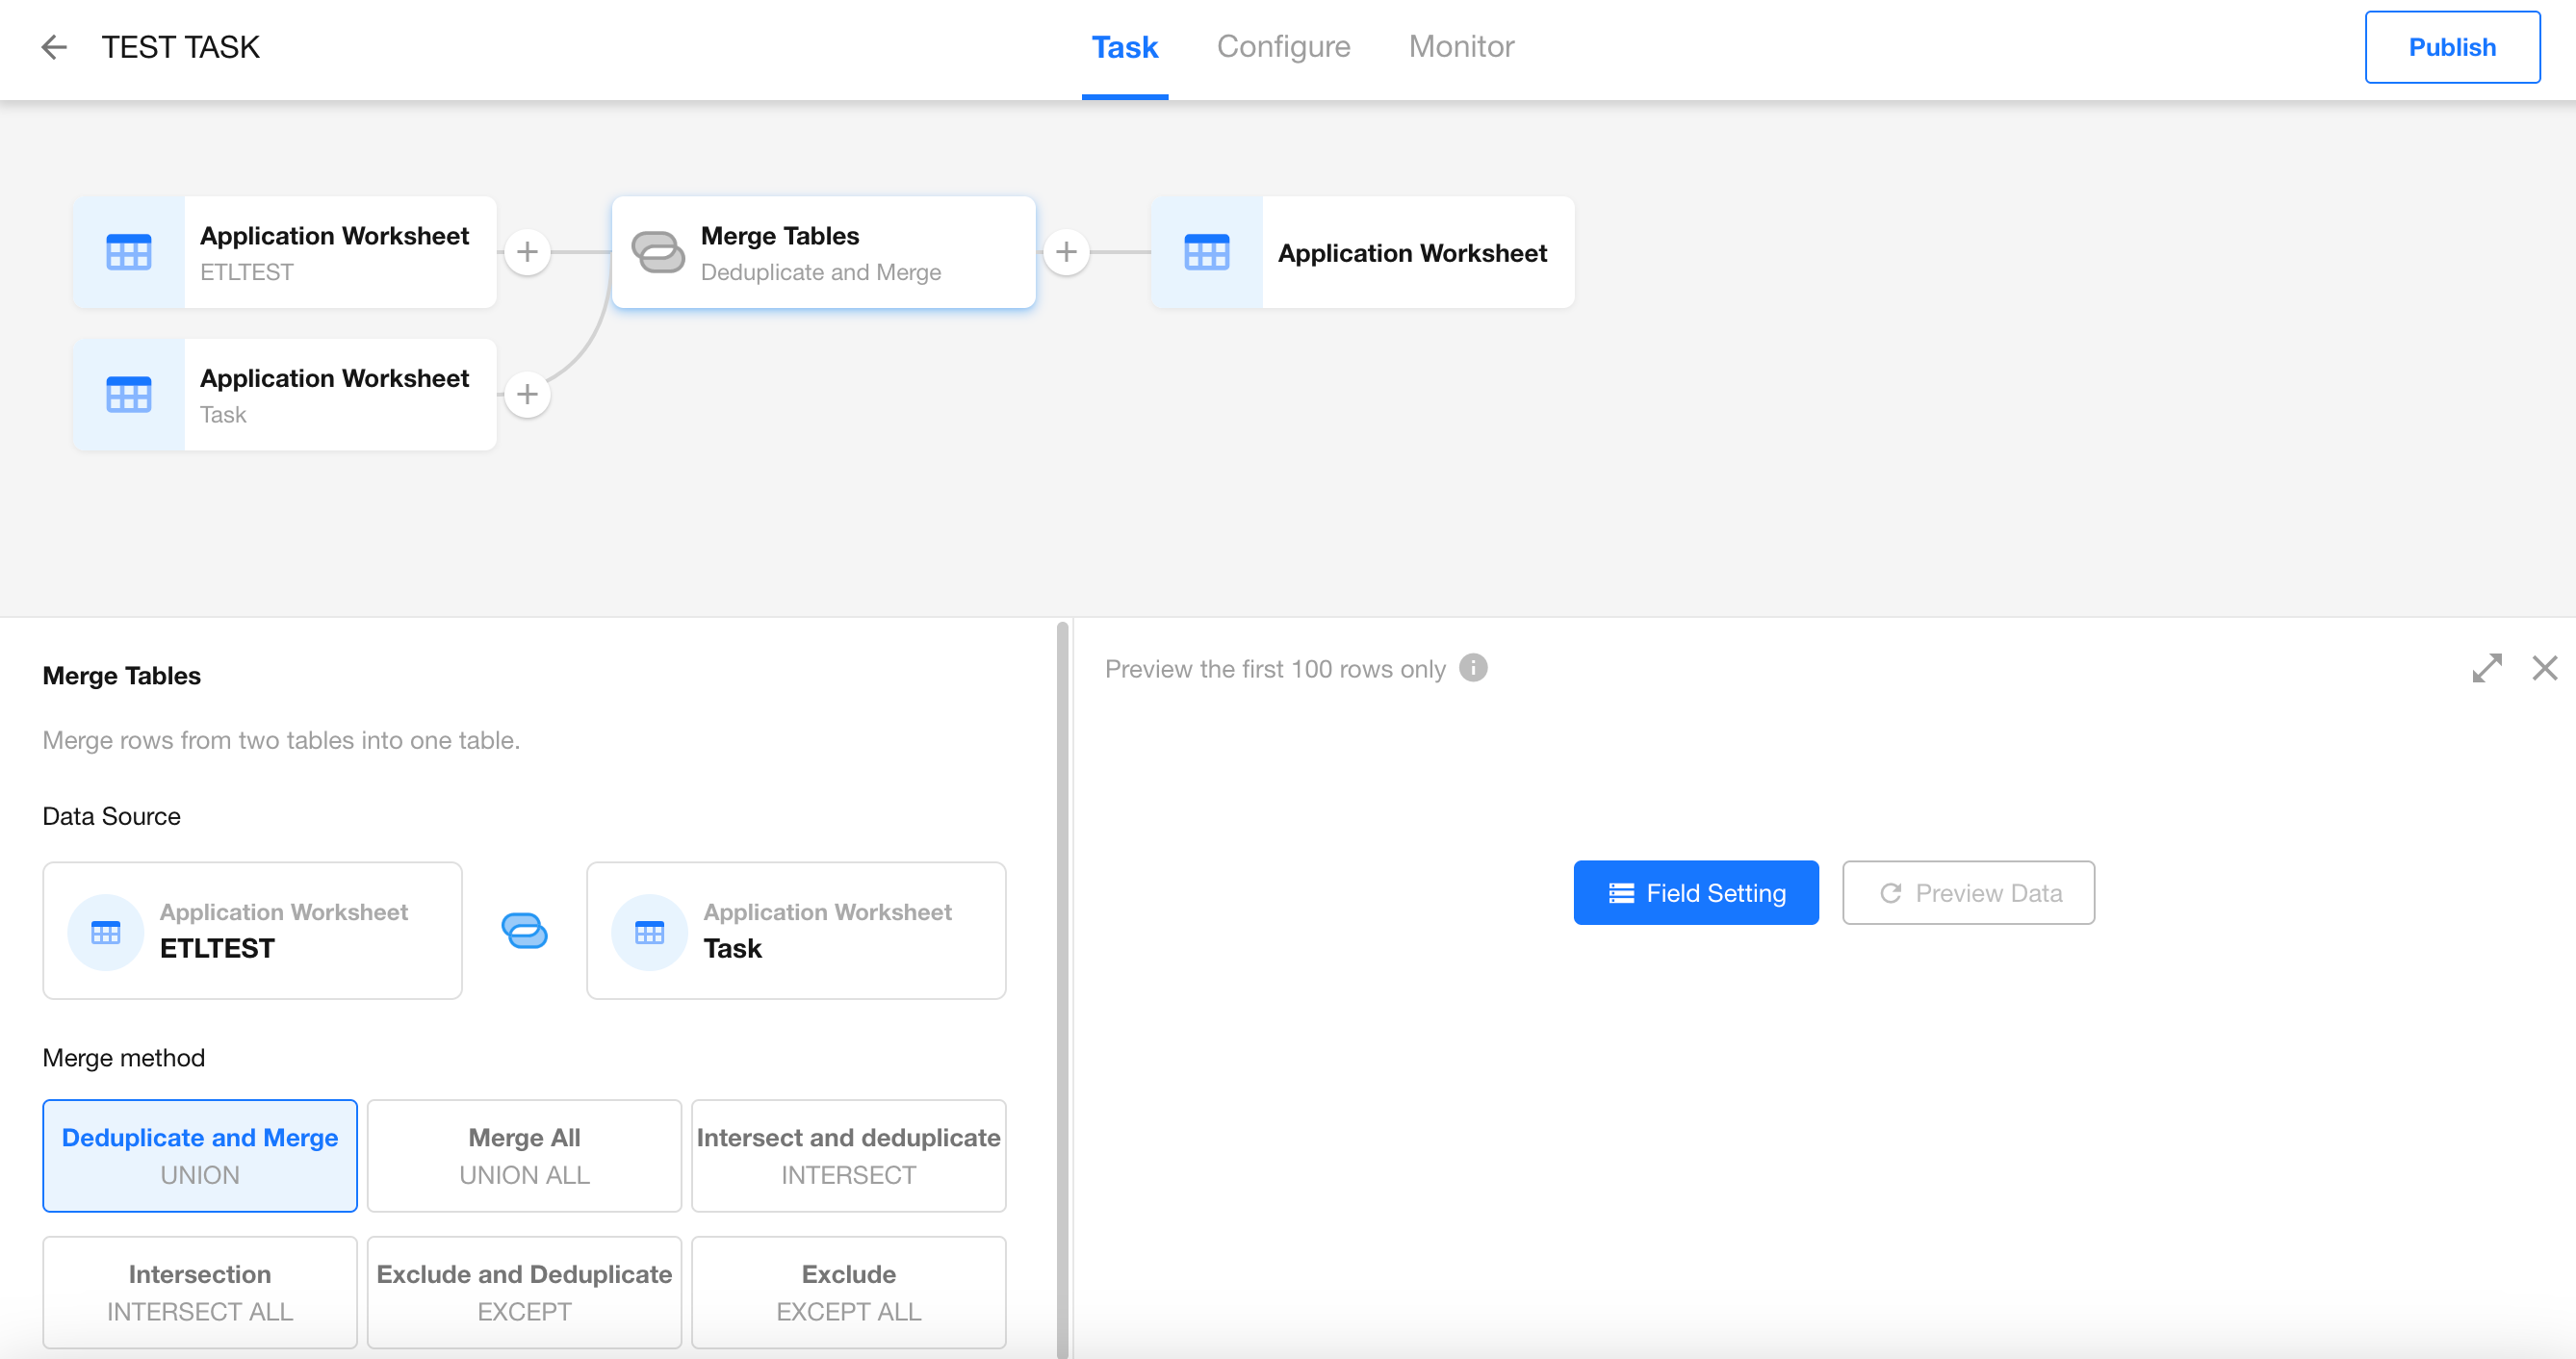
Supported Set Operations:
- UNION (Distinct): Combines all records from both tables and removes duplicates.
- UNION ALL: Combines all records from both tables, including duplicates.
- INTERSECT (Distinct): Keeps only the records that exist in both tables, with duplicates removed.
- INTERSECT ALL: Keeps all records that exist in both tables, including duplicates.
- EXCEPT (Distinct): Keeps records that exist in the left table but not in the right table, with duplicates removed.
- EXCEPT ALL: Keeps records that exist in the left table but not in the right table, including duplicates.
Limitations
Only fields with the same name and data type will be merged into a single column.
Use Case Example
Let’s say you’ve completed a group summary node operation on one dataset and now need to merge the result with branch school scores that are stored in a separate system.
-
Prepare the Data
Group Summary Result:
Branch School Score Data (from database):

-
Add a Merge Tables Node
-
Configure the Merge Method
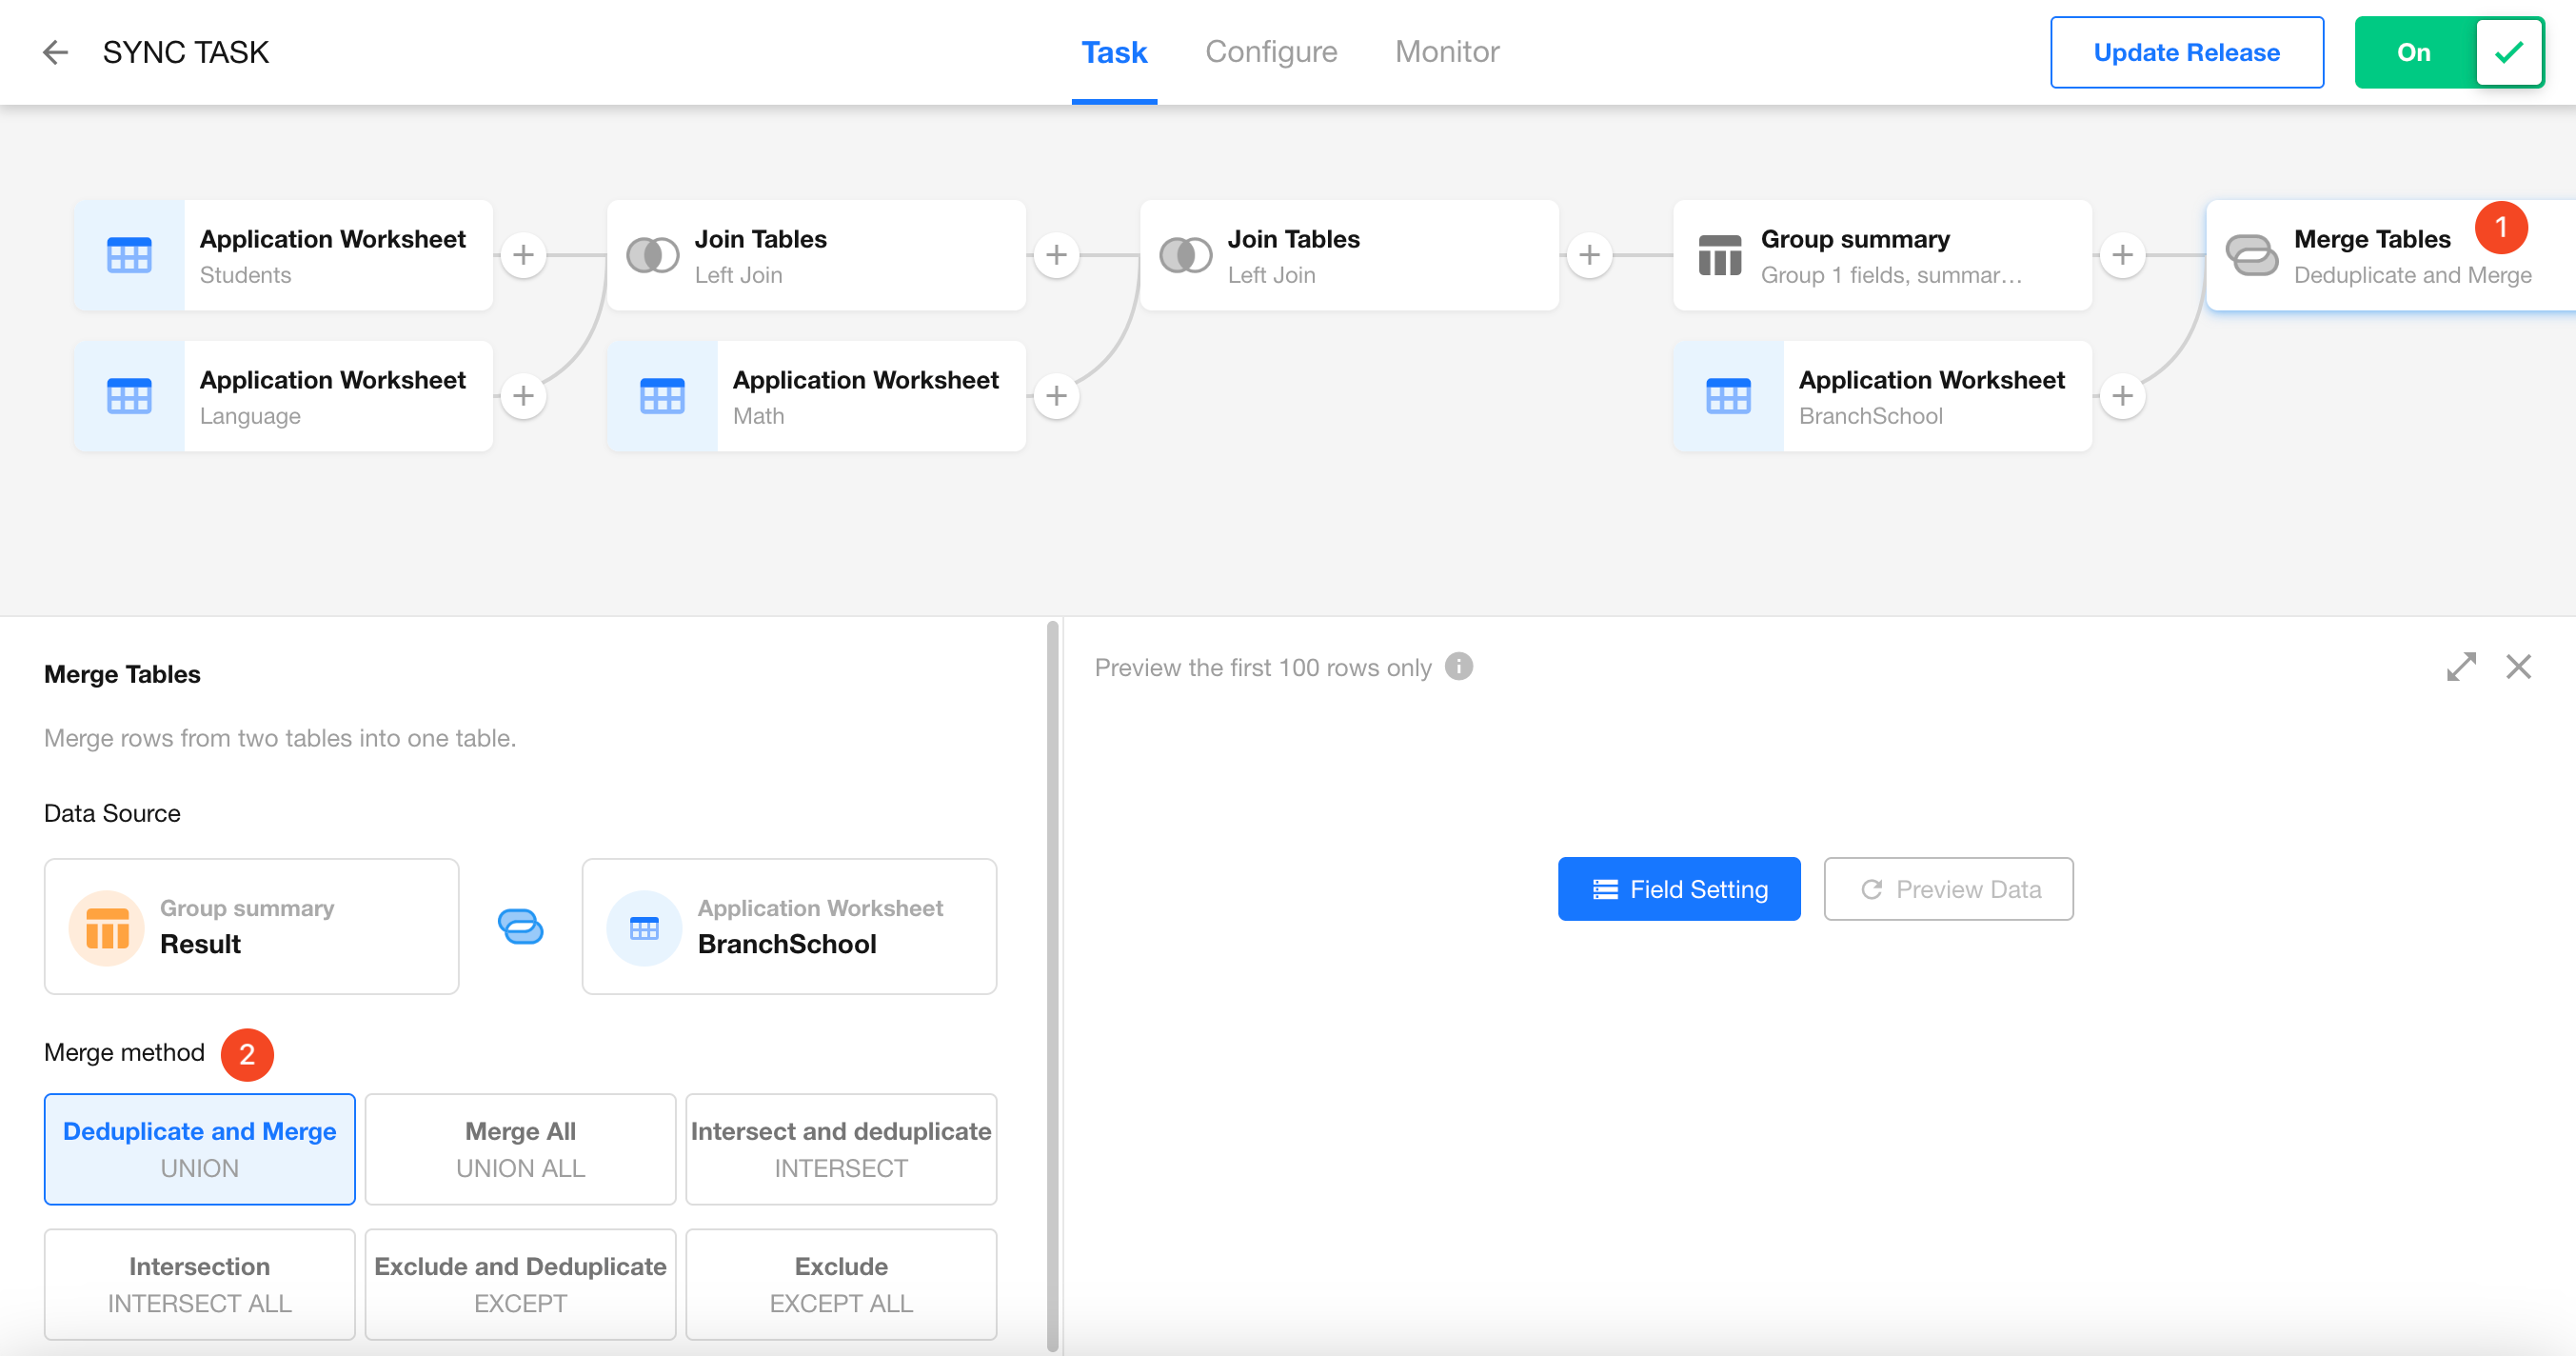
-
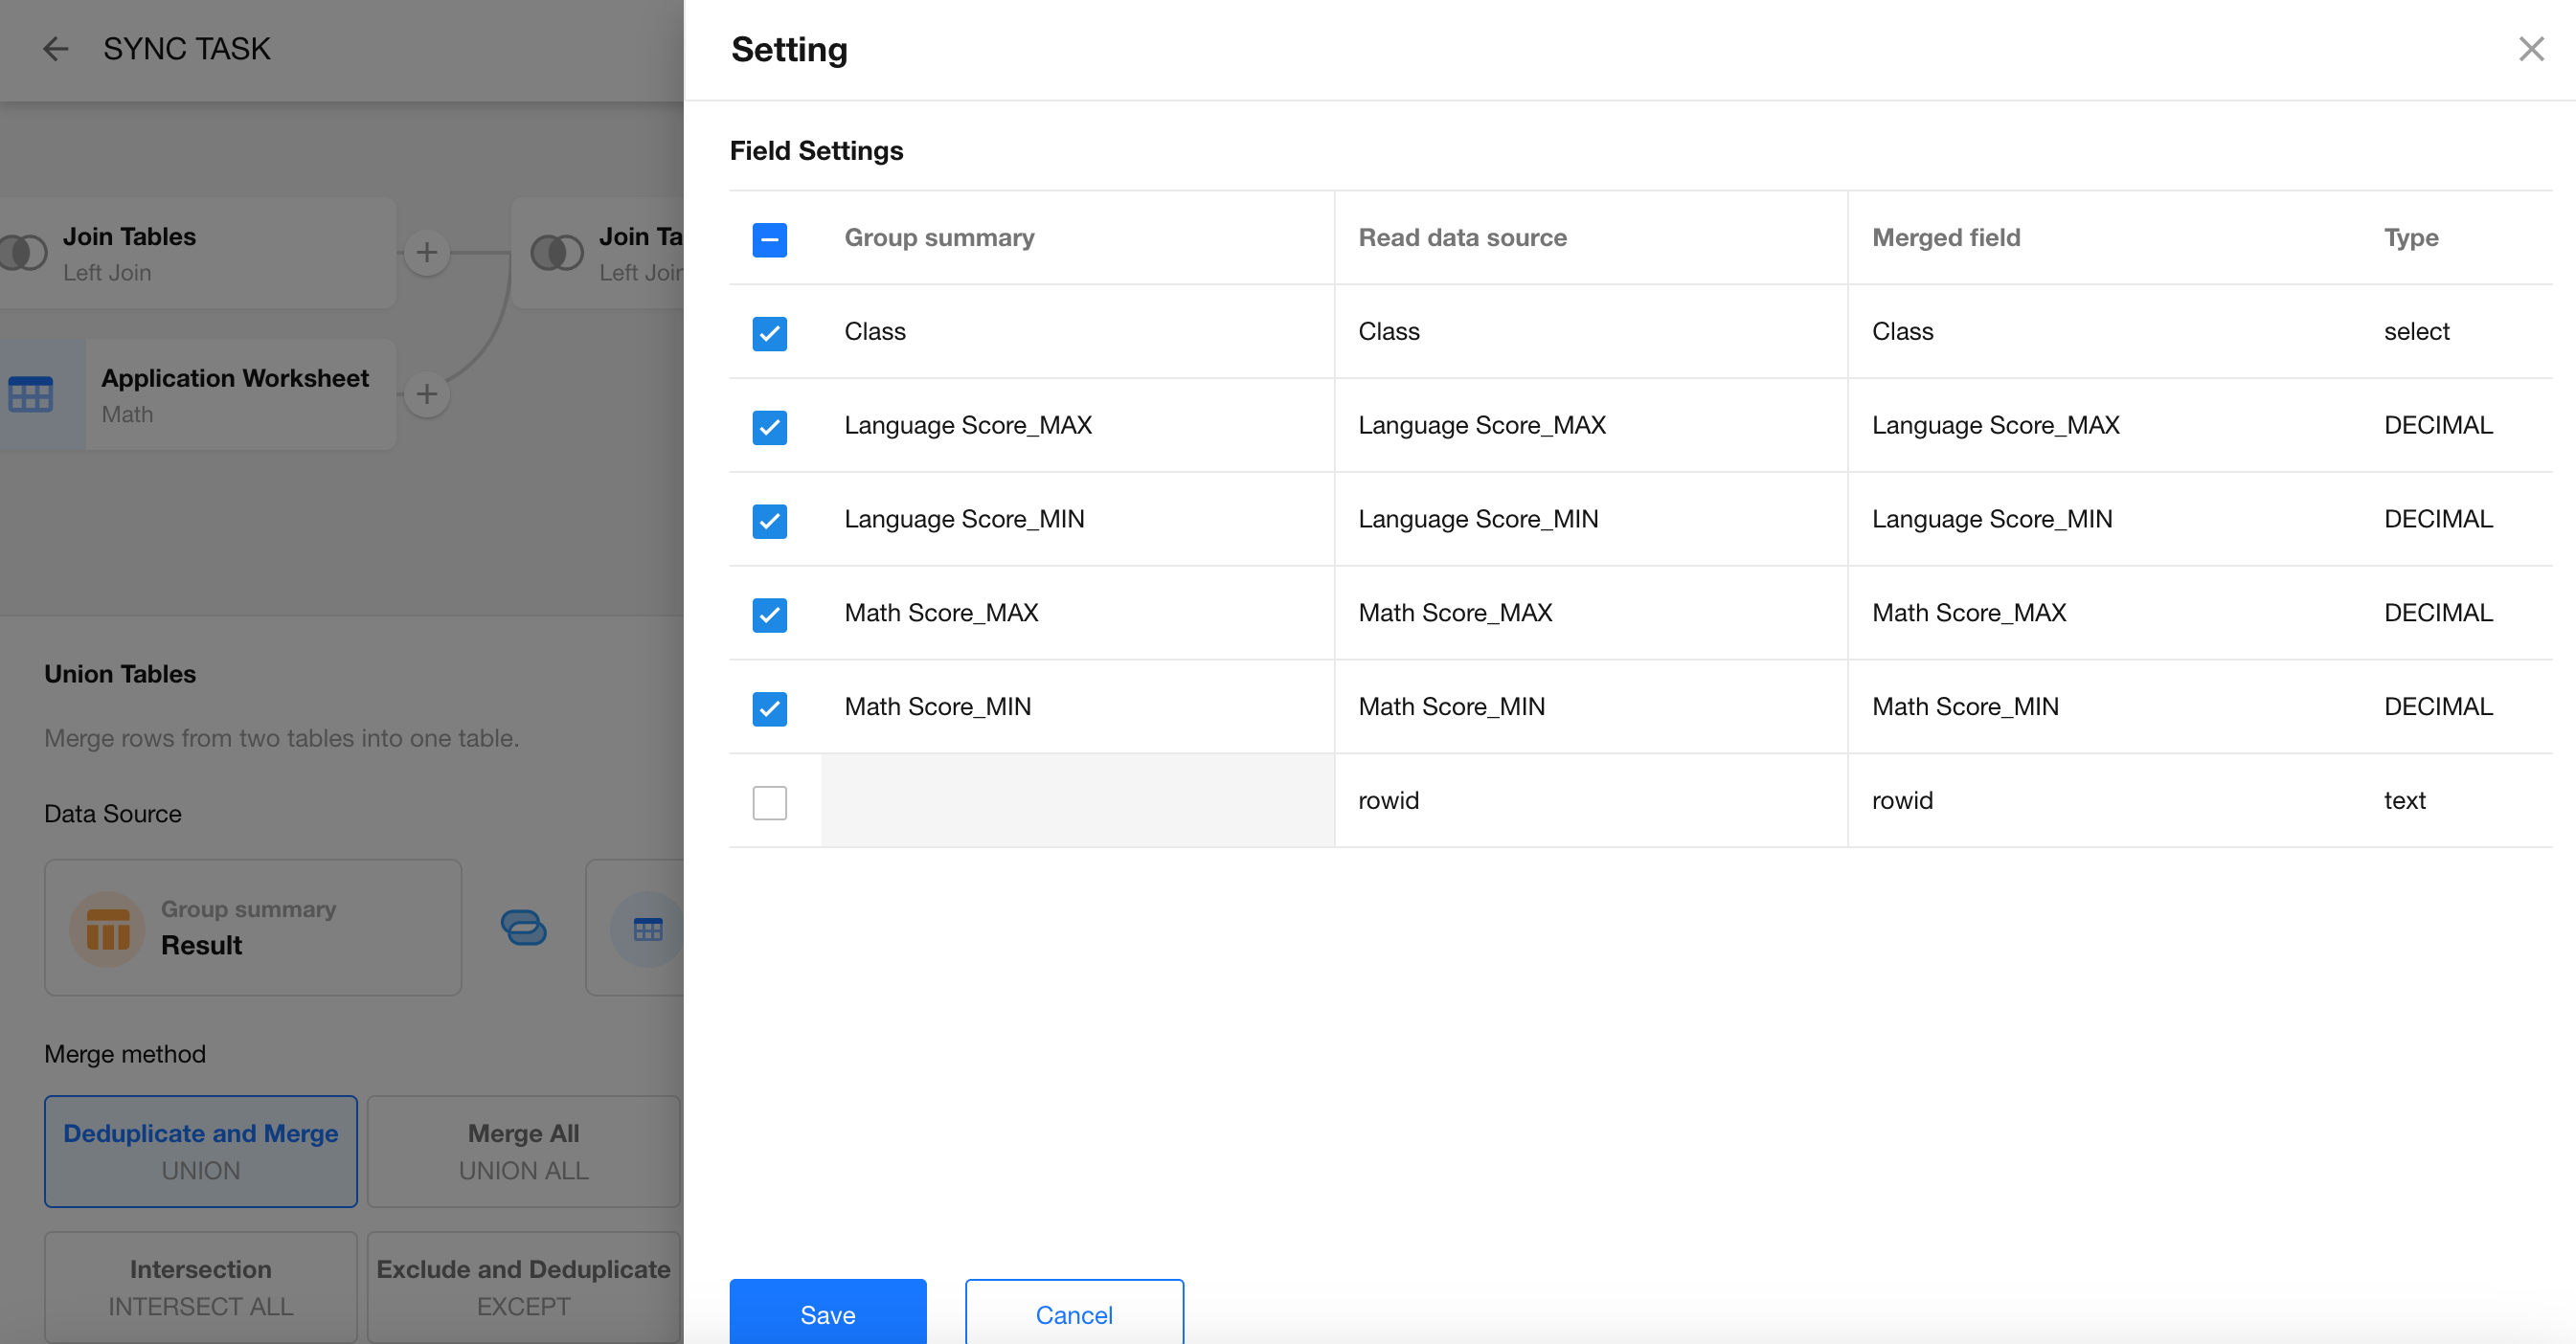
Field Mapping
Ensure that matching fields (by name and type) are properly aligned for the merge.
-
Create the Destination Worksheet
Choose to create a new worksheet or write to an existing one.
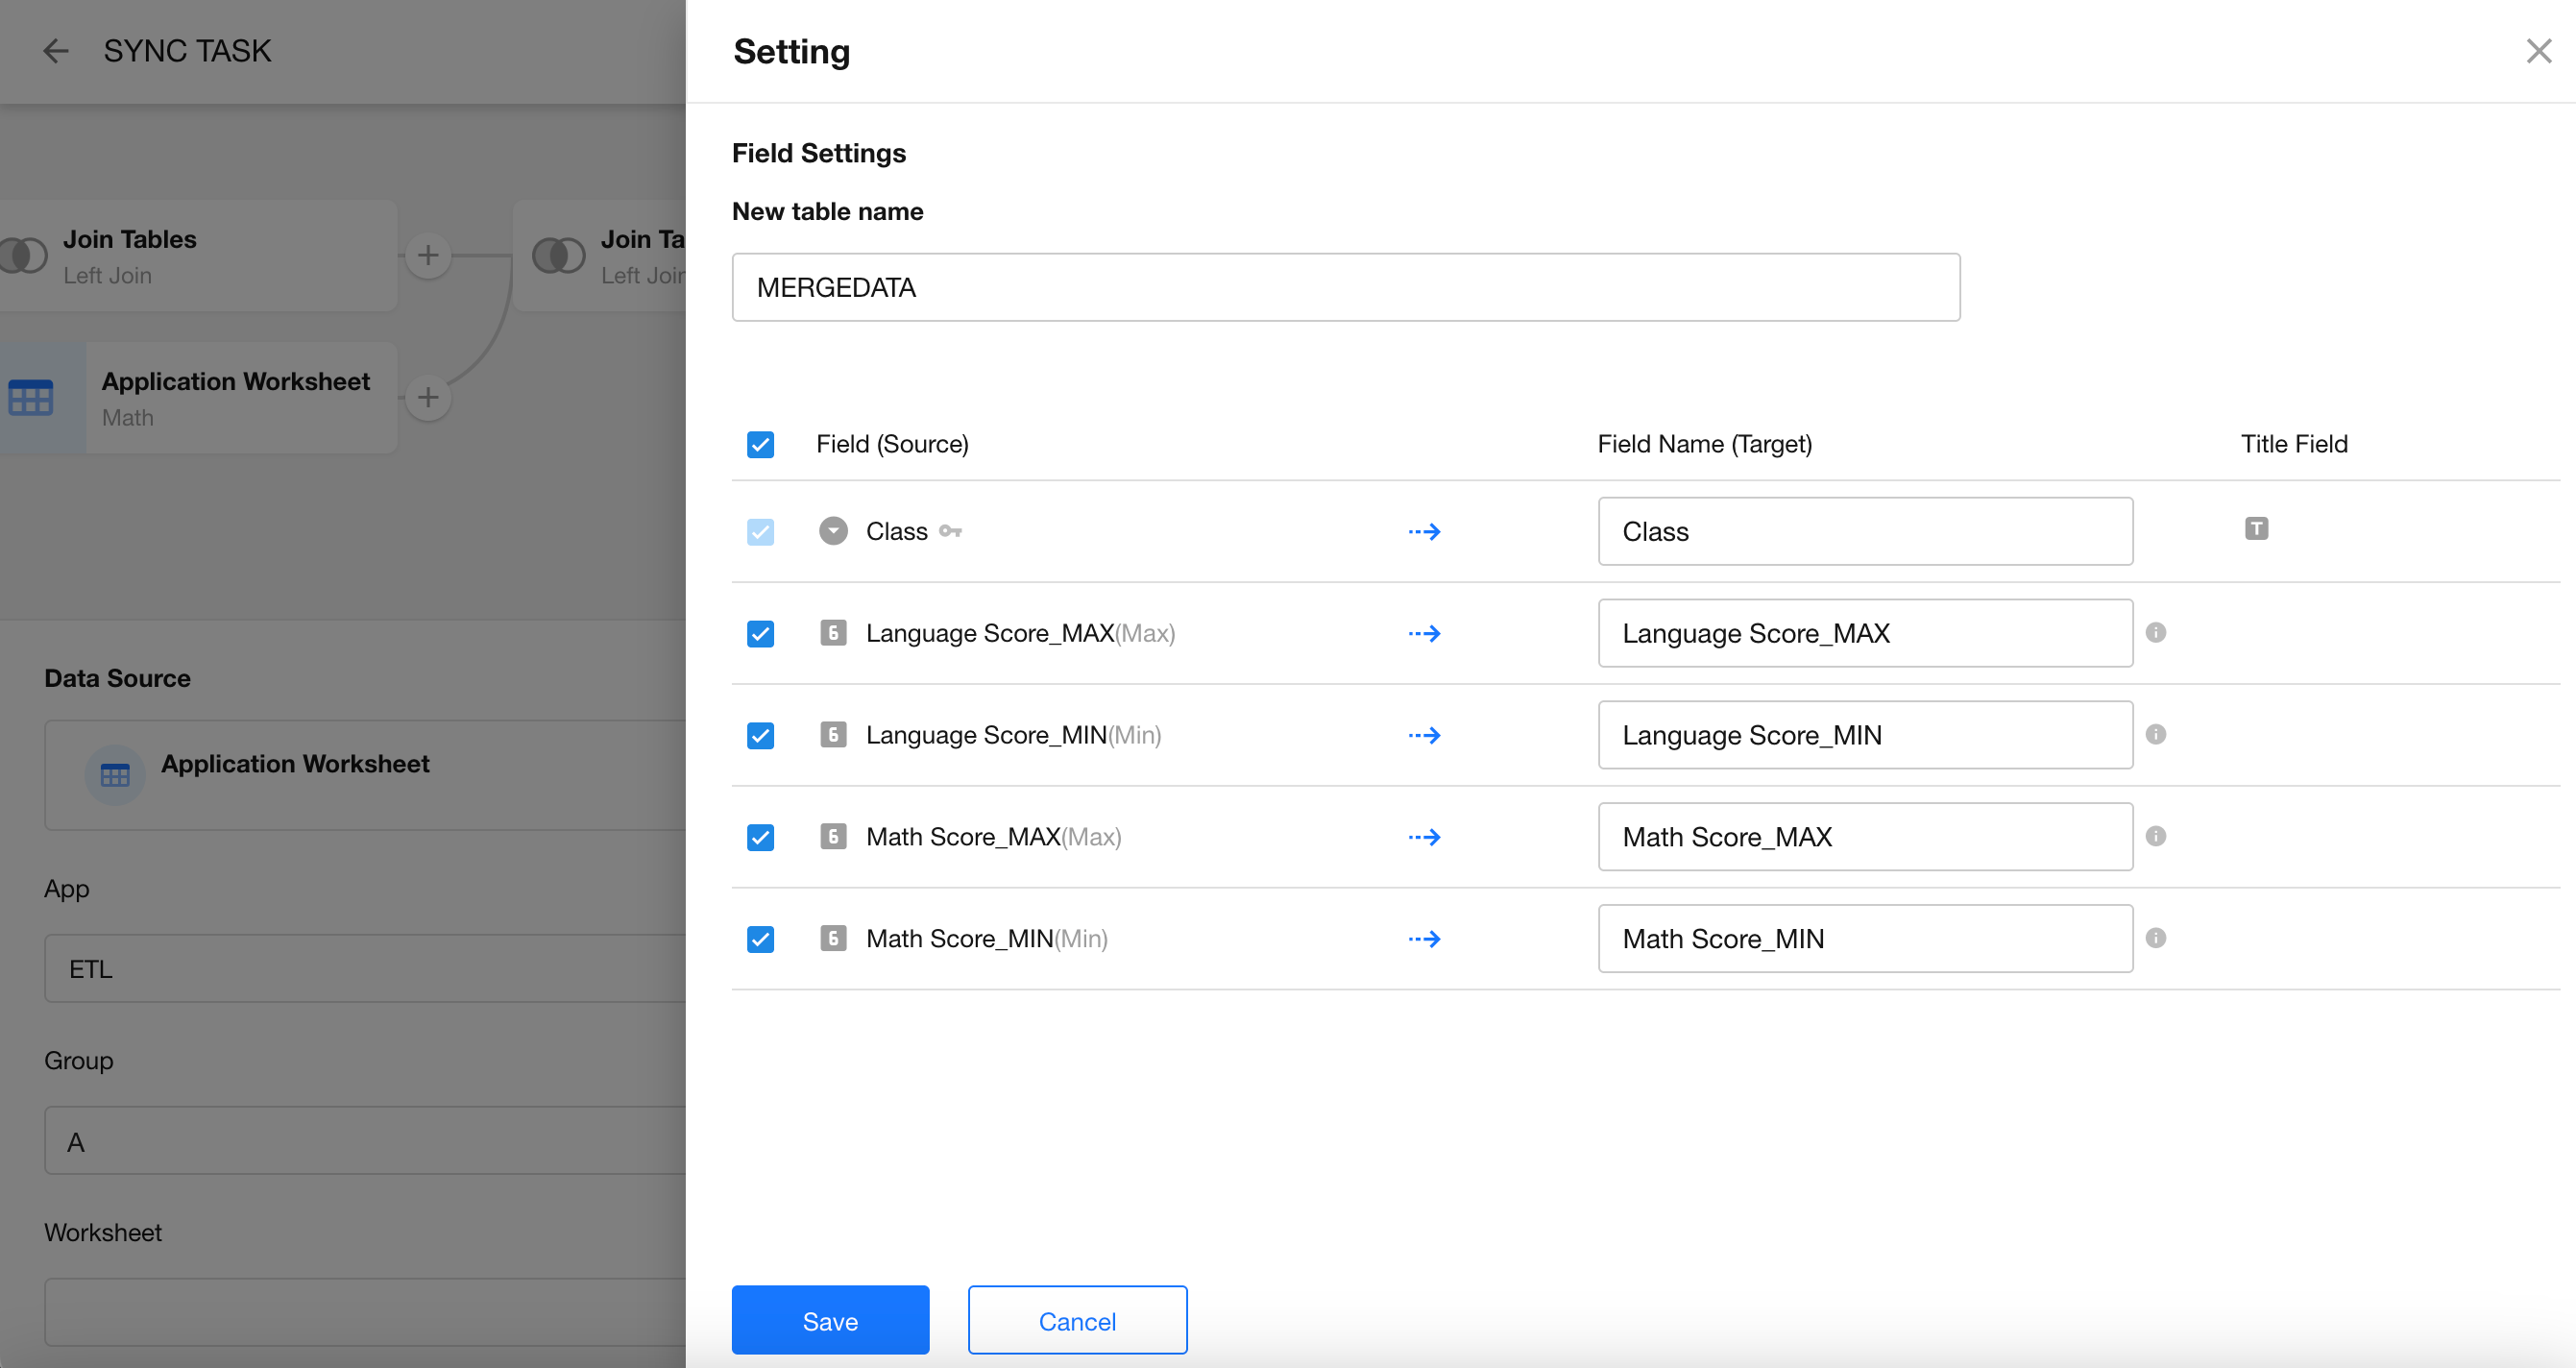
-
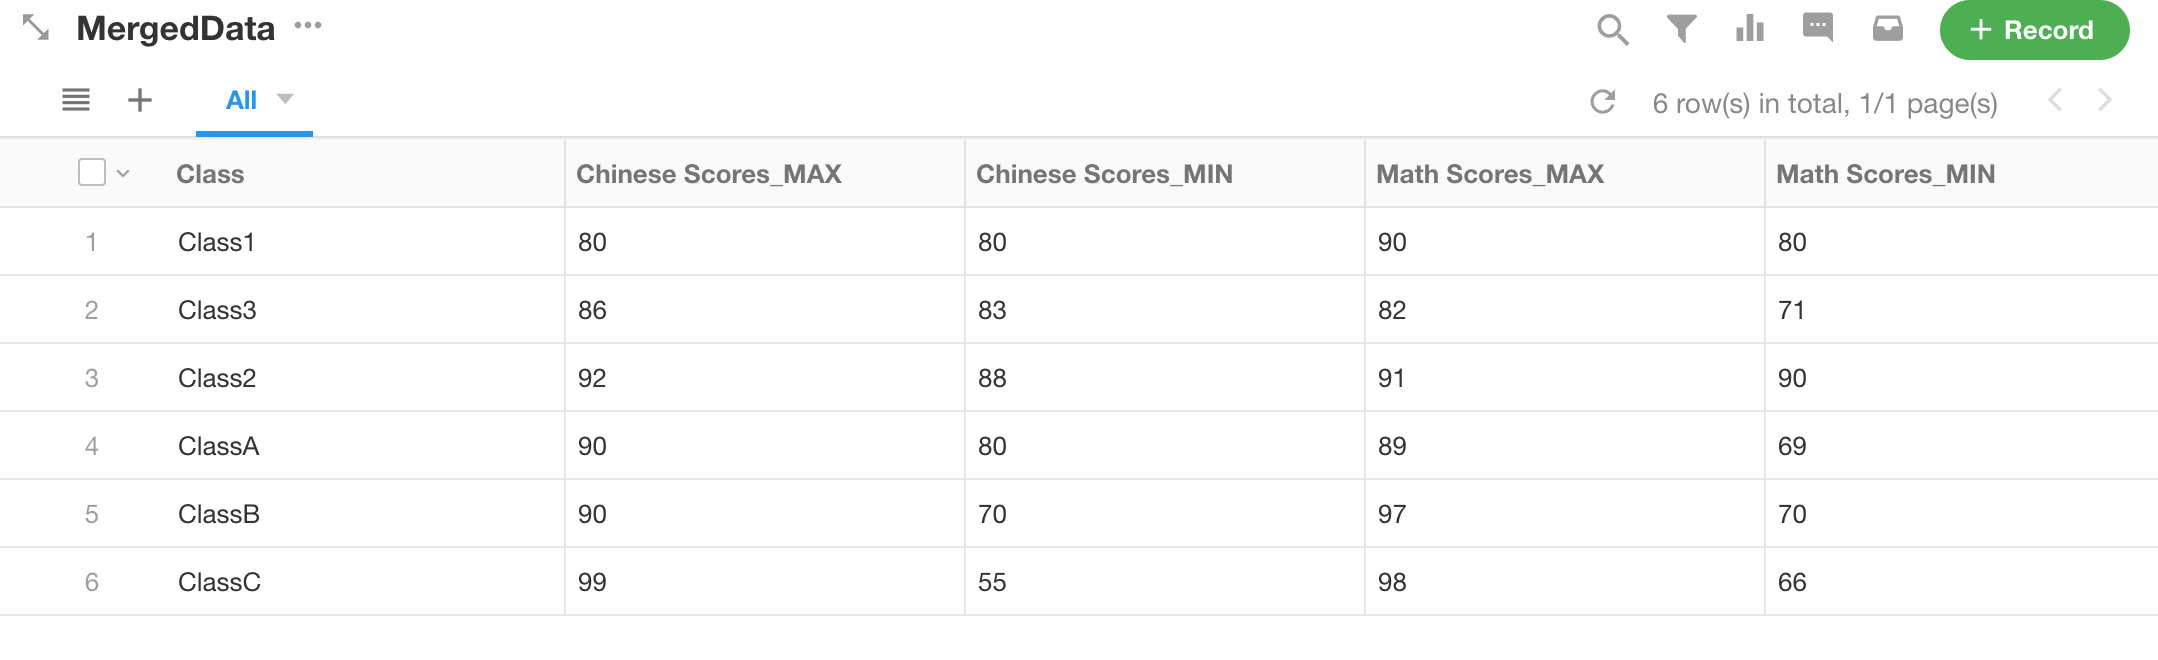
Publish the Sync Task
Execute and verify the merged dataset.
Was this document helpful?