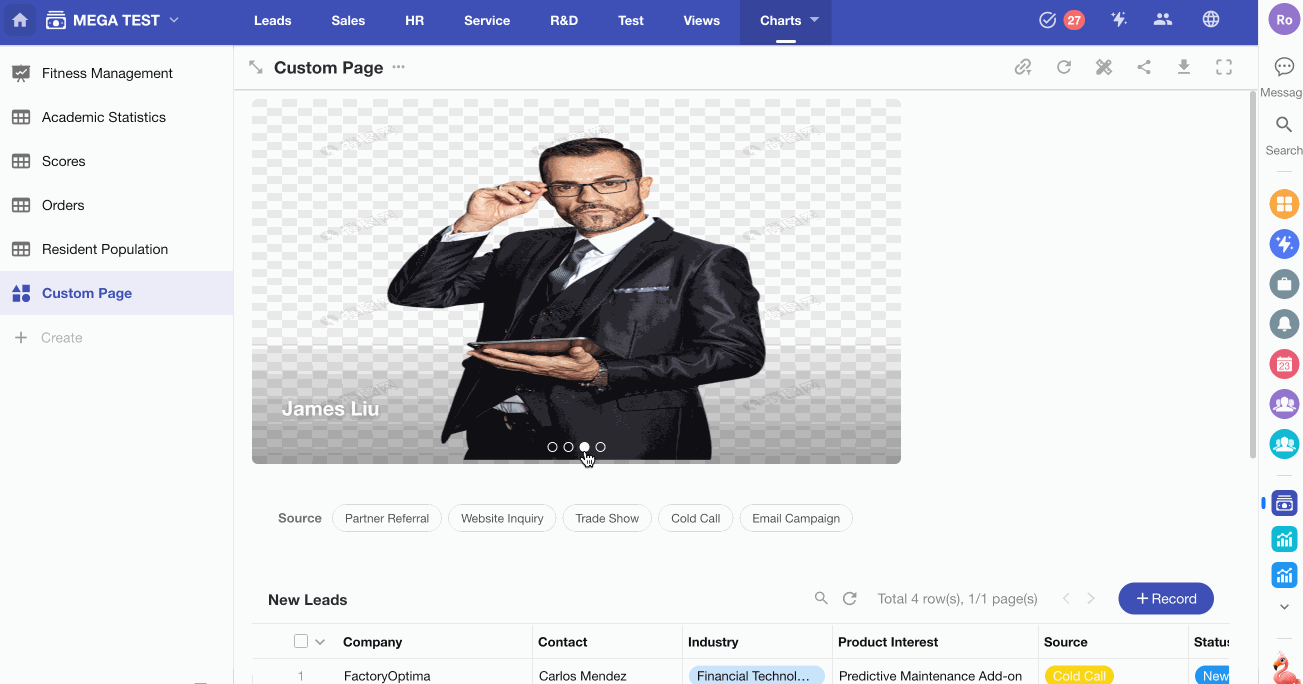
Adding Carousel to a Custom Page
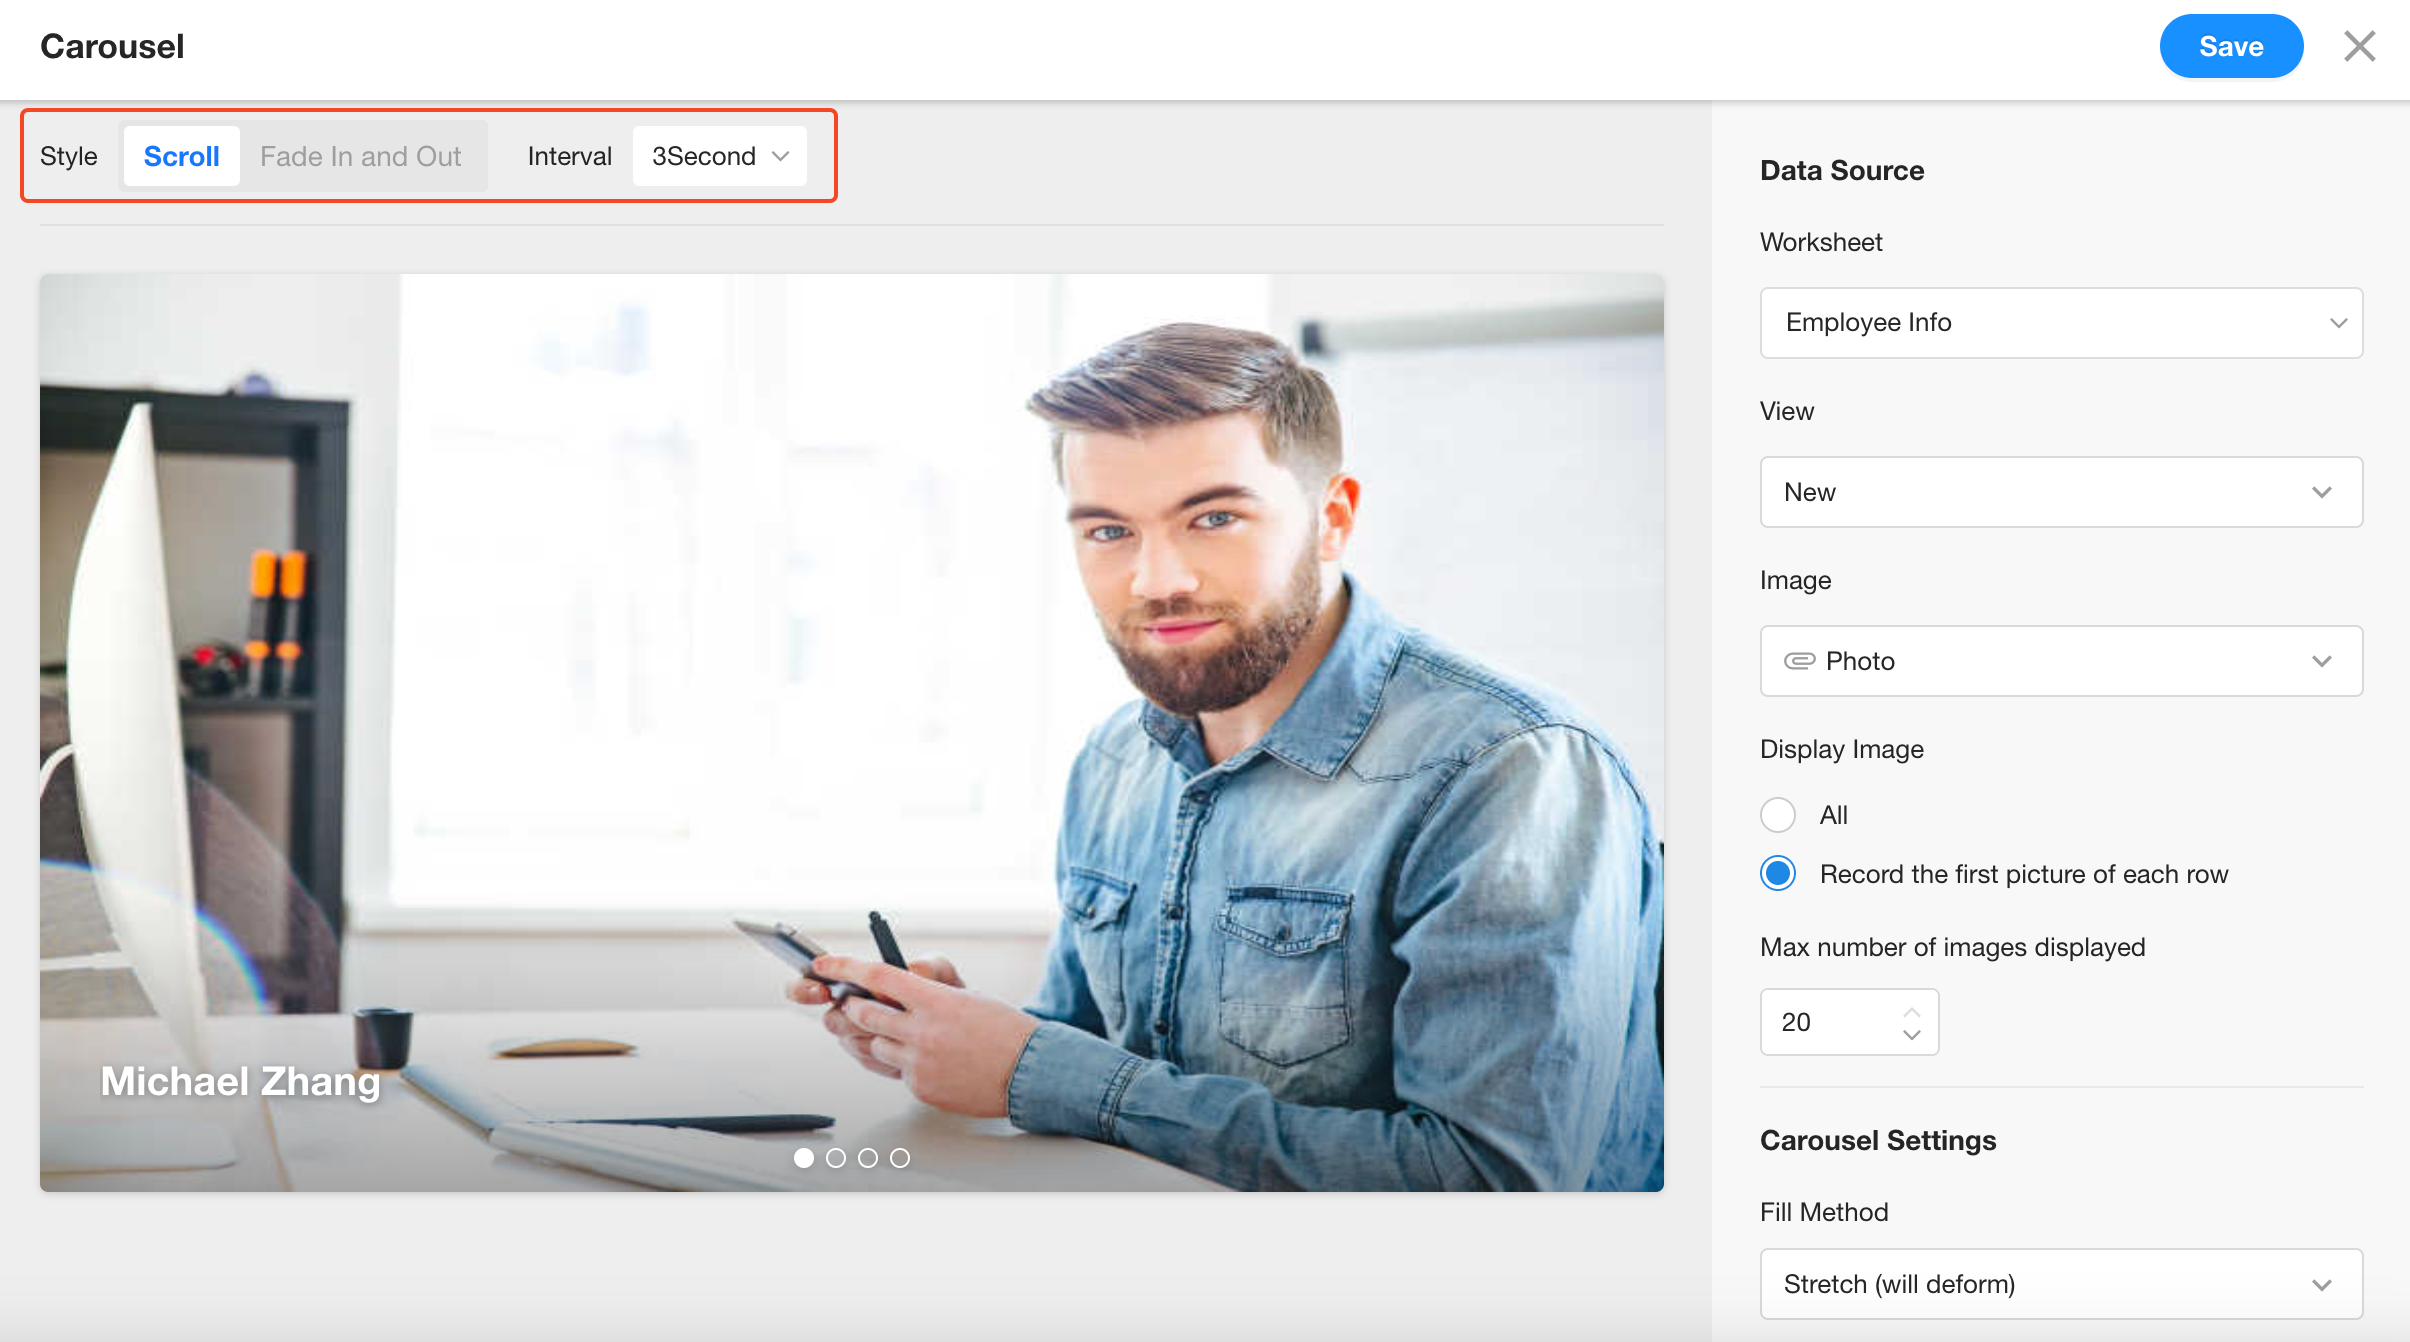
The carousel component allows you to loop through images stored in records. Each image can include embedded links or descriptive text. Carousels are commonly used for showcasing and promotional purposes. For example, display newly onboarded employees from the past 30 days:
Step-by-Step Guide
1. Add the Carousel Component to a Custom Page
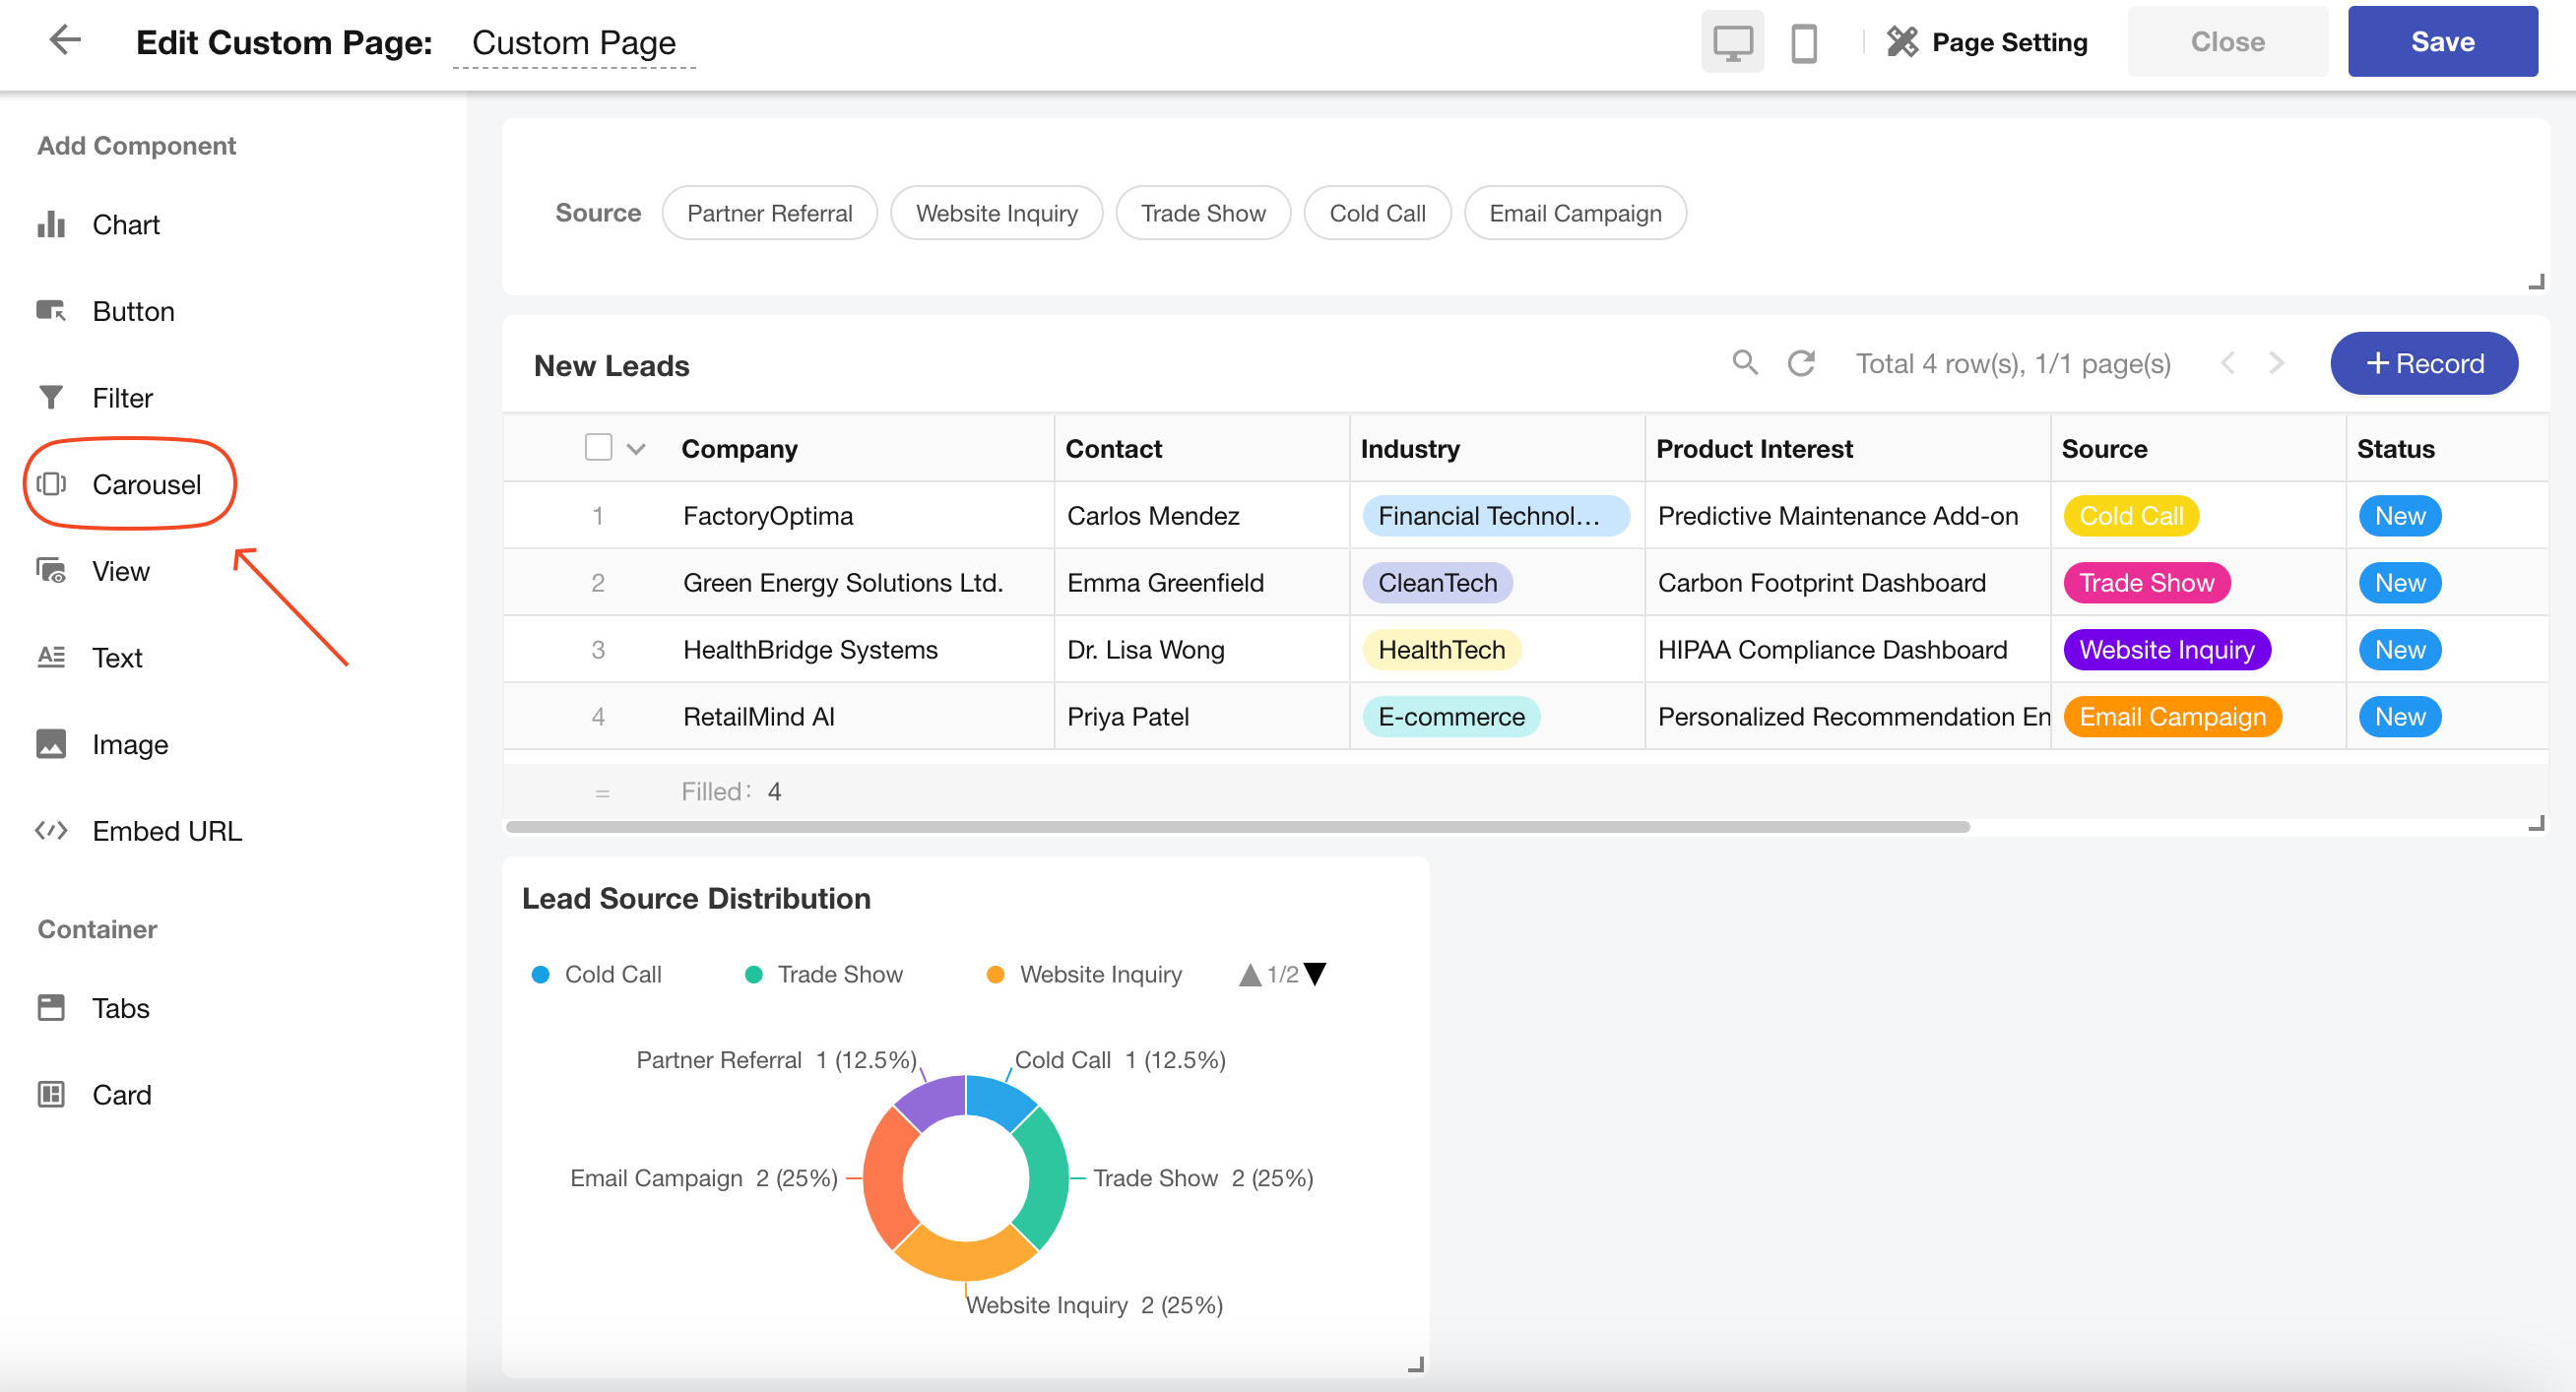
2. Select Data Source
-
Choose the worksheet, view, and the specific file field (or barcode field) that contains the images.
-
Image Display Options:
-
Display all images: All images uploaded in the file field will be shown. For instance, if a colleague uploads three photos, all three will be displayed.
-
Display the first image per record only: Only the first image from each record will be shown, even if multiple images were uploaded.
-
-
Max number of images to display: Sets the total maximum images in the carousel.
Example: If set to 5, and the first record contains 5 images, no additional records' images will appear. If each record has one image, only the first 5 records will be displayed.
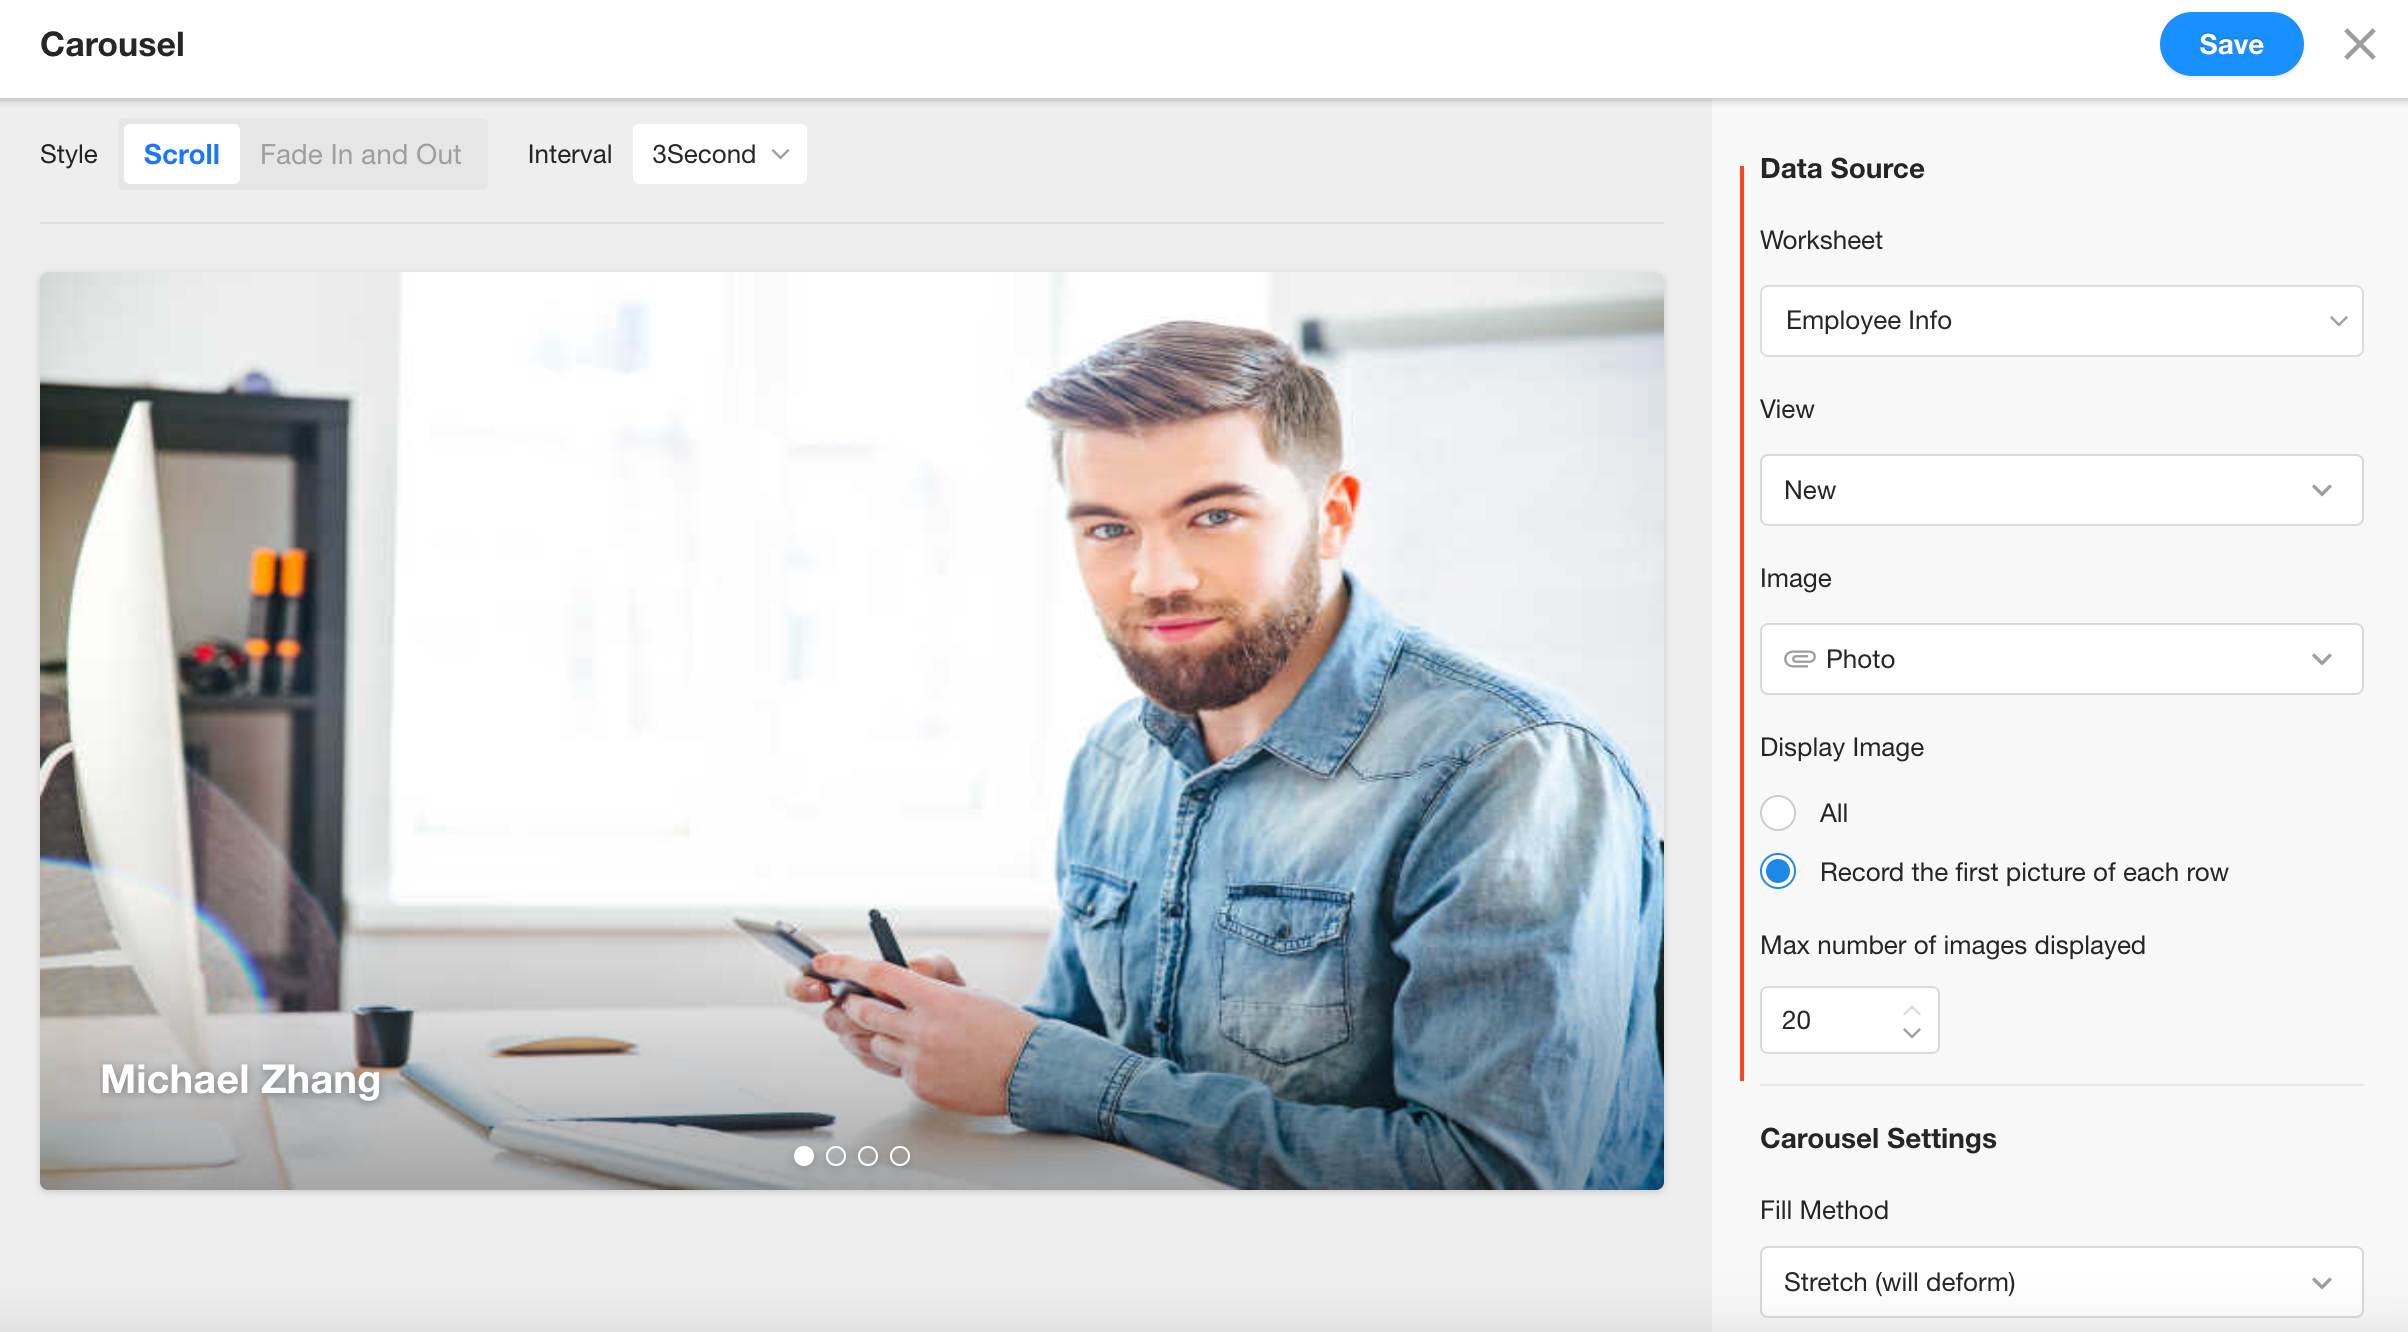
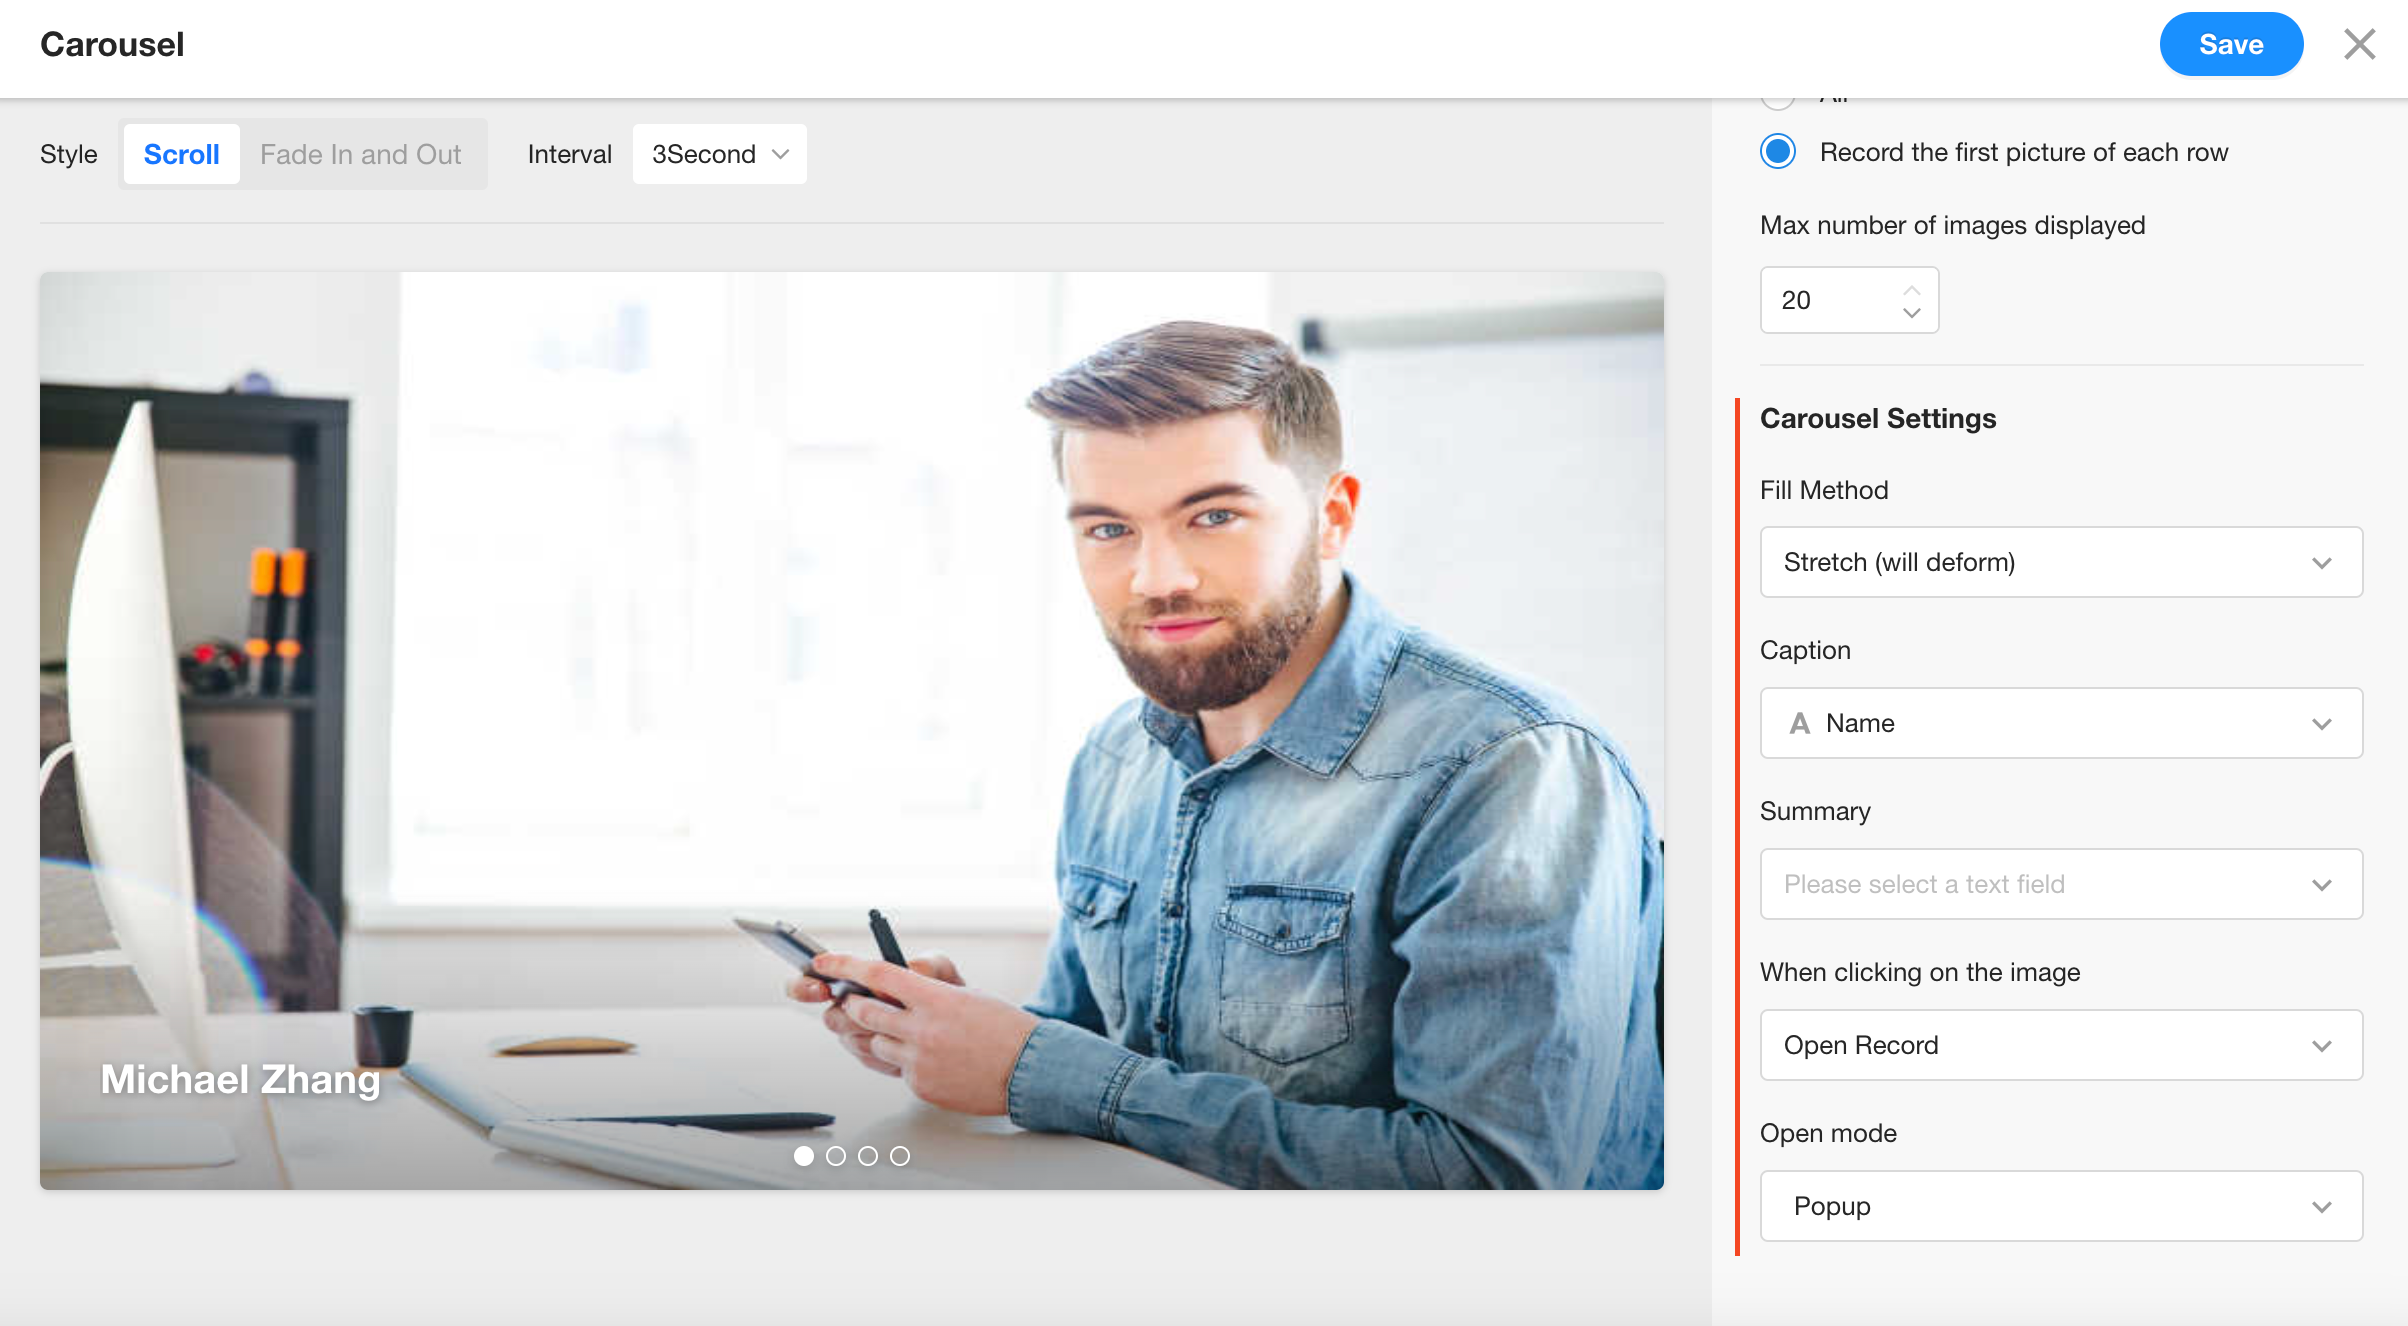
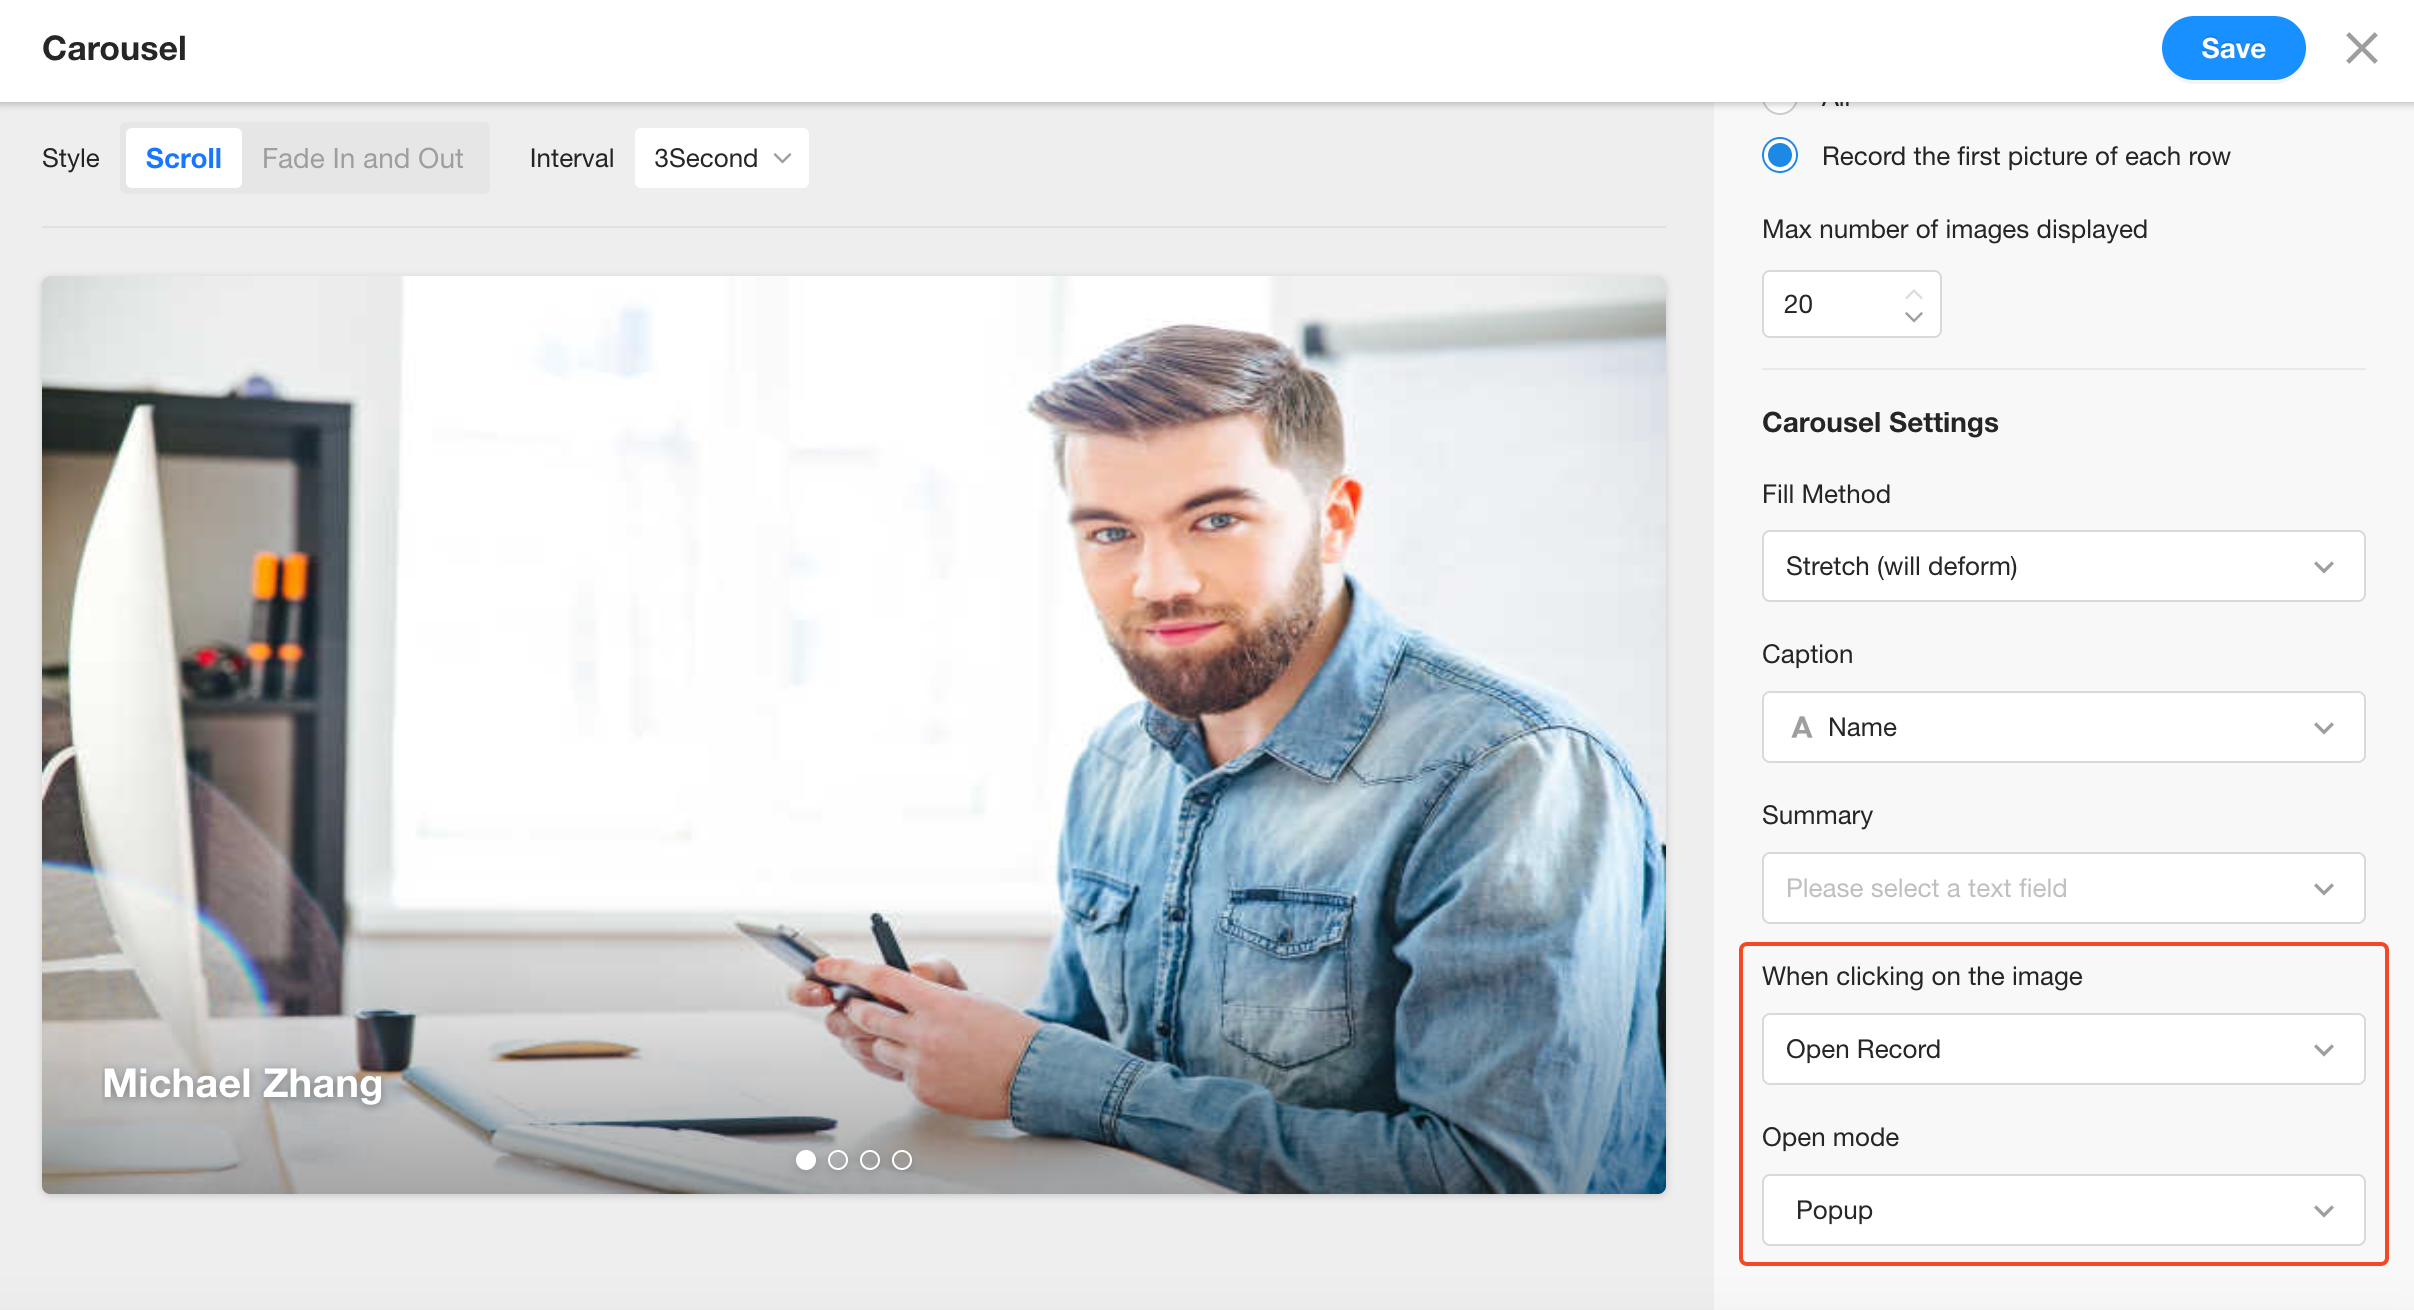
3. Display Settings
Configure how images appear in the carousel, including fit mode, background color, title, and description.
Note: Title and description must be text-type fields.
4. Carousel Animation and Interval
5. Click Behavior
There are three available click actions for carousel images:
-
Open Record:
Opens the record associated with the image. You can choose how it opens:
- In a popup
- On the current page
- In a new tab
-
Open Link:
Opens an external URL. You can specify how it opens:
- In a popup
- On the current page
Note: The link must be stored in a text-type field.
-
Preview Image:
Clicking the image opens a larger preview version.
Was this document helpful?