Print QR Codes/Barcodes for Records
When performing bulk operations on records in a worksheet, you can print QR codes or barcodes. The data source can be either the record’s access link or the content of a specific field.
Not supported on IE, Safari, or desktop apps. Please use Chrome, Edge, Firefox, 360, or other modern PC browsers.
Steps
In table view, select the records you want to print, then choose Print QR Code or Print Barcode.
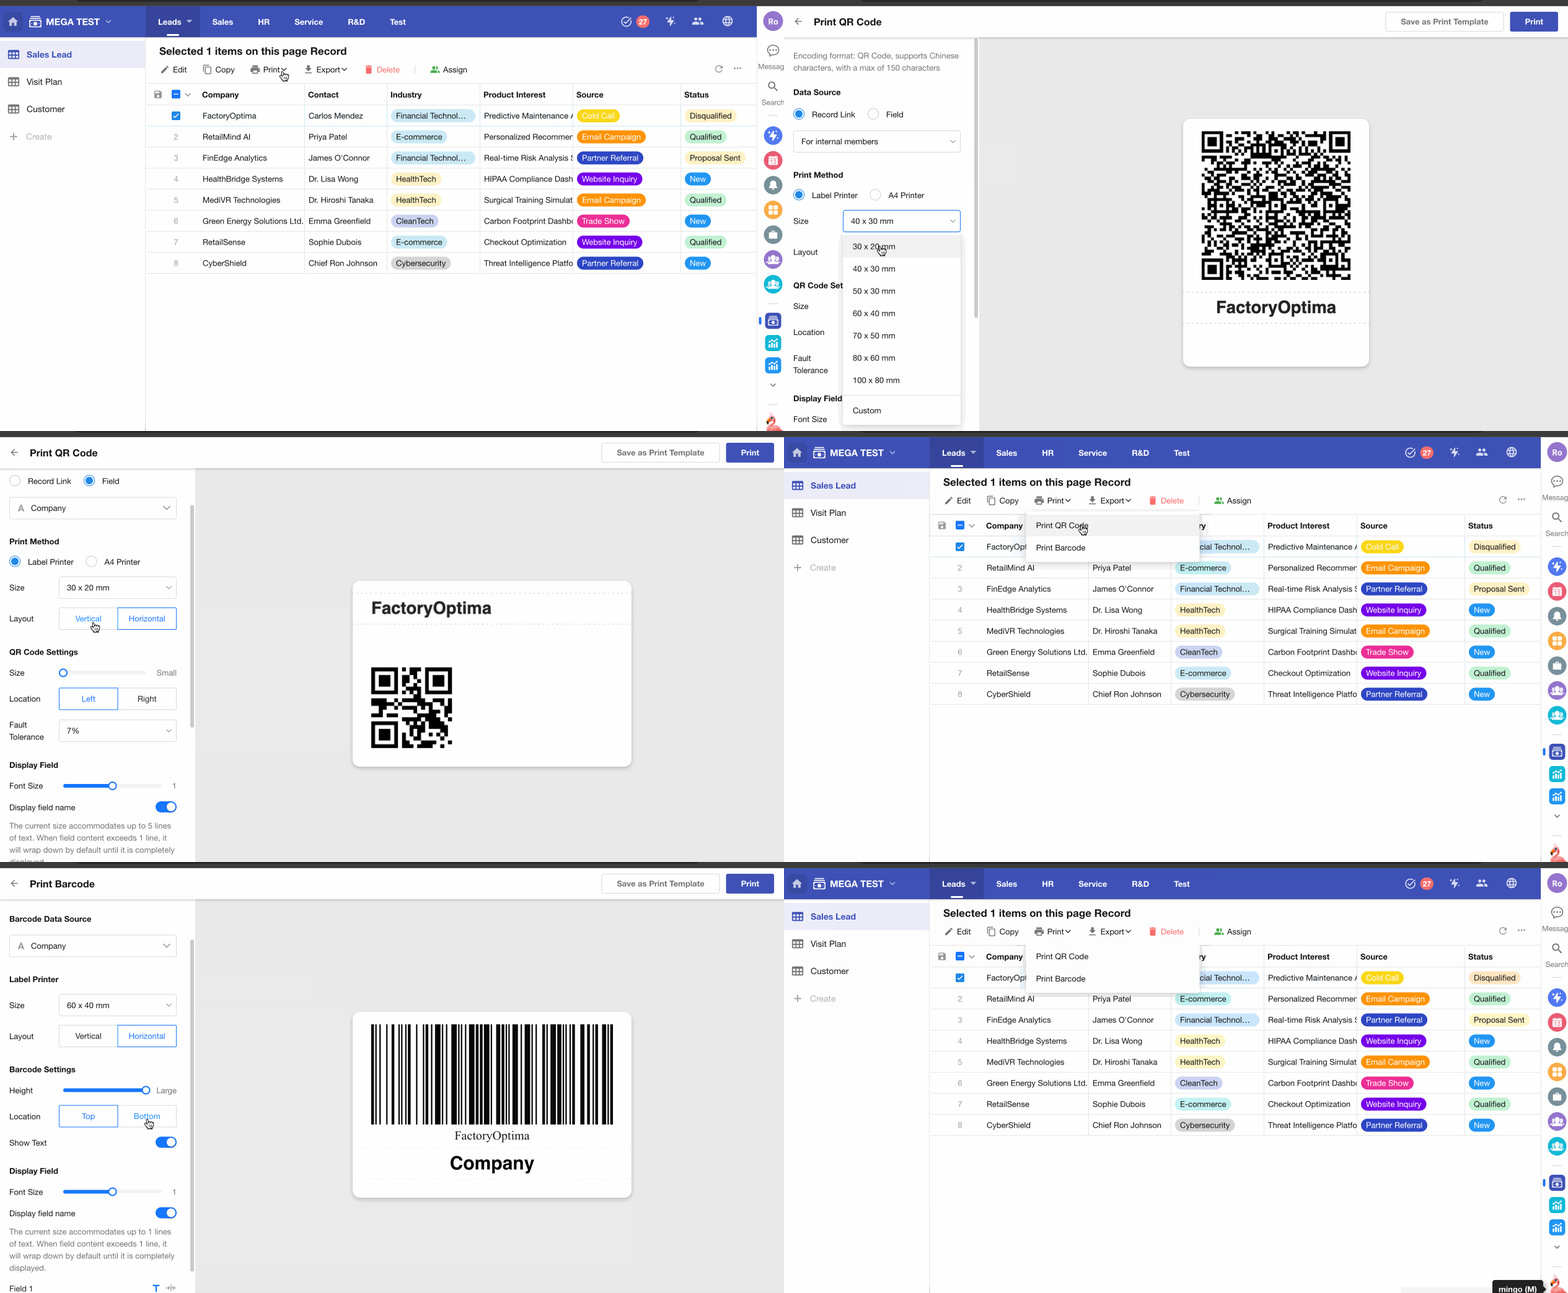
1. Select Records to Print
Once records are selected, the Print QR Code/Barcode button will appear.
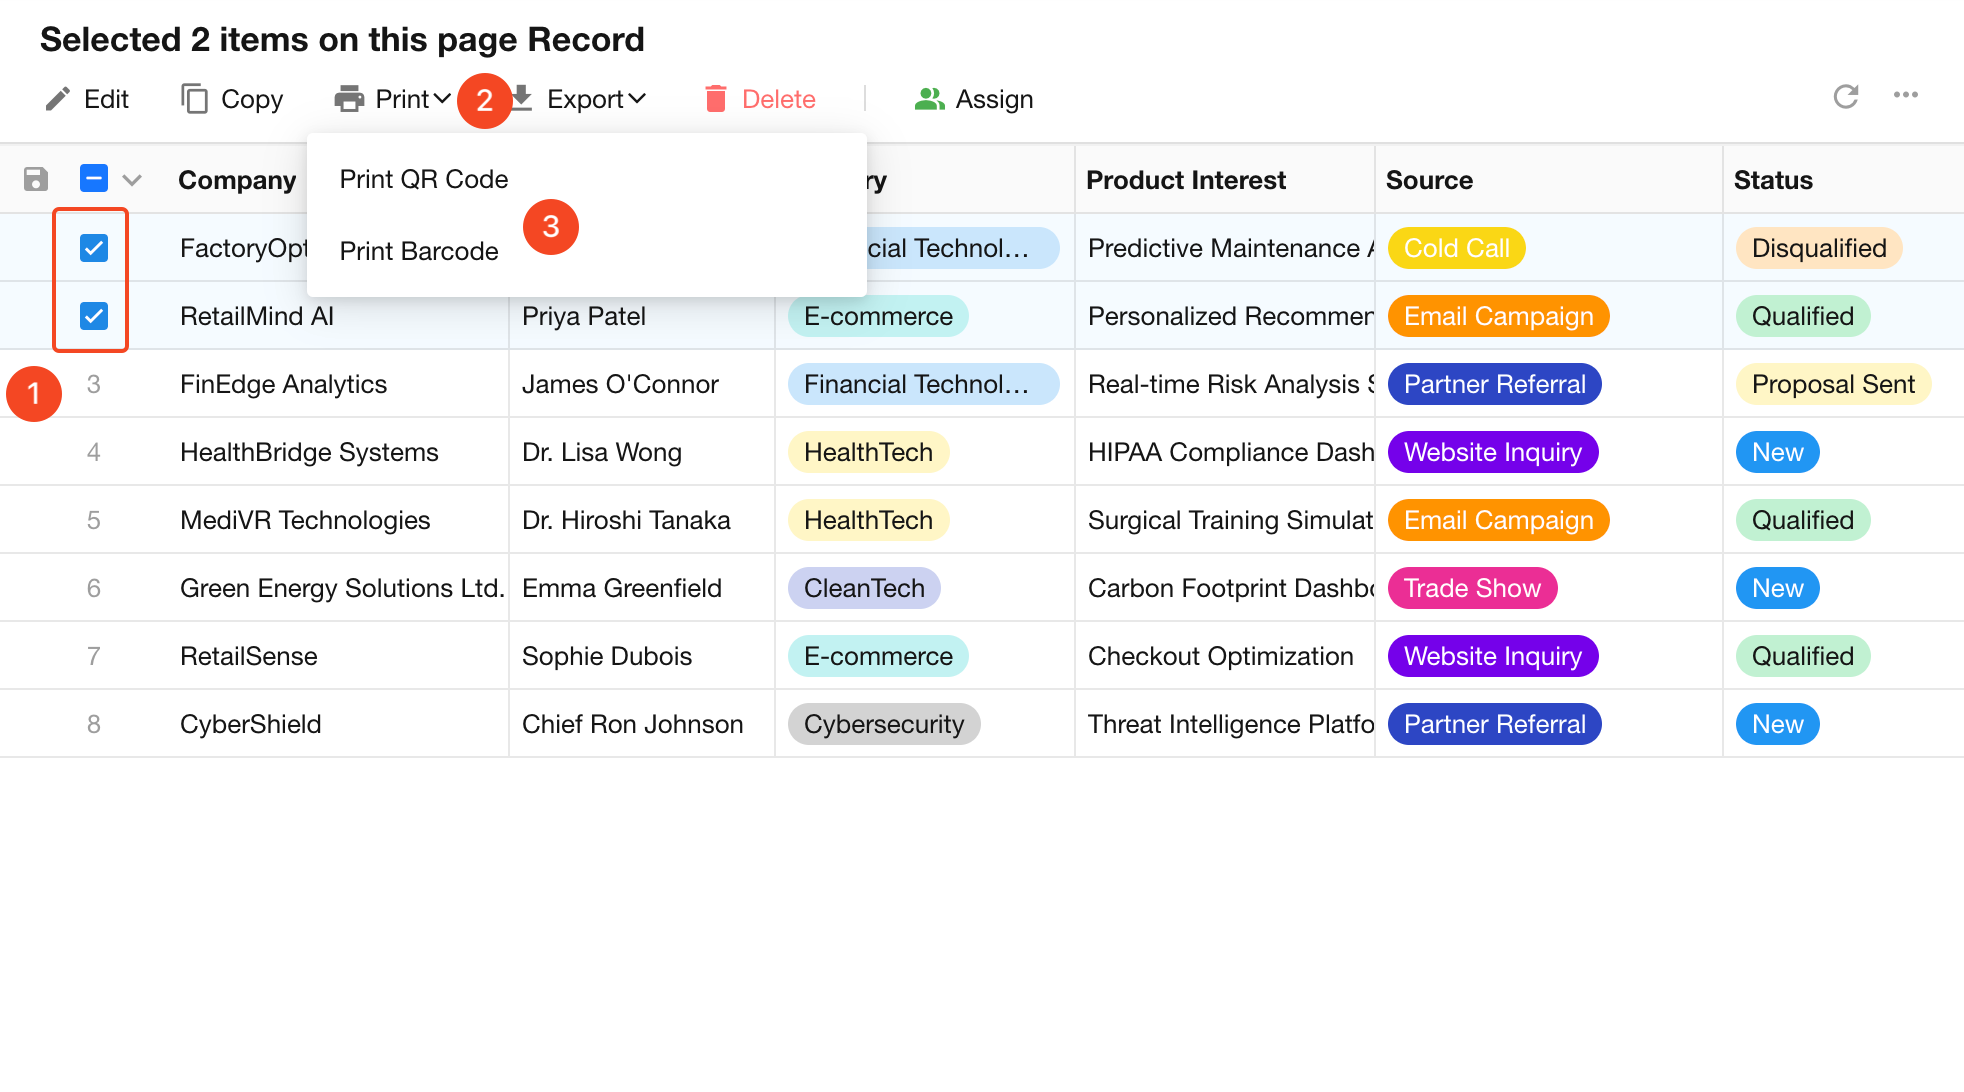
Can't see the print button?
Possible reasons include:
-
Printing in batch operations is disabled in the worksheet’s Function Switches, or printing is not allowed in the current view, or non-admins are restricted from printing.
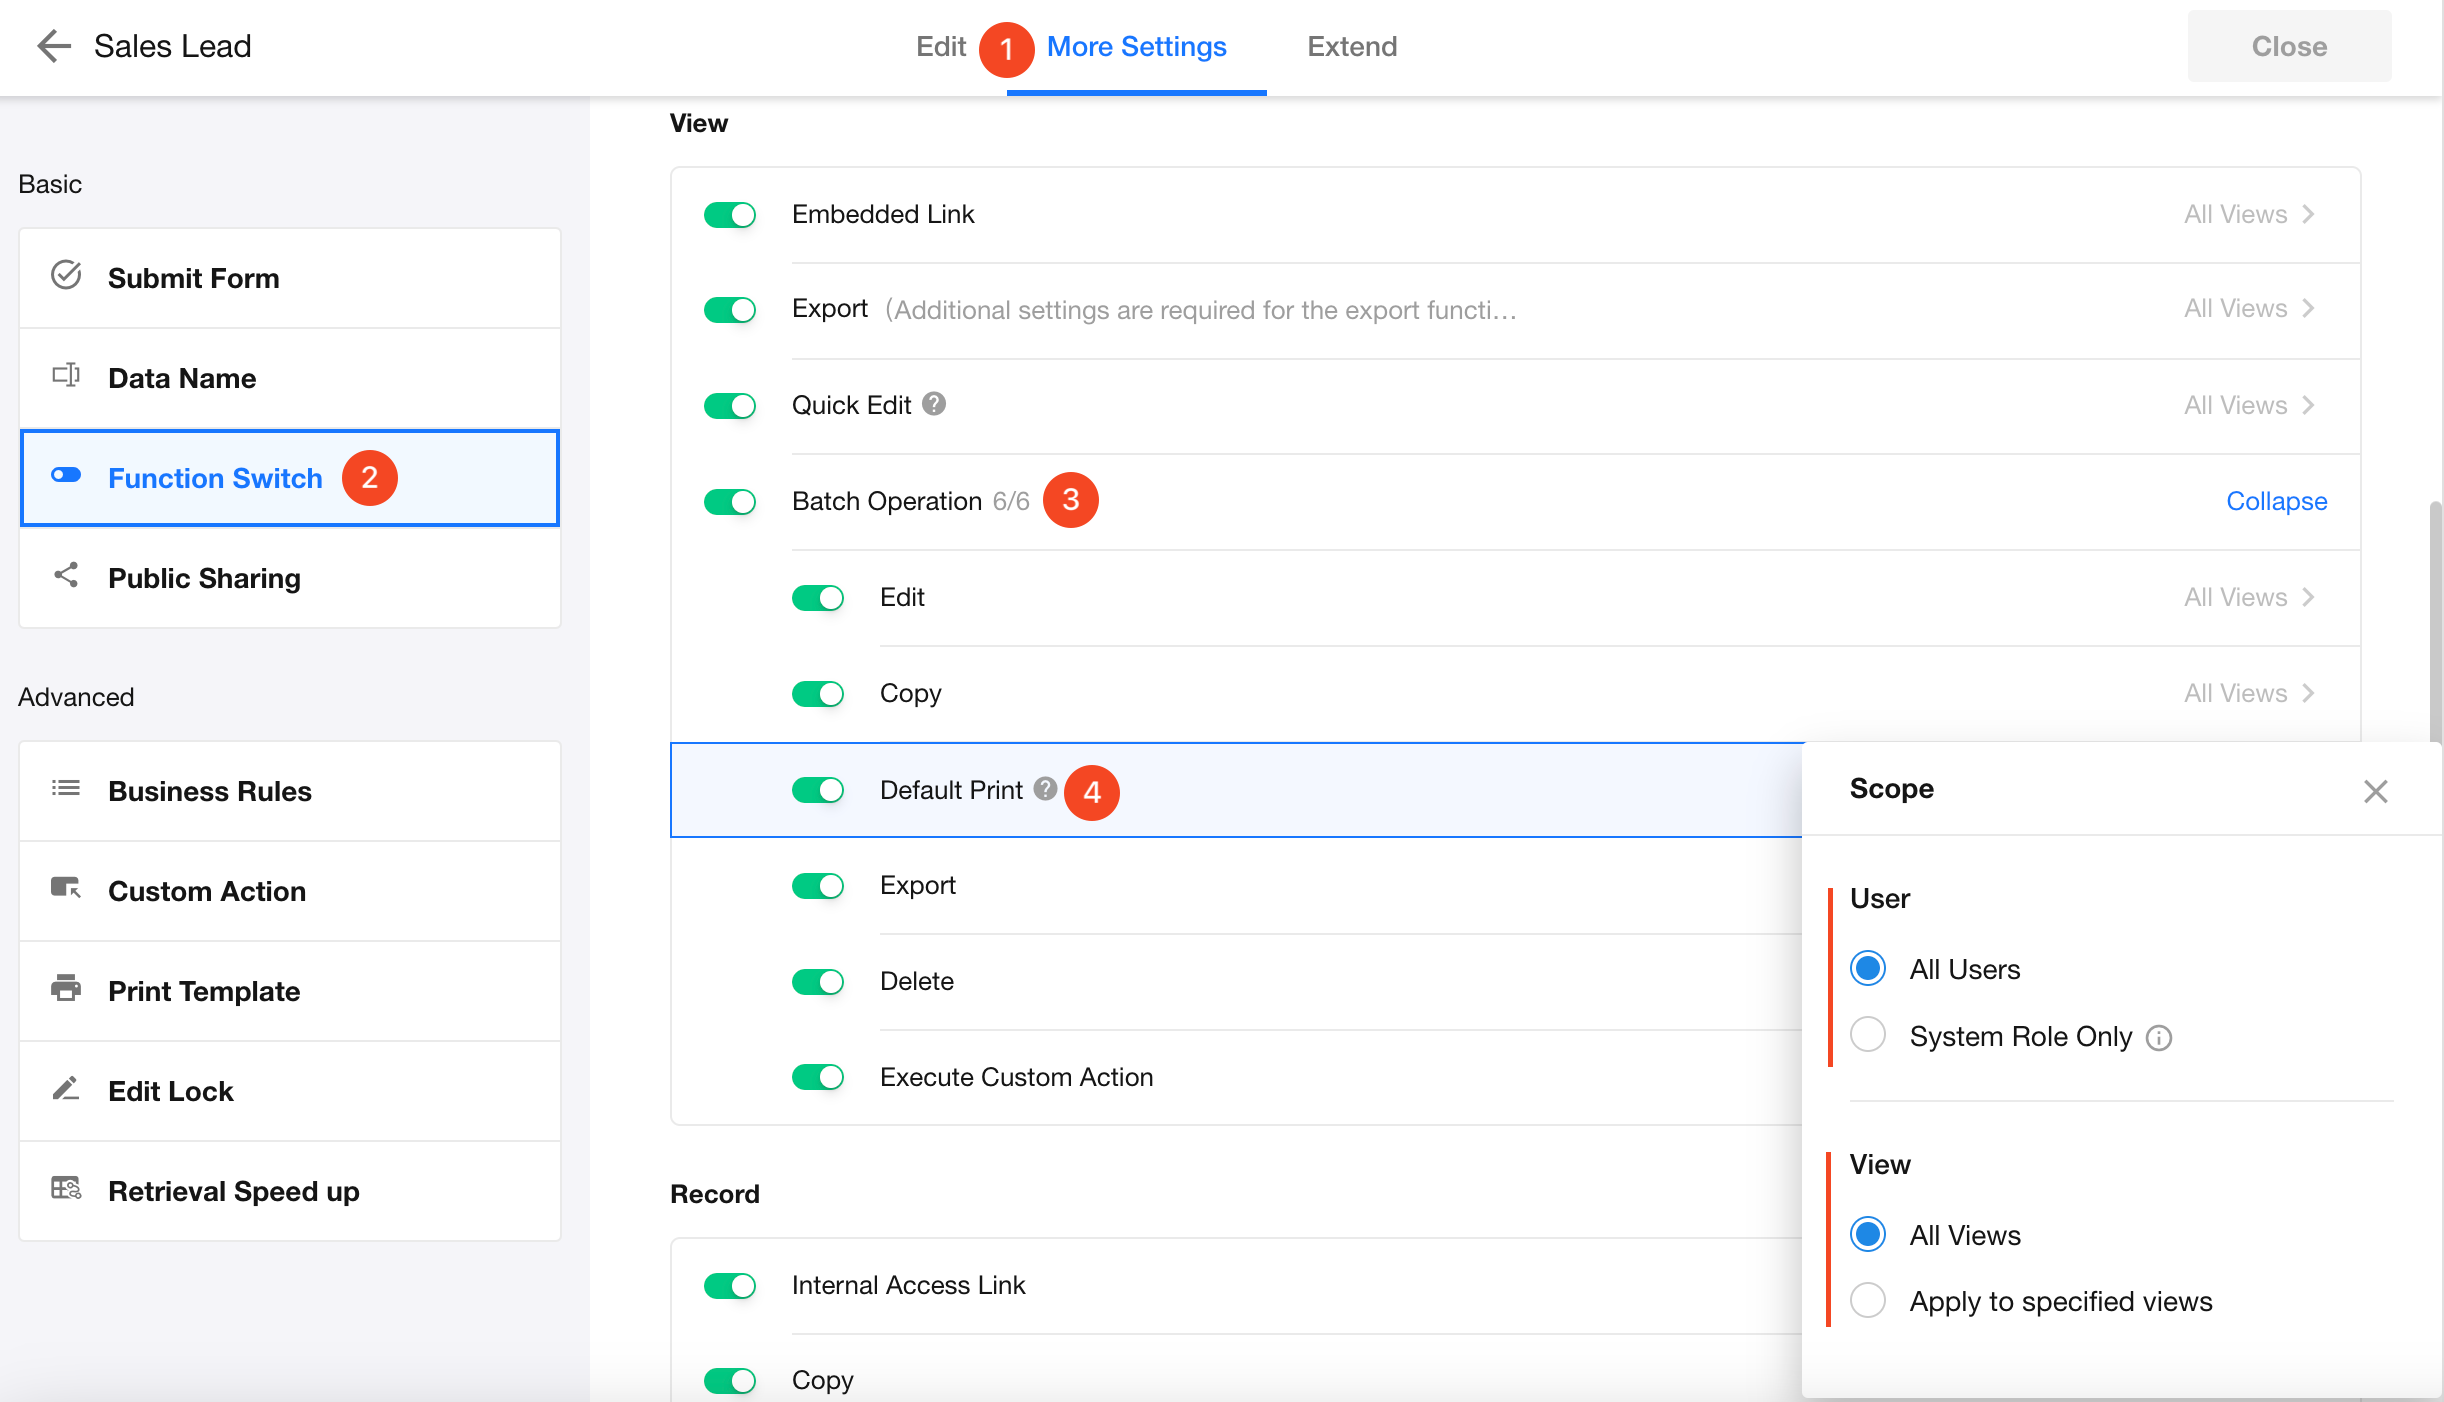
-
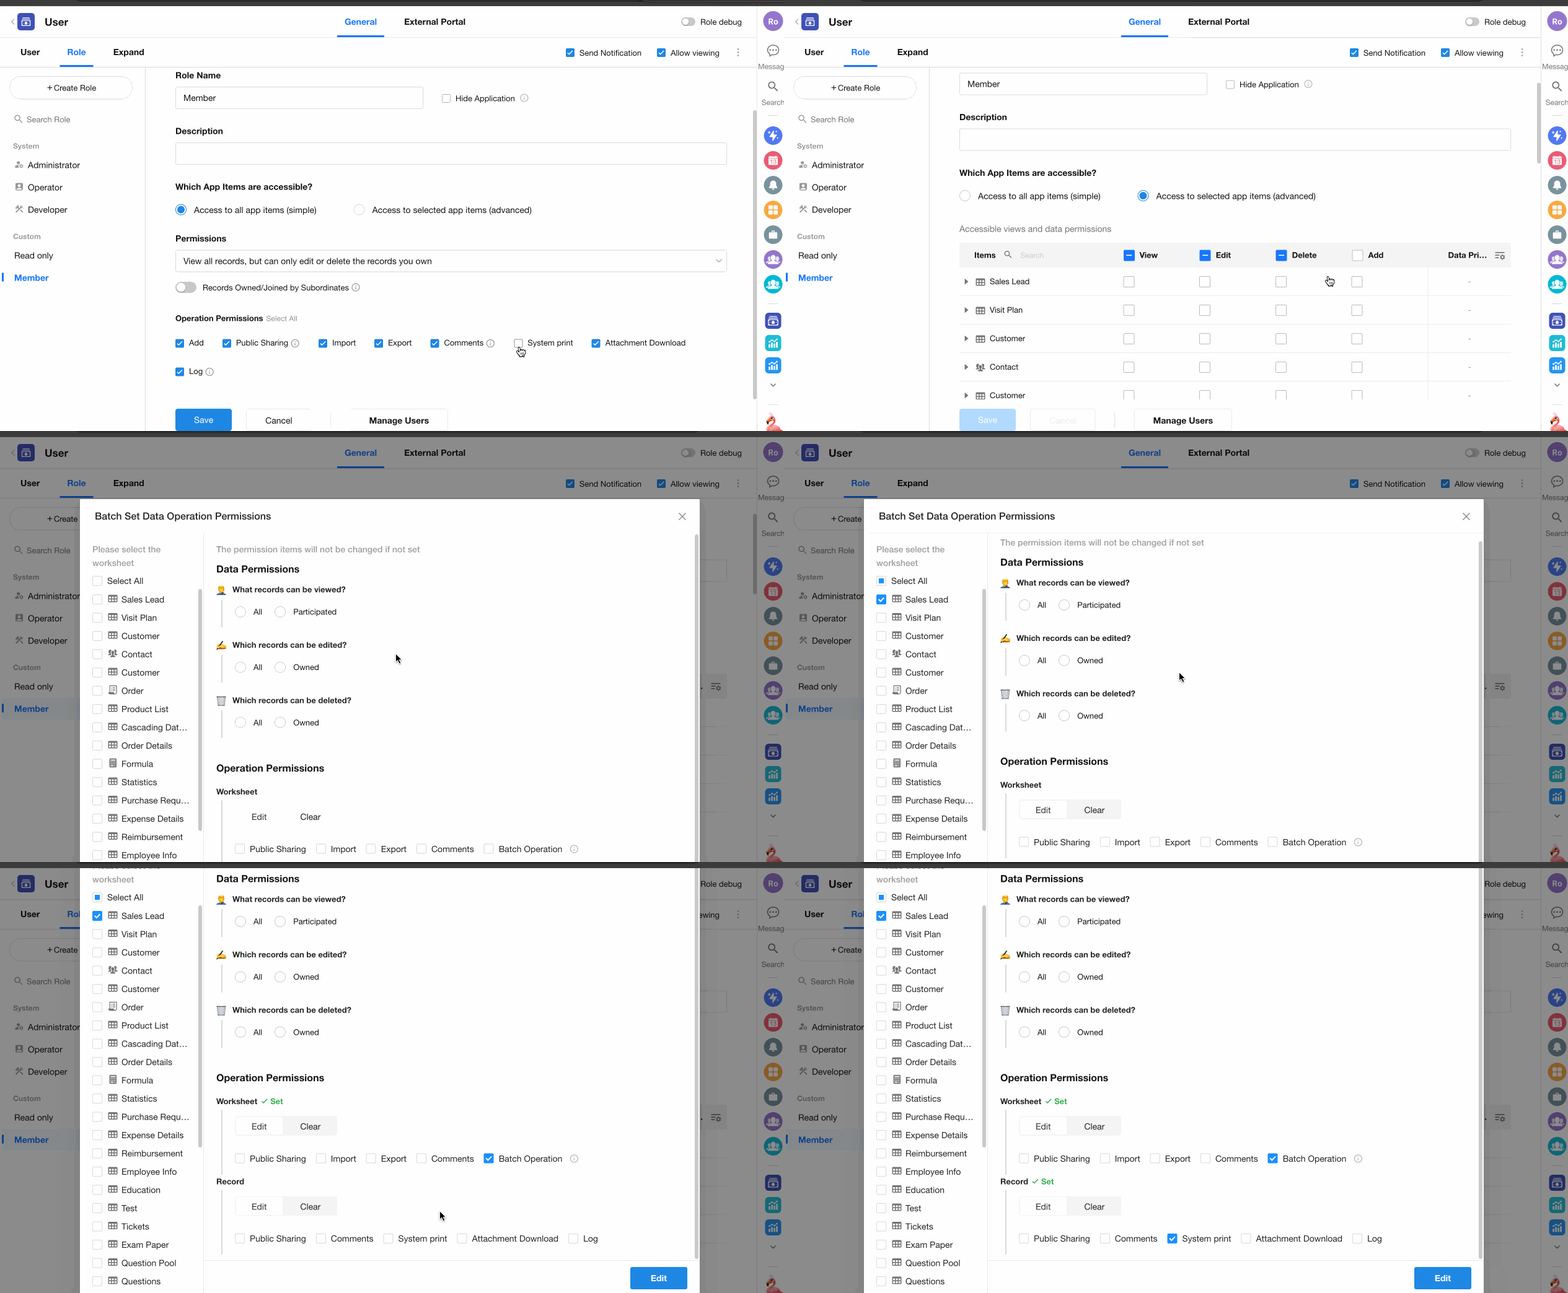
The current user (non-admin) does not have printing permissions:
-
"System Print" is not enabled
-
"Batch Operations" is not enabled
-
2. Choose Data Source
-
QR Code: Uses QR-code encoding, supports Chinese characters, and allows up to 150 characters. Data source can be a record link or field content.
-
Barcode: Uses Code128 encoding, supports numbers, letters, and symbols, with a maximum of 30 characters.
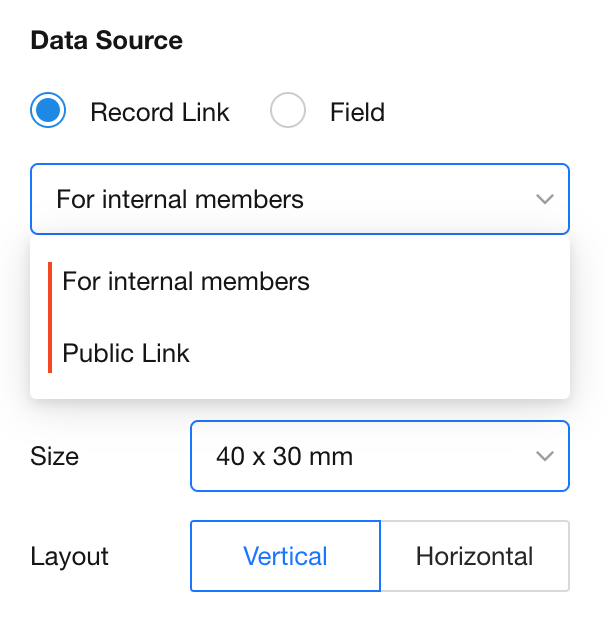
Record Link
Use the record’s access link as the QR code source. Scanning the code opens the record's detail page.
-
Internal Member Access: Only app members can access the record after logging in.
-
Public Link: Anyone scanning the code can open the shared page of the record.
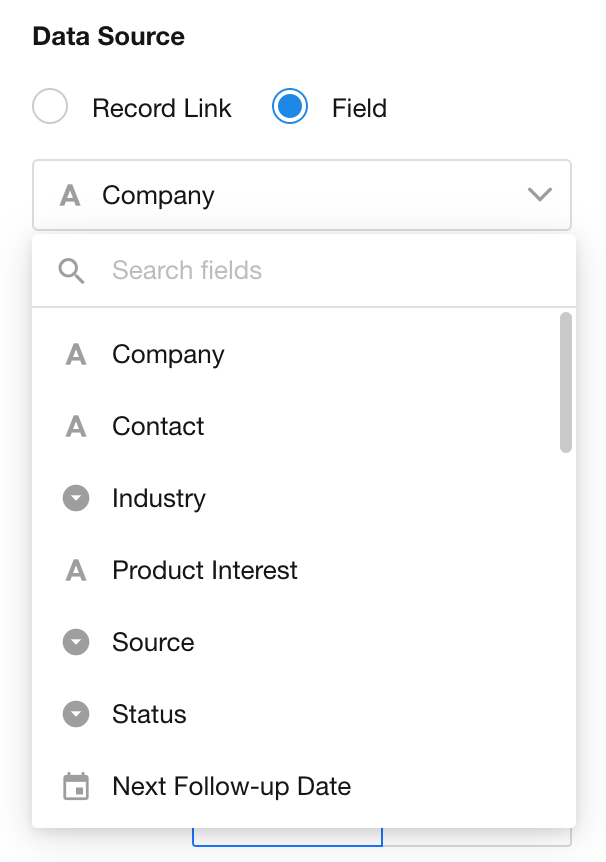
Field Value
Select a field as the QR/barcode source. Scanning the code will return the field’s text content.
3. Select Printer
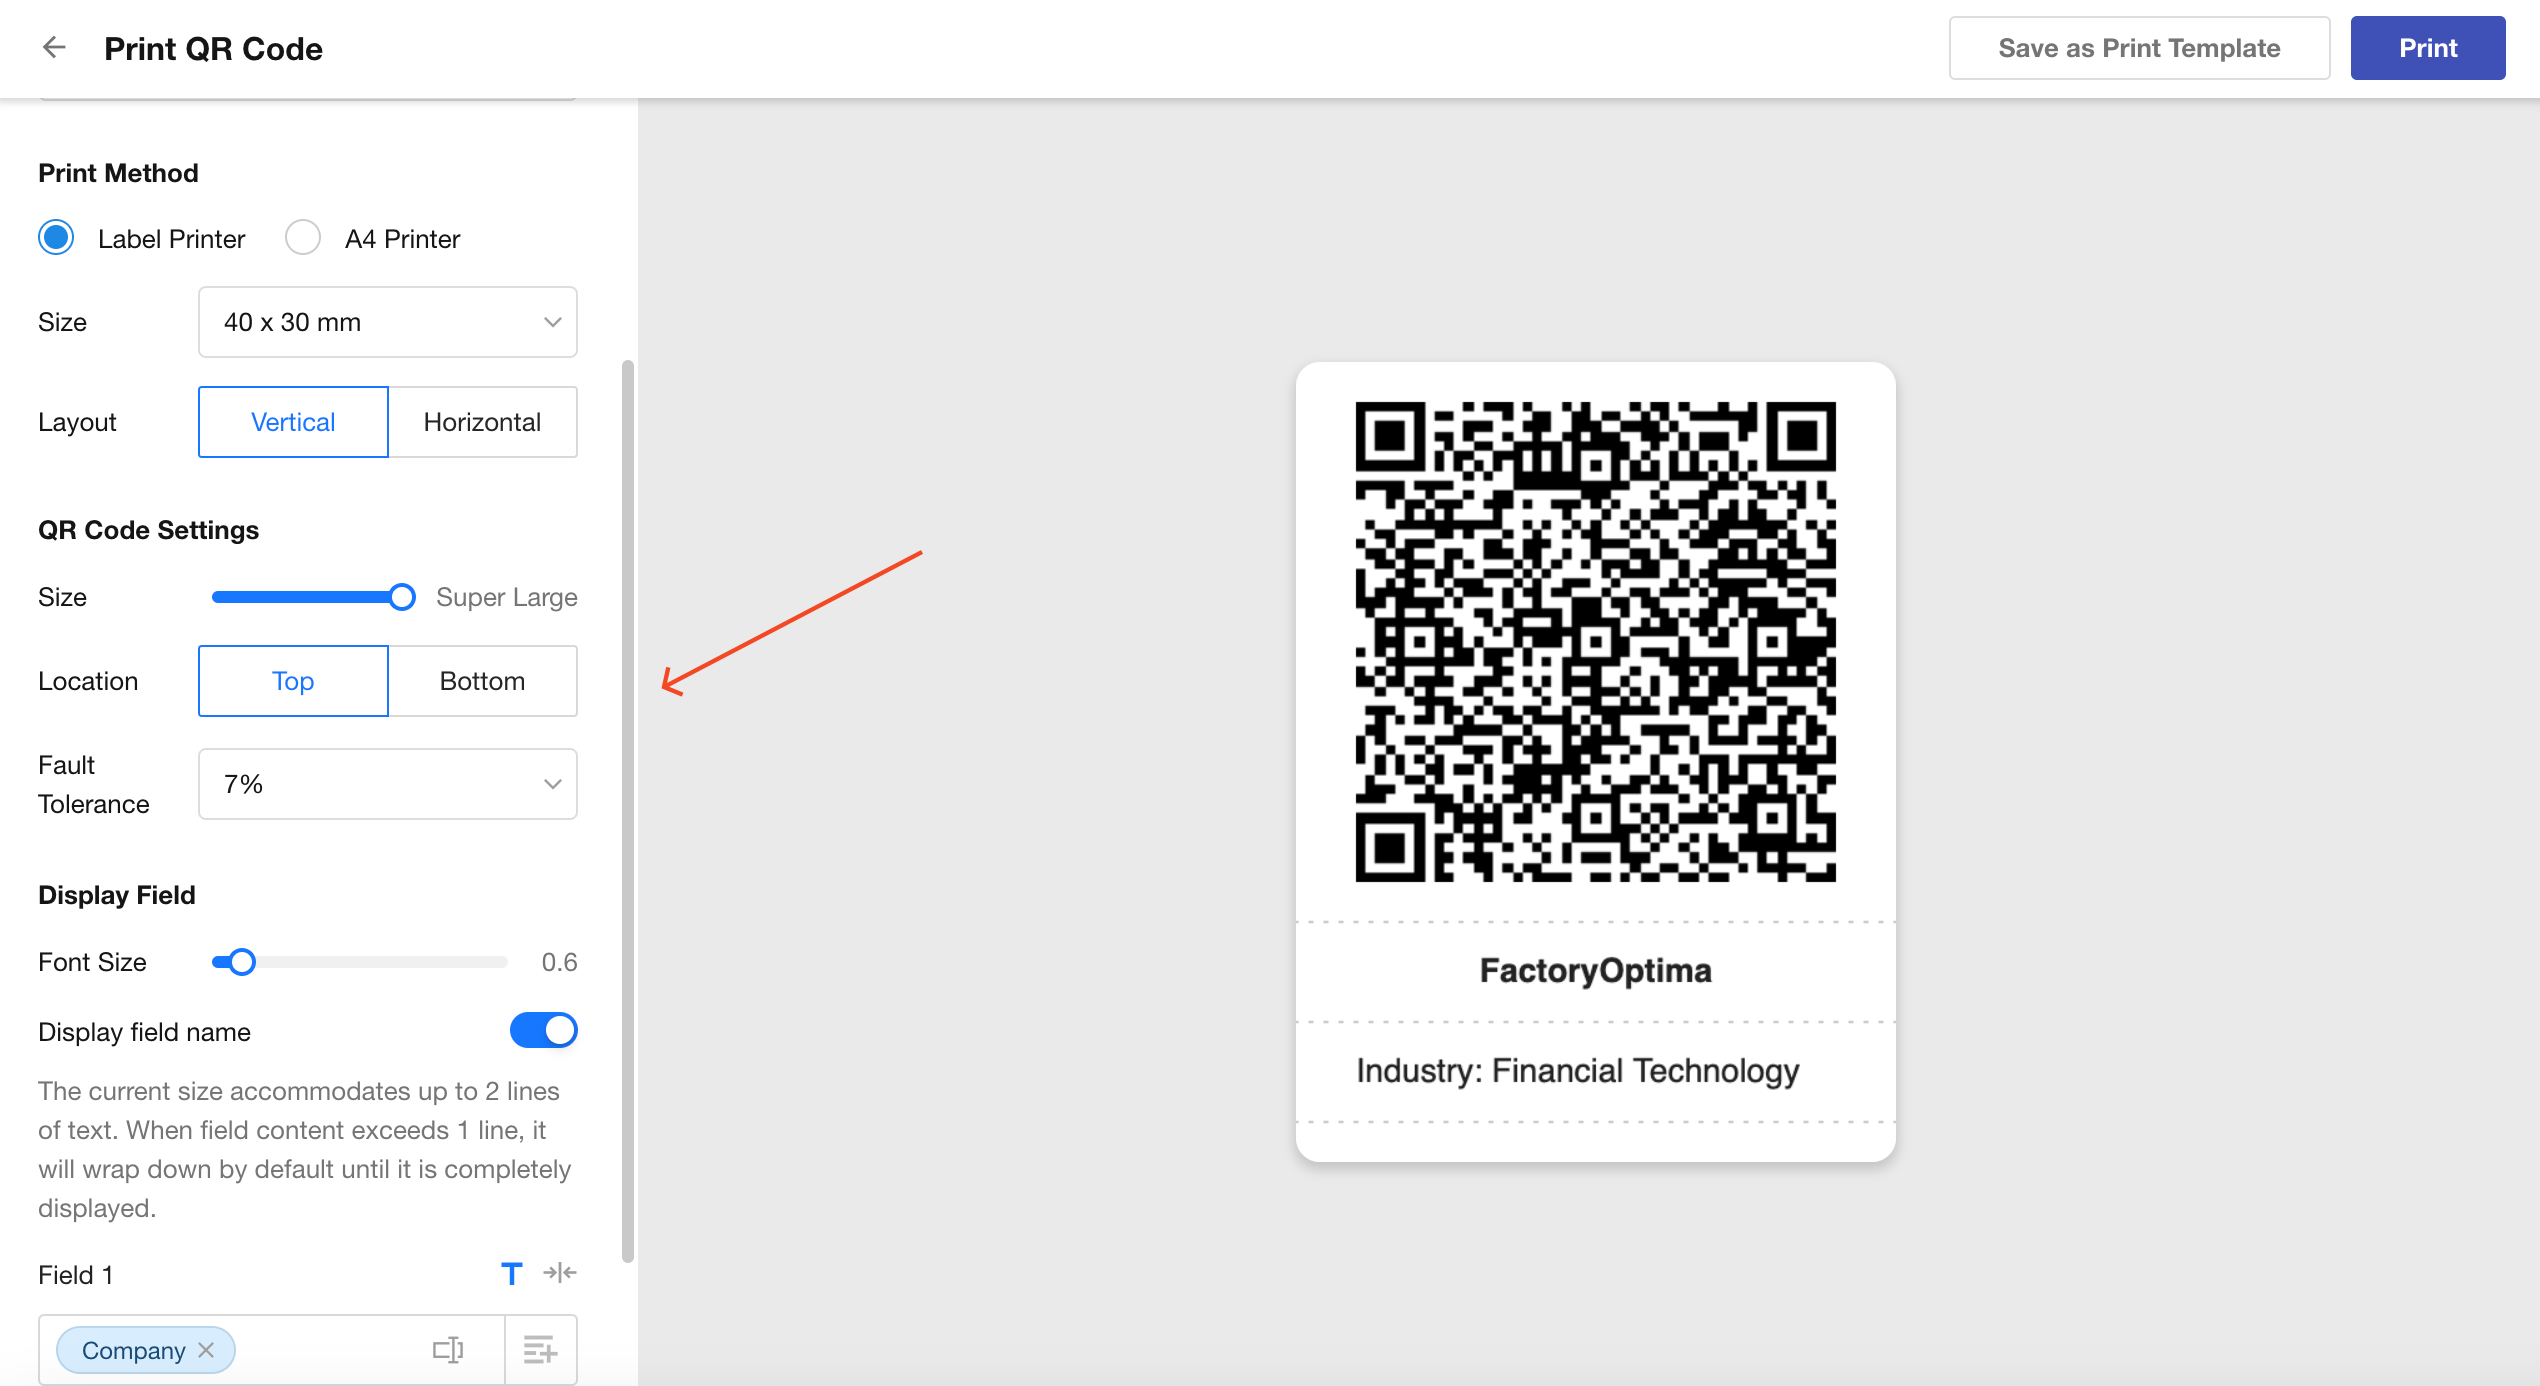
Label Printer
-
Barcodes can only be printed via label printers.
-
Size: Choose from preset sizes or customize width and height.
-
Layout & Locatin: Set the relative position of the code and text.
-
Size Options: Choose from Small, Medium, Large, or Extra Large.
-
Fault Tolerance: Higher levels allow more of the QR code to be obscured while still remaining scannable.
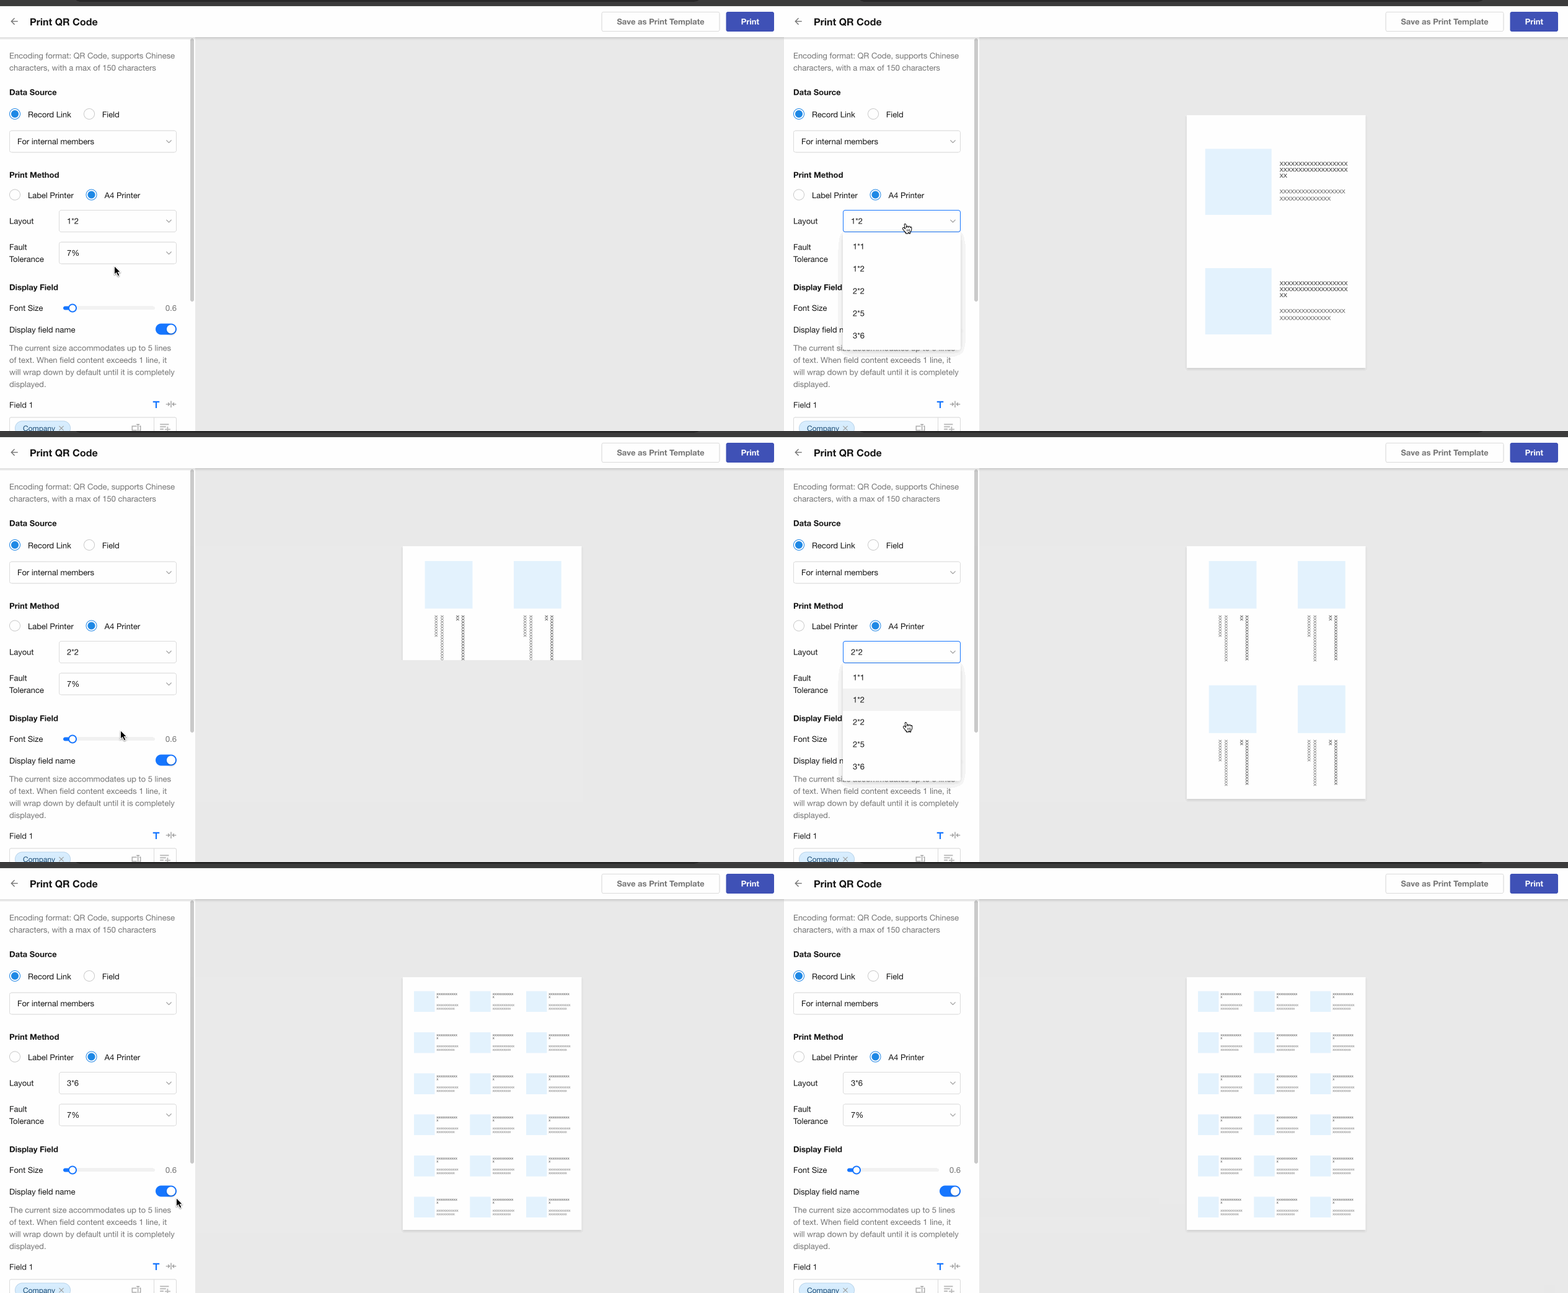
A4 Printer
For A4 printers, the paper size is fixed. Simply choose how many rows and columns of codes to print per page.
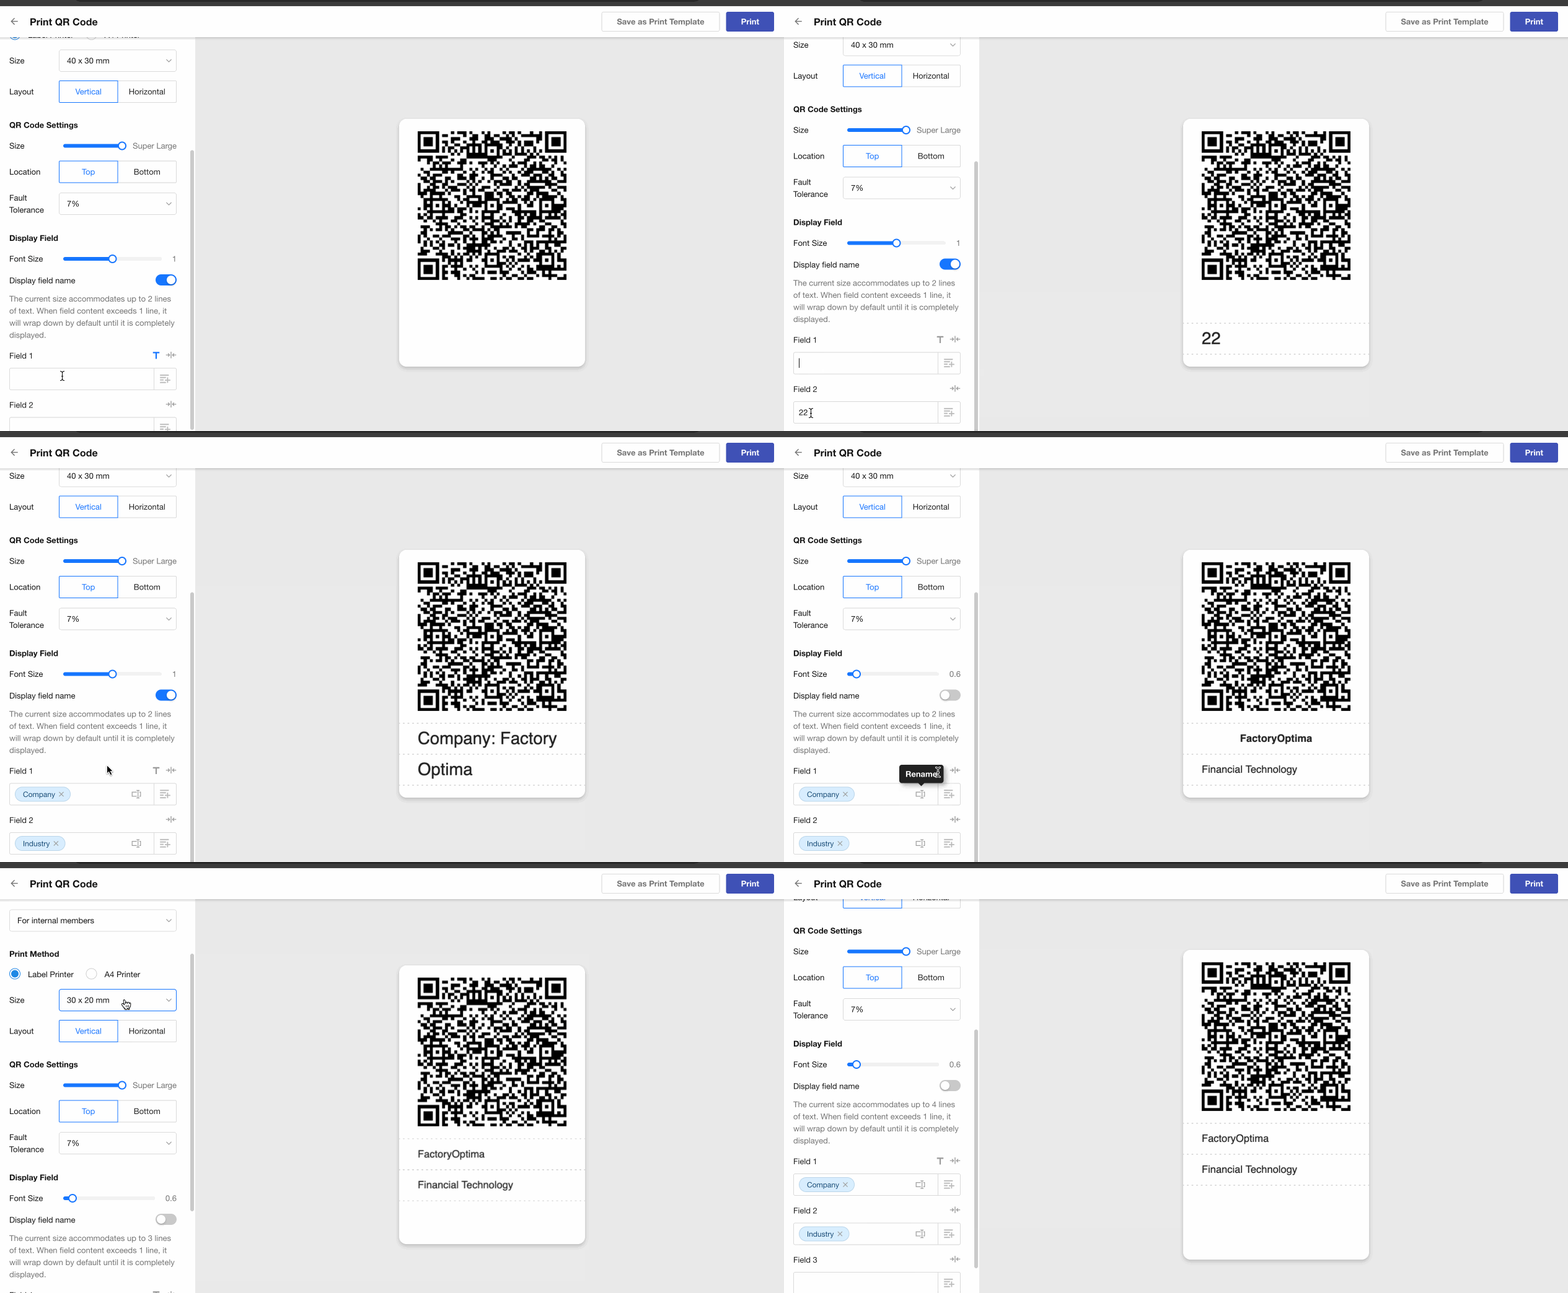
4. Configure Displayed Fields
You can show additional field values around the QR or barcode.
-
The number of fields displayed depends on label size, code size, and layout.
-
Font size for title fields is fixed; others can be adjusted.
-
Option to show or hide field names.
-
Field names can be renamed for display only (does not affect the worksheet).
-
When single-line display is enabled, font size auto-adjusts to fit content.
-
Title fields are bold and centered; field name is hidden in this case.
-
Fixed text can be used as field content.
If a field is hidden in the table view, it will not appear in the printed QR code via quick print.
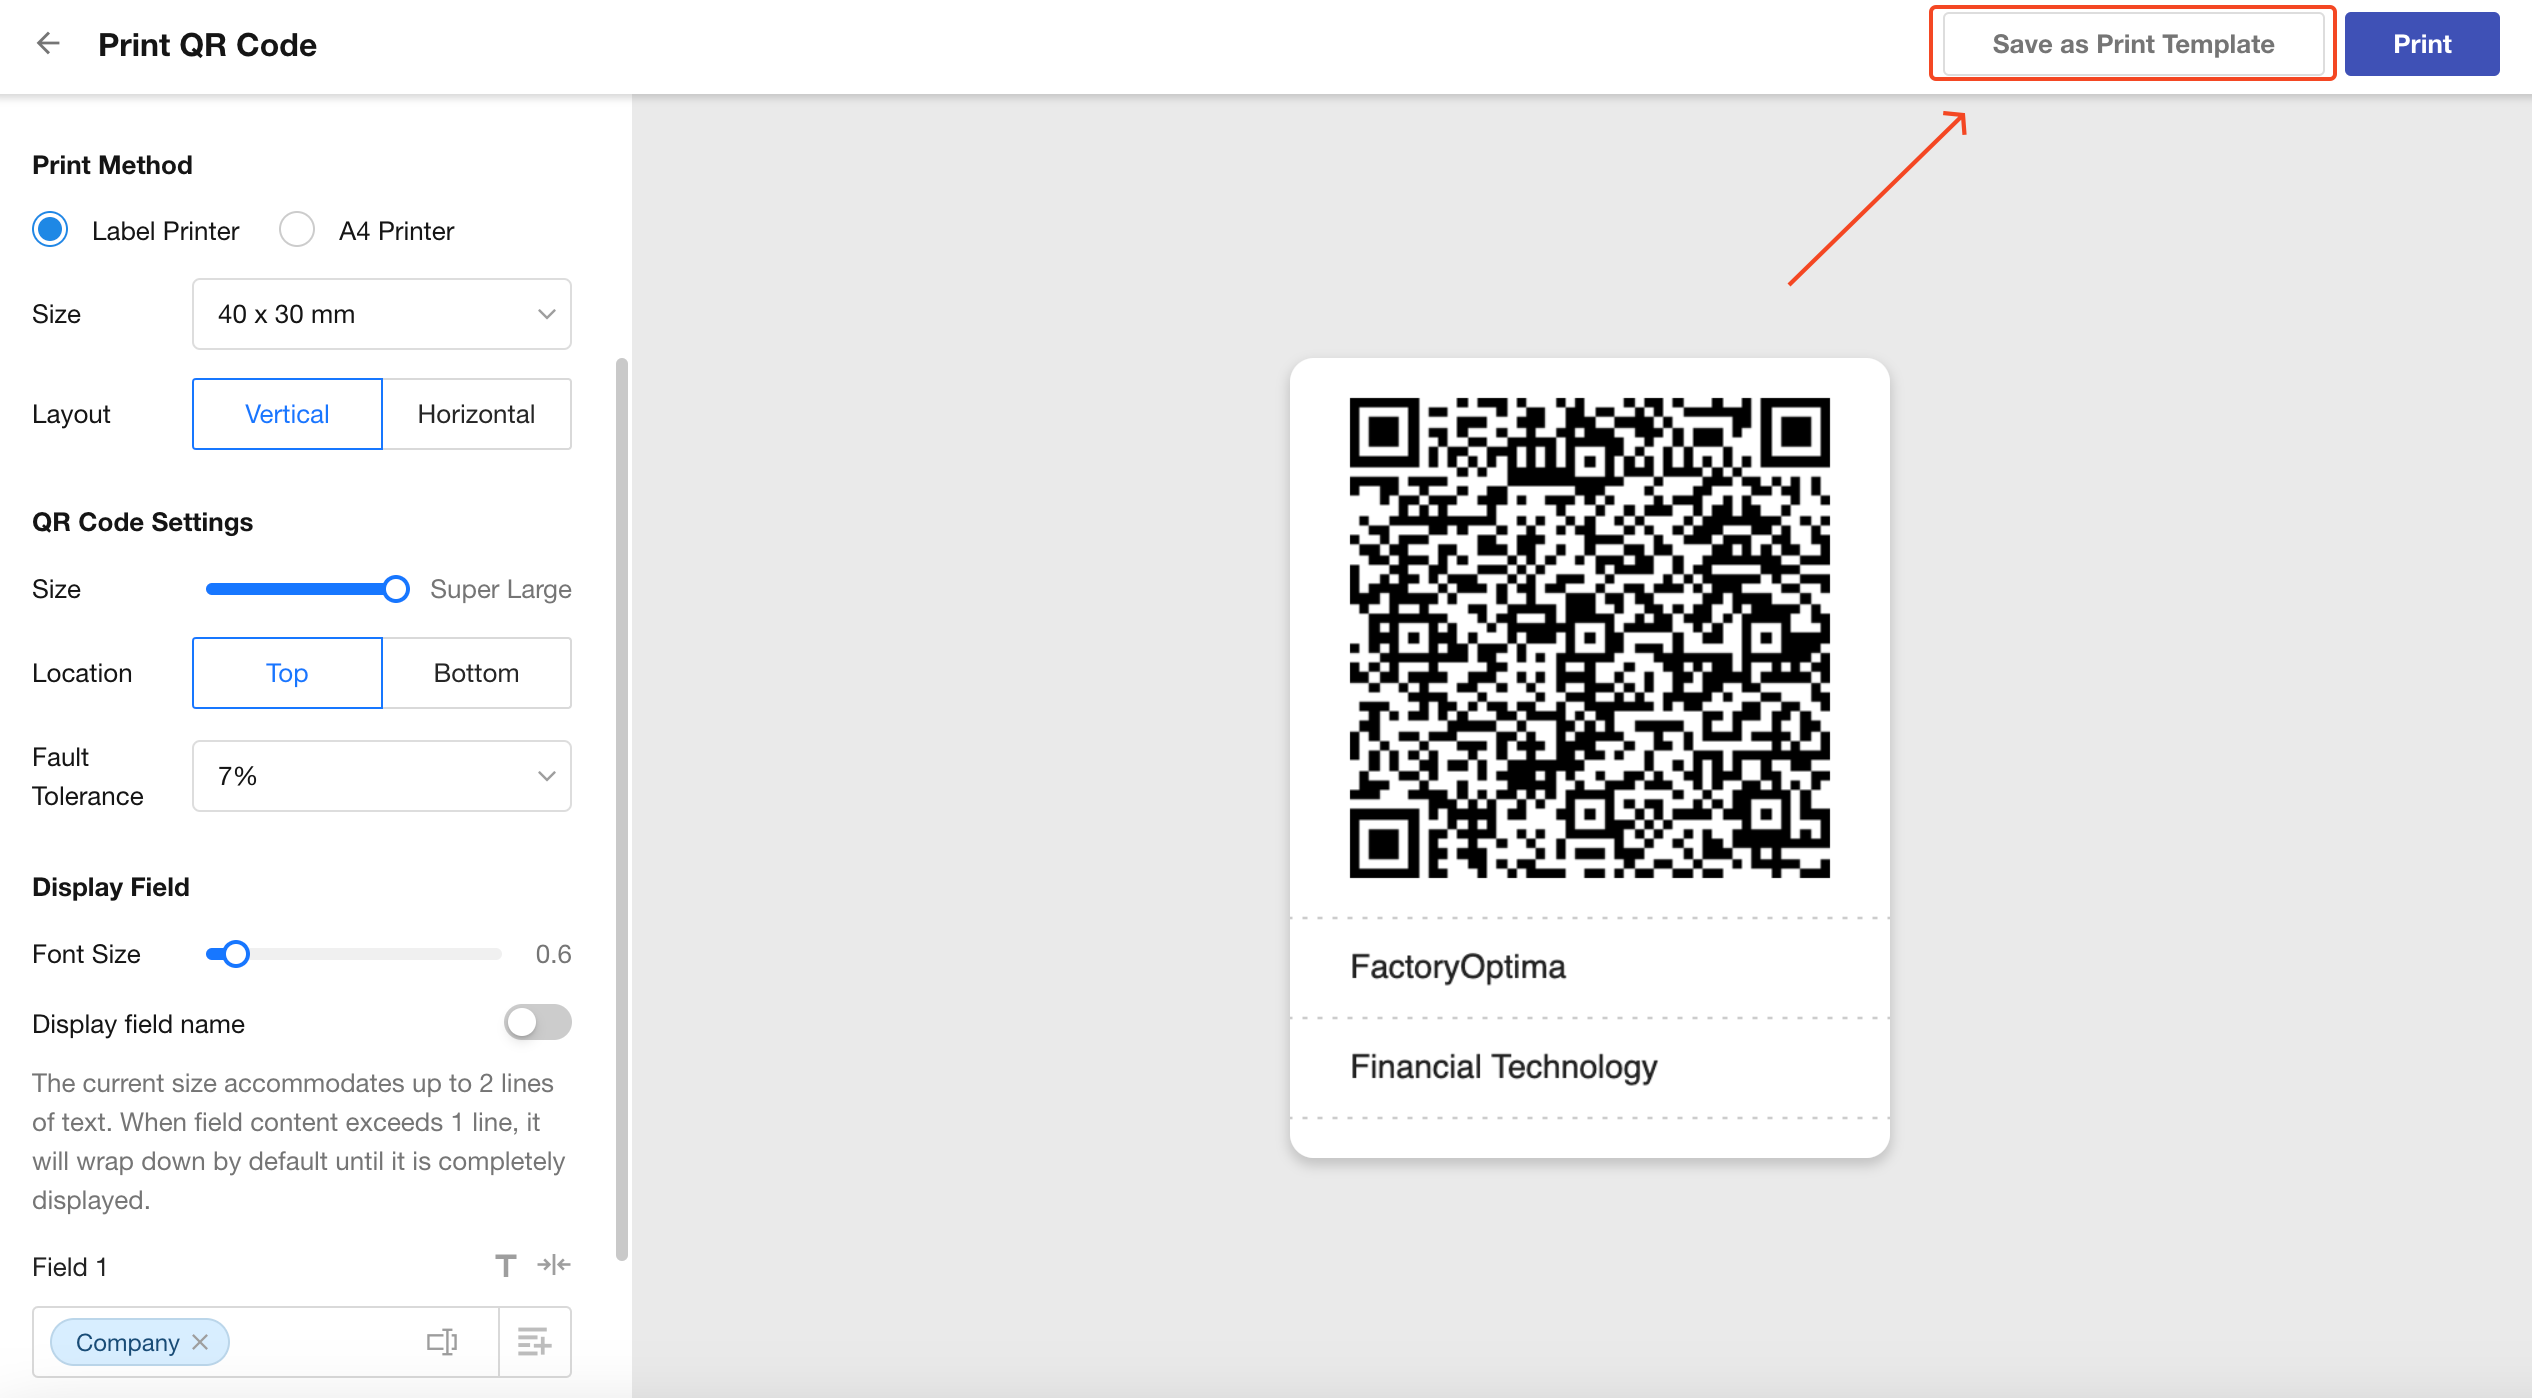
5. Save as Print Template
After setting everything, you can save your configuration as a template for future use.
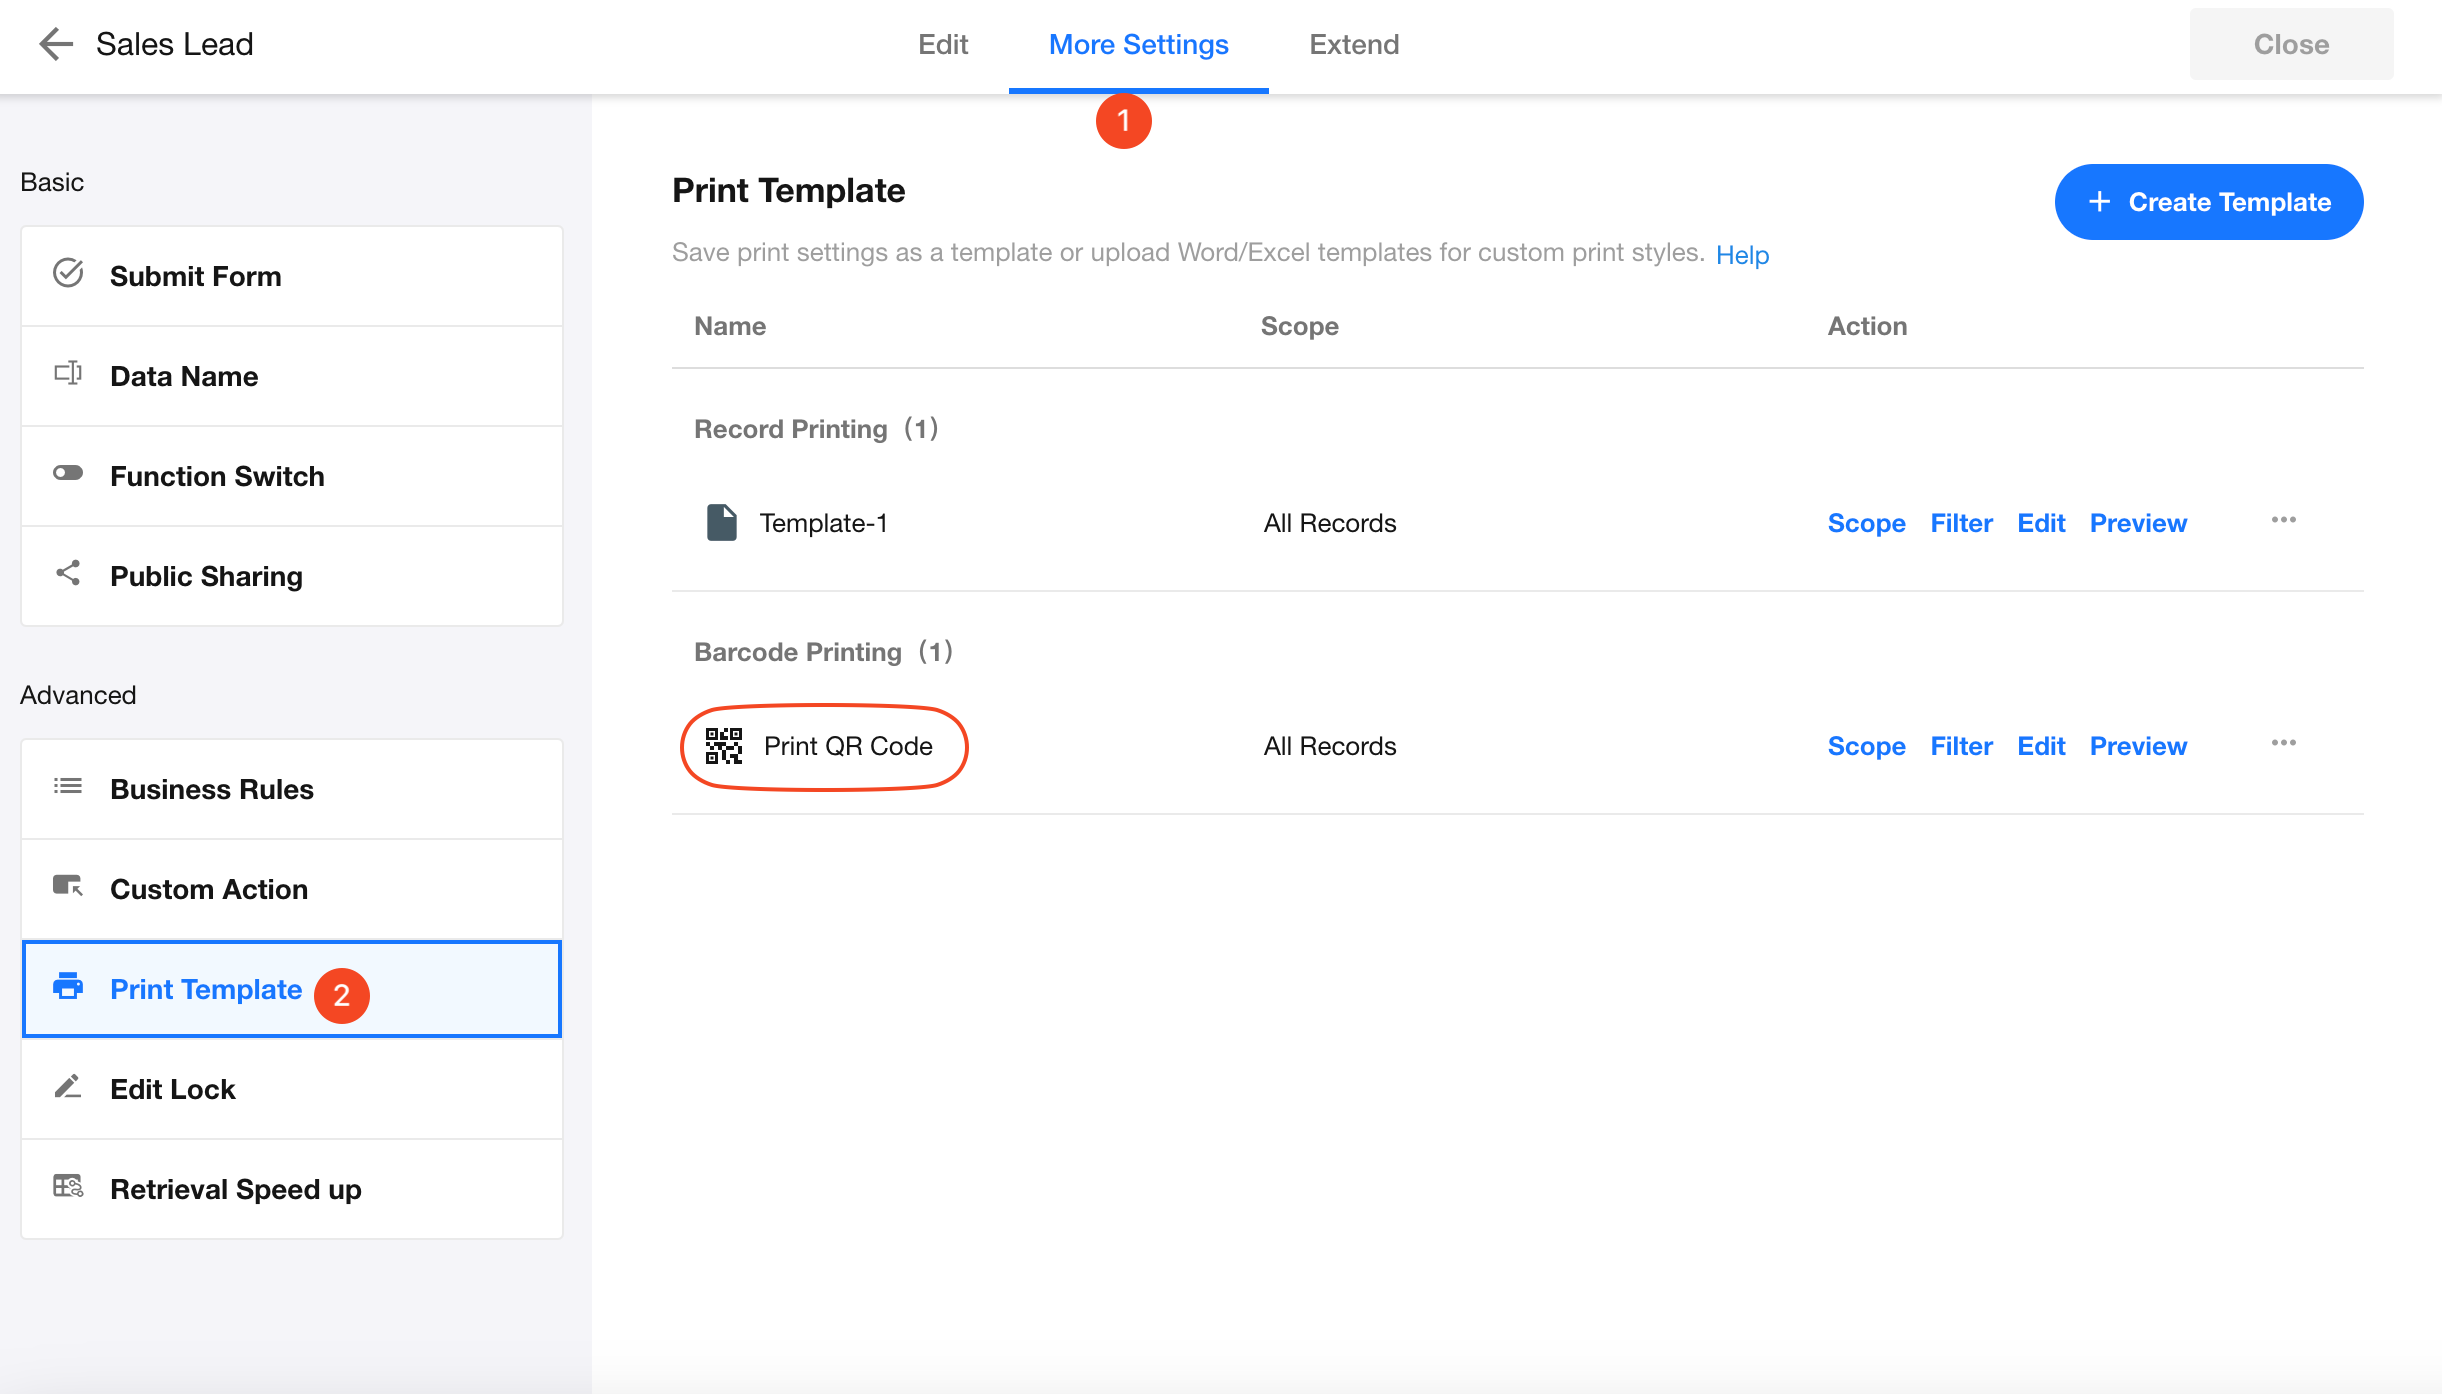
Saved templates can be managed and modified in the worksheet.
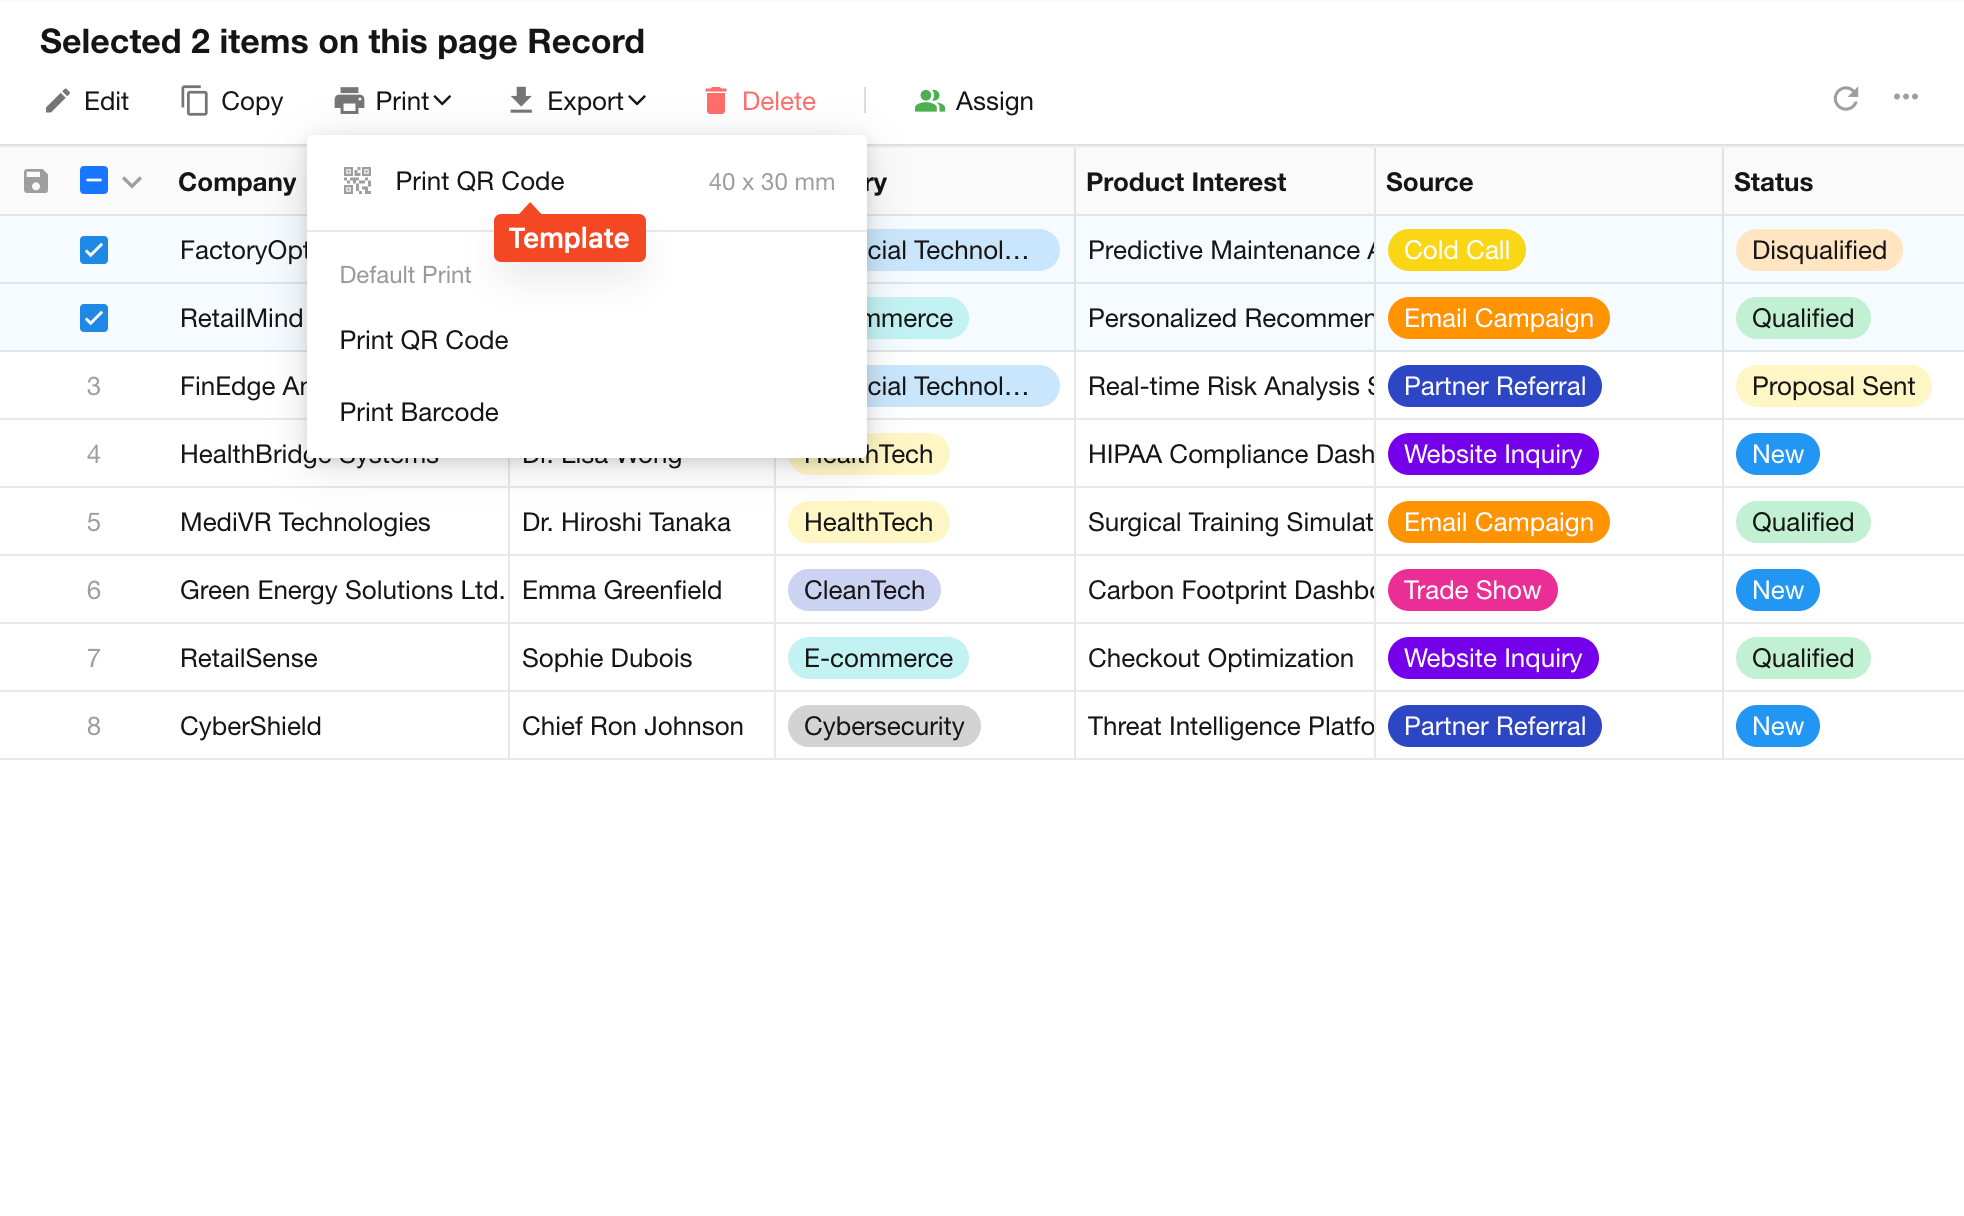
You can also select a saved template during printing. Bulk printing supports up to 200 records per print.
6. Print
Note: The print page appearance may vary across browsers.
-
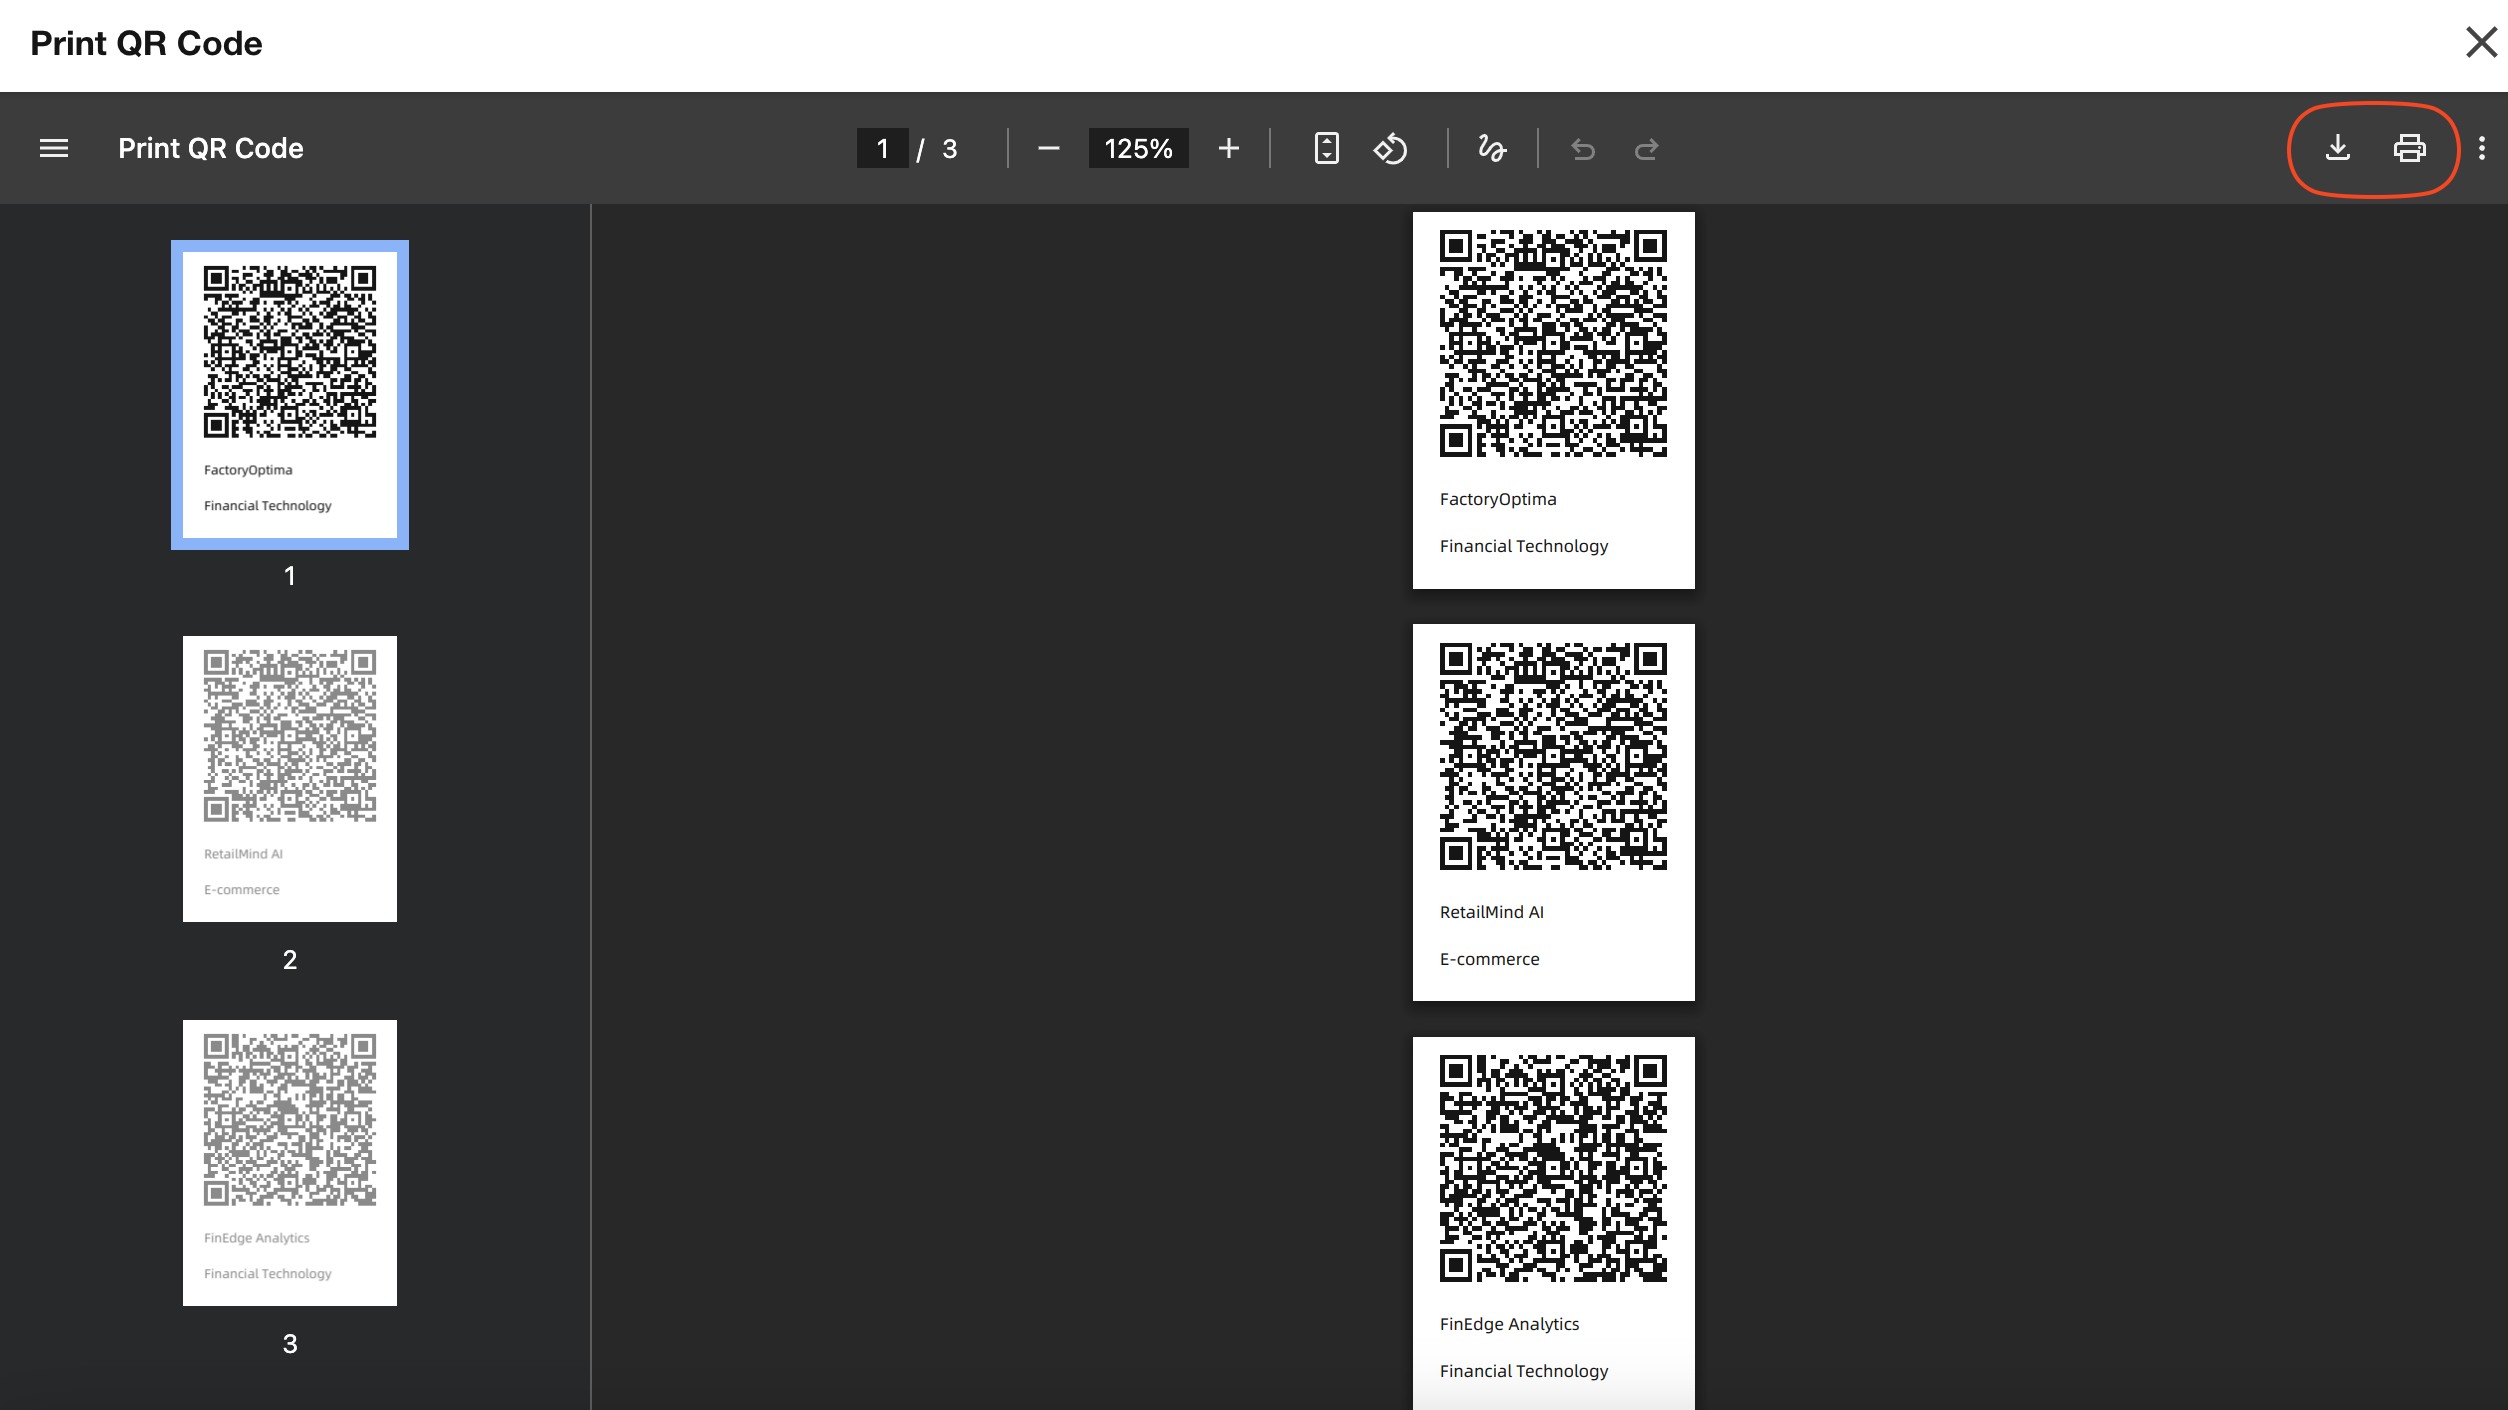
Click the Print button to enter the system print dialog.
-
Alternatively, you can download as a PDF document and print it using your preferred method.
Was this document helpful?