Create a System Print Template
Before getting started, read the Introduction to Print Templates to learn how print templates work.
This article explains how to create a System Print Template. If you want to create a Word or Excel print template instead, see Word/Excel Print Templates.
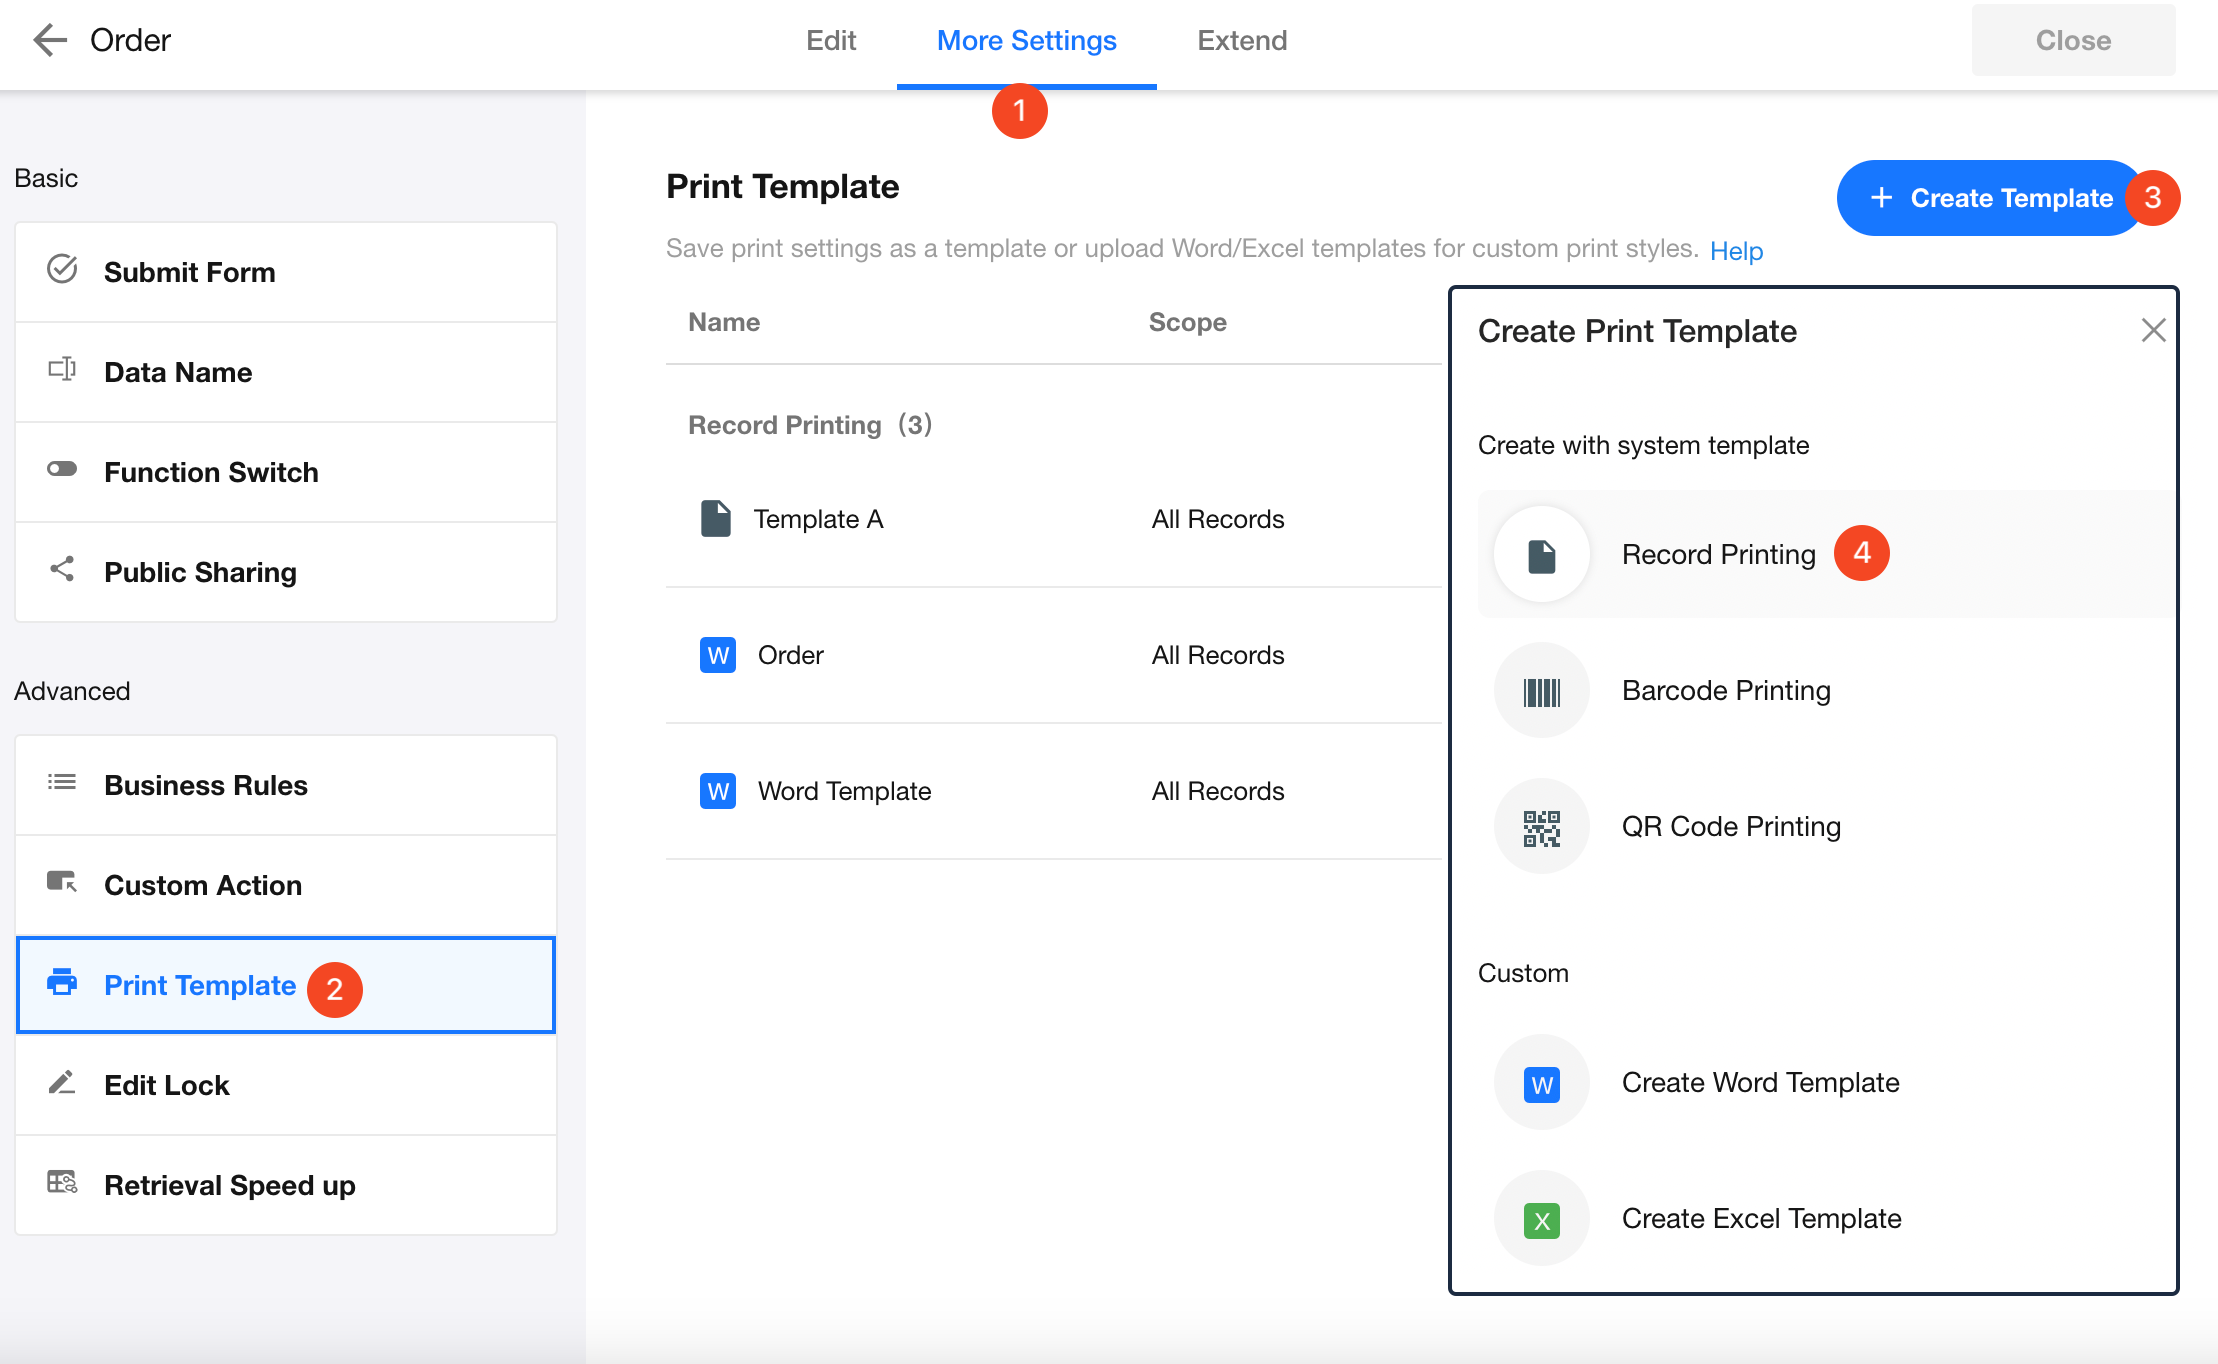
Open the System Print Template Designer
Go to Edit Form > More Settings > Print Template, click Create Template, then select Record Printing to create a system print template for worksheet records.
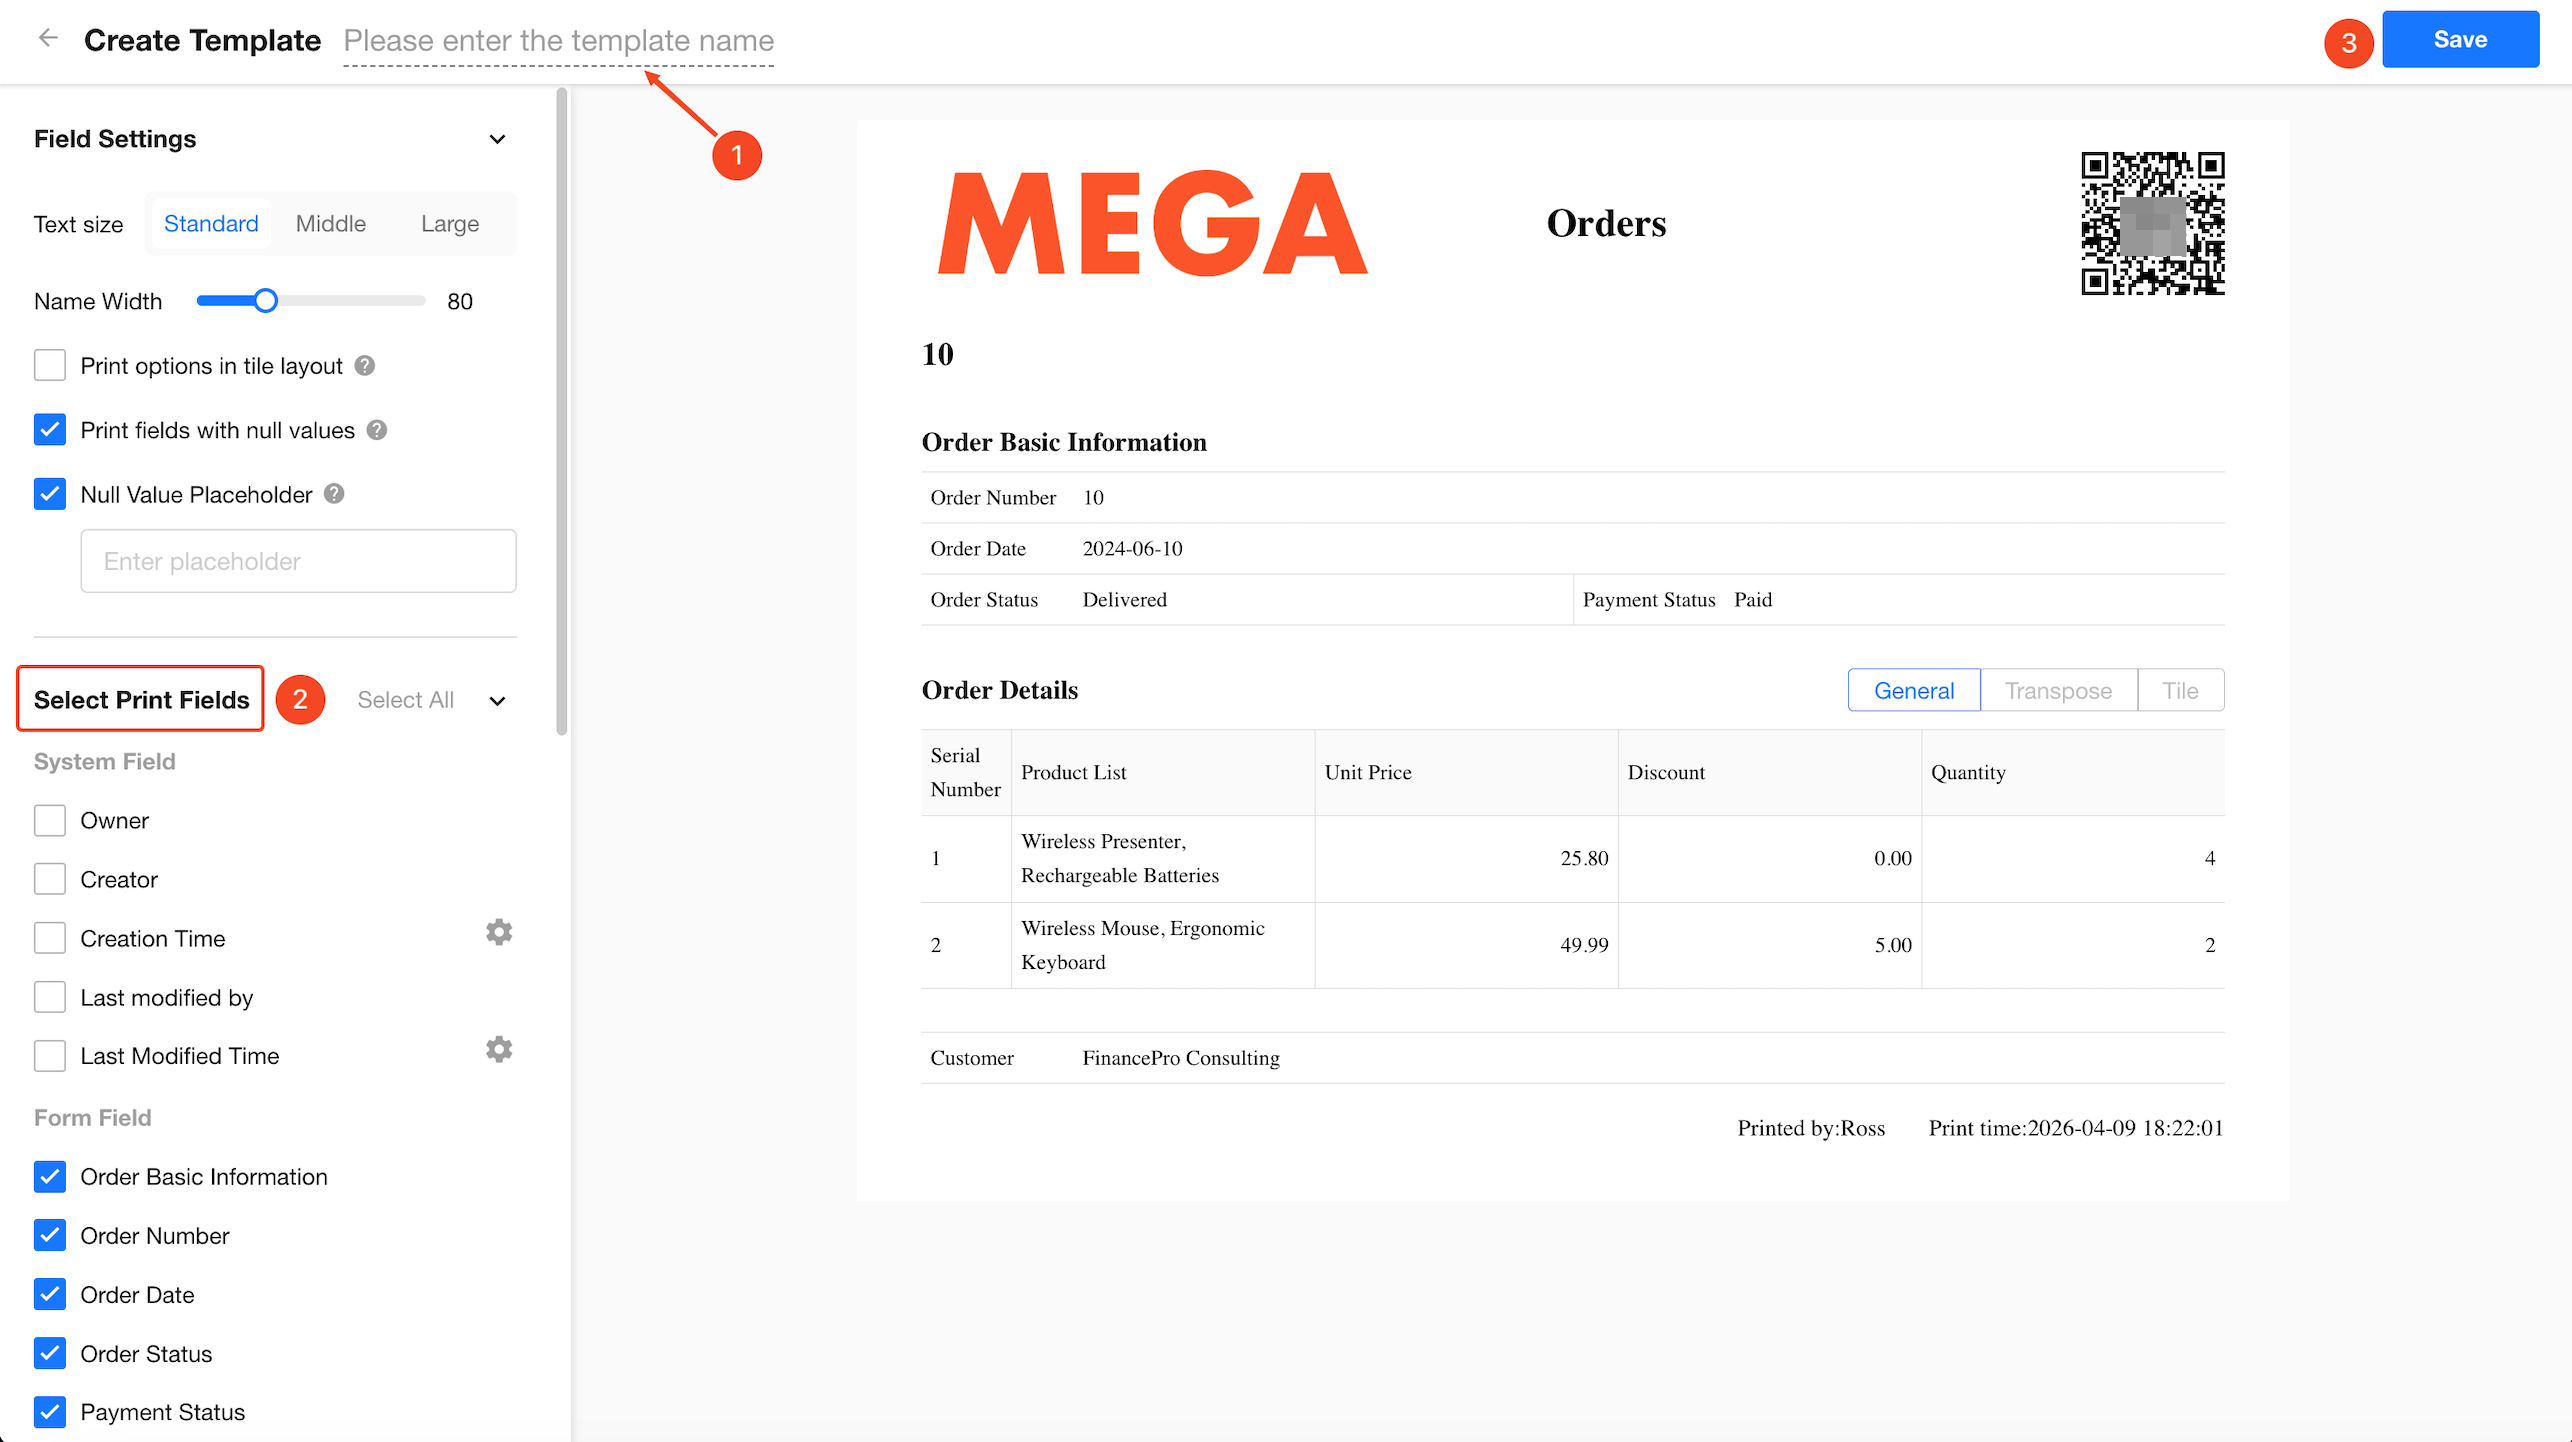
Design the Template
The left panel contains the print settings, where you can configure the page layout (paper size and orientation), font size, fields to print, and other print options. The center panel provides a real-time preview of the output.
Once you've finished designing the template, click Save.
Print Options in Tile Layout
If "Print options in tile layout" is enabled, all options in a tiled option field will be printed—even if they are not selected in the record.
If disabled, only the selected options will be printed.
Print Fields with Null Values
System print templates allow you to control whether fields with empty values are displayed during printing. You can also define a custom placeholder (e.g., ---) to maintain a clean and consistent layout.
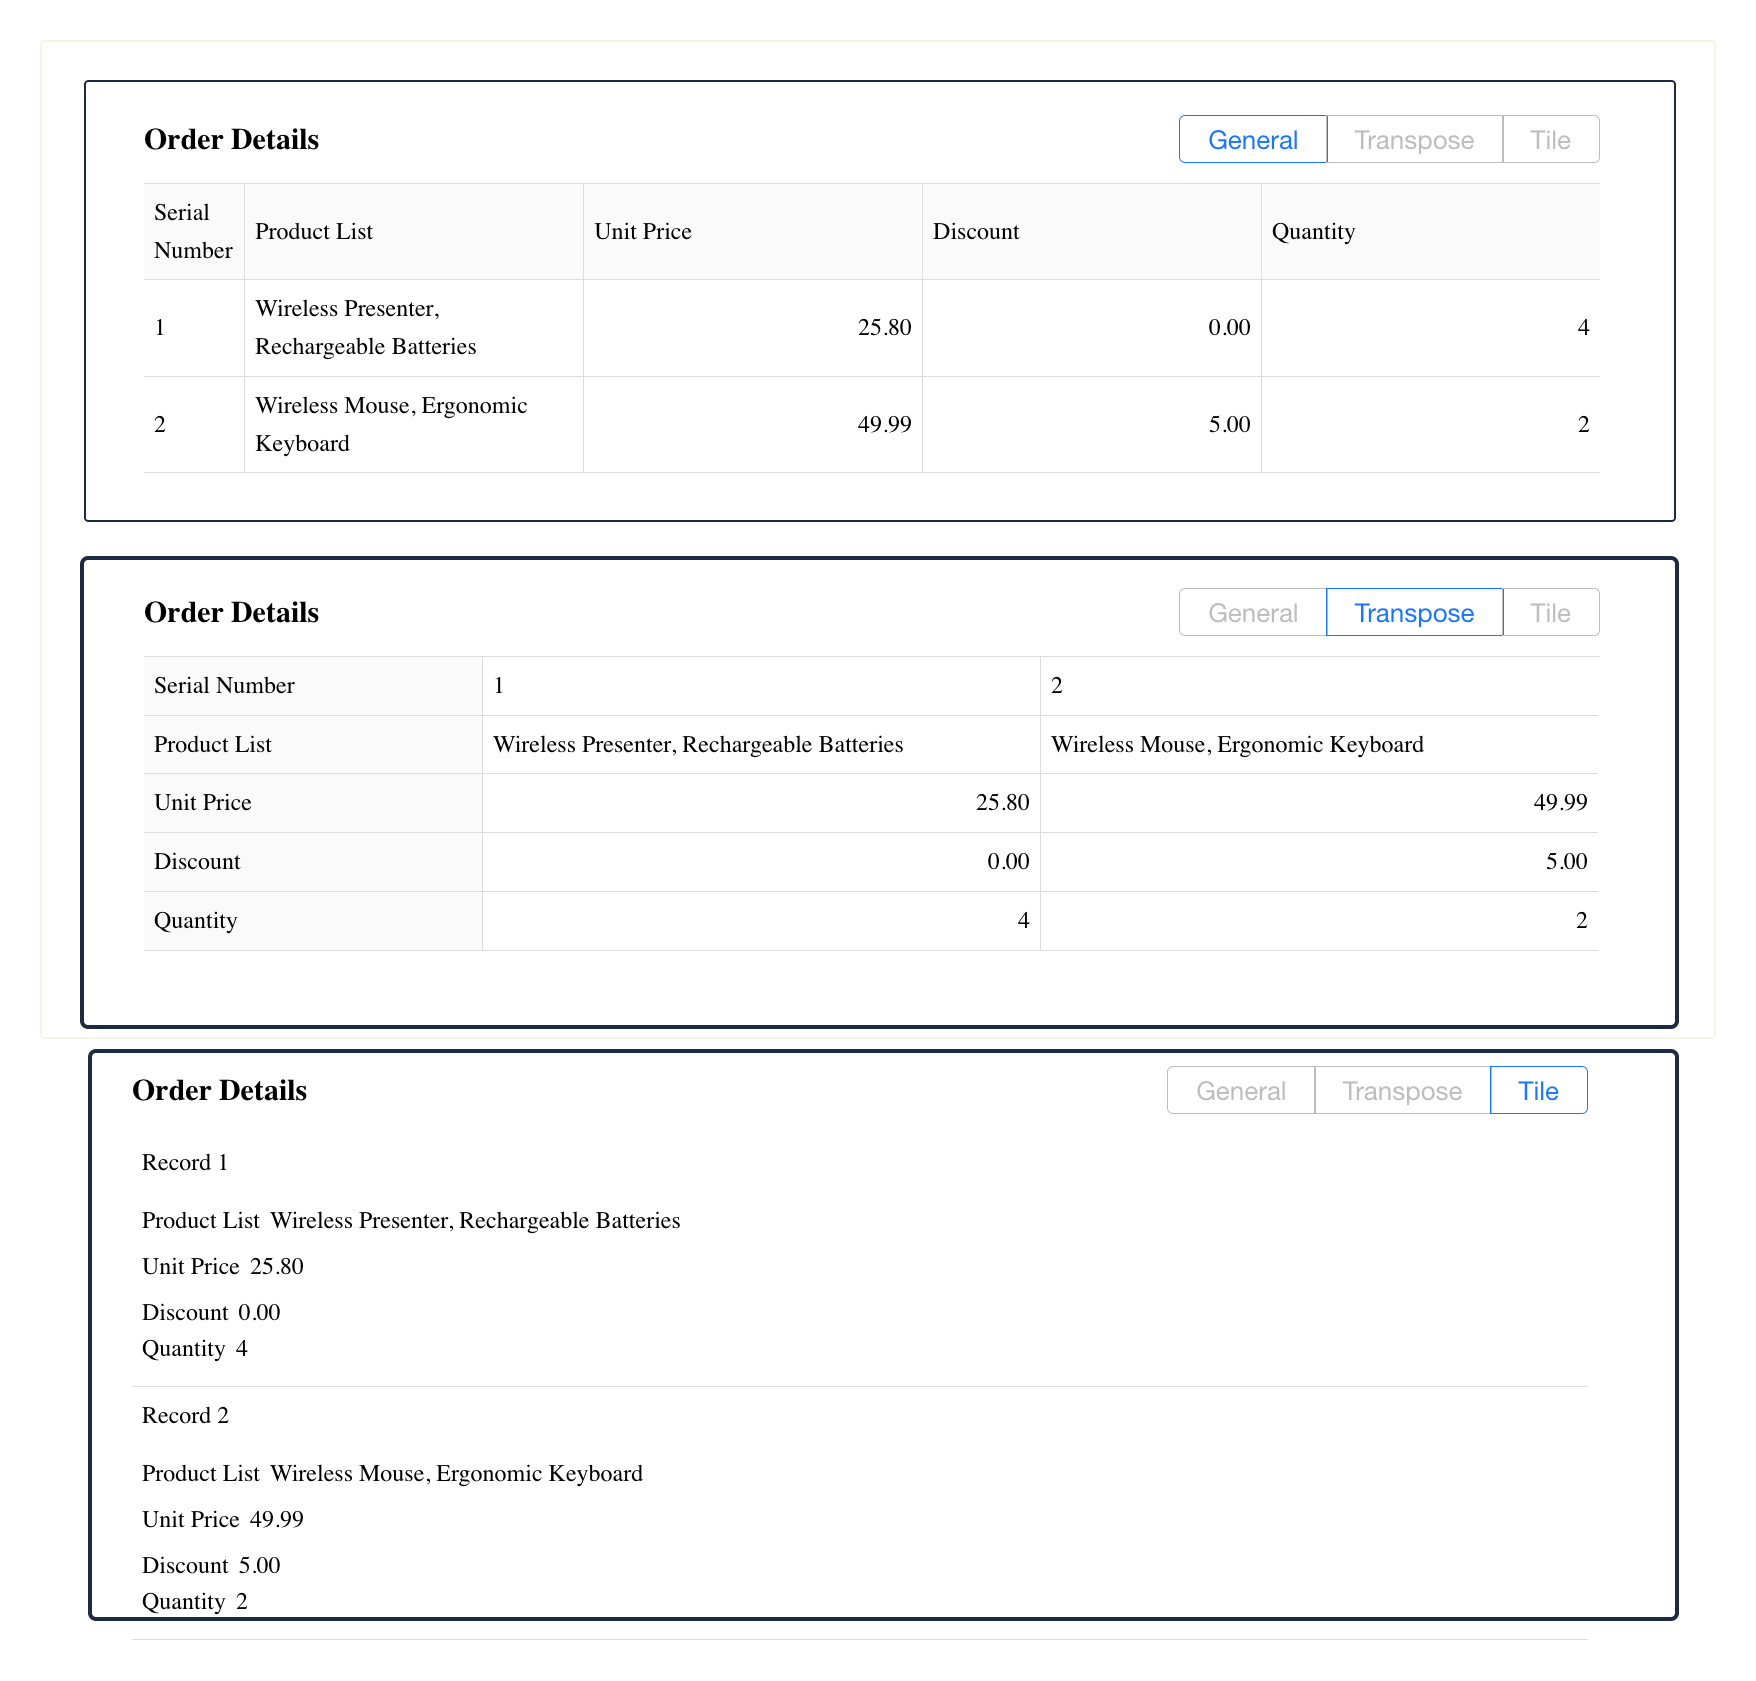
Printing Formats for Subforms and Related Worksheets
Subform and related worksheet printing supports three formats:
- General
- Transpose
- Tile
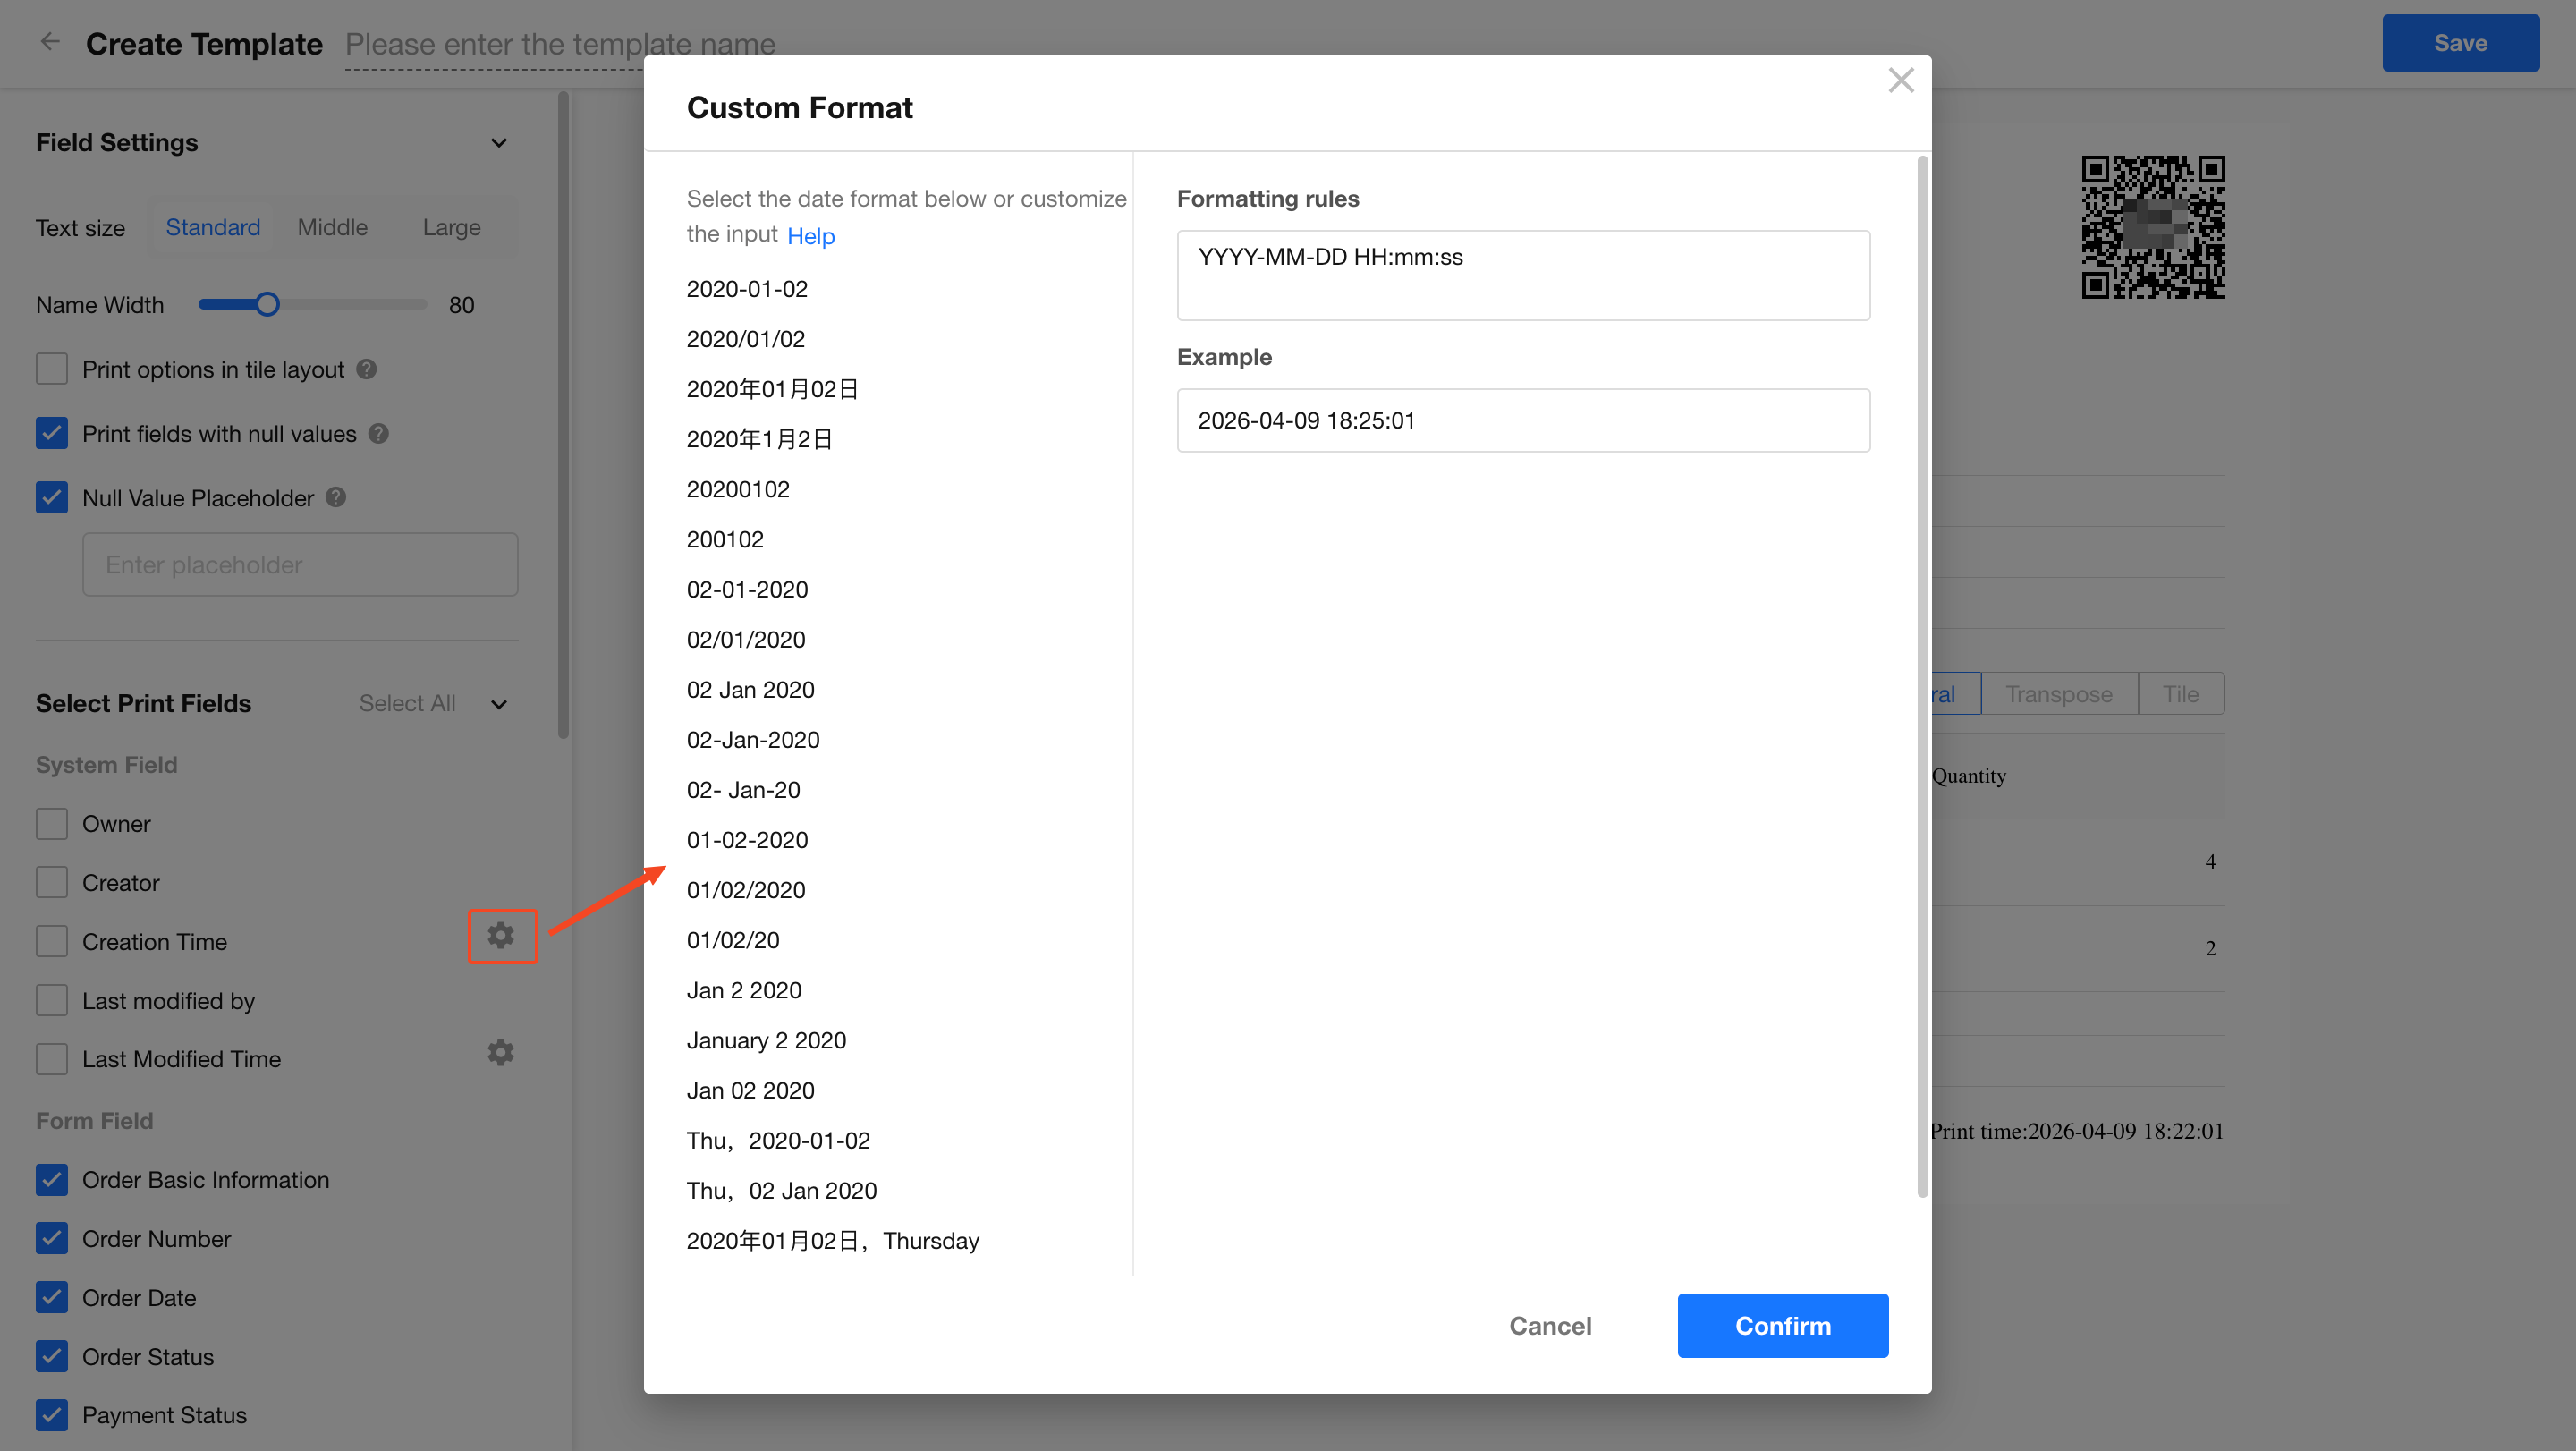
Date/Time Format Settings
For system time fields like "Creation time" or "Last modification time", you can customize the date/time display format. Click the settings icon next to the field to adjust the format.
Allow Downloading & Printing
If "Allow downloading & printing" is unchecked, non-admin users won't be able to download the generated print file. Admin users always retain download access.
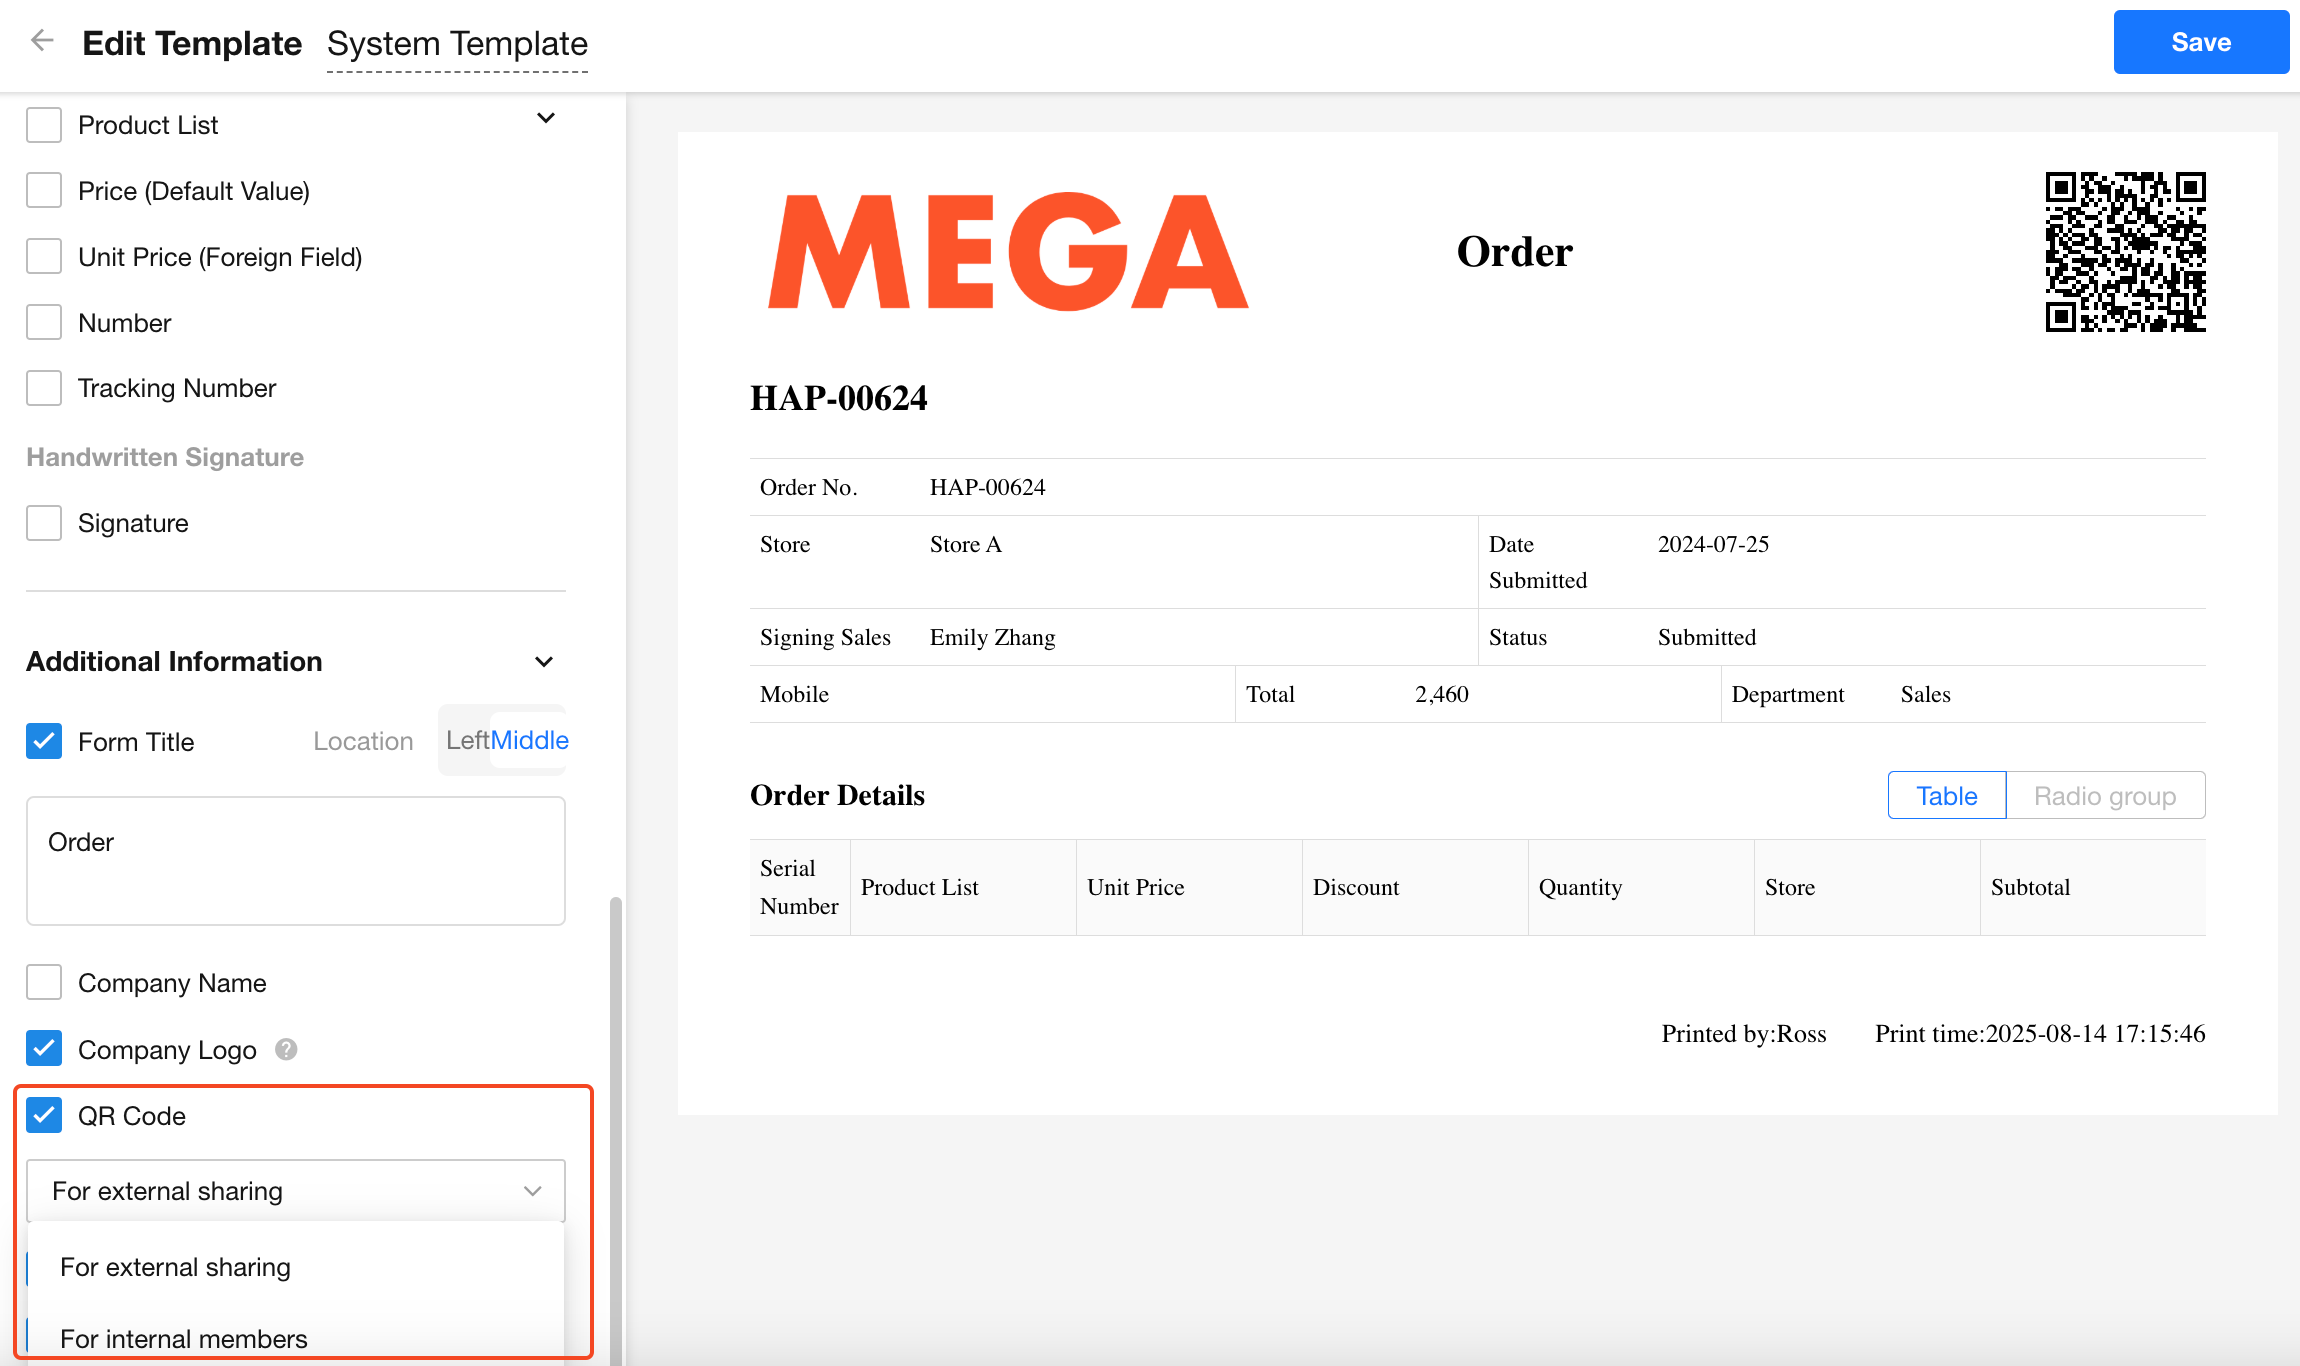
Record QR Code Type
You can embed a QR code of the record on the print page. Depending on your scenario, you may choose between:
-
Public Link
Anyone can scan the code to access the shared record page. -
Internal Member Access Link
Only application members can access the record after logging in, with permission checks applied.
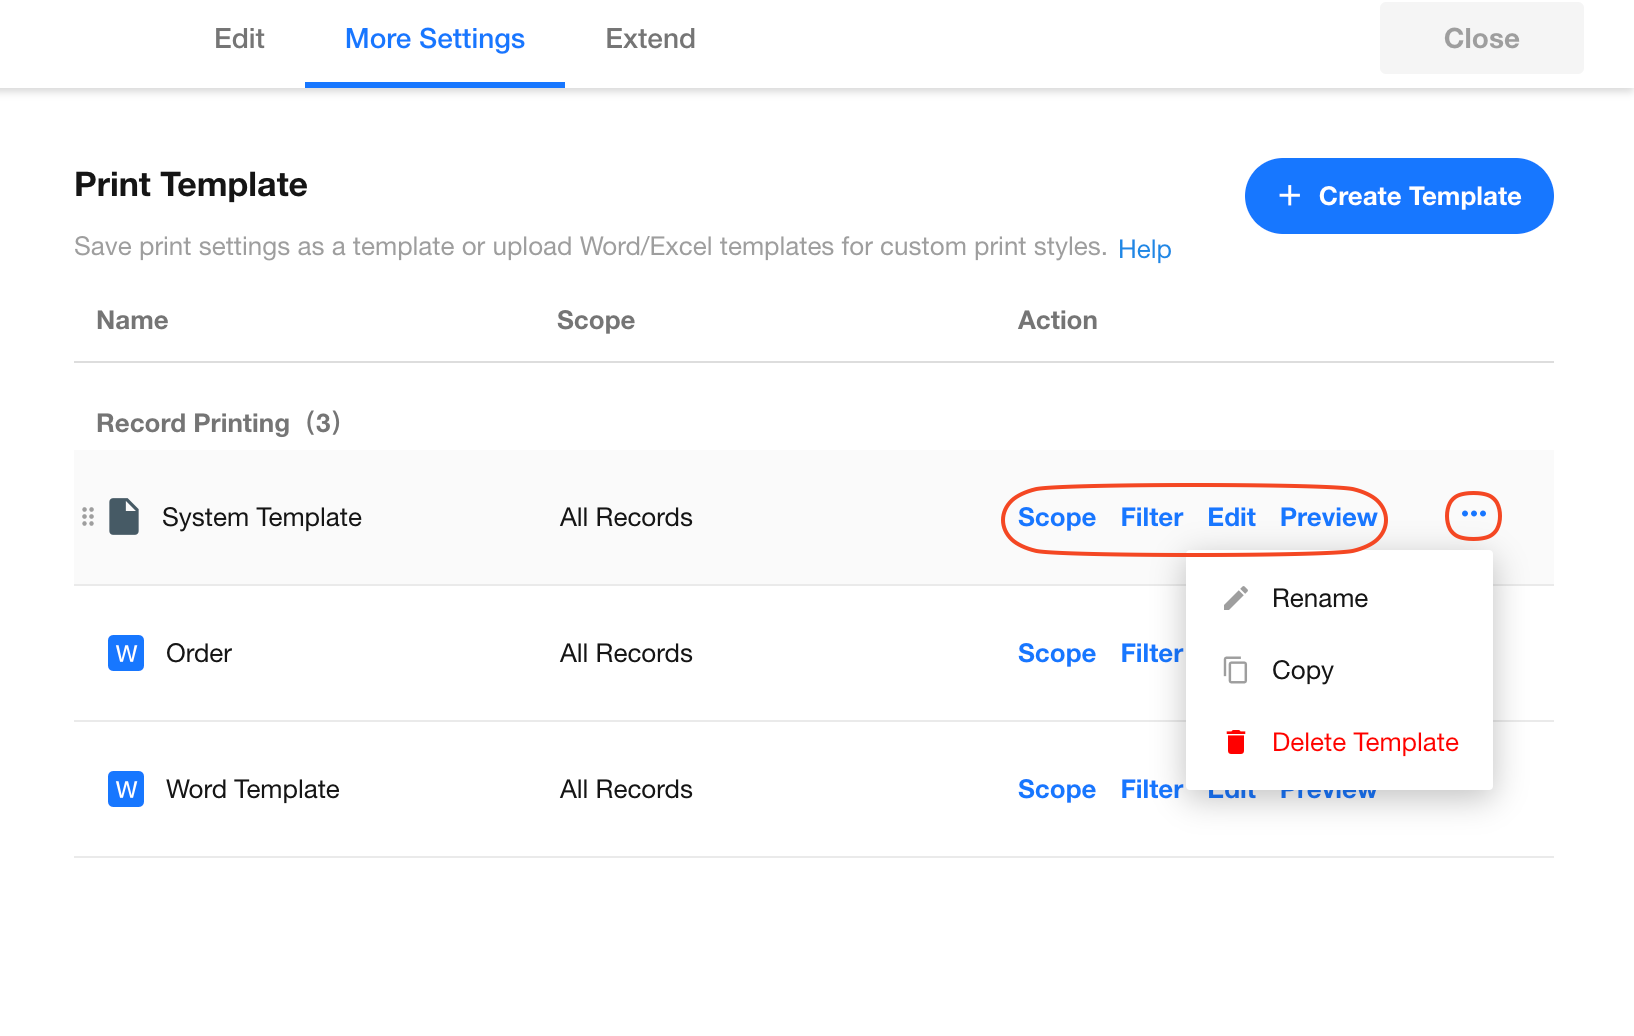
Template Management
You can manage your existing templates with the following options:
- Rename
- Delete
- Edit/Redesign
- Set availability in specific views
- Filter usage (only display for records meeting certain criteria)
Learn more about Print Template Management
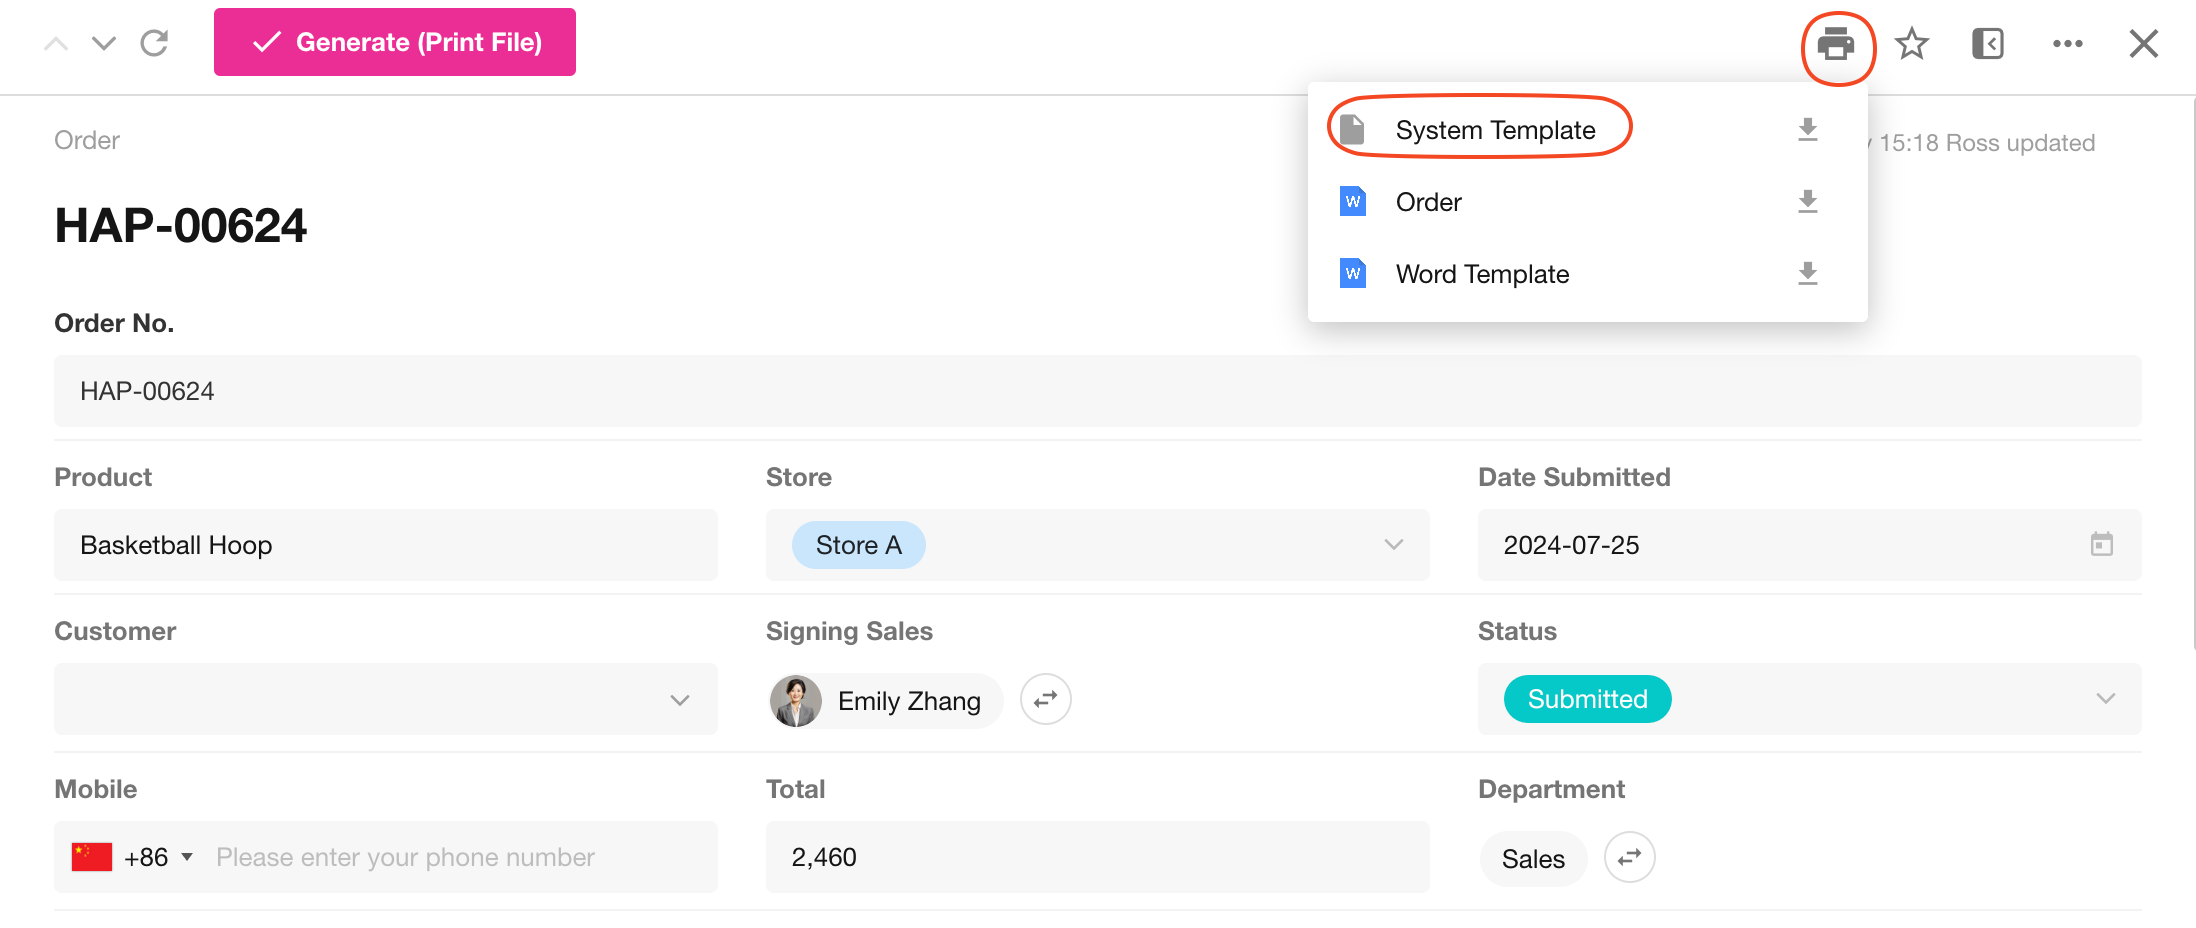
Using the Template
Once the system template is designed and saved, you can select it directly during record printing for quick access.
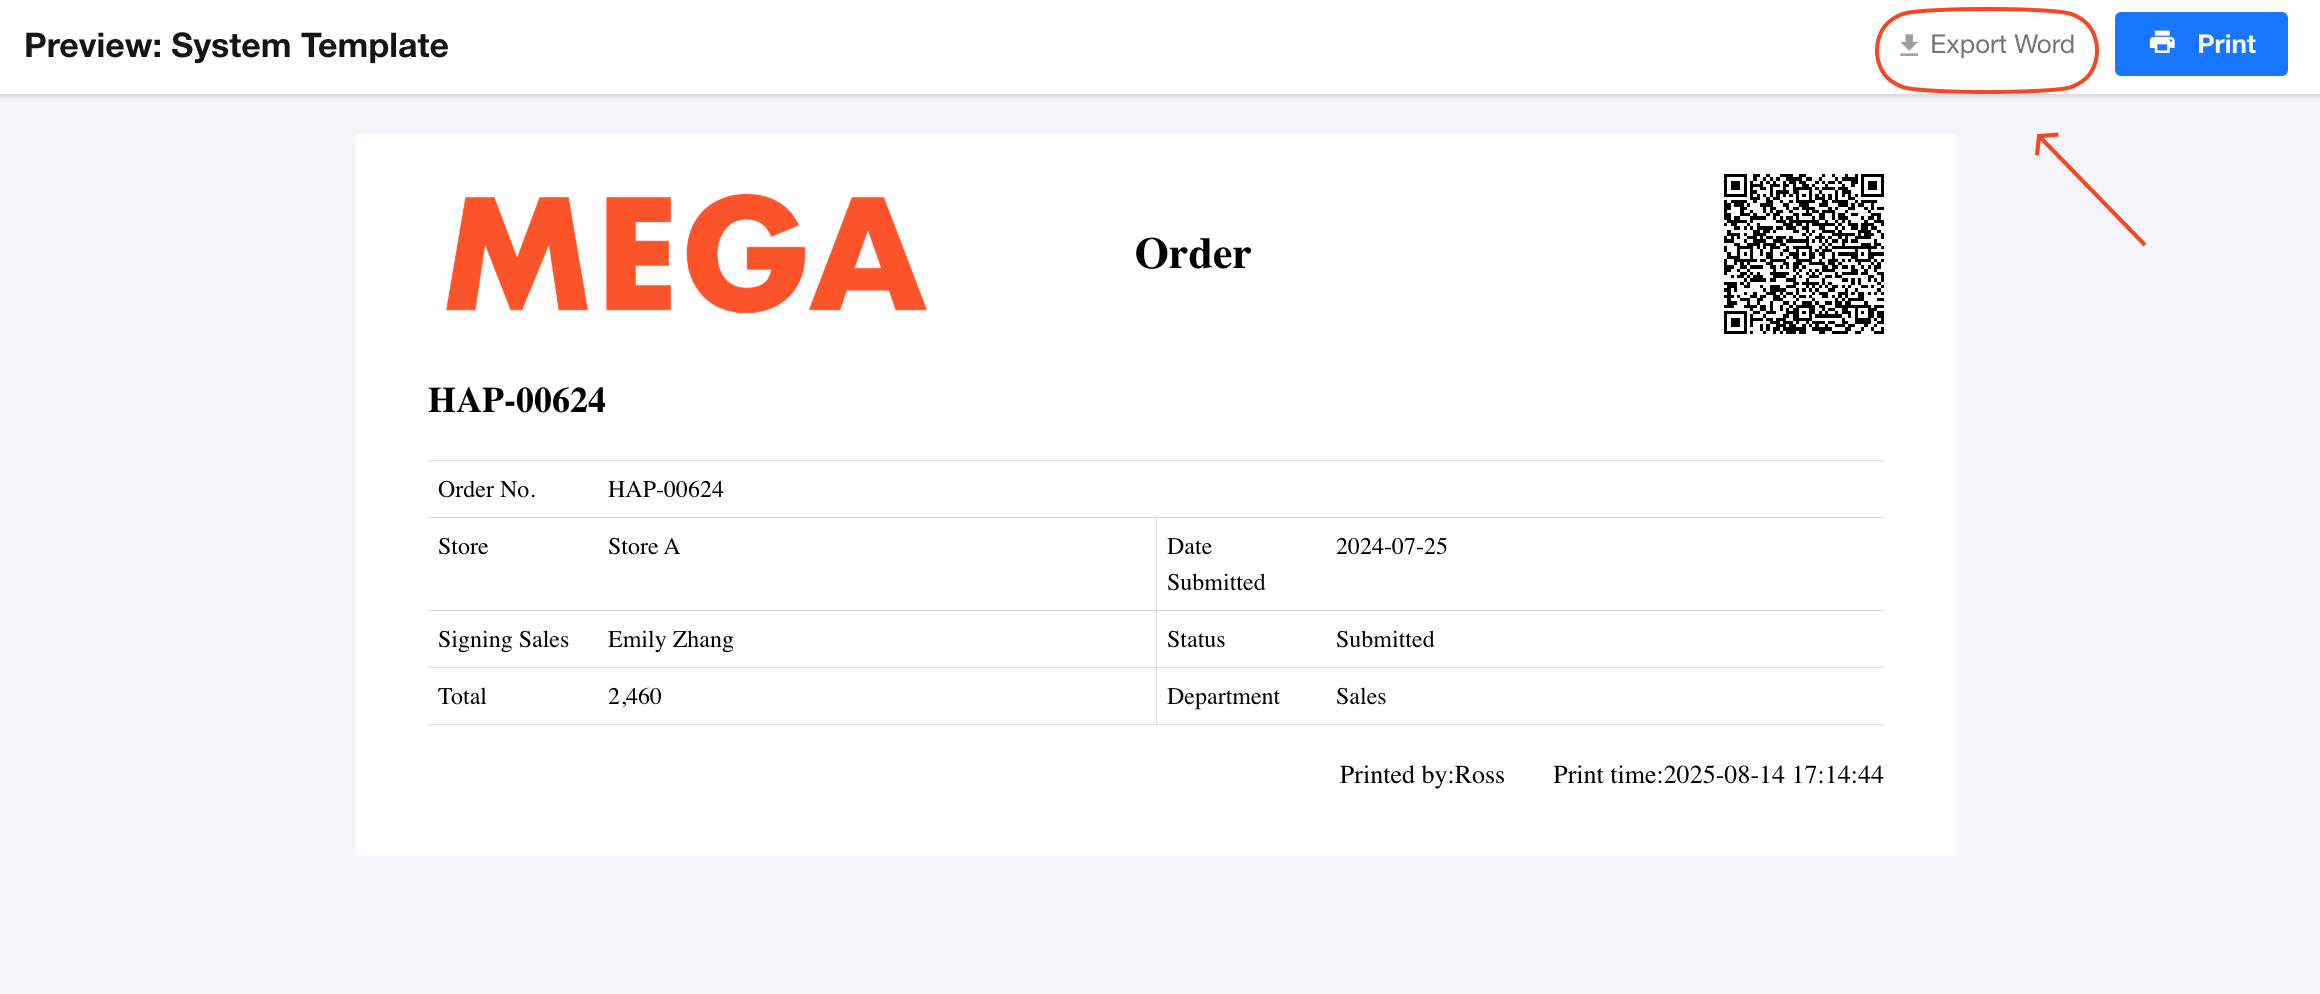
System templates also support exporting to Word files. If the button is not visible, the application administrator may have disabled "Allow Downloading & Printing".
Was this document helpful?