Create an Excel Print Template
Before getting started, read the Introduction to Print Templates to learn how print templates work.
Accessing the Print Template Designer
Go to Edit Form > More Settings > Print Template, click Create Template to create an Excel print template.

When creating an Excel print template for the first time, you’ll need to reference the field codes corresponding to each field in the worksheet. By pasting these codes into your pre-designed Excel file, the data will be auto-filled during printing.
Step 1: Start to Design

Step 2: Understand the Field Code Reference Table

The field reference table includes:
-
Field Name: The name of the field in the worksheet.
-
Field Code: A formatted code based on the field name, used to identify the field. Paste this code into your Excel template to retrieve the corresponding data.
-
Field ID/Field Alias: Works the same as the field code, but is more precise and unique. If field codes are duplicated within a worksheet, use the Field ID or Alias instead.
Step 3: Design Your Excel Template
We recommend editing the template using Microsoft Excel. Templates created in WPS may encounter formatting issues during printing.
You can download a sample template (pre-filled with example fields and field codes, using a simple layout) and modify it, or start with your existing template.

Below is a pre-designed Excel template. Simply paste the field codes into the appropriate cells.

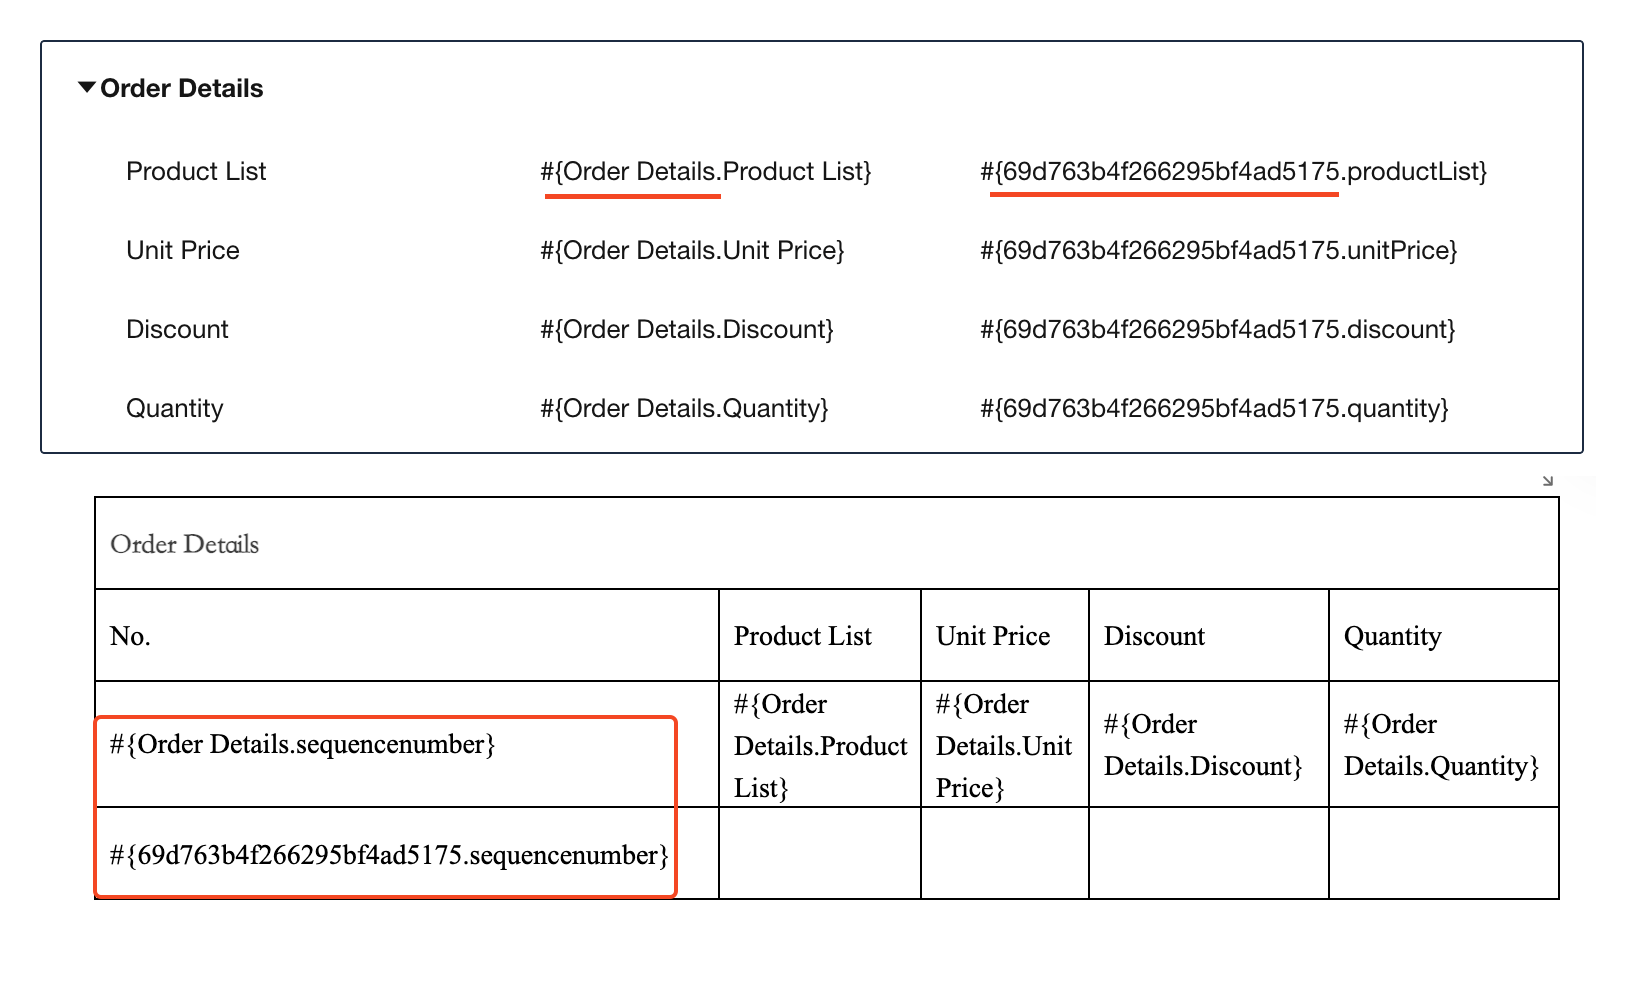
To match your preferred layout, insert the field codes into the corresponding table cells. Below is an example demonstrating how to paste field codes from both the worksheet and its related worksheet into an Excel template:

Step 4: Configure Related Worksheets

Start by drawing a table. The first row should contain column names, and the second row should contain the corresponding field codes.

Step 5: Set Serial Numbers in Detail Lists
If you want to display row numbers when printing subforms or related worksheets, use the sequencenumber keyword.
Code format:
#{DetailWorksheetName.sequencenumber}or#{DetailWorksheetID.sequencenumber}
Example Template Layout:
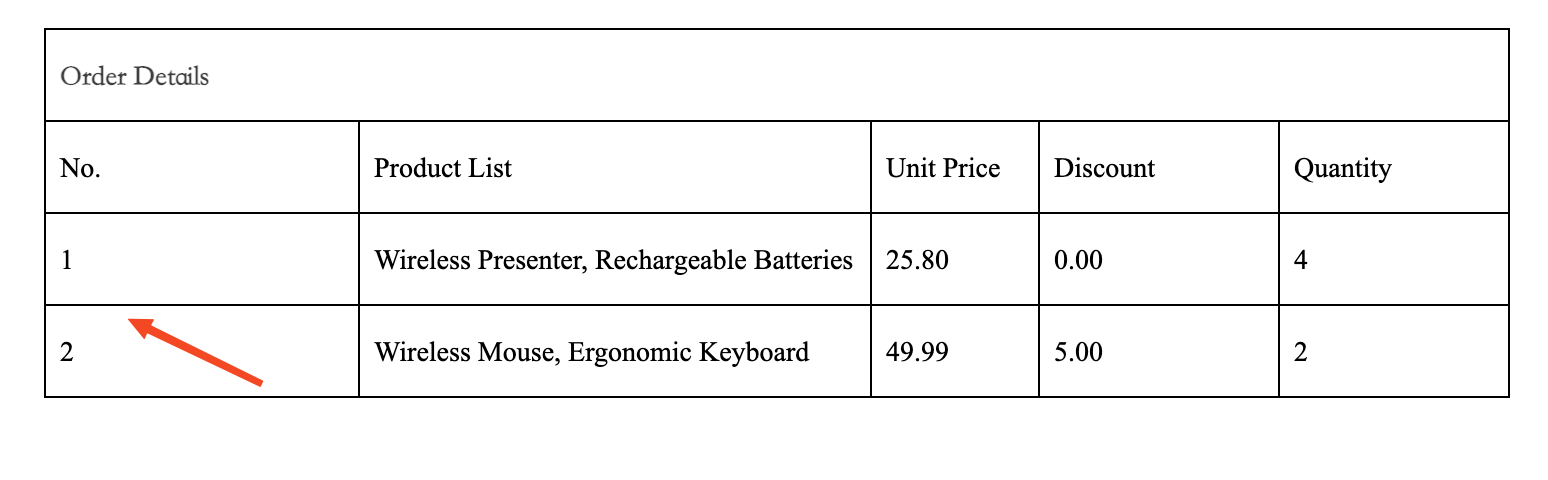
Printed Output:
Step 6: Upload or Save the Template
Users can upload a local file or create a template online. Excel templates only support .xlsx format.

Step 7: Set Exported File Name
Files generated using the template can be exported. The export file name can follow a default pattern or a custom naming rule.
- Default name: Template name + Title field + Export timestamp.
- Custom name: You can select other fields to concatenate the filename.

Step 8: Enable File Download/Allow Editing Before Printing
Step 9: Test the Template

Learn more about Word/Excel Print Template Rules t](/worksheet/print-template-rules)
Was this document helpful?