Public Form
After publishing a worksheet publicly, non-application members can submit data without logging in by accessing the public link or scanning the QR code.
Use Case
-
Publicly collect registration information, surveys, and customer satisfaction feedback.
-
After publishing the worksheet publicly, customers can submit tickets directly through the public link.
Basic configuration
Example demonstration
Create a conference registration worksheet, then share the data submission link or QR code publicly to allow non-members to submit data.
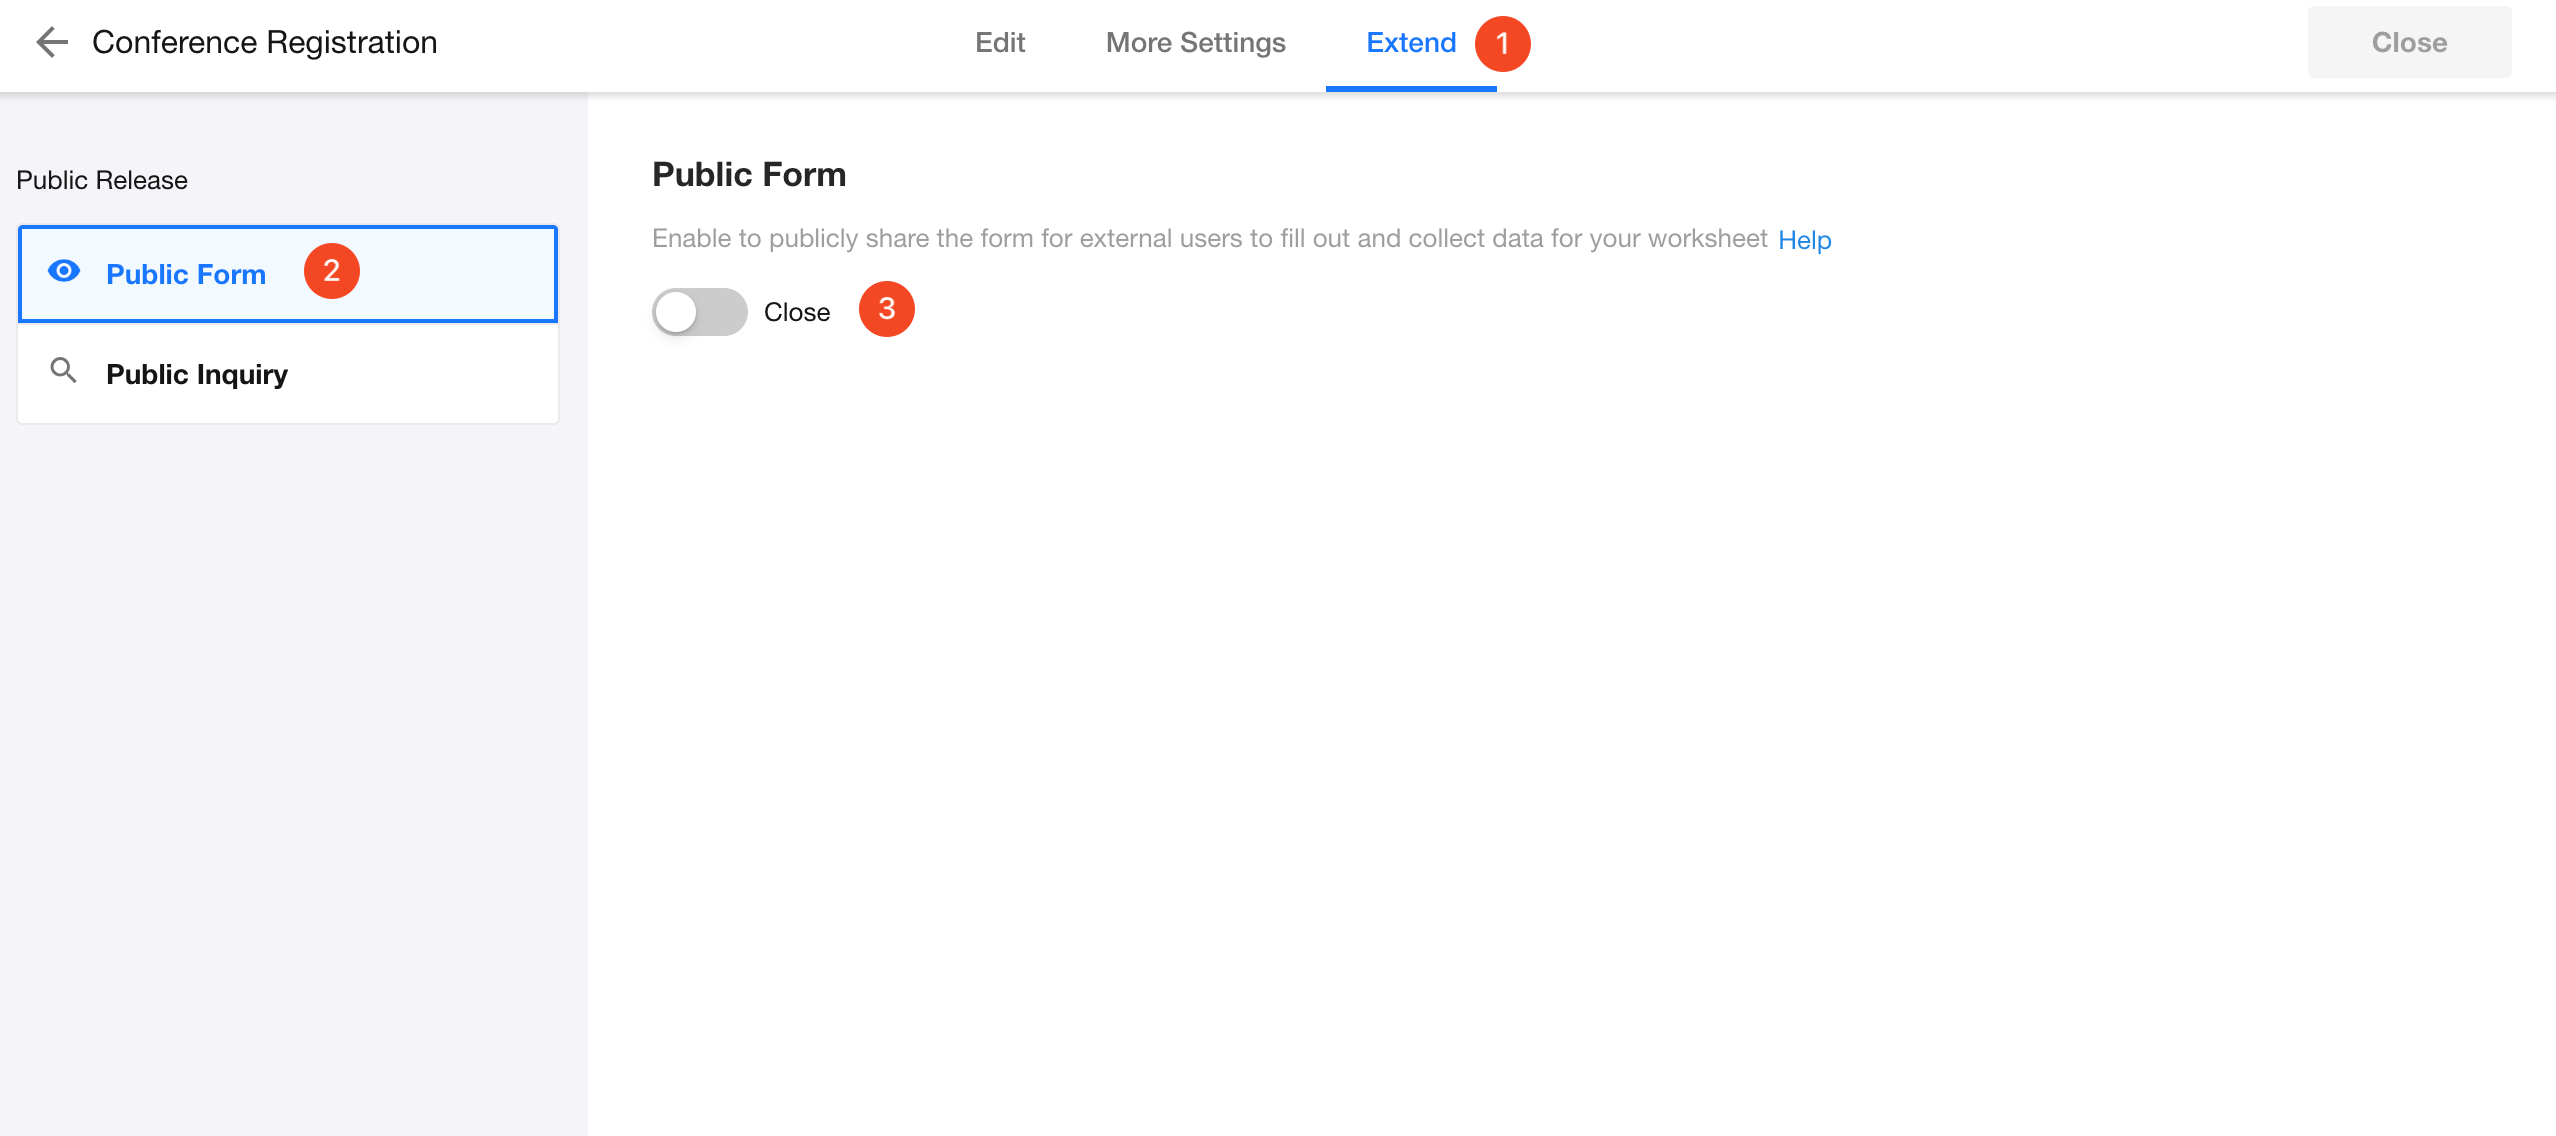
1. Enable public form
After designing the worksheet, click [Extend] > [Public Form], then enable "Public Form".
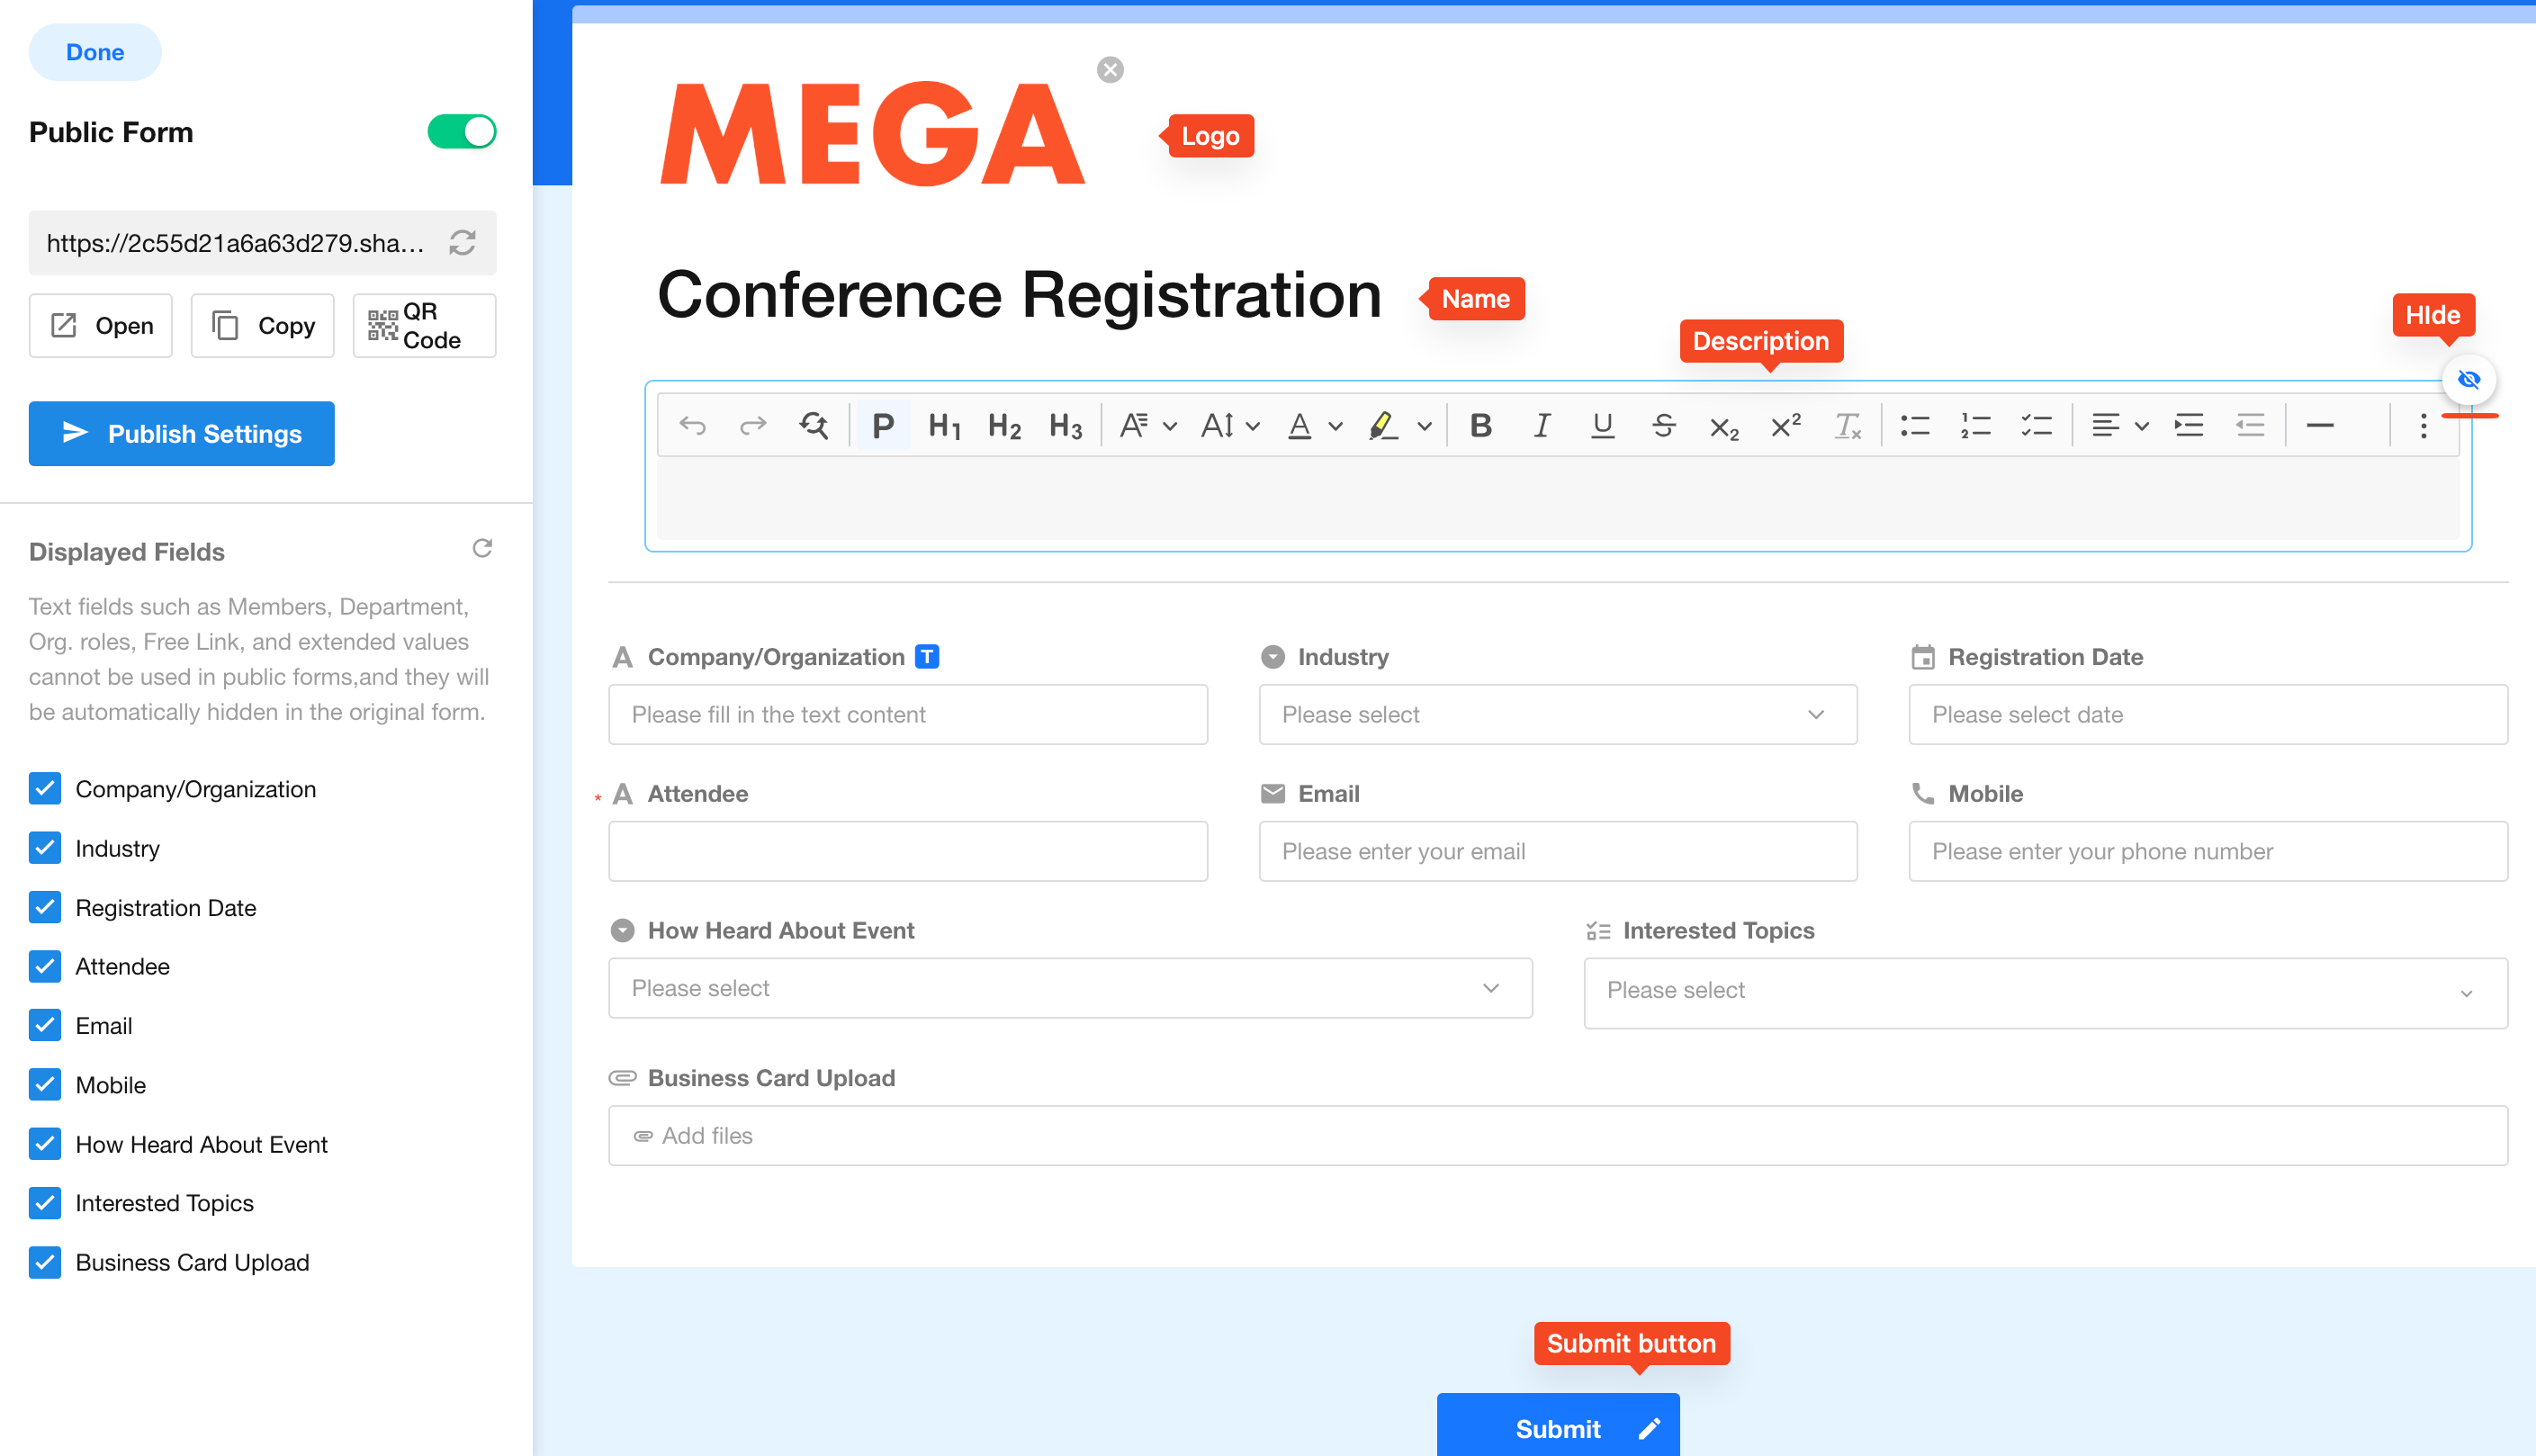
2. Set public form name/description
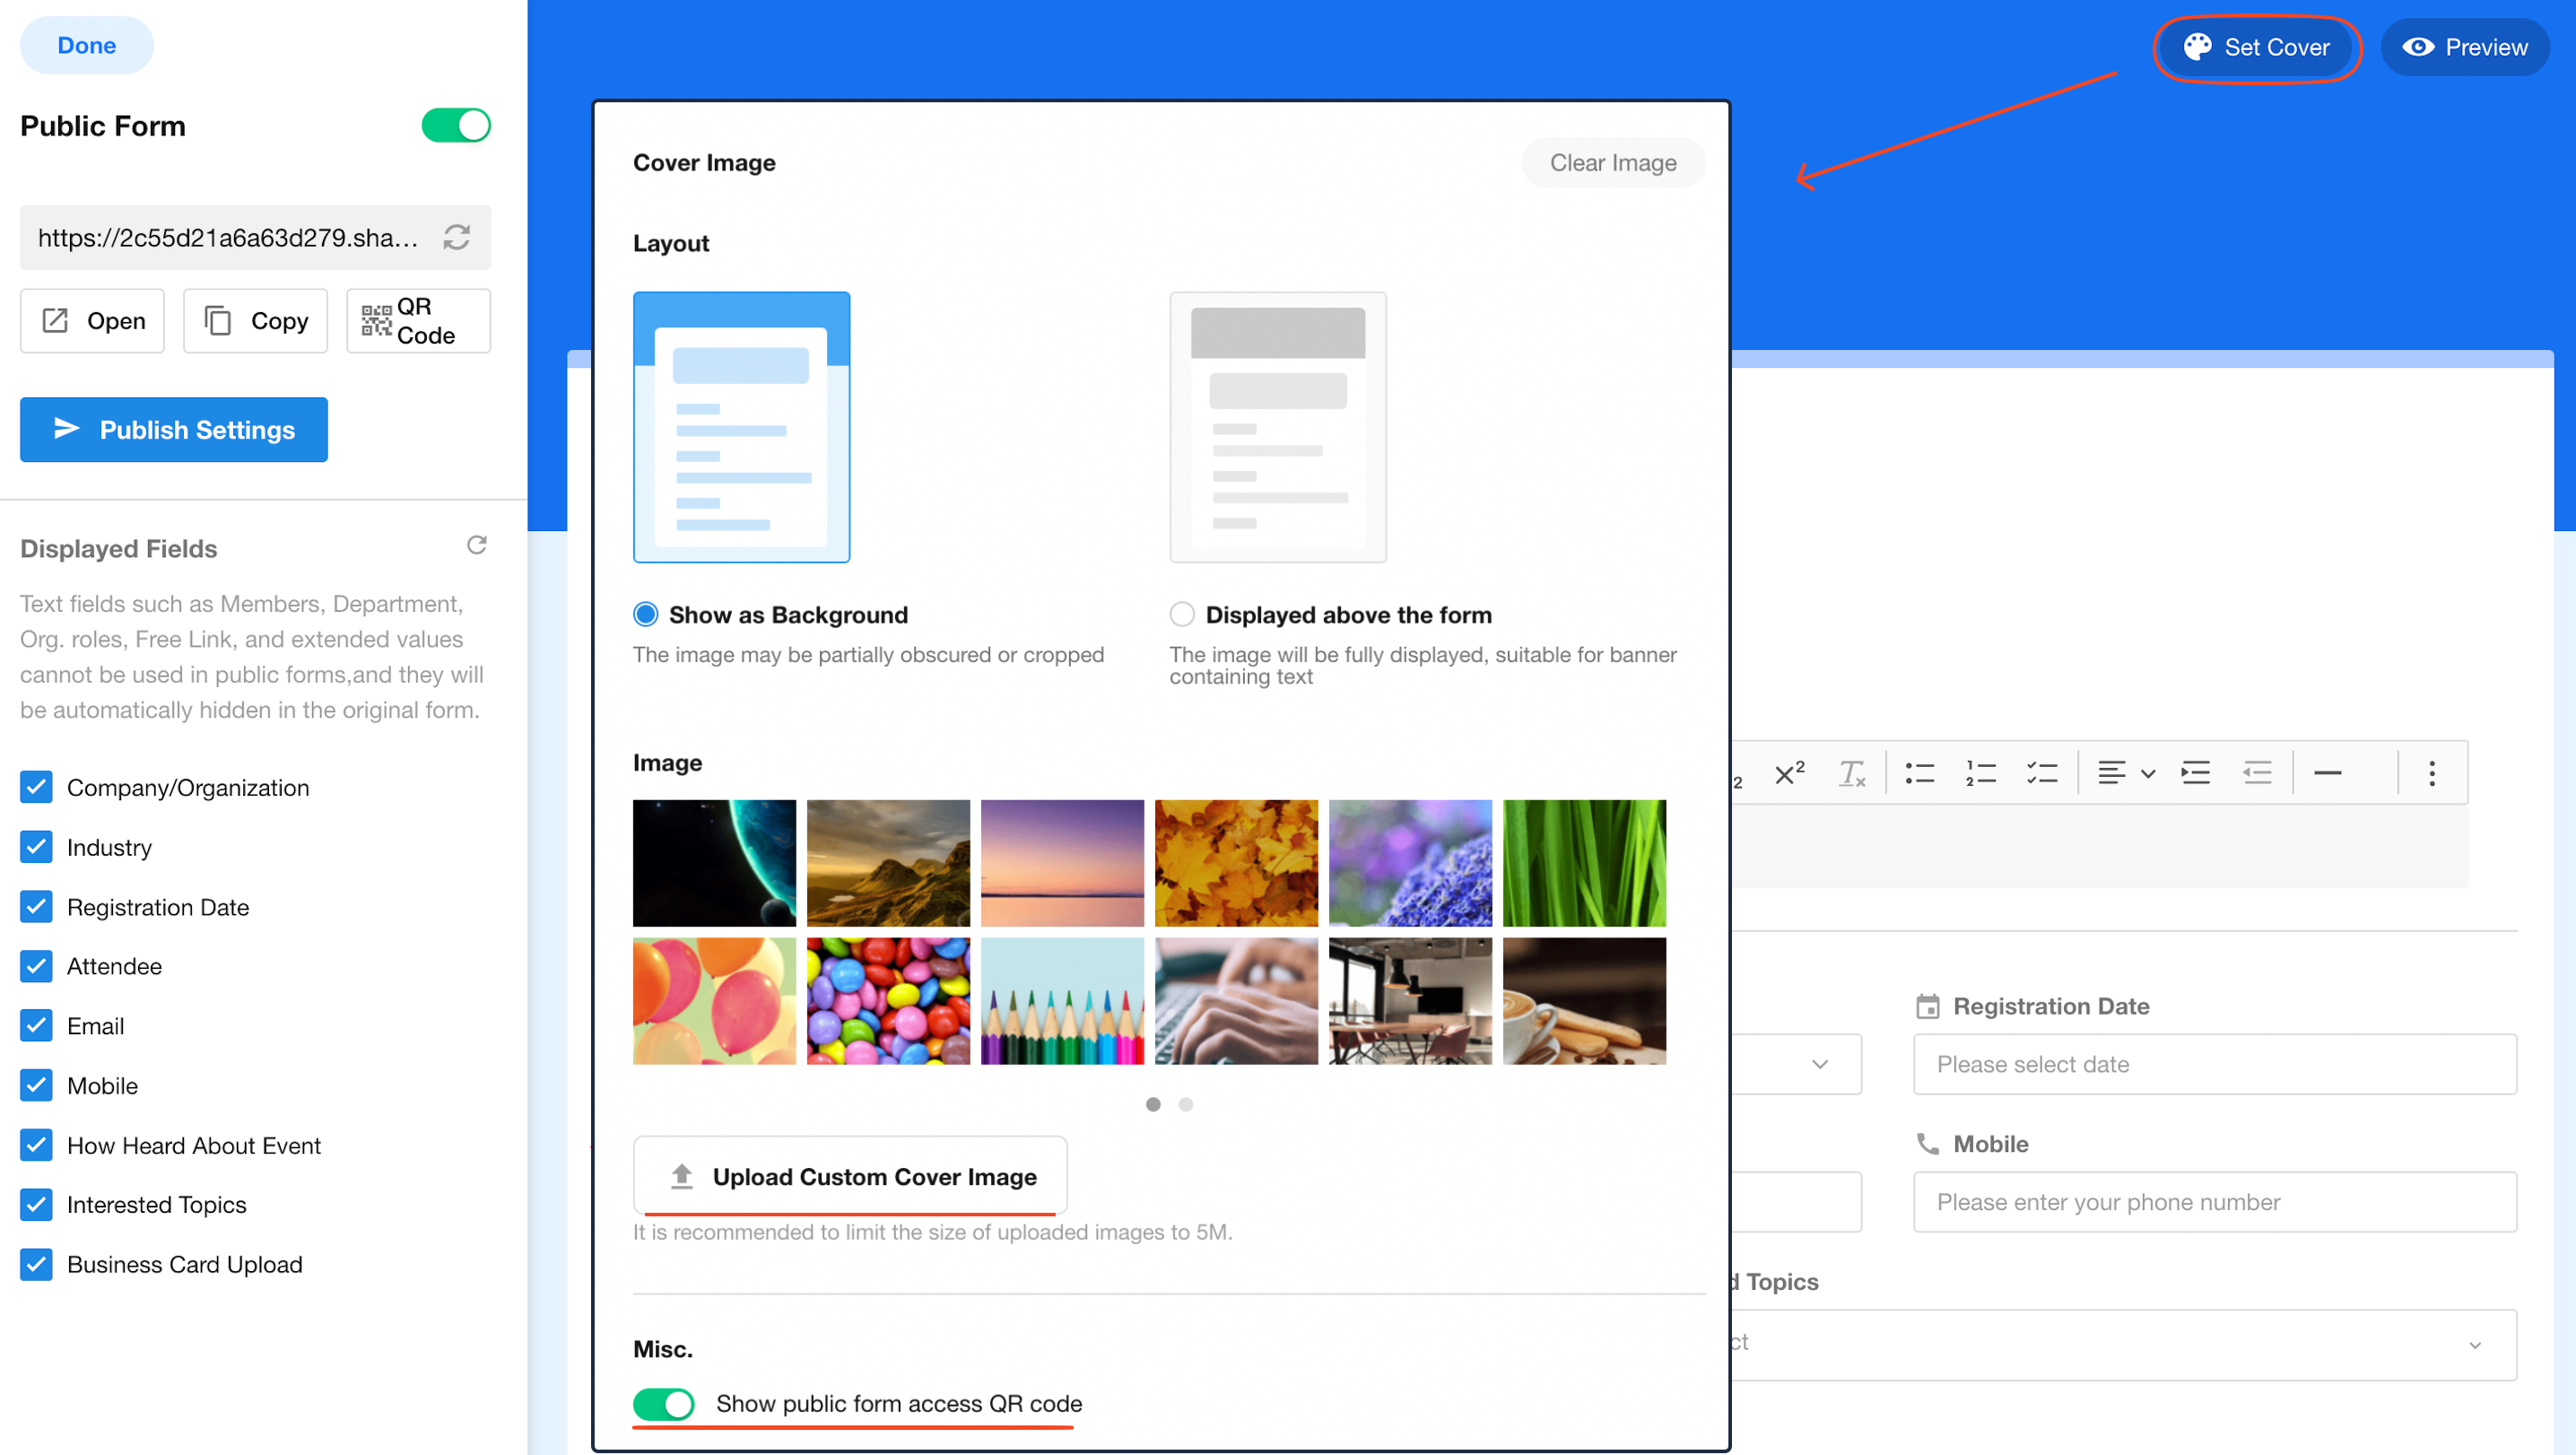
3. Configure public form cover
The cover settings include theme color, image, and whether to display QR code on the public form.
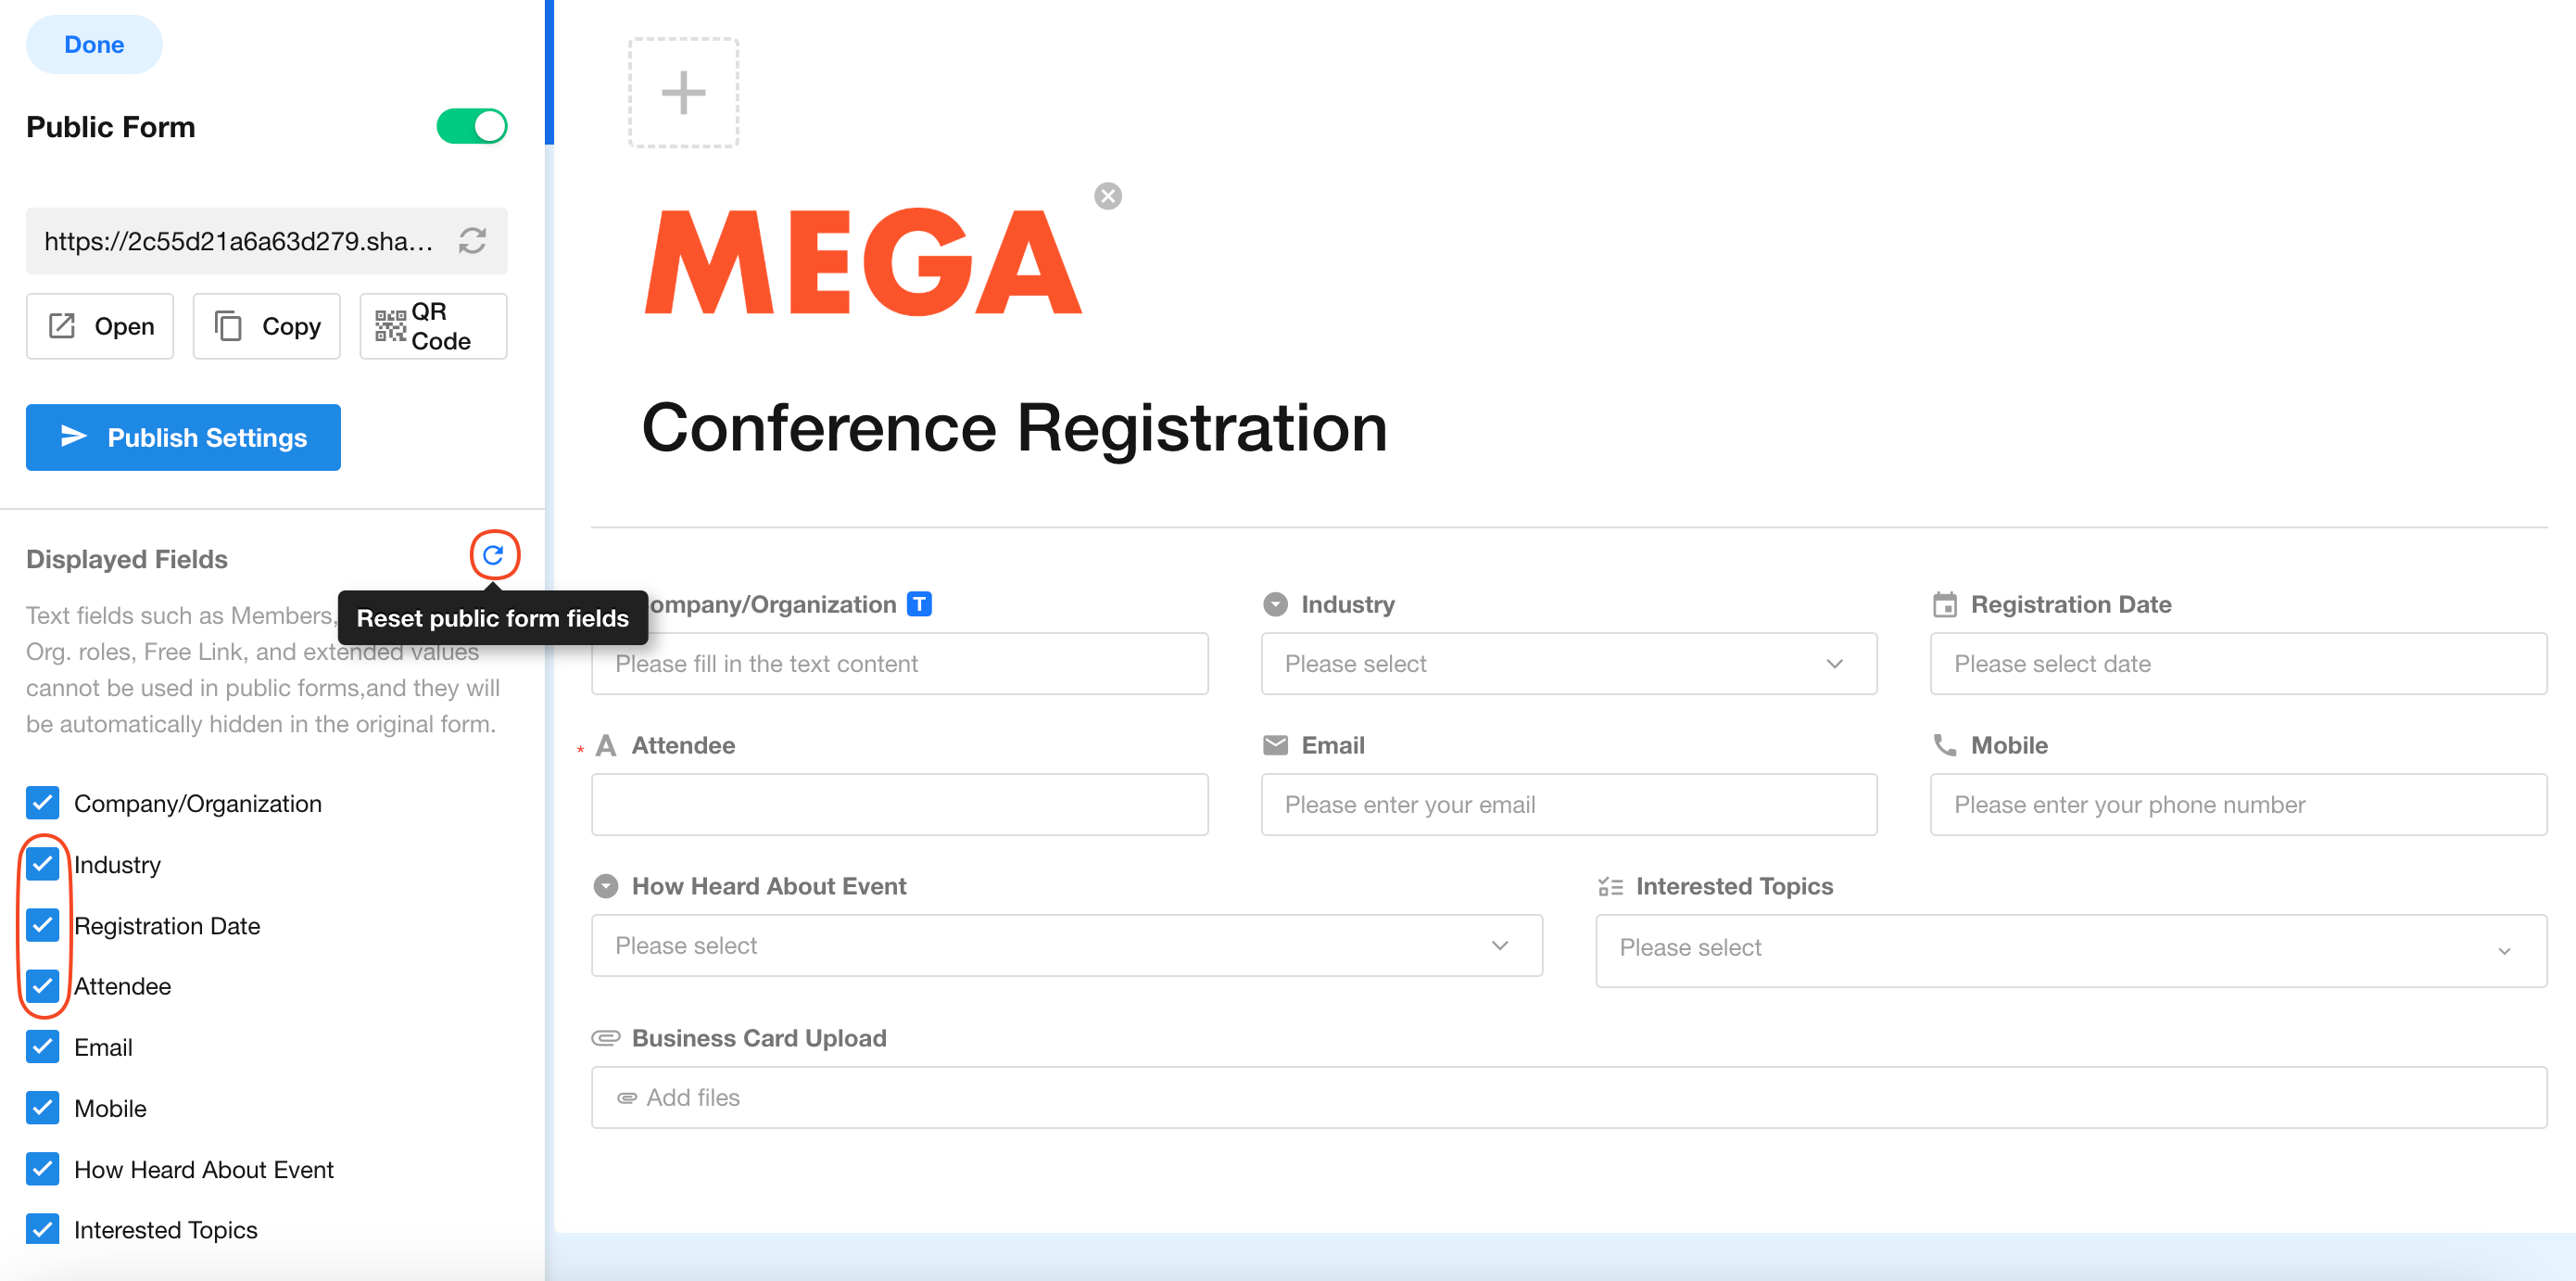
4. Select display fields
-
Not all worksheet fields need to be displayed on the public form - only add necessary fields.
-
Field positions can be adjusted by dragging. The field layout on the public form won't sync with the form design page.
-
Click "Reset" to restore fields to original state, which will clear all hidden fields and sorting settings.
-
Some system fields (like Members, Department, Org-roles) can not be displayed publicly.
-
For file uploads via public form, the maximum single file size is 64MB.
4. Public link and QR code
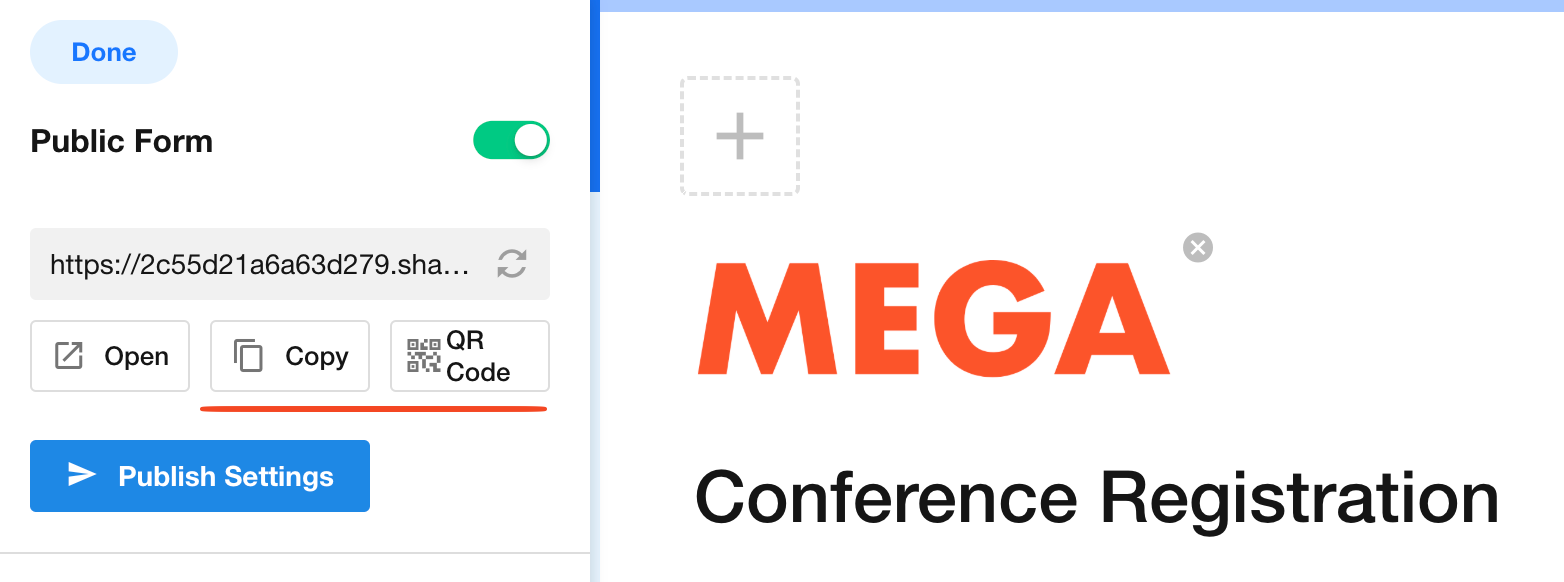
After completing the above configurations, you can share the public link and QR code with relevant users for data submission.
5. Disable/Regenerate link
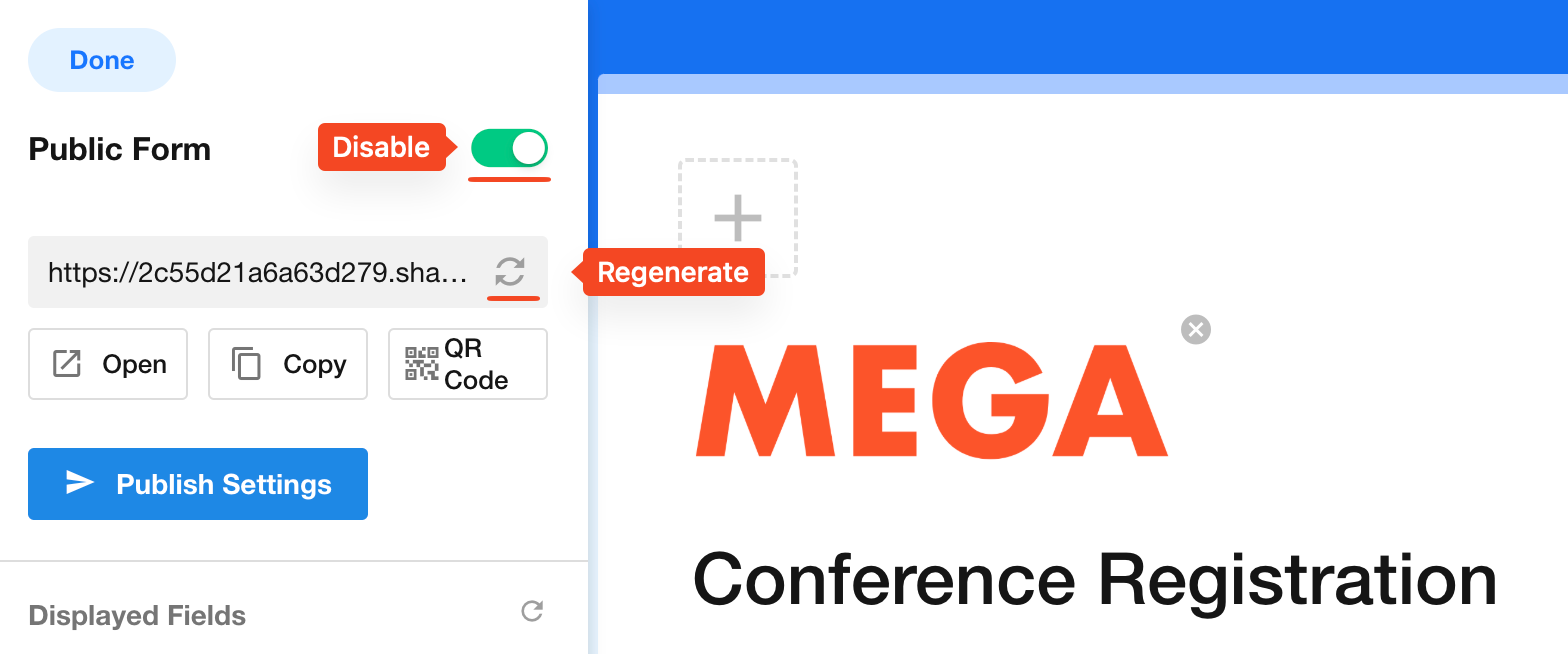
When the public form is disabled, users will no longer be able to submit data through the link or QR code.
After regenerating the link, the previous link will become invalid.
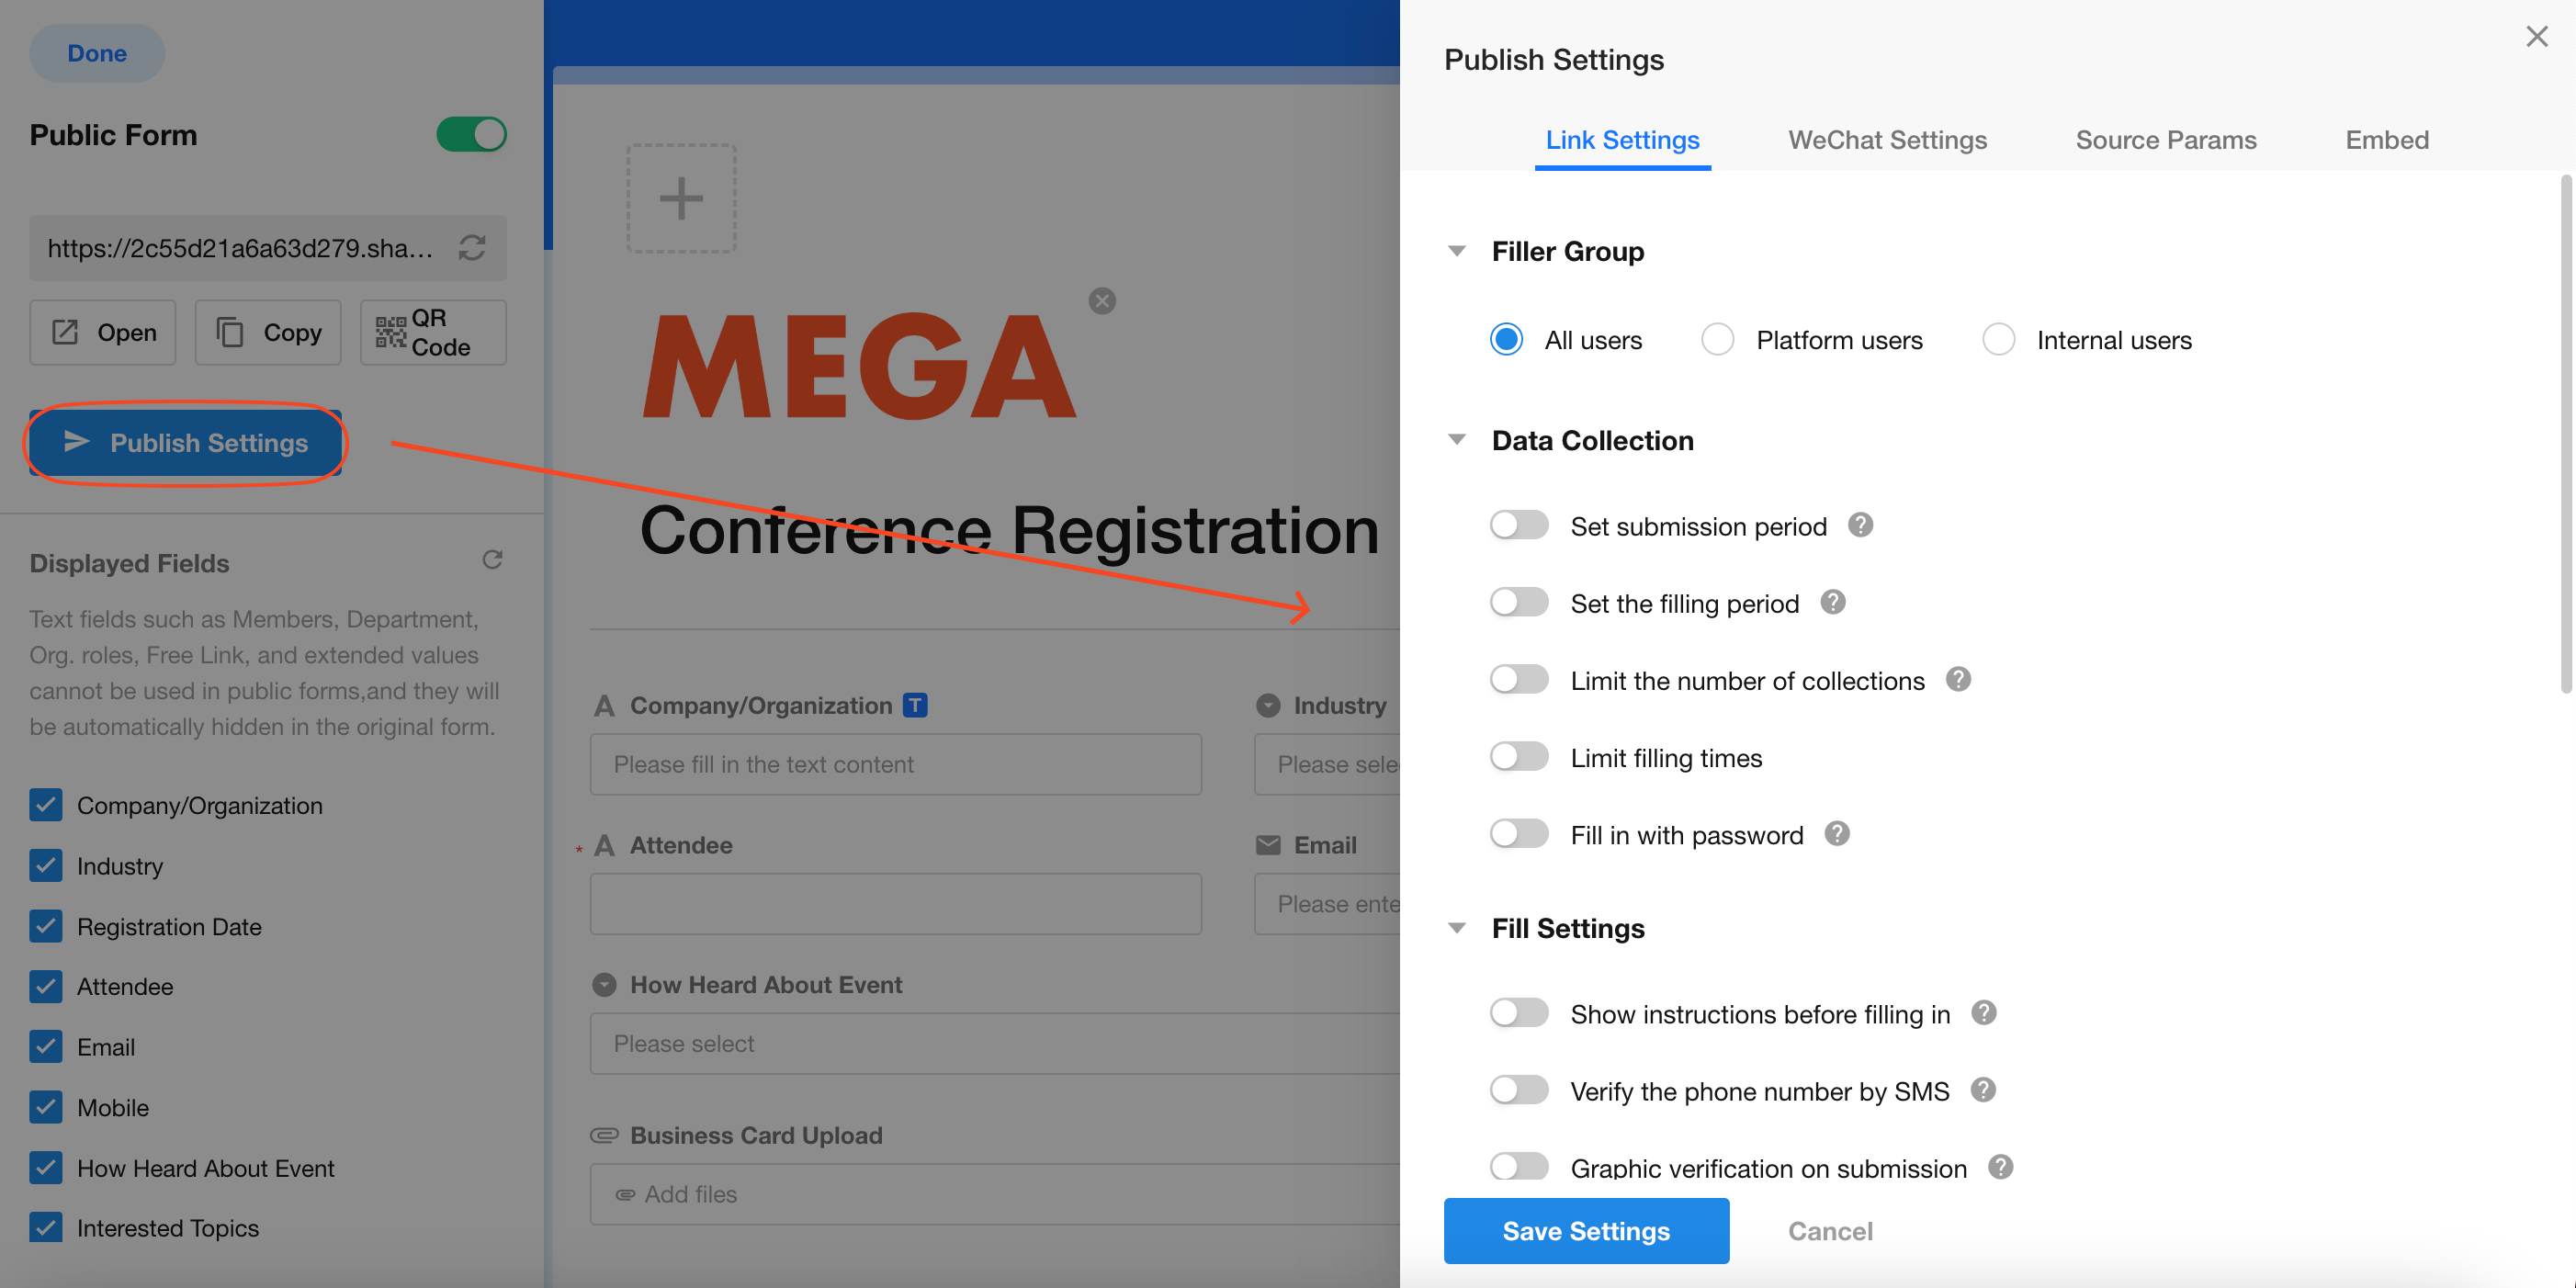
Data collection restrictions
You can apply necessary restrictions during data collection, such as:
-
Allowed submission time period
-
Number of submissions per user
-
Maximum data collection quantity
-
Password requirement (if needed)
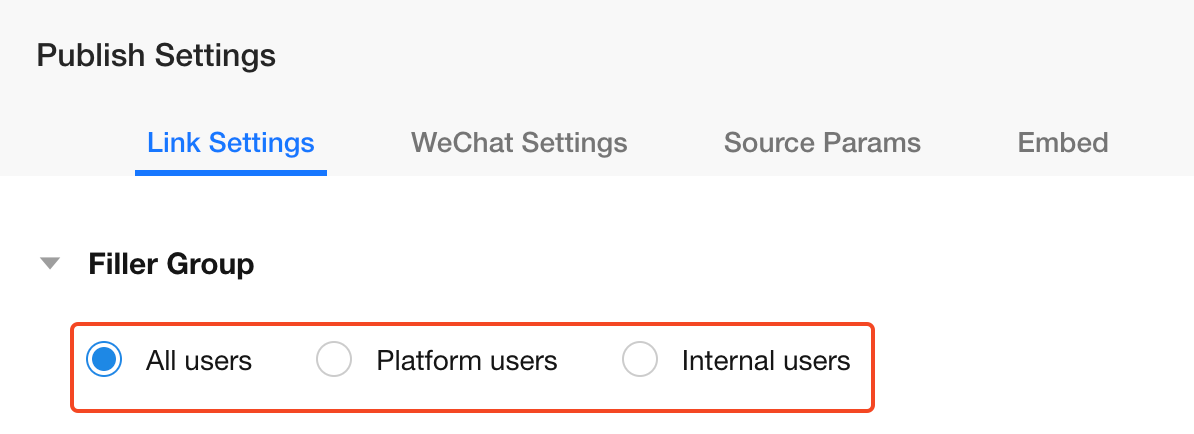
6. Available users for public forms
-
All Users: No restrictions on users
-
Platform Users: Only users registered with HAP
-
Internal Users: Users must not only register with HAP but also join the current organization
If "Platform Users" or "Internal Users" is selected, users will need to log in to submit data when opening the link.
7. Set data submission time frame
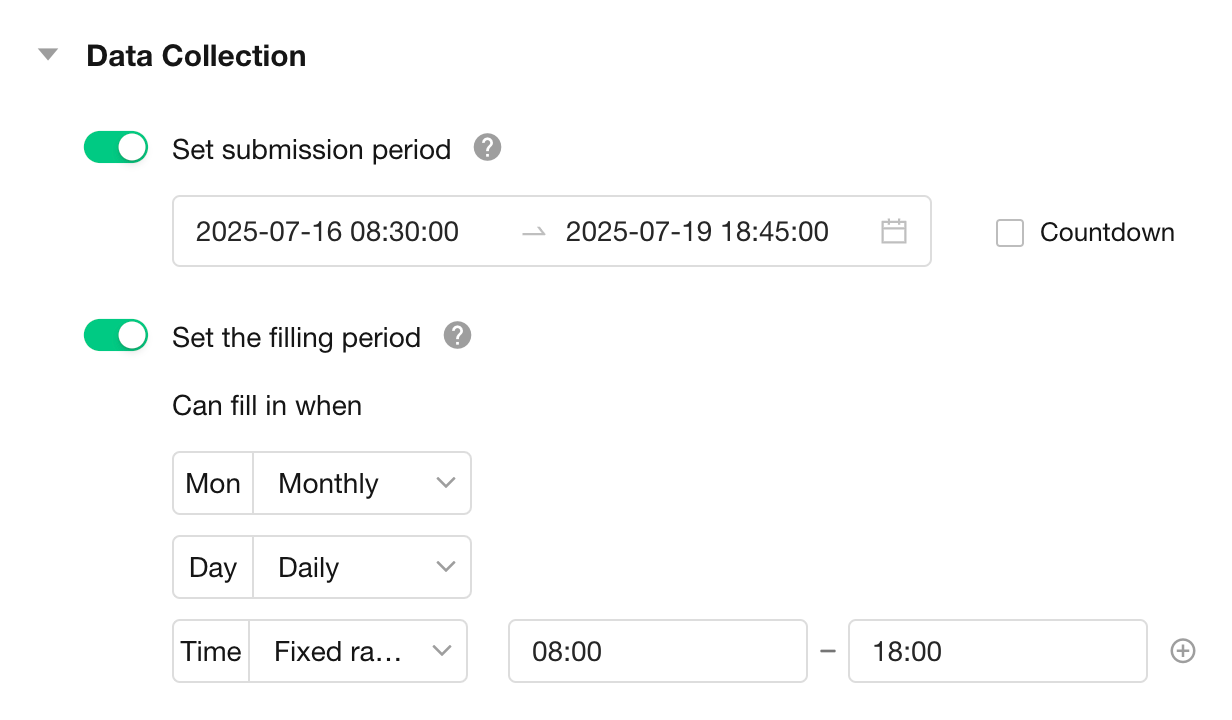
There are two ways to restrict users to submit data only within specified time periods.
-
Link Start/End Time
-
A time period can be set during which users are allowed to submit data.
-
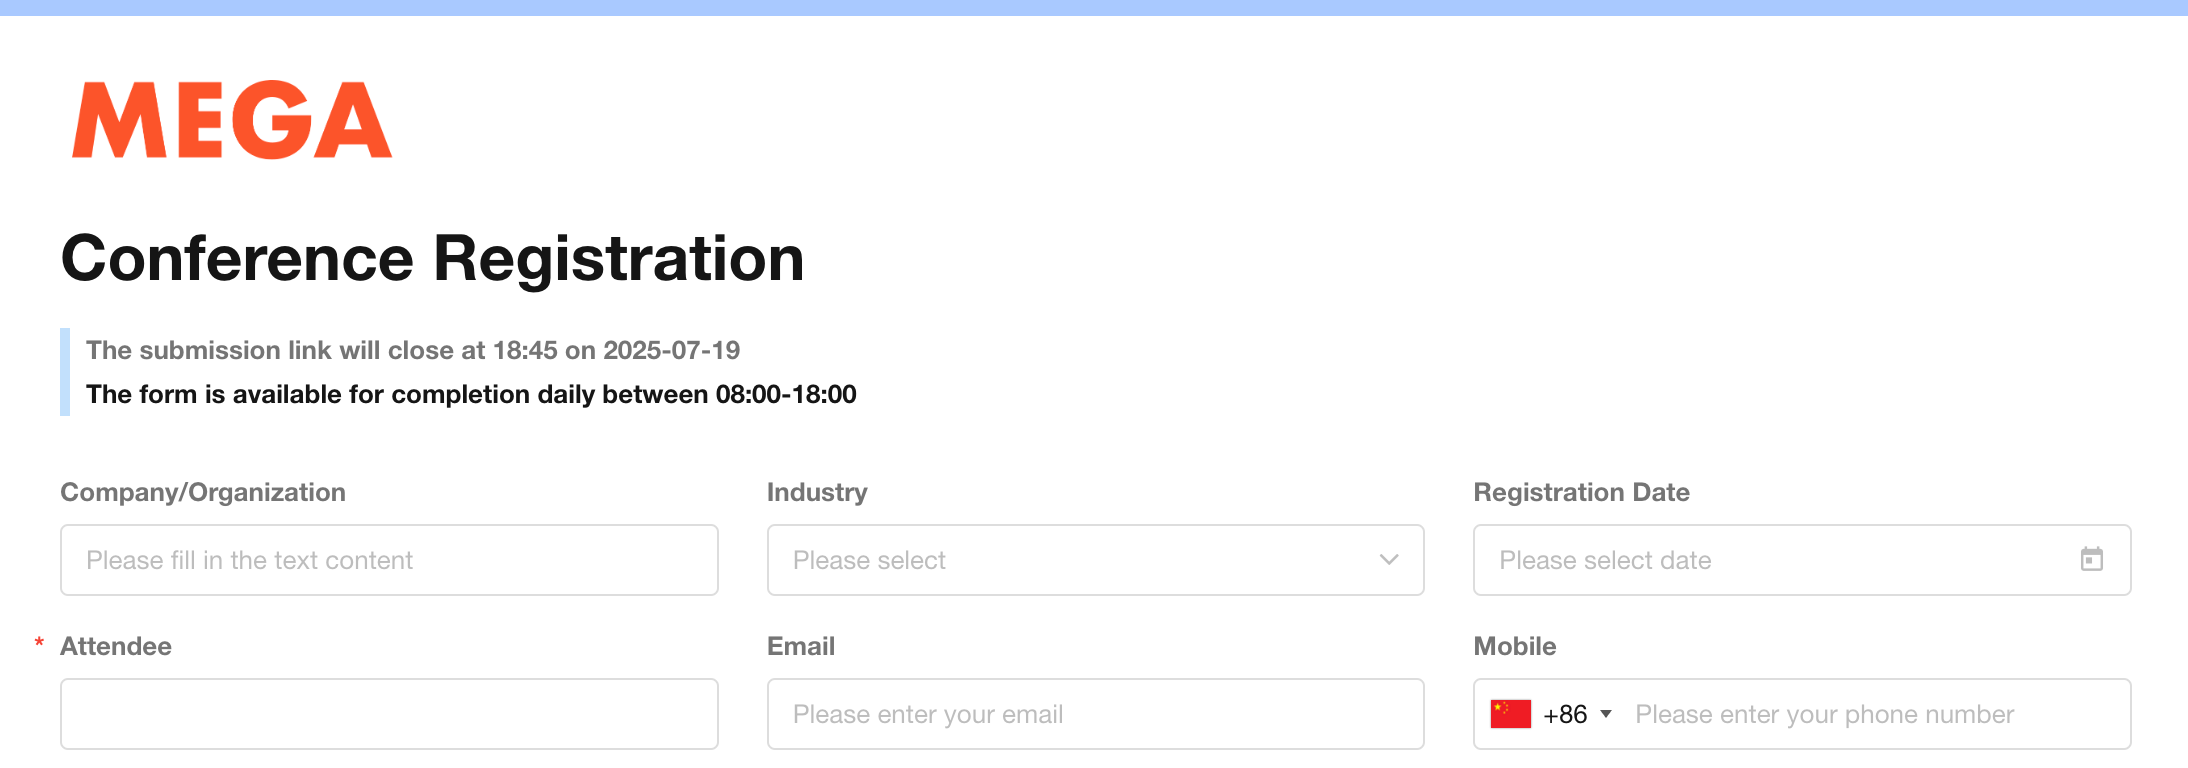
Submissions are not allowed before or after this period, and the public form page will display corresponding notifications.
-
If "Countdown" is checked, the deadline on the page will display as: [Collection will end in 3 days, 2 hours, and 17 seconds]; if unchecked, it will display as: [Deadline: 2023-08-10 20:00].
-
-
Set data fill-in time frame
These two methods can be configured together.
Effect:
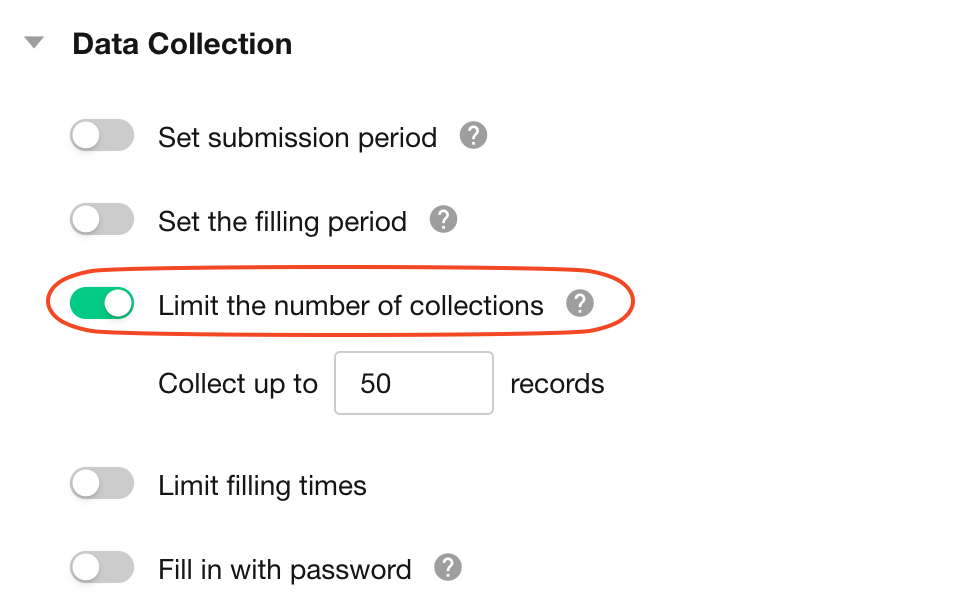
8. Limit collection quantity
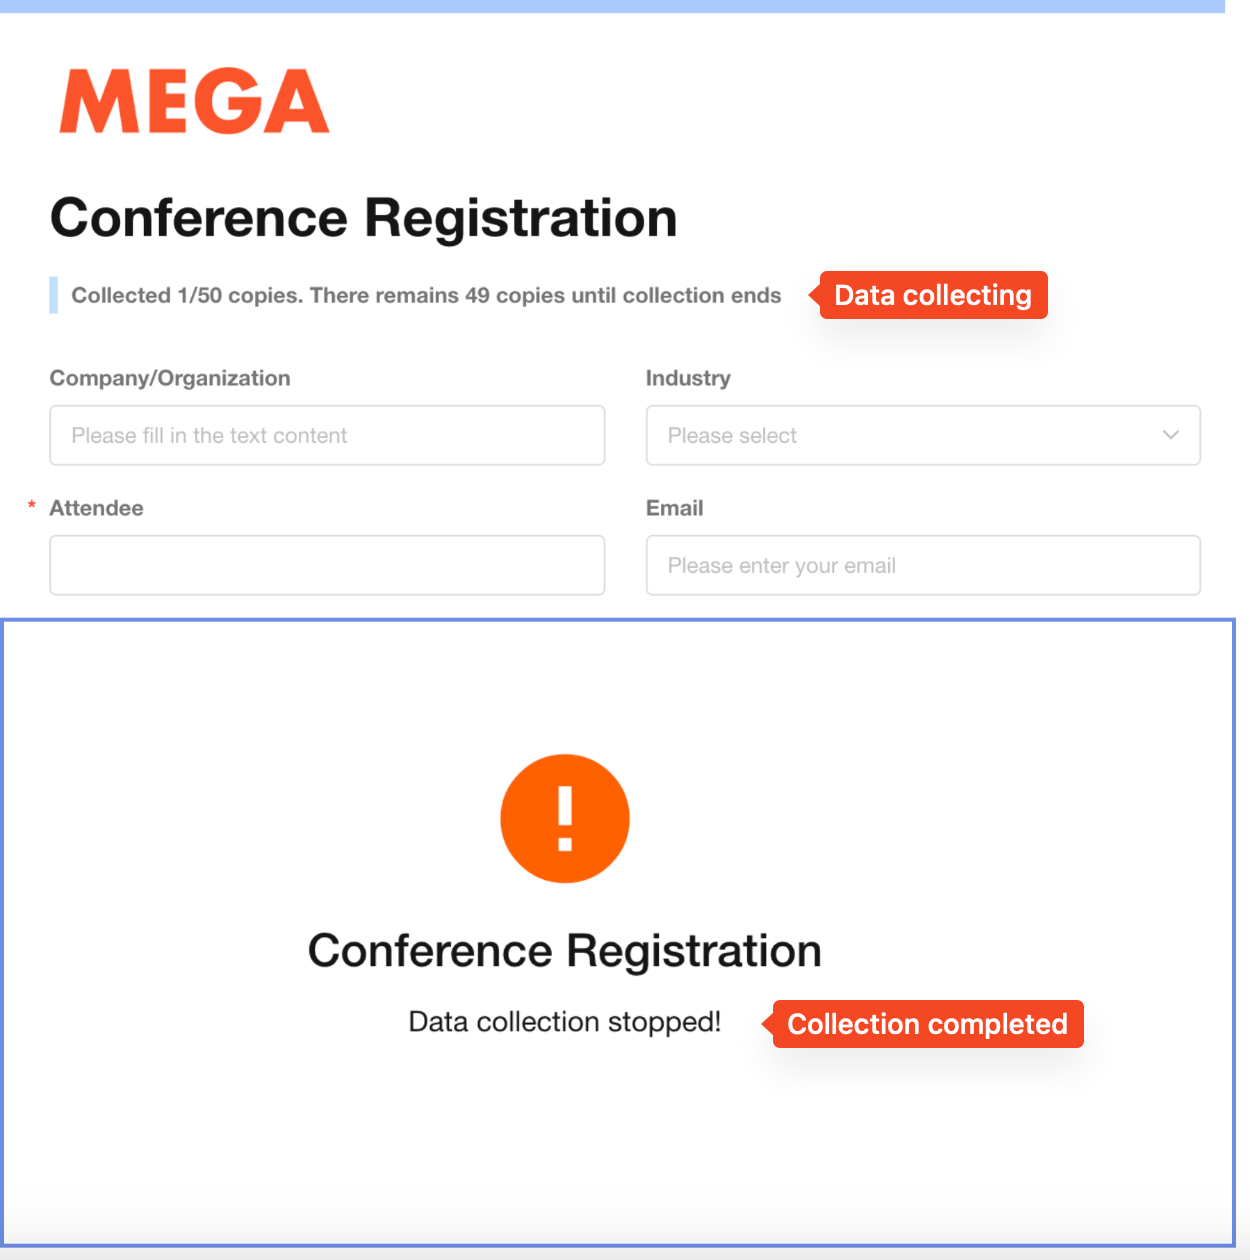
Set a collection quantity limit - data collection will stop once the collected data reaches this limit.
This quantity refers only to publicly collected data, excluding records created within the application.
Corresponding prompt on the public form:
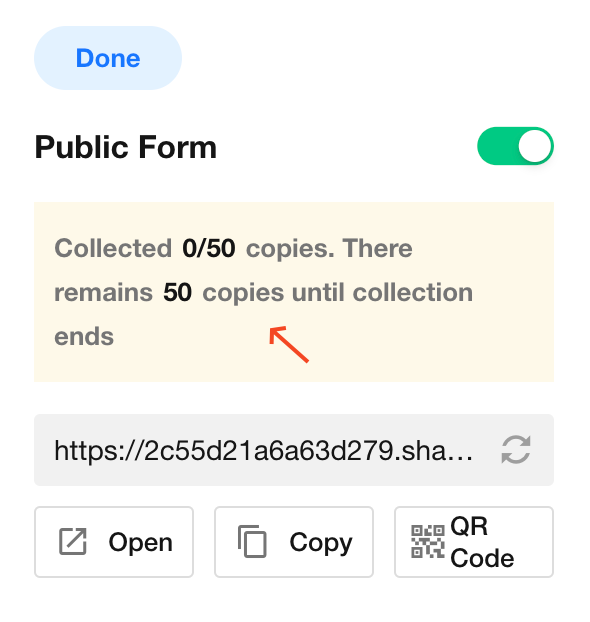
Application administrators can view data collection status on the public form configuration page.
9. Limit submission frequency
By default, there's no limit on how often each user can submit the public form. Settings are available to limit submissions per day/week/month/year.
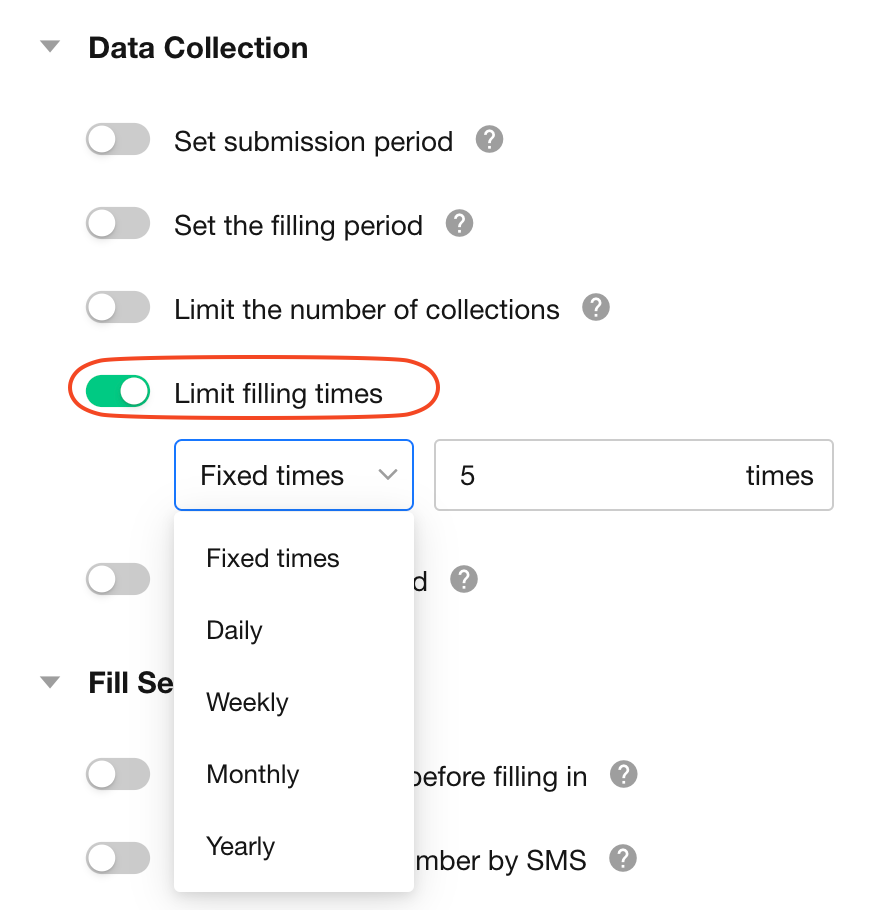
If the public form is available to "All Users" without collecting WeChat information, restrictions can only be identified through device cache. For "Platform Users" or when WeChat information is collected, restrictions can be based on the submitter's identity.
10. Fill in with password
A random 4-digit password is generated by default (customizable).
When enabled, users must enter the password before accessing the form submission page via the link.
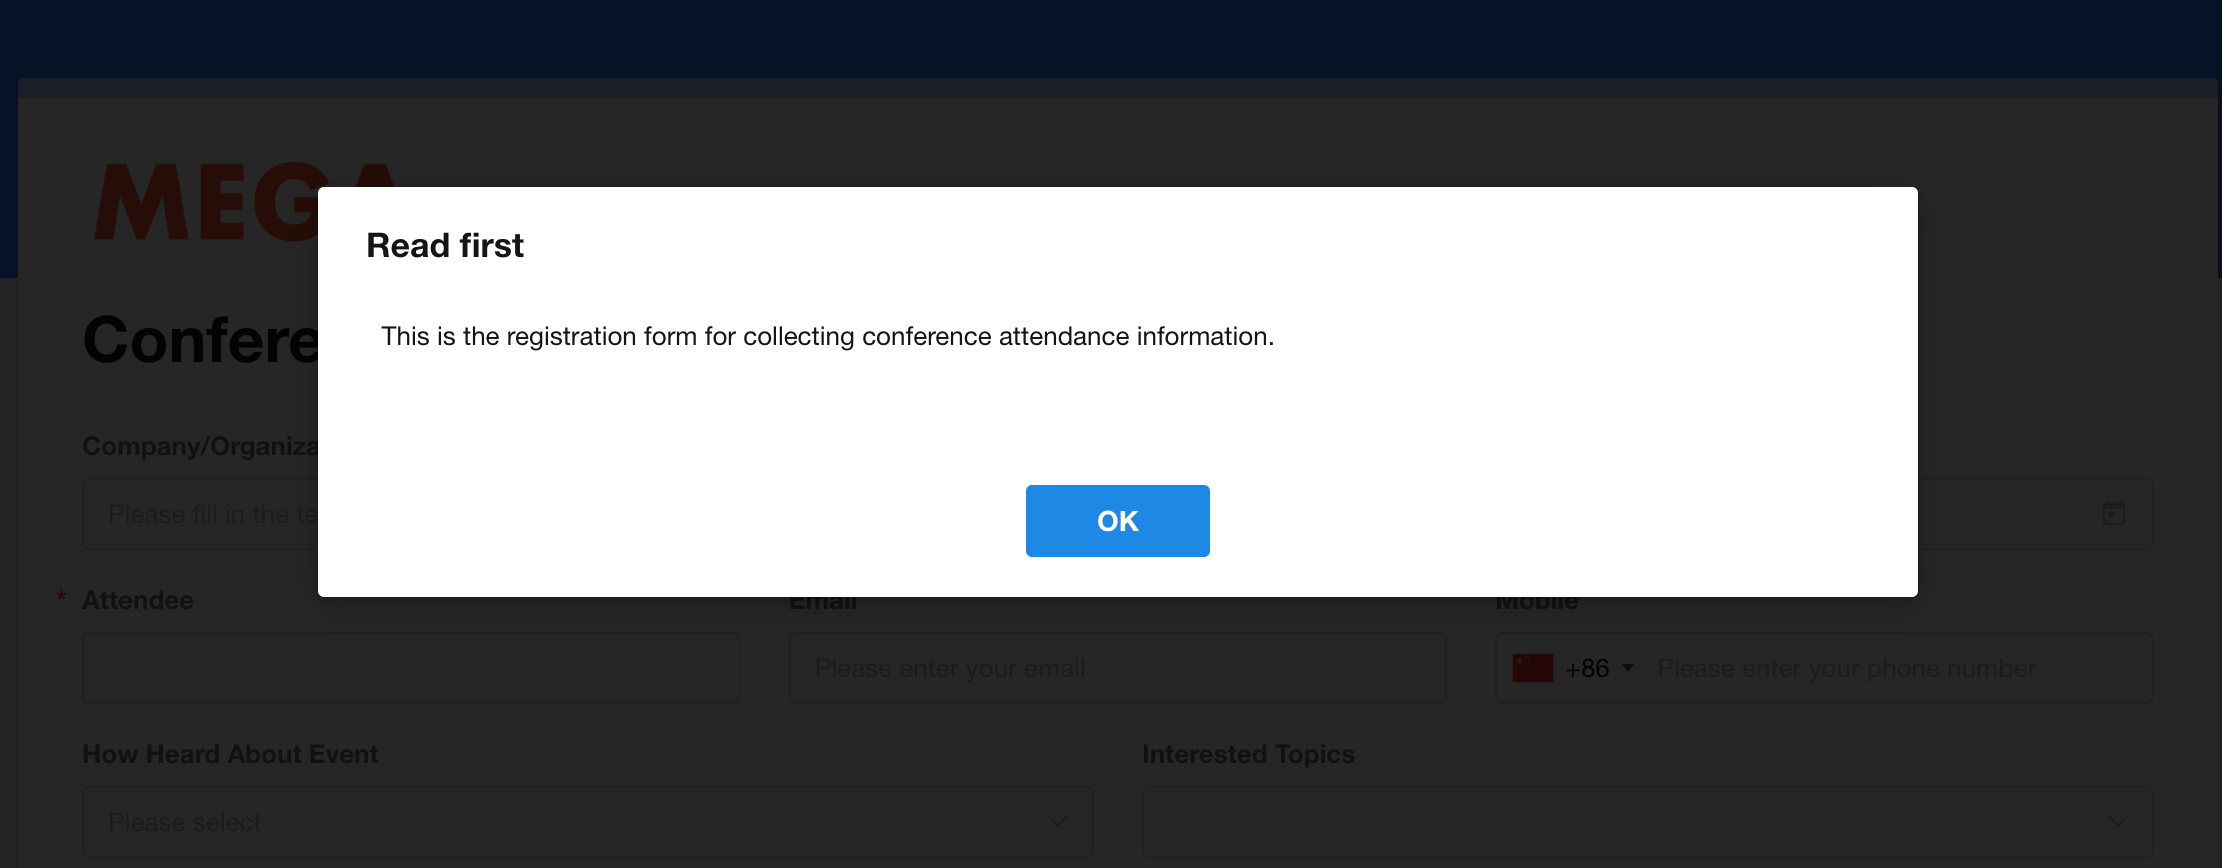
12. Show instructions before filling in
Configure instructions to be shown to users before they fill out the public form as needed.
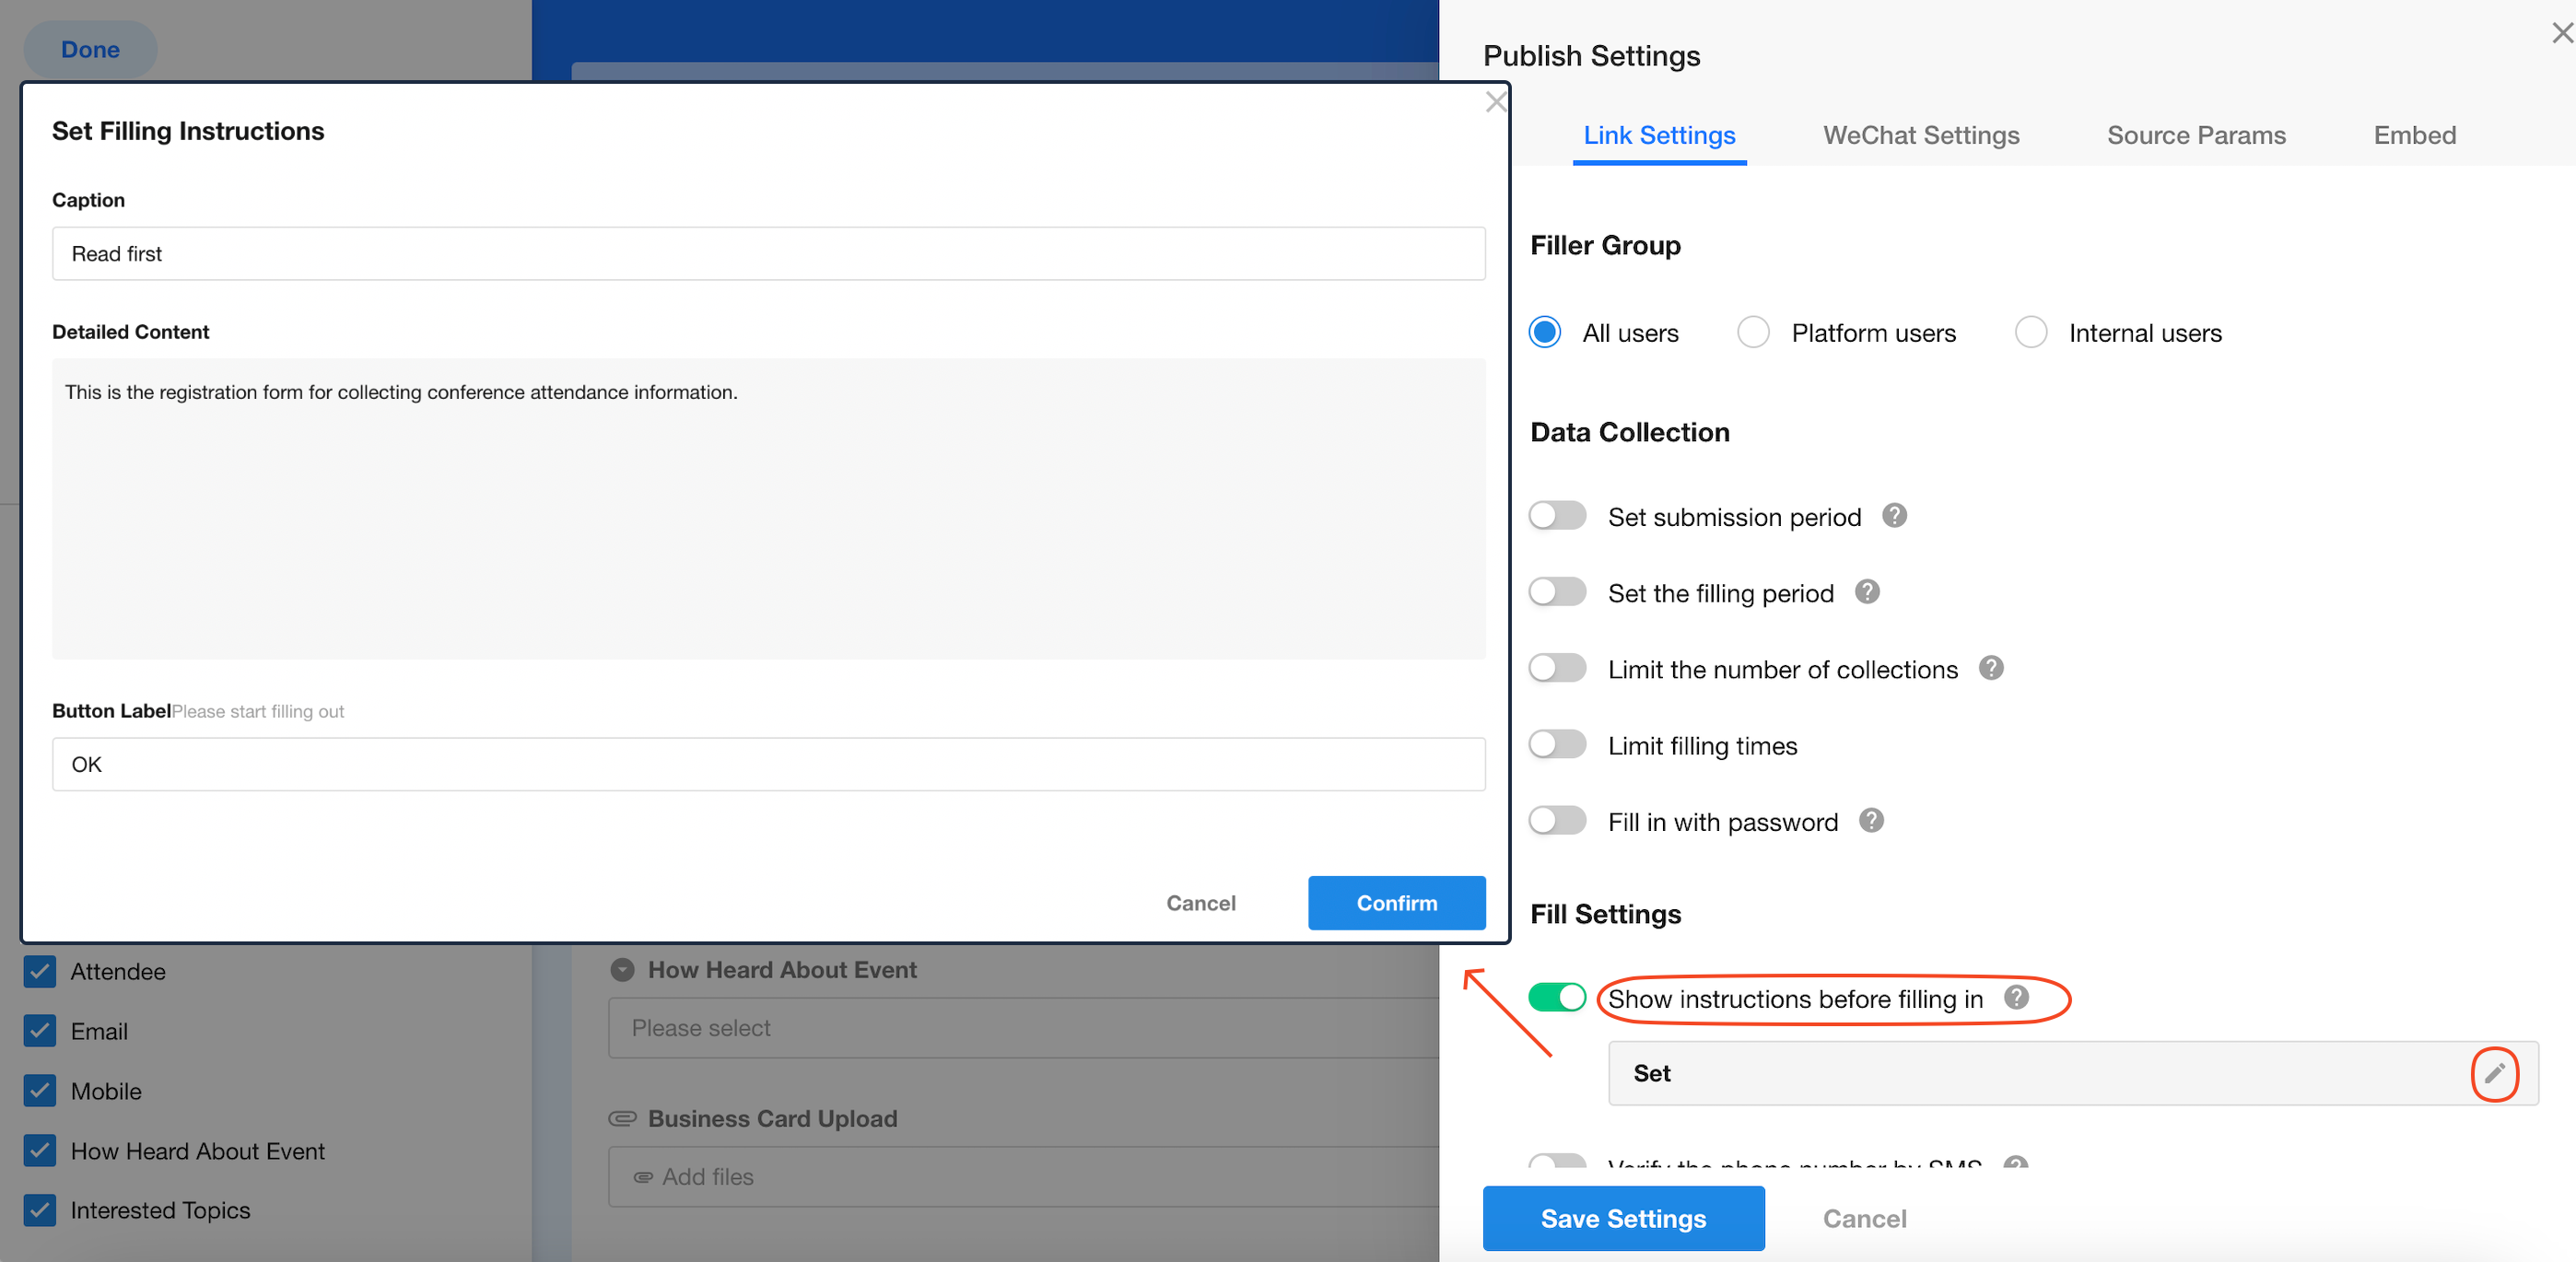
When opening the public form page:
13. SMS/Graphic verification
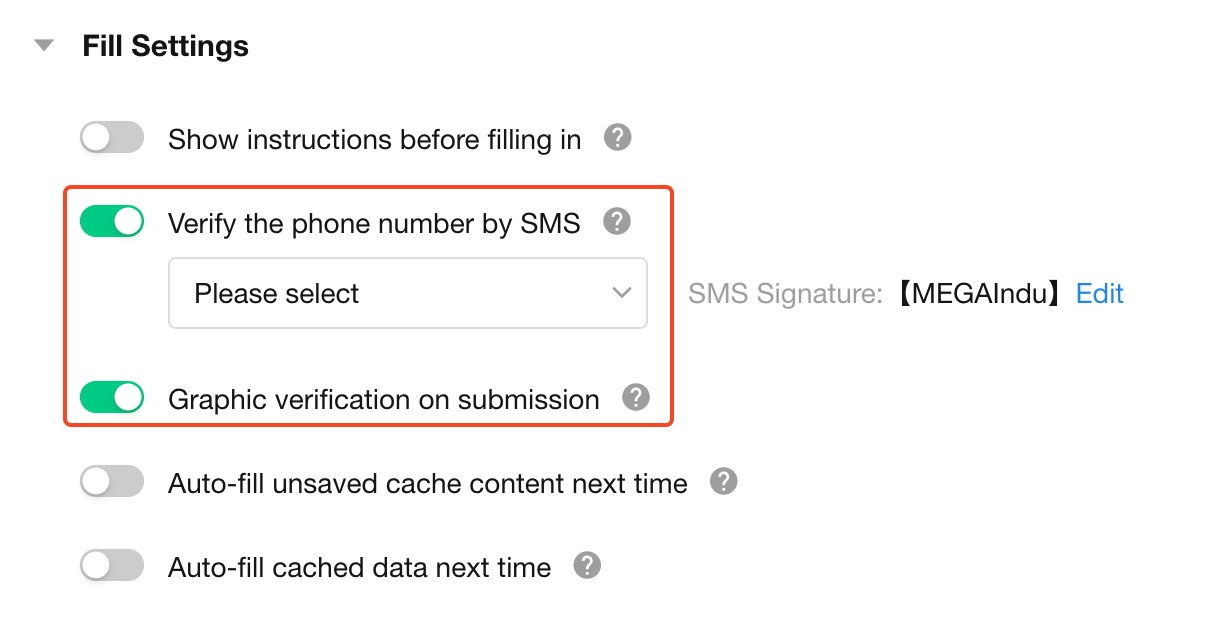
For data security, verification before submission can be enabled, including:
-
Verify the phone number by SMS
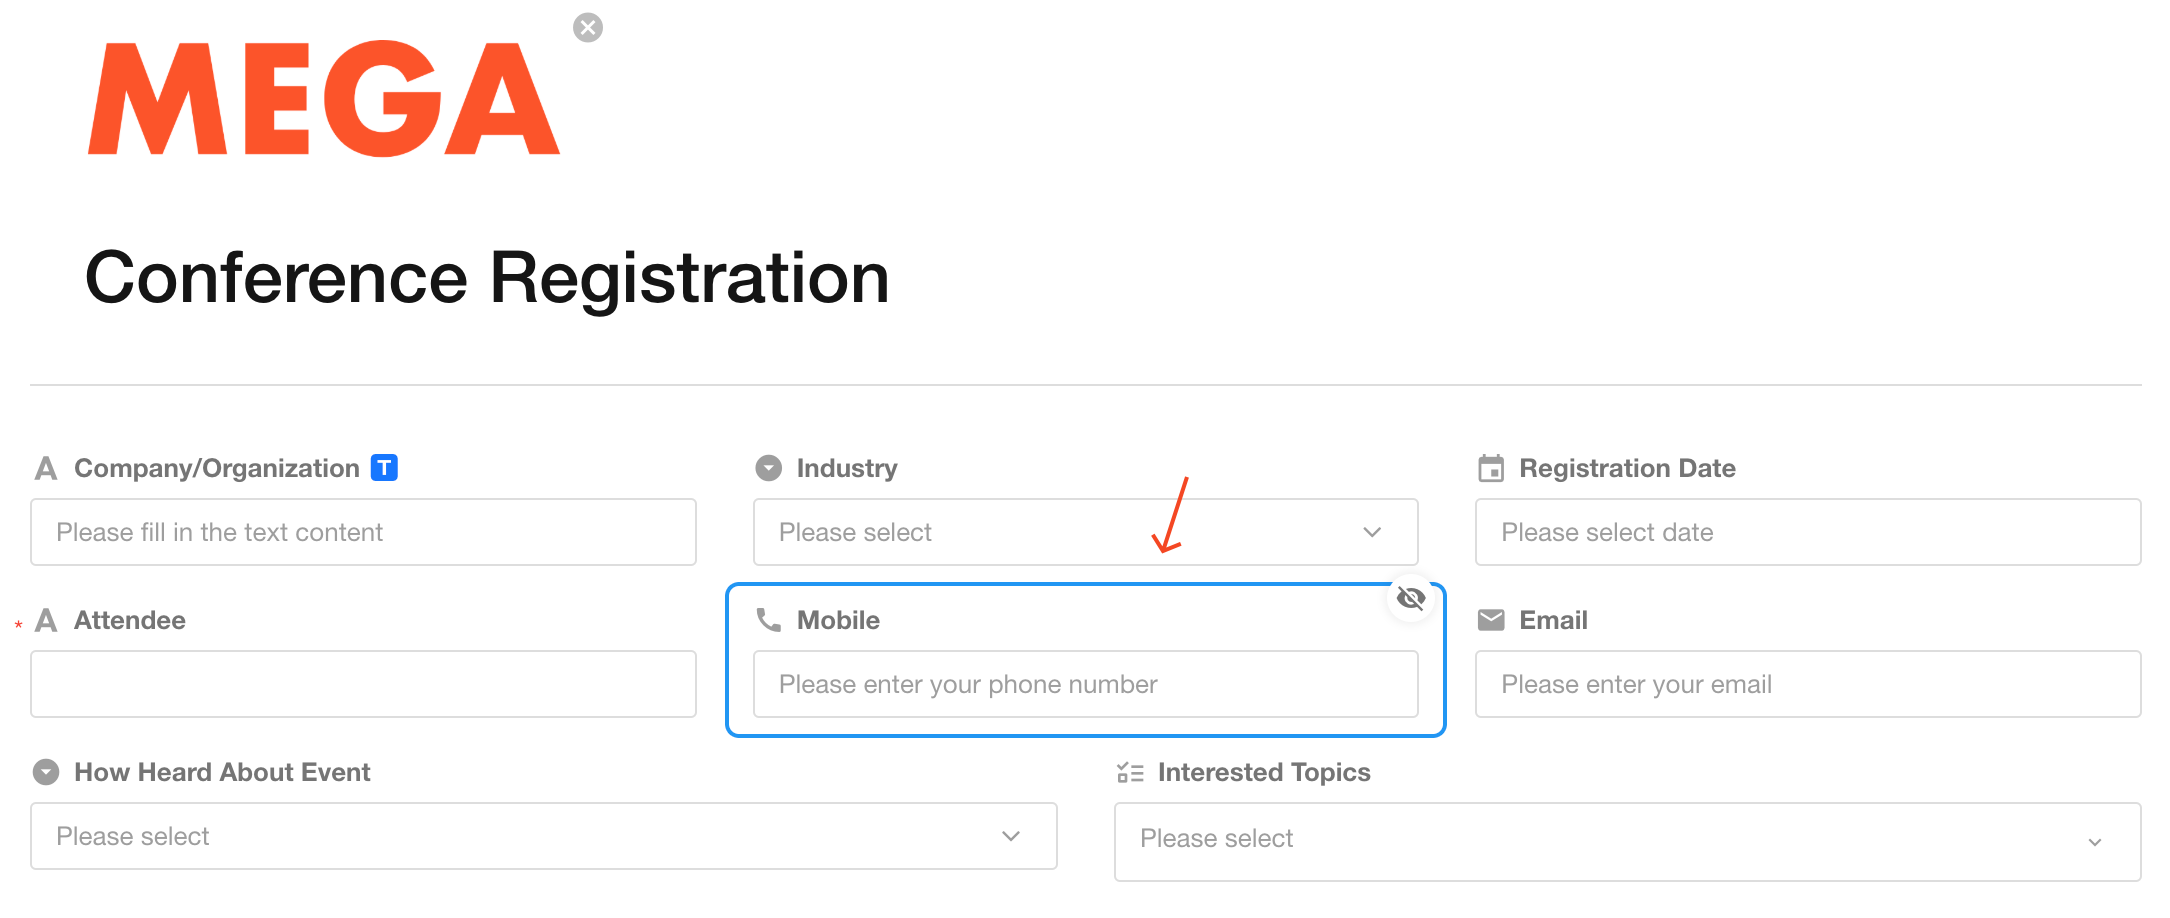
If a mobile number is required in the form, an SMS verification code will be sent to verify the phone number. Data can only be submitted after correct code entry.
The SMS signature defaults to "HAP" and can be modified to your organization's name (international numbers always use "HAP" signature).
-
Graphic verification before submission
A puzzle verification is required before submission - data can only be submitted after completing the puzzle.
Note:
-
If both SMS verification and graphic verification are enabled, mobile verification completes first, followed by puzzle verification.
-
If mobile verification is enabled but the public form doesn't collect mobile numbers, SMS verification will be skipped.
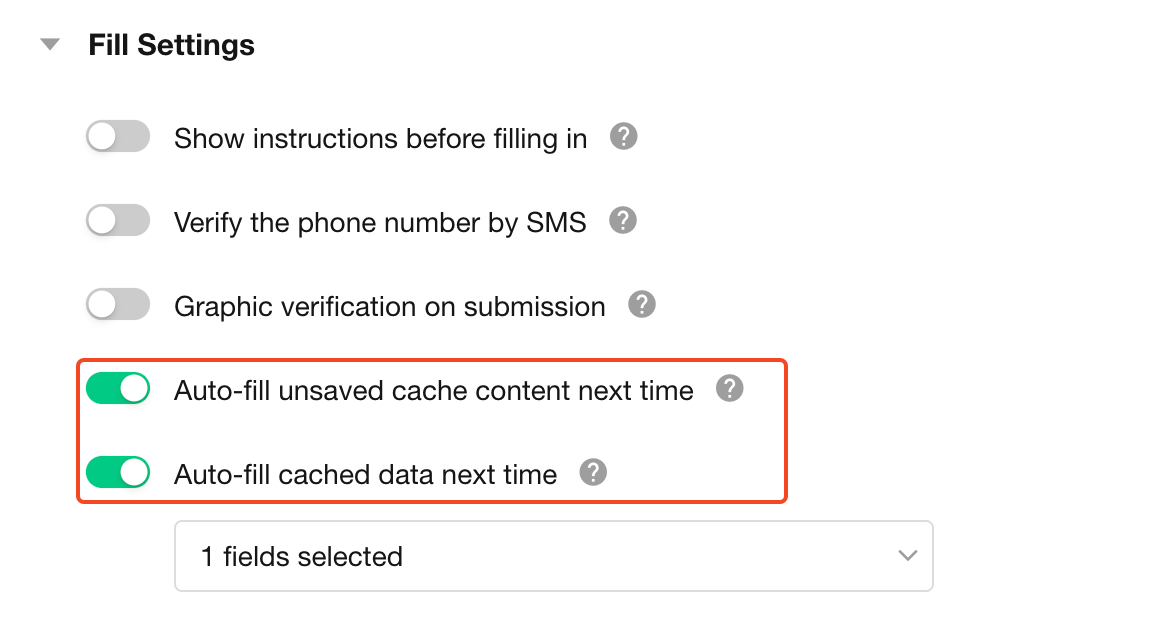
14. Cache filled data
-
Cache unsubmitted data
If a user opens the public link, fills in some fields but leaves the page without submitting, the cached fields will auto-fill when reopening the link (if caching is enabled).
This is a browser-based feature - clearing browser cache will remove cached data.
-
Cache last submitted data
For repeated form submissions with identical fields contents, enable caching of last submission to auto-fill previously submitted fields (only requiring partial modifications). Supports caching specific fields only.
This is a browser-based feature - clearing browser cache will remove cached data.
Cached data will override default field values when reopening the form.
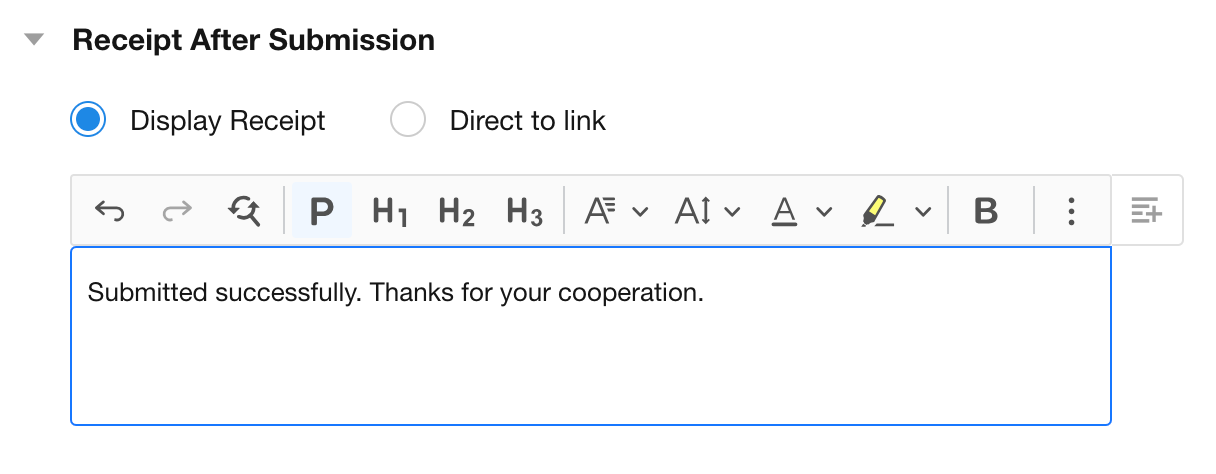
15. Receipt after submission
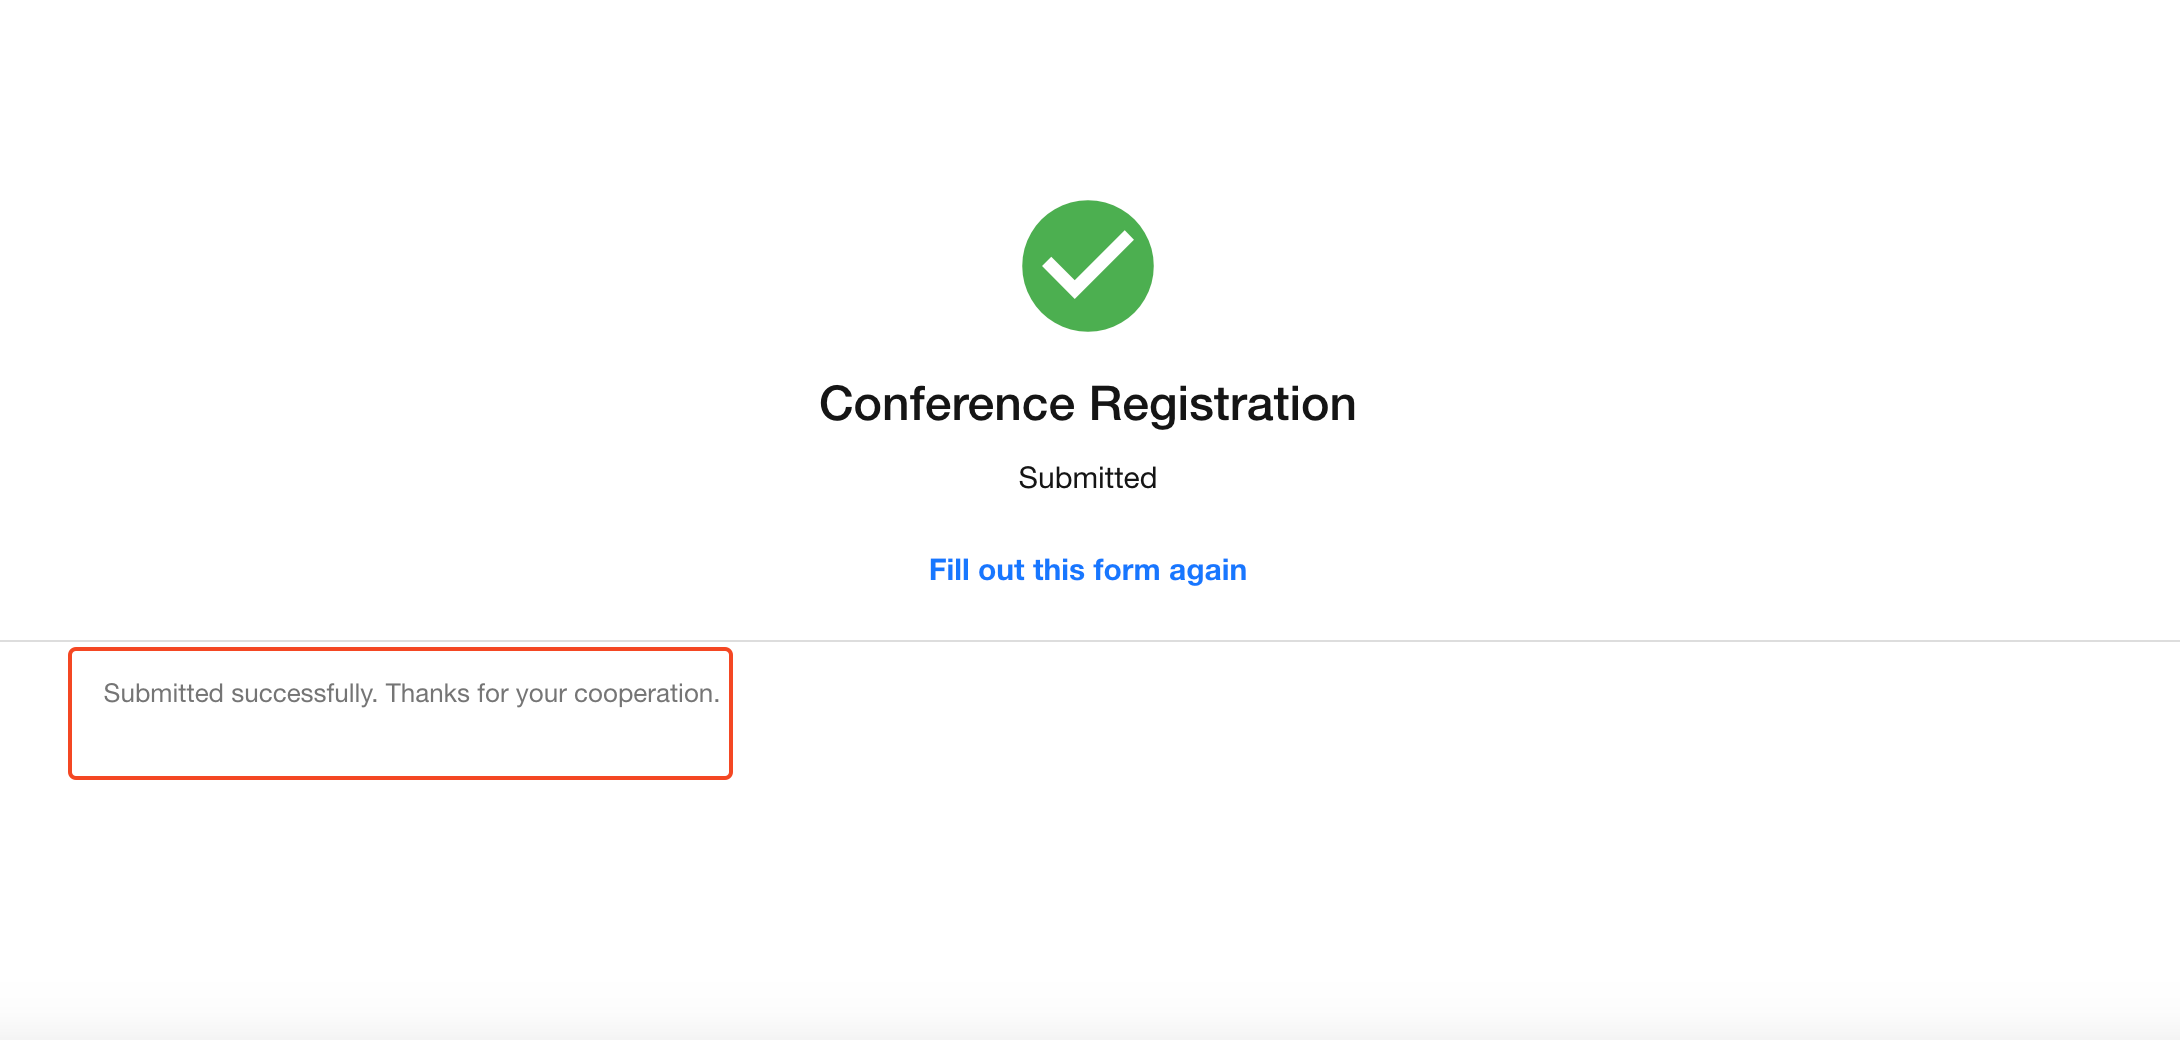
This can be text confirming successful submission, instructions for next steps after submission, or a redirect to a specified link (which may include dynamic field values).
The receipt may also contain dynamic field values. Users can configure the post-submission receipt according to the actual business requirements of the public form.
After submission:
WeChat settings
16. WeChat sharing card
When sharing a public form in WeChat (to friends or Moments), you can customize the sharing card style (including title, description, and icon). Note that shared cards in Moments only display the title and icon.
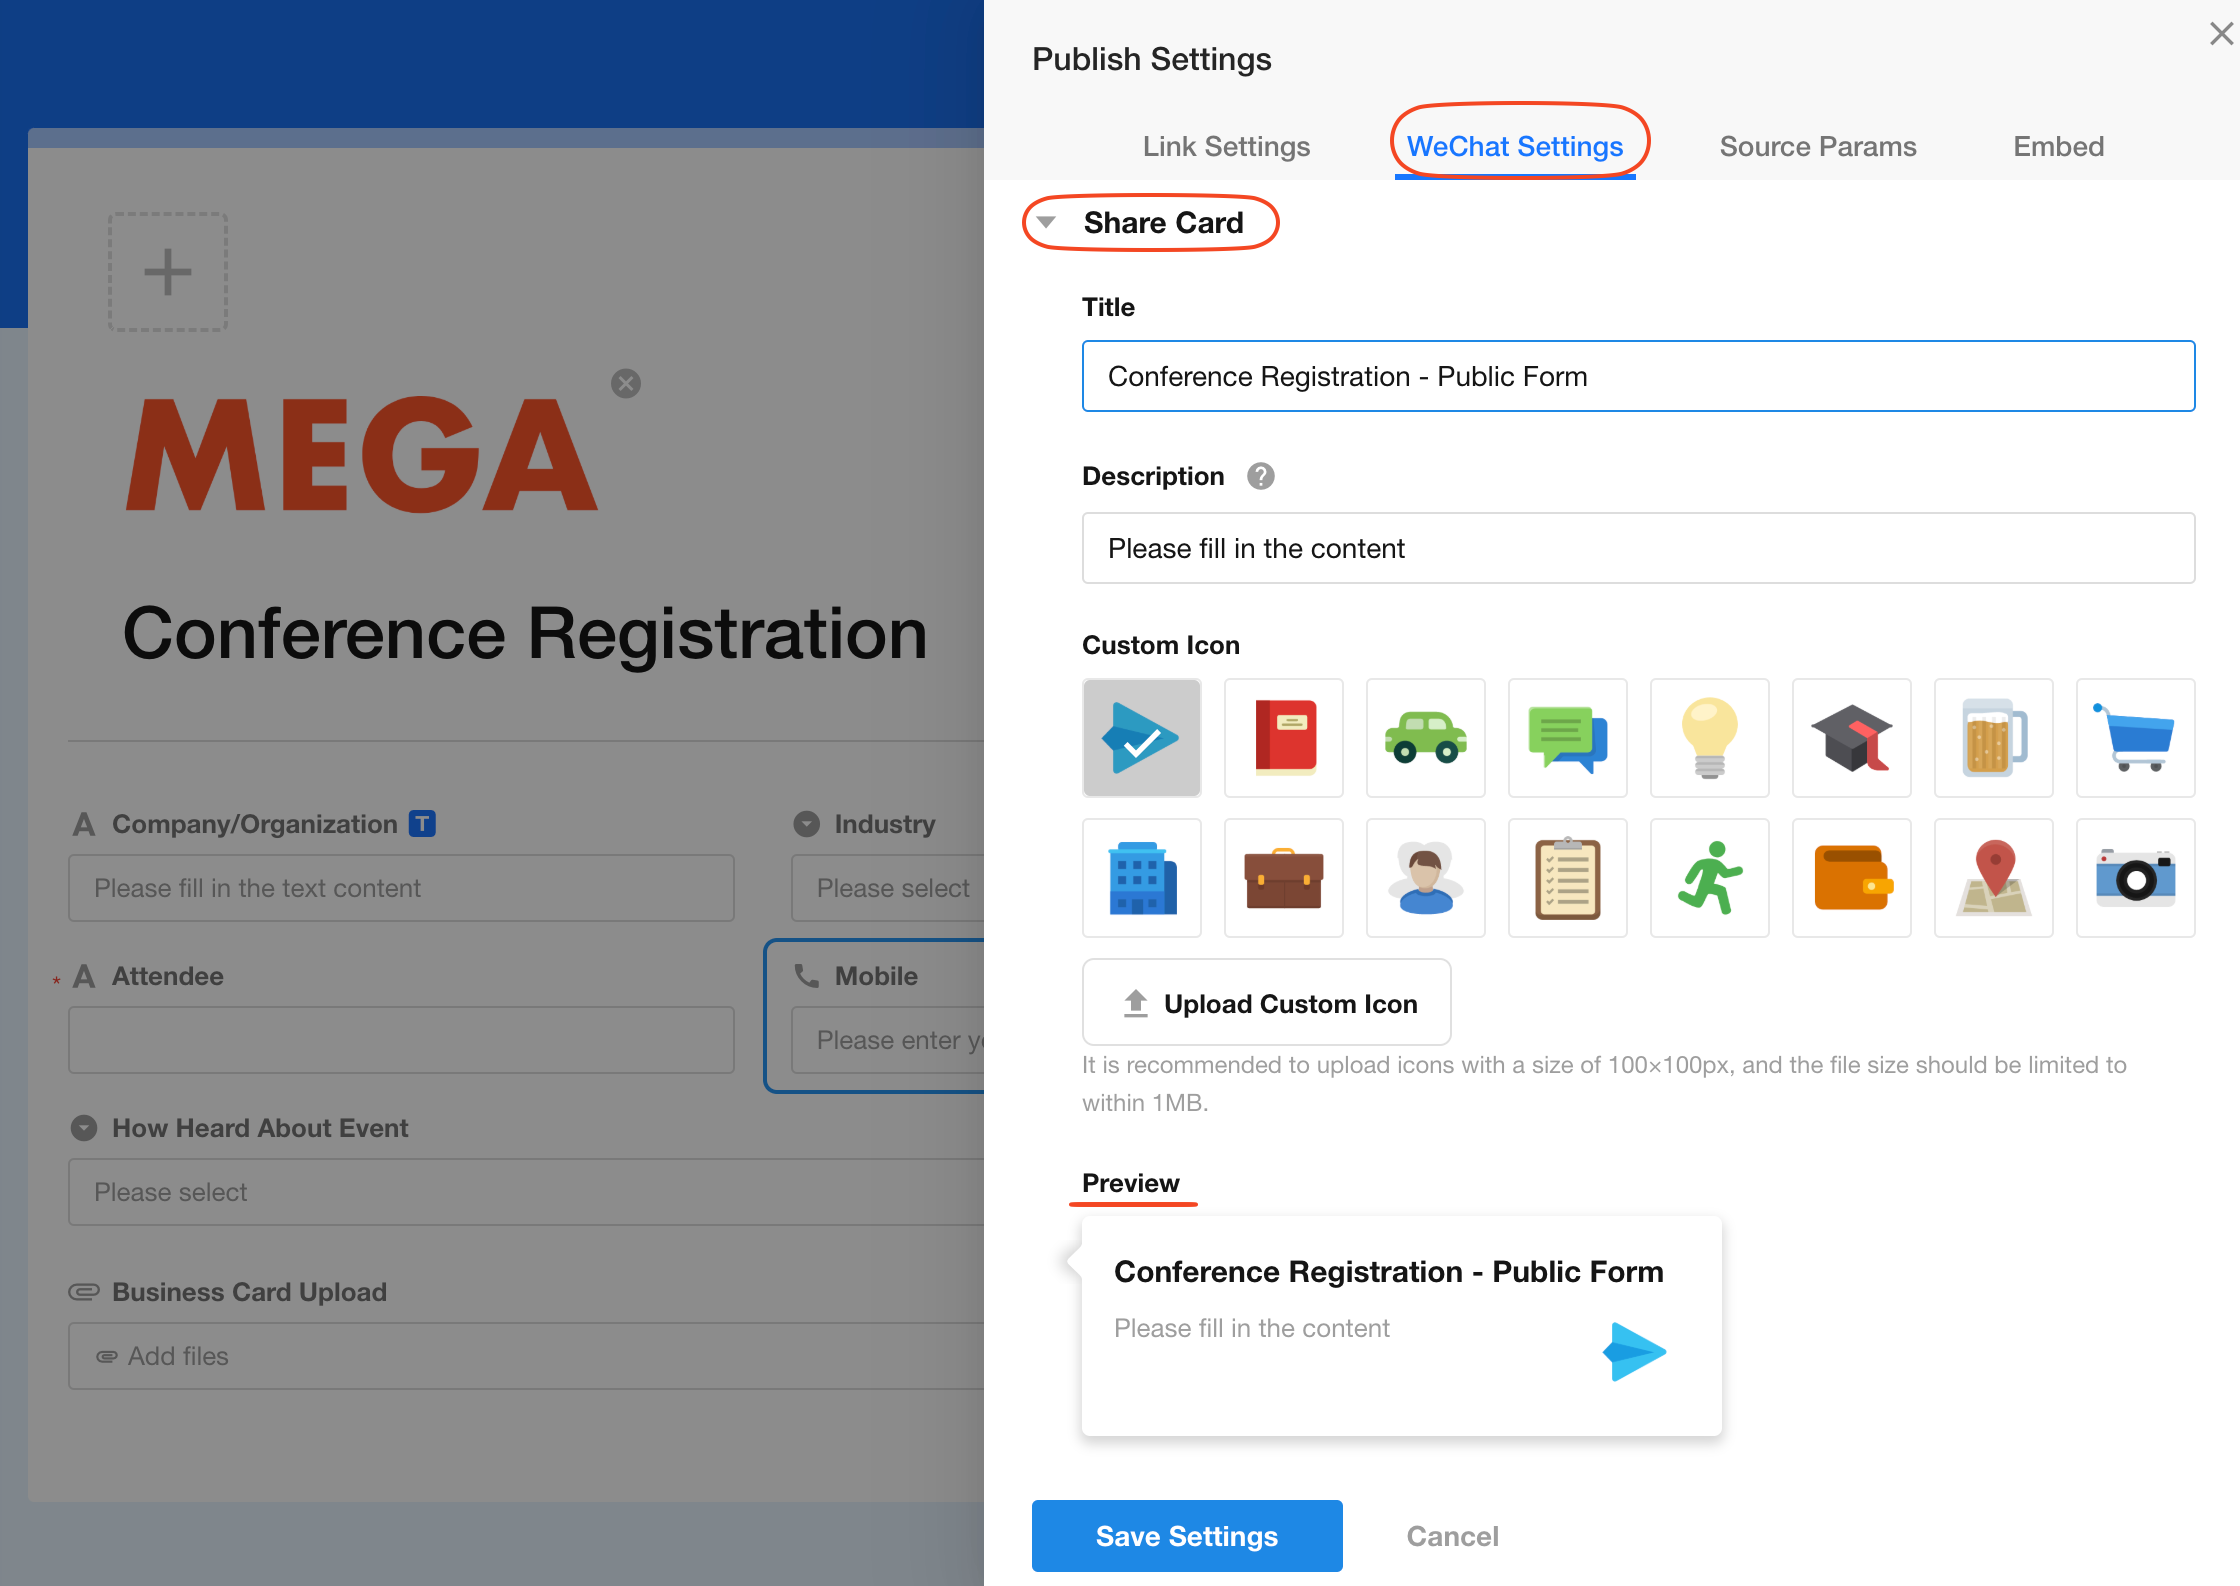
The sharing card style only takes effect when the public form is accessed via WeChat QR code scanning before being shared or forwarded.
Source parameters/Device information
17. Extended parameters
Add extended parameters to the link and record these extended parameters in worksheet fields (text fields).
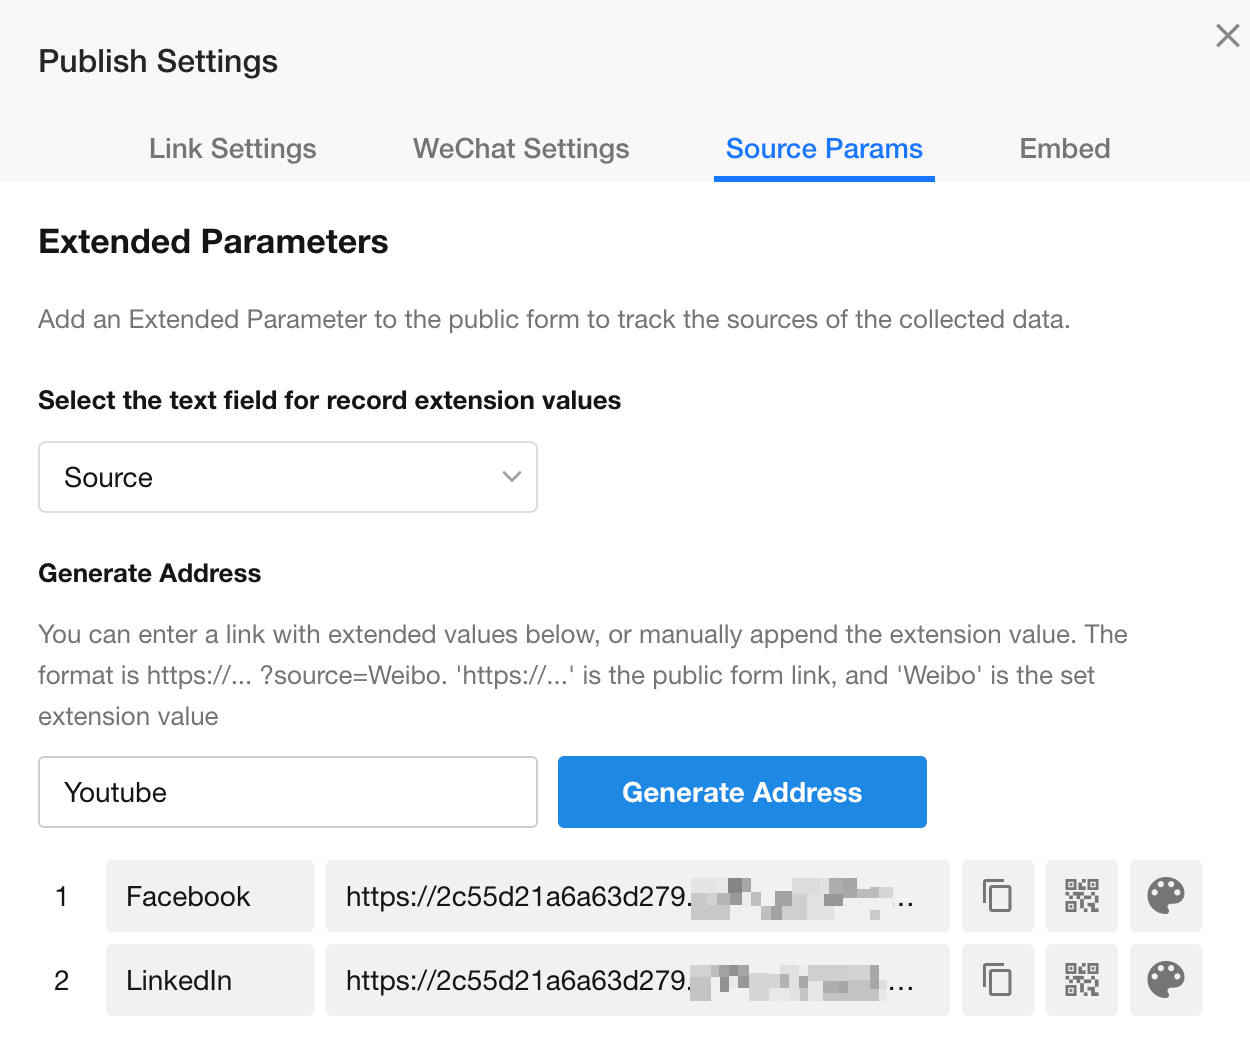
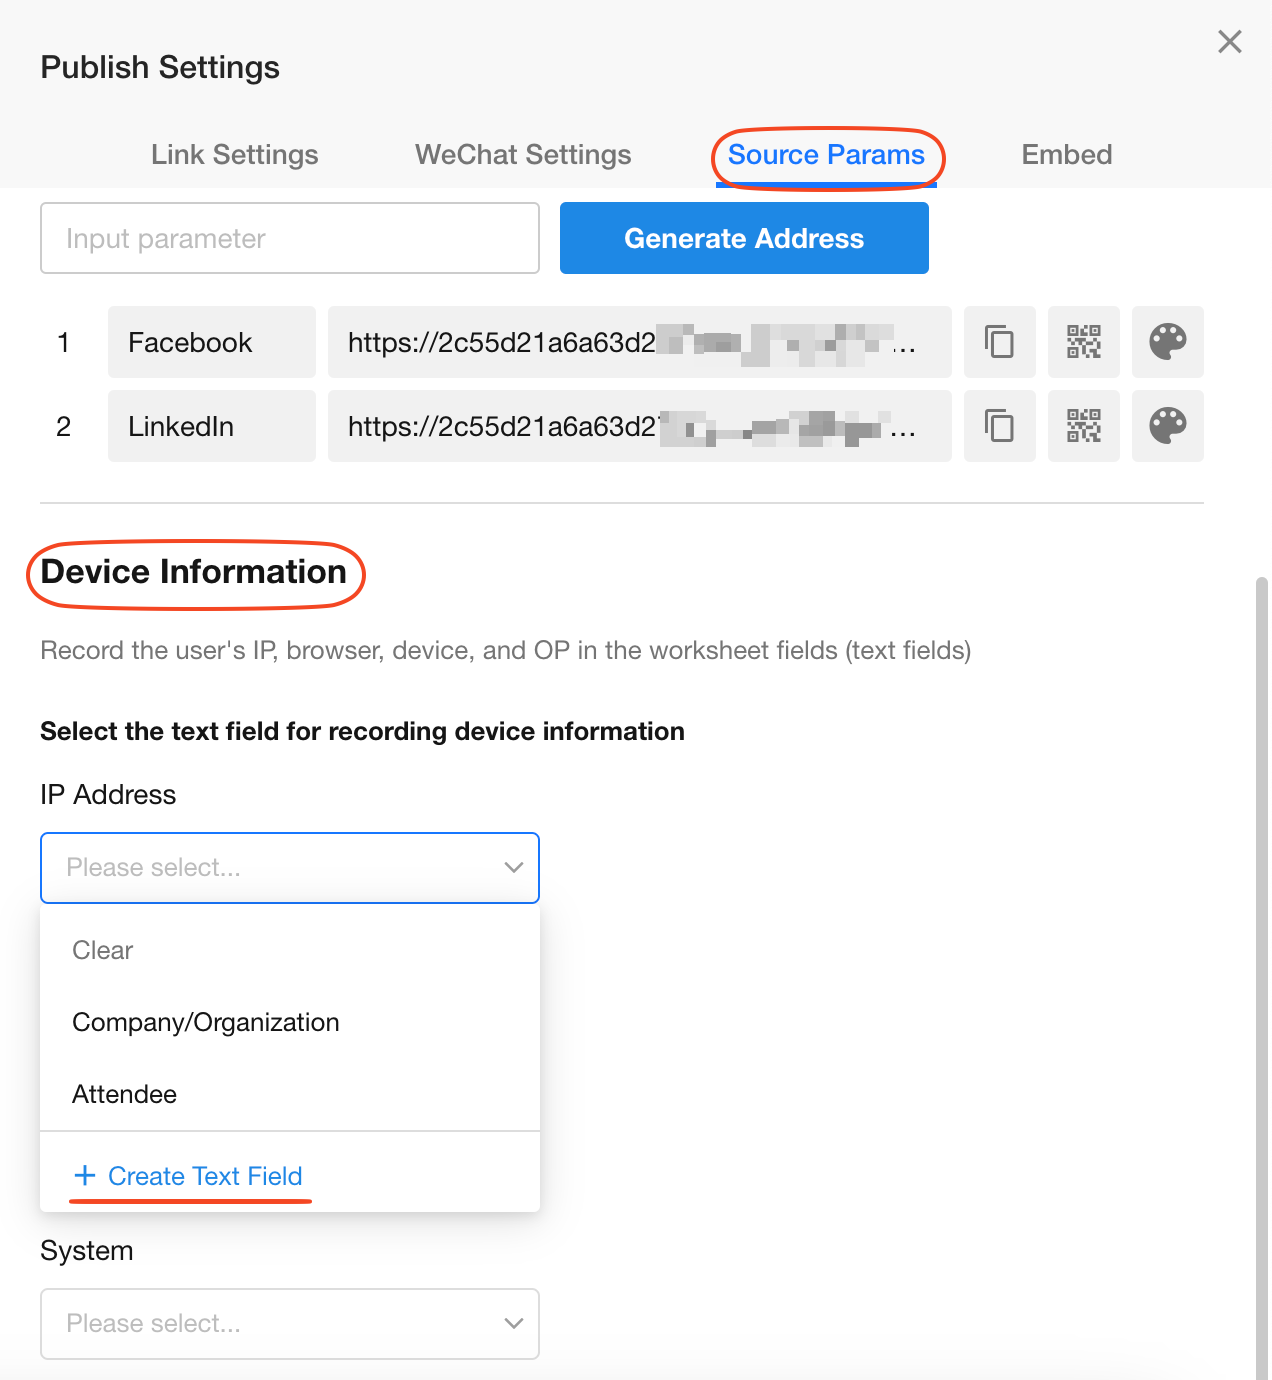
As shown above, if this public form is published on two channels - Facebook, LinkedIn - two corresponding dedicated links will be generated. The two data sources (Facebook, LinkedIn) will be recorded in the "Source" field of the worksheet.
By entering "Youtube" and clicking "Generate Address", another dedicated address and QR code for Youtube will be created.
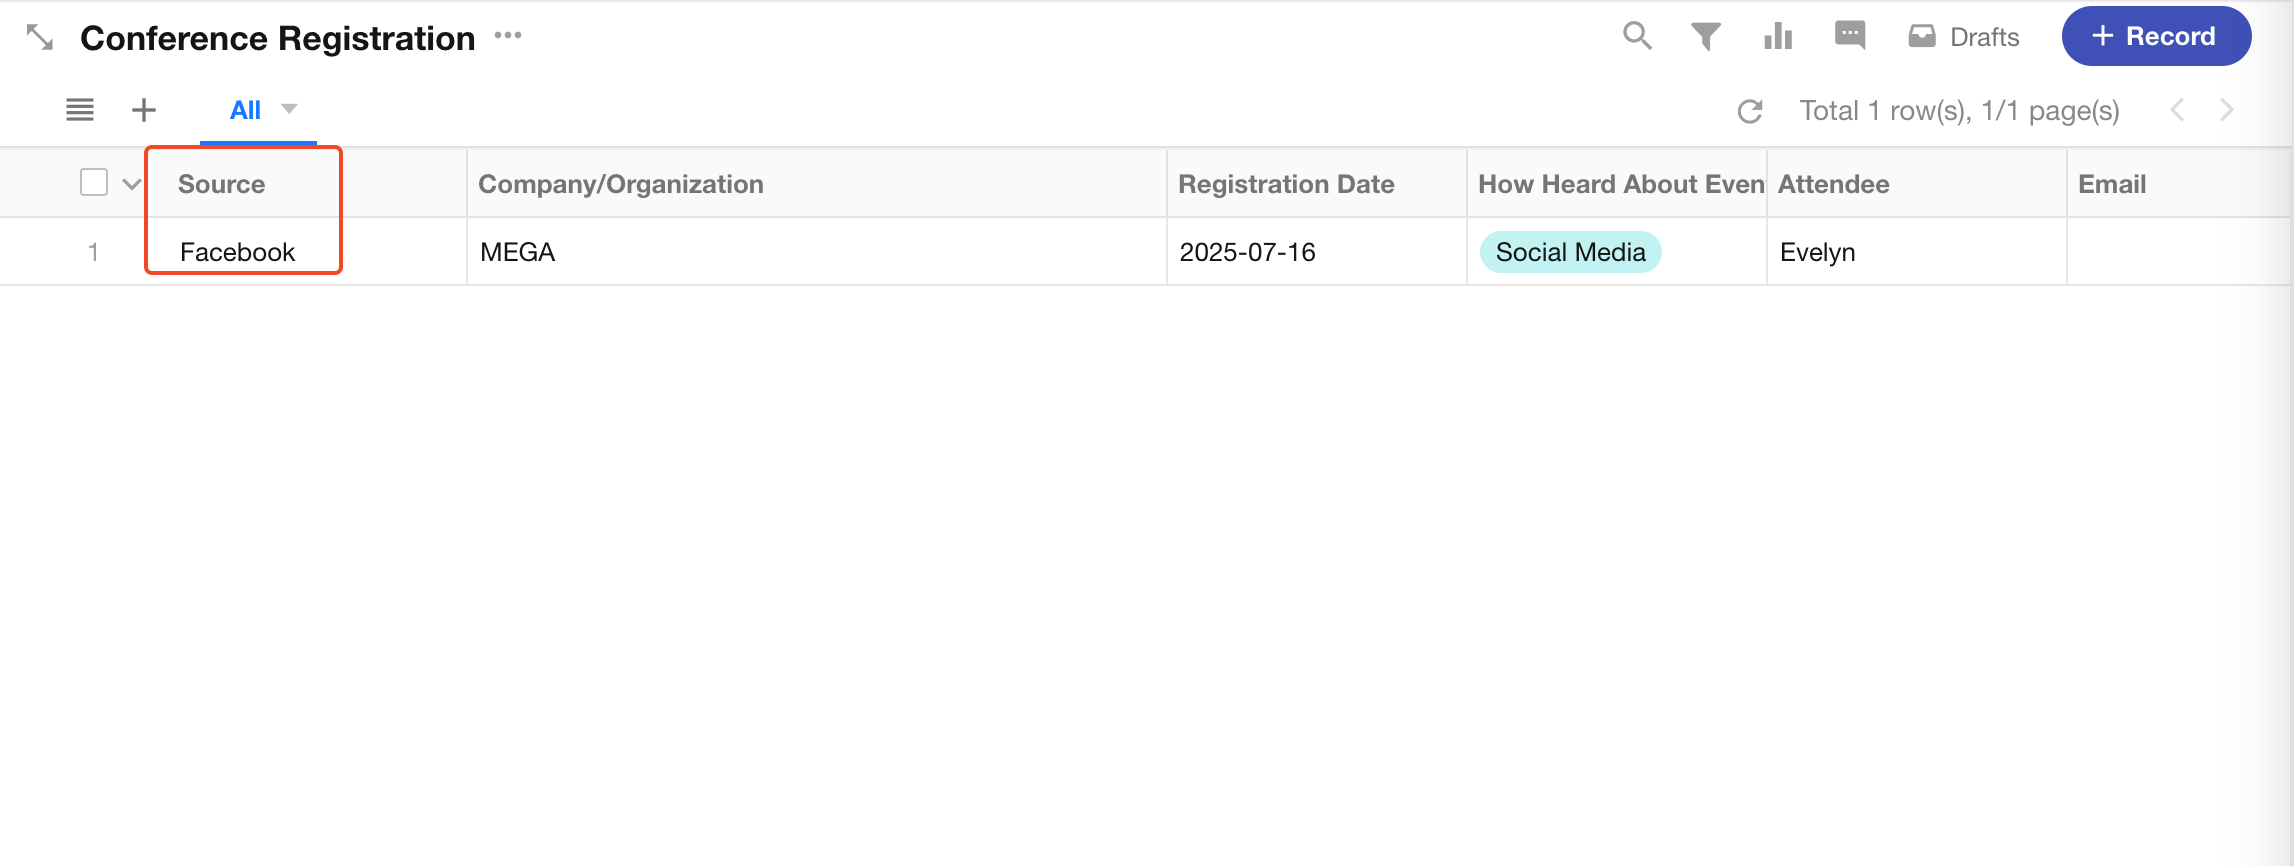
Fields used to record extended values will not be displayed on the public form page.
Concatenated links
The source-parameter-containing links mentioned above do not necessarily require generation through the "Generate Address" button to be valid. For example, dedicated links for two channels - Facebook, LinkedIn - are generated with parameters stored in the "Source" field.
The generated links would appear as follows (below links are non-clickable examples for format demonstration only):
https://www.mingdao.com/form/66cxxxxxxxxxxxx846c?source=Facebook
https://www.mingdao.com/form/66cxxxxxxxxxxxx846c?source=LinkedIn
From these two links, we observe only the content after "source=" differs, which represents the extended parameter. Therefore, we can directly modify the content after "source=" to "Youtube" as follows:
https://www.mingdao.com/form/66cxxxxxxxxxxxx846c?source=Youtube
This link will function normally, though the QR code won't be automatically obtainable.
Similarly, concatenating links through workflows by selecting a dynamic field (record ID, phone number, etc.) as the parameter value can also automatically generate a traceable public link.
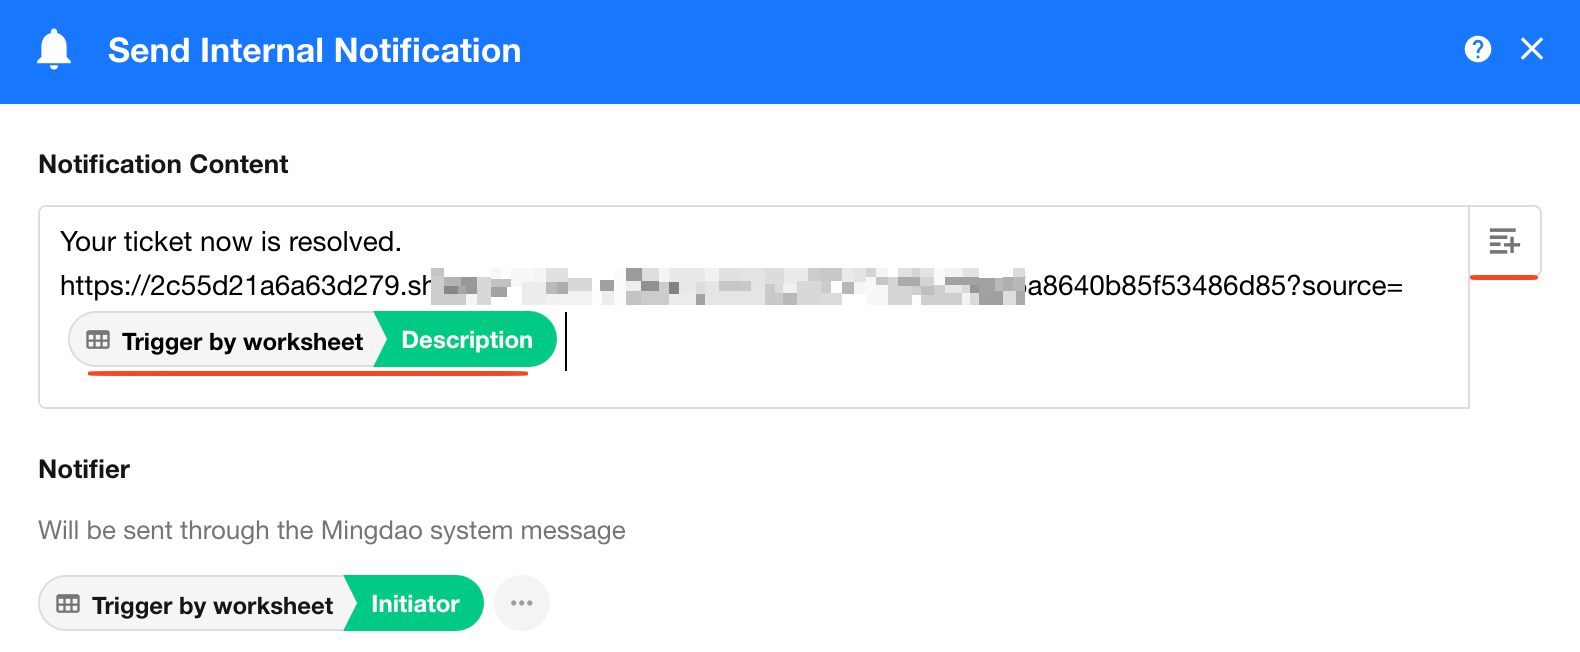
Get extended parameters
Before submitting records, other fields can obtain extended parameters from the link through custom functions. View more details
18. Device information
Store the user's IP address, browser, device, and operating system when filling out the form into worksheet fields (text-type fields). If there are no suitable fields in the form, you can directly click [+ Create Text Field] to add new fields.
After form submission, the obtained device information will be automatically written to the selected fields.
Fields used to record device information will not be displayed on the public form page.
HTML embedding
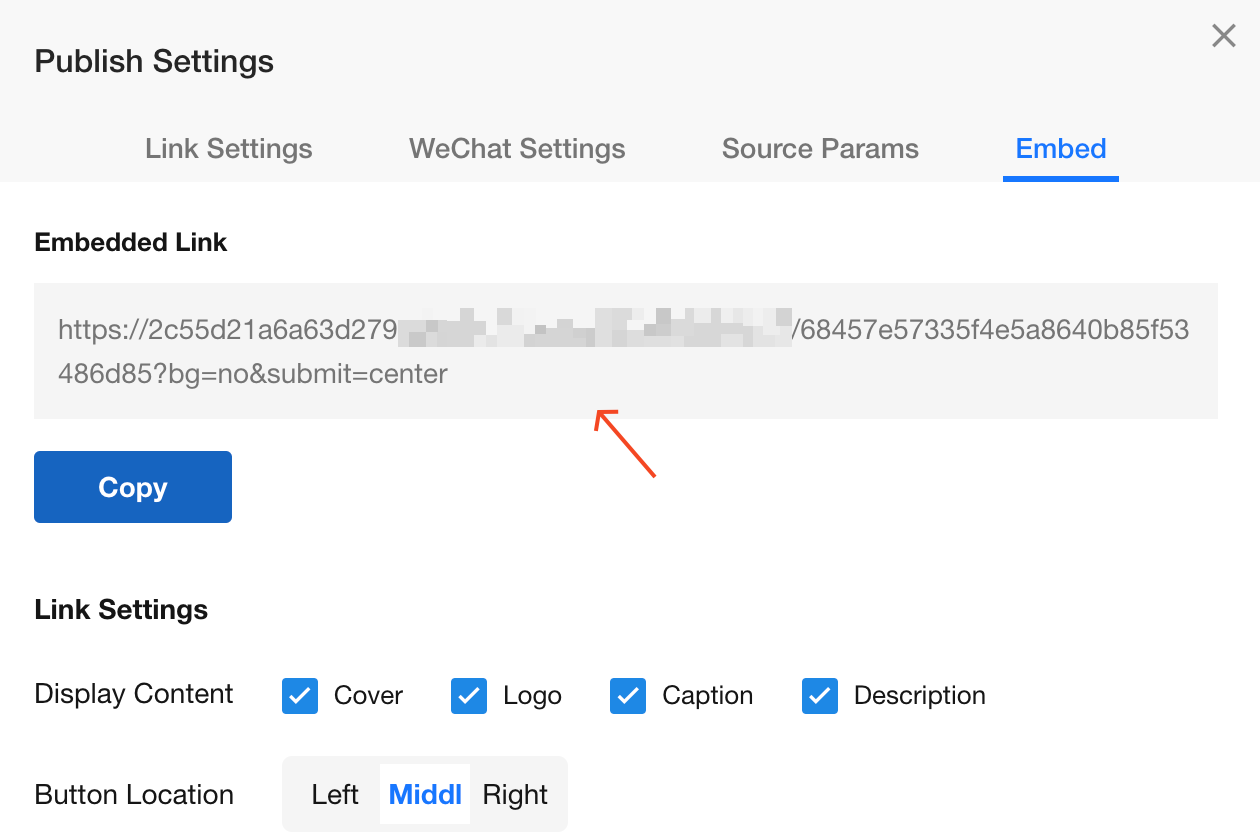
By embedding HTML code, you can seamlessly integrate the public form page into other systems.
When embedding into other systems, you can configure the link to maintain page cleanliness and layout aesthetics:
-
Hide unnecessary content (title/Logo/description, etc.)
-
Set the display position of the "Submit" button (left/center/right)
After completing these settings, the relevant parameters will be written into the embedded code. Simply copy the embed code to easily achieve cross-system form display.
