Submit Record/Save as Draft
When creating records, you may encounter the following requirements:
-
Save as Draft: Partially fill out fields without submitting, save it as a draft, and later reopen it from the draft box to complete and submit.
-
Custom Submit Button: Rename the submit button to better align with business scenarios, making it more intuitive for users.
-
Post-Submission Actions: After submitting a record, different actions may be needed, such as:
-
Continue adding: Keep the record creation page open to add a second record immediately.
-
Retain field values: Preserve some field values from the first record when adding a second one.
-
Direct to record details page: After creation, automatically navigate to the record details page to trigger workflows or post comments.
-
Single-record mode: Restrict creation to one record at a time by hiding other buttons.
-
All these options can be configured in Form Settings.
Form Settings
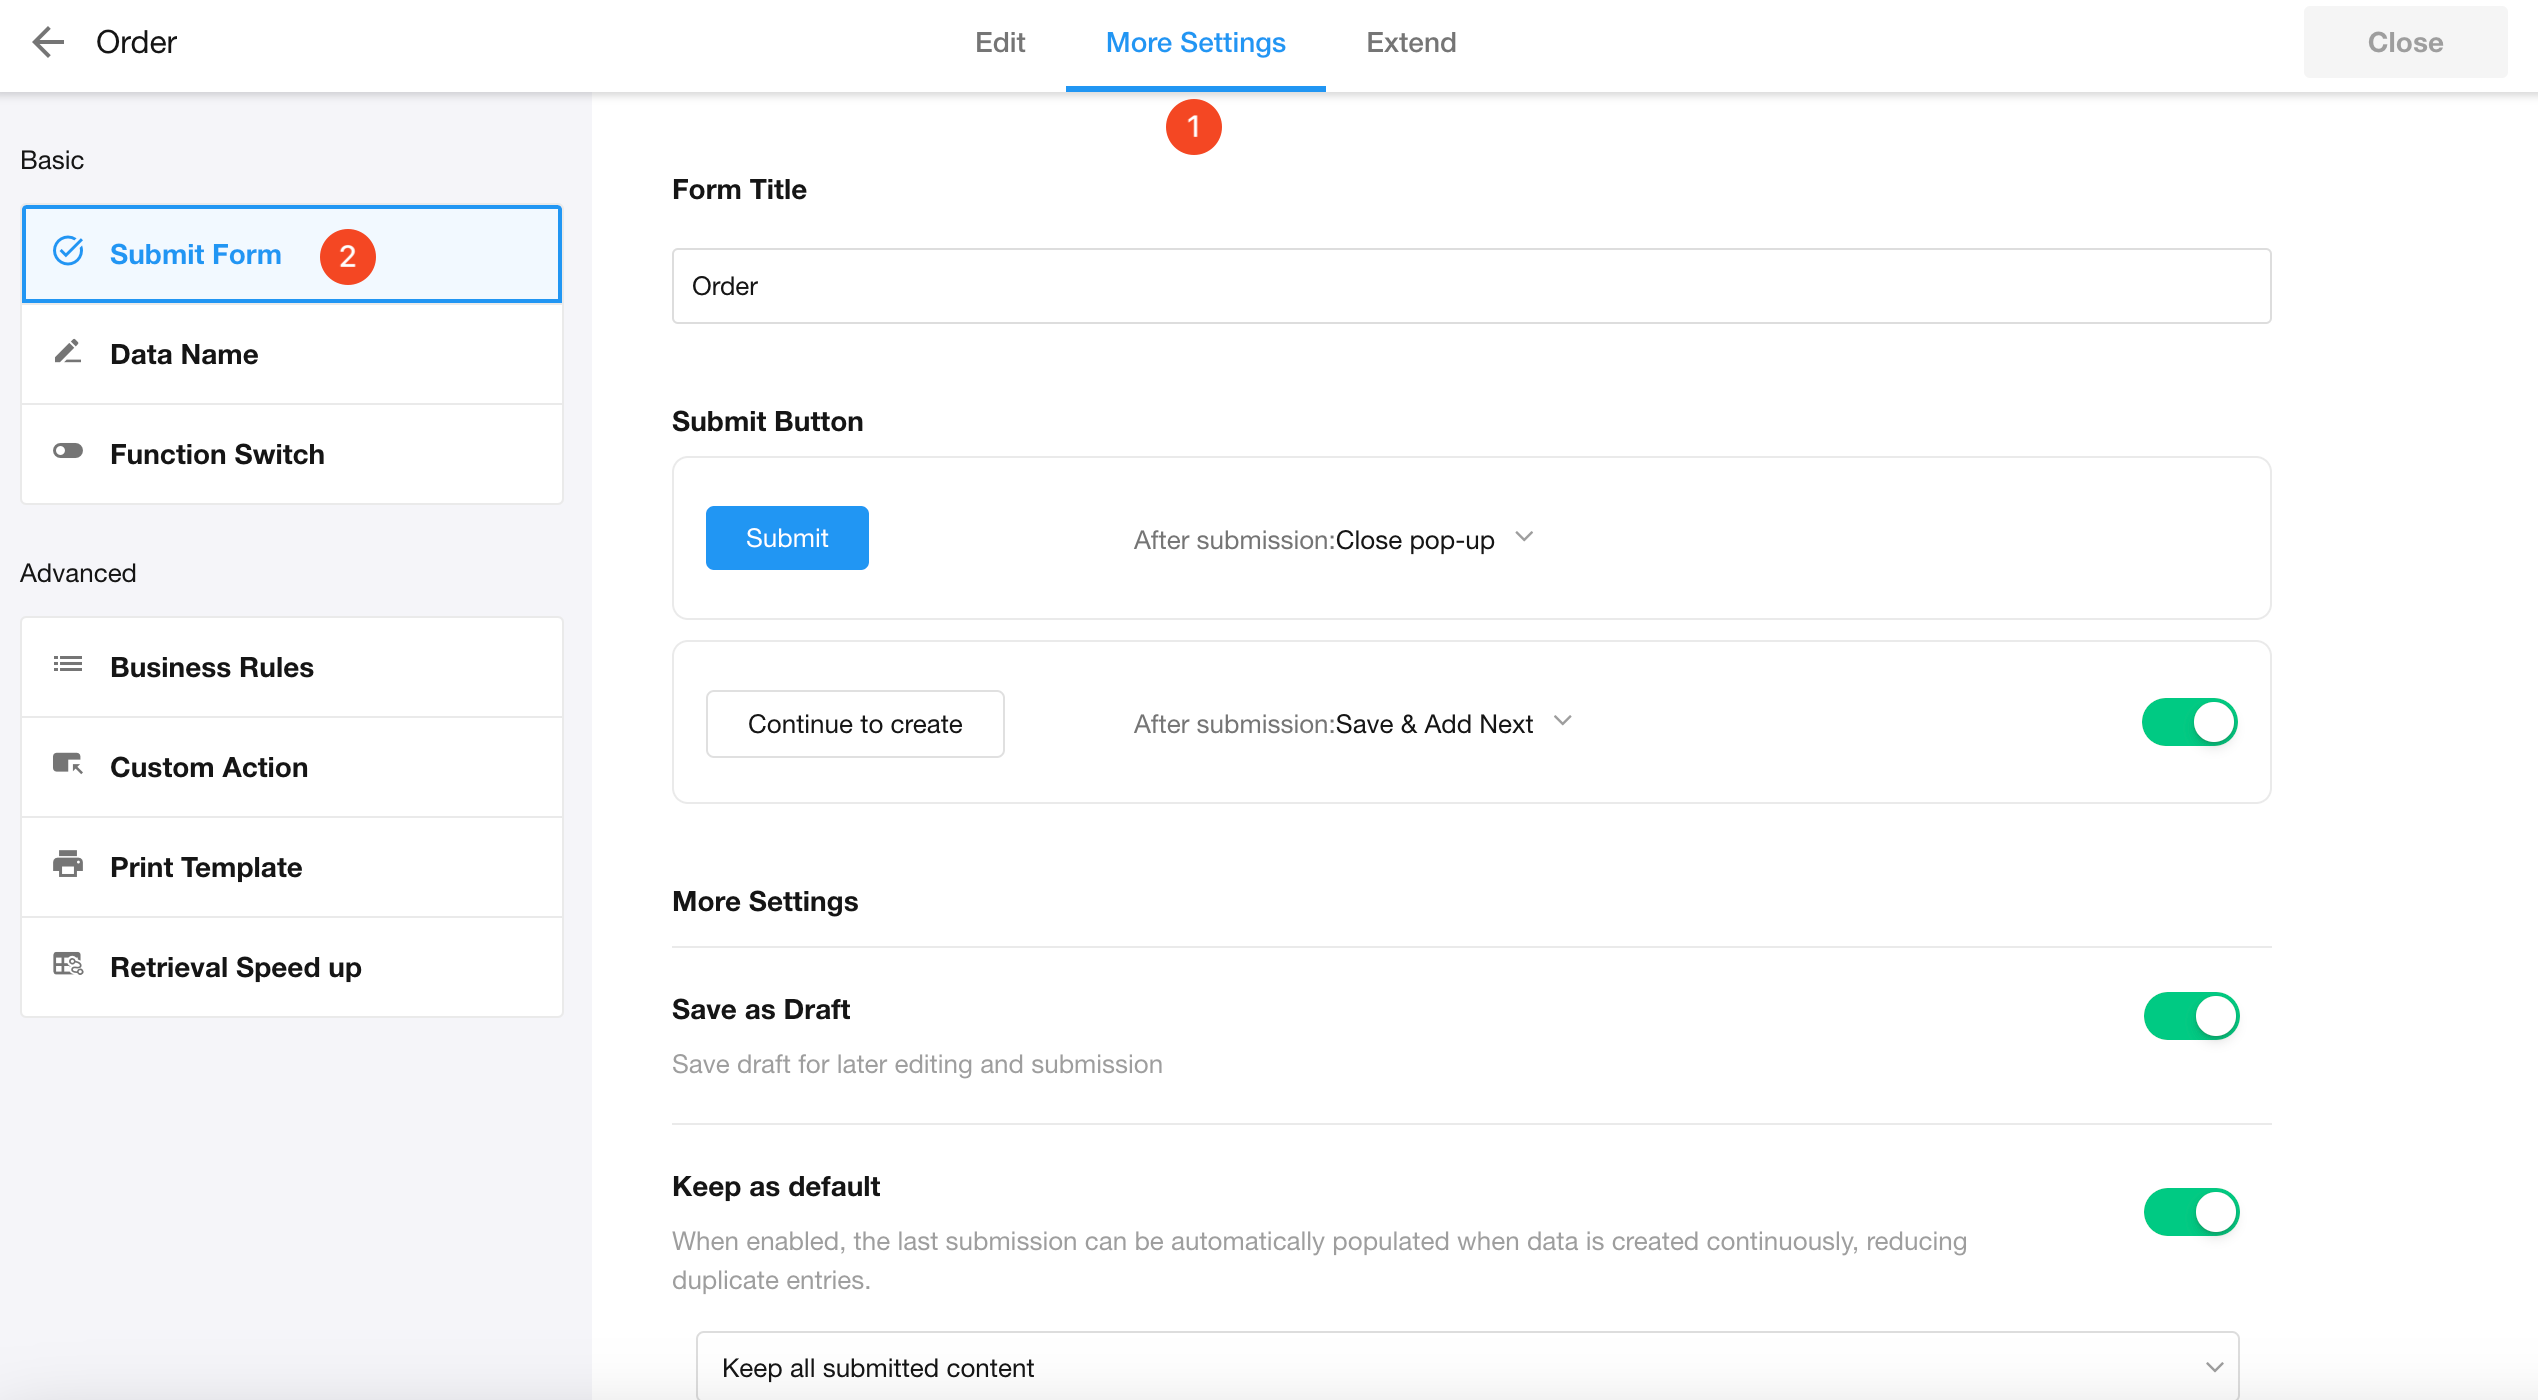
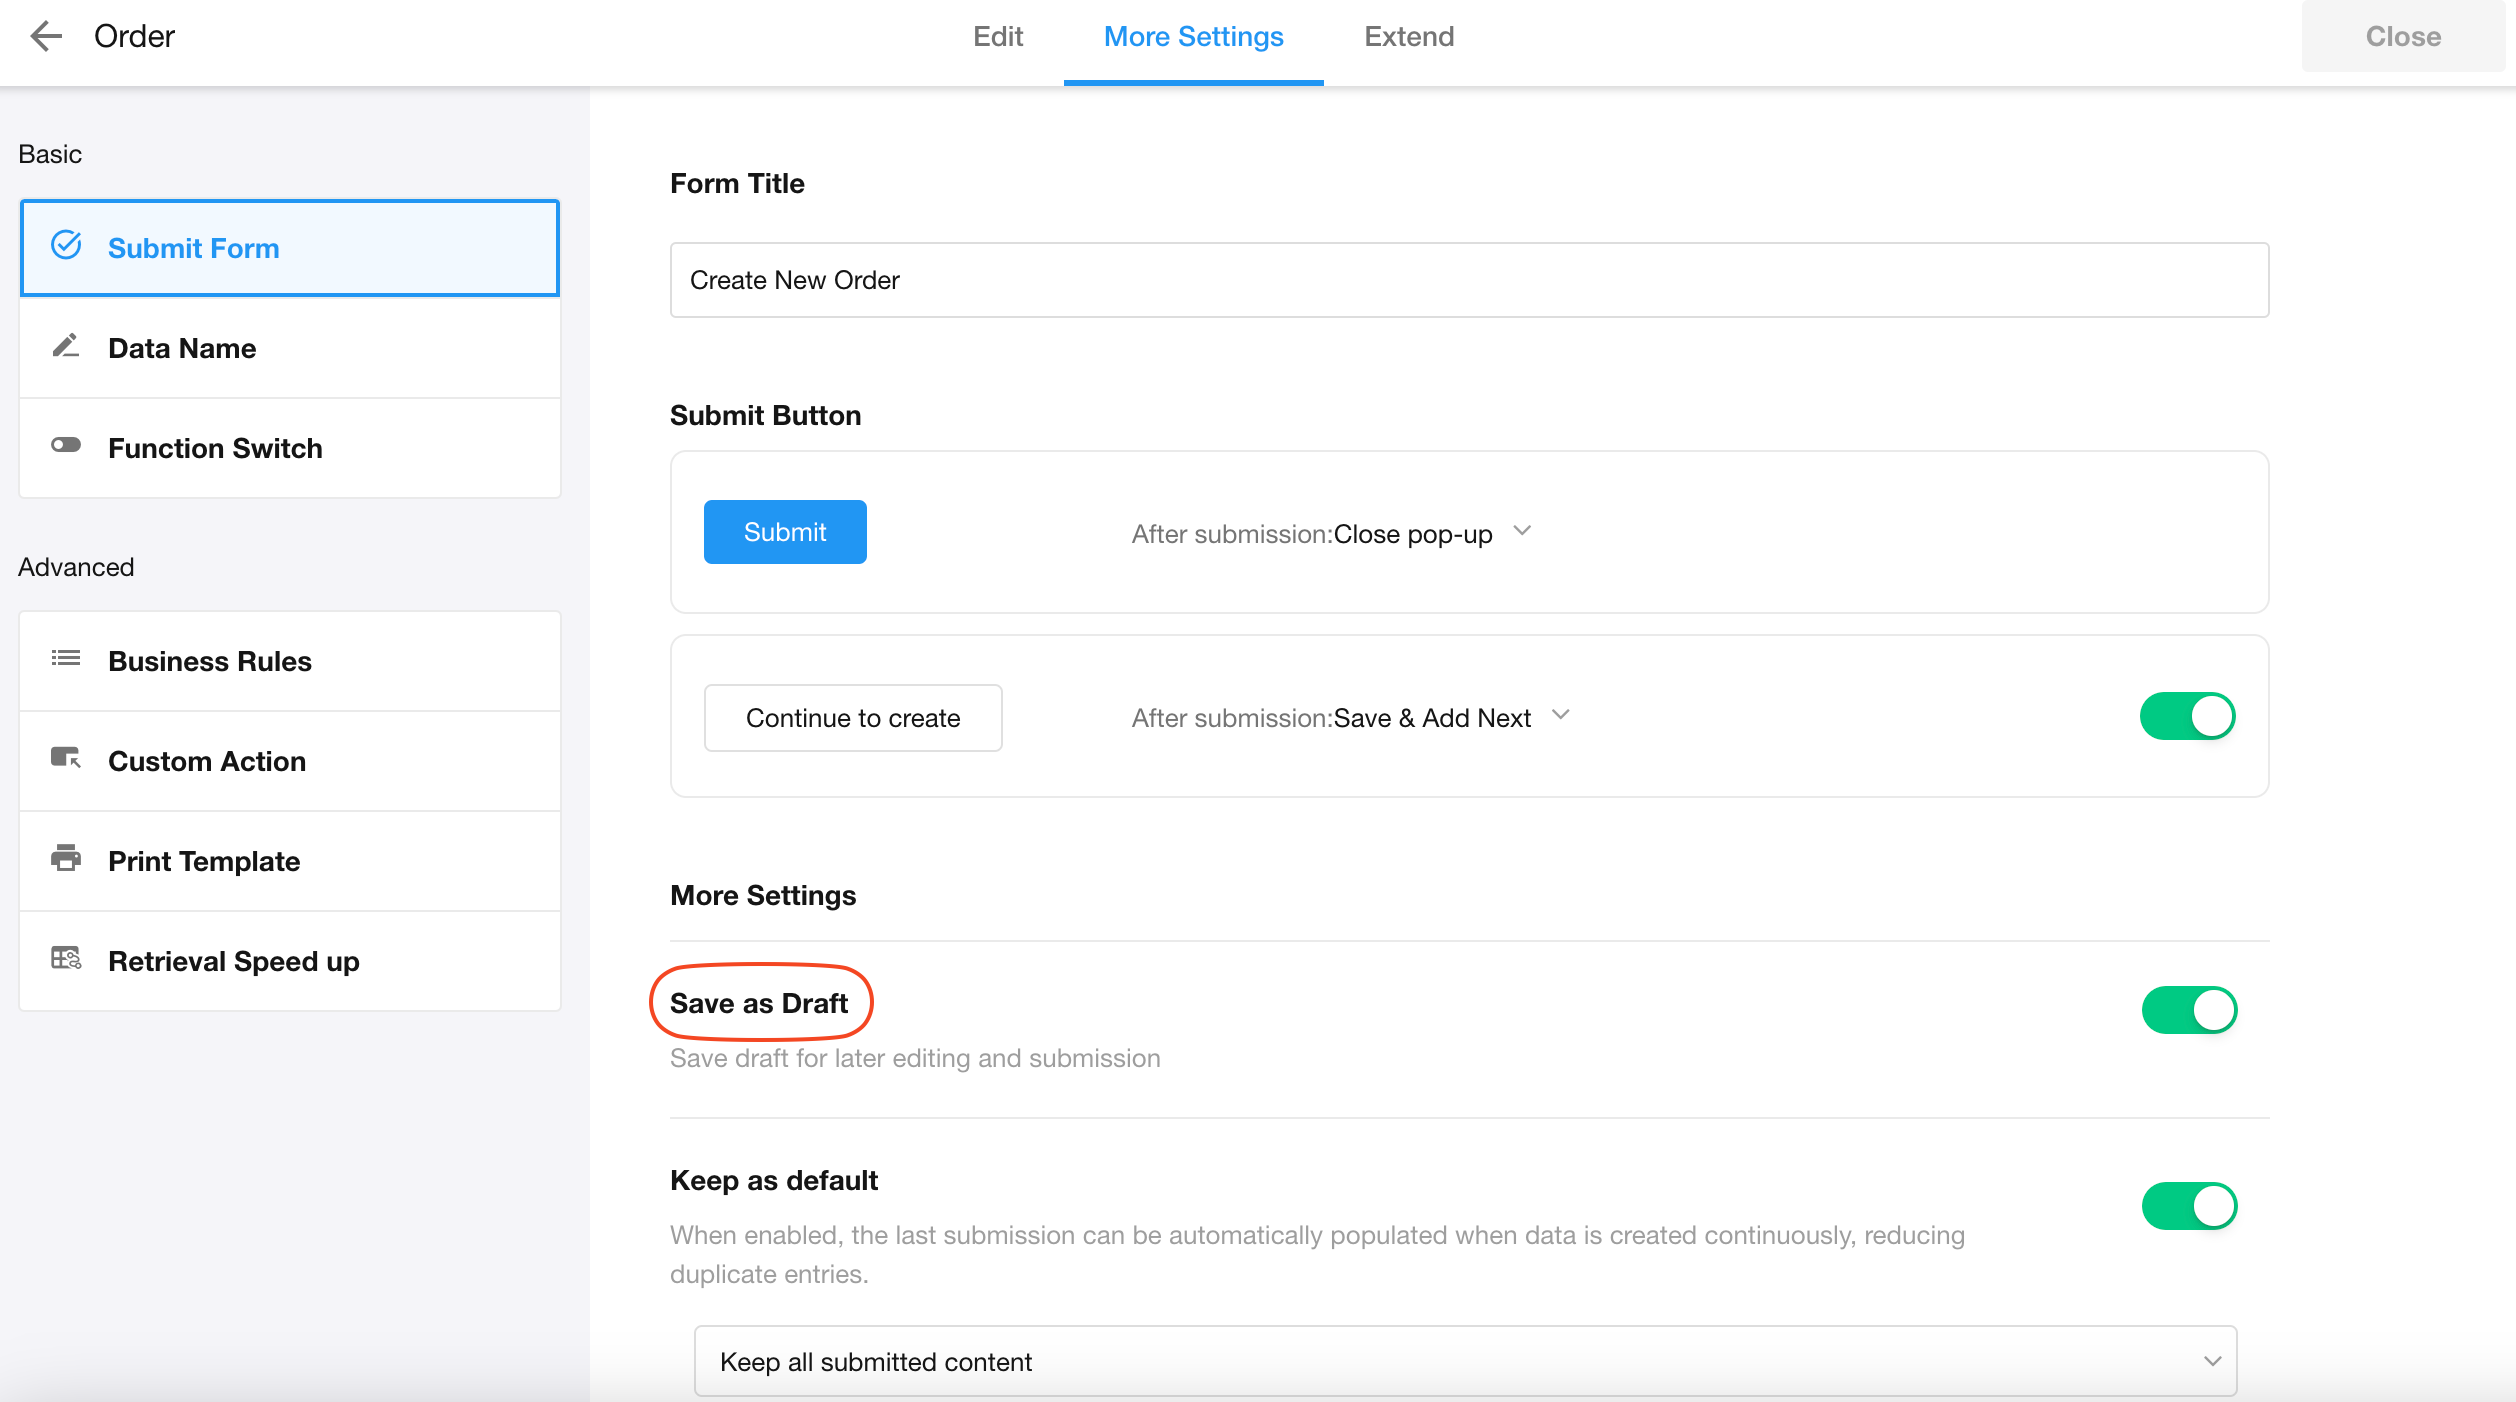
Application administrators can navigate to the form editing page and click [More Settings] > [Submit Form] to configure the following five key settings:
-
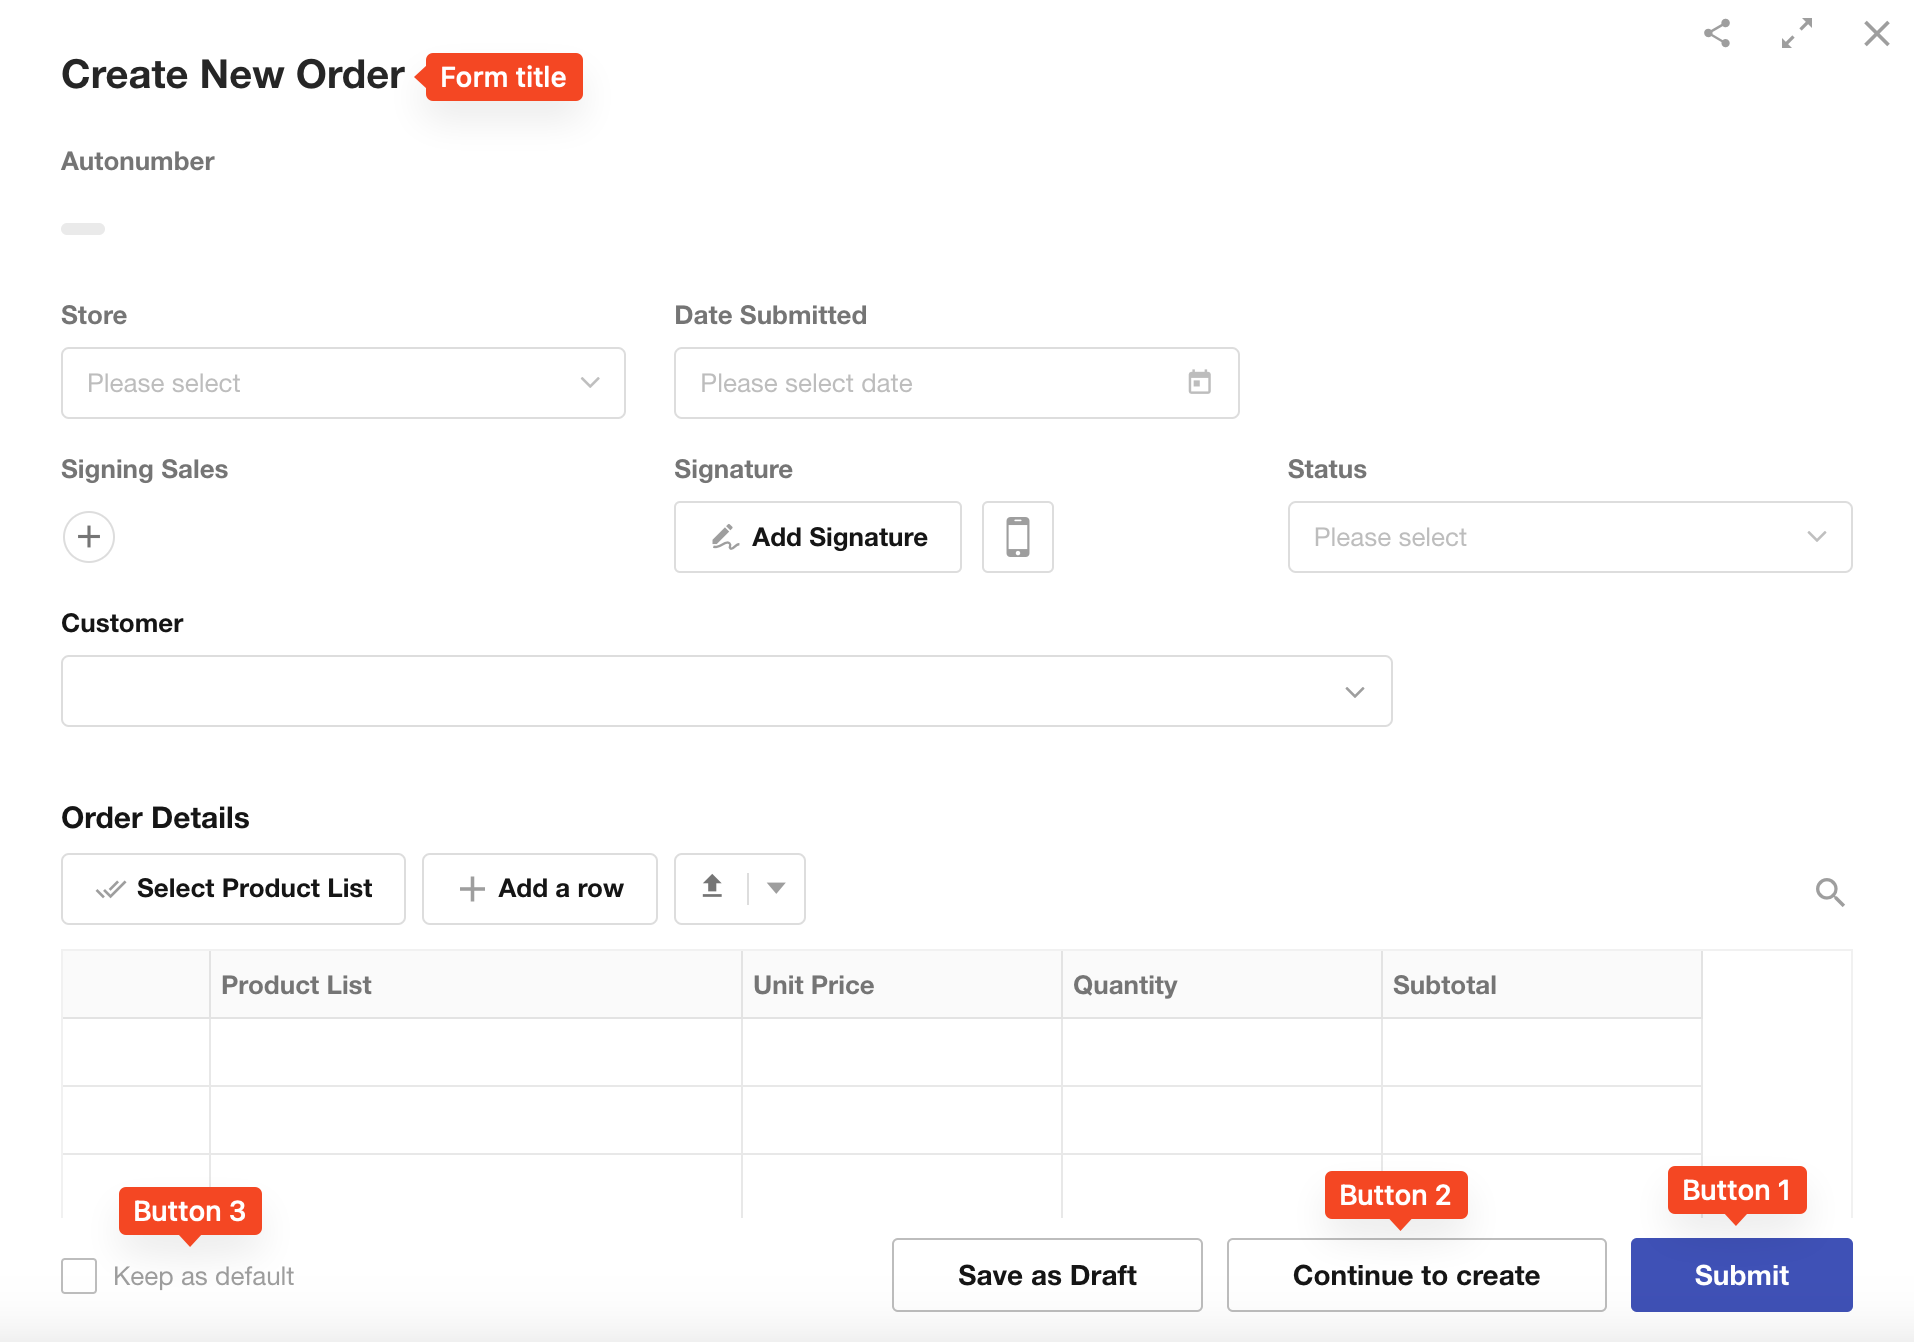
Title of the record creation page (form title)
-
The [Save as draft] button
-
Default "Submit" button (Button 1)
Customize its name and post-submission action.
-
"Continue to create" Button (Button 2)
Customize its name and post-submission action.
-
Retain previously entered content (Button 3)
Toggle whether to preserve field values from the last submission.
1. Record Creation Page Title (Form Title)
This title appears at the top-left of the creation page (e.g., set as "Create Sales Order").
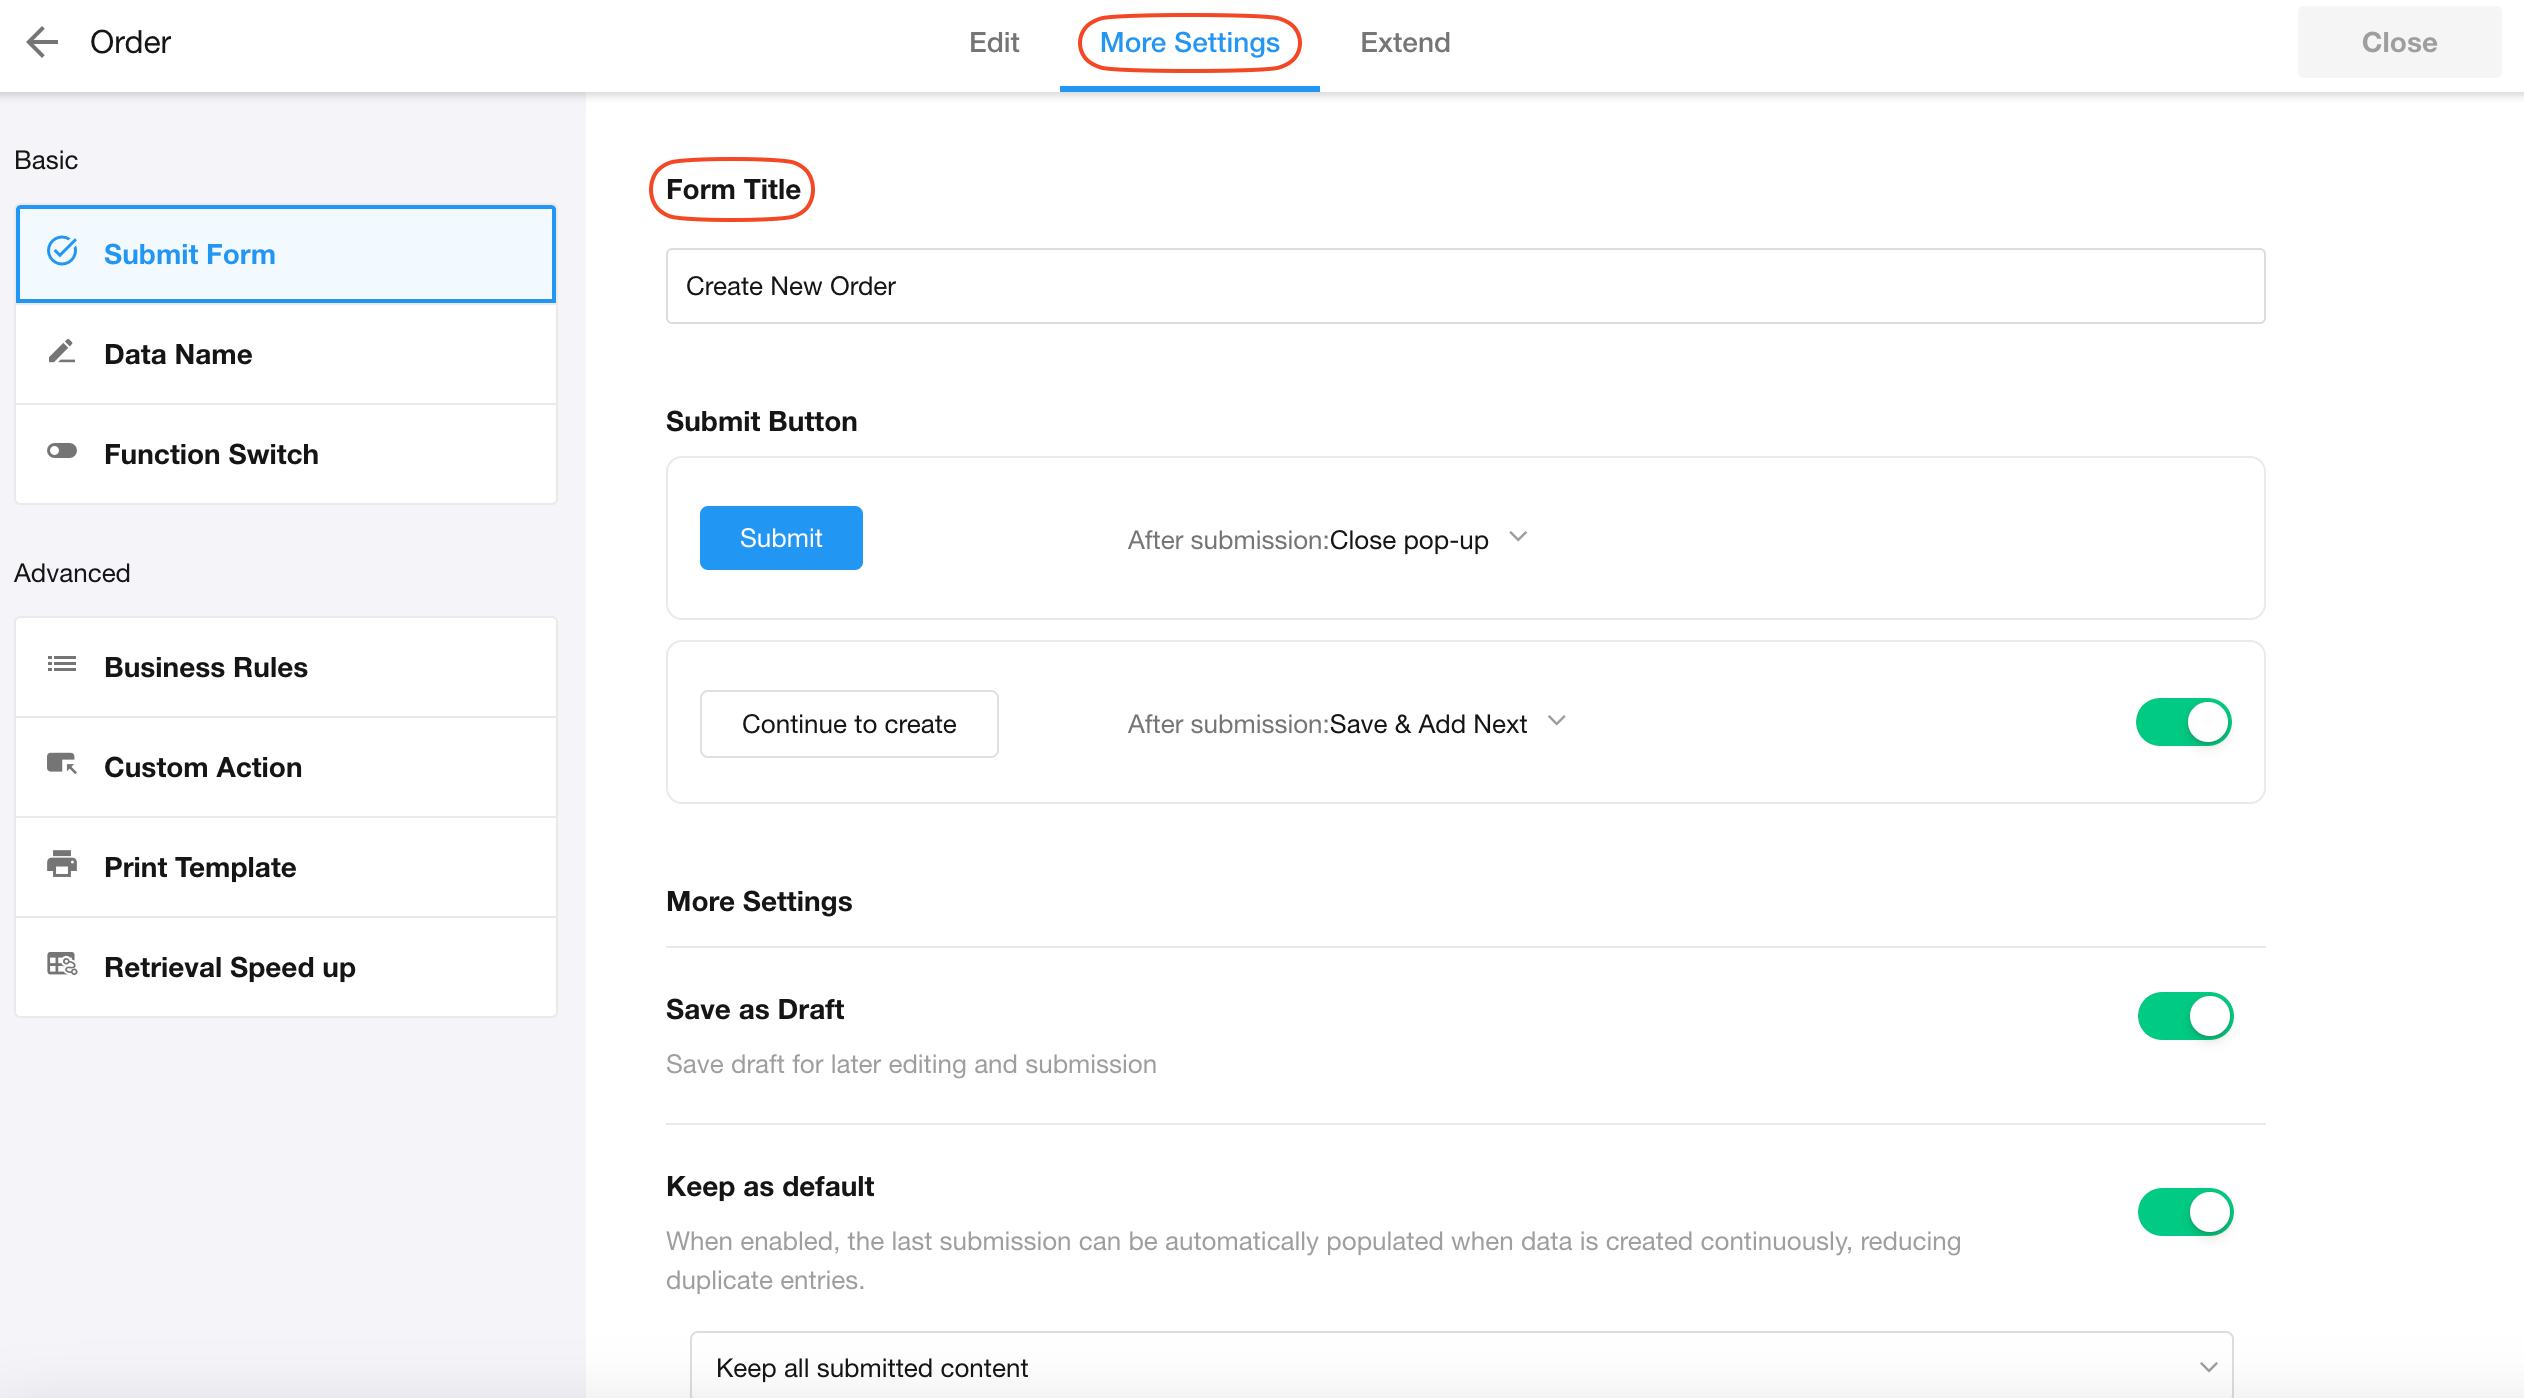
As shown below:
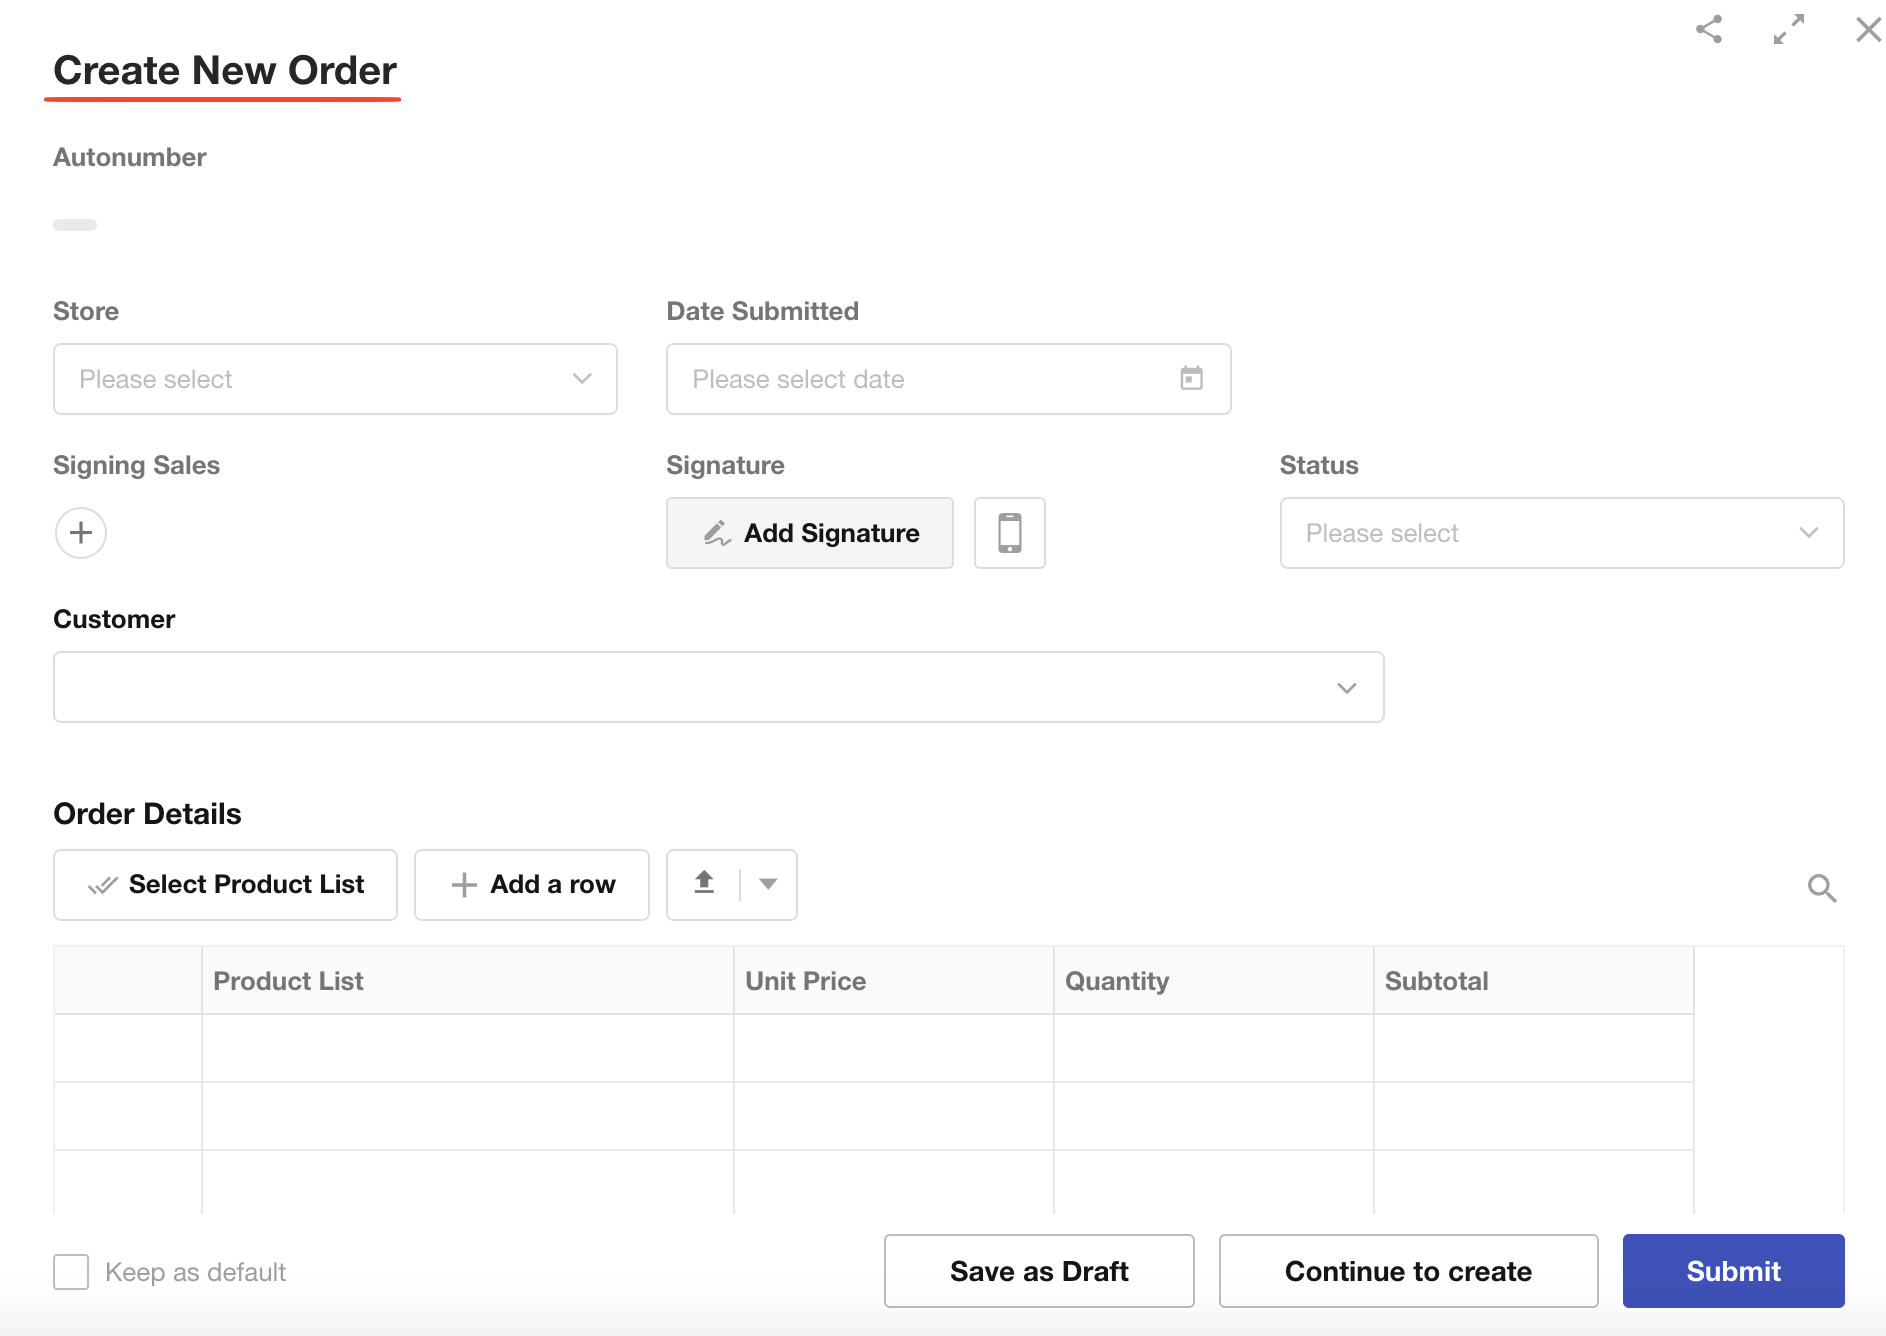
The record name setting can also modify the title of the record creation page, with the following priority for title display:
Form Title > Record Name > Record (by default)
Taking an Order worksheet as an example, the title of the record creation page may appear in these three ways:
-
"Submit New Order" (when form title is set)
-
"Create Order" (when no form title is set but record name is configured as "Order")
-
"Create Record" (when neither form title nor record name is configured)
2. Save as Draft
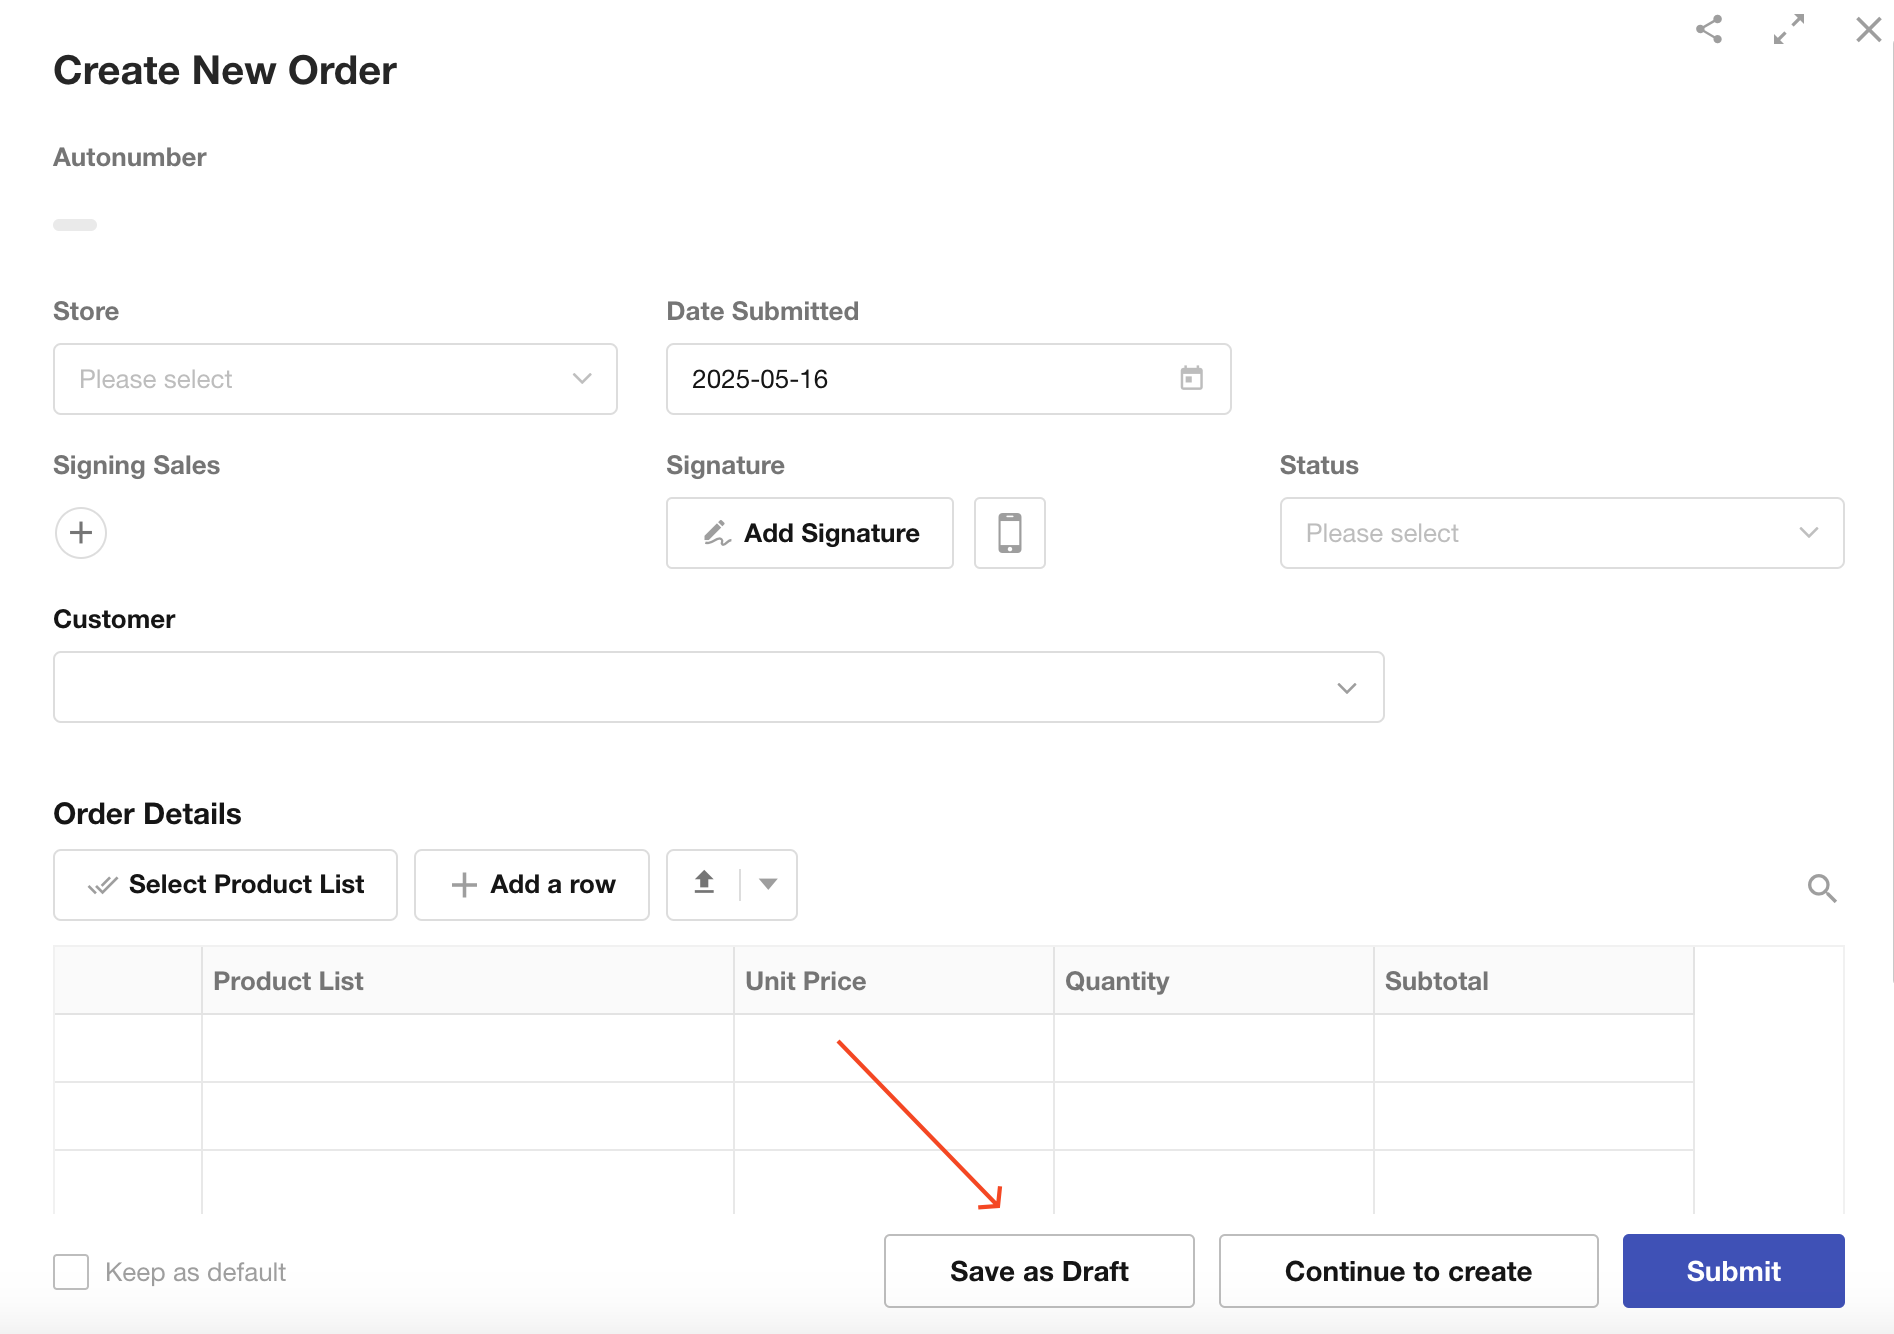
When drafts are enabled (default for new worksheets), a "Save as Draft" button appears on the record creation page.
Partially filled records can be saved to the Draft Box by clicking "Save as Draft".
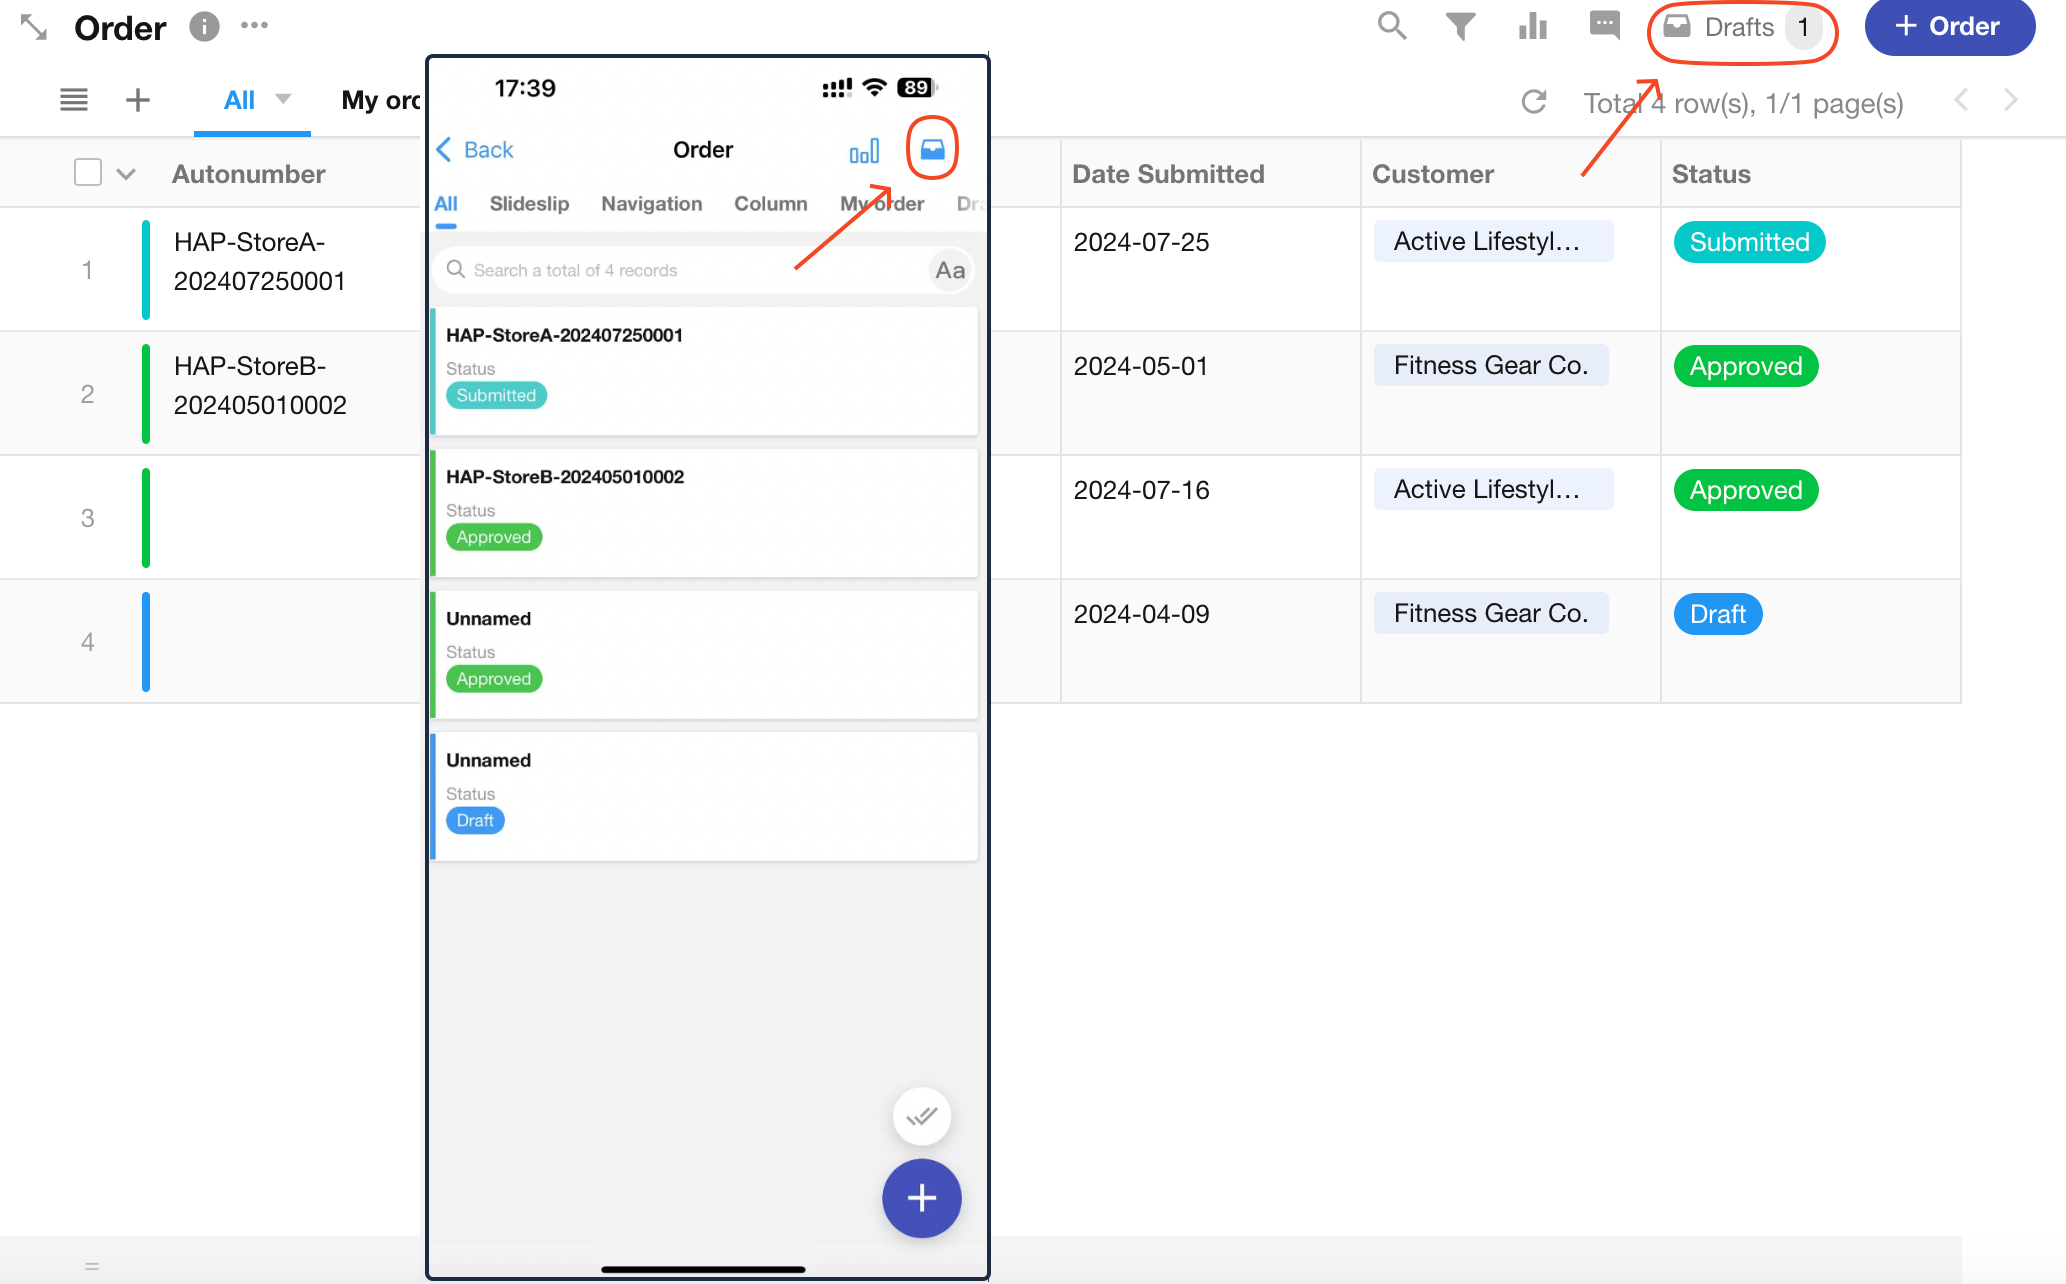
Draft Box Access:
Draft records can be reopened, edited, and either resaved as drafts or submitted.
Rules for Draft Records:
- Users only see their own drafts.
- Drafts records cannot be retrieved via workflows, worksheet queries, or API calls.
- No notifications are sent for member selections (e.g., record owners/members fields) in drafts.
- Drafts records do not trigger workflows.
- Field requirements (required fields, duplicates, formats, business rules) are not validated when saving drafts.
- Each user can save up to 10 drafts per worksheet.
- Drafts are not included in the worksheet's record count.
- Files in drafts count toward attachment storage limits.
3. Default "Submit" Button
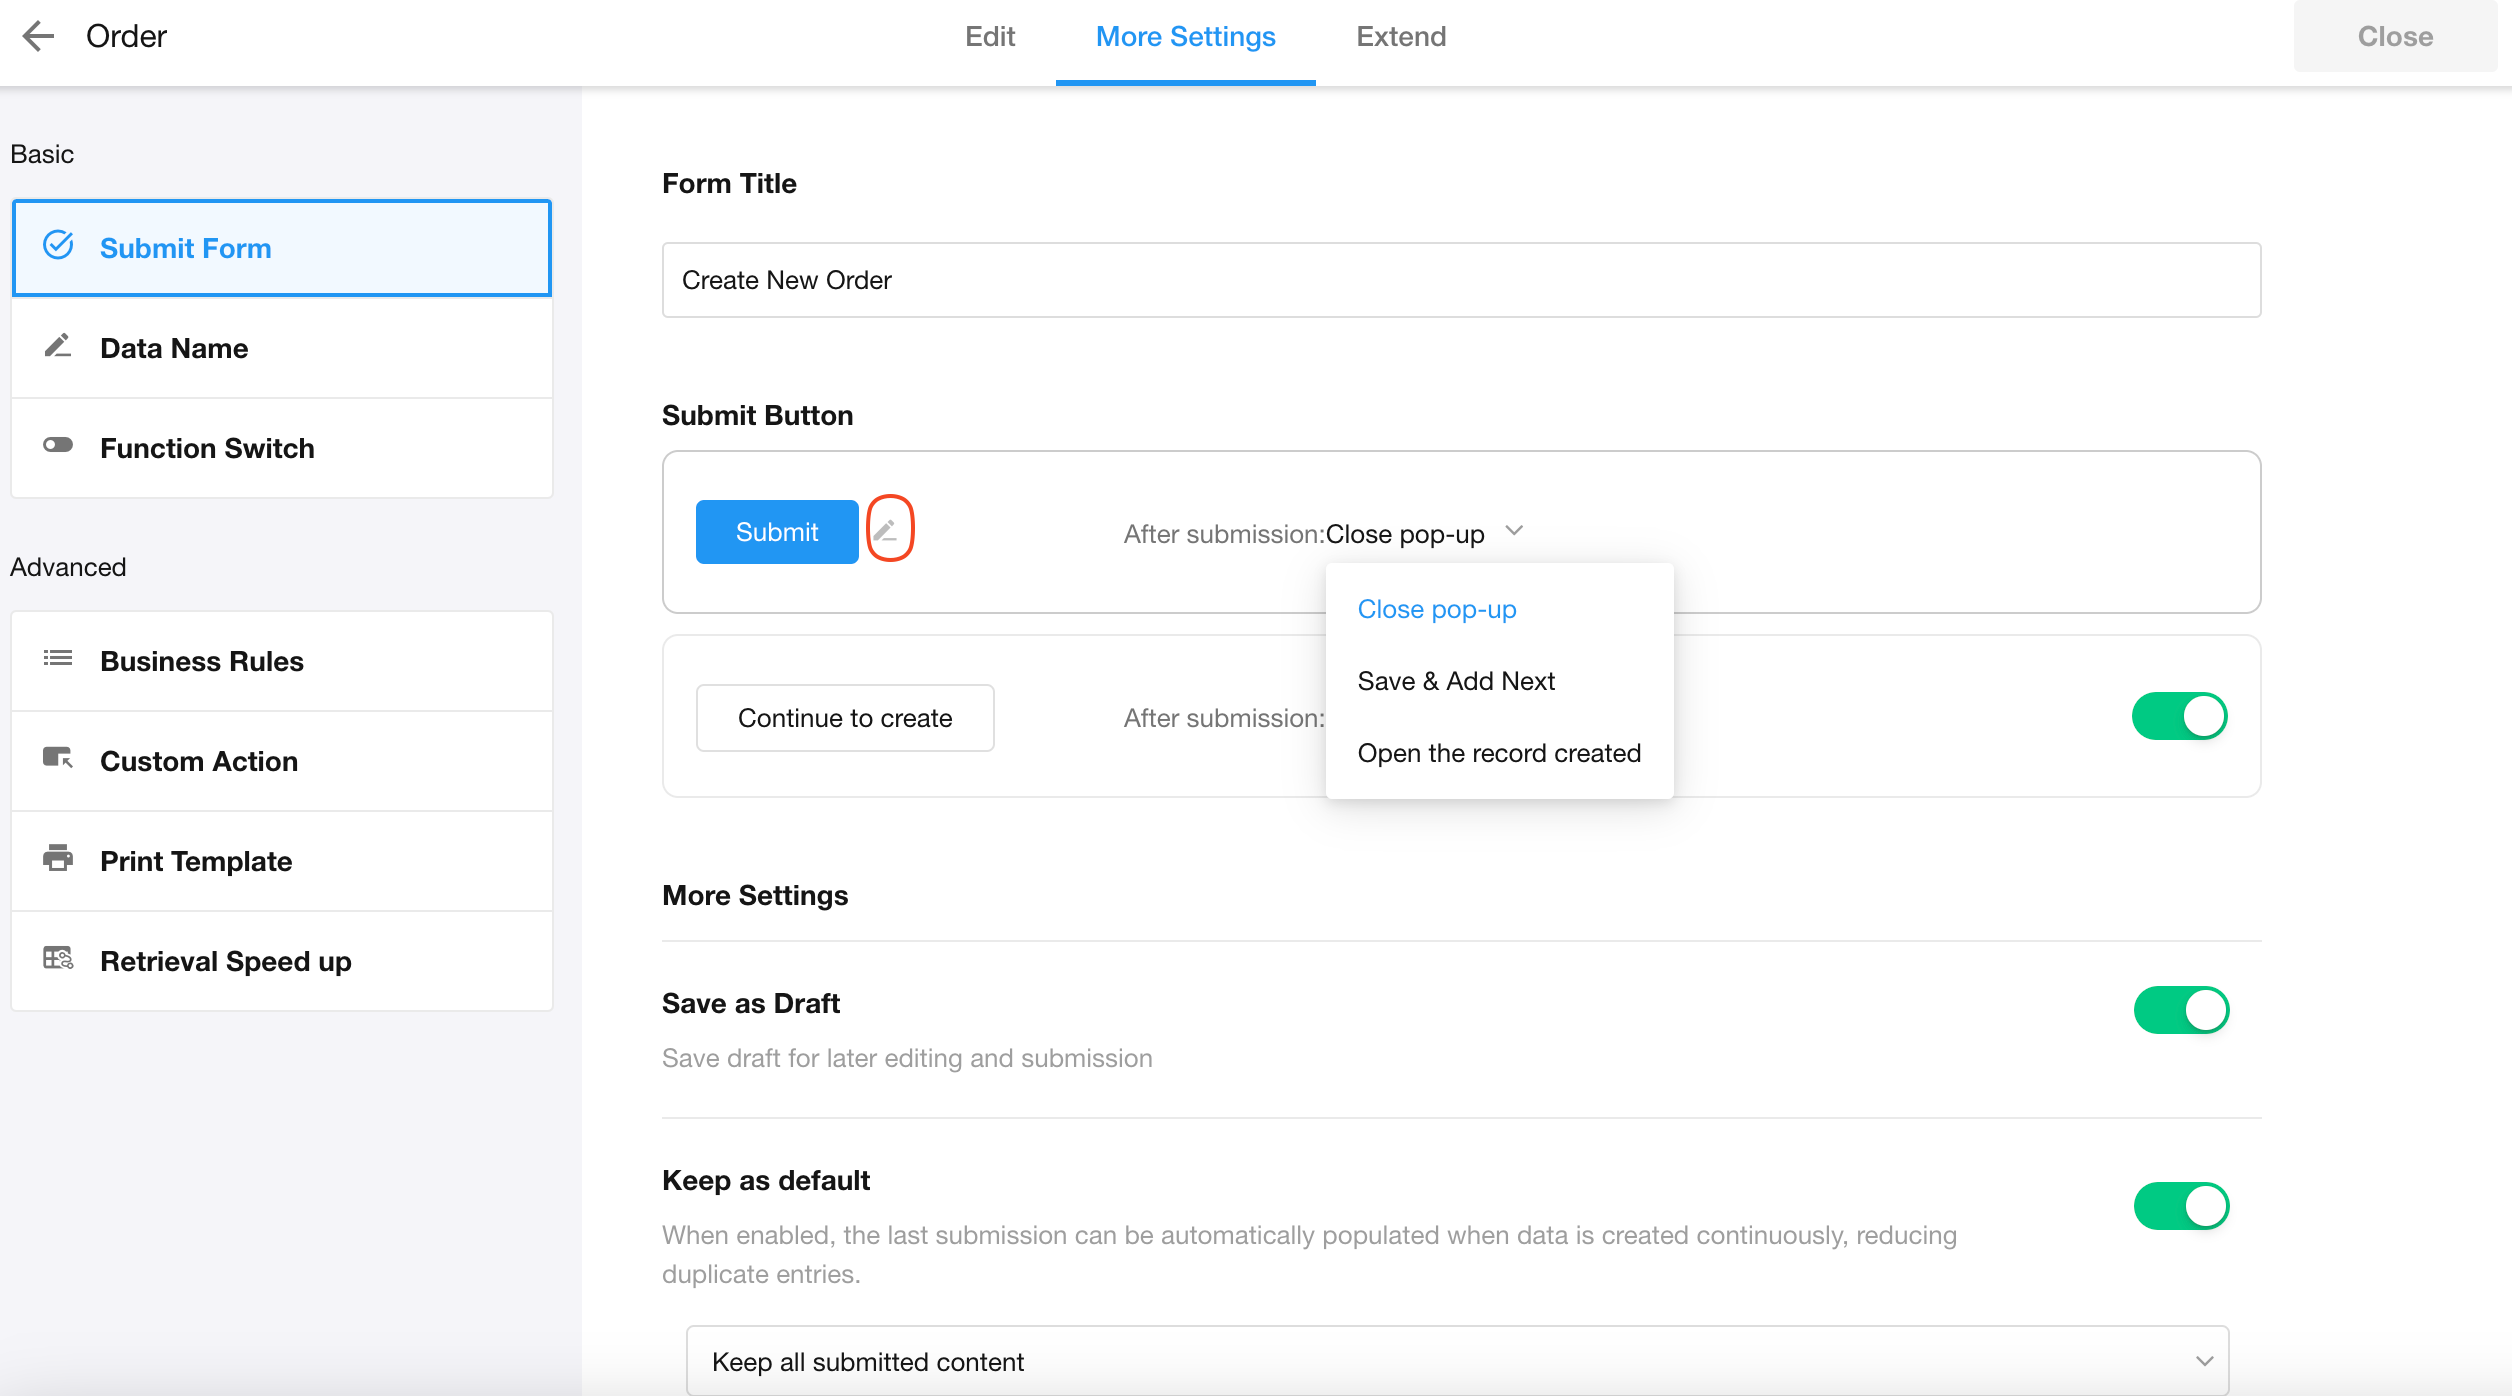
This submit button is always visible (cannot be hidden), but its name and post-submission action can be customized.
-
Customize button name
Rename the button to reflect its action (e.g., "Submit & Close").
-
Post-submission actions
-
[Close pop-up]
Submits and closes the pop-up, ending the operation.
-
[Save & Add Next]
Keeps the creation page open to add another record.
-
[Open the created record]
After submission, the newly created record will open directly in the specified view, allowing users to post comments or trigger custom buttons. The displayed fields and buttons on the record details page will adhere to the view's configuration.
-
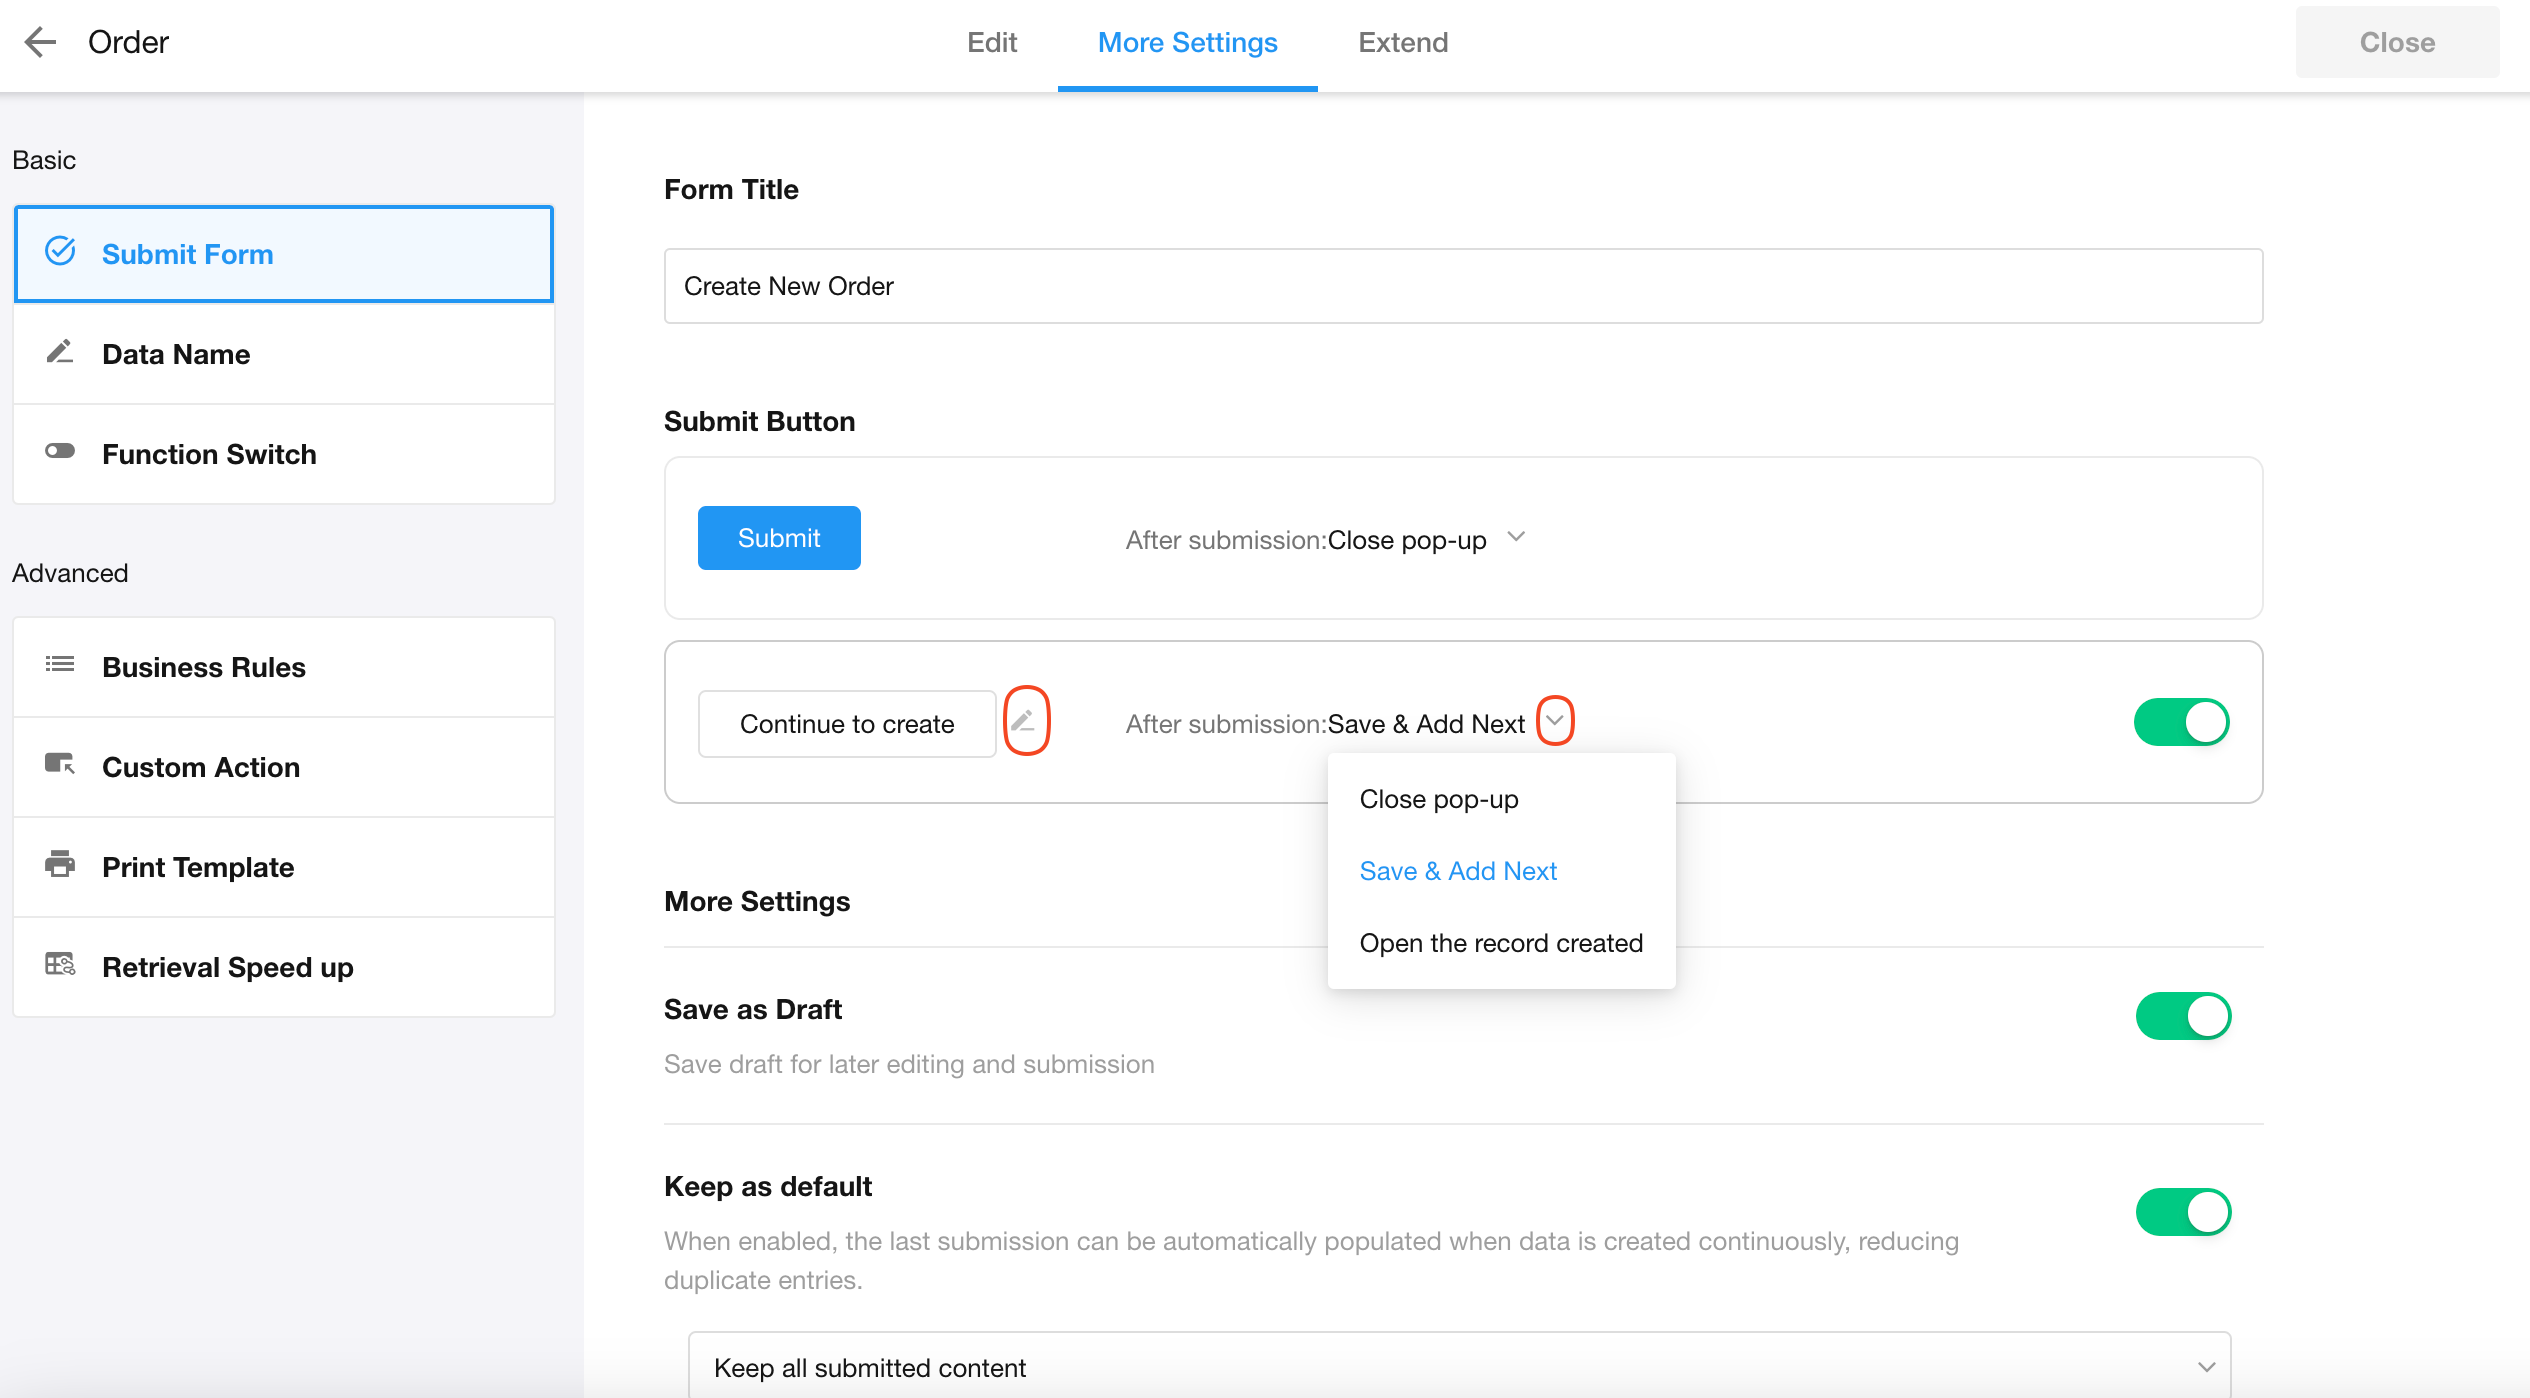
4. "Continue to Create" button
This auxiliary button can be hidden when not needed, and its name and actions can be customized.
5.Retain last submitted content (keep as default)
When adding multiple records with repeated field values (only needing to modify a few fields per record), enable this "Keep as default" button.
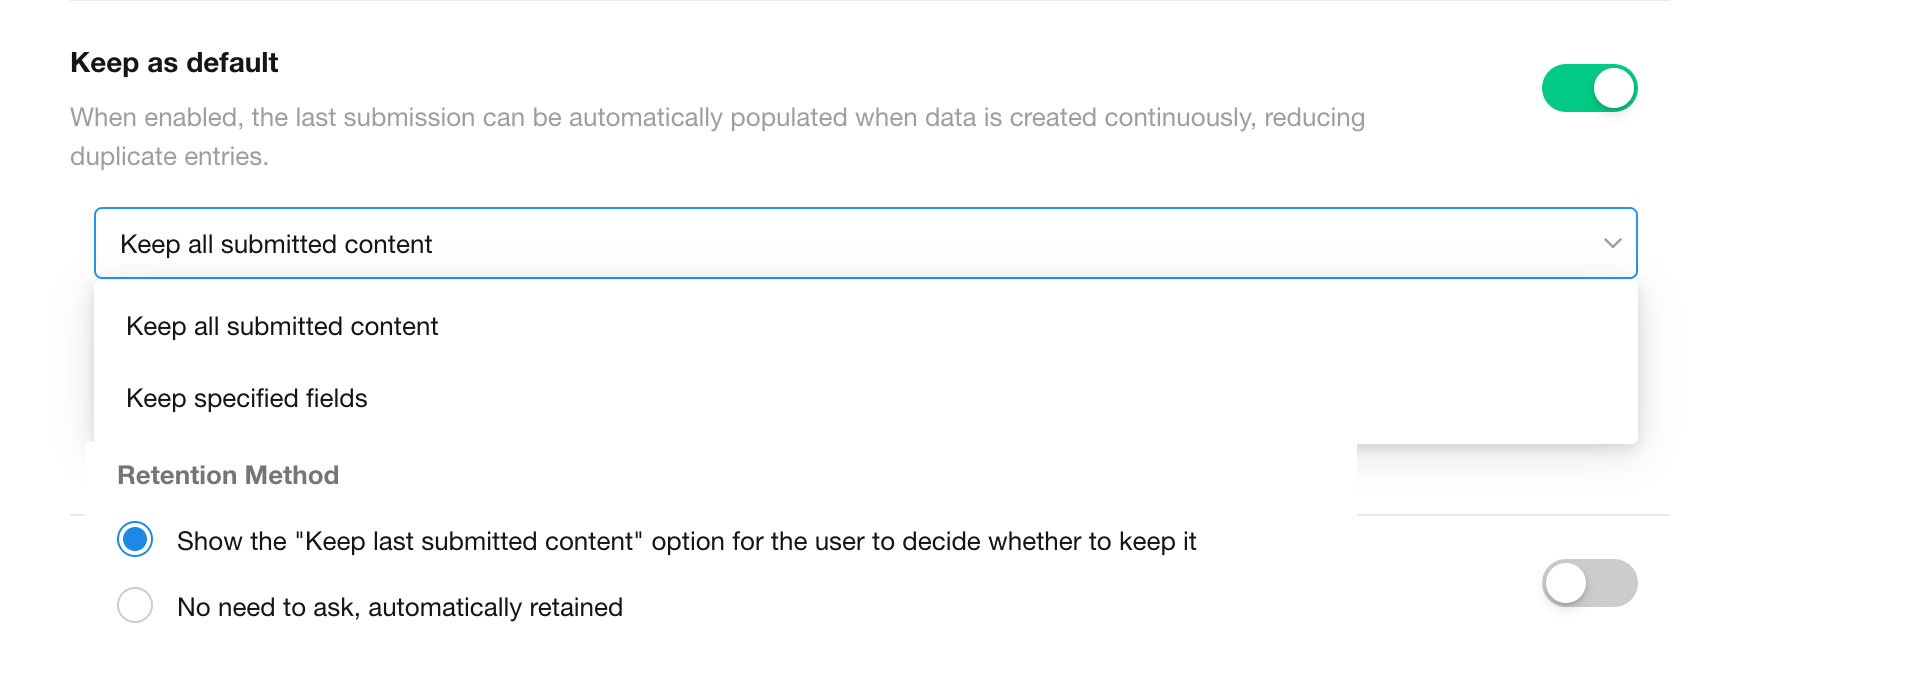
Retention Scope:
-
Keep all submitted content
-
Keep specified fields only
Retention Methods:
-
User prompt (Checkbox)
Show the "Keep as default" option for users to decide whether to keep it.
-
Automatic retention
Automatically retains fields content when "Continue to create" is clicked.
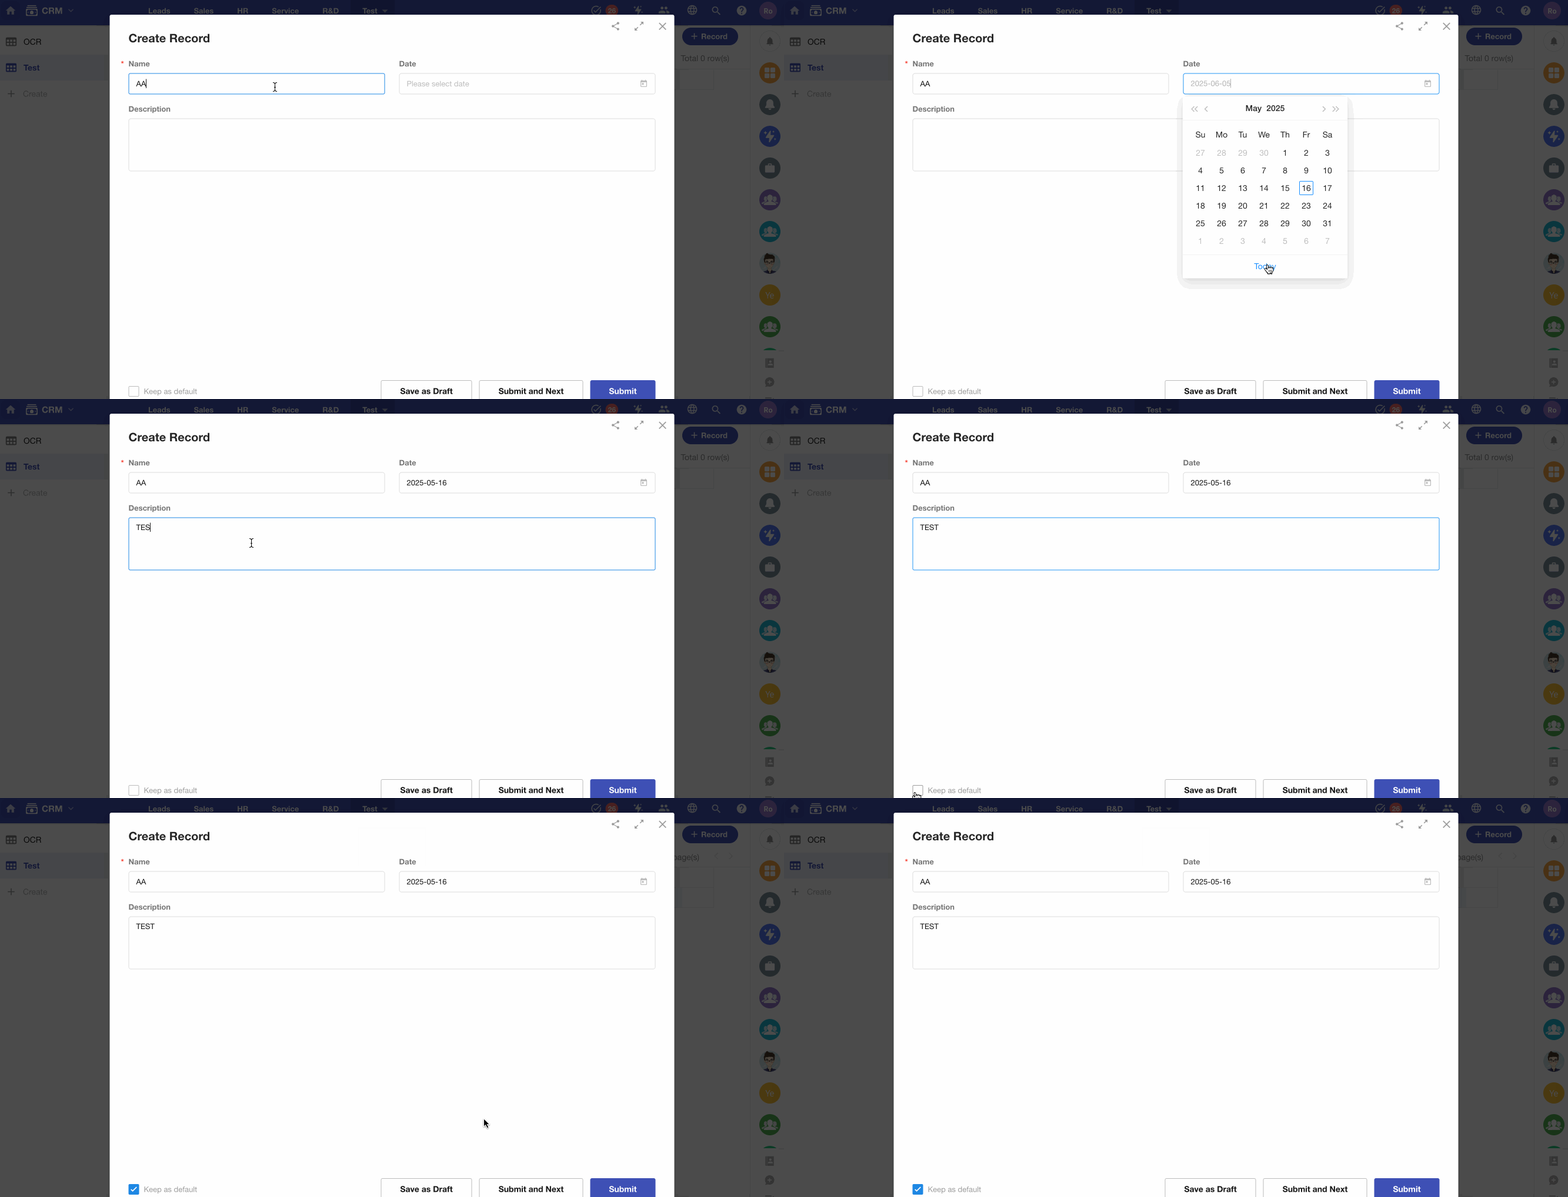
Examples:
Retains all fields, and requires user confirmation:
Retains specified fields, and automatic retention:
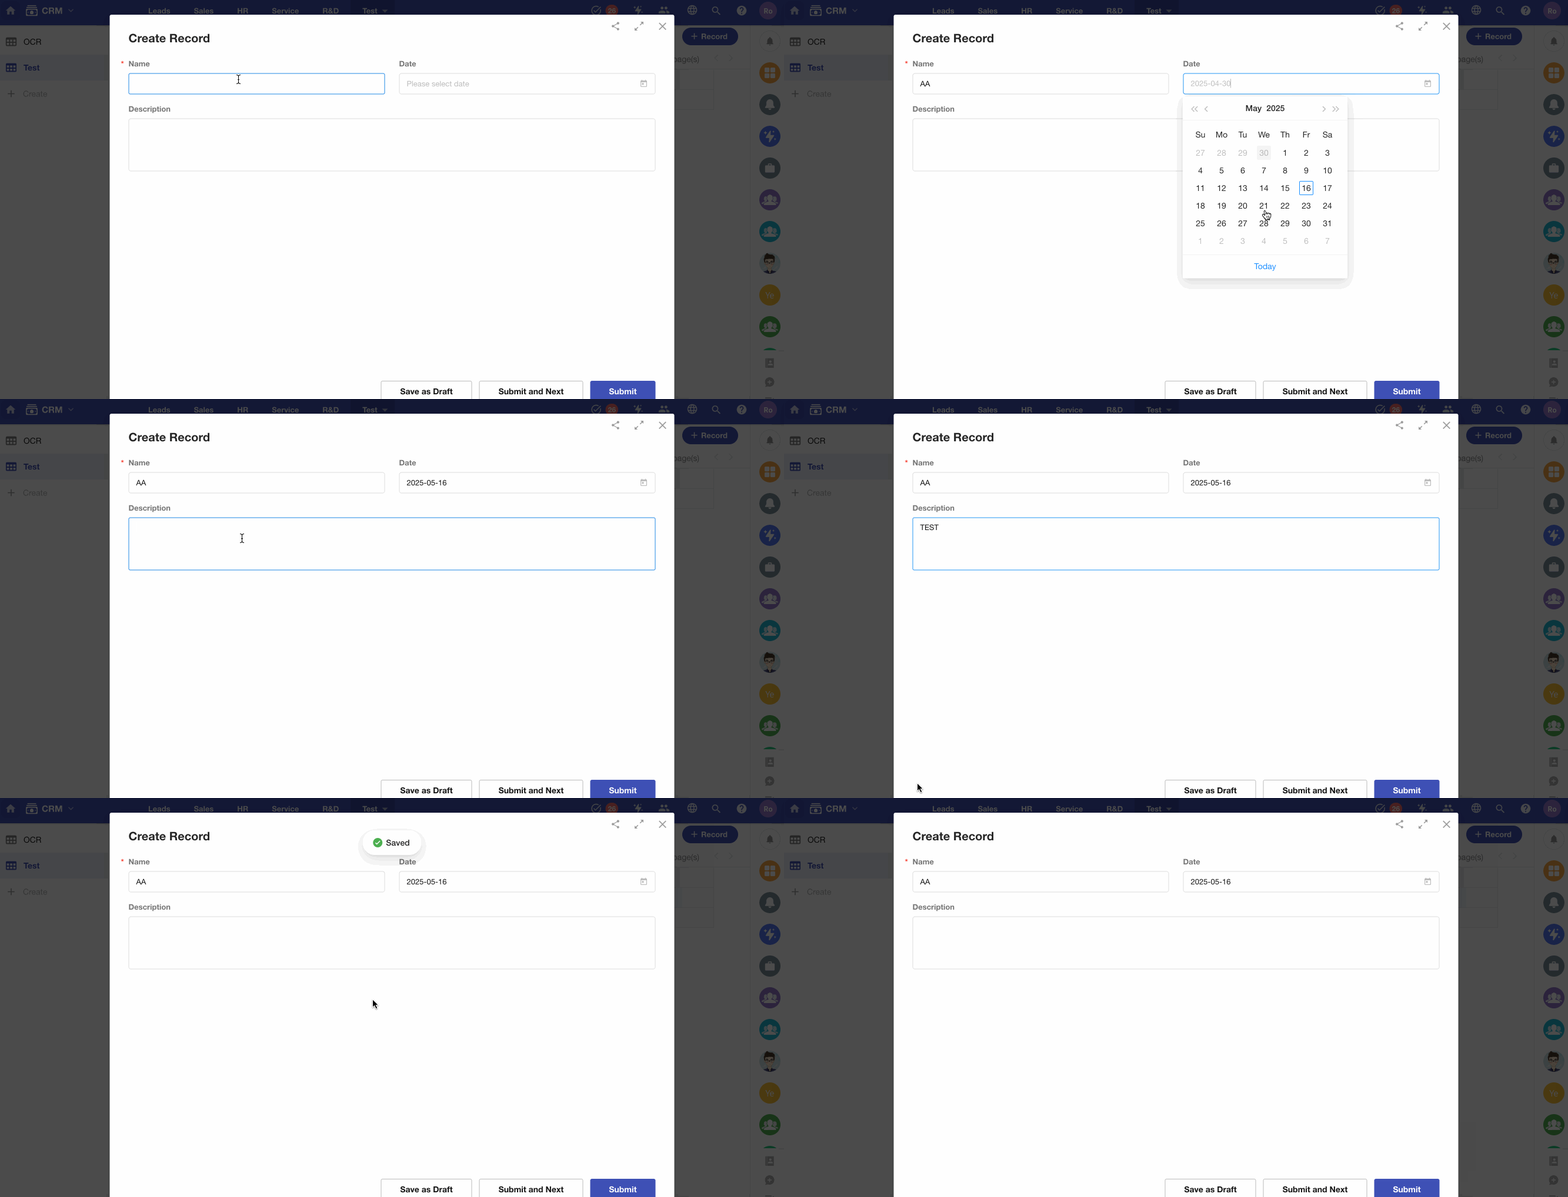
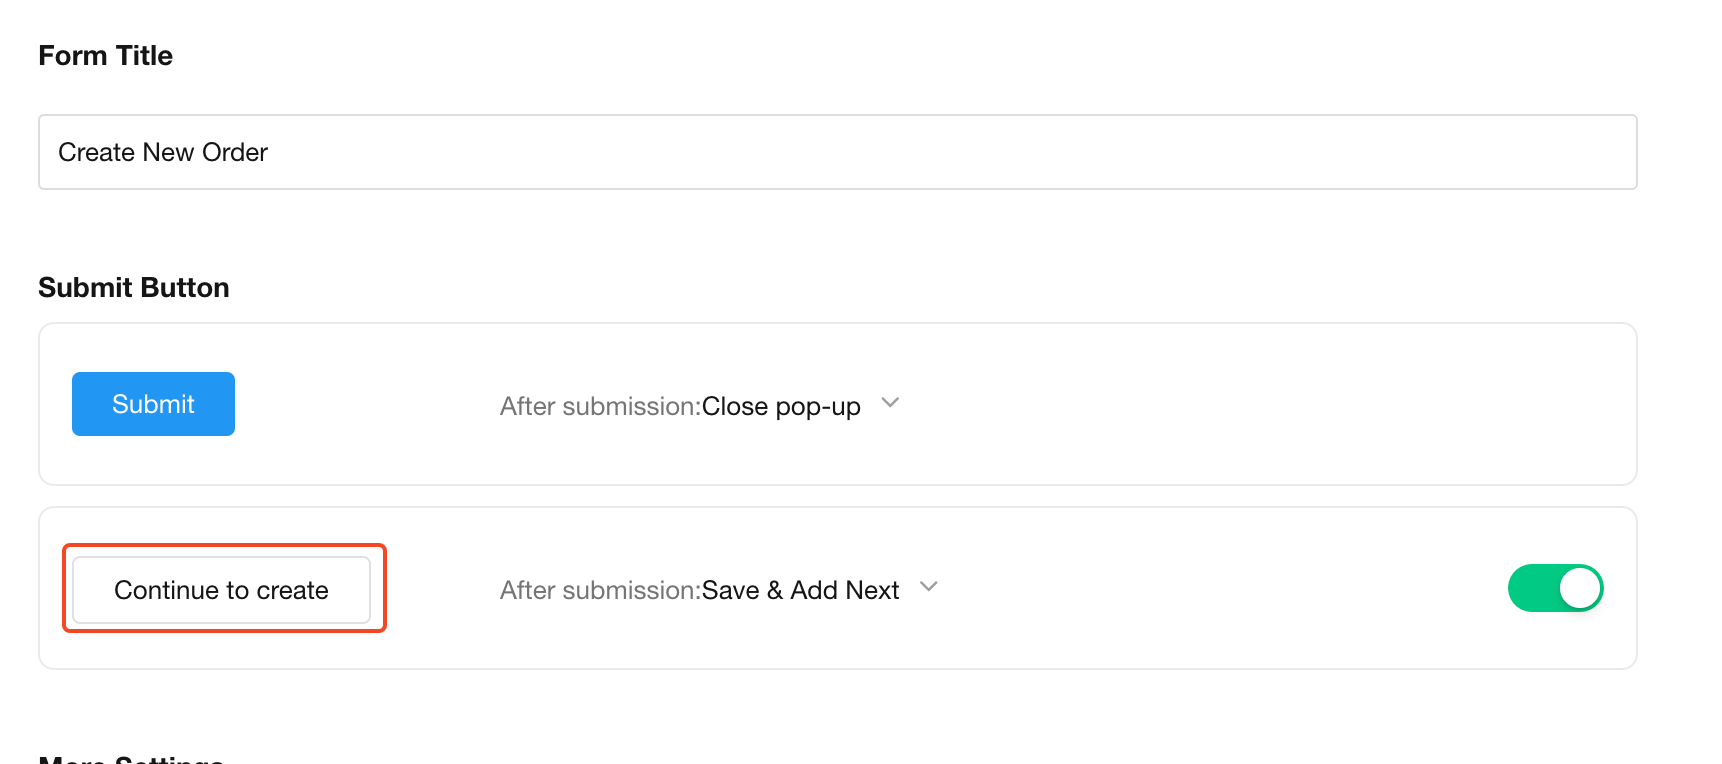
Settings:
-
When manually clicking "Continue to create" button.
-
When "Create next record after submission" is enabled for text/file/relationship fields in field settings.

6. Double confirmation before submission
After clicking the submit button, a secondary confirmation can be enabled. Both the confirmation prompt and buttons support customization.
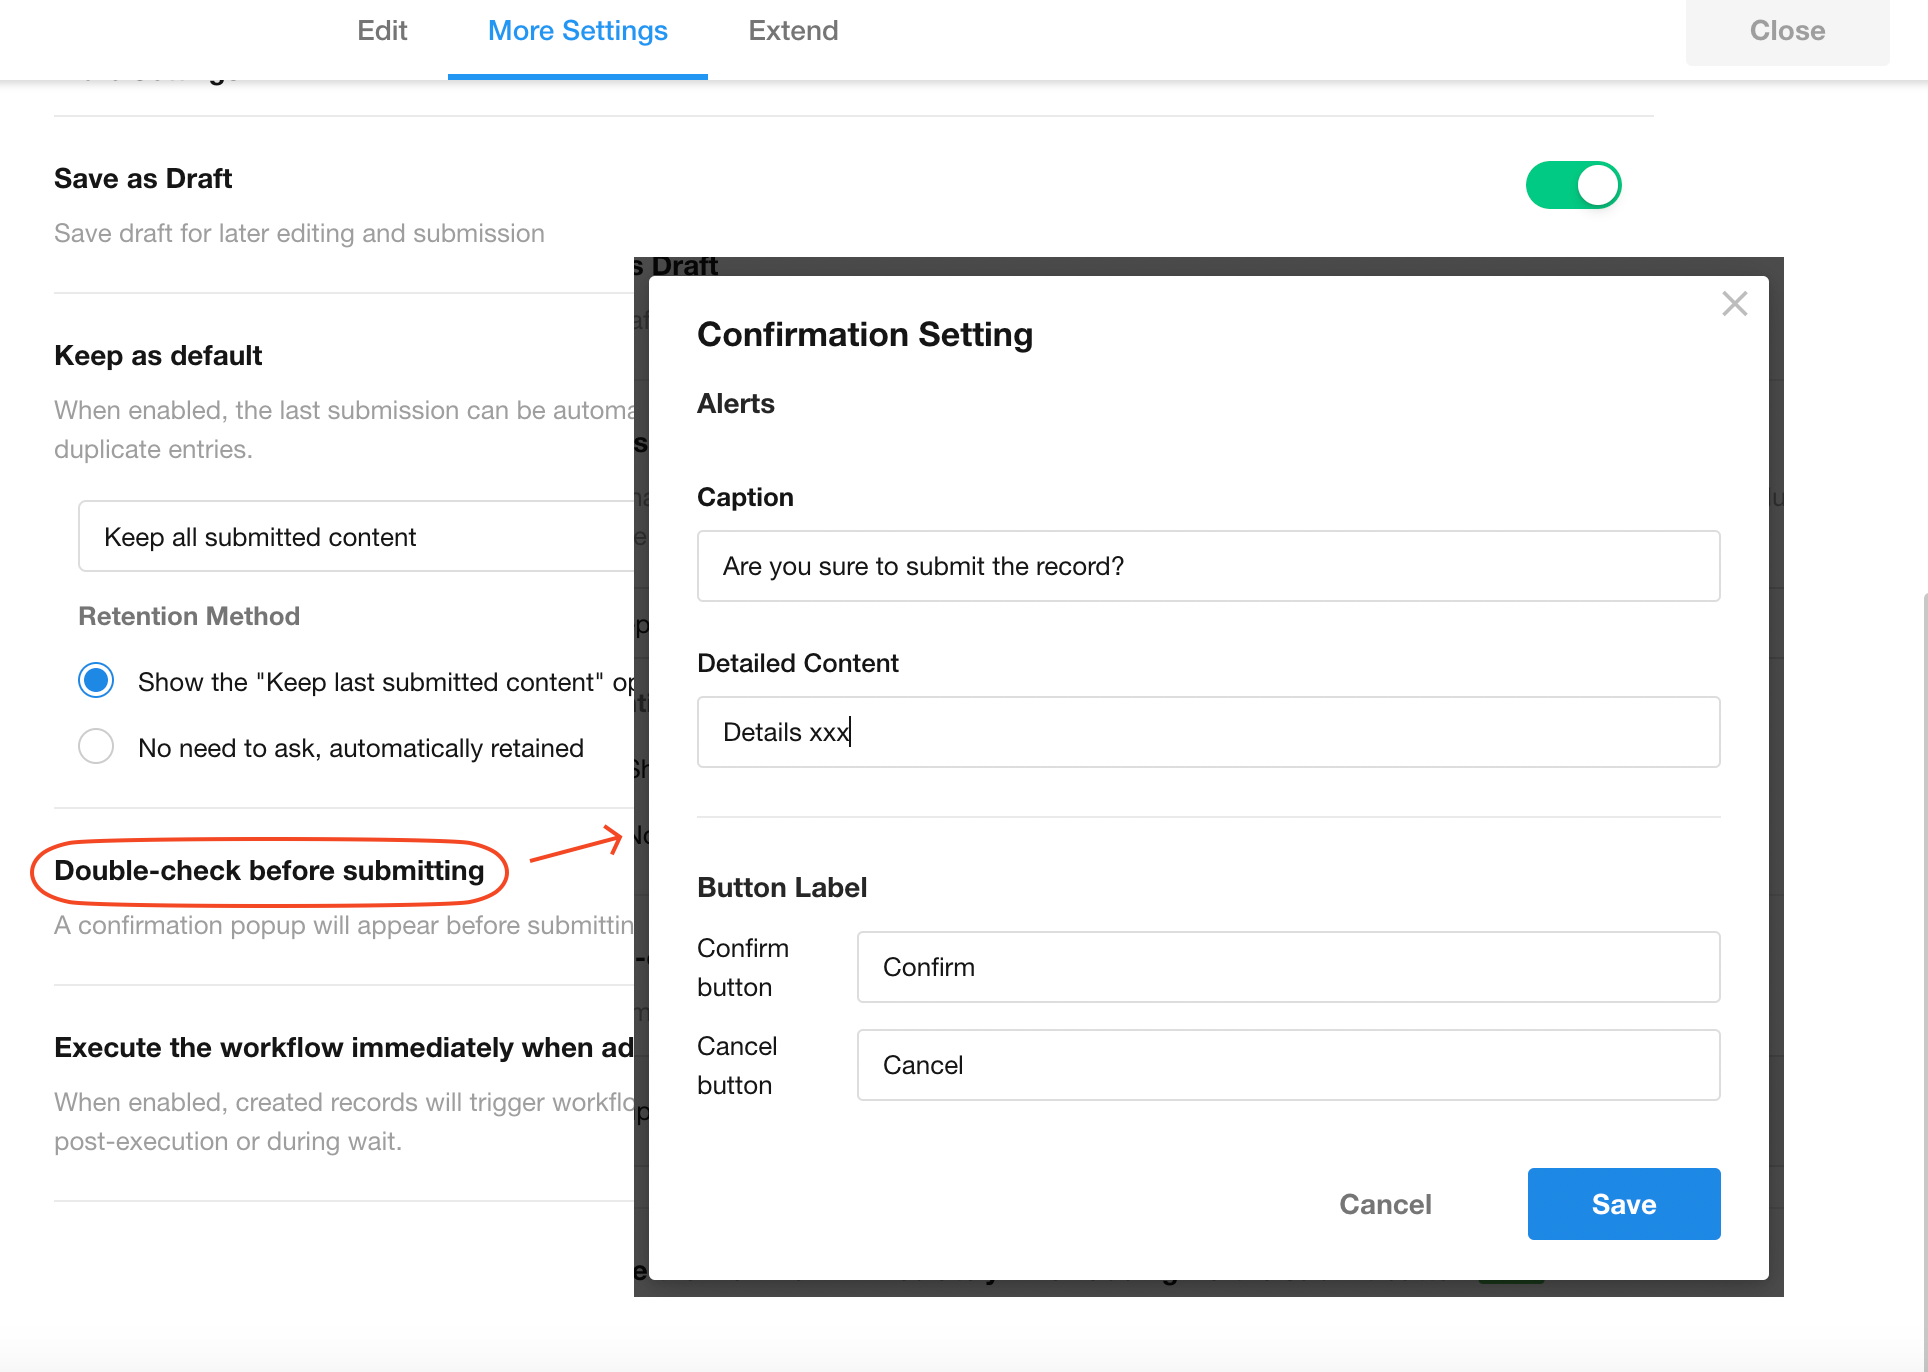
Example:
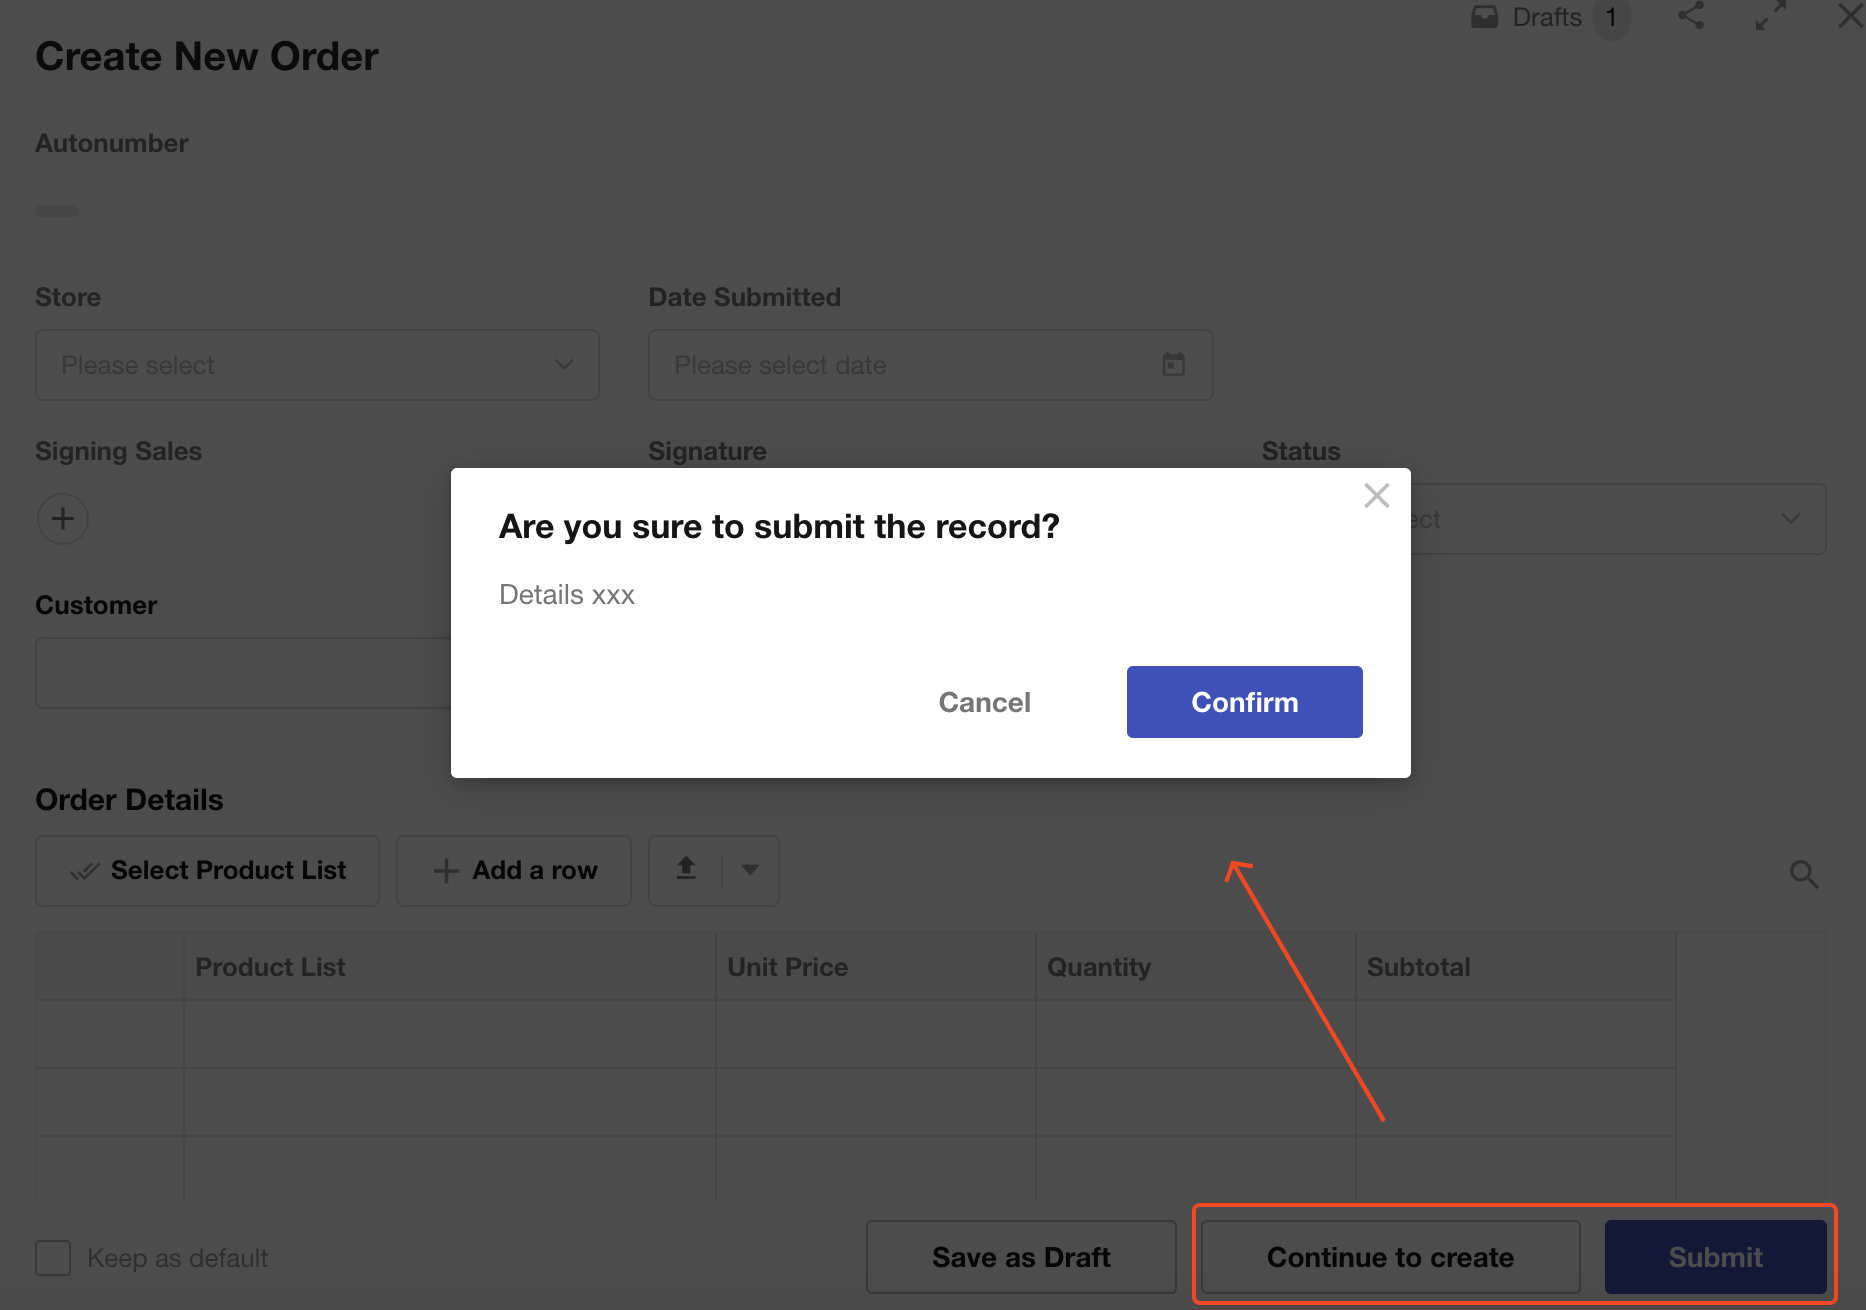
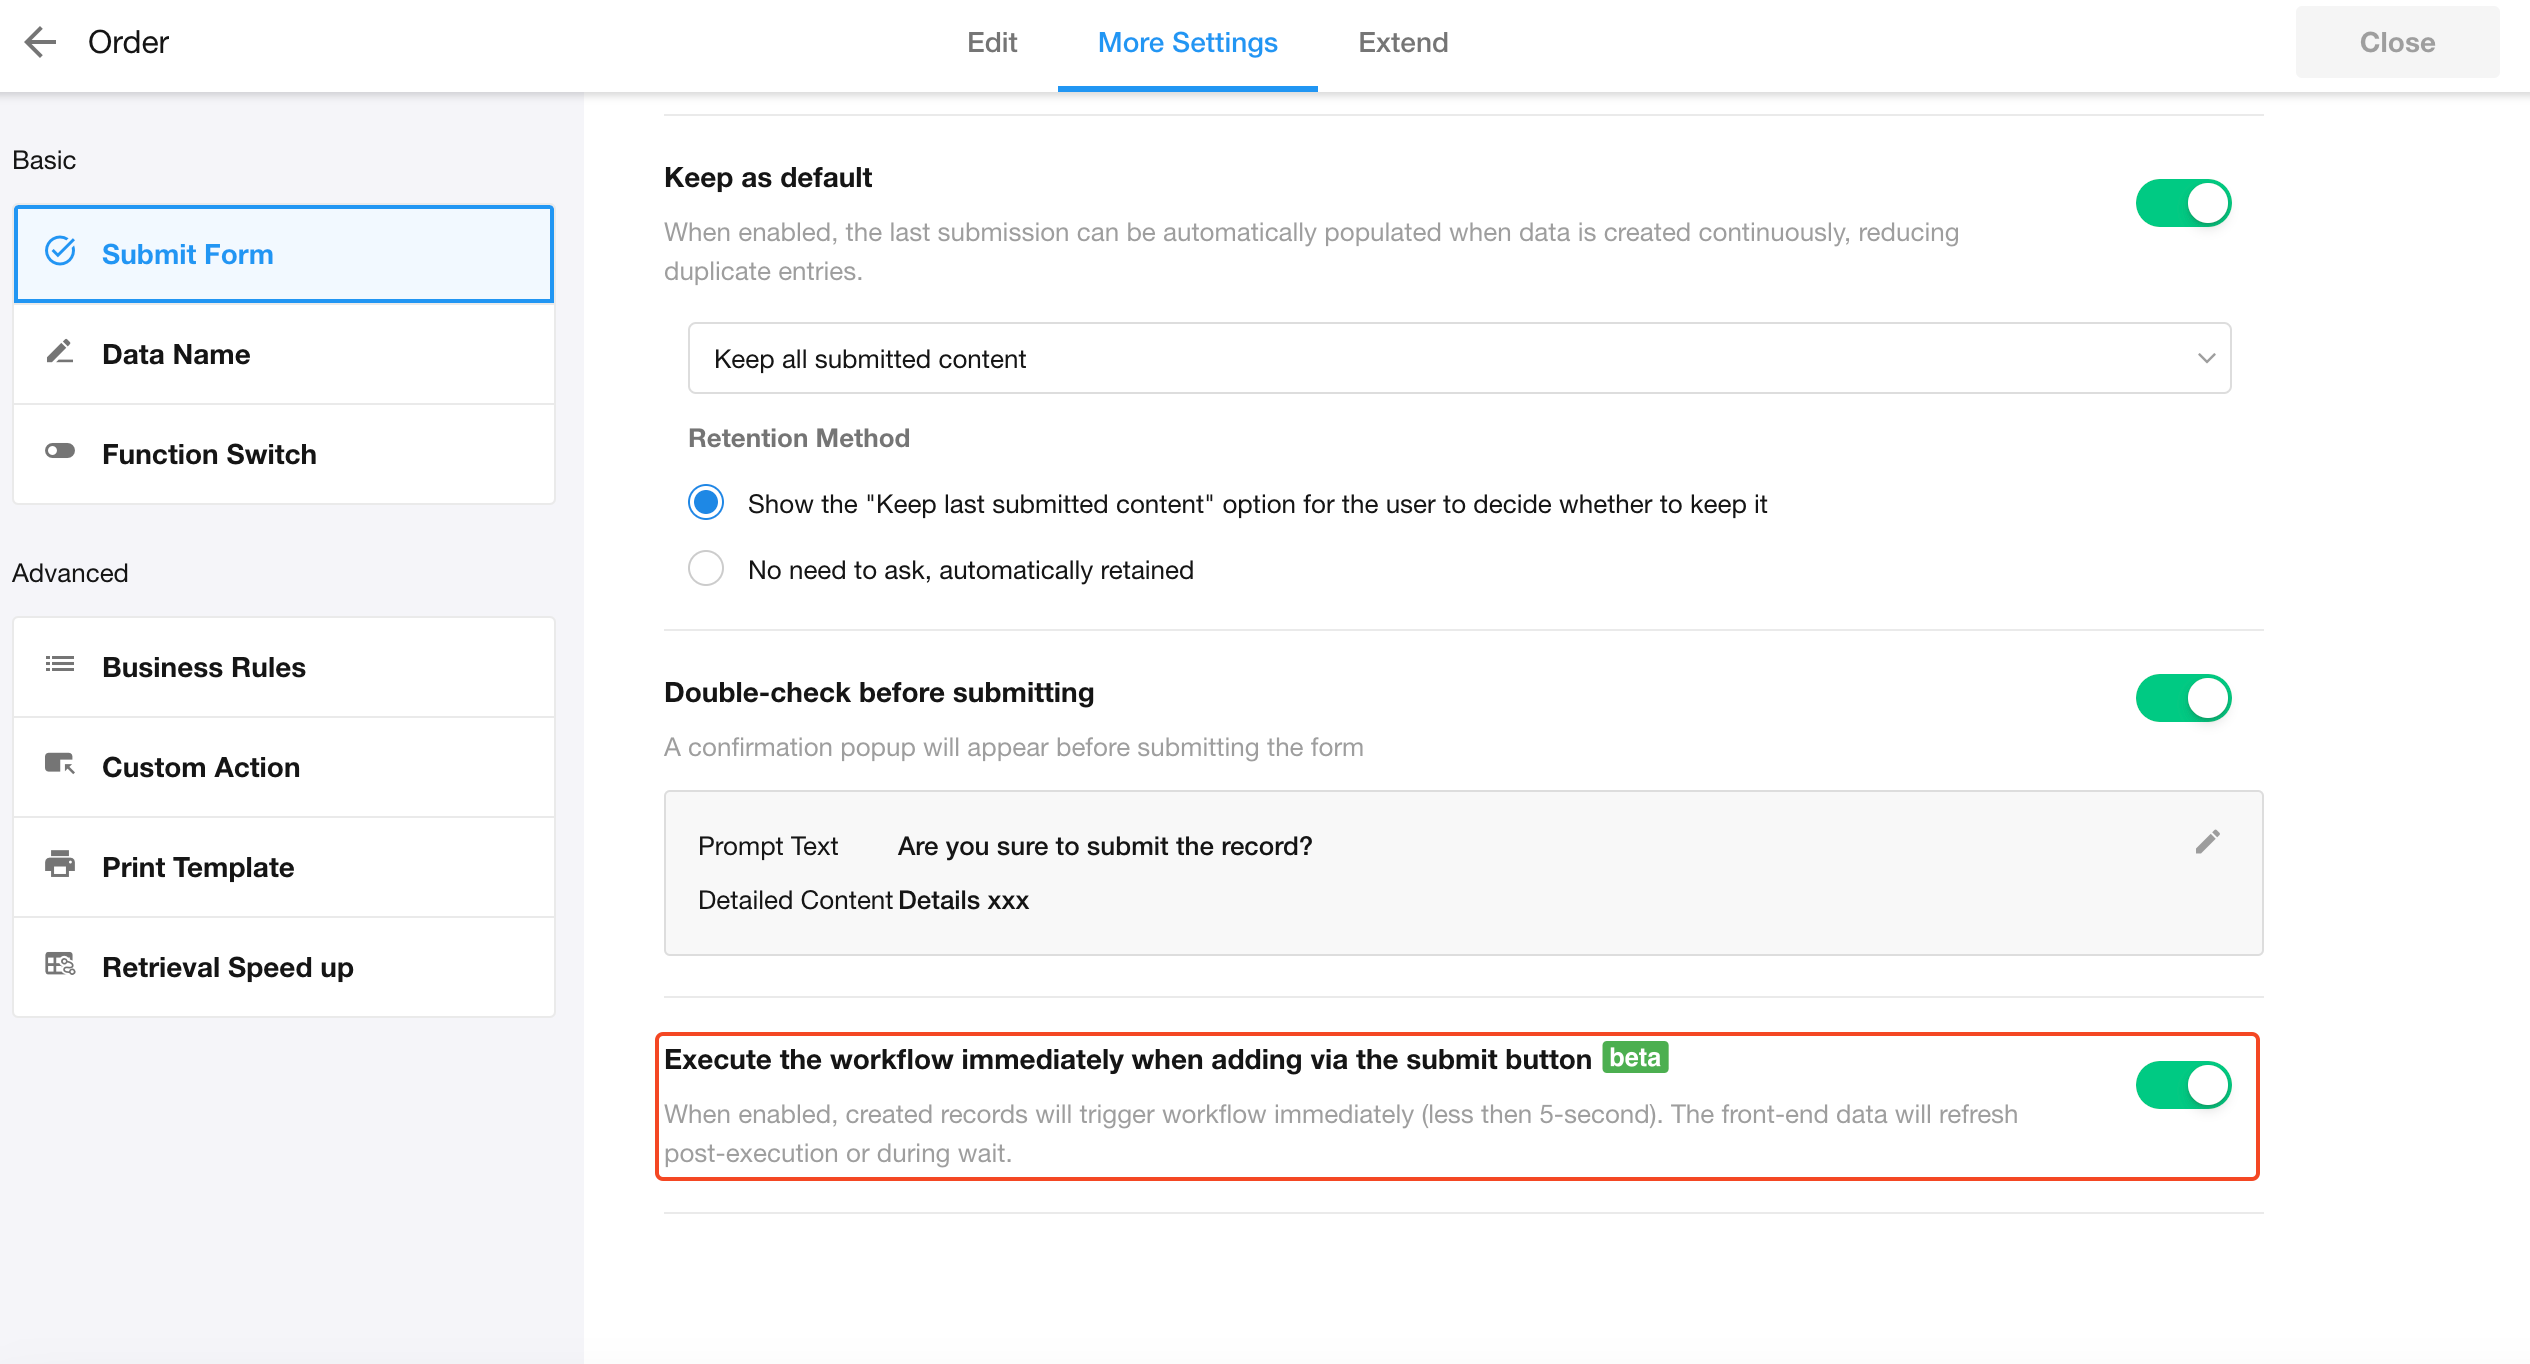
7. Immediately trigger workflow after submission
By default, workflows are triggered 5 seconds after record creation. To execute workflows immediately (e.g., for real-time data updates), enable "Trigger workflow immediately after submission".
Supported workflow methods: "Trigger when adding new records" and "Trigger When creating and updating records".
After triggering workflows, wait up to 10 seconds, if the user opens the new record’s details page, content refreshes automatically.
This feature only applies to records created via the "Create" button. For records added via imports, workflows, or APIs, workflows still trigger after the default 5-second delay.
