Basic Operations on Worksheet
Below are basic operations in a worksheet.
-
Edit a worksheet
-
Modify name, icon and description
-
Modify the record name
-
Copy/Delete/Restore a worksheet
-
Move a worksheet
-
Sort/Hide a worksheet
-
Set groups
-
Expand/Collapse the worksheet sidebar
1. Edit Worksheet
Click [Edit form] to enter the form editing page where you can add or edit fields.

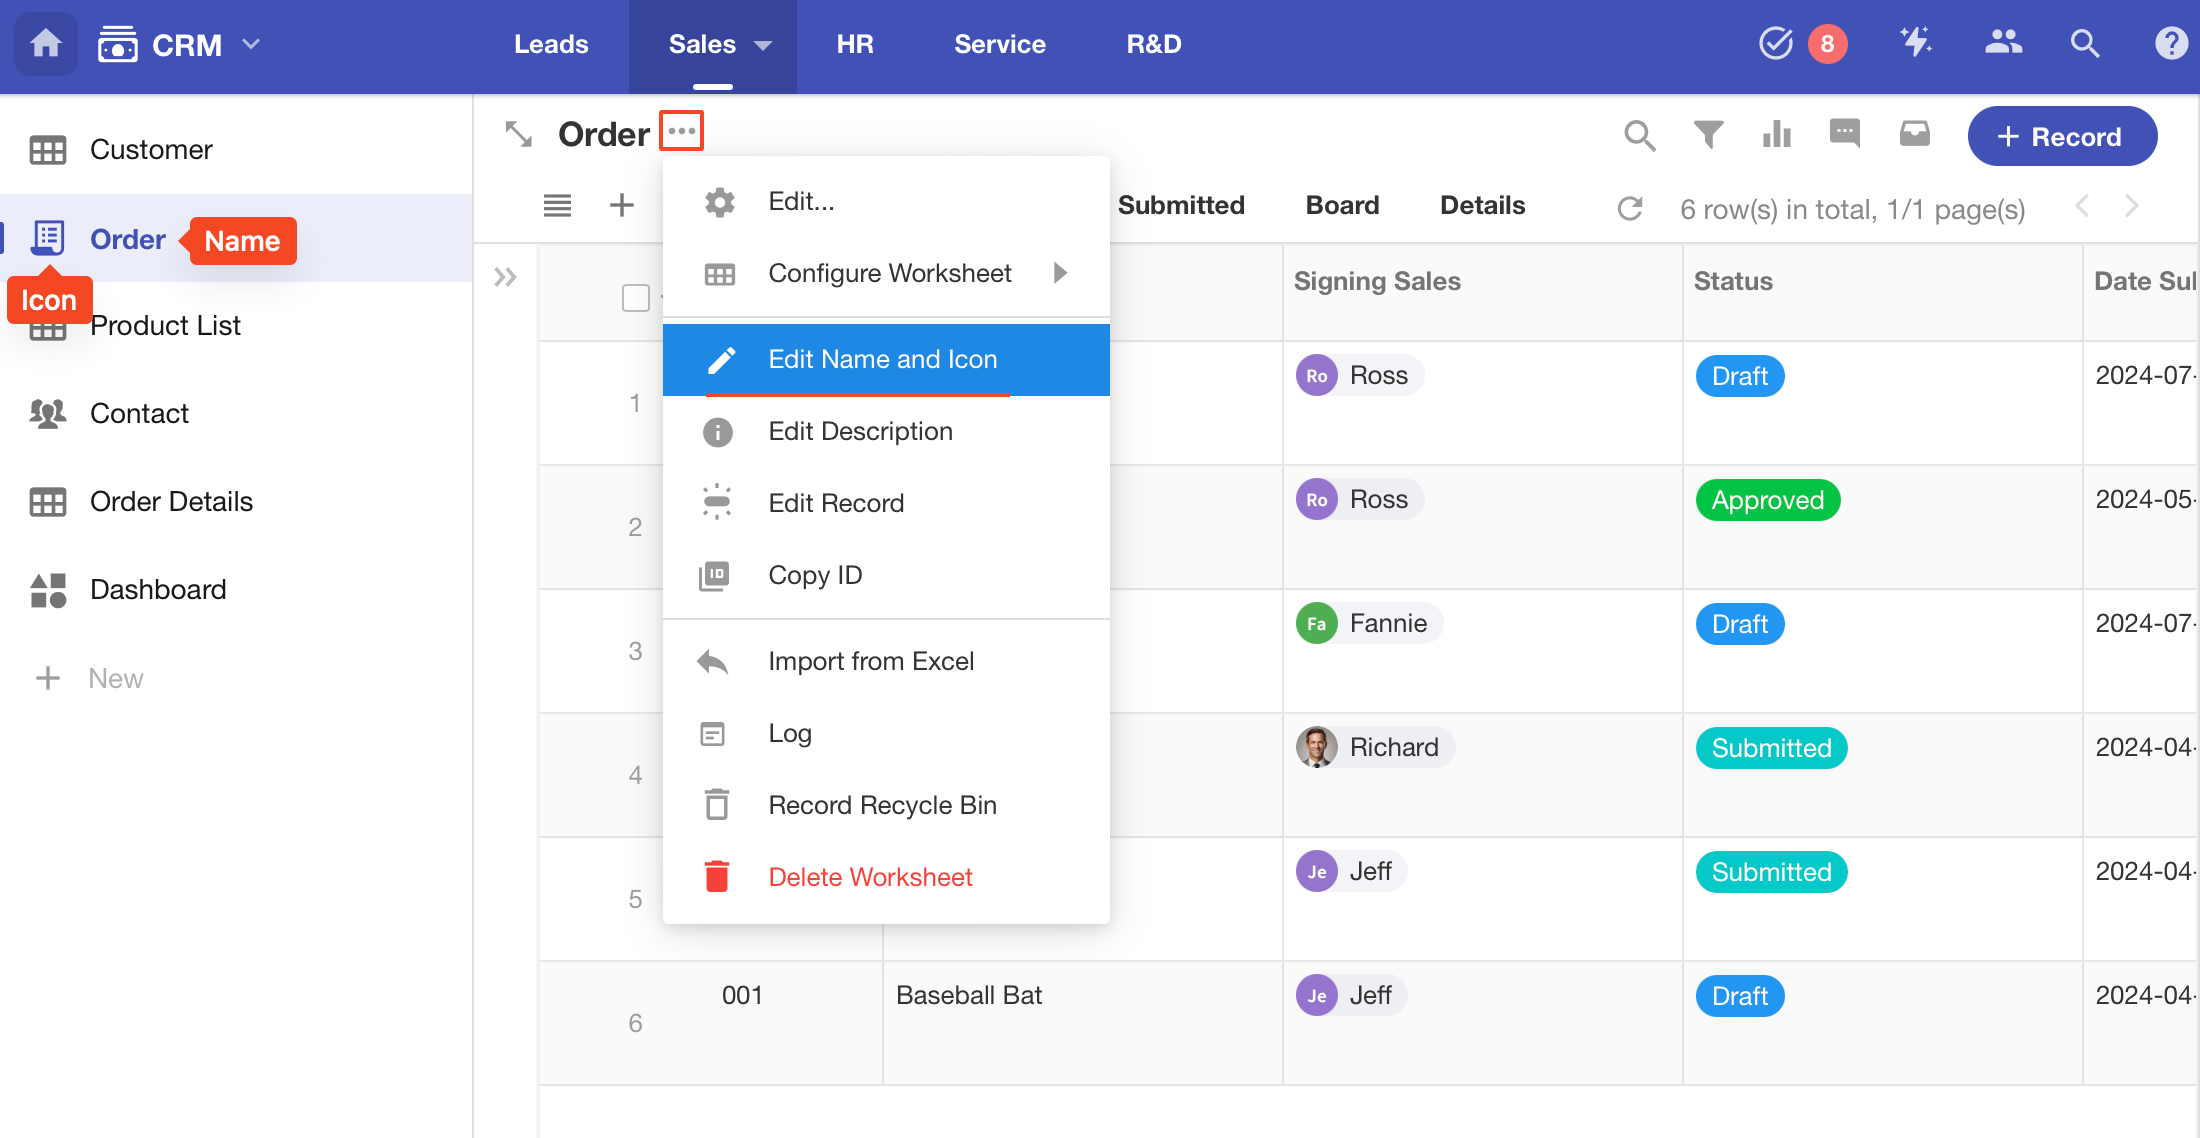
2. Modify Name/Icon
3. Modify Worksheet Description
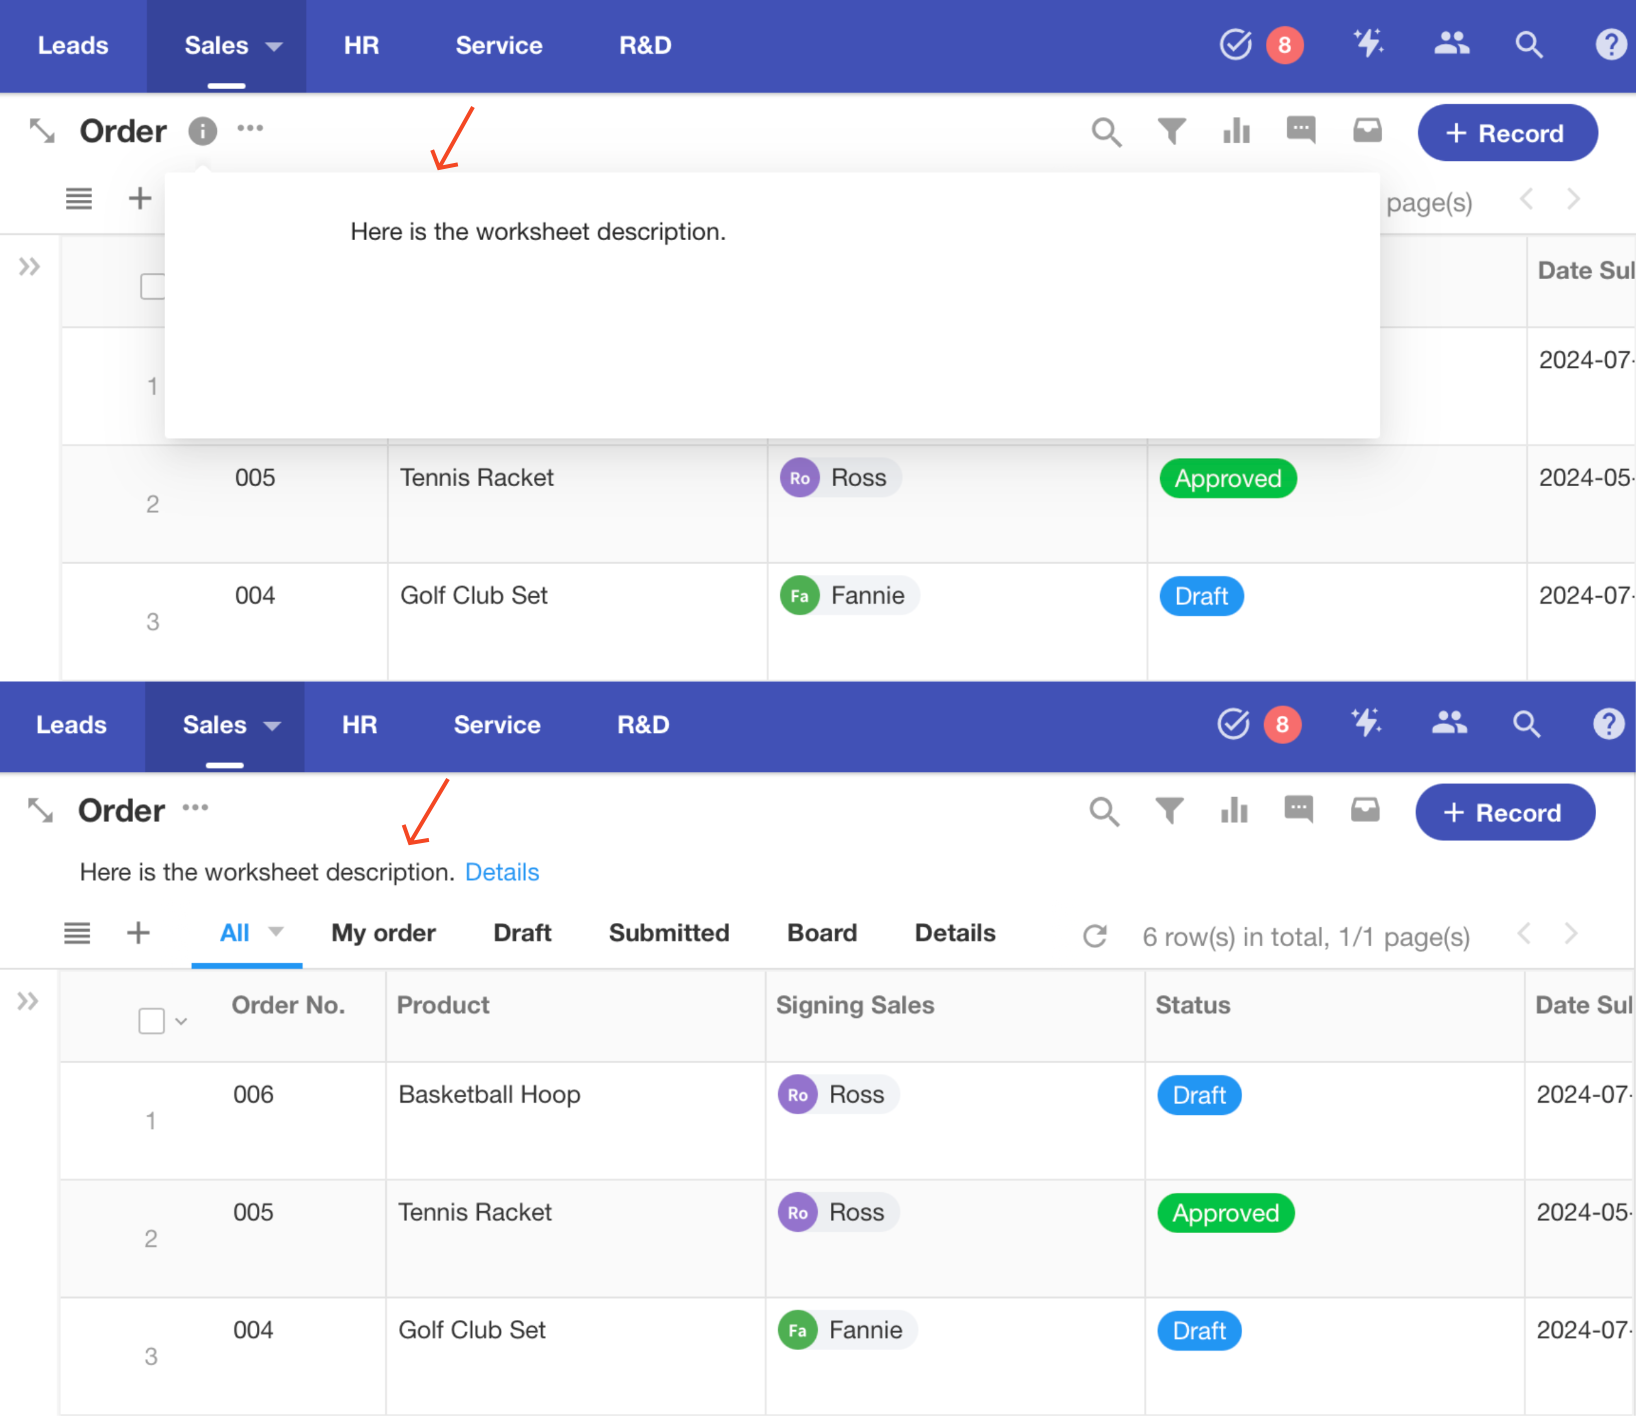
The worksheet description provides a brief description of the content and purpose of the worksheet, helping users better understand and utilize the worksheet. The worksheet description supports two display modes: icon and text.
Icon: Click the icon and it will display the worksheet description.
Text: The worksheet description always appears below the worksheet name.
4. Modify Record Name
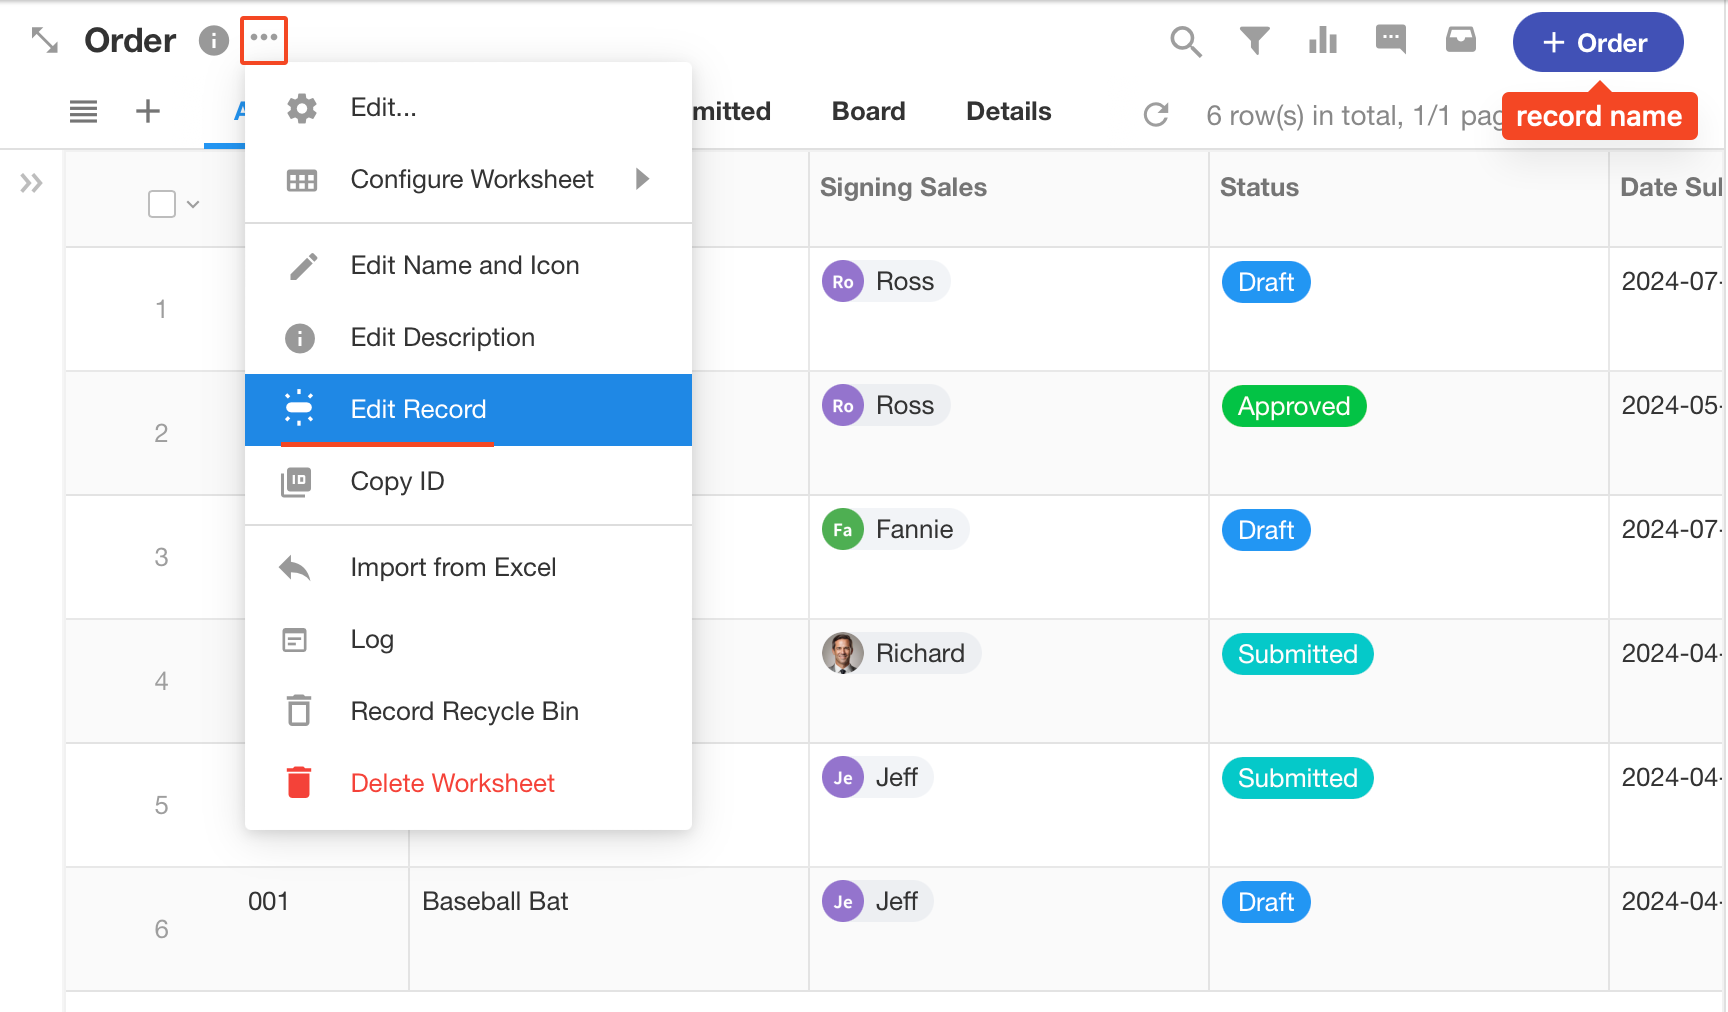
The default name for each row of data in a worksheet is Record. You can customize the record name according to your business object. For example, in the worksheet Order, a record is an order, thus you can change the record name to Order.
5. Copy/Delete/Restore Worksheet
Copy Worksheet
-
Operation:
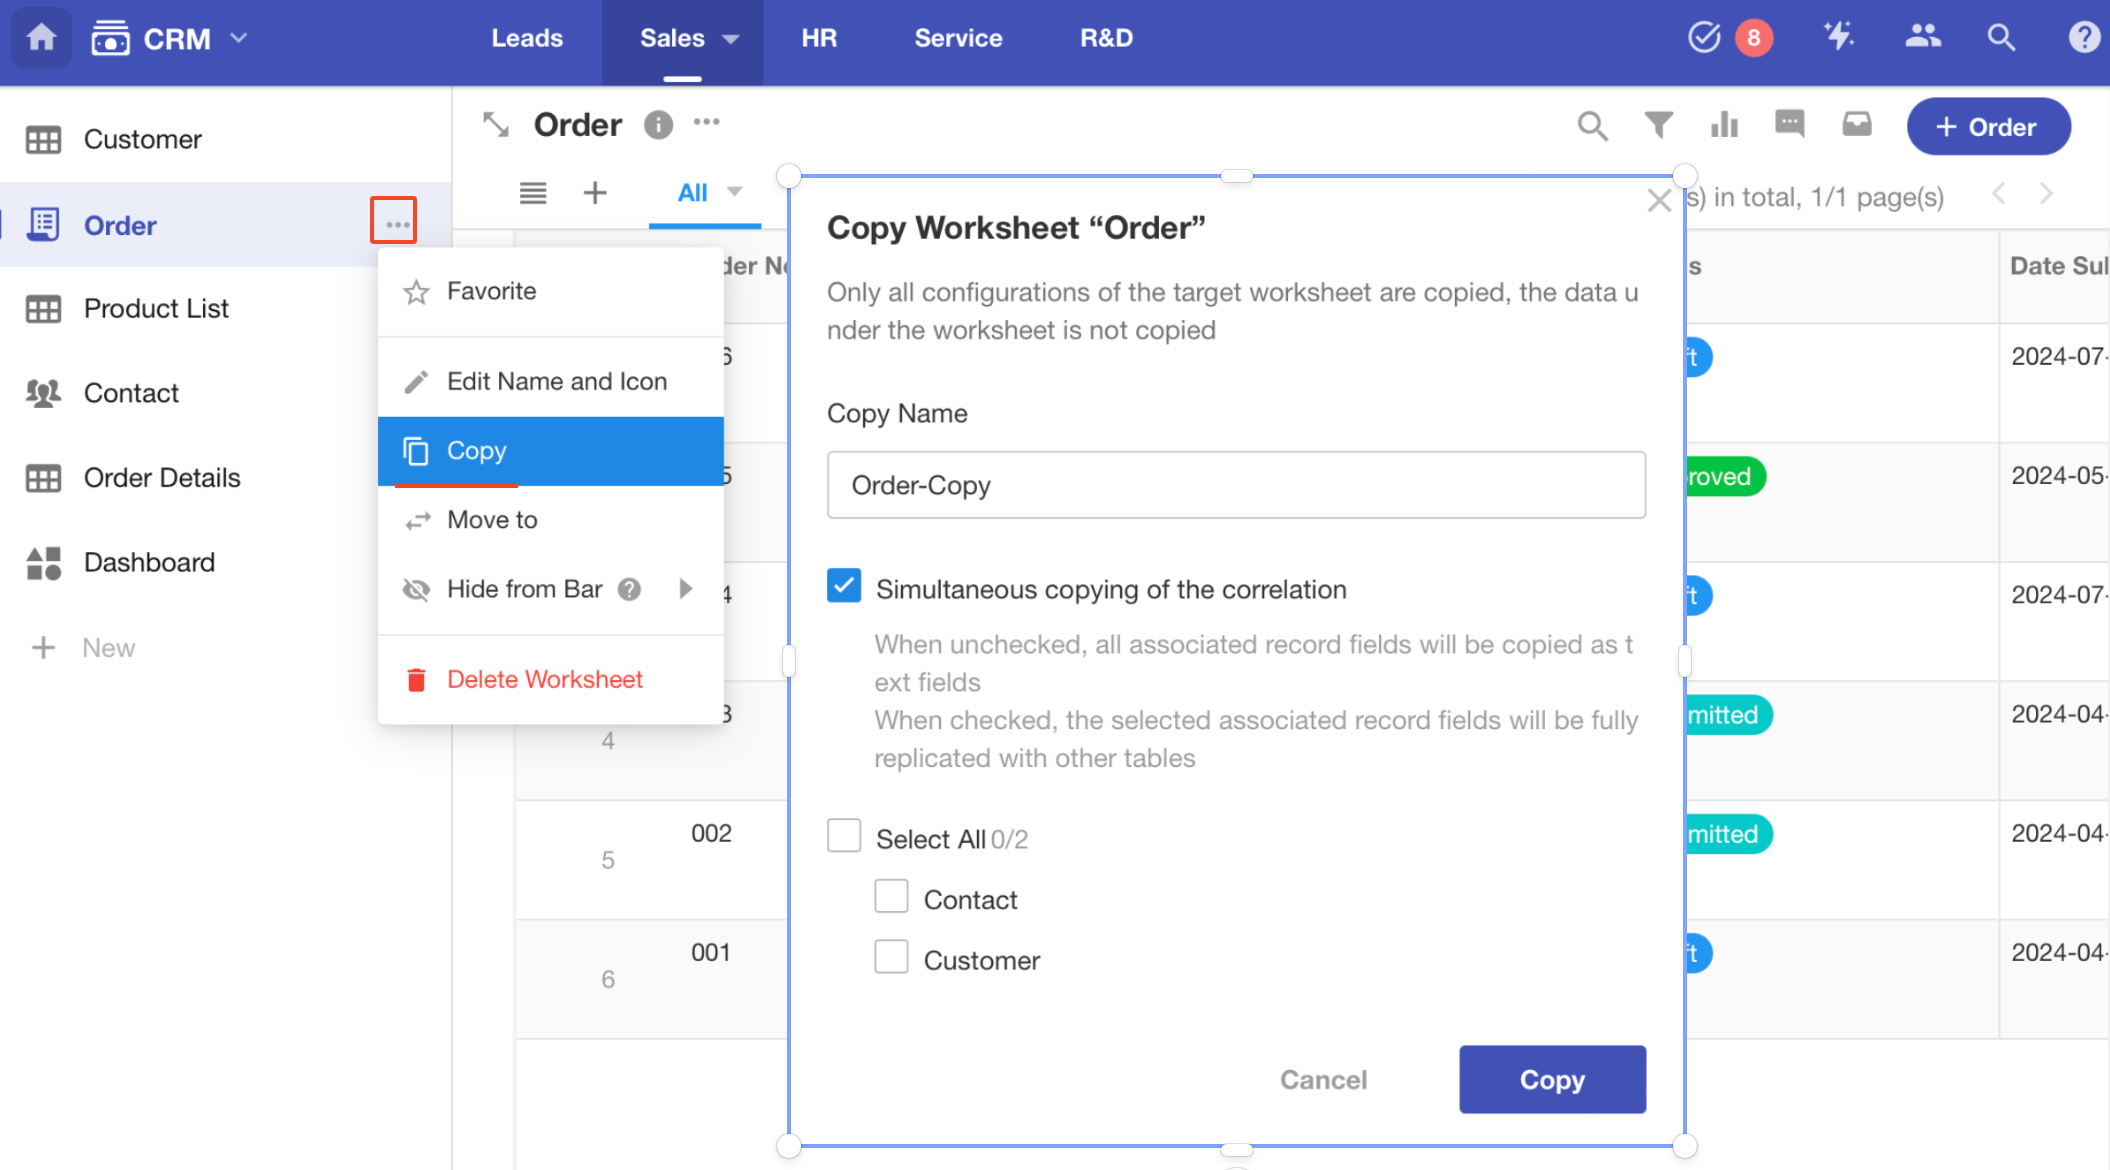
If the worksheet is related to other worksheets, you can choose which related fields are copied.
-
What is not copied
-
Data in each record of the worksheet is not copied.
-
Discussions and logs in the worksheet are not copied.
-
Delete/Restore Worksheet
Only application administrators have permissions to delete and restore worksheets.
-
Delete Worksheet
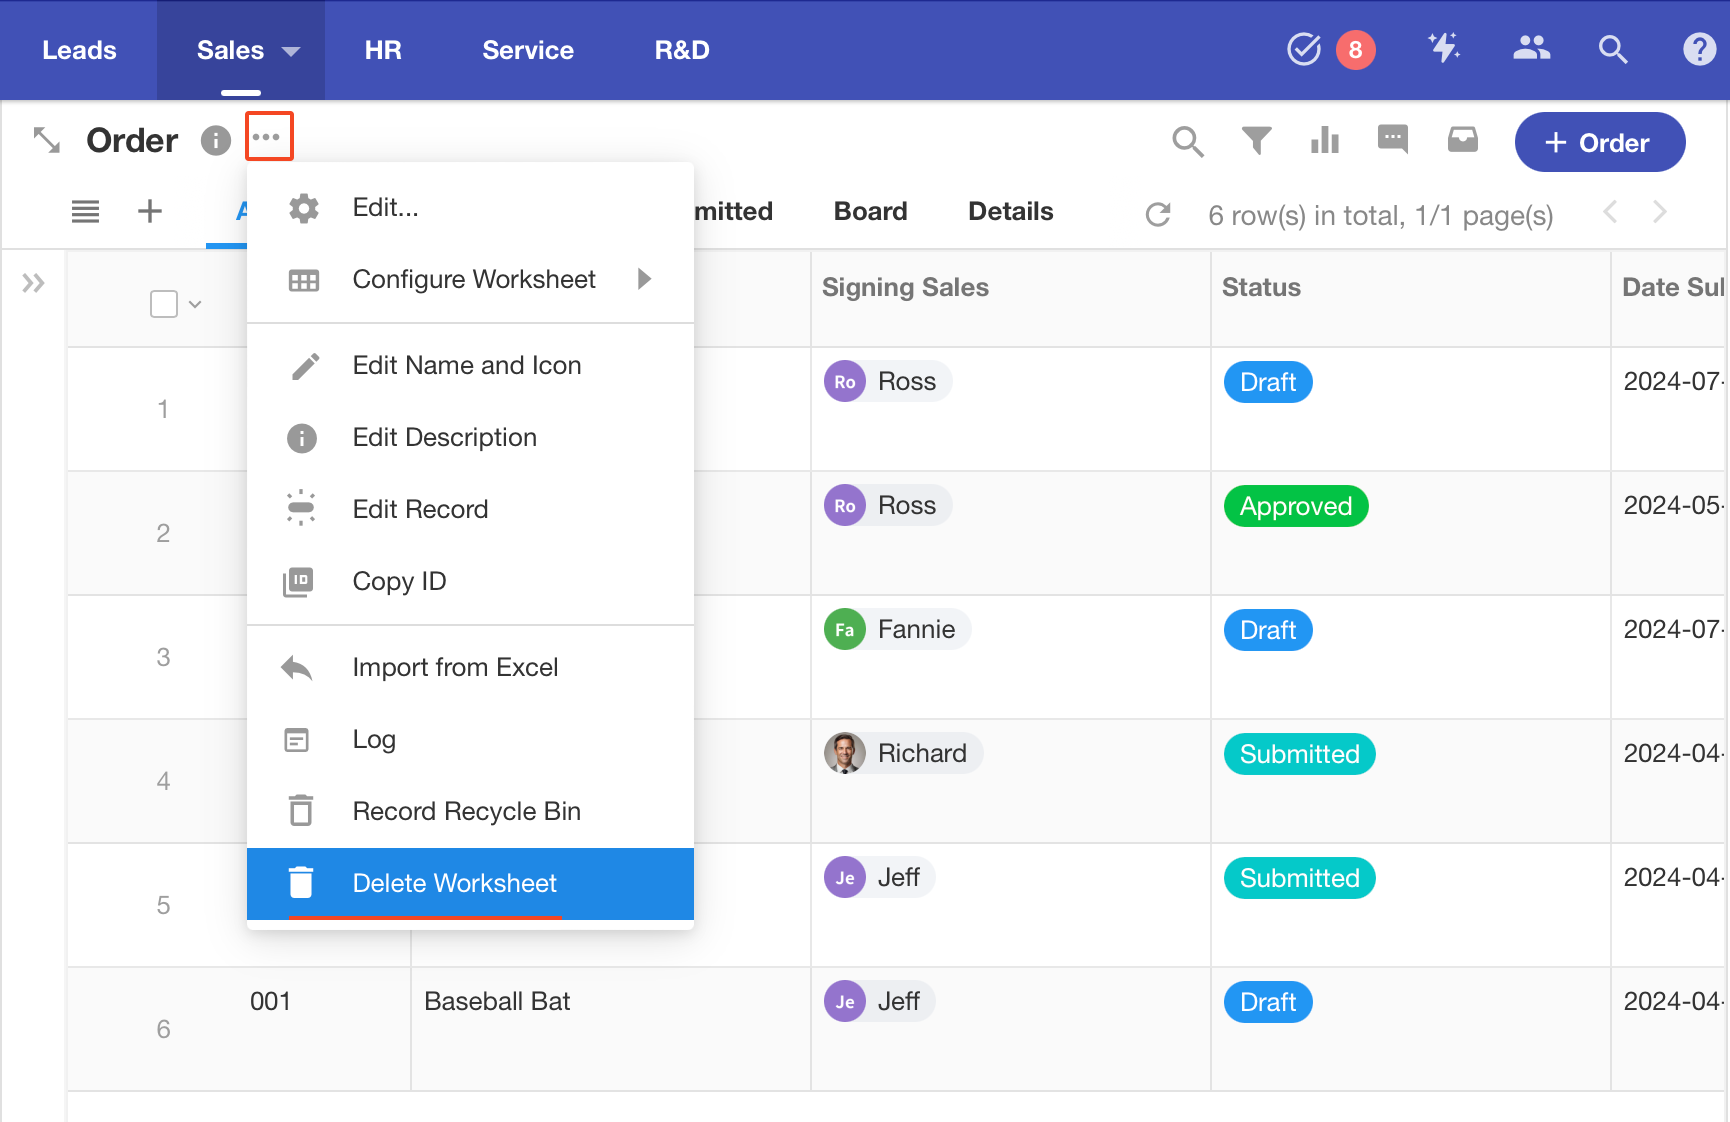
-
Restore Worksheet
-
Worksheets that have been completely deleted cannot be restored.
-
Deleted worksheets can be restored within 60 days, and those deleted for over 60 days are automatically deleted completely.
-
If a worksheet is restored, its structure, such as the relationship with other worksheets is also restored.
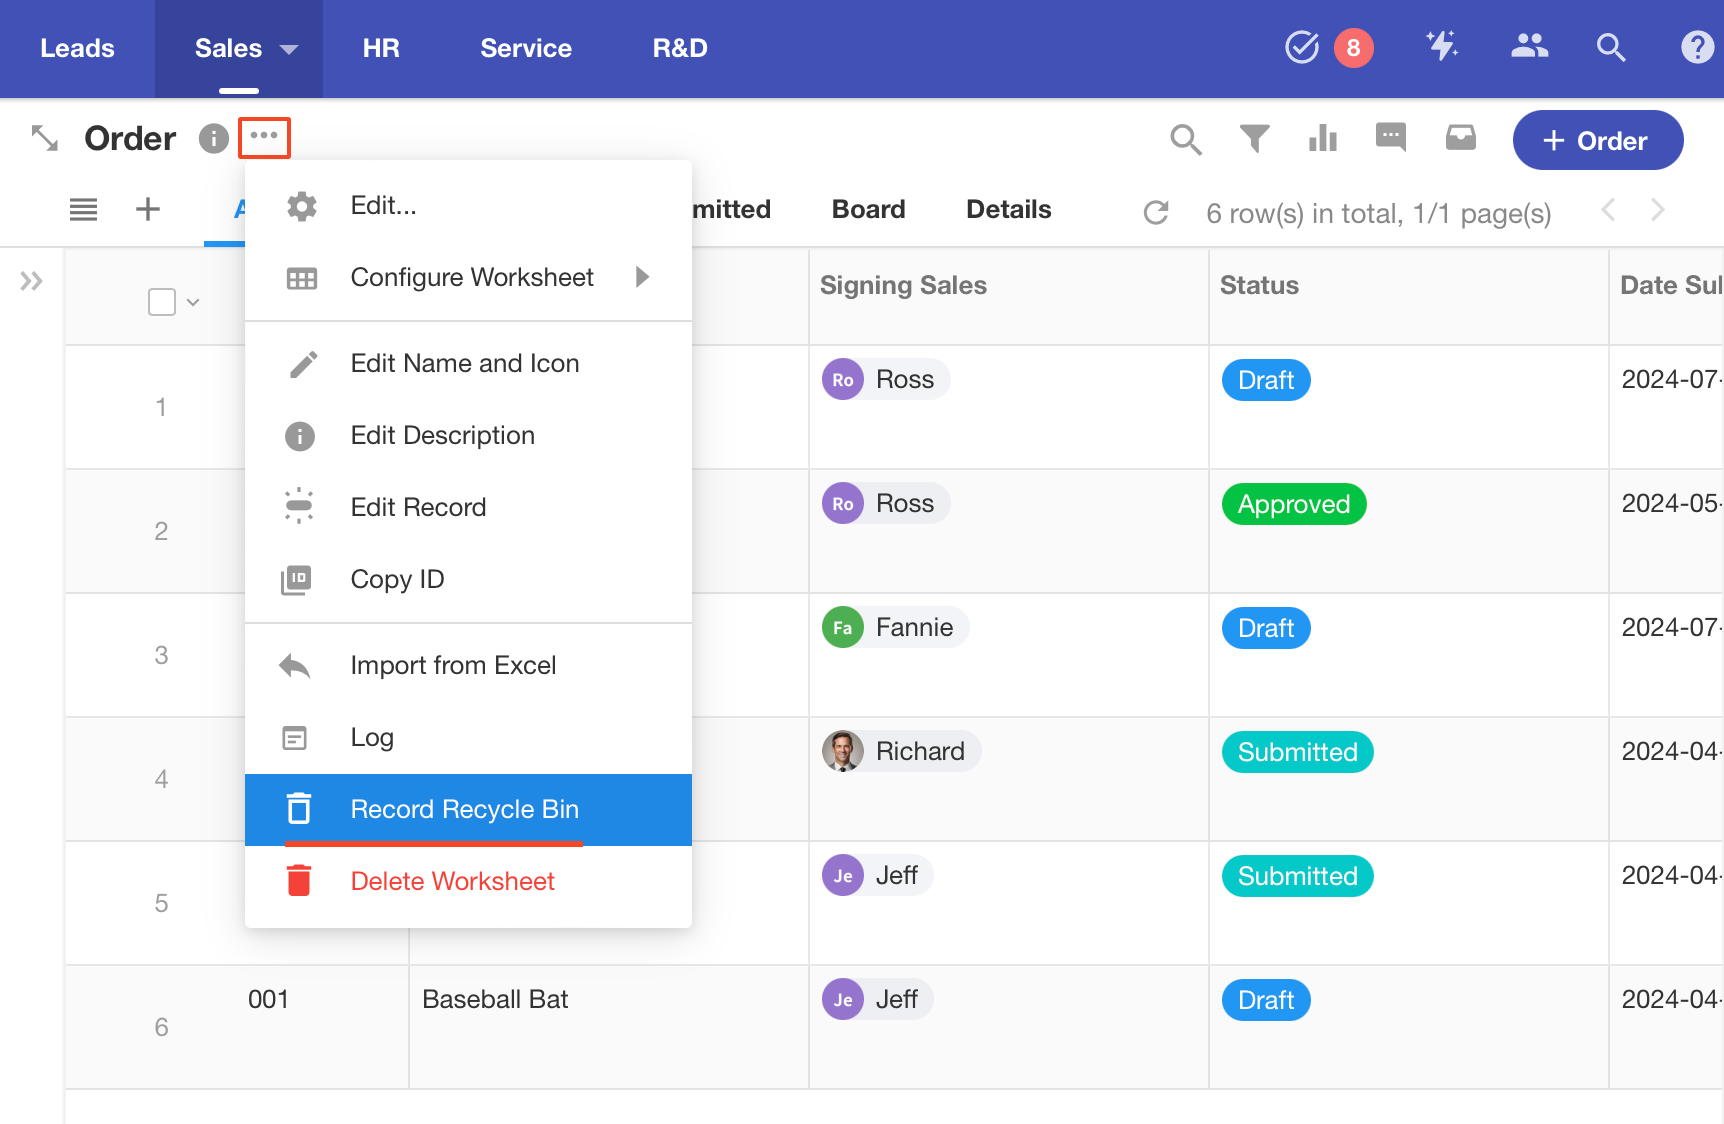
-
6. Move Worksheet
You can move a worksheet to another group in this application or to another application in the organization. If moving a worksheet to another application, you must be the application administrator or developer of the other application.
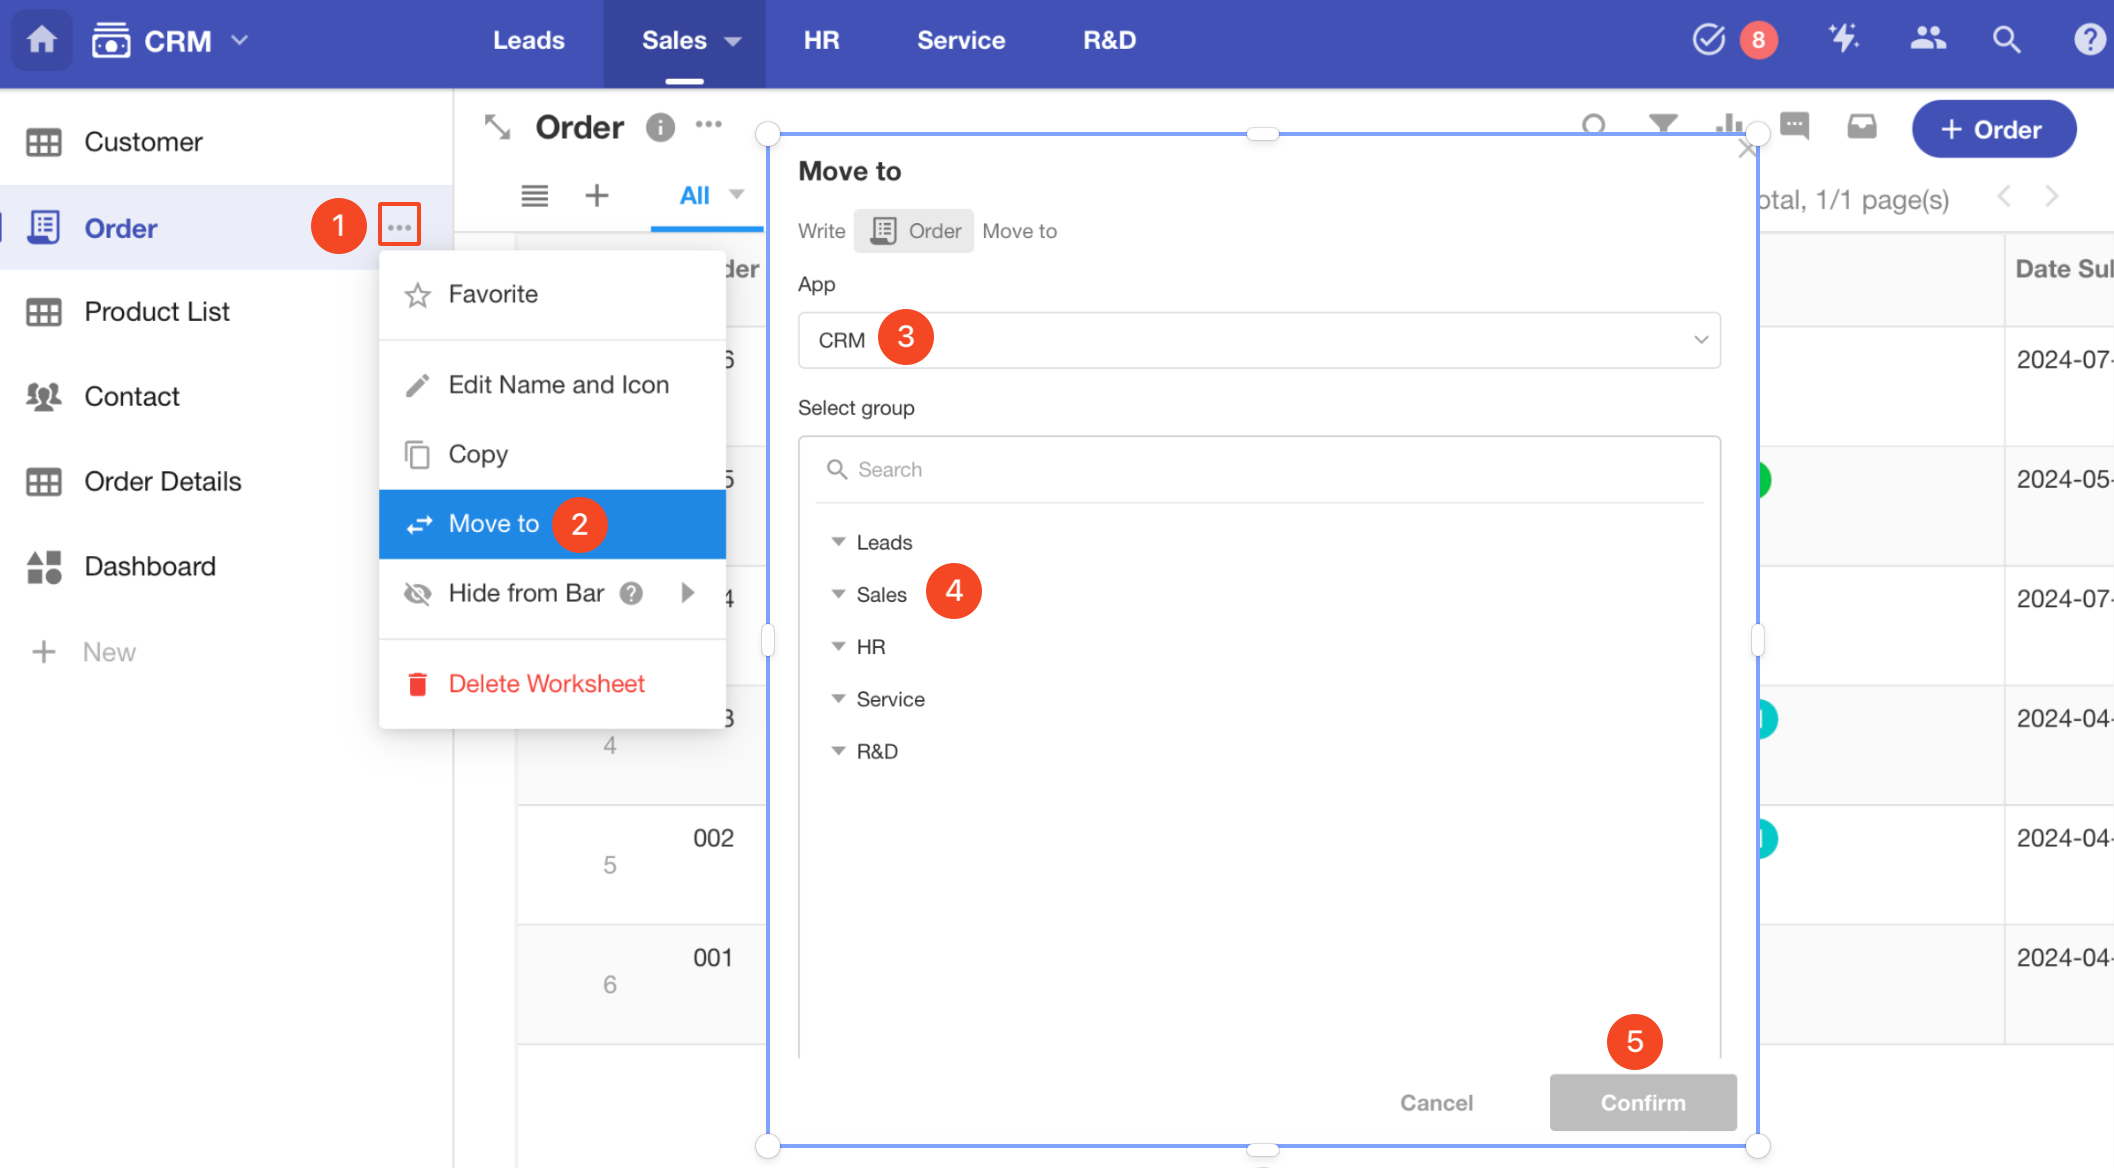
7. Sort/Hide Worksheet
-
Sort Worksheets
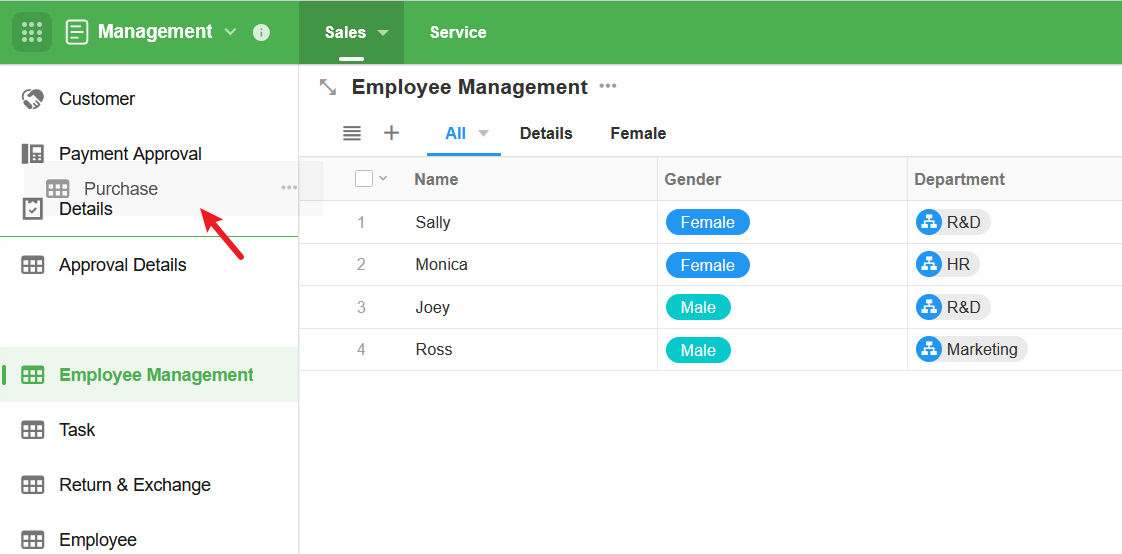
In the navigation list, drag the worksheets up and down to re-order them.
-
Hide Worksheet (Hide in Navigation Bar)
Some worksheets do not need to appear in the navigation, only being used when related records are accessed. In this case, such worksheets do not need to be shown in the navigation to maintain a clean interface.
In the application's worksheet navigation, click the [...] button next to the worksheet name to set the worksheet as "hidden from bar". It supports hiding only on the PC end, only on the mobile end, or hiding on all terminals.
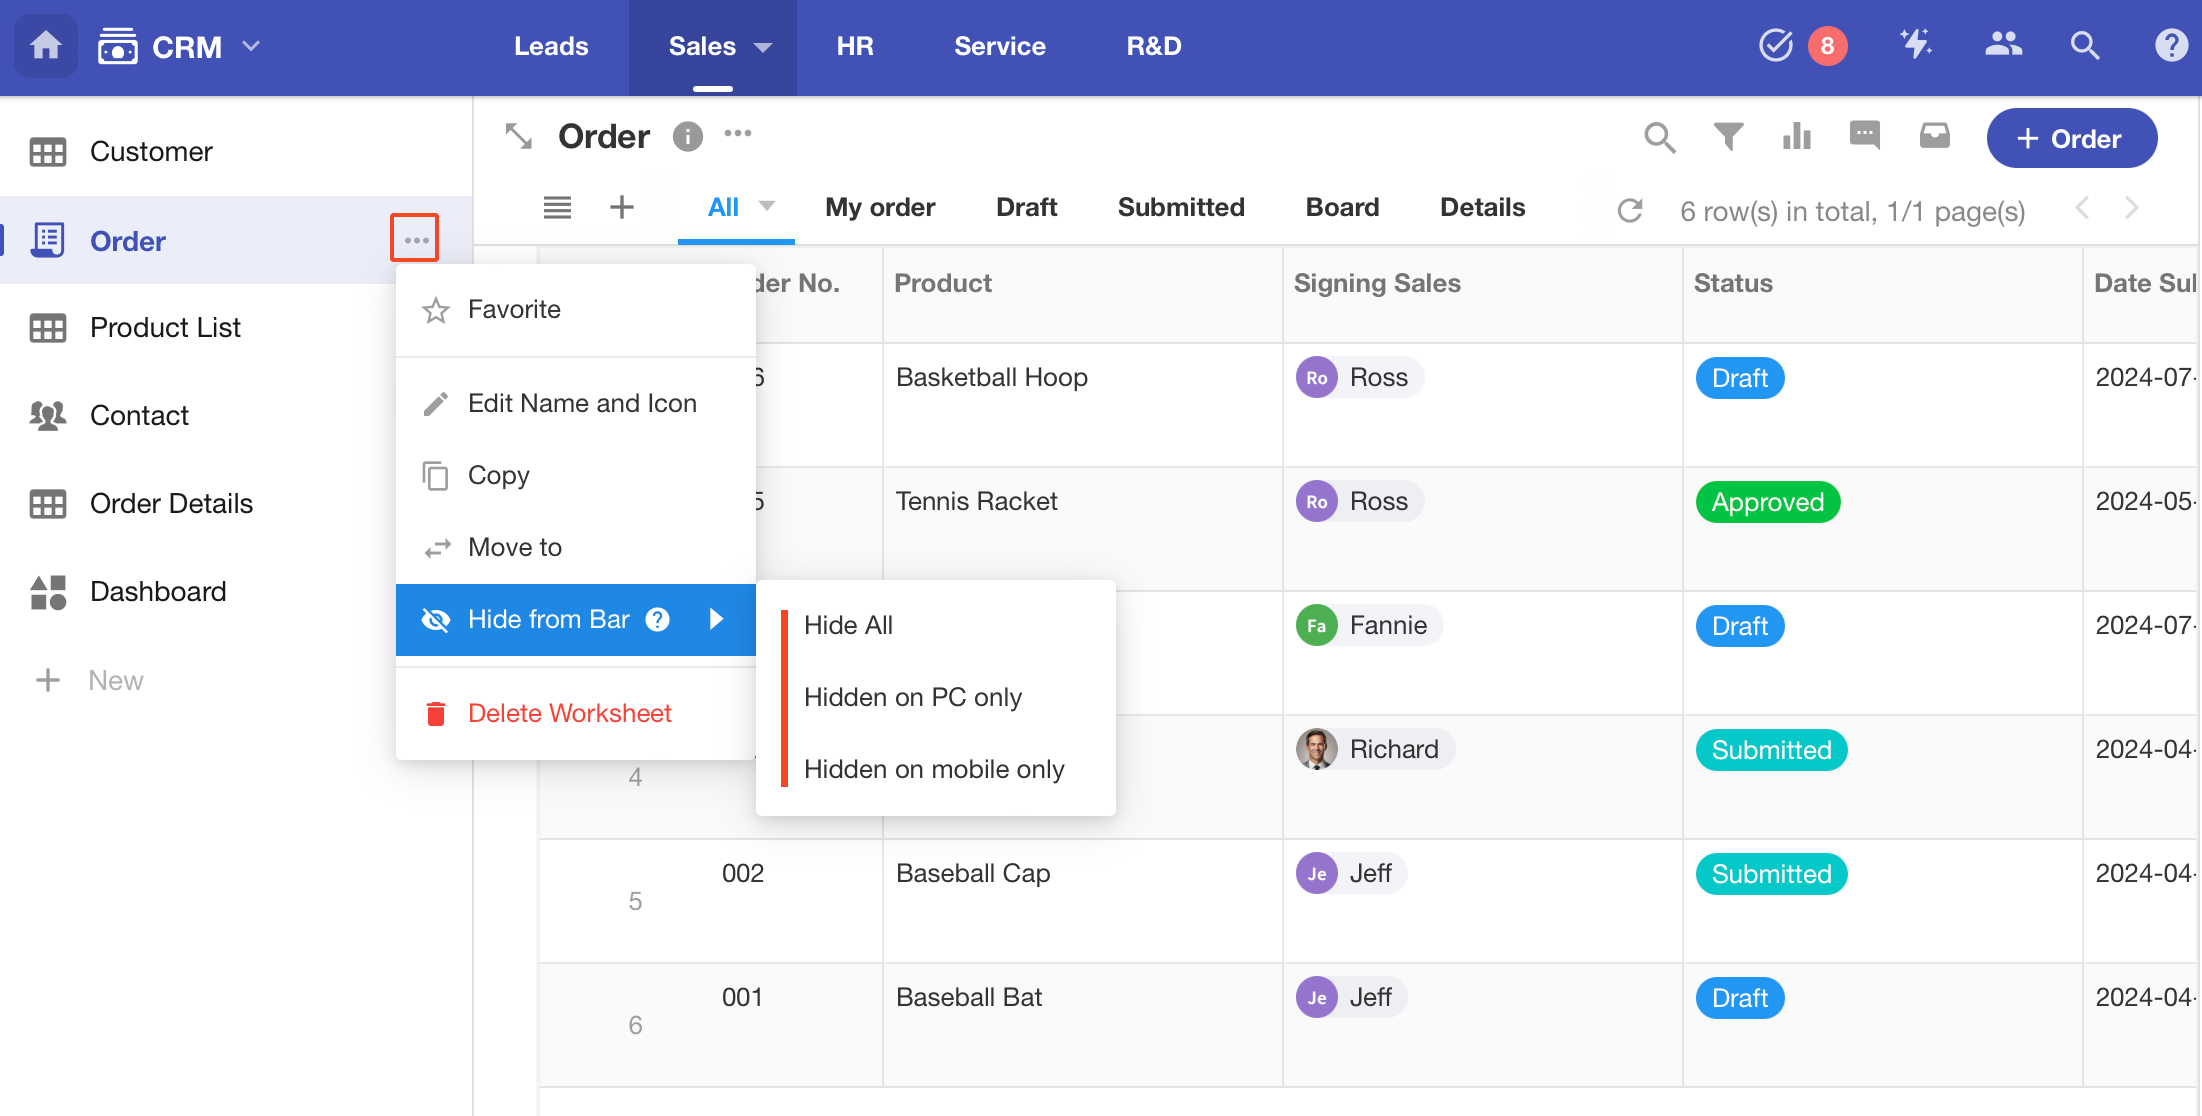
After hiding the worksheet, the entry of this application item will not be visible to normal users in the navigation, only visible to the system roles (including application administrators and developers), and the user's permissions on the worksheet still follow the role’s permission configuration. If a user is configured with the permission to view the worksheet, the entry of the hidden worksheet is not visible in the navigation, but if the user gets the access link to the worksheet, he can still access the worksheet and view the data he has the permission to see.
If system roles (administrators and developers) also do not need to see the hidden worksheet, the option "view hidden items" can be unchecked in the application's navigation settings.
8. Set Groups
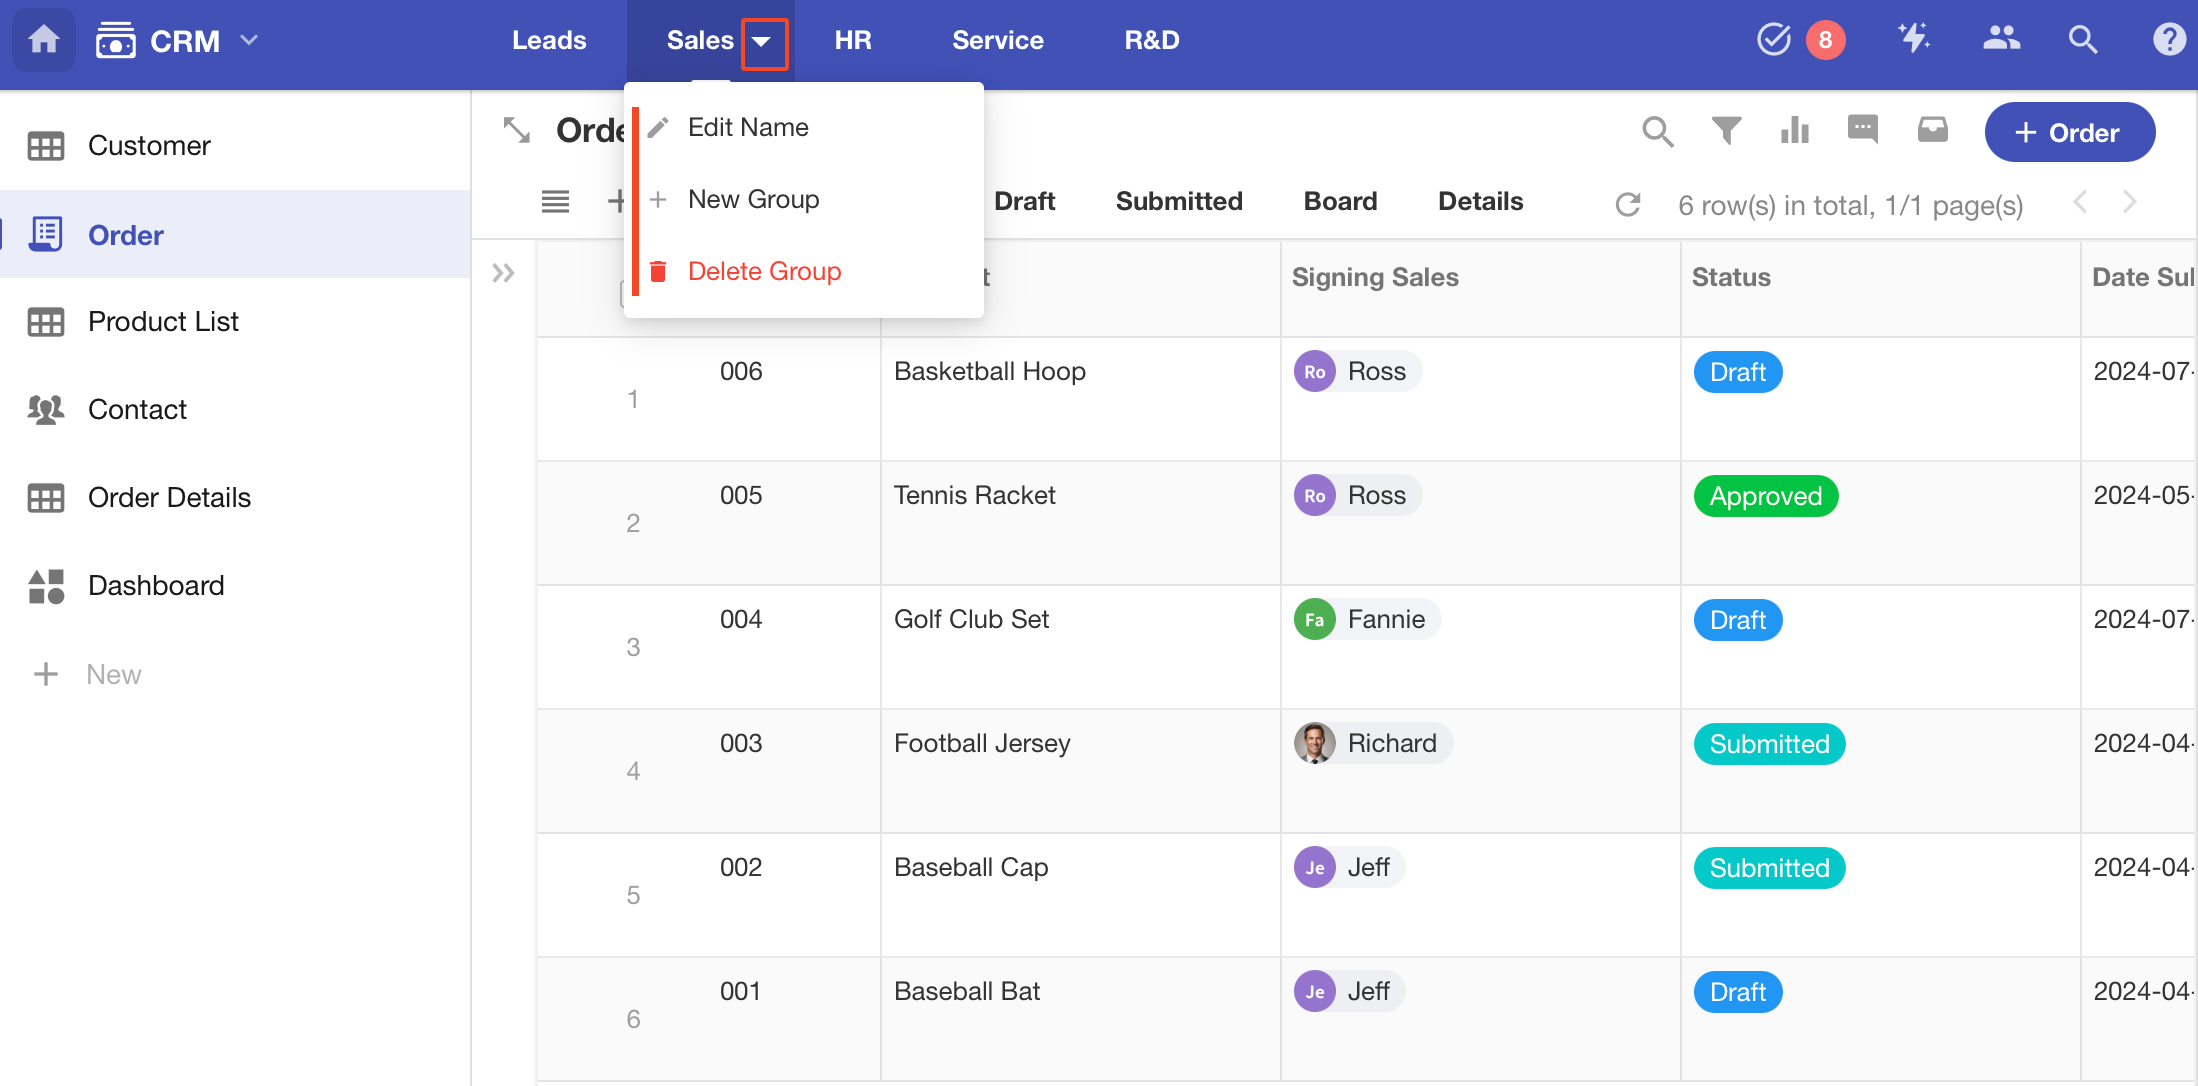
When there are multiple worksheets in the application, you can create groups to manage them. The groups will be displayed at the top navigation of the application, so that you can switch between worksheets quickly.
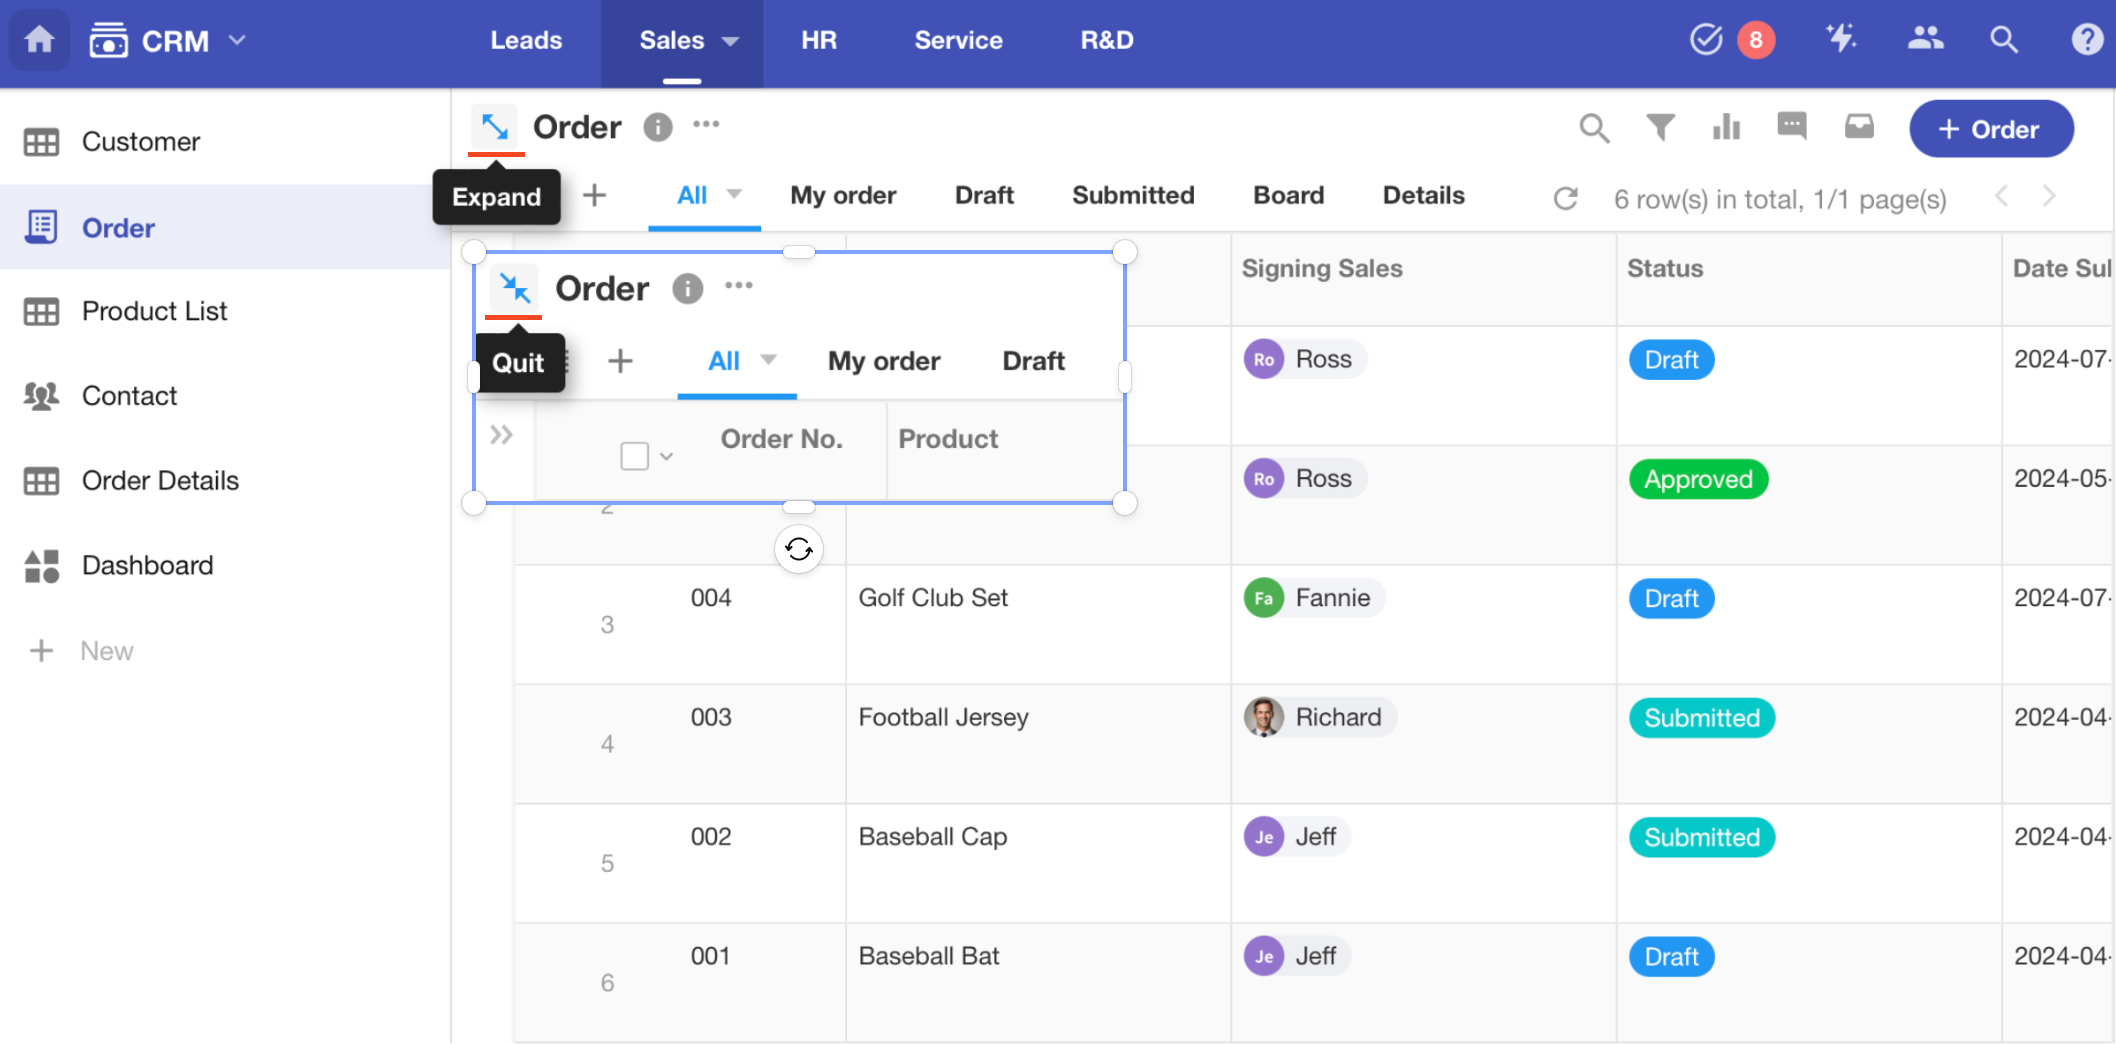
9. Hide/Expand Worksheet Navigation Sidebar
-
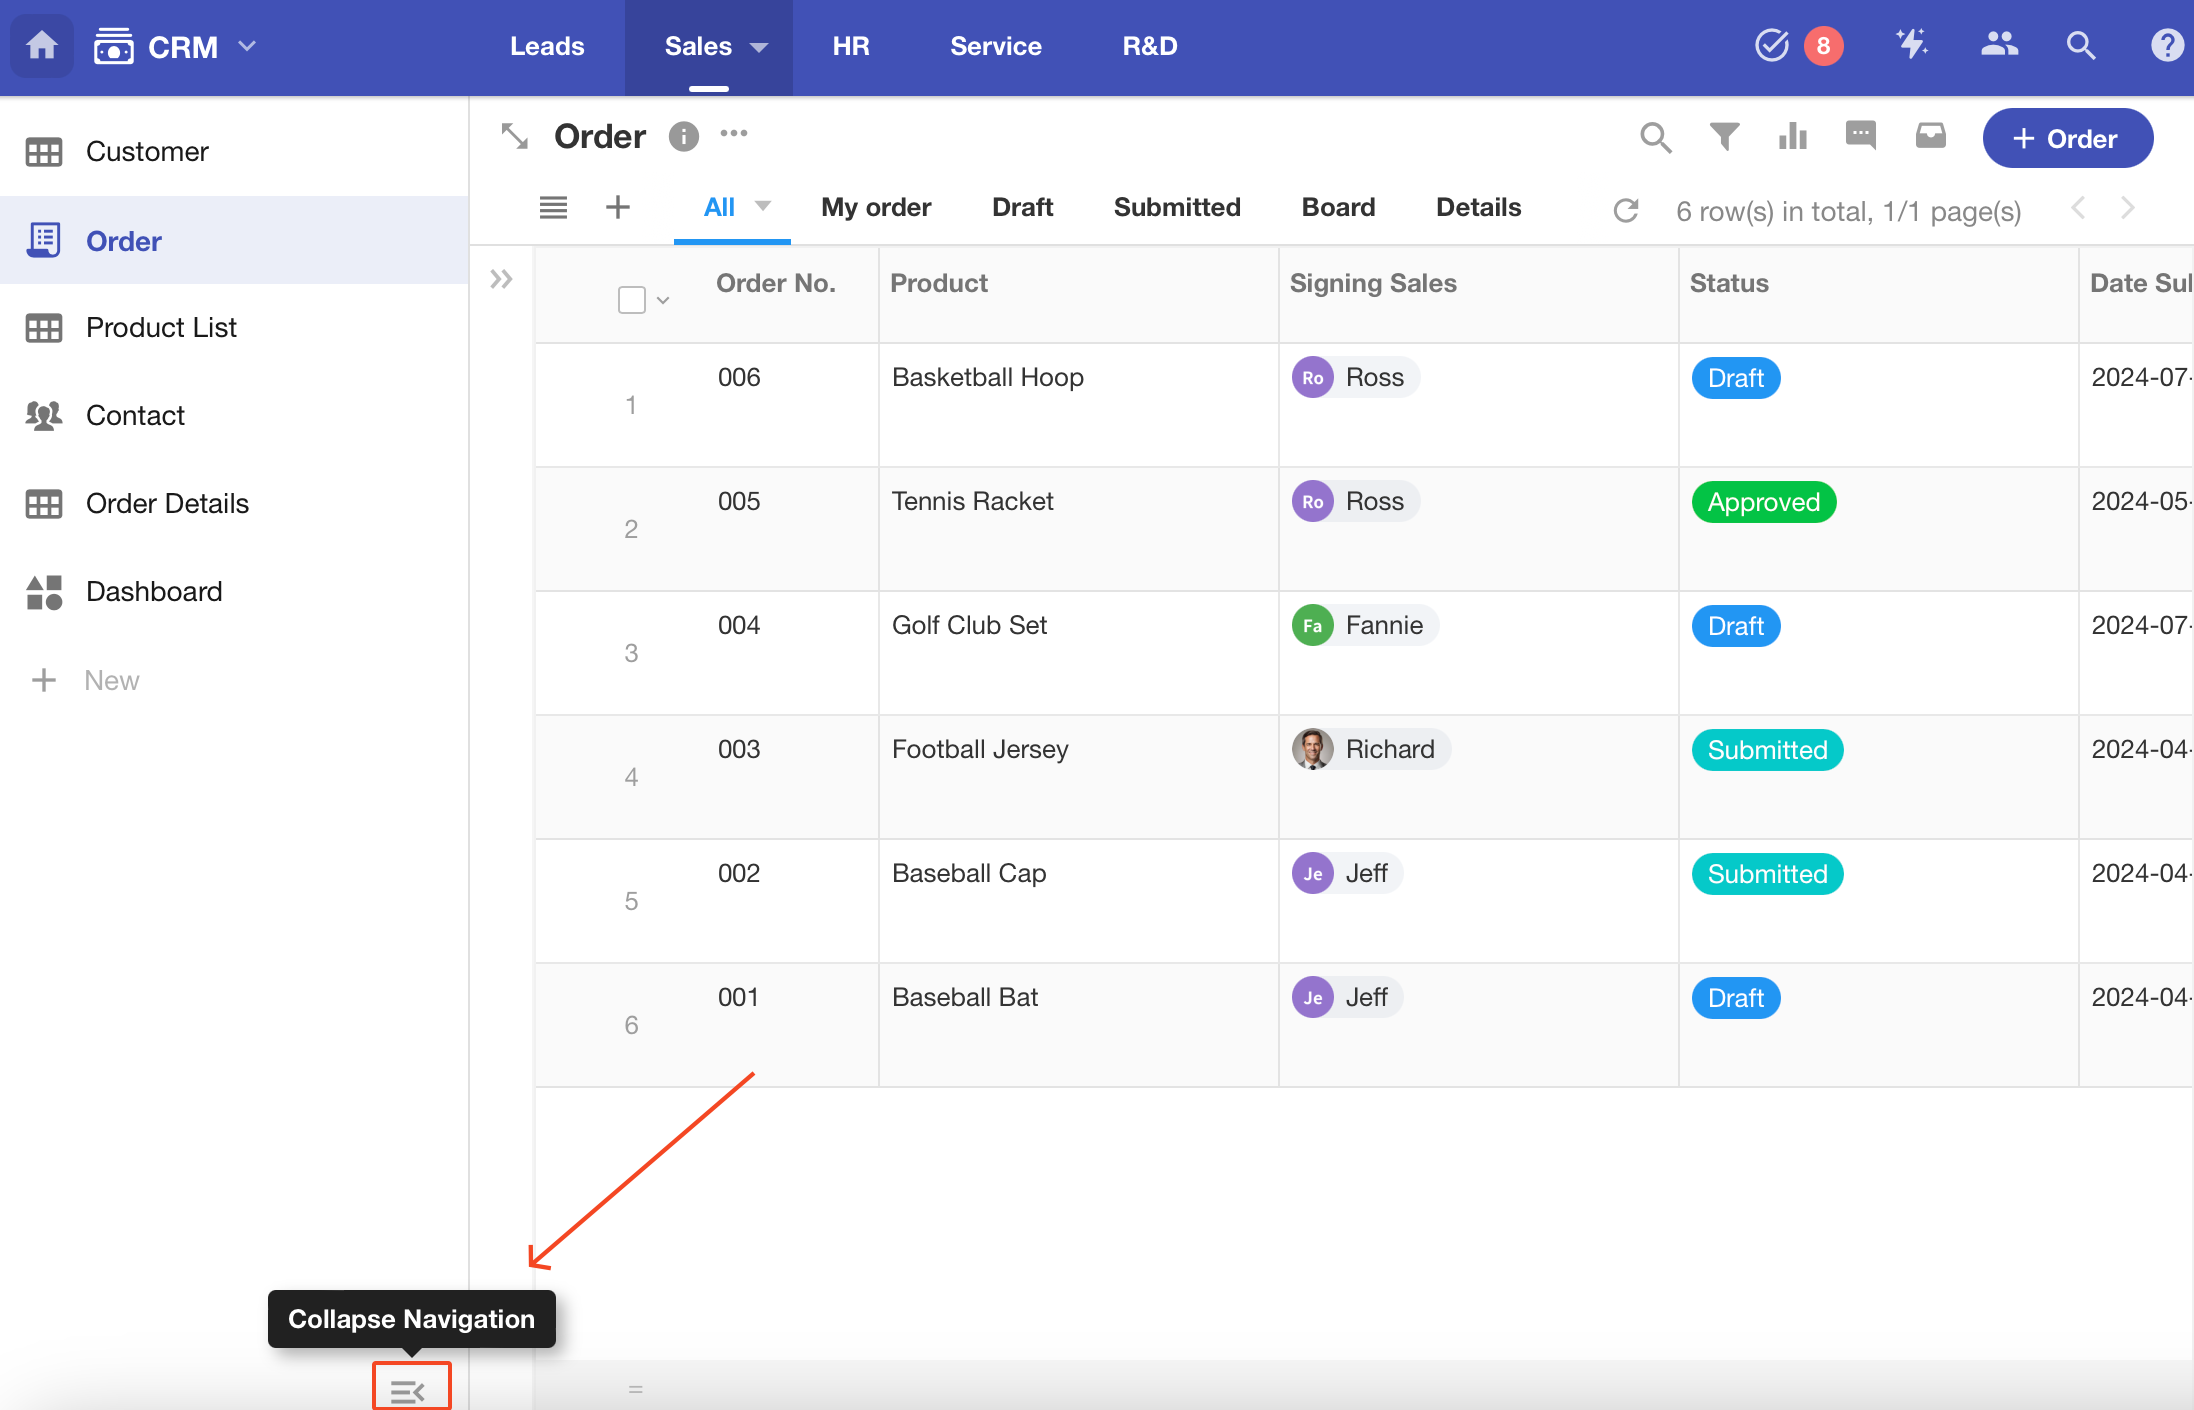
Expand/Collapse
-
Dispaly/Hide
