Merchants and Online Payments
Overview
HAP supports collecting online payments directly through forms using WeChat Pay or Alipay. Payment information is recorded and displayed in the corresponding worksheet record.
- Public Forms: After submitting a public form, users are presented with a payment page.
- Worksheet Records: After creating a record in a worksheet, users can make payments from the record details page. Refunds are also supported.
Payment Page:

Payment Information:

Before enabling online payments in a form, you must activate merchant services for your organization and then configure payments in the worksheet.
Merchant Services
Activate Merchant Services
Configuration Path: Go to Org Admin > Payments & Invoicing > Merchant. On the merchant management page, click Apply to activate merchant services, then select a payment channel.
Service Fees and Transaction Rates
- Service Fee: Charged per merchant account at CNY 999 per year or CNY 199 per month.
- Transaction Rates: Lakala charges a transaction fee of 0.3%. For WeChat Pay and Alipay, refer to their official transaction rates.
Merchant Management and Withdrawals
- You can create up to 20 merchants.
- Funds from completed transactions are automatically transferred to the merchant's account one business day after the transaction date.
- Verified merchants cannot be deleted.

Orders and Refunds
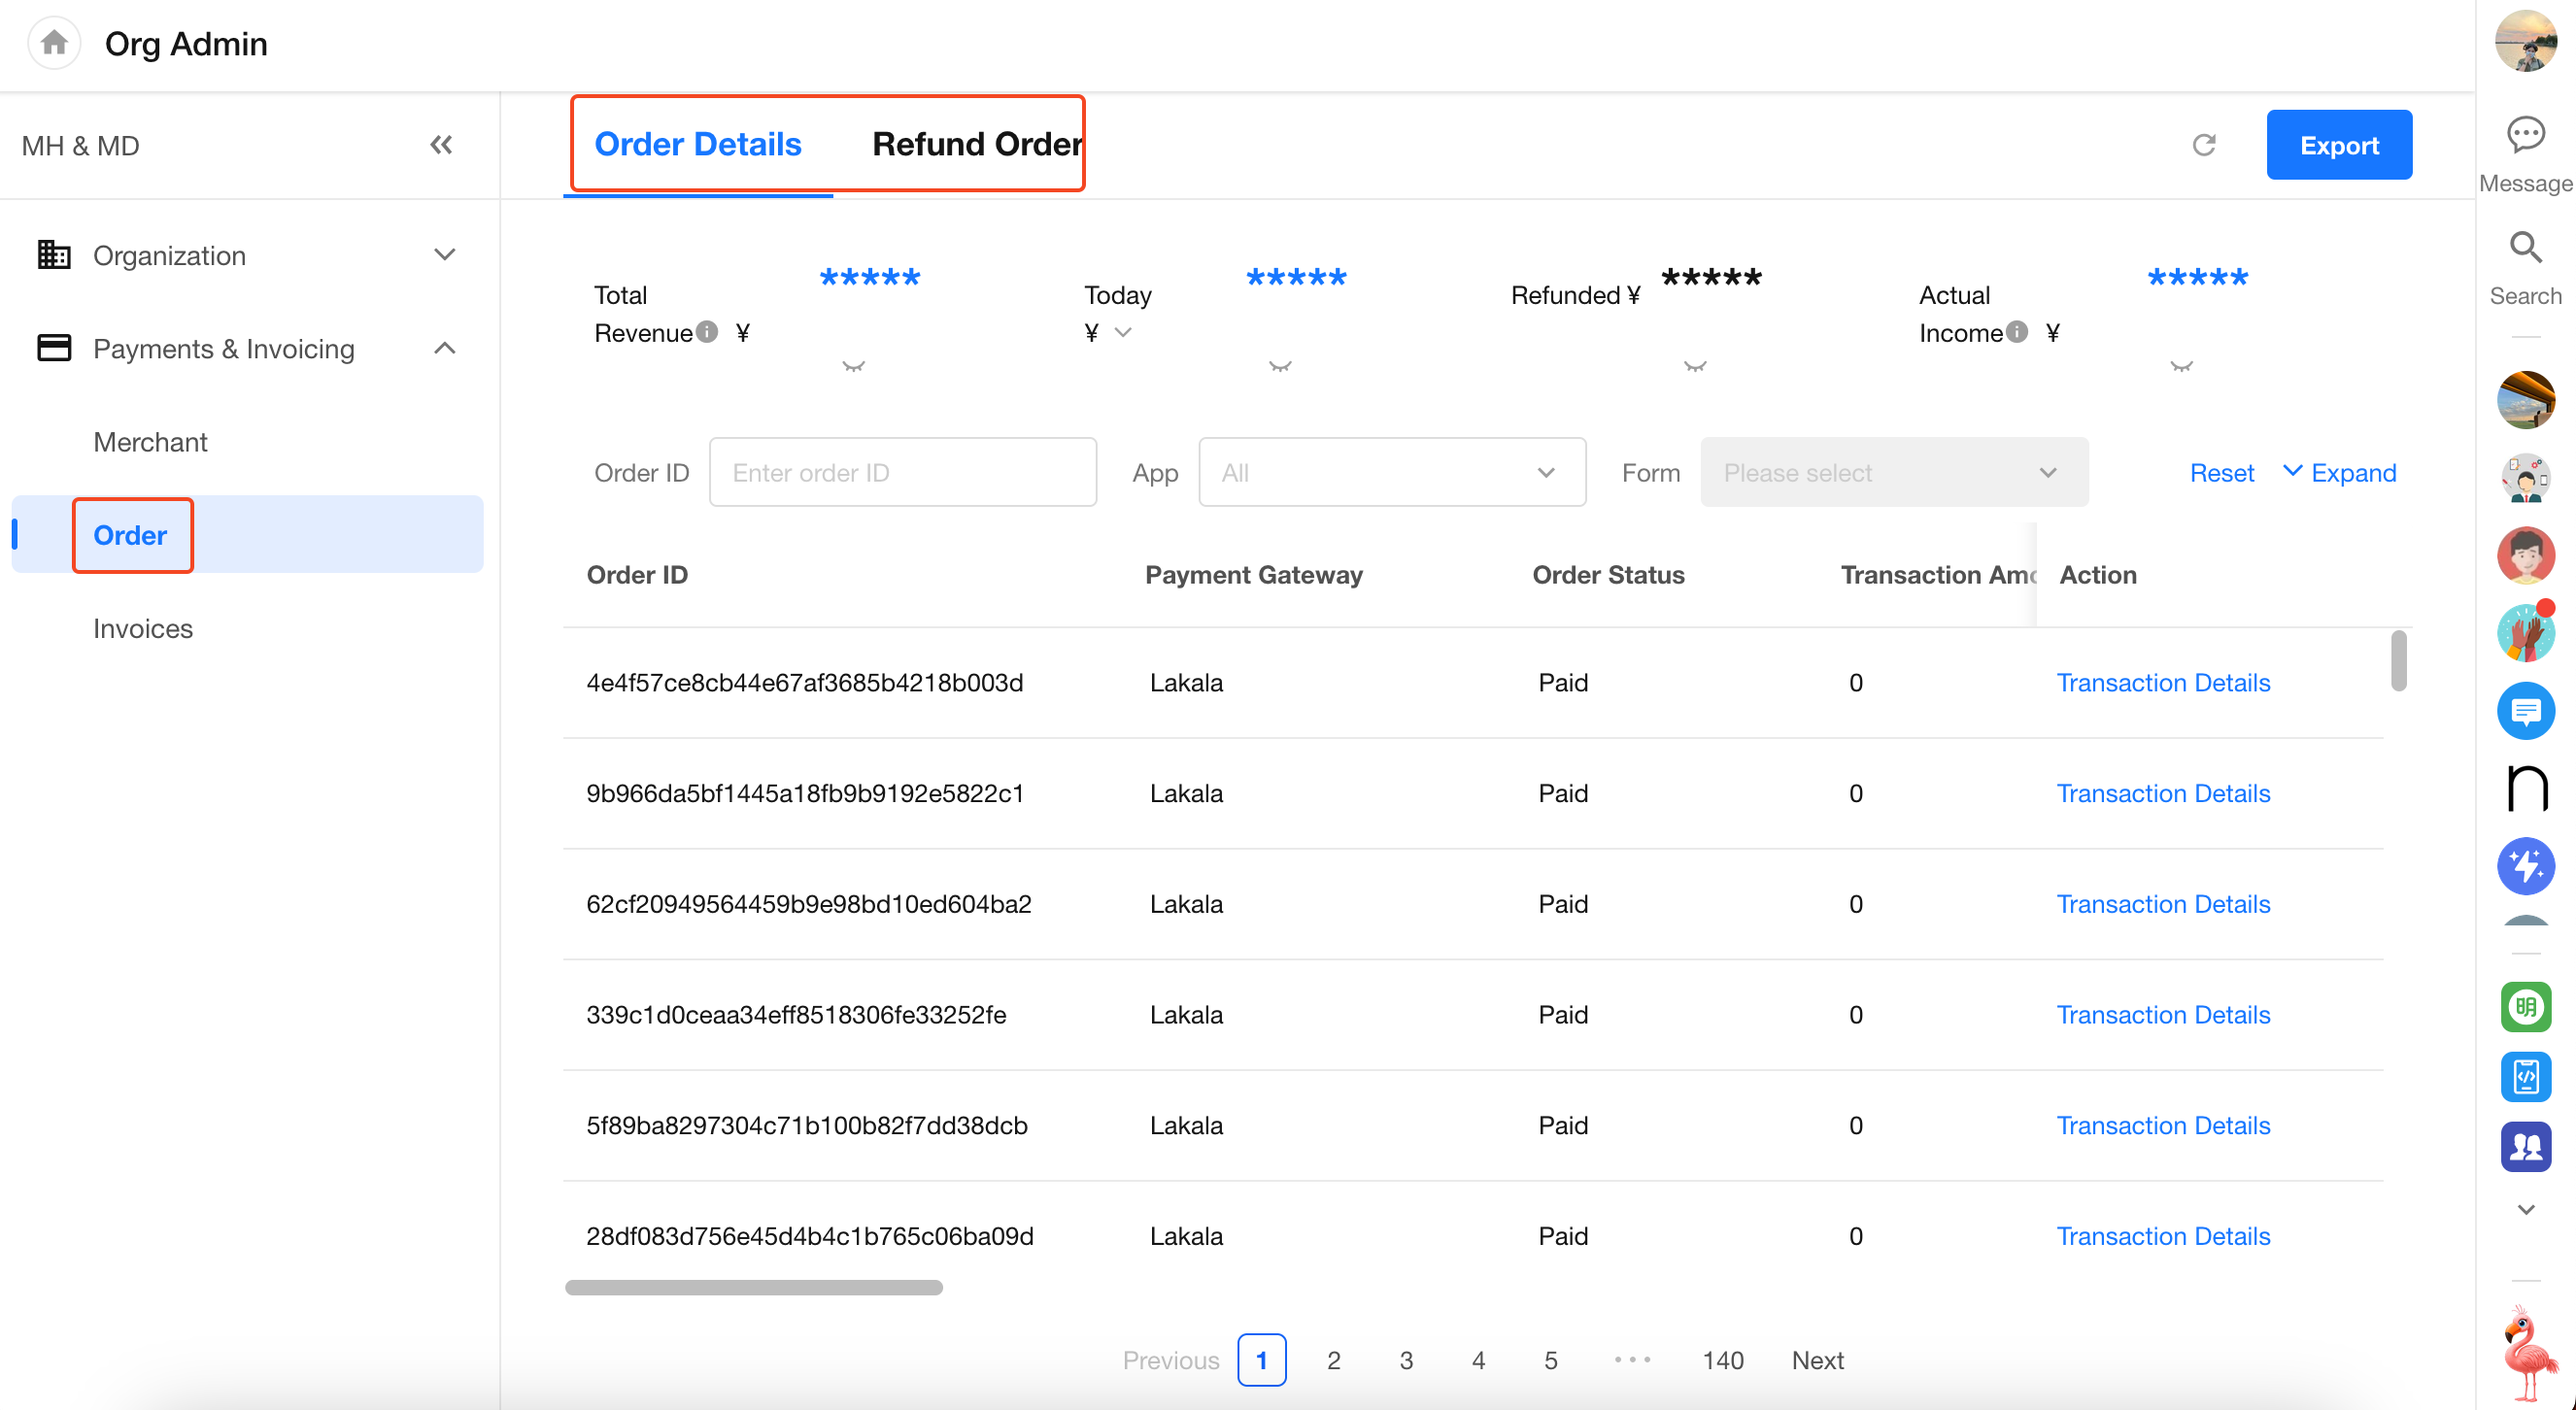
Configuration Path: Go to Org Admin > Payments & Invoicing > Order to view transaction details and refunded orders.
- Order Details: View information about each transaction. Completed transactions can be refunded.
- Refund Order: View information about all refunded orders.
Online Payments
Online payments can be used for scenarios such as membership management, event registration, and software purchases. You can configure payment collection based on your organization's business needs.
Enable Payments
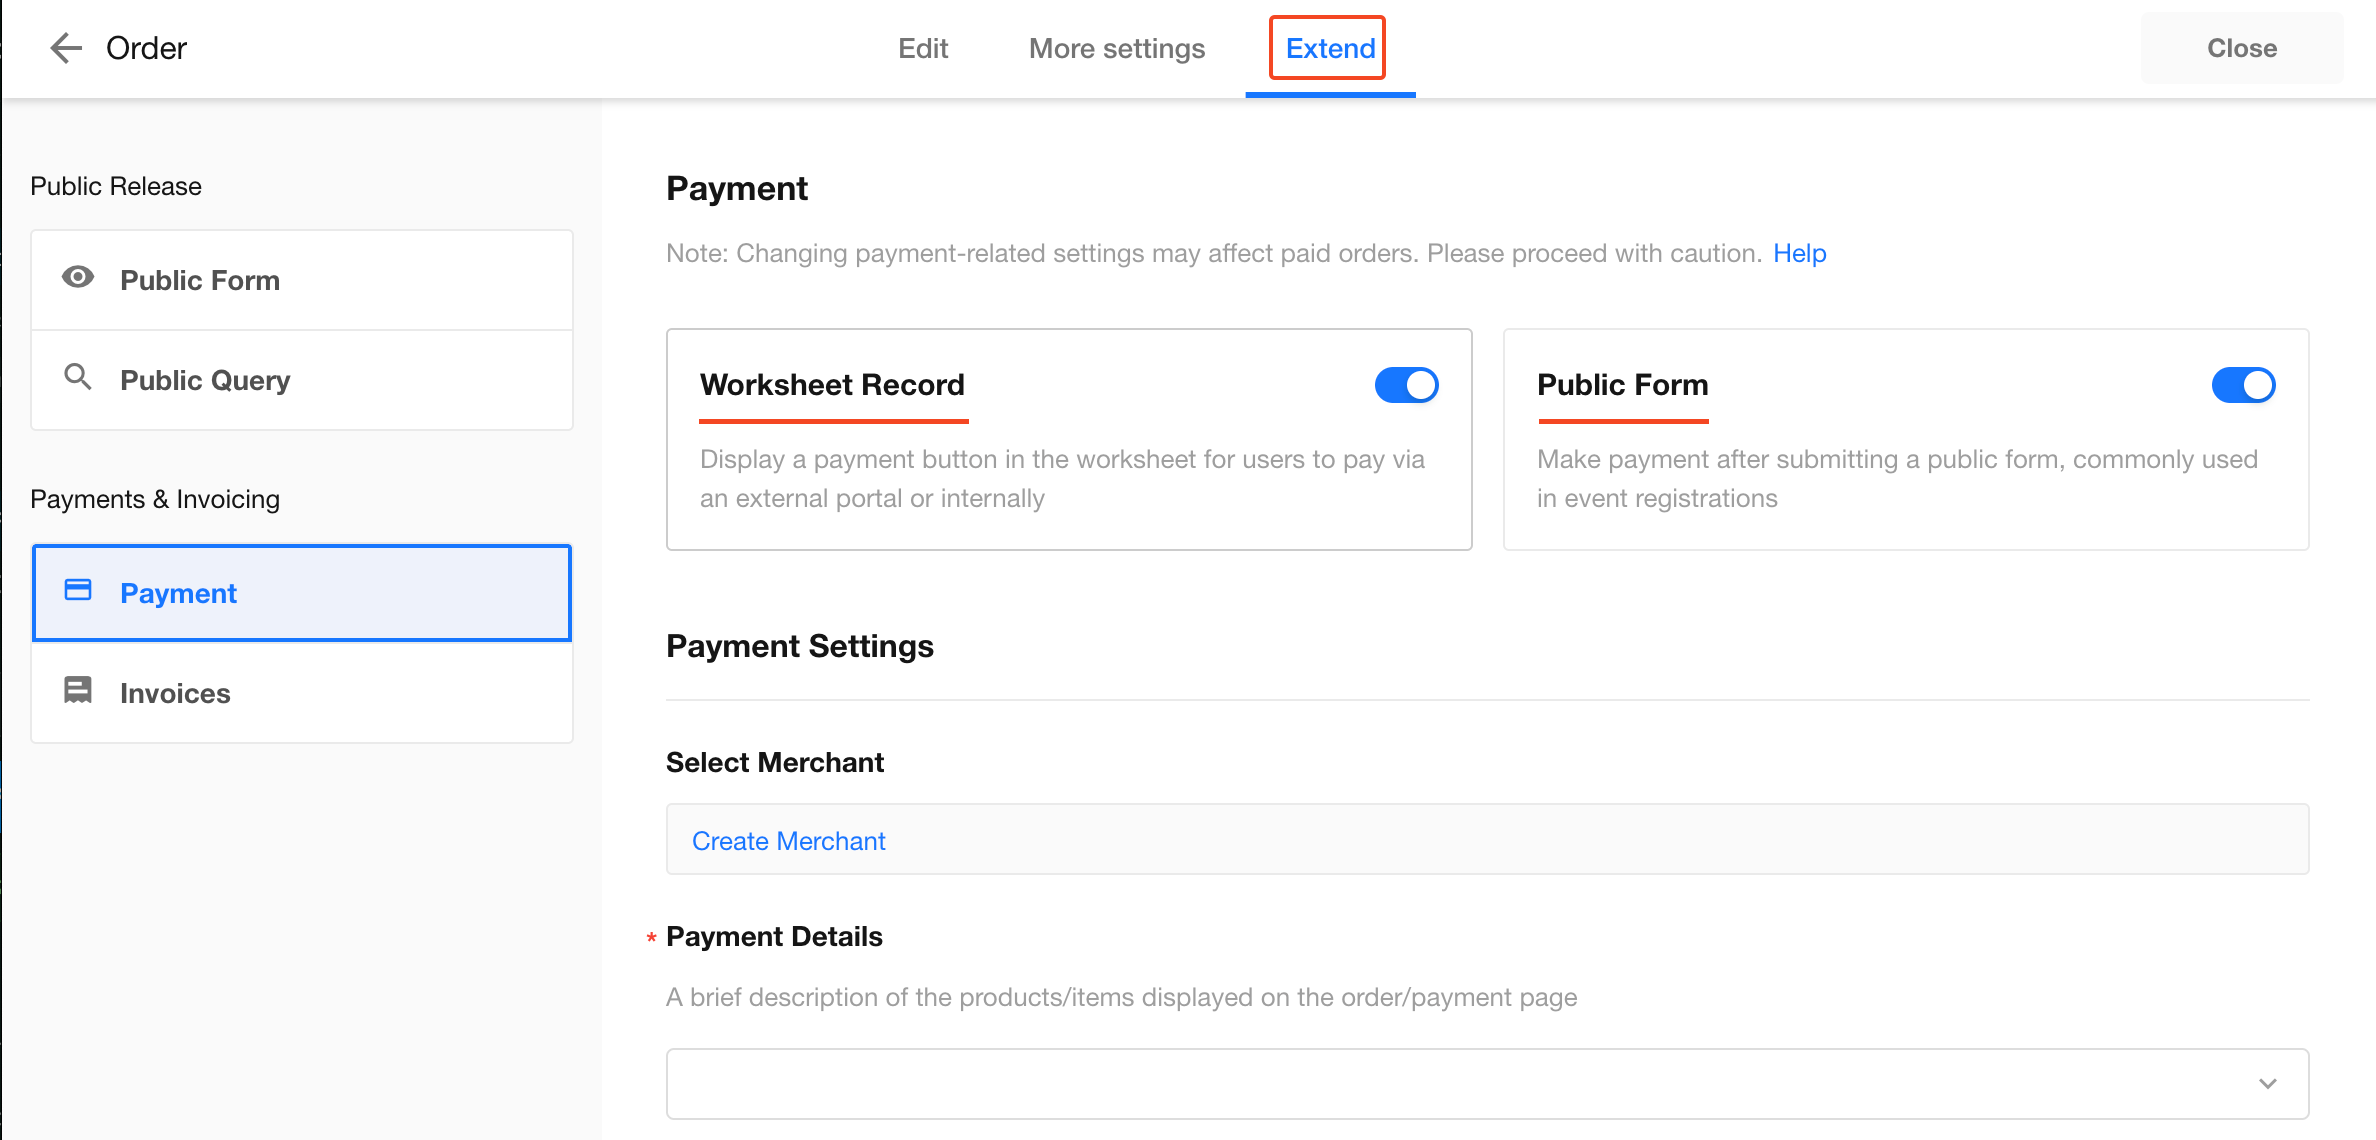
Go to Form Editor > Extend > Payment to enable online payments.
Payments are supported for both worksheet records and public forms.
Payment Settings
Basic Settings
- Select Merchant: An organization can have multiple merchants, but each worksheet can be associated with only one merchant for receiving payments.
- Payment Description: Select a field whose value will be displayed on the payment page.
- Payment Amount: The payment amount is taken from the value of a numeric field in the record.
- Transaction Timeout: When enabled, unpaid transactions are automatically closed if payment is not completed within the specified time.

Configure the Payment Button in Records
After a record is created, a payment button appears in the record details page. You can also share the payment link with others so they can complete the payment.

The payment button is a system button. You can control its visibility in three ways:
- Configure whether internal members and external users can use the payment button separately.
- Display the payment button only in specified views.
- Display the payment button only when the record meets specified conditions.

You can also control whether members of specific roles can use the payment button through role permissions.

Field Mapping
After a payment is completed, you can write the payment information back to the corresponding worksheet record.
Click the Click to Set button and select the fields to which the payment information should be mapped.

Pay Now
When Pay Now is enabled, users are taken directly to the order details and payment page after clicking the payment button in a record or submitting a public form, without an additional confirmation step.
When disabled, users must confirm the payment before the payment page opens.

After users click Pay Now, the order remains in Pending Payment status until payment is completed. The order can be canceled while it is pending payment.

Submit Form After Successful Payment
When Submit the form after payment is enabled, form data is submitted only after payment succeeds. If the user does not complete the payment, the form data is not submitted.
This option is available only for public forms and requires a Transaction Validity Period to be configured.

Display Payment Information in Records
Enable Display order information in the record detail sidebar to display payment information in the right sidebar of the record details page.

Example:
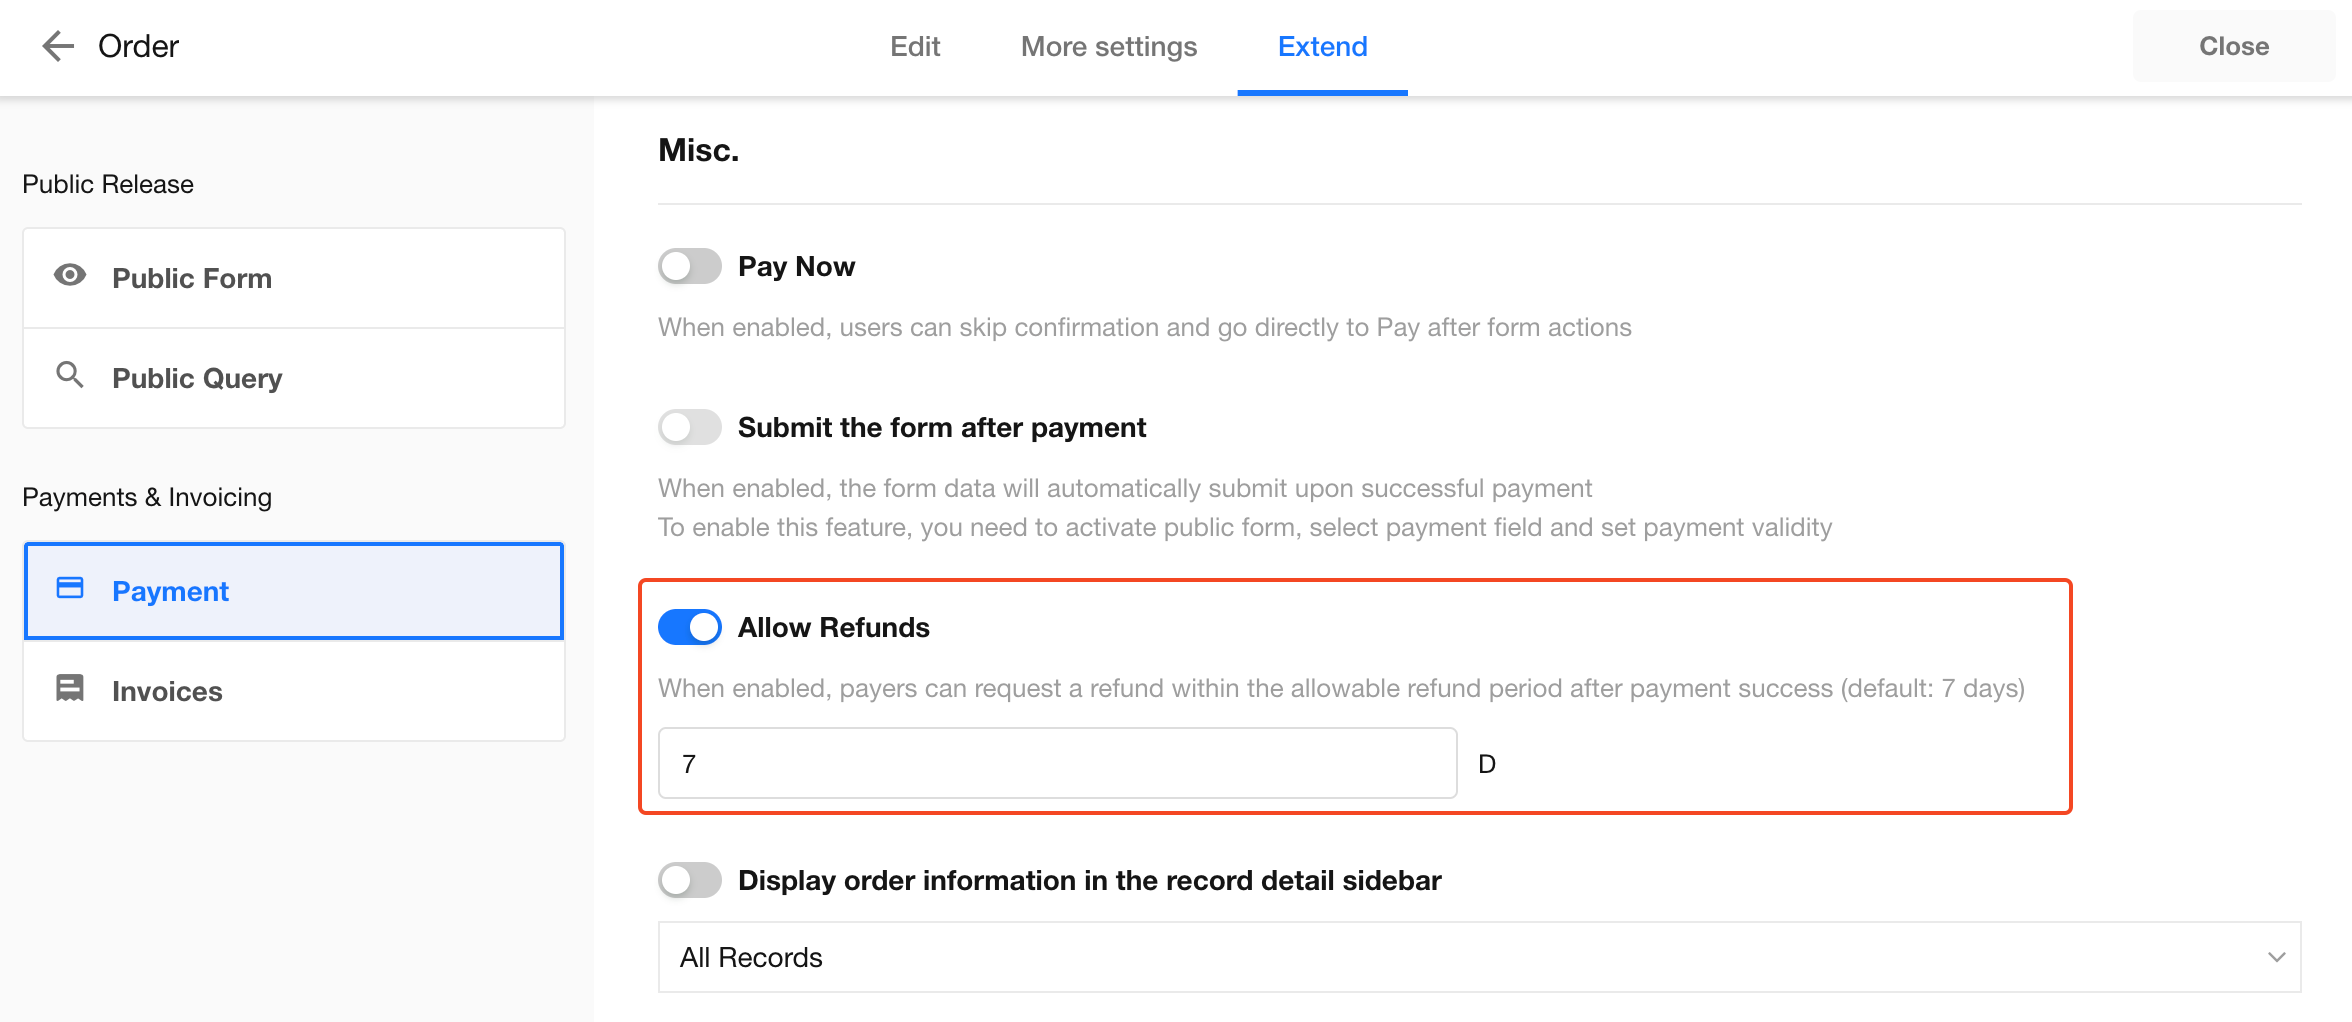
Allow Refunds
When Allow Refunds is enabled, you can configure the refund request period.
Payers can request a refund within a specified number of days after a successful payment. The default refund period is 7 days.
For eligible orders, users can request refunds directly from the payment information section of the corresponding record.
If Display order information in the record detail sidebar is not enabled, users cannot request refunds directly from records. To request a refund, they must contact an administrator, who can process it in the Org Admin Console.
Payment Process Example
-
Display payment options after creating a record.
-
Public Forms: After clicking Submit, users are presented with the payment information and payment button.
-
Worksheet Records: After creating a record, the payment button appears on the record details page. Click the button to view the payment details. You can also copy the payment link and share it with someone else to complete the payment.
-
-
Scan the QR code to pay.
Users can scan the payment QR code using WeChat or Alipay. Once payment is completed, they can view the order details.

-
View payment information and request refunds.
Payment details and mapped payment information are displayed in the worksheet record. Refunds can also be requested when the order meets the refund conditions.

Was this document helpful?