Organization Security Settings
Organization Security Settings provide centralized controls for member access, Contacts visibility, data access, sensitive information protection, and feature restrictions. These settings help reduce the risk of data leakage, unauthorized access, and misuse of high-risk features.
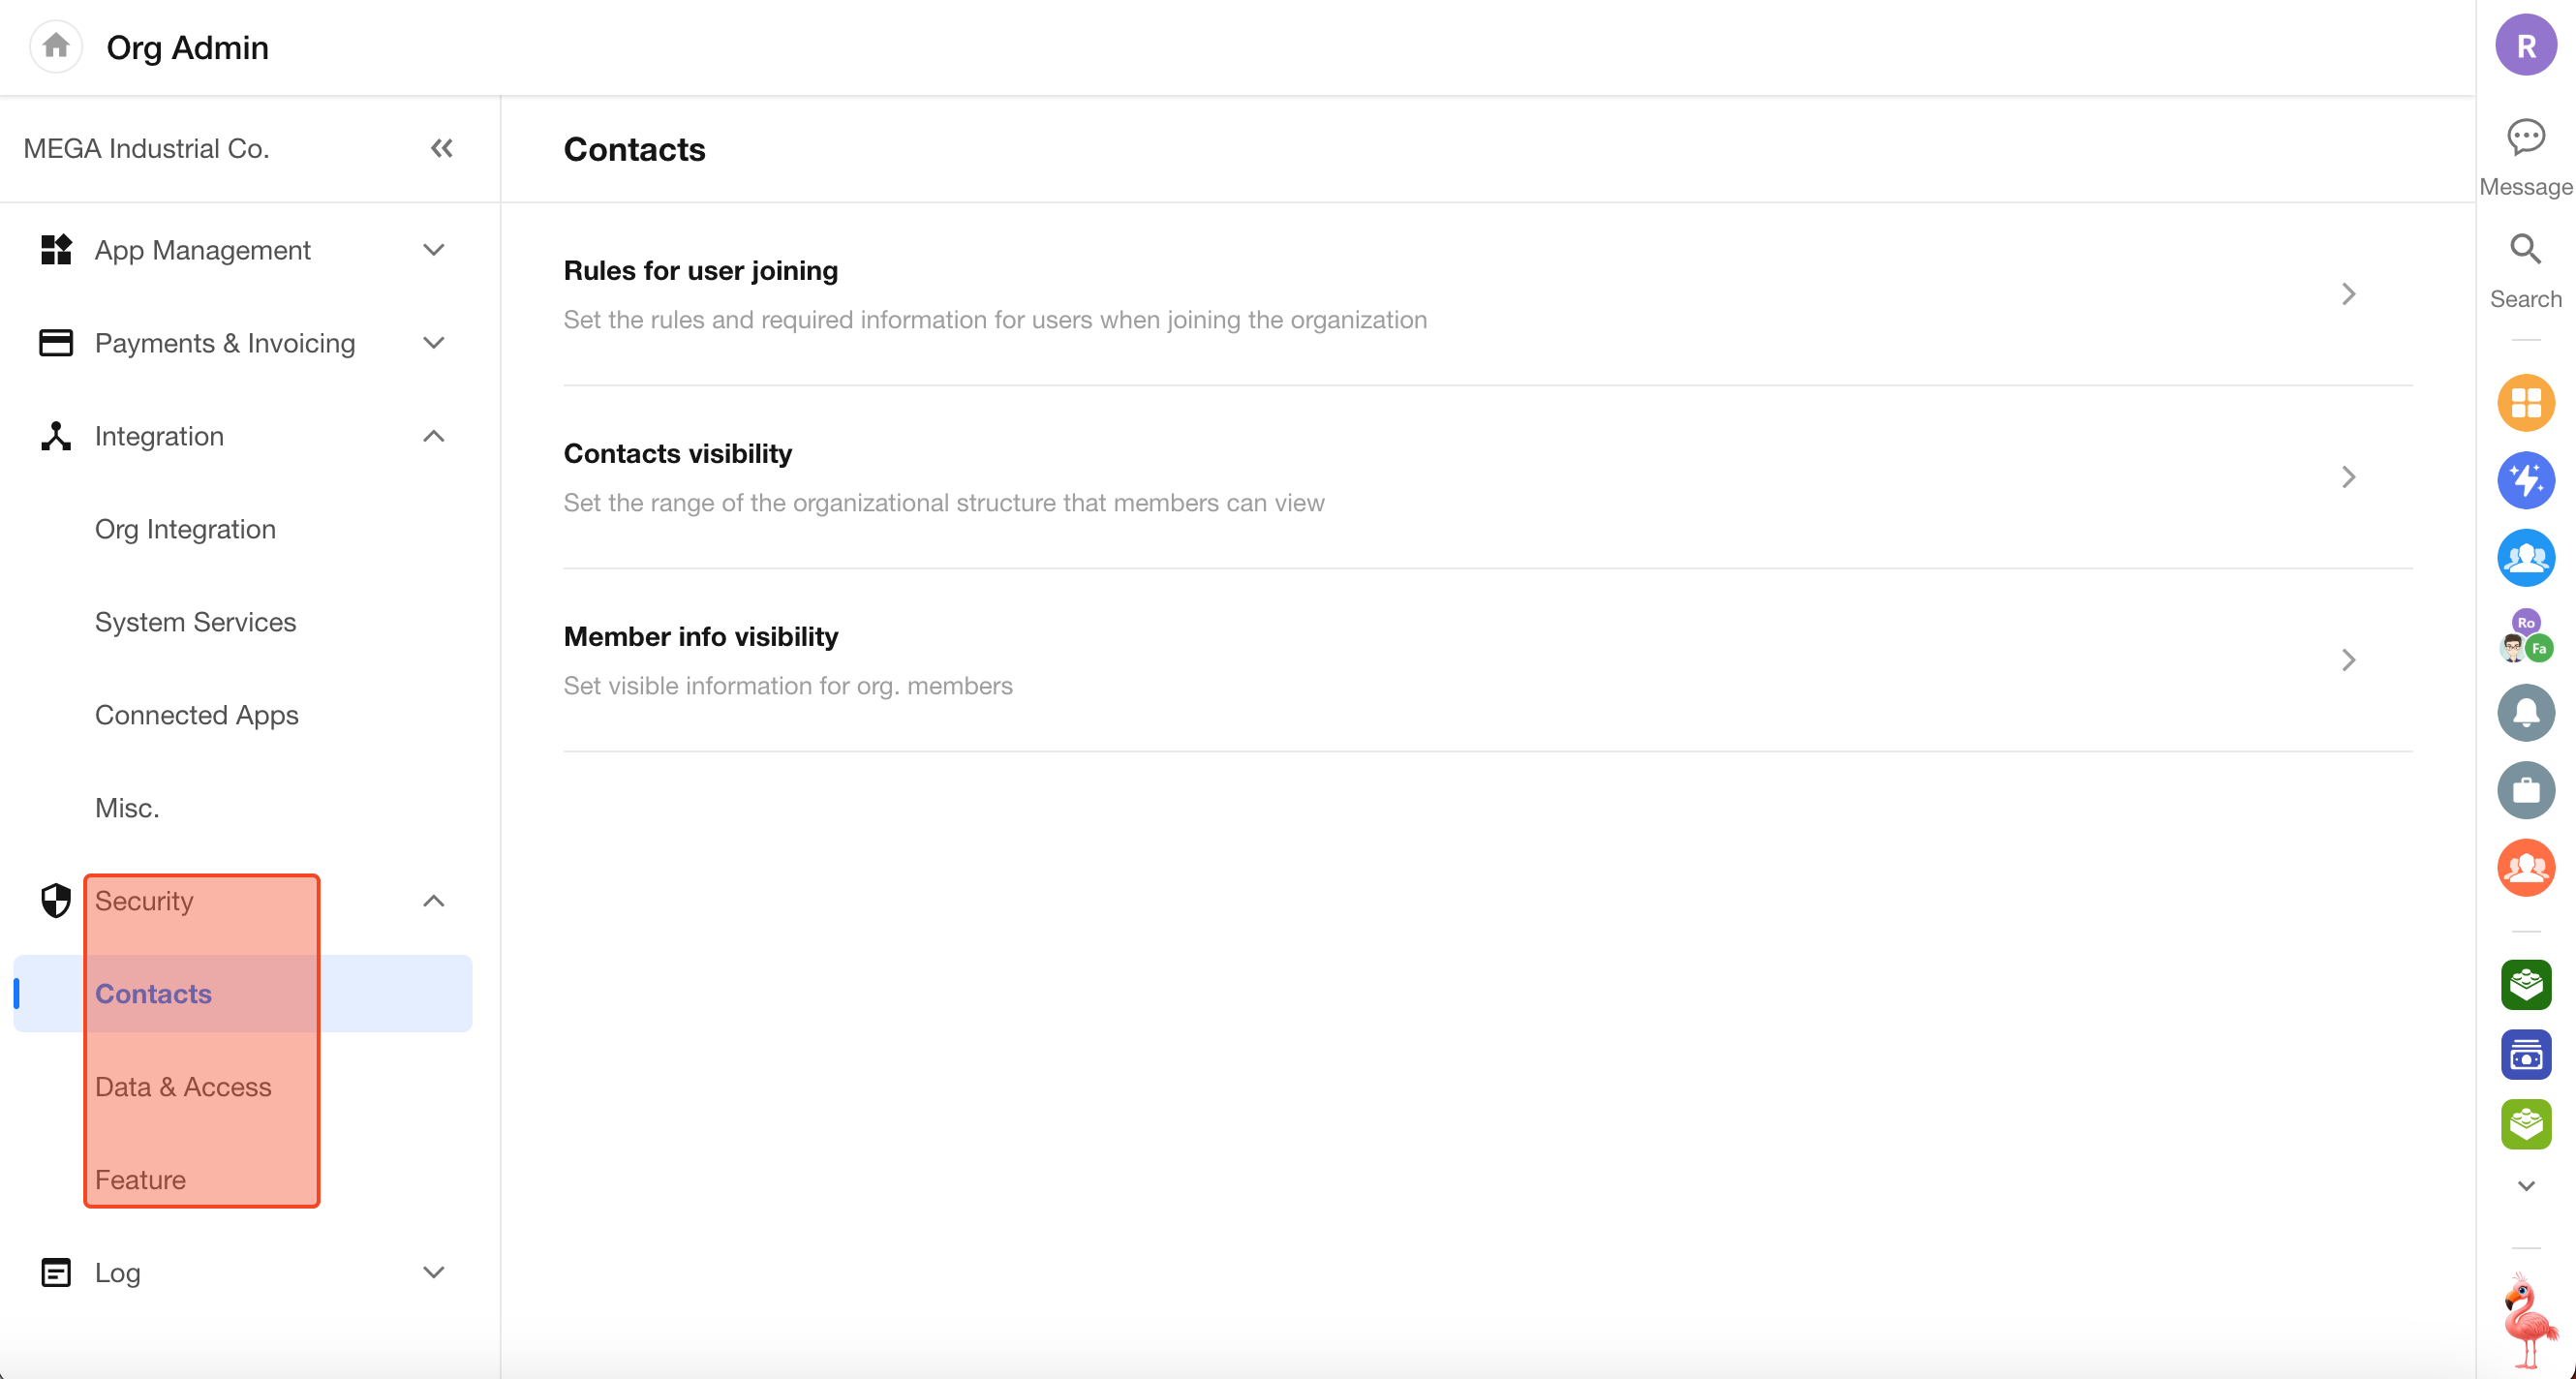
Organization administrators can configure user join policies, Contacts visibility, member profile visibility, screen watermarks, API and CLI access policies, API network proxy settings, field encryption rules, and password verification exemption policies in one place by navigating to Org Admin > Security.
User Joining Rules
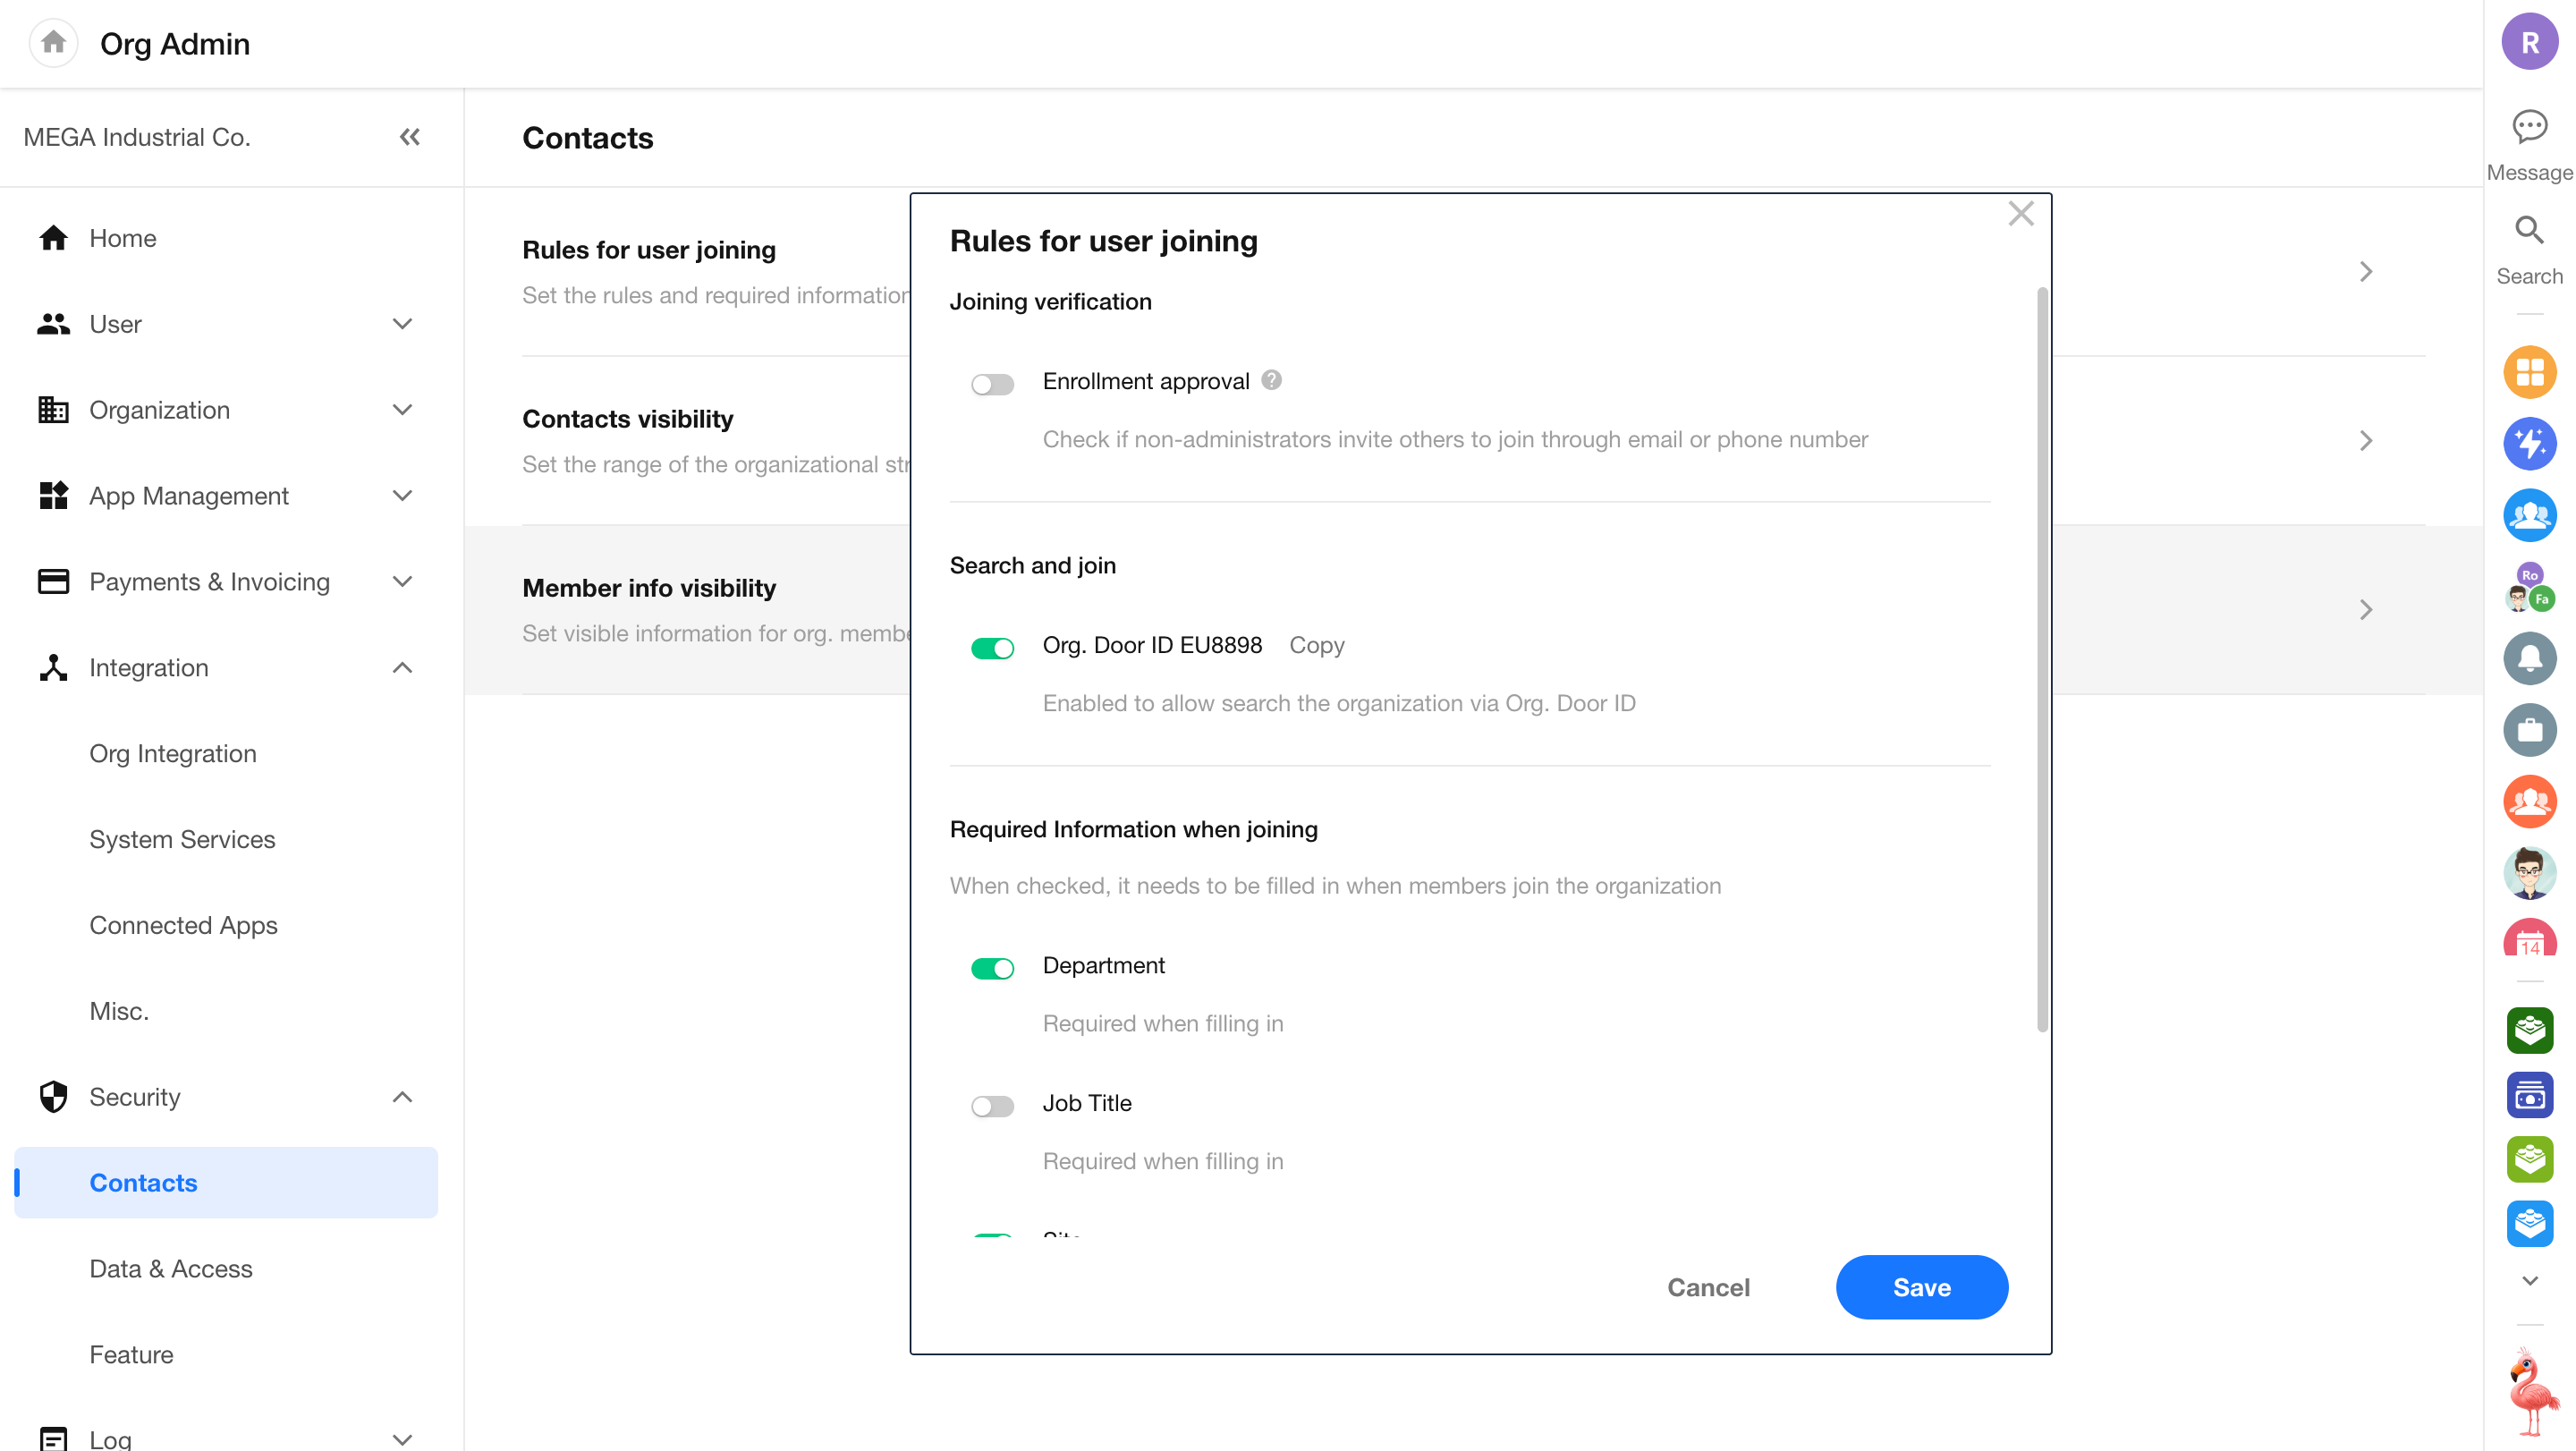
In Security > Contacts > Rules for user joining within the Organization Admin Console, administrators can centrally configure the approval for users joining the organization and required identity information fields.
-
Approval Upon Joining
The system applies different approval logic based on the invitation source and security policies:
Enrollment Approval:
When enabled, users invited by non-admin members must be approved by an administrator before joining the organization. When disabled, users can join directly after submitting their information.Approval-free Join:
Invitations sent directly by administrators via specified phone numbers or email addresses allow users to join without approval after registration.Mandatory Approval:
Users who request to join via a public invitation link or by searching the organization Door ID are always subject to administrator approval. -
Join via Organization Door ID
Enabled:
External users can find the organization by searching the Door ID and submit a join request.Disabled:
Users cannot search or request to join the organization using the Door ID. -
Identity Information Collection
Administrators can customize the fields that users must complete when applying to join the organization, such as department, job title, work location, and employee ID. These fields will be displayed on the application page.
Contacts Visibility Settings
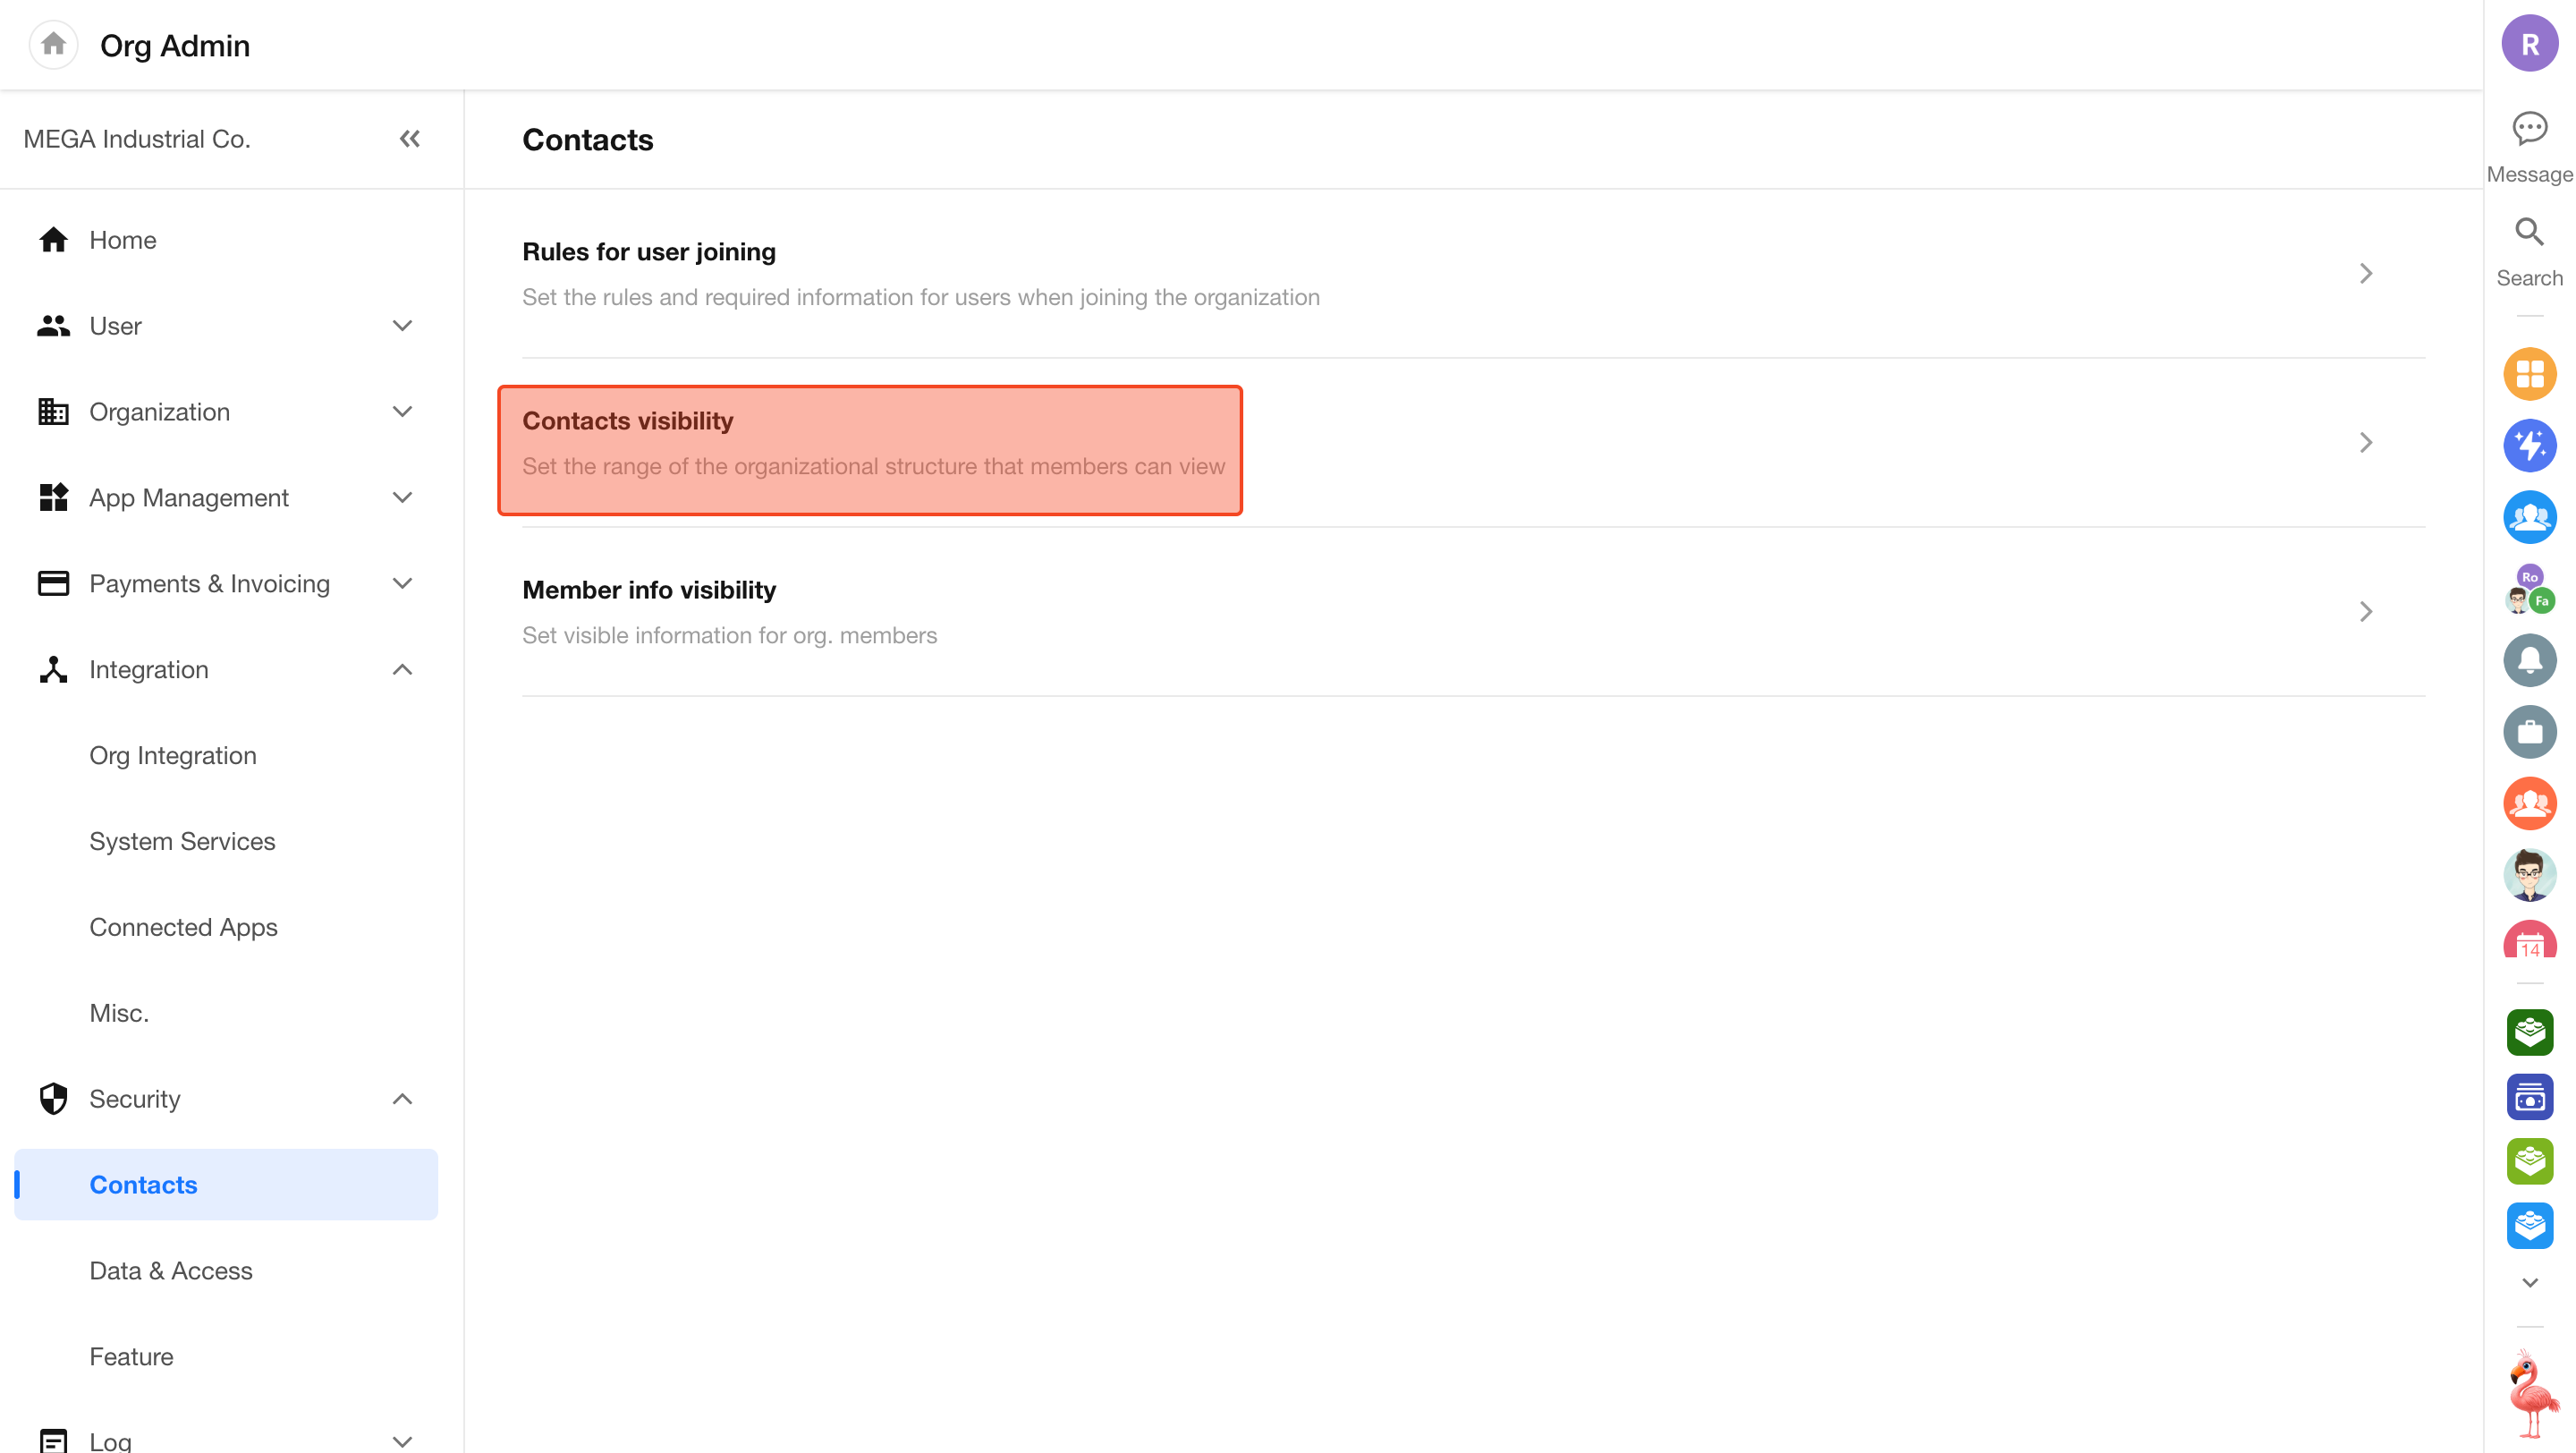
In Org Admin > Security > Contacts > Contacts Visibility, administrators can flexibly configure members’ access to Contacts based on the organization’s privacy requirements.
Rule Description
The system provides the following three strategies to control Contacts visibility:
-
Restrict Viewing Other Departments
Selected members can only view users and the structure within their own department. You can configure a whitelist (users exempt from restrictions) and specify additional visible departments or users.
-
Restrict Viewing All Users
Restricted members cannot view any Contacts information within the organization (including users and department structure). You can specify “visible users” to support specific collaboration scenarios.
-
Hide from Everyone
Completely hides specific users from the organization’s Contacts. Other members will not be able to search for these users when adding application members, inviting users to groups, or mentioning users (@) in record discussions.
Note: This rule only supports configuration at the user level. Batch configuration by department or job title is not supported.
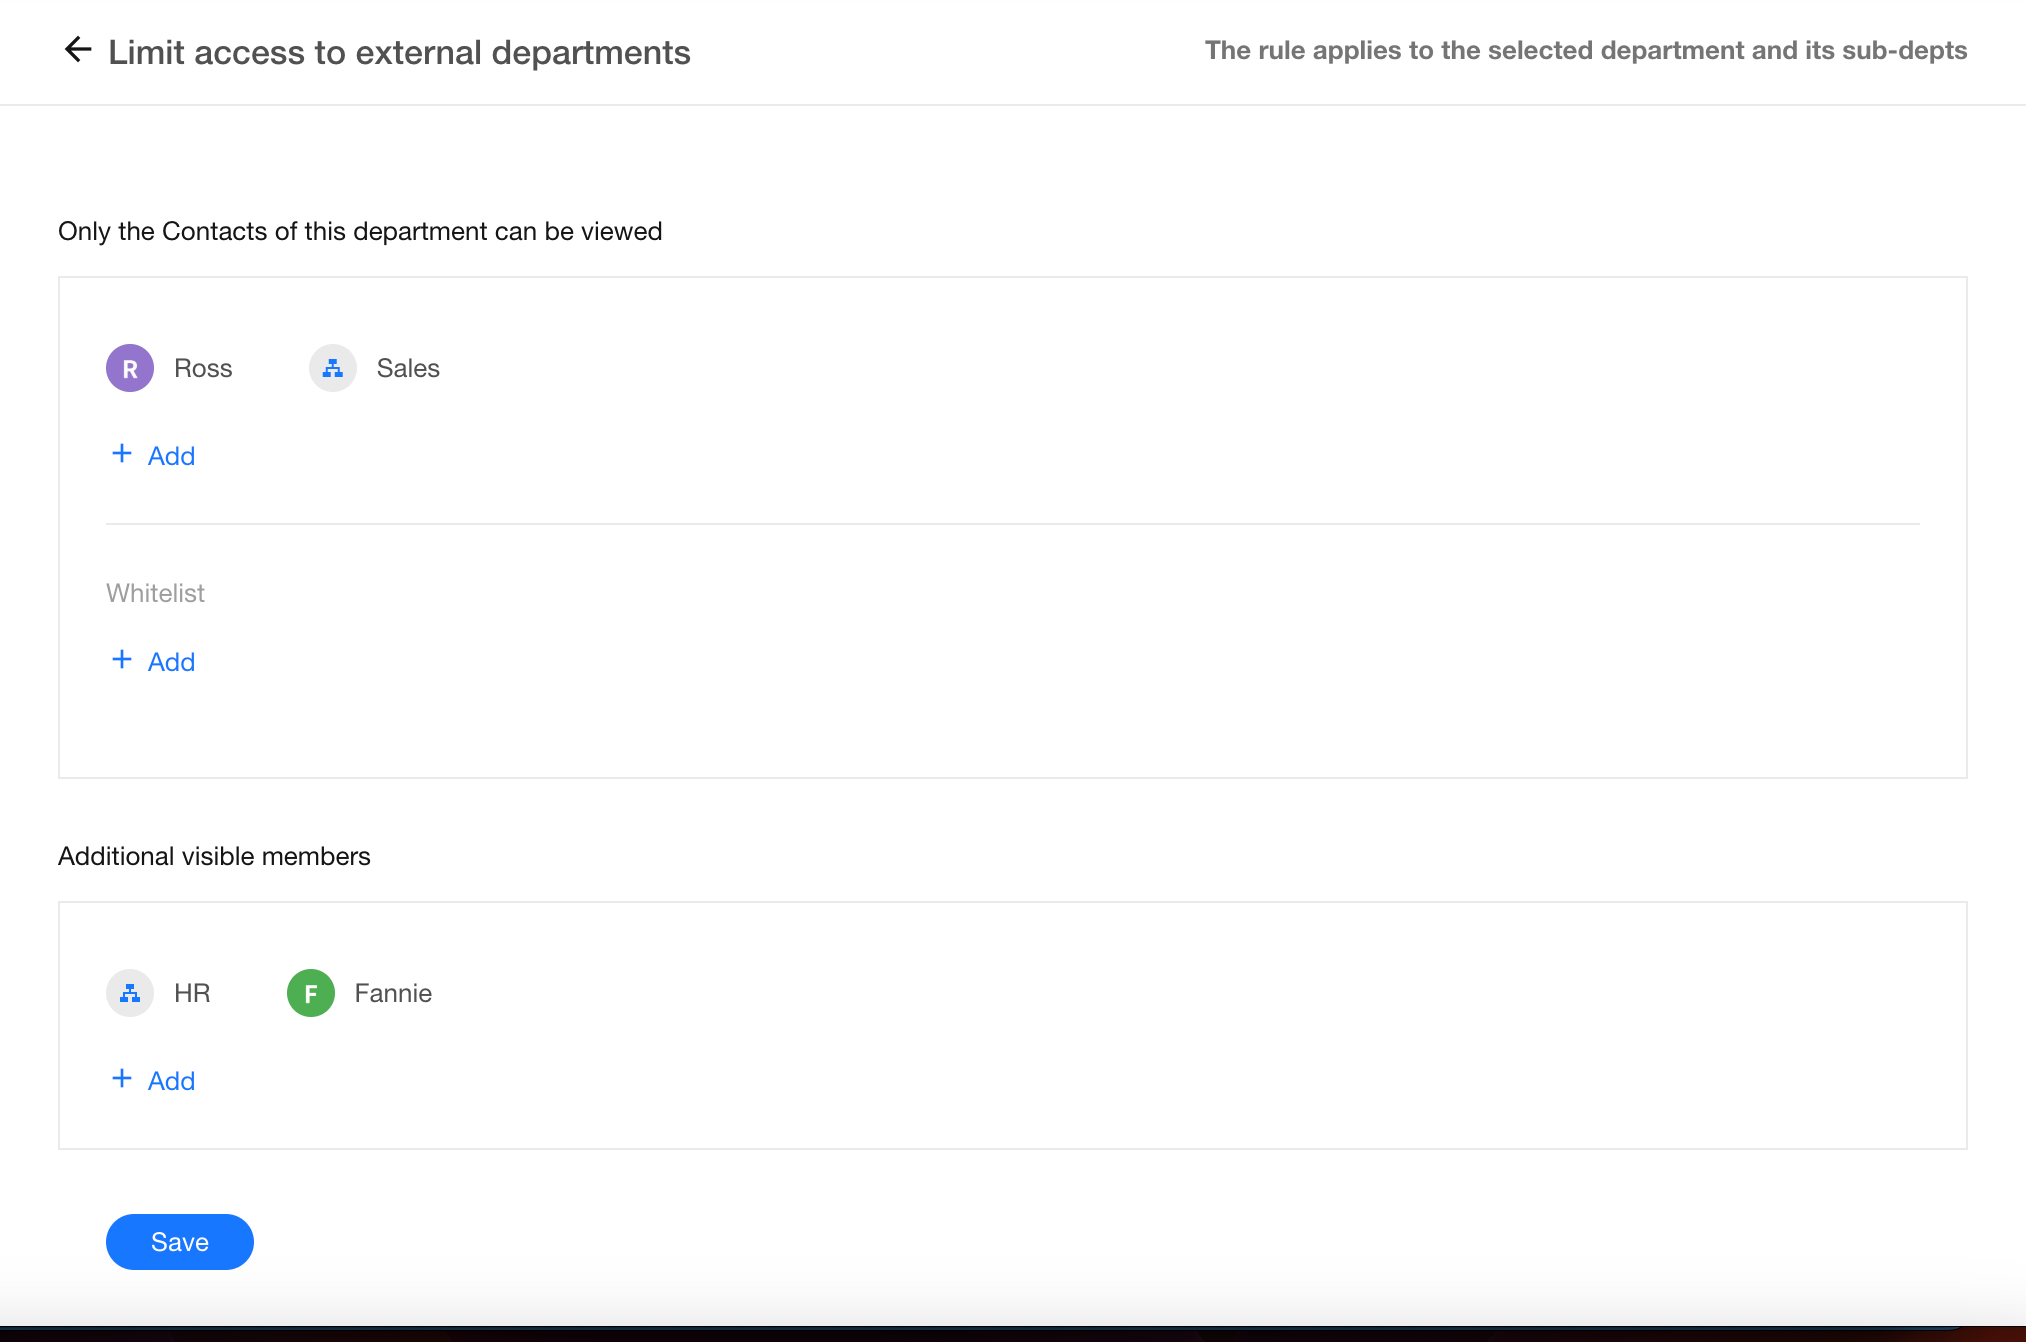
Scenario 1: Restrict Viewing Other Departments
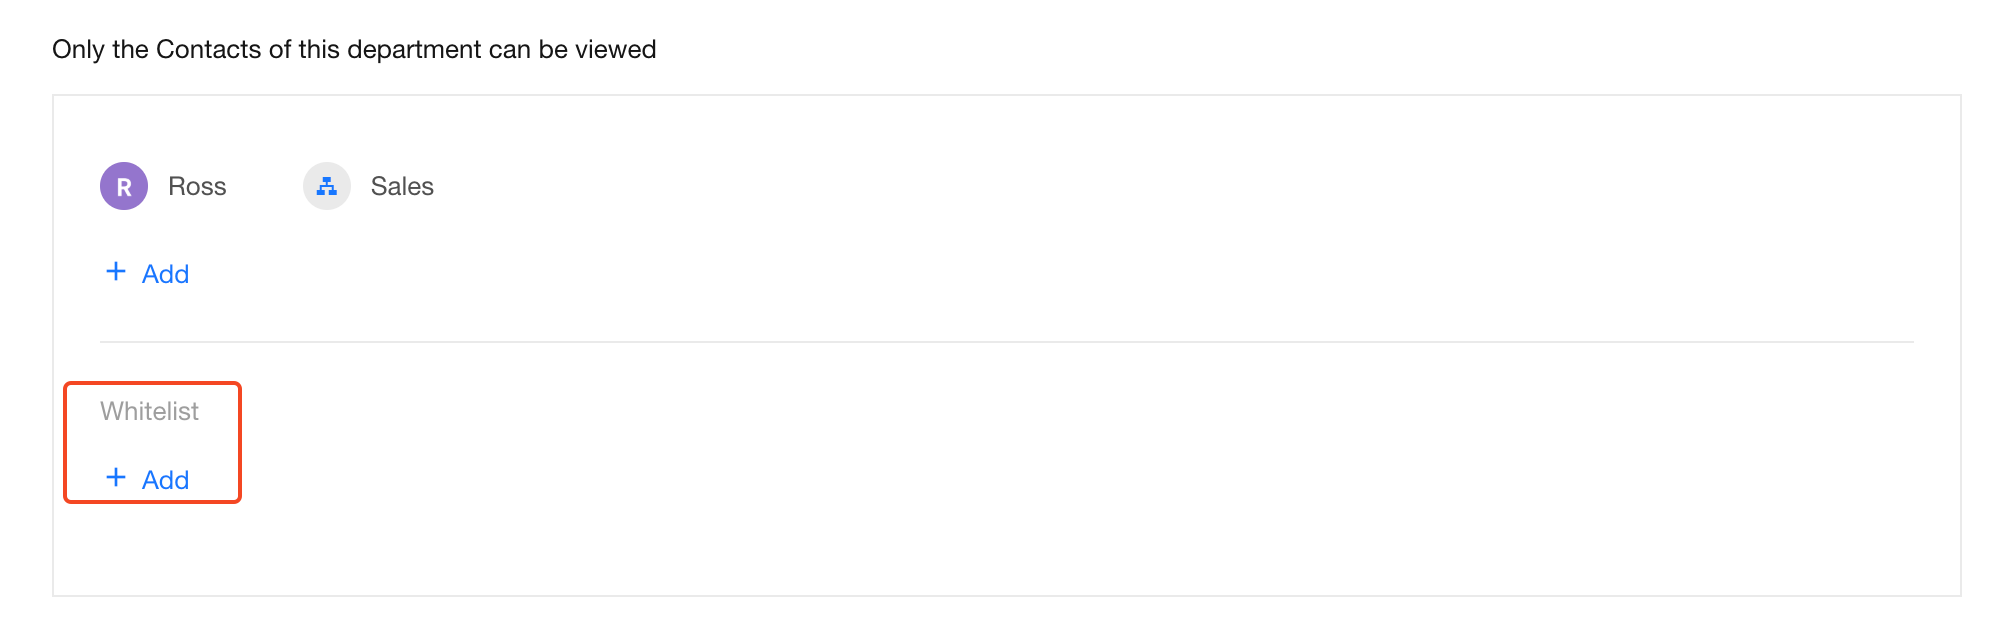
Suppose Ross (in the R&D department) and members of the Sales department should not be able to view other departments, but are allowed to view members of the HR department and Fannie from the Marketing department. In this case, select the Restrict Viewing Other Departments rule.
- Create a new rule
- Under Only allow viewing own department Contacts, select Ross and the Sales department
- Under Additional visible members, add the HR department and Fannie
Whitelist
If the restriction applies to a department or organization role, you can designate a subset of users as a whitelist. Whitelisted users are exempt from the visibility restrictions.
For example, if the organization’s super administrator belongs to the Sales department, they should be added to the whitelist. Otherwise, the administrator would also be restricted, which may affect management efficiency.
Scenario 2: Restrict Viewing All Users
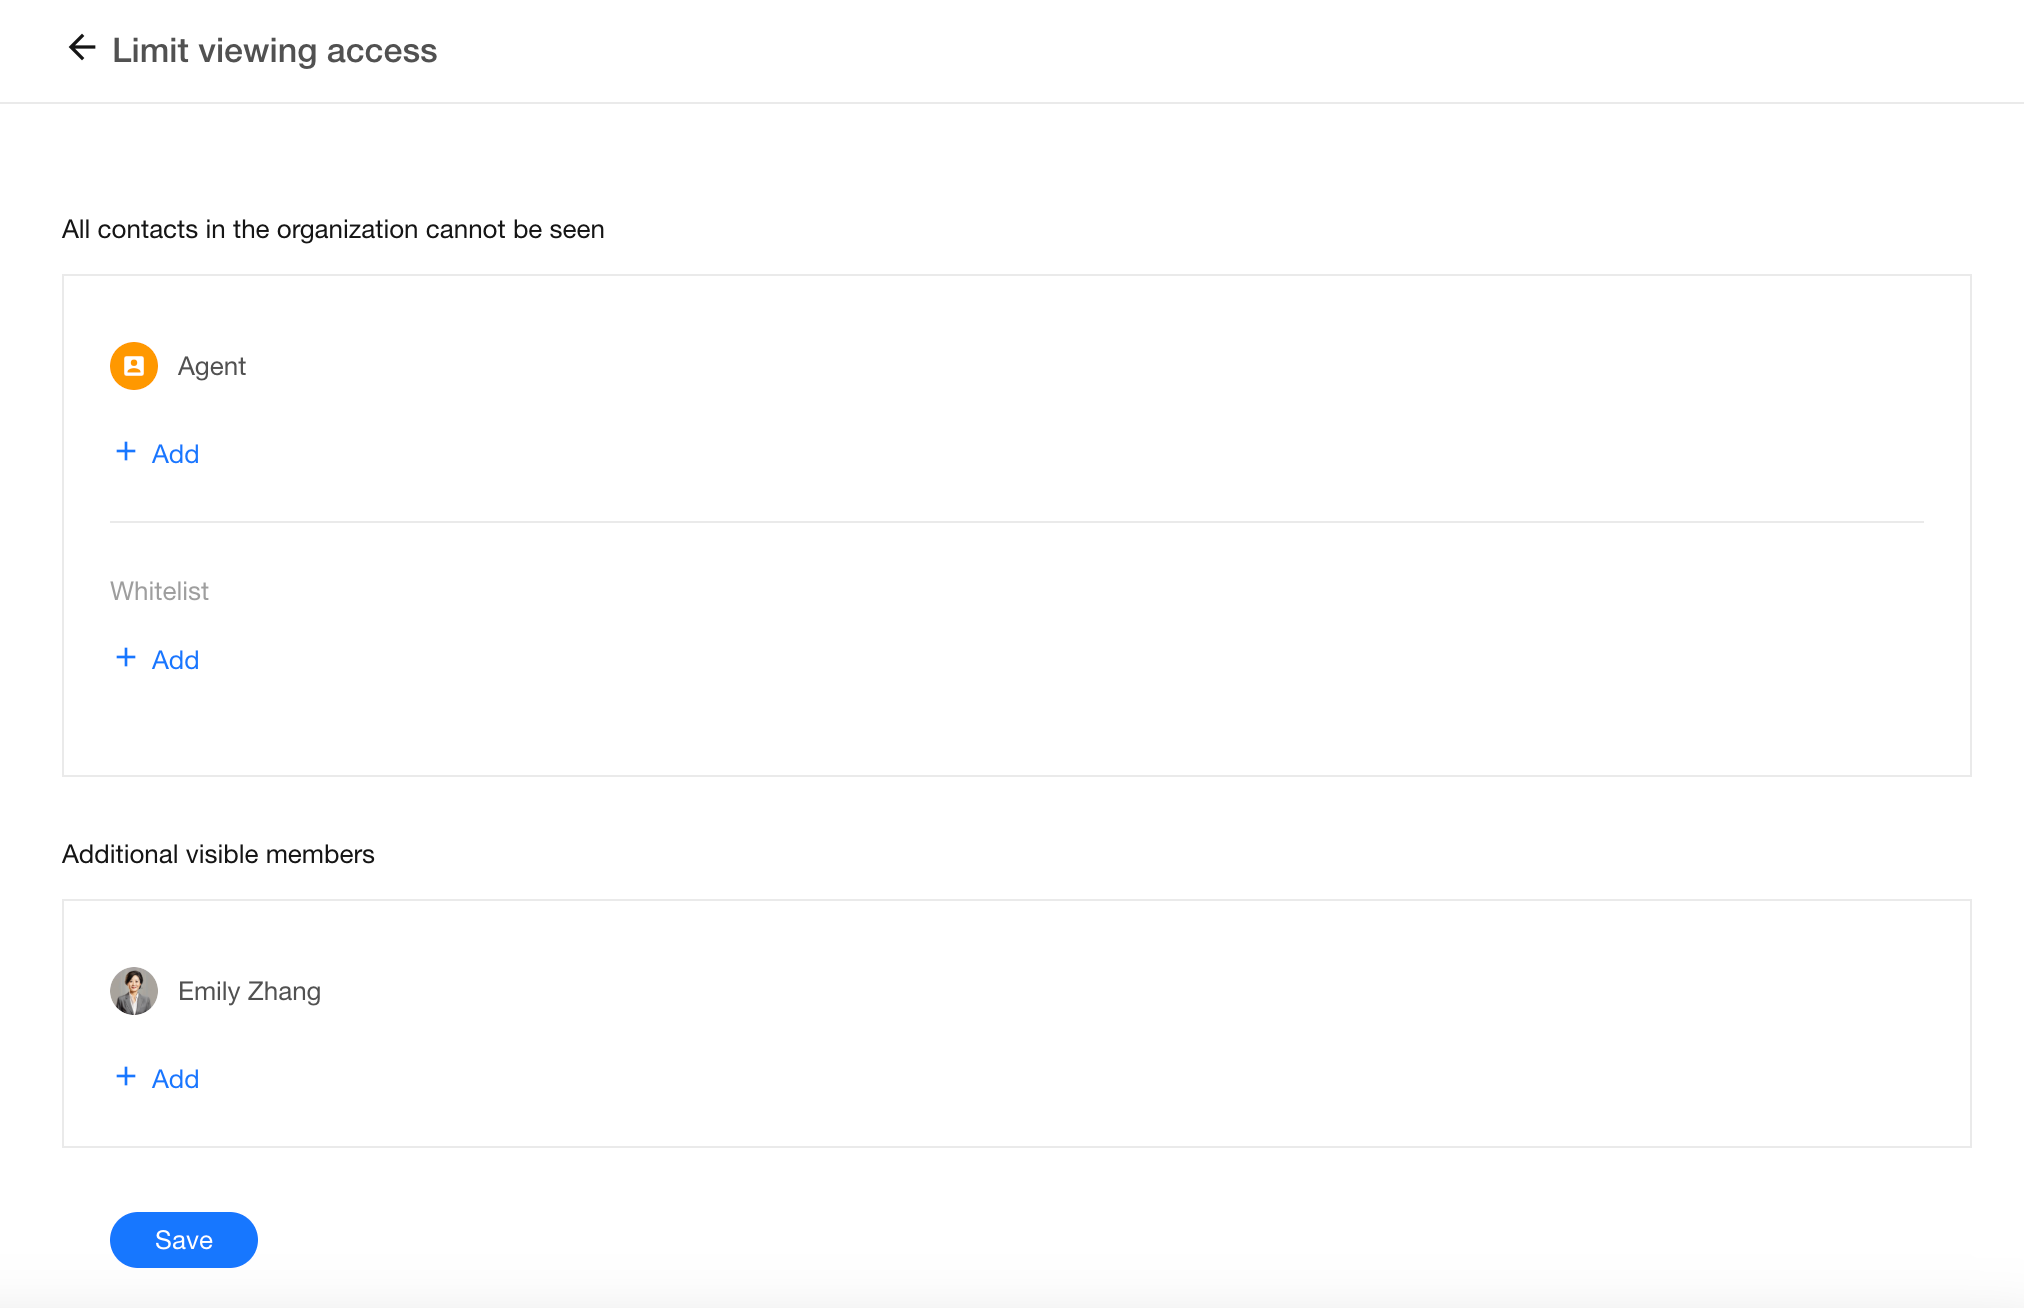
If agents have joined the organization, they are considered “colleagues” by default, meaning they can chat with each other and view Contacts. This is usually not desirable. You can use the Restrict Viewing All Users rule to prevent agents from accessing any Contacts information.
- Create a new rule
- Under All contacts in the organization cannot be seen, select the agent role via organization roles. If certain agents should not be restricted, exclude them using the whitelist
- Under Additional visible members, add specific users who should remain visible. All others will be hidden from the agents
Scope of Contacts Visibility Rules
- In Contacts, users and departments that are not visible will be hidden in both “All” view and department-based views
- In posts or record discussions, invisible users will not appear when mentioning (@) or selecting members
- In member selection dialogs, invisible users and departments will be hidden
Rule Priority
Individual vs. Department
Rules applied to individual members take precedence over rules applied to their department.
For example:
- Rule 1: Jeff can view the HR department
- Rule 2: Jeff’s department cannot view the HR department
Final result: Jeff can view the HR department.
Parent Department vs. Sub-department
-
Case 1: Only the parent department is selected

If only the R&D department is selected, its sub-departments inherit the same visibility scope. Members in R&D Team 1, R&D Team 2, and the R&D department can only view Contacts within these departments.
-
Case 2: Both parent and sub-departments are selected
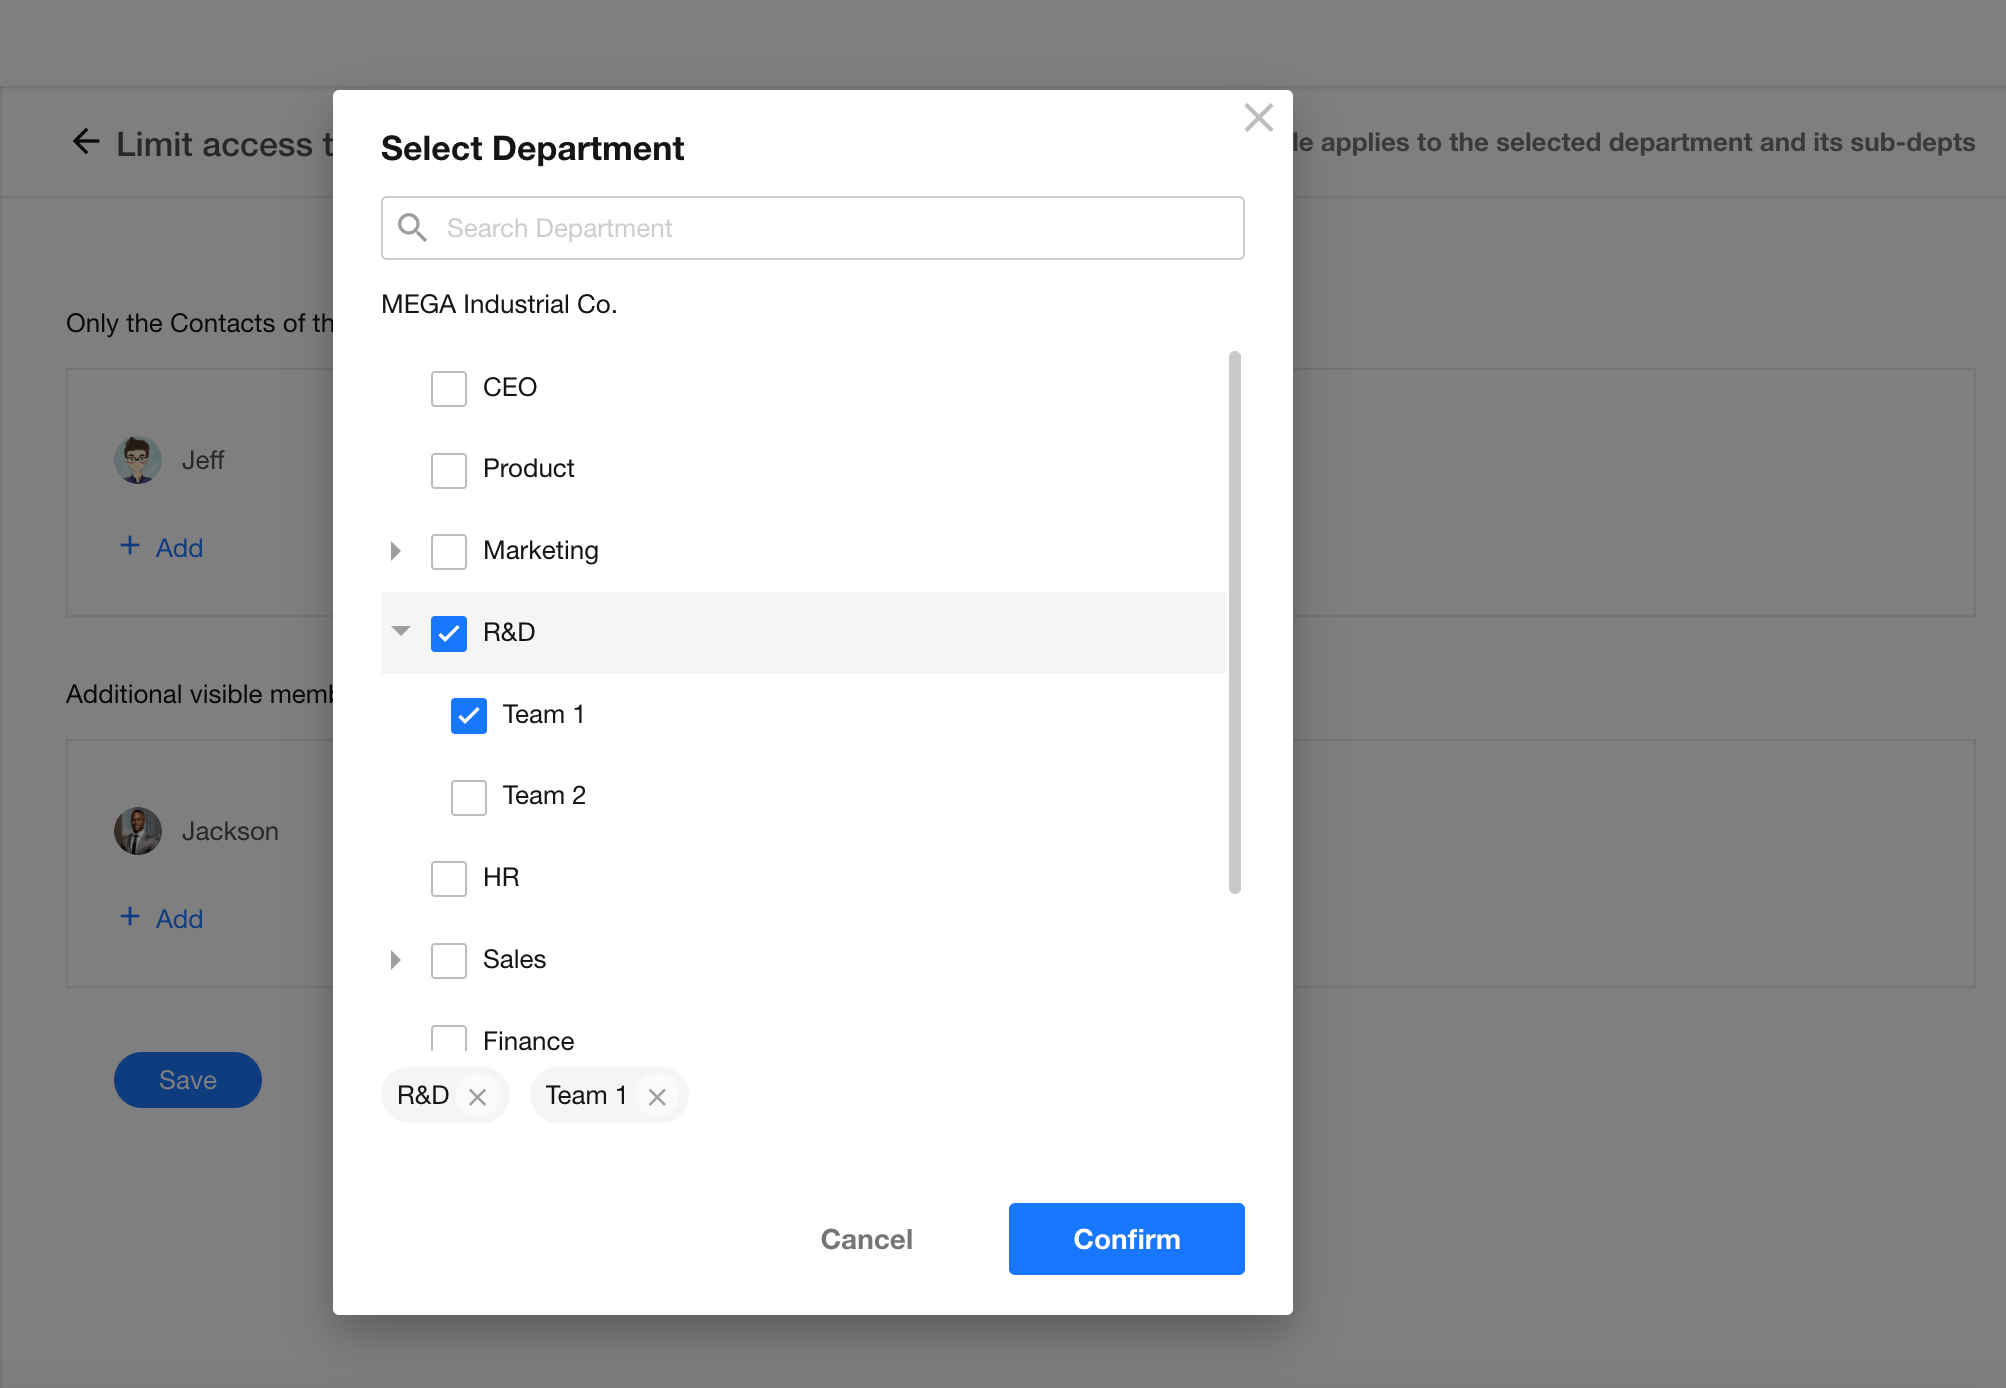
If both the R&D department and R&D Team 1 are selected, R&D Team 1 follows its own rule.
- R&D department can view: [R&D department, R&D Team 1, R&D Team 2]
- R&D Team 1 can view: [R&D Team 1]
- R&D Team 2 can view: [R&D department, R&D Team 1, R&D Team 2]
Users Belonging to Multiple Departments
-
If one department is not restricted, the user is not restricted
Jeff belongs to both the Sales and Marketing departments. If the Sales department is restricted but the Marketing department is not, Jeff can still view all Contacts.
→ The most permissive scope applies. -
If all departments are restricted, visibility is the union of all rules
Jeff belongs to both the Sales and Marketing departments.
- Rule 1: Sales department can additionally view the HR department and Jackson
- Rule 2: Marketing department can additionally view the R&D department
Final visibility: [HR department, R&D department, Jackson]
Member Information Display
Organization administrators can configure what information is shown when members view each other's profiles and business cards under Org Admin > Security > Account.
-
If a member sets their phone number or email as “Visible to myself only” in Account & Privacy, that information will not be visible to others.
-
When a member belongs to multiple departments or holds multiple positions, the system will display all associated departments and job titles.
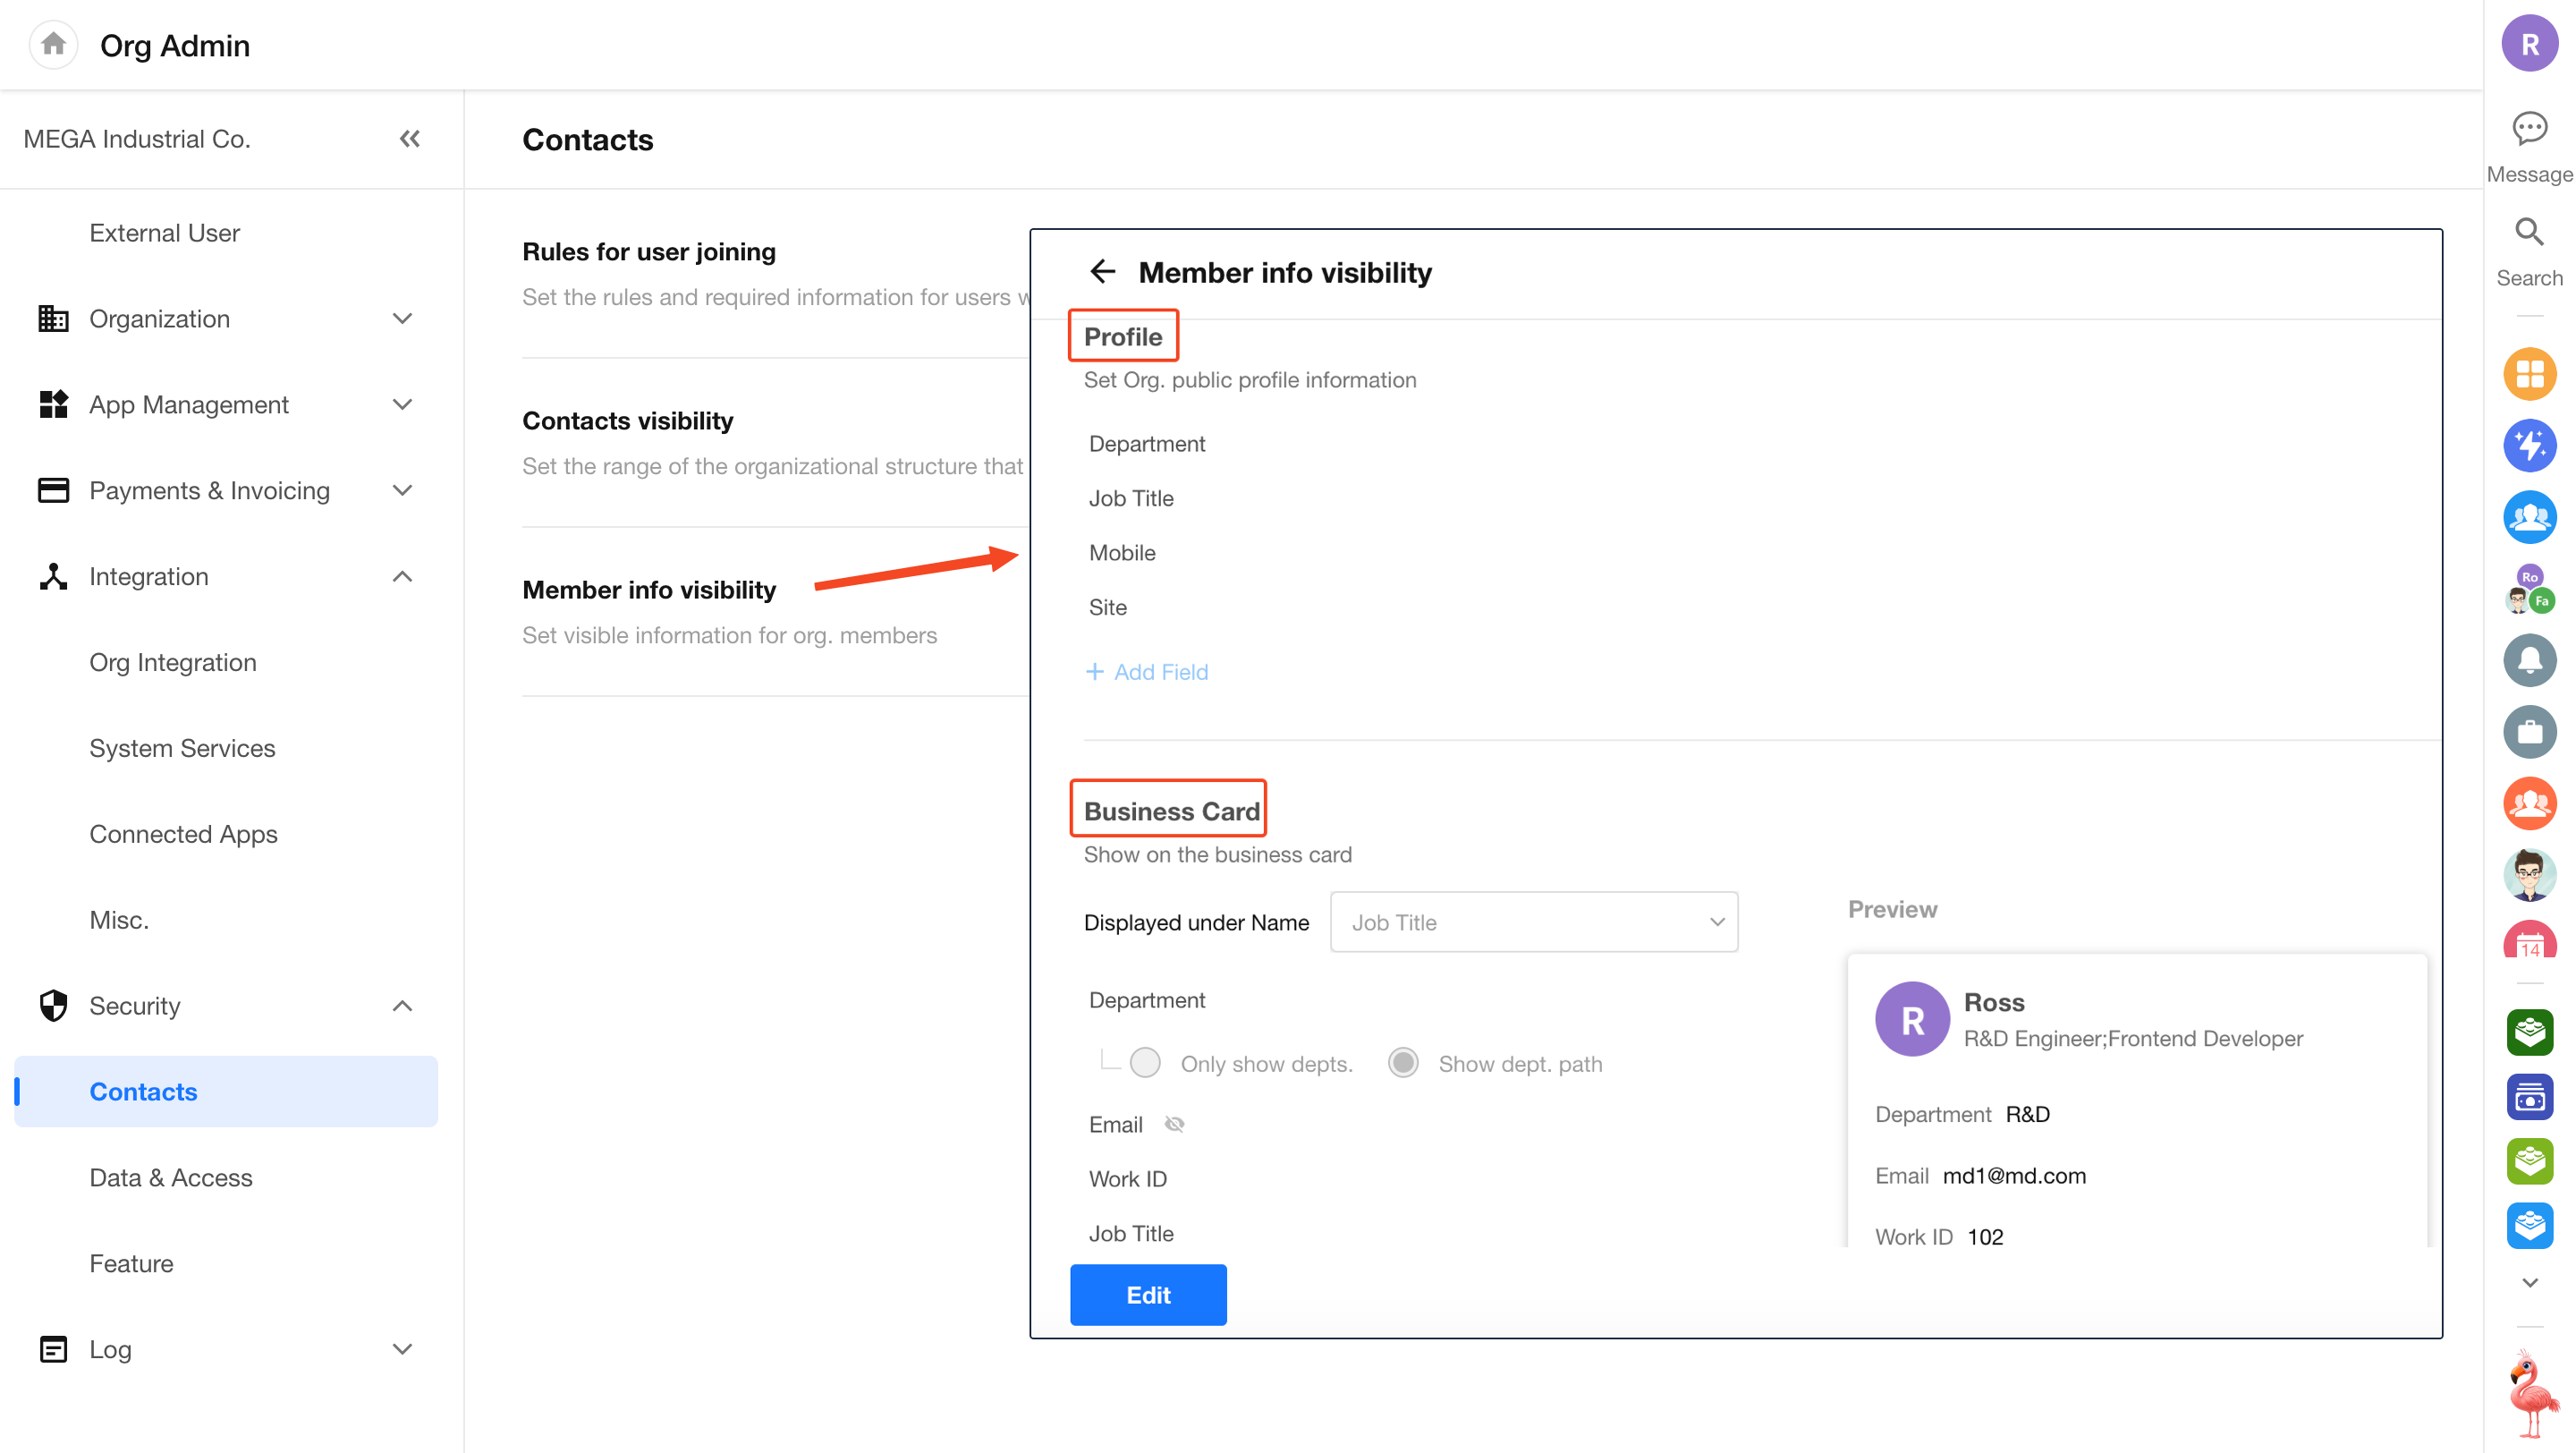
The personal profile is primarily shown when viewing the Contacts or visiting the member’s post page:
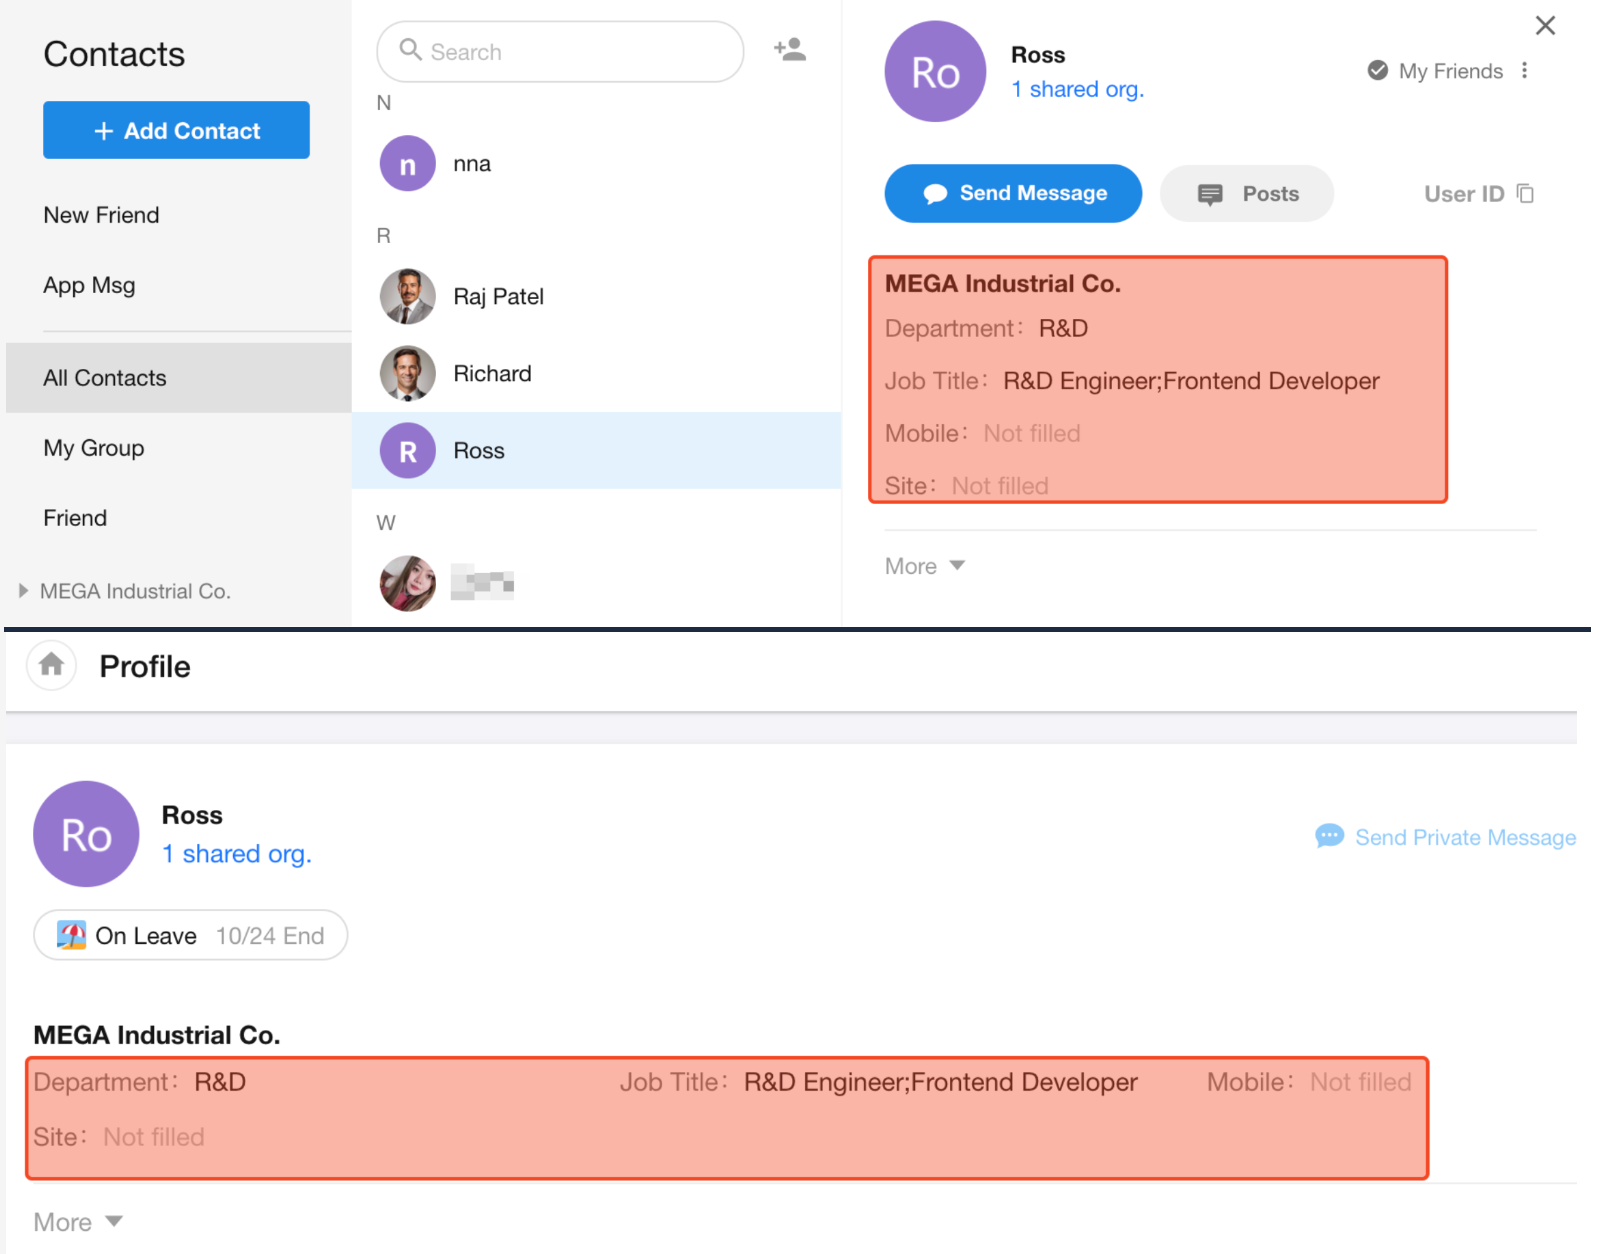
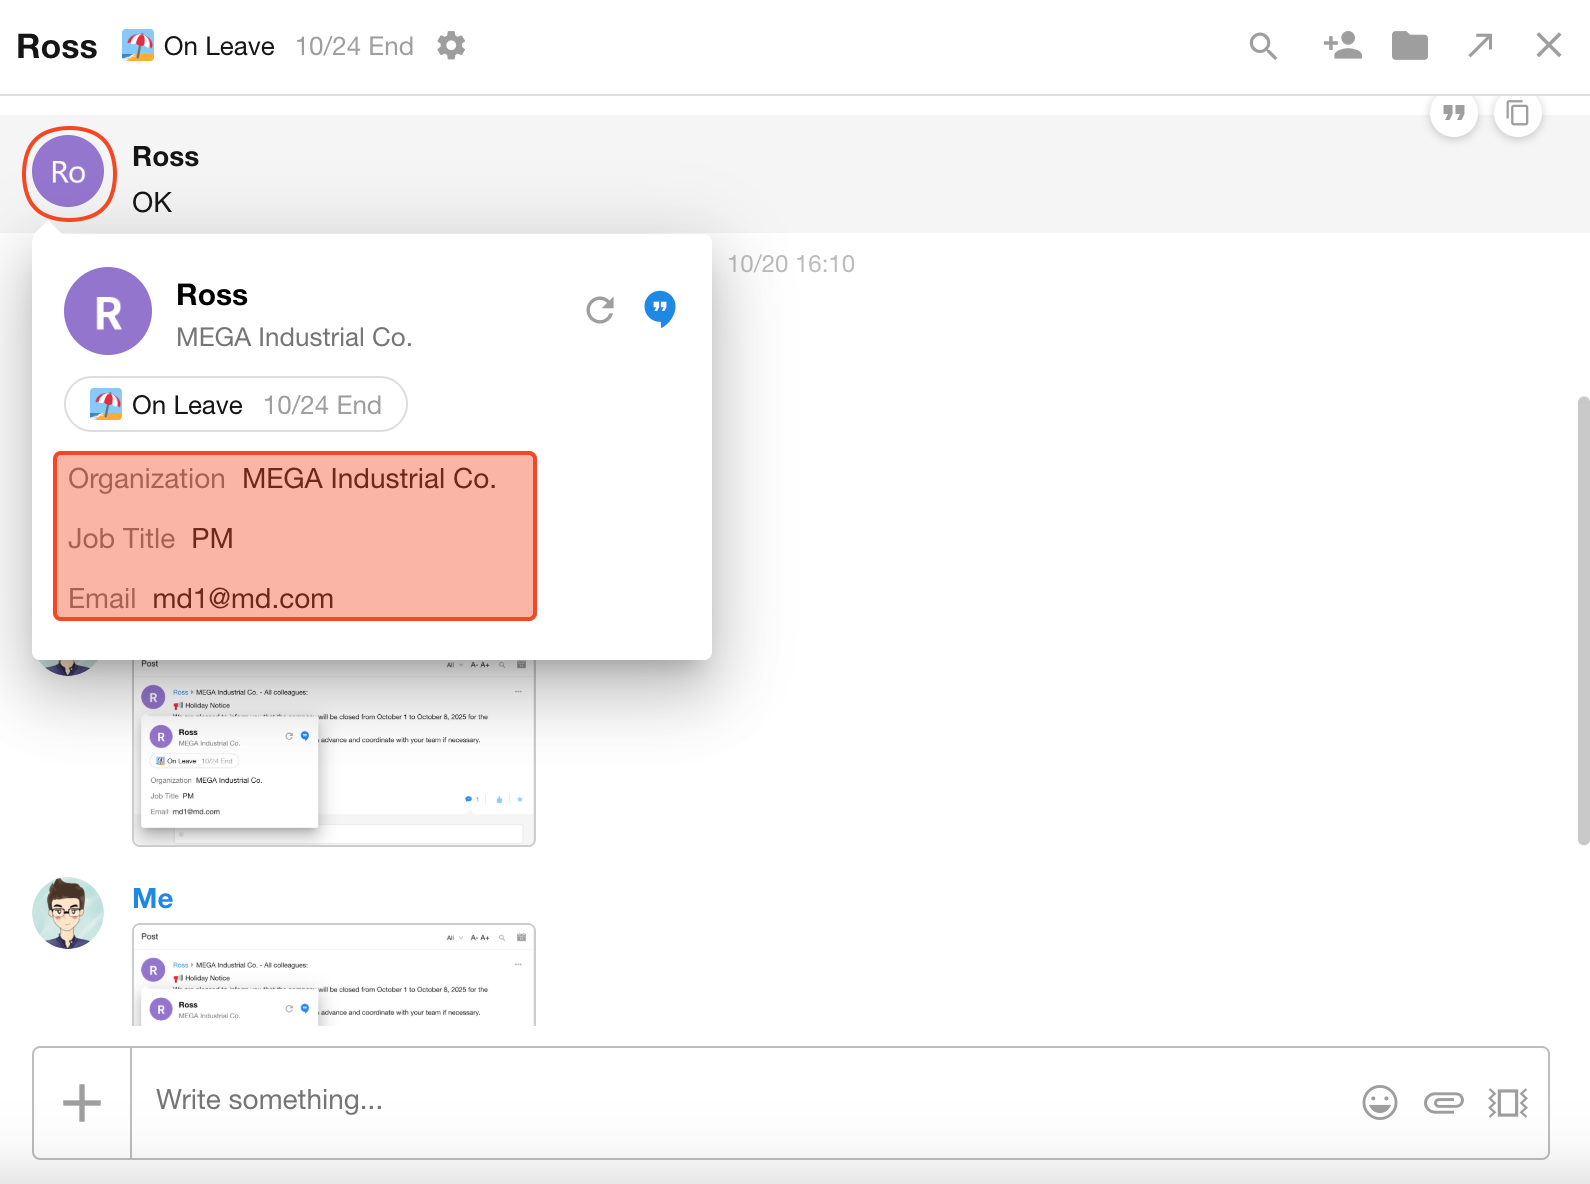
Business card refers to the pop-up information layer shown when clicking a member’s avatar within the app.
-
Fields that are left empty will not be displayed.
-
The Department field supports two display modes:
- Show only the department name
- Show the full department path
Screen Watermark
To enhance enterprise data security, screen watermarks can be enabled on the organization management console, app views, and worksheet pages.
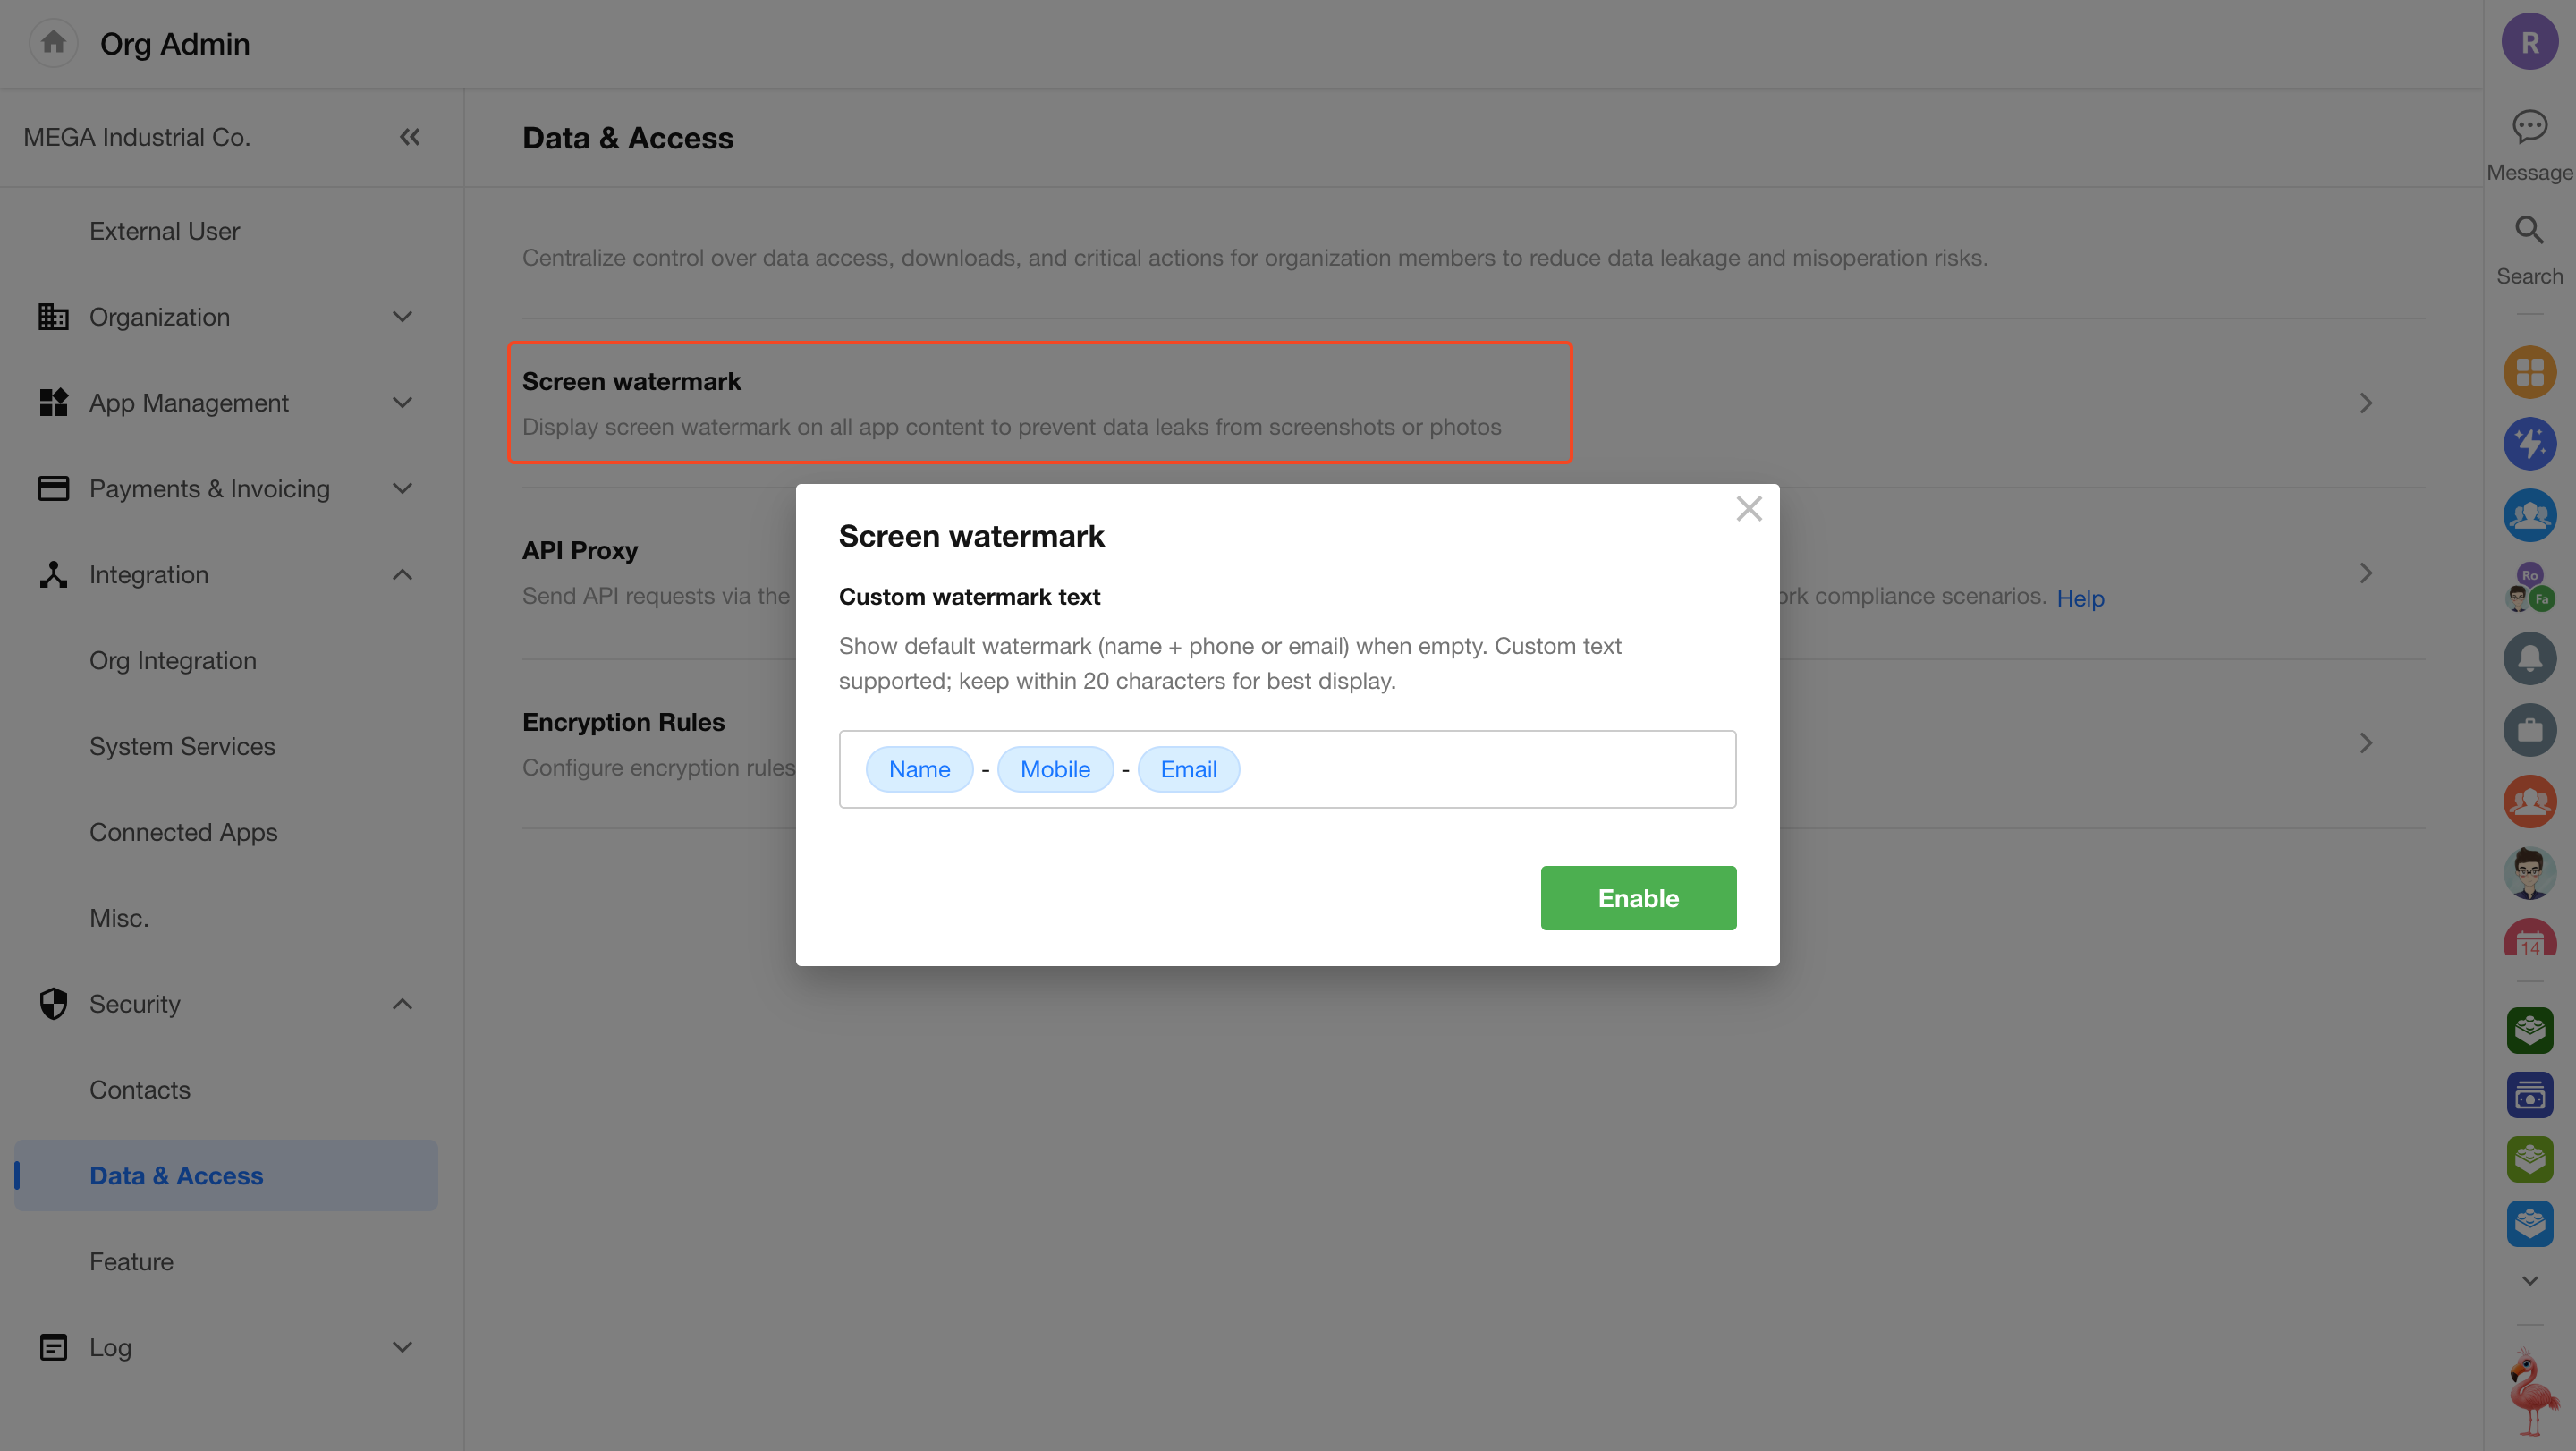
Enable / Disable Watermark
Organization admins can click the profile avatar and navigate to Org Admin > Security > Data & Access to toggle the watermark setting.
The watermark can include combinations of the user's name, phone number (last 4 digits), email, and organization name.
You can also input a custom fixed string—up to 20 characters.
Watermark Display
Where the Watermark Appears
Watermarks are shown on selected pages only:
-
All pages in the Organization Management Console
-
App pages where user data is displayed:
- Home page
- Record creation page
- Record editing page
- View pages (record list)
- Custom pages
Watermark is retained when custom pages are saved as images
- User Management (including External Portal Management)
- Workflow list page
Watermarks do not appear on form configuration or workflow configuration pages within the app.
Watermarks are supported when saving custom pages as images. Watermarks can also be applied when previewing or downloading images from file fields. For more information, see Watermark Settings for File Fields.
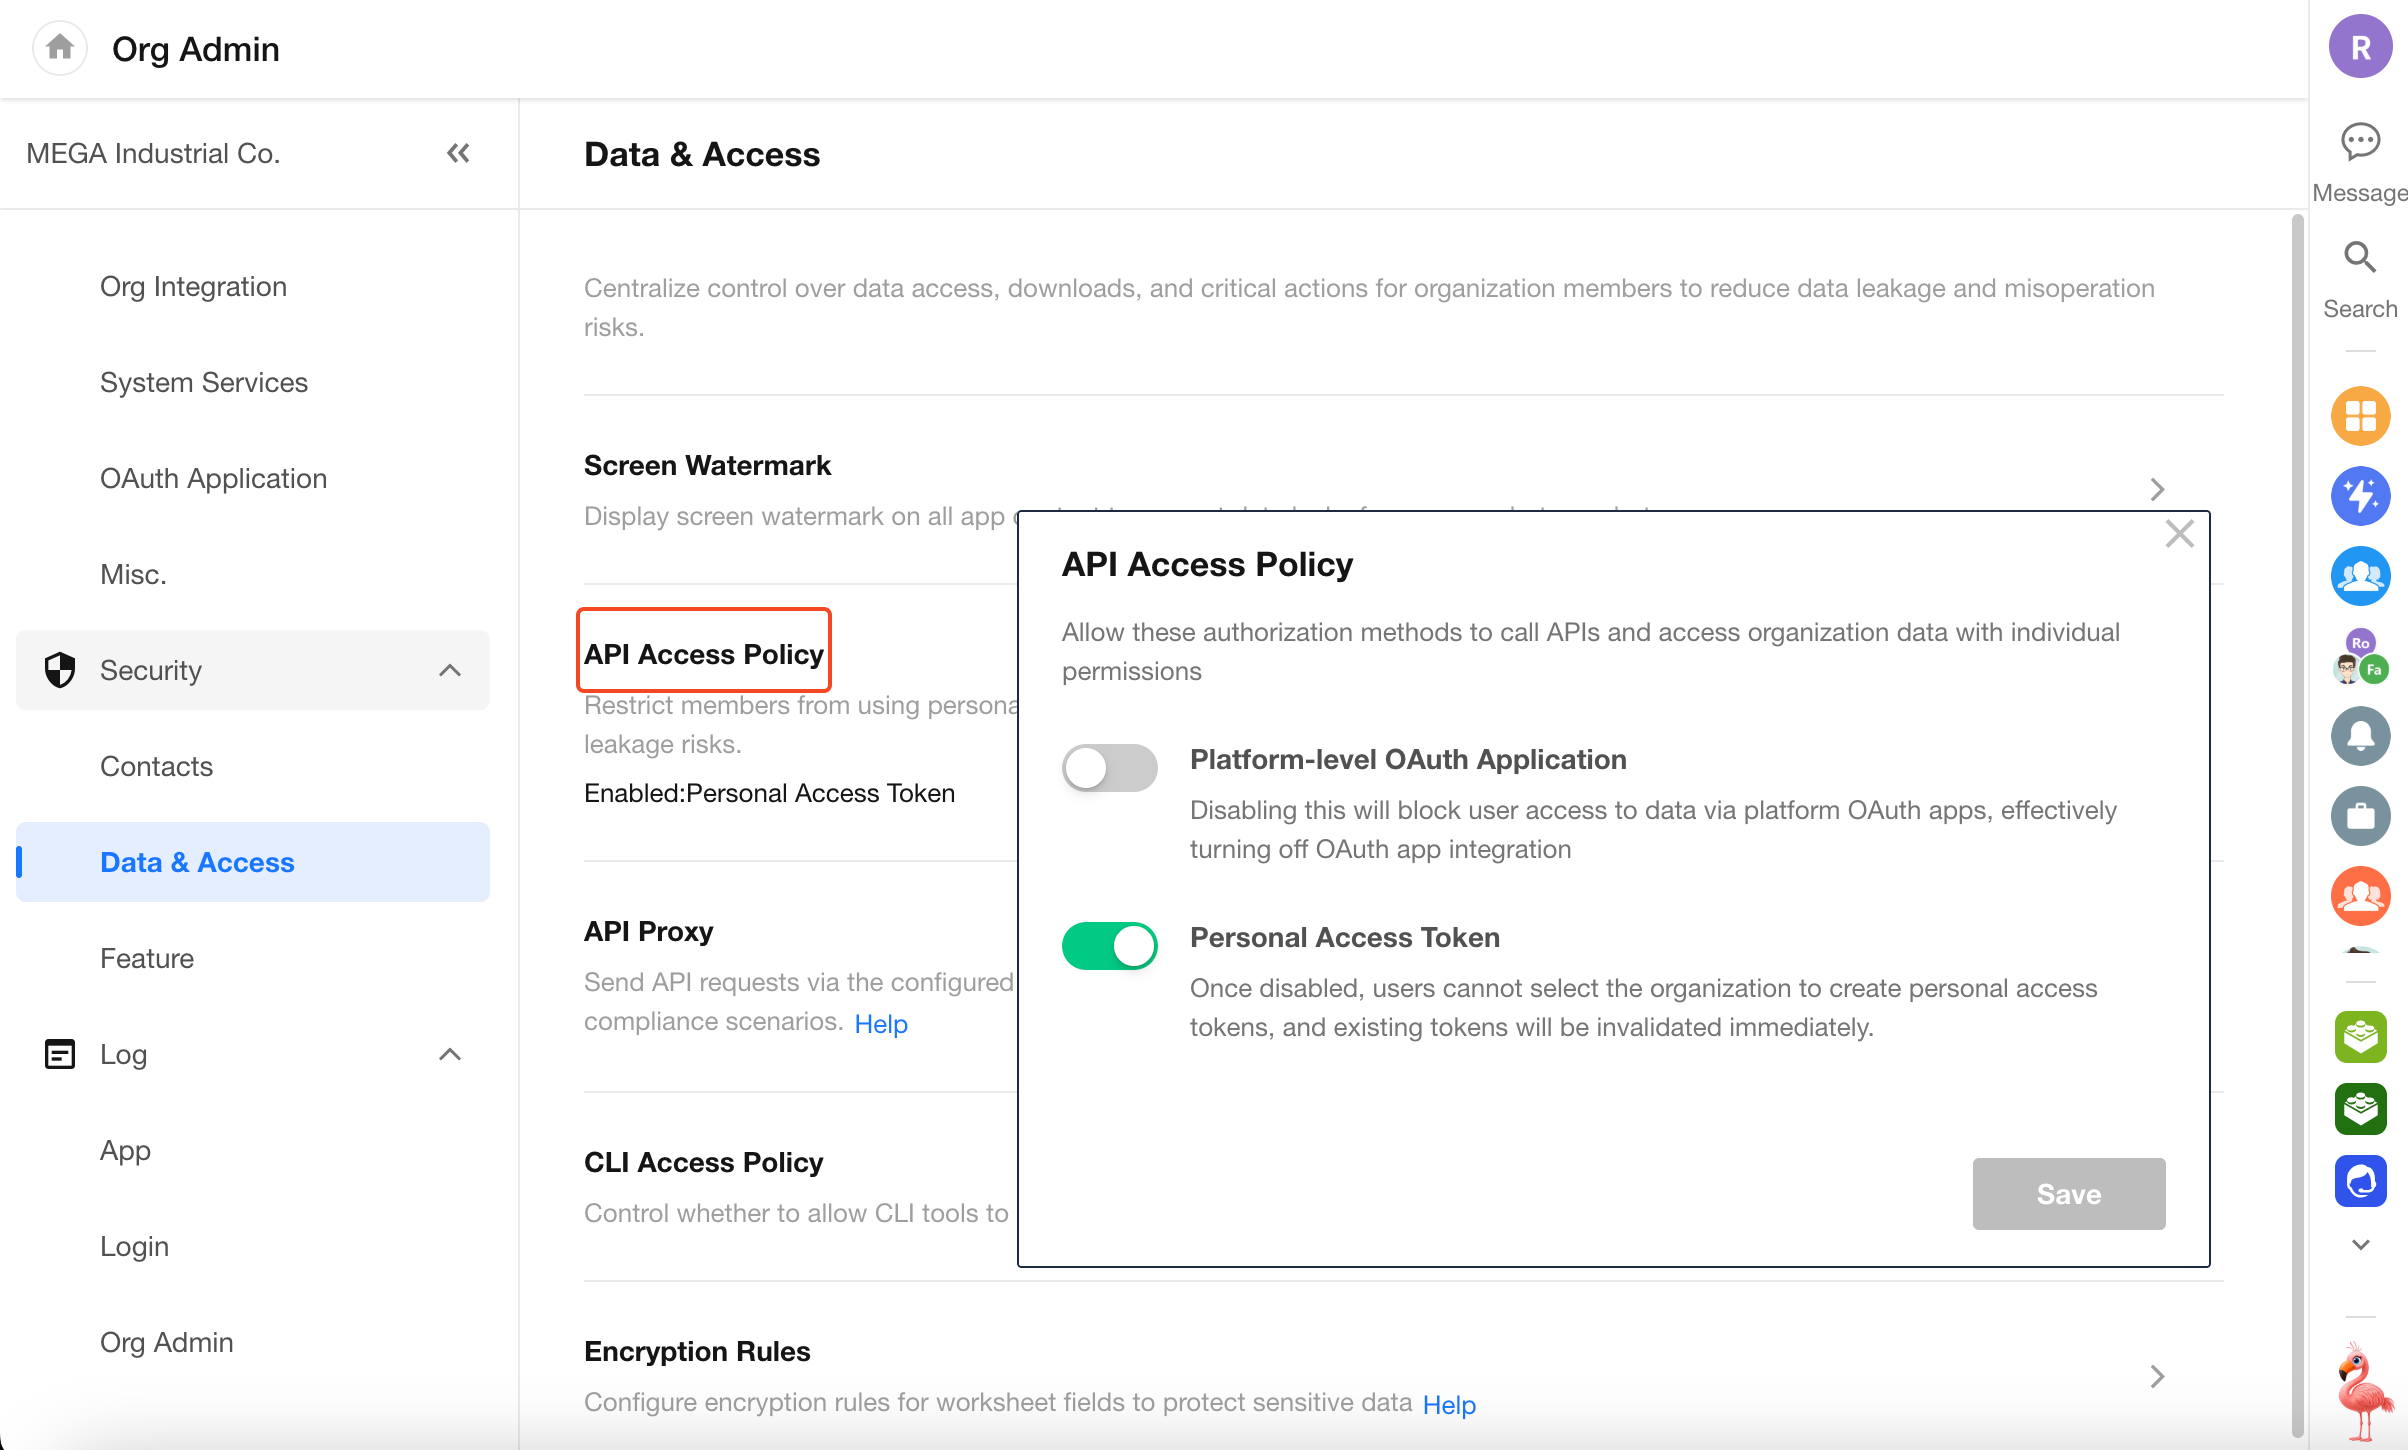
API Access Policy
You can control whether organization members are allowed to call APIs directly using platform-level OAuth applications or Personal Access Tokens (PATs), helping reduce the risk of unauthorized access to organization data.
To configure: Organization administrators click the avatar and go to Orga Admin > Security > Data & Access, then enable the allowed authentication methods under API Access Policy.
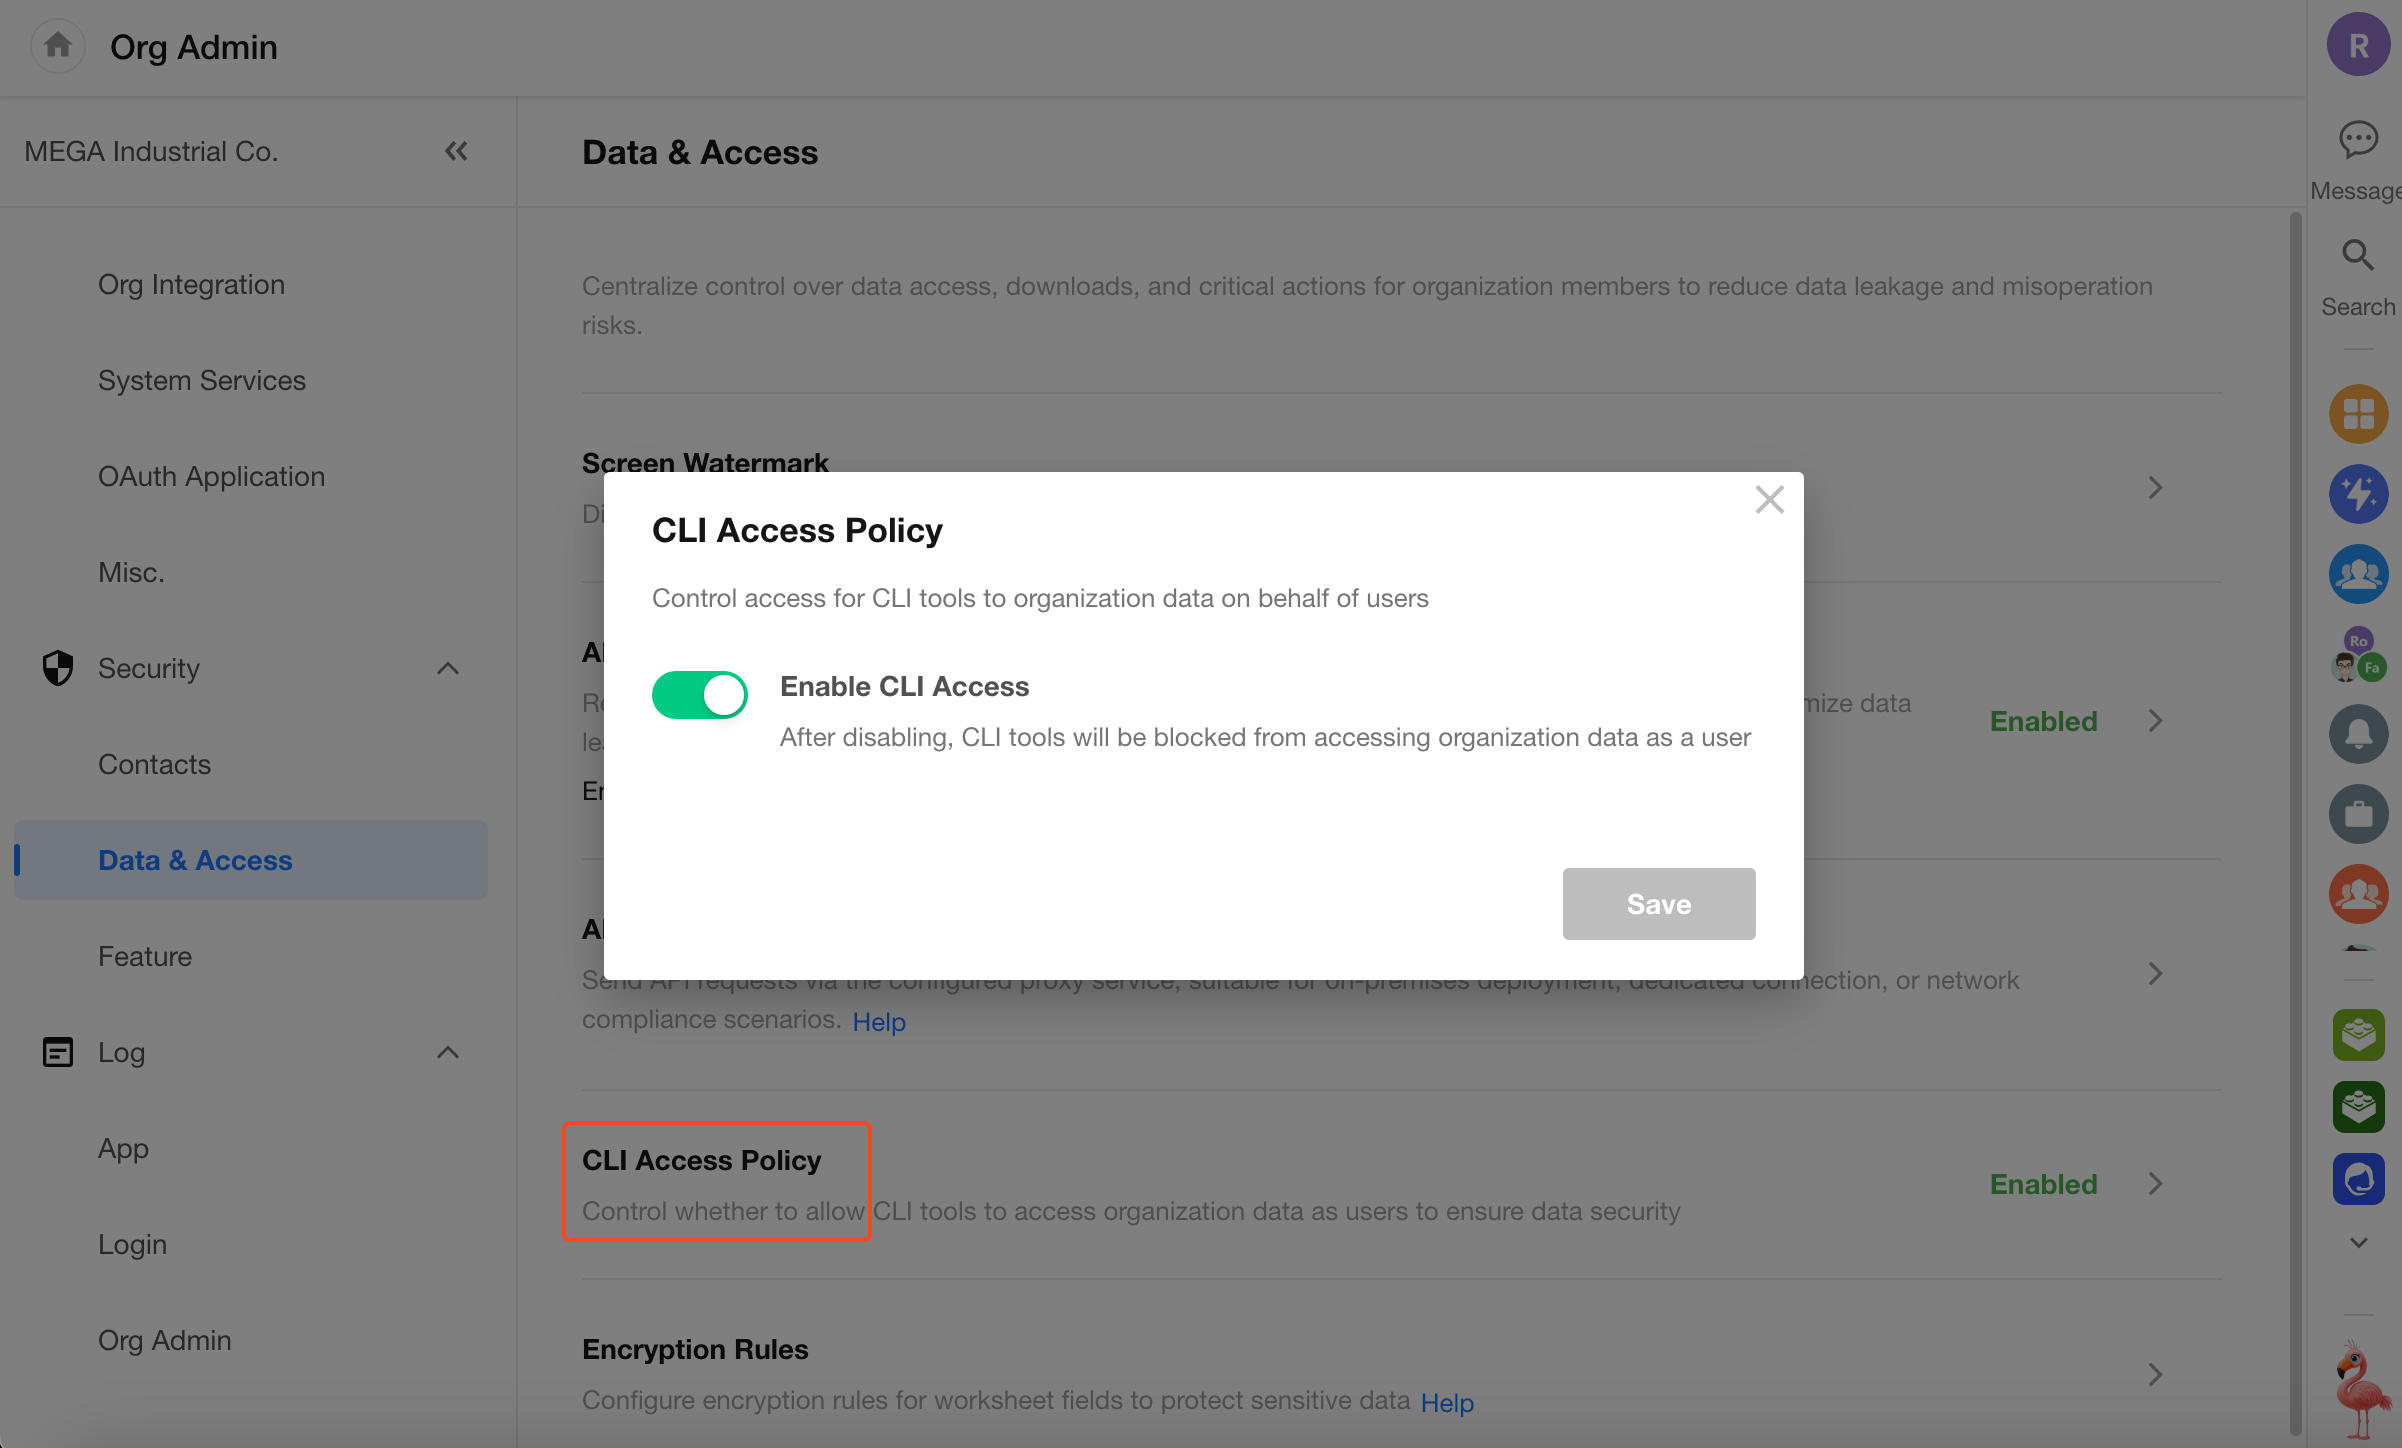
CLI Access Policy
You can control whether the CLI is allowed to access organization data on behalf of users, helping protect organization data.
To configure: Organization administrators click the avatar and go to Org Admin > Security > Data & Access, then enable the allowed option under CLI Access Policy.
When disabled, the CLI can no longer access organization data using user identity and permissions.
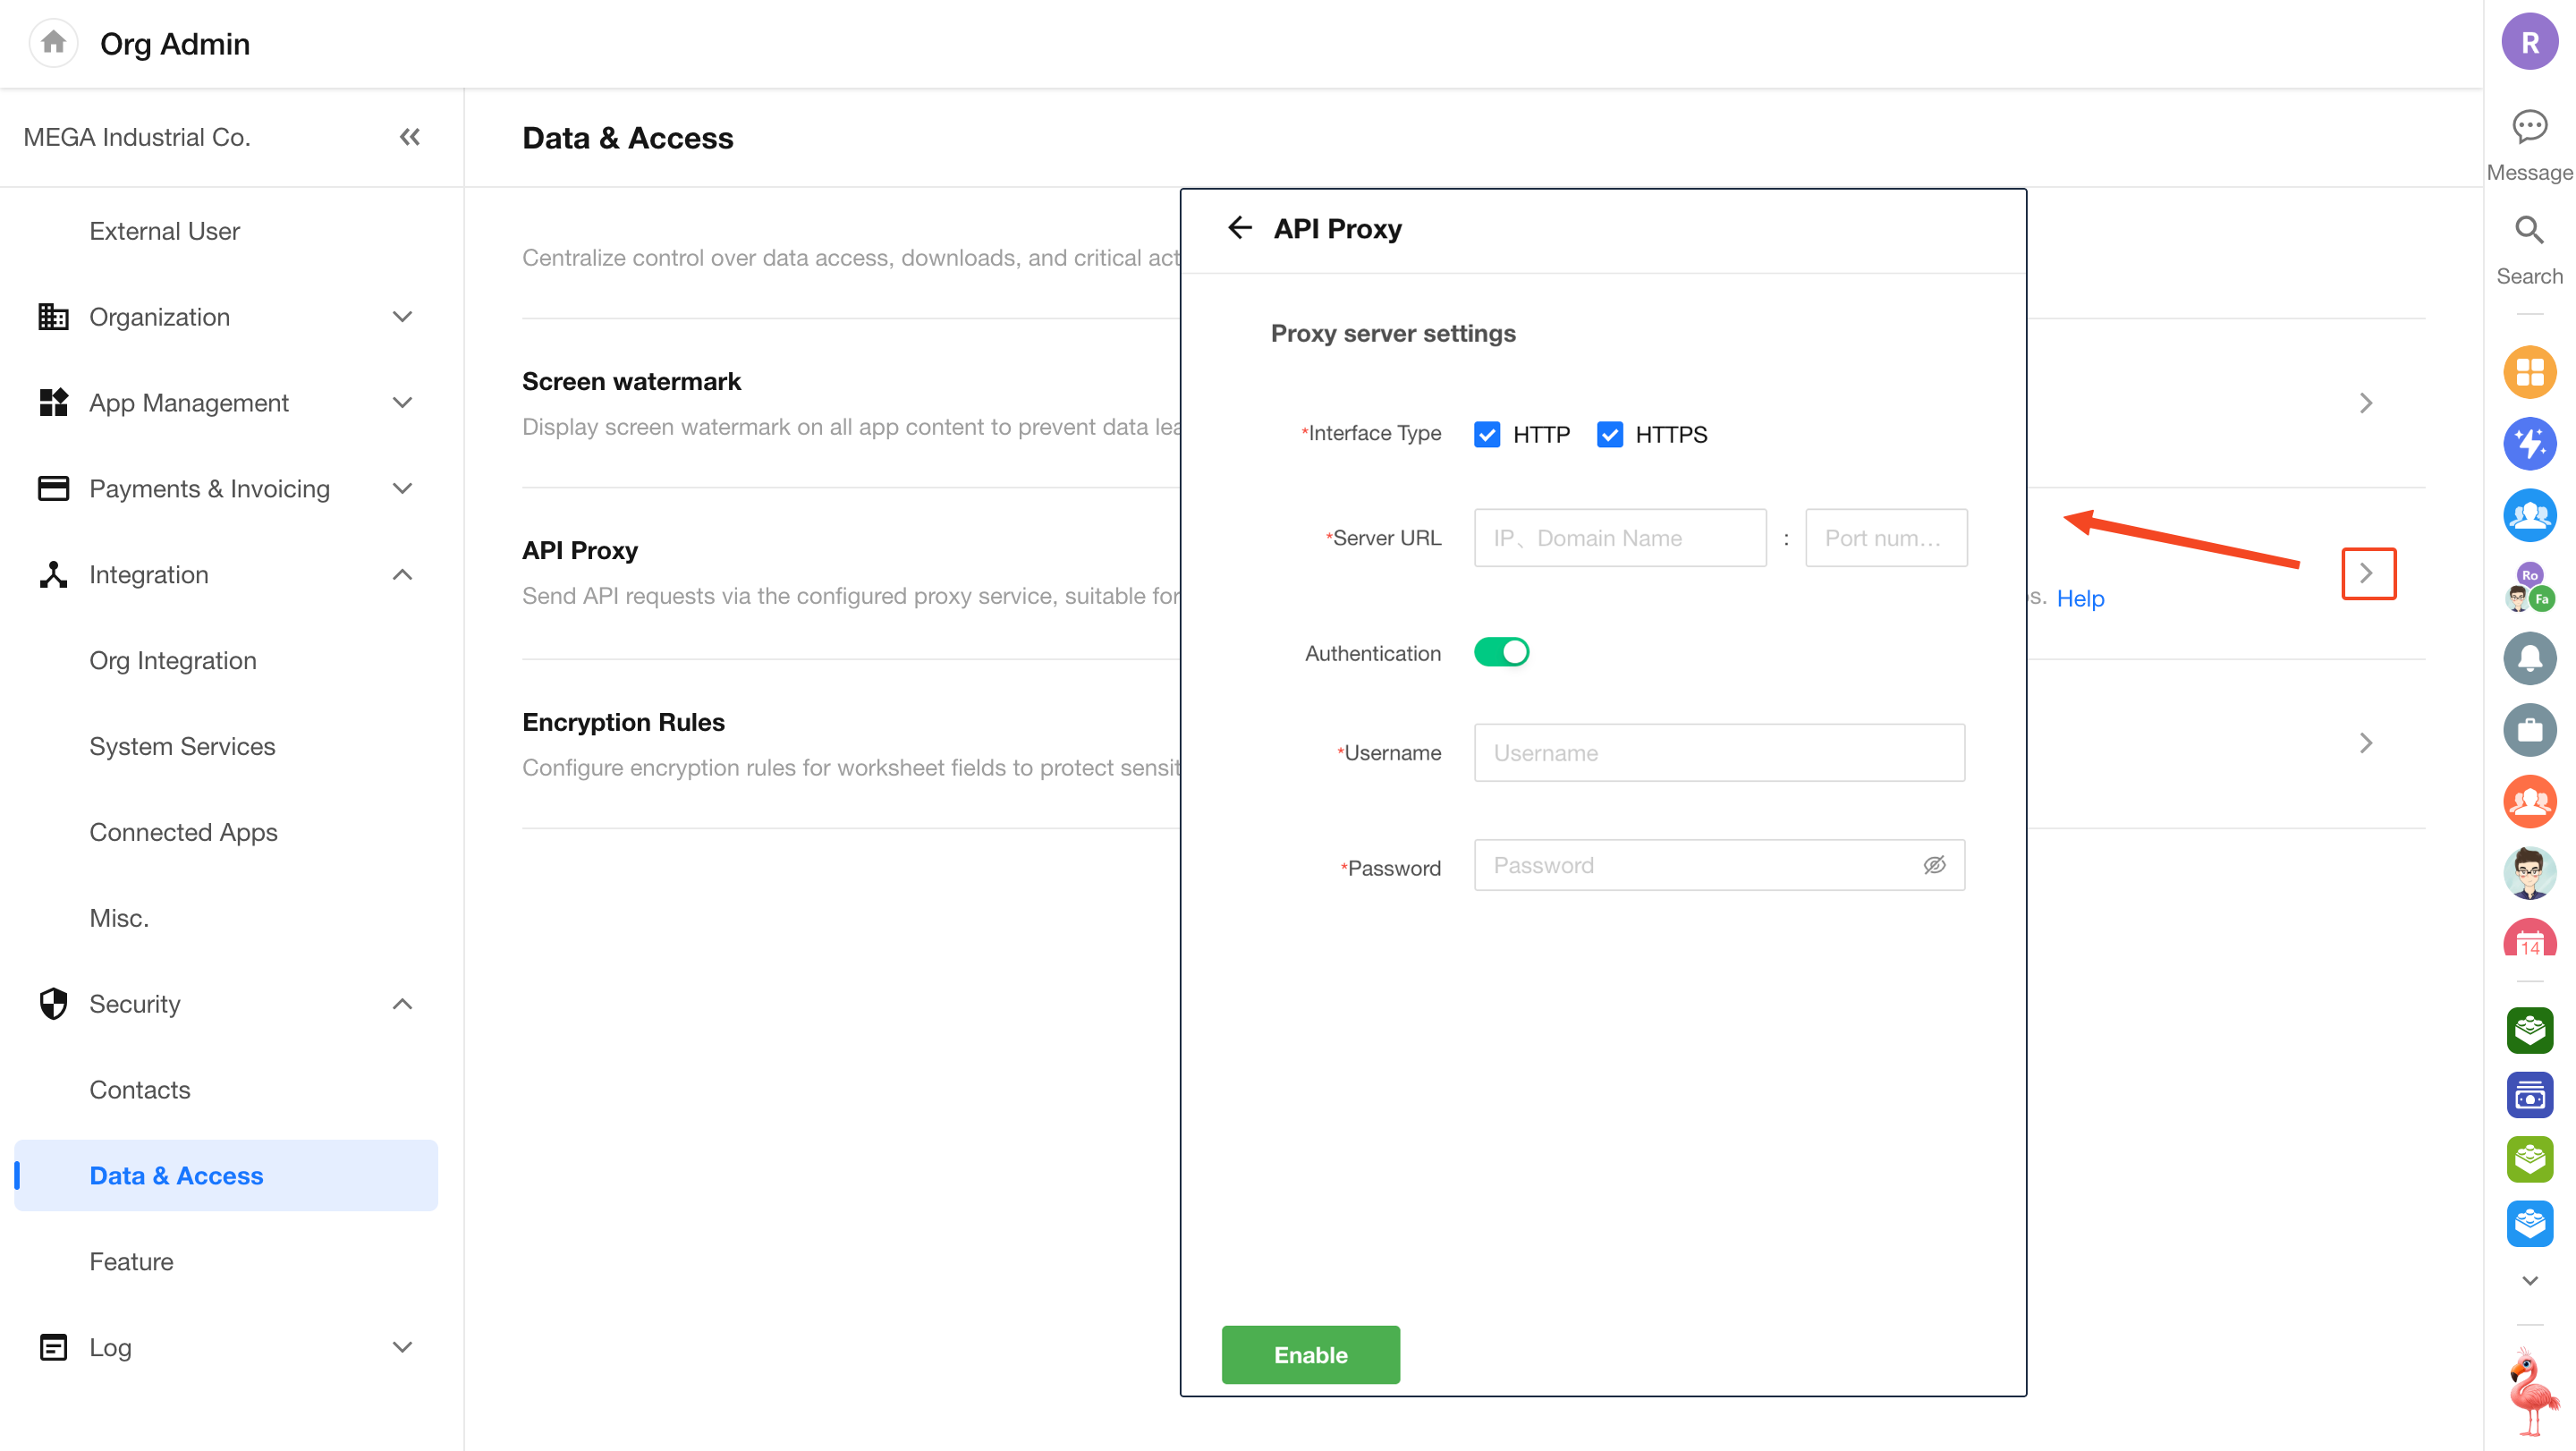
API Proxy
Organization administrators can configure an API network proxy to route API requests from internal apps through a designated proxy server.
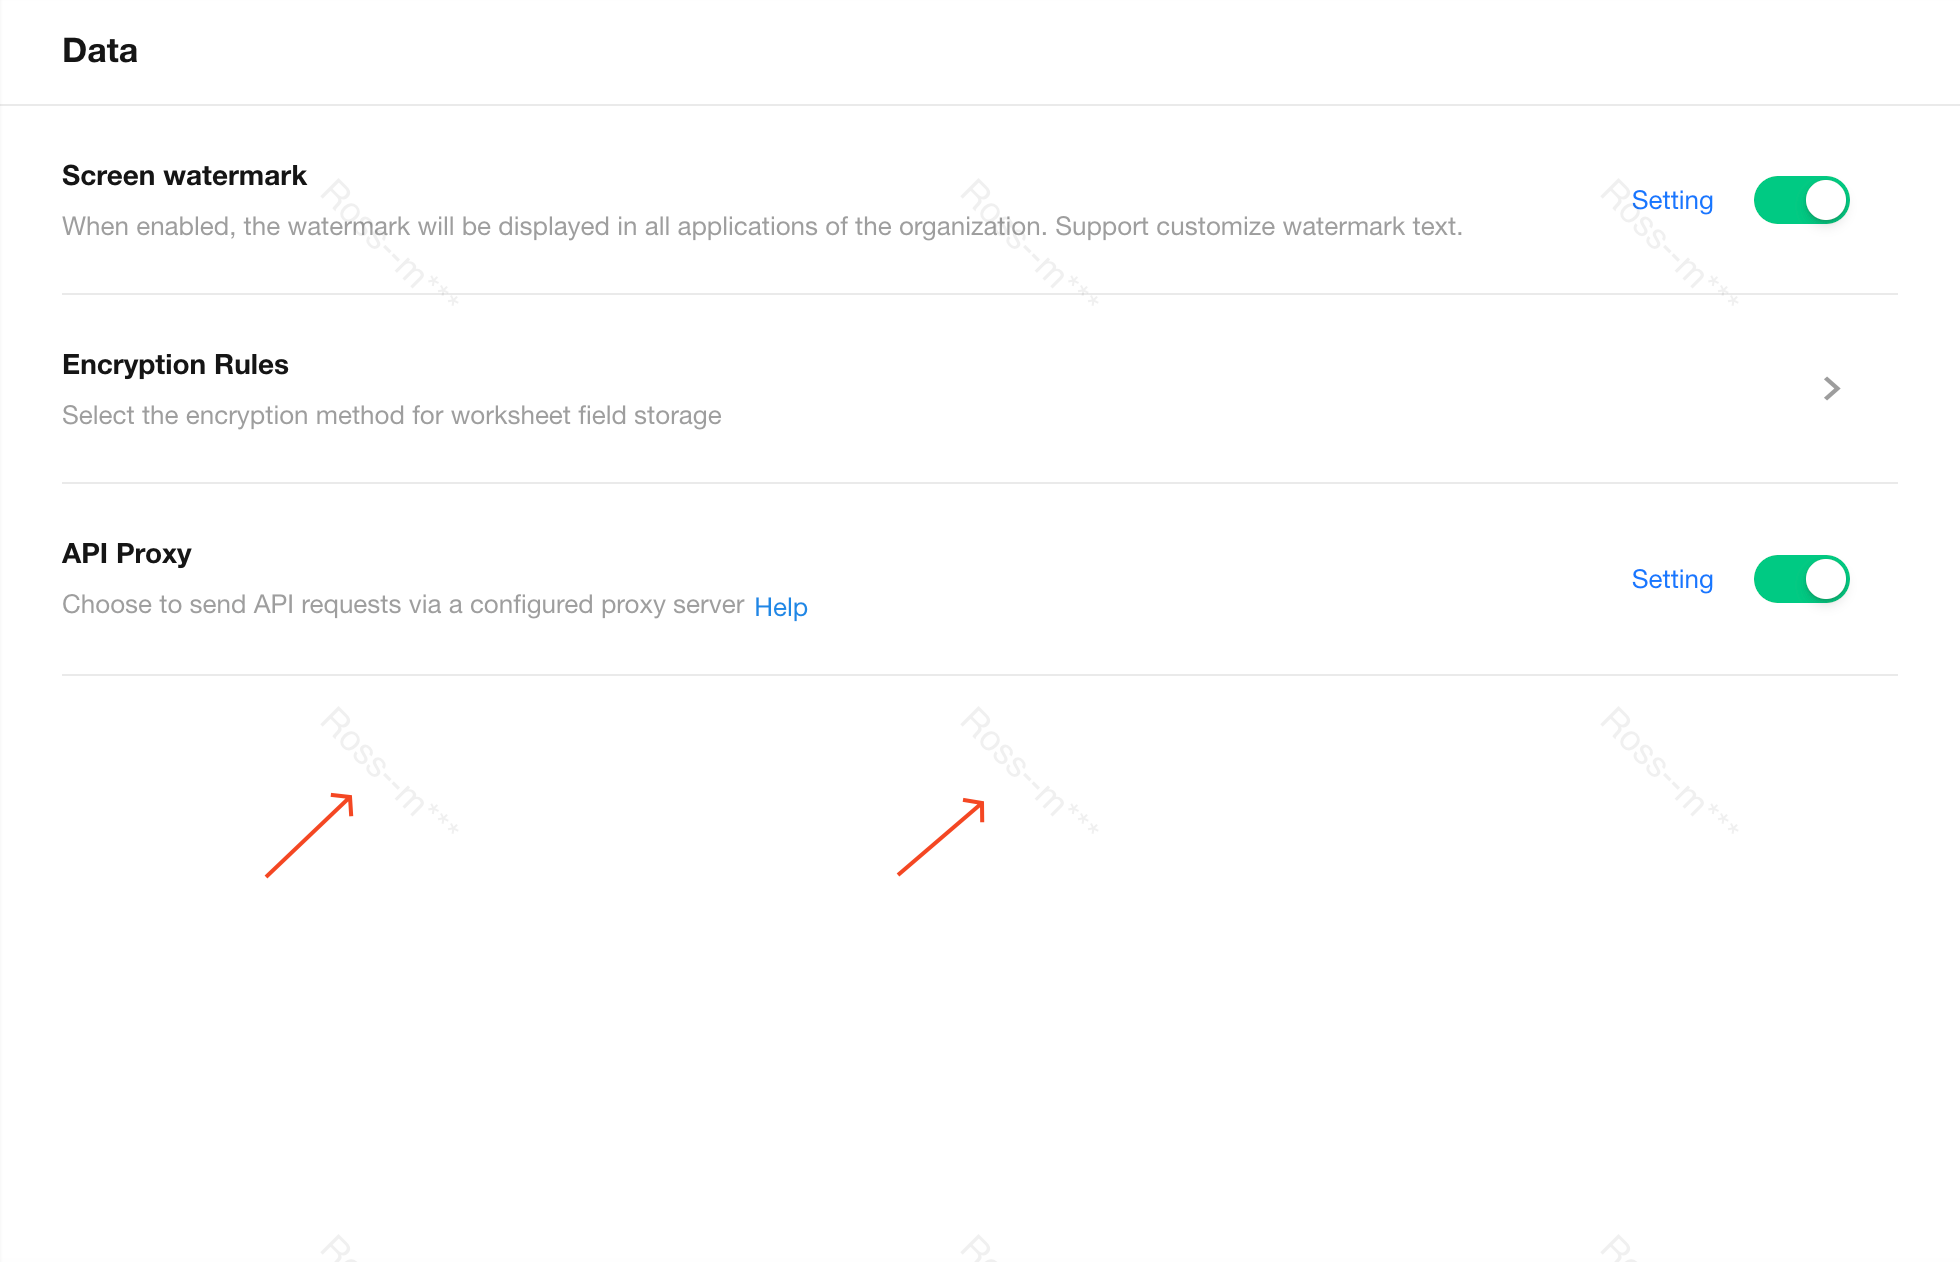
Enable and Configure
Go to Org Admin > Security > Data & Access, and toggle on API Proxy. Then click Setting to configure the proxy information.
Note: If the proxy server is only configured for HTTP, HTTPS requests will bypass the proxy, and vice versa.
Where the Proxy Can Be Used
-
"Send API Request" node in workflows
-
API request settings in Integration Center
Field Encryption Rules
Some business data involves sensitive information that may require encryption, such as customer account numbers, ID numbers, bank card details, phone numbers, emails, and passwords. Once encrypted, the data is stored in ciphertext in the database and decrypted for display according to defined rules.
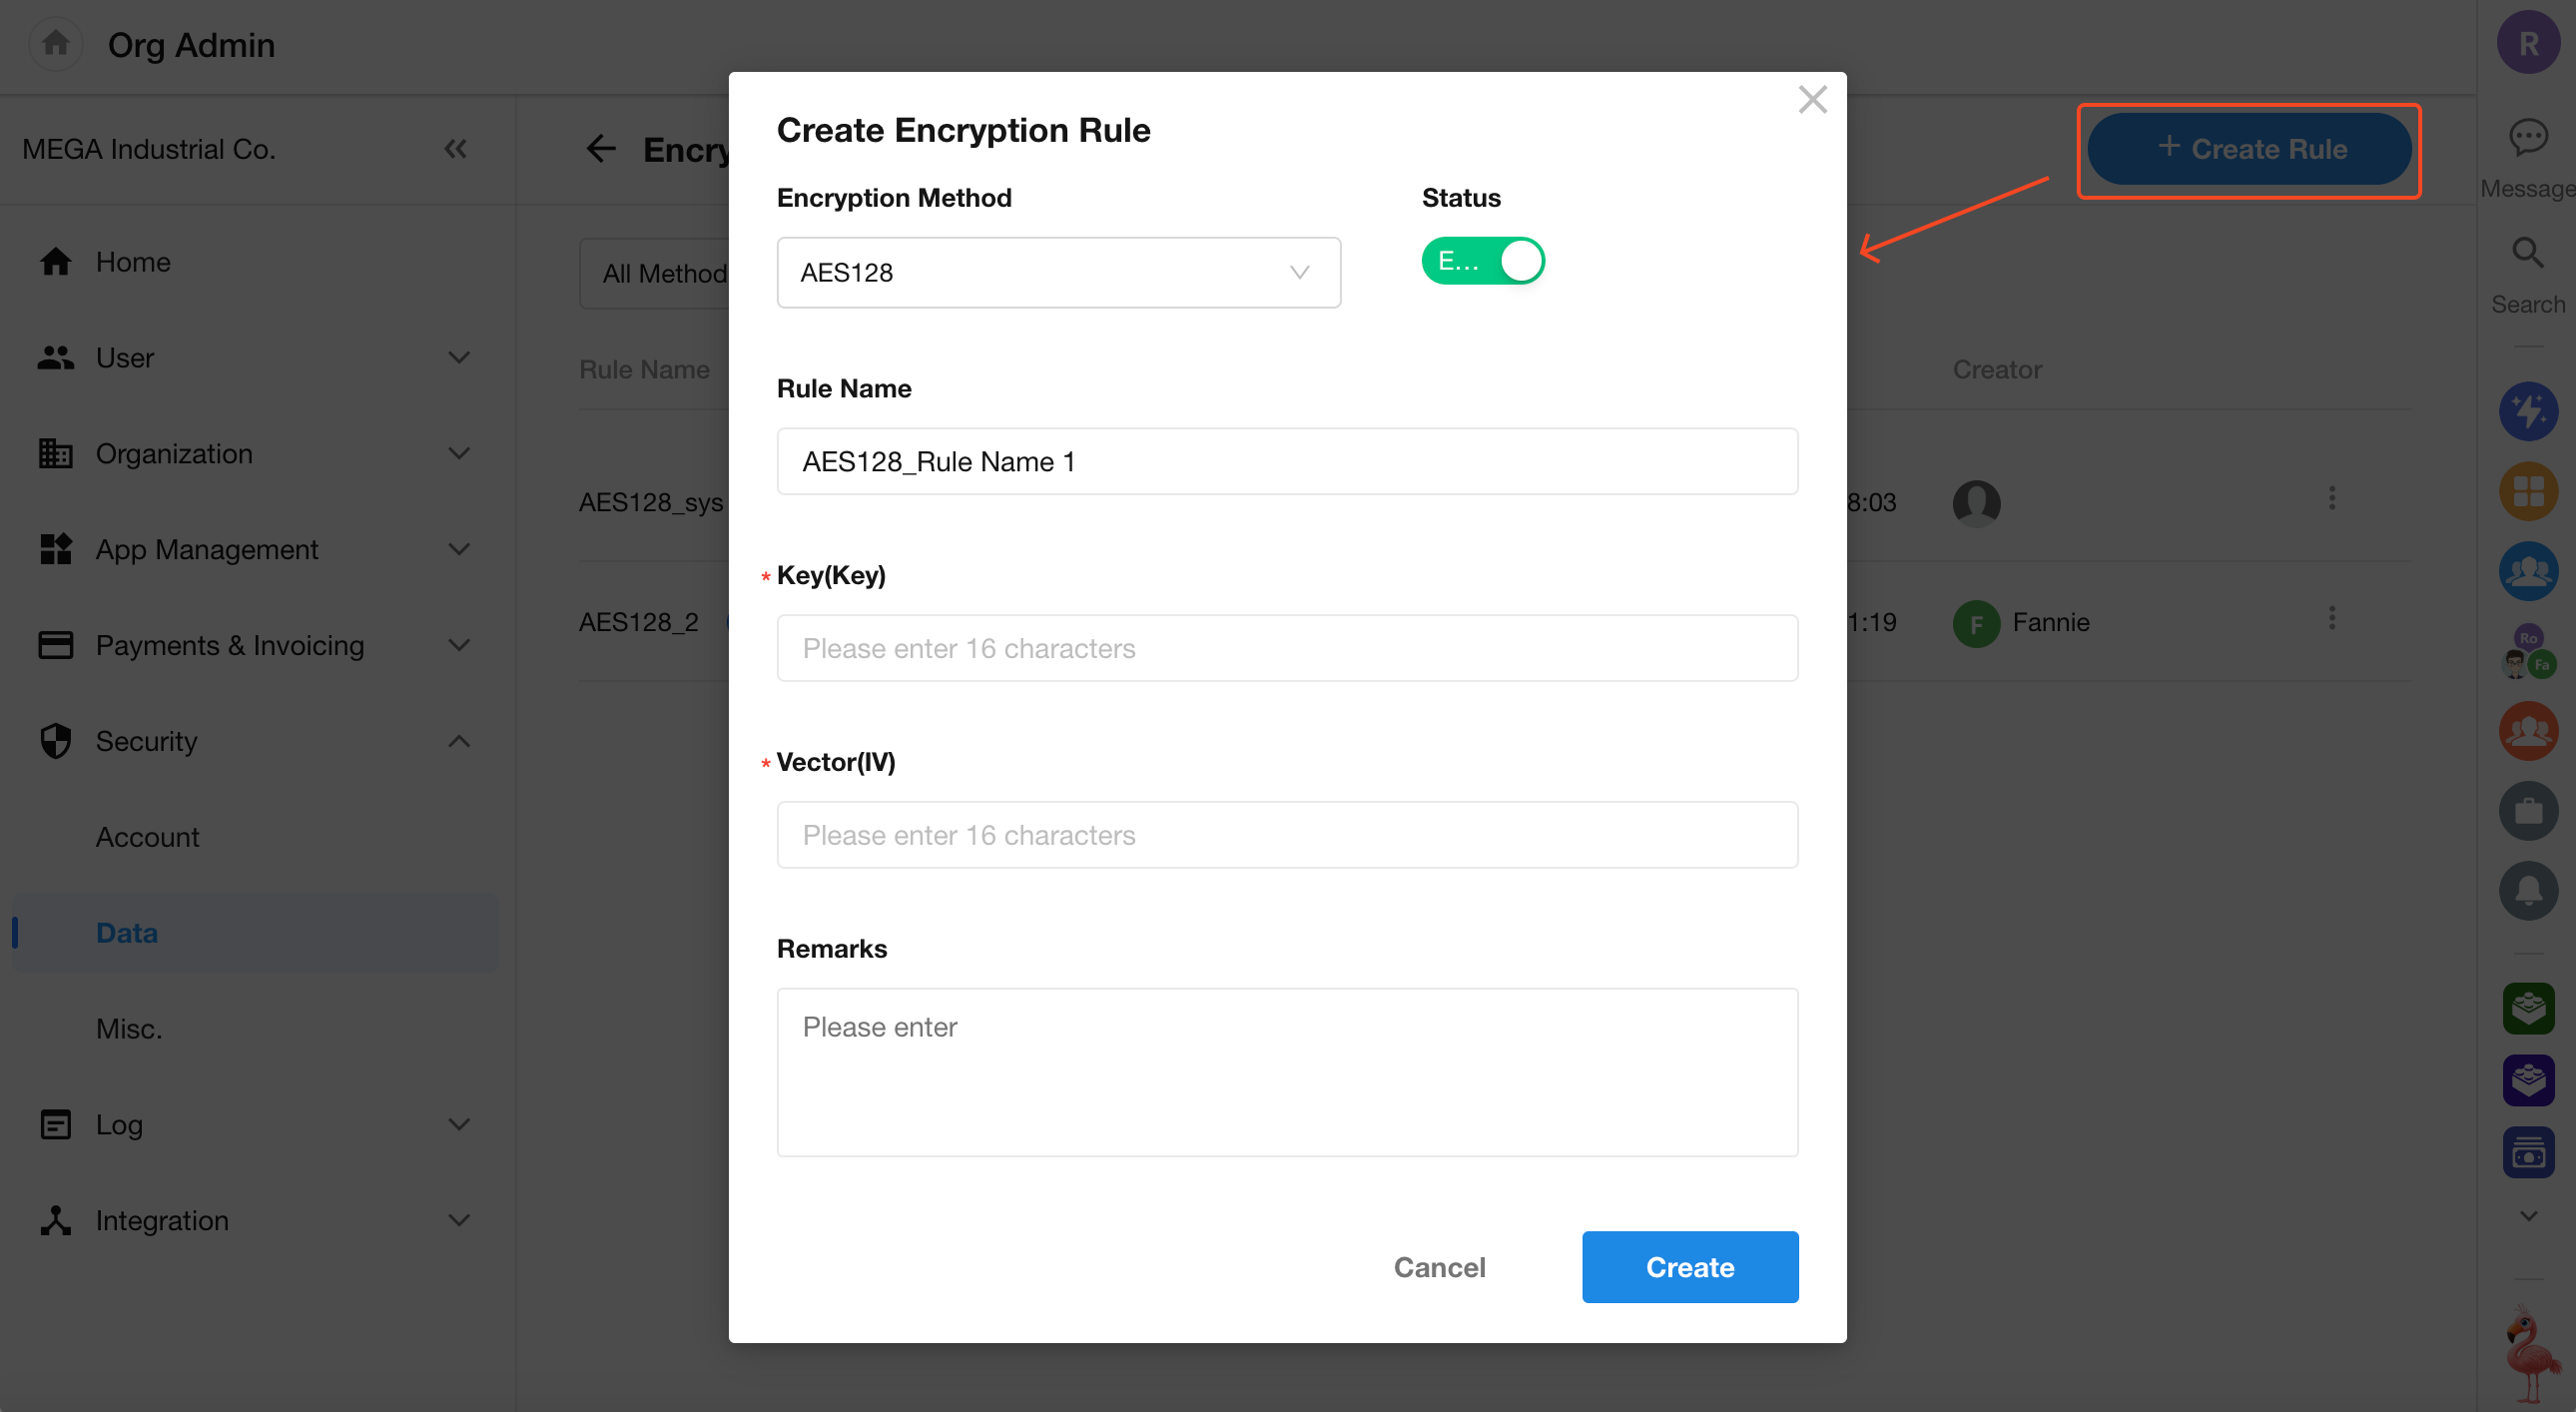
Create an Encryption Rule
Before applying encryption to fields, an organization admin must configure encryption rules.
To create a new encryption rule:
Go to Security > Data & Access > Encryption Rule to create and manage encryption rules.
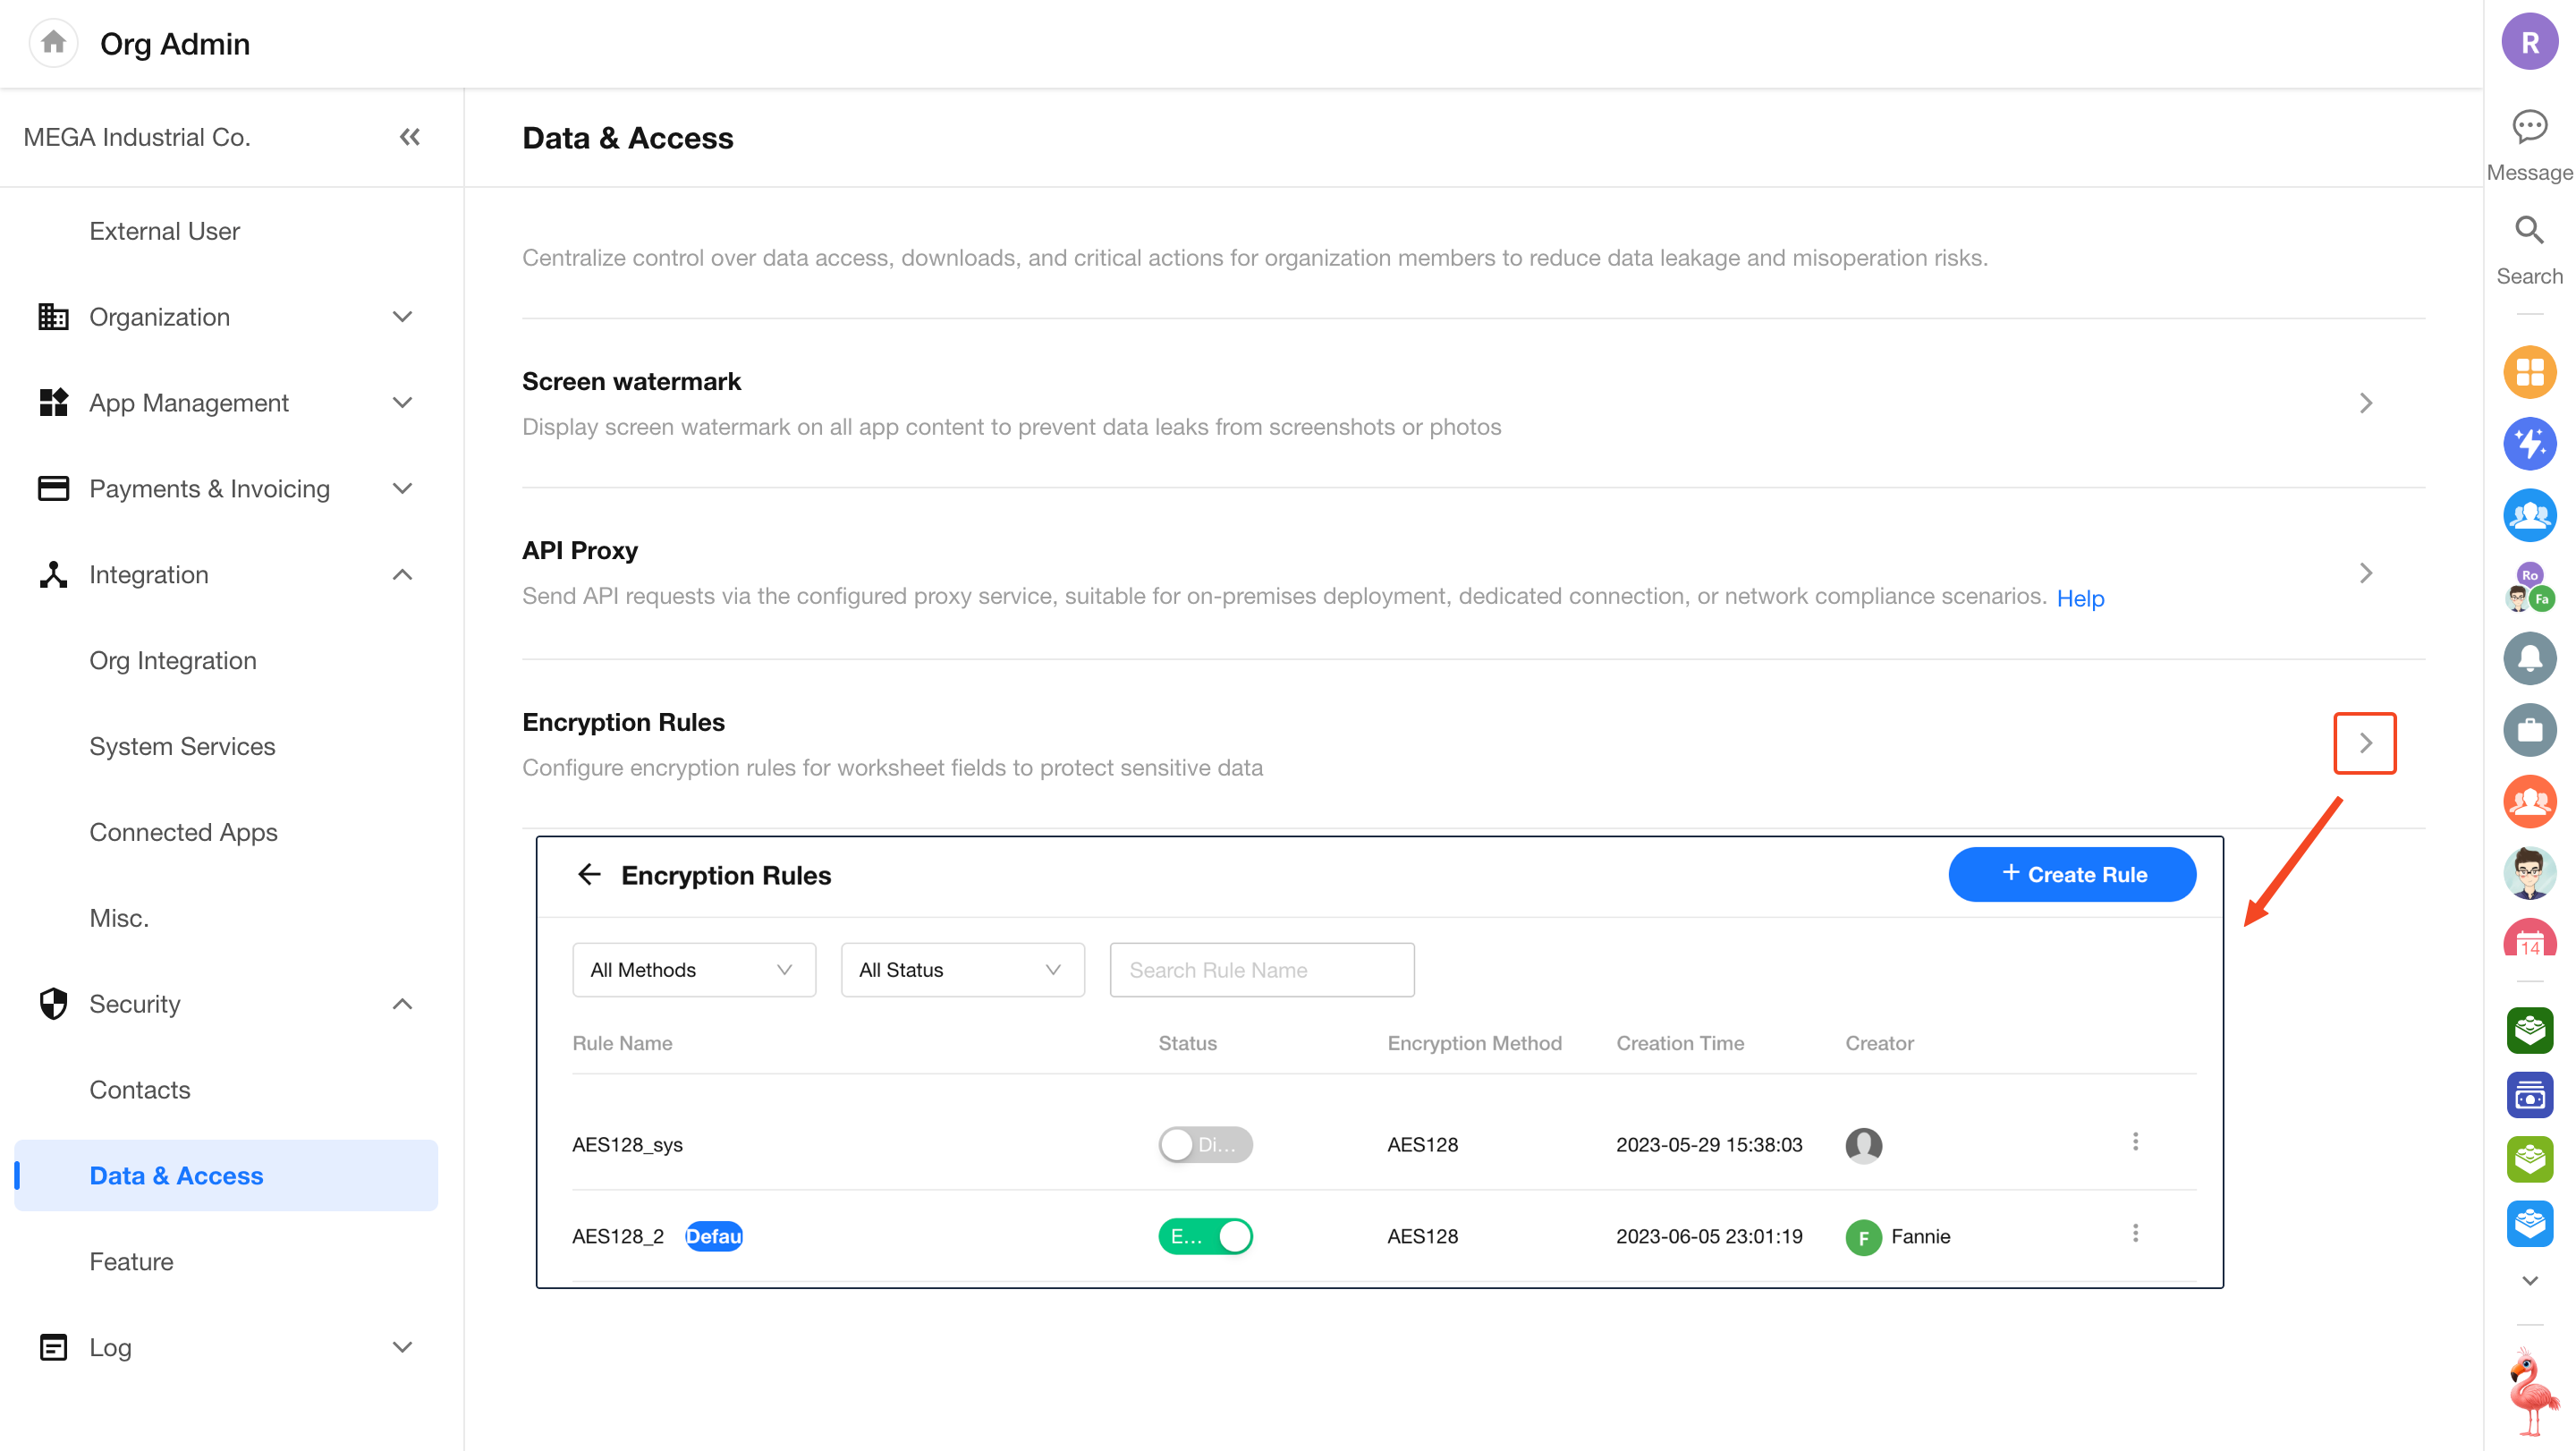
Each rule includes the encryption method and encryption key. Multiple rules can use the same method.
HAP supports four encryption methods: AES128, AES192, AES256, and SM4.
Manage Encryption Rules
Each organization is automatically provisioned with a default encryption rule (using AES with a randomly generated key).
Super admins can create additional rules by specifying the encryption method and key.
- System-generated rules cannot be modified or deleted
- You can designate a default encryption rule
- Rules can be enabled or disabled
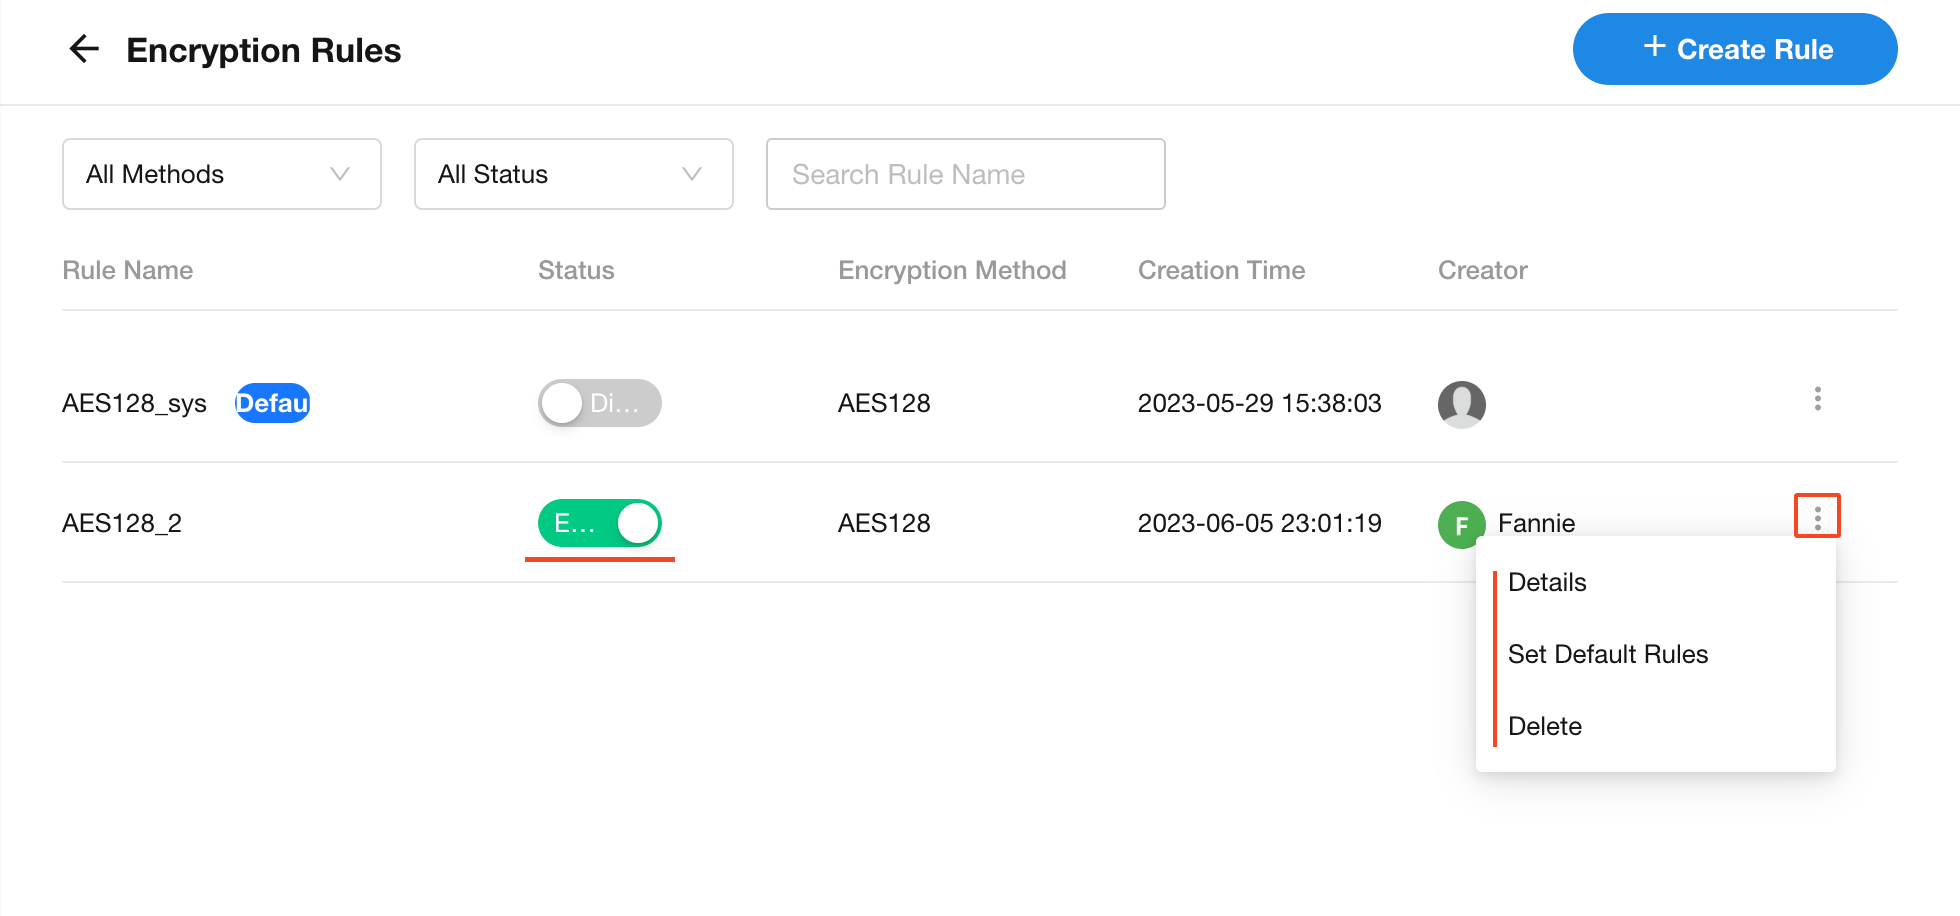
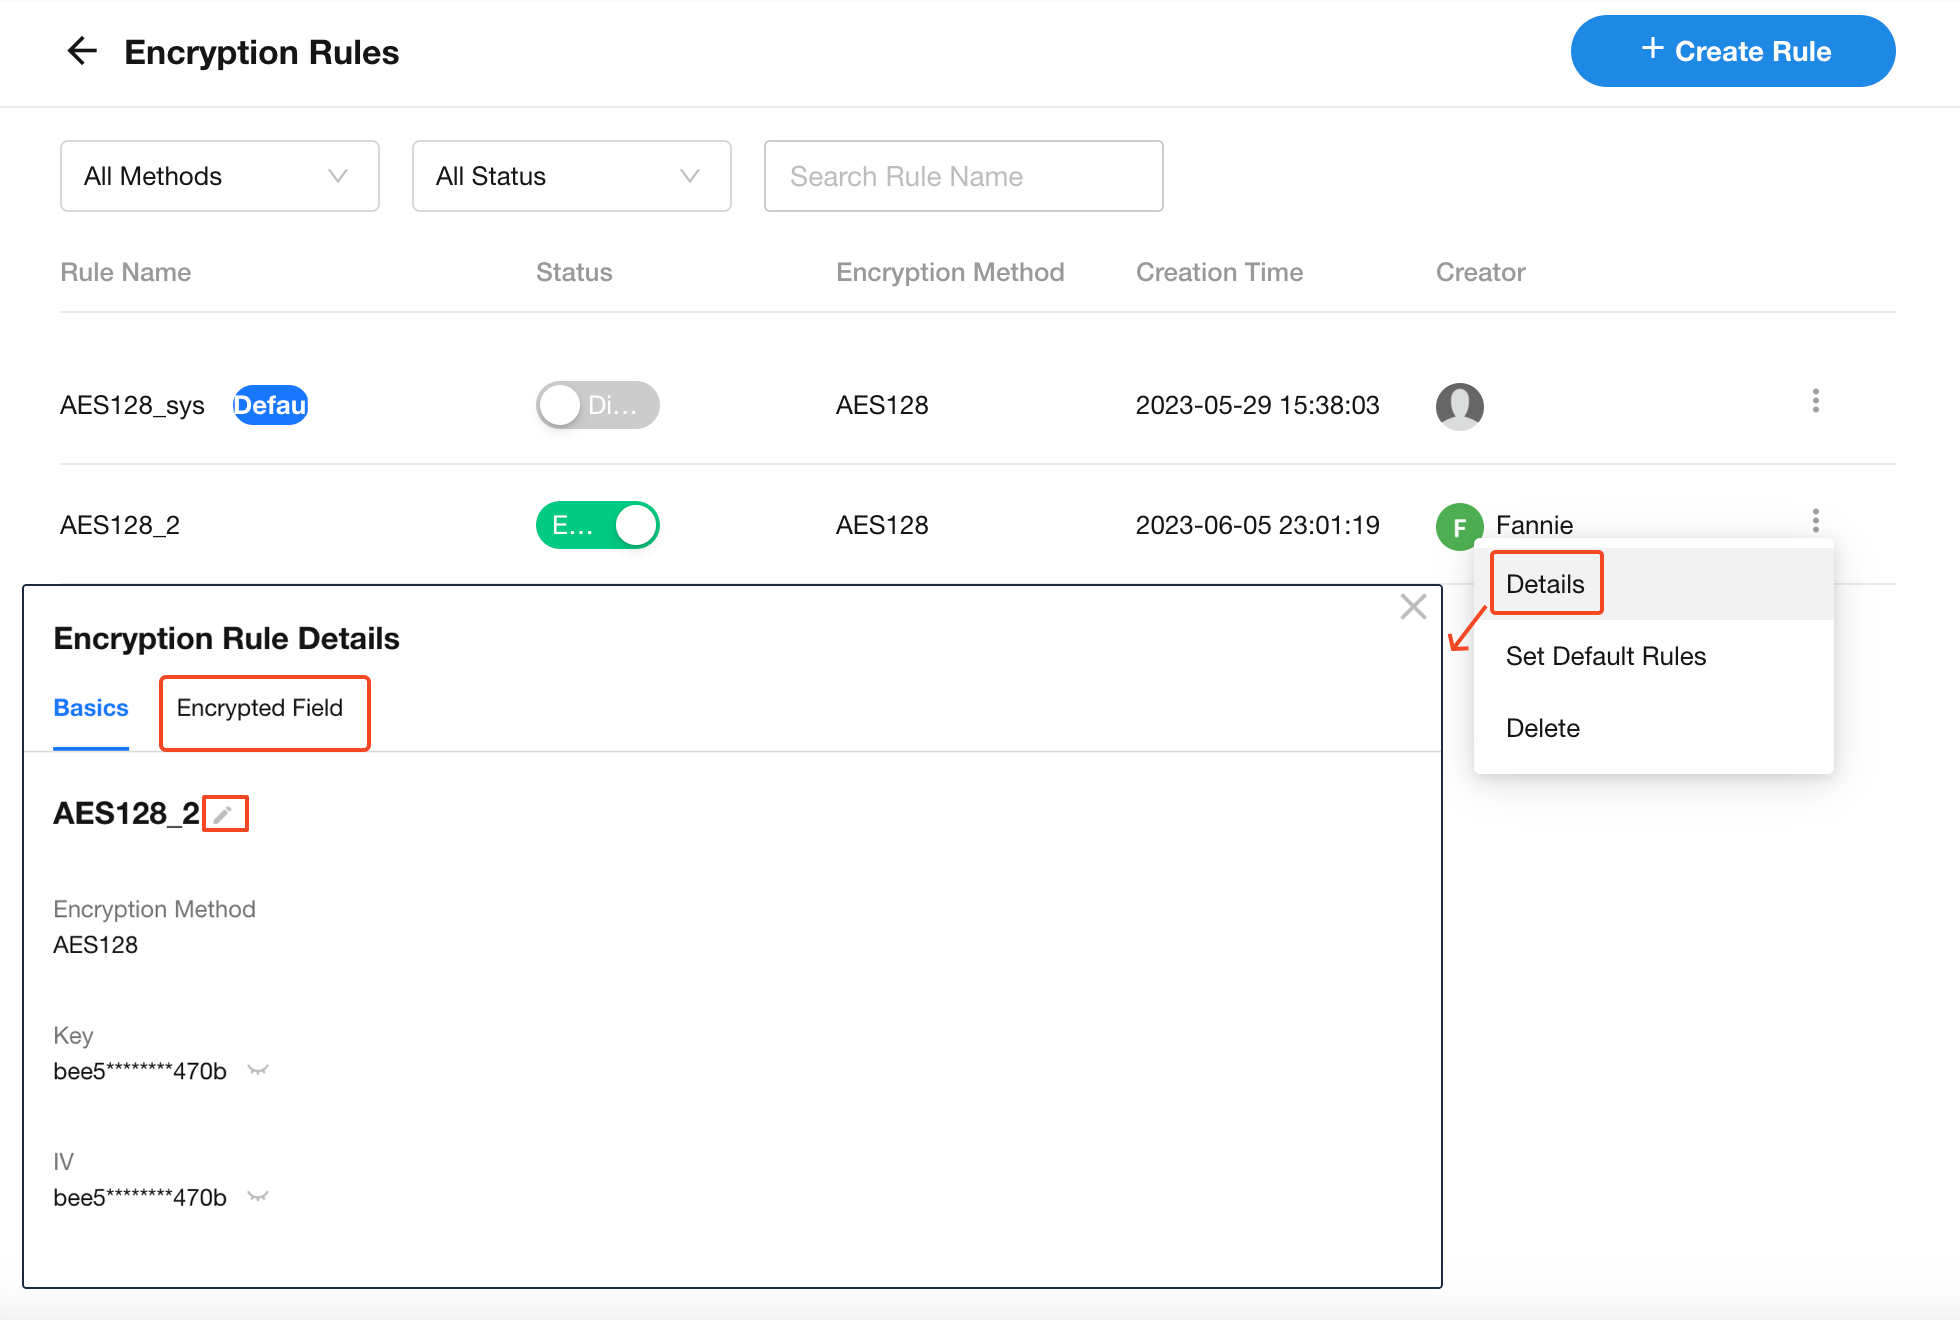
For individual rules, you can edit the rule name or view all fields using that rule.
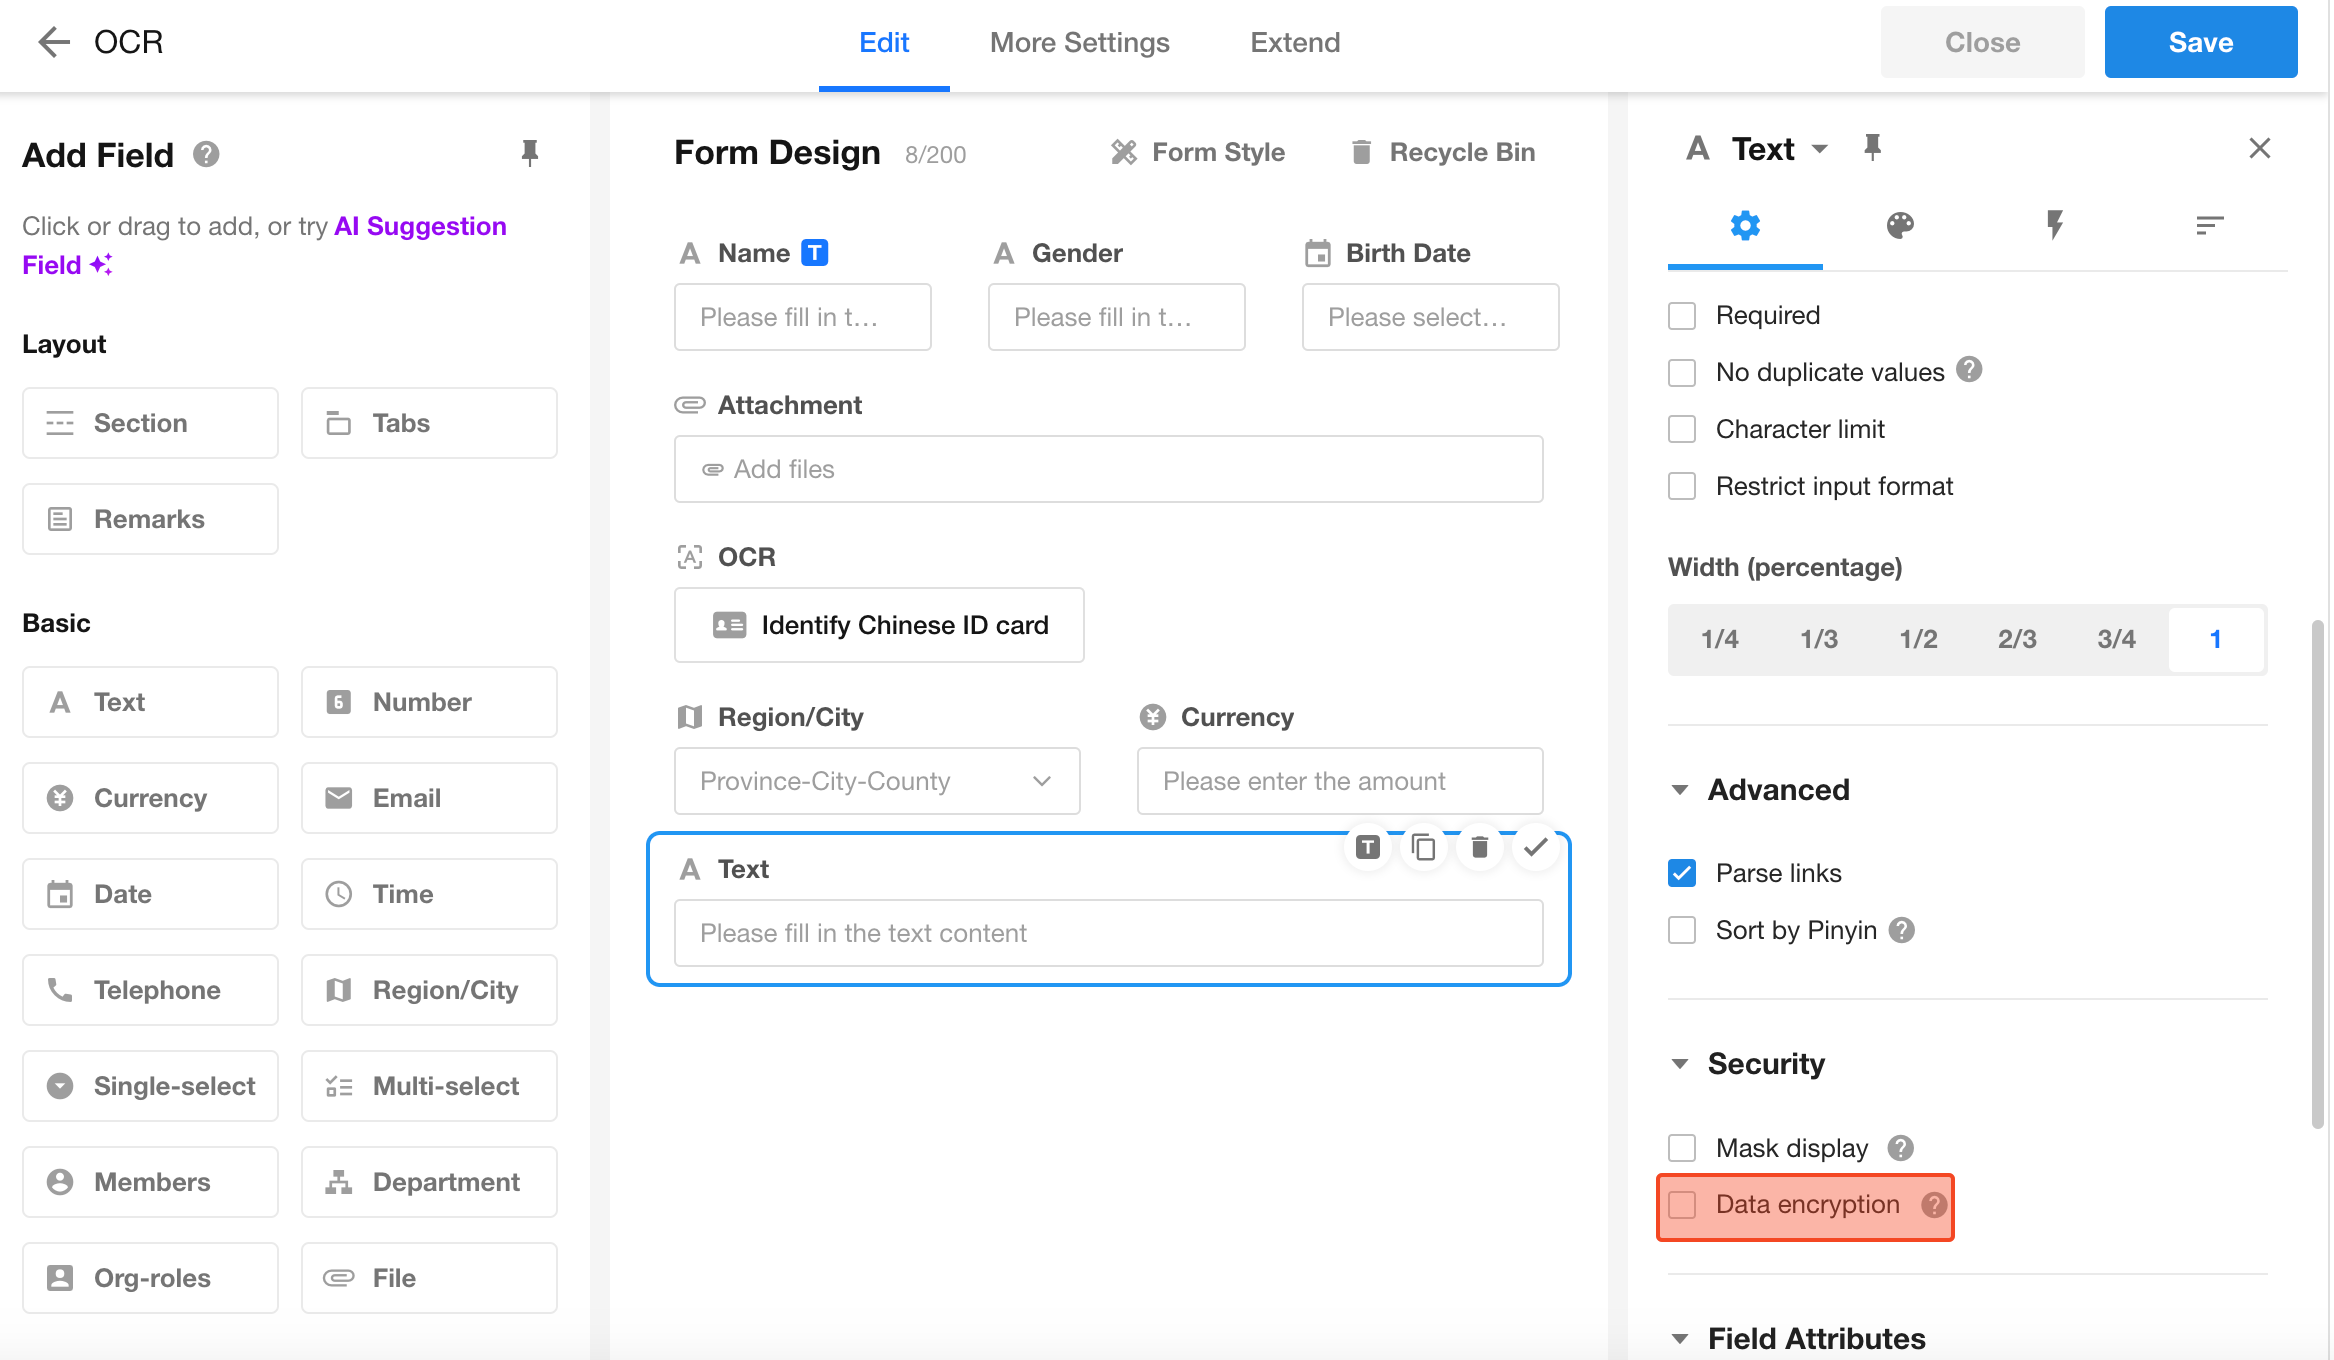
Apply Encryption Rules to Fields
Once encryption rules are configured, they can be applied to fields in a worksheet.
Learn more about field encryption
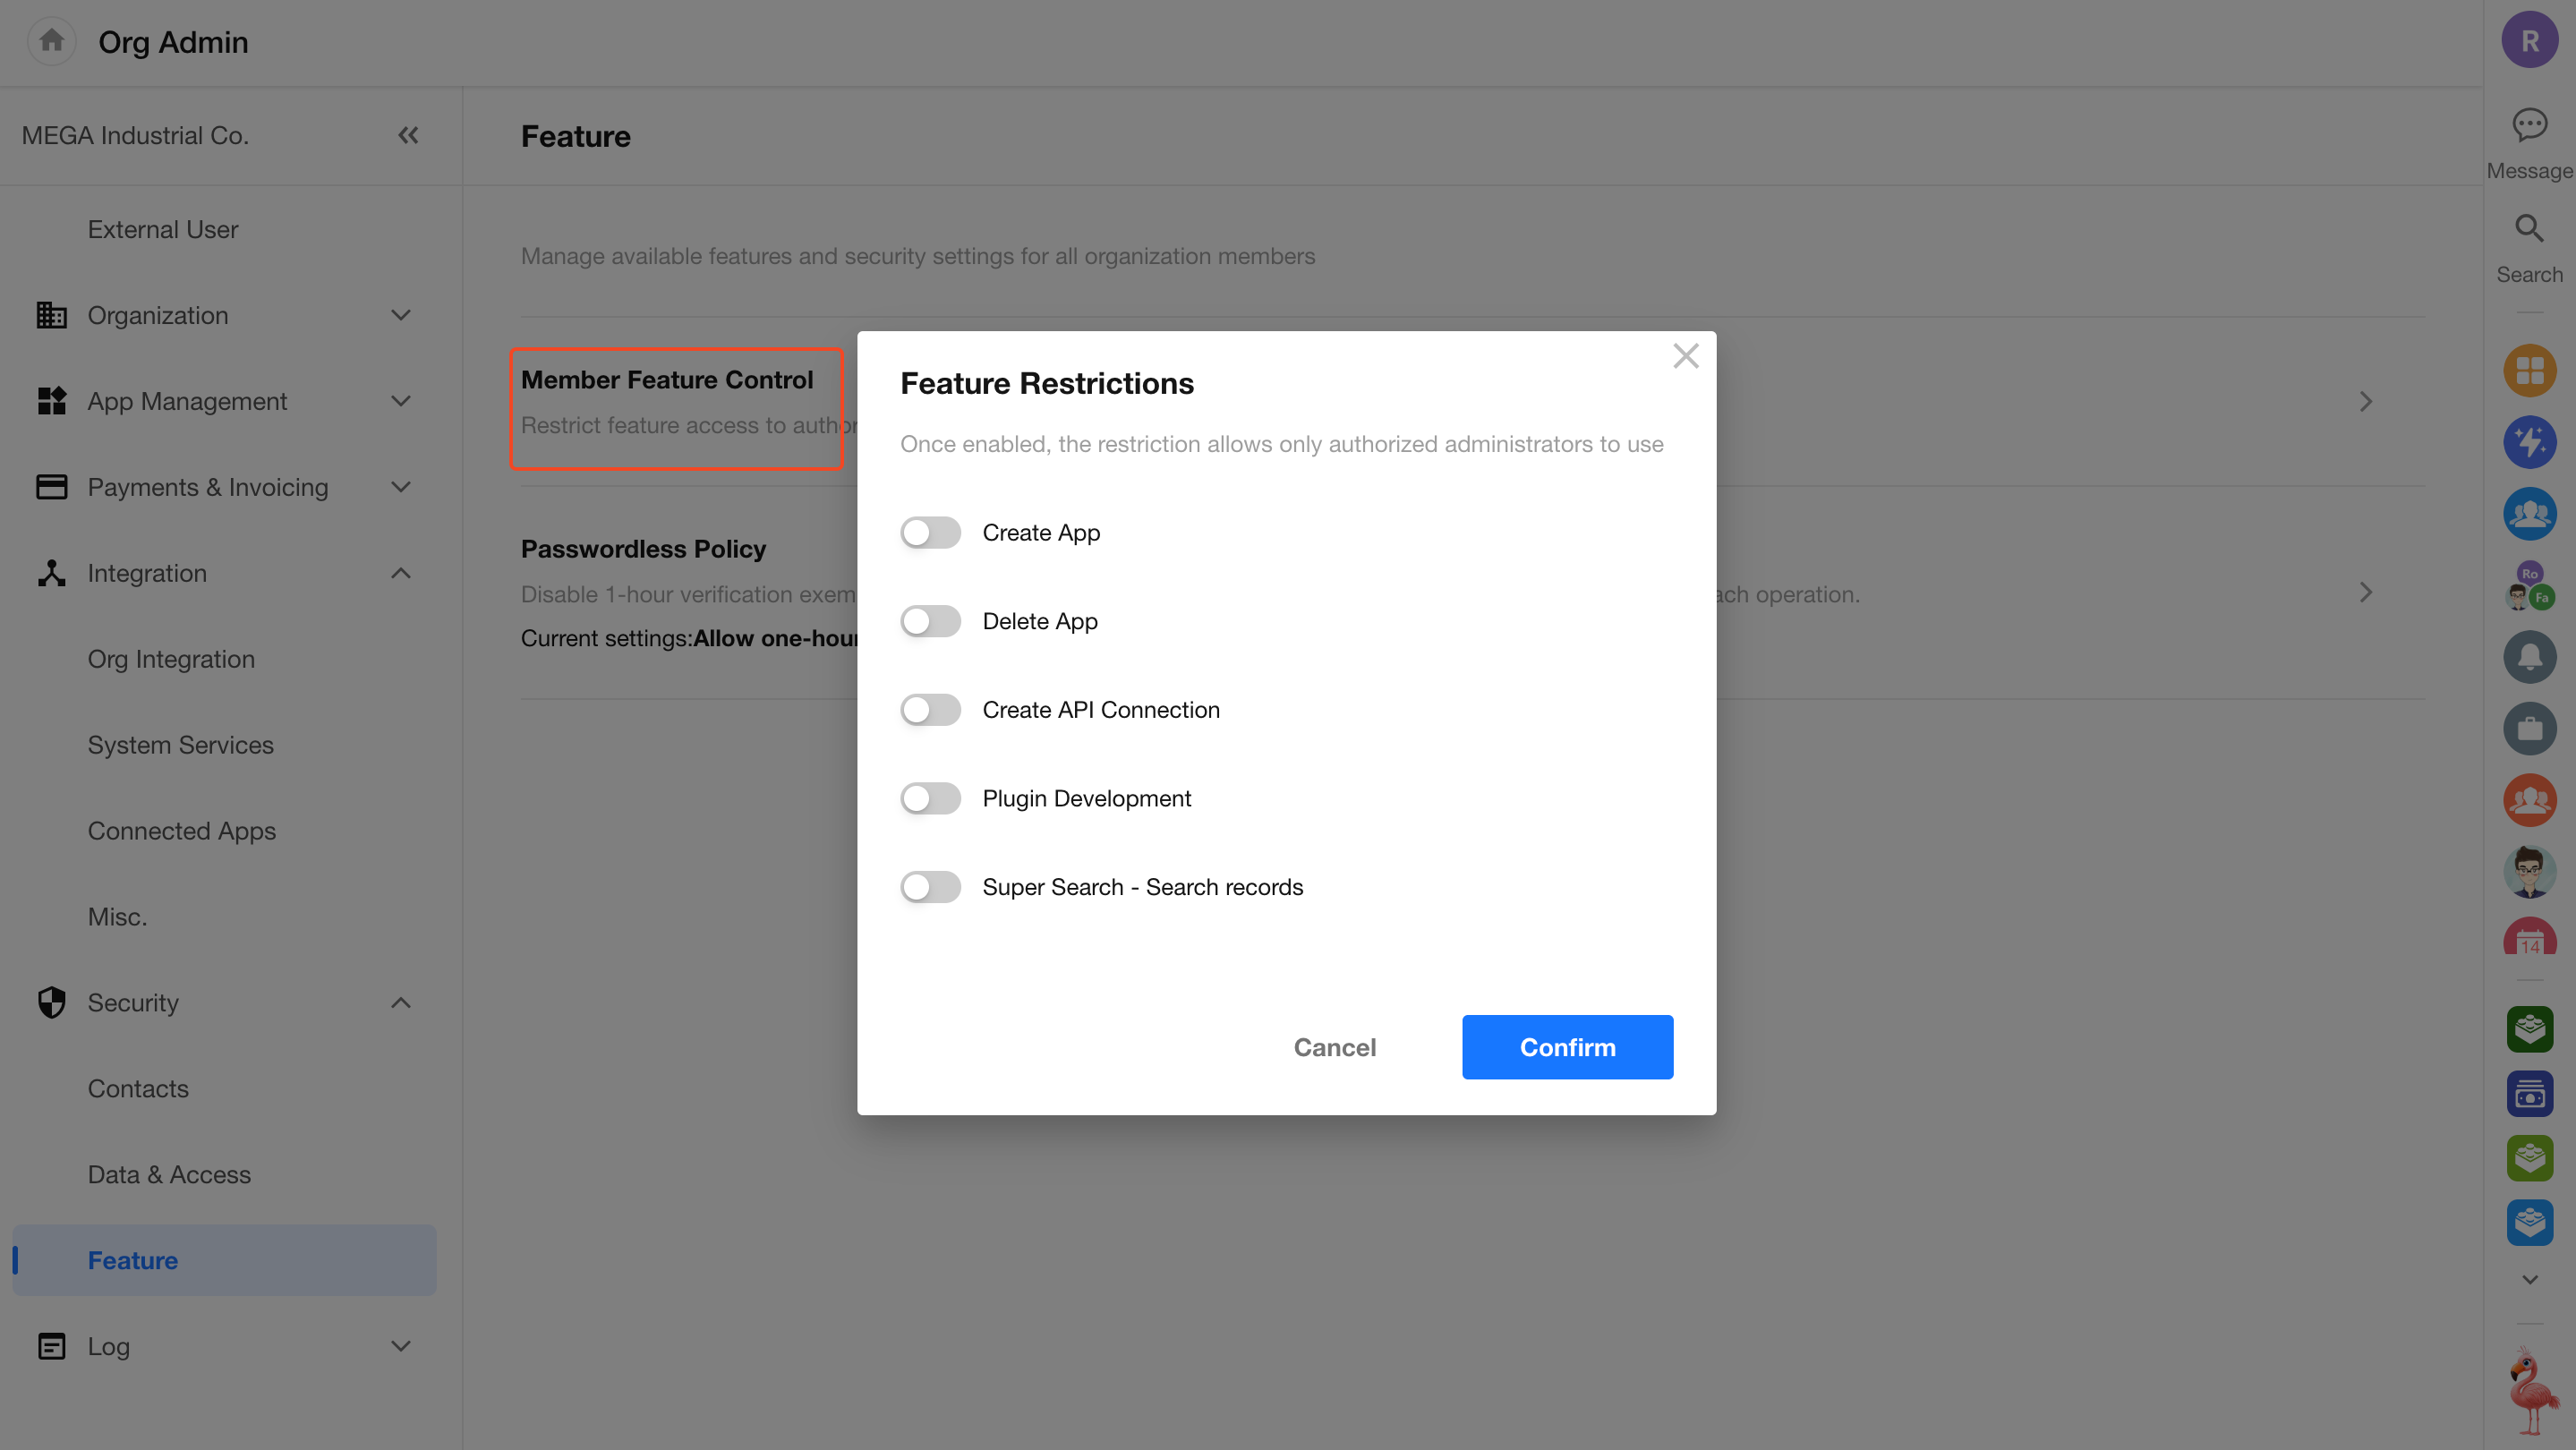
Feature Restrictions
Some features can be restricted to app administrators only, including:
- Creating new apps
- Deleting apps
- Creating API connections
- Developing plugins
- Performing record search in Super Search
Go to Org Admin > Security > Feature > Member Feature Control to enable or disable each item in the popup window.
By default, all restrictions are disabled, meaning all members can access the features. When enabled, only app administrators can perform the corresponding actions.
When record search in Super Search is disabled, it is unavailable for all users.
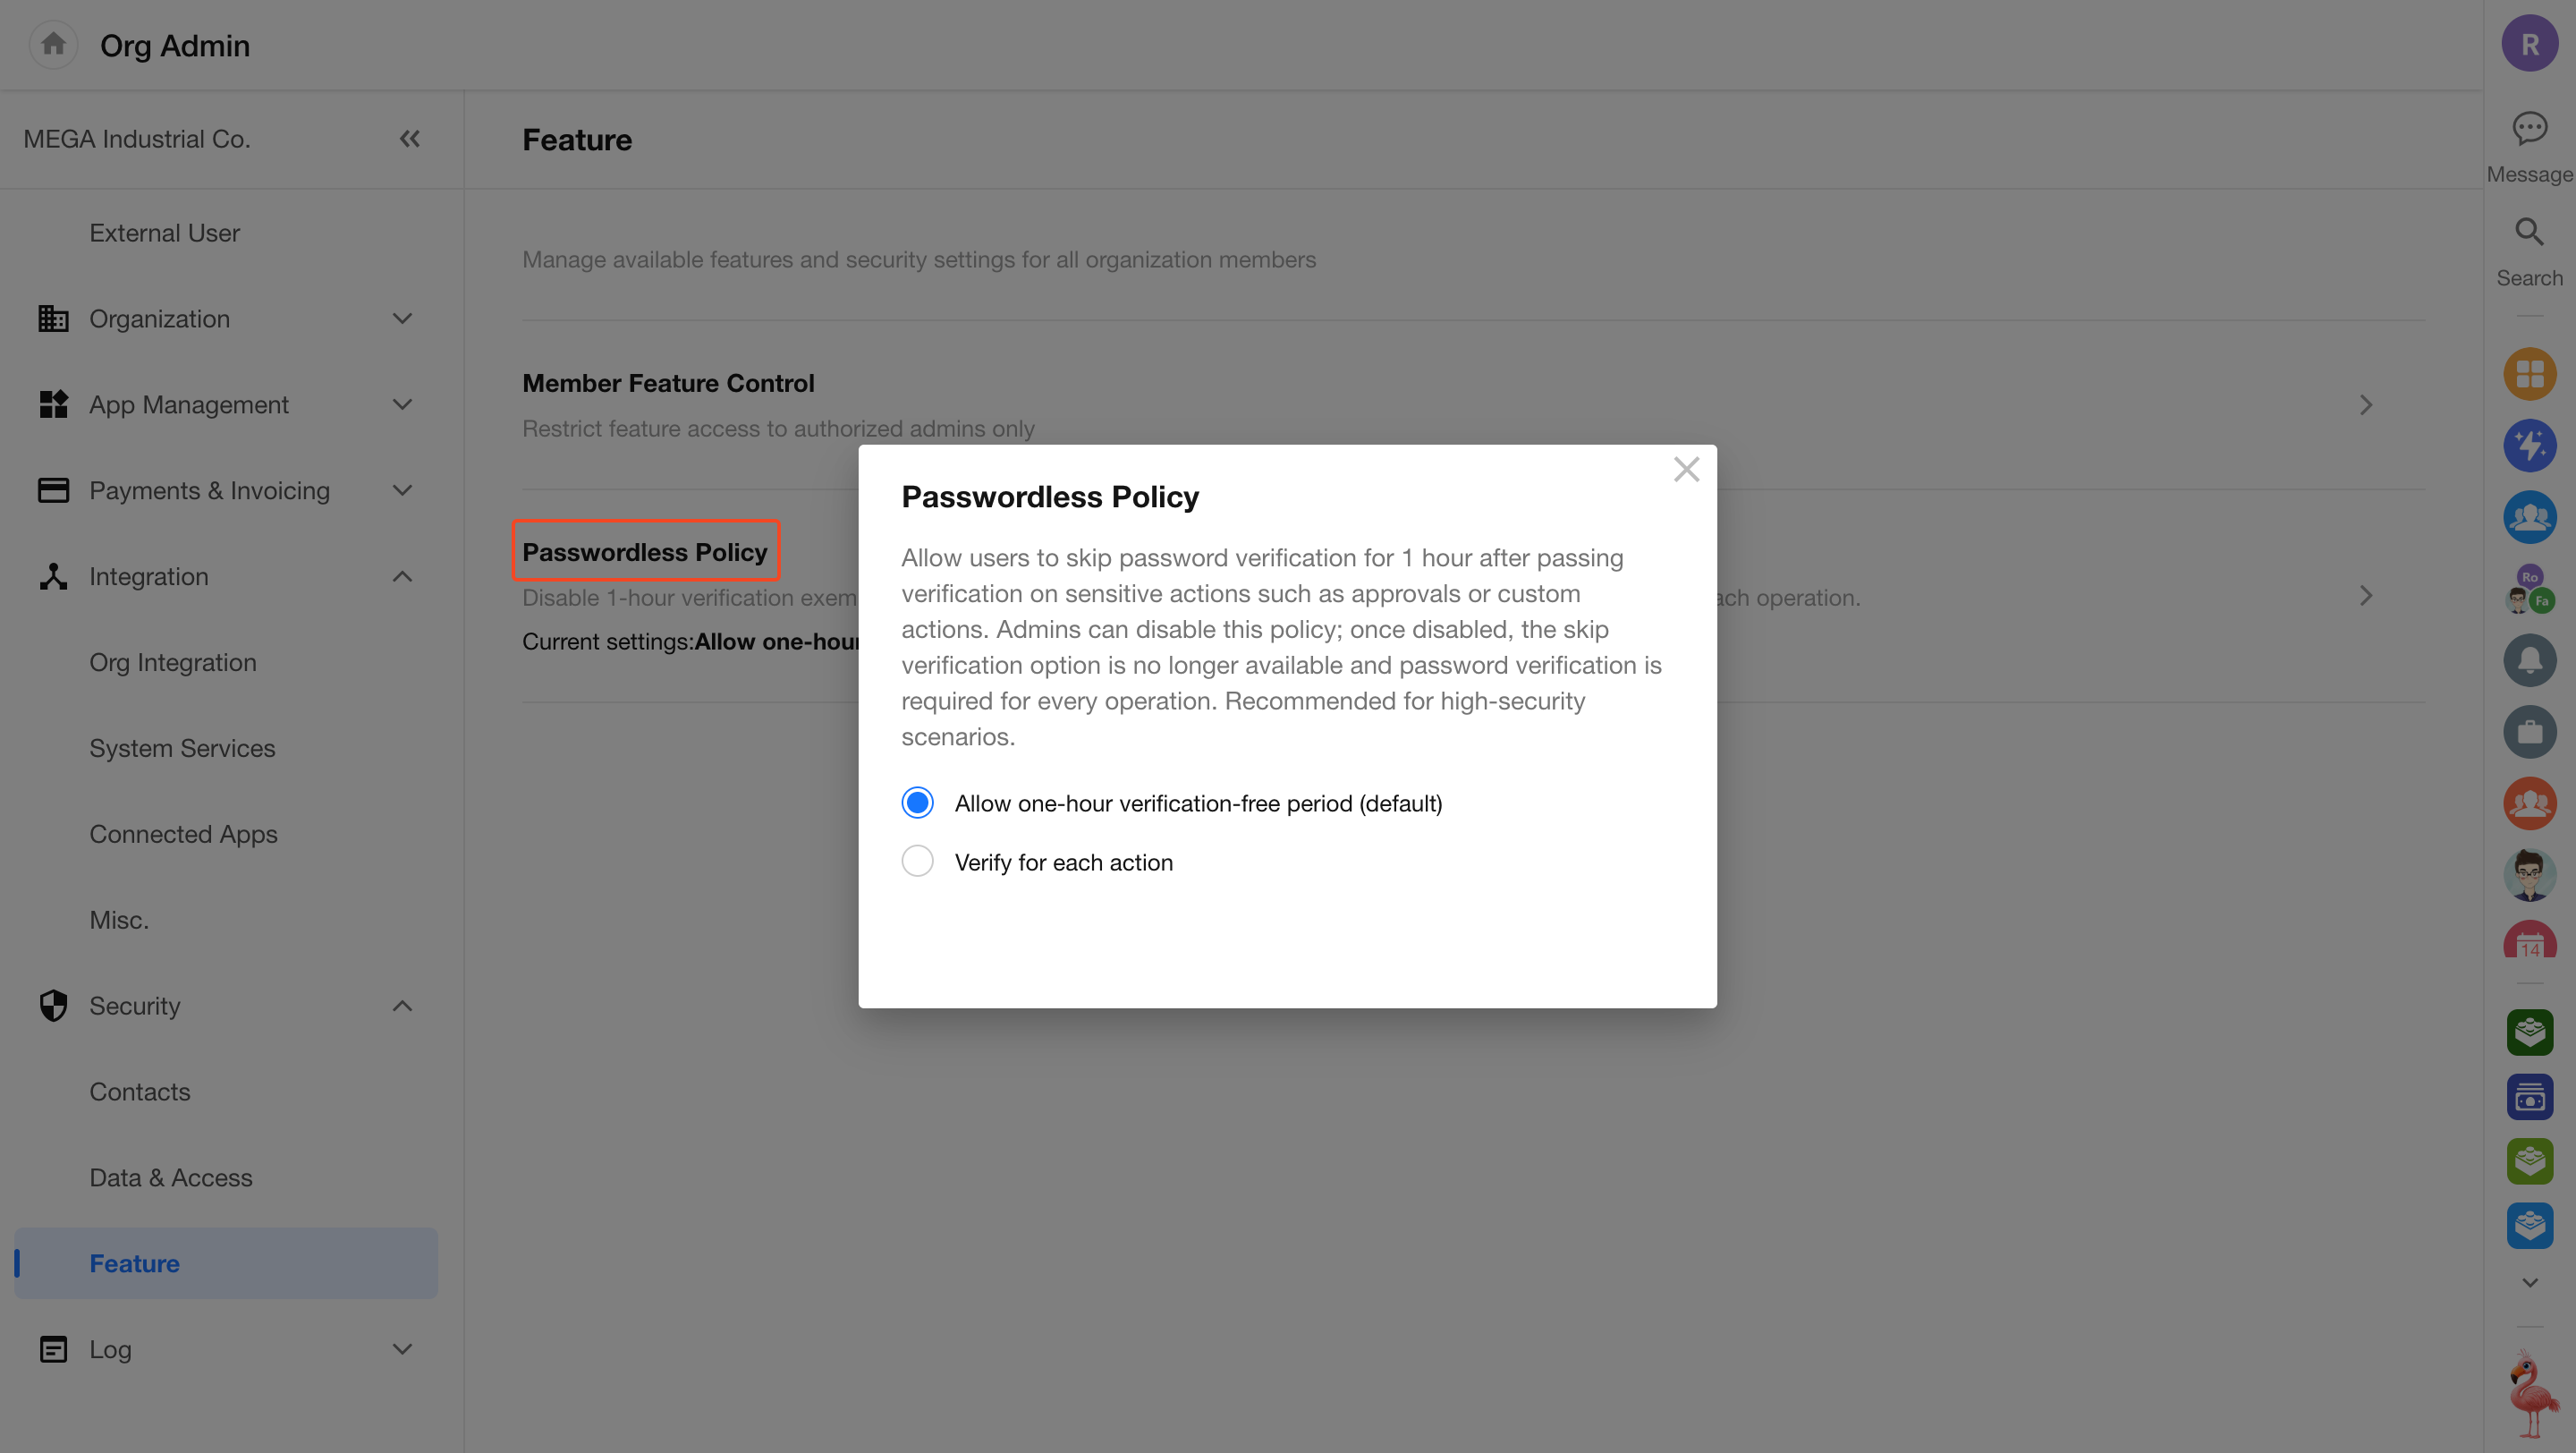
Password-Free Verification Policy
In approval workflows and custom buttons, password verification can be configured for sensitive actions. If you want users to skip repeated password verification within a certain period (e.g., 1 hour) after successful verification, you can enable the password-free verification option.
In the Organization Admin Console, go to Security > Feature > Passwordless Policy to enable Operation Without Verification.
-
When enabled:
For all custom buttons and approval workflows across the organization that require login password verification, users can choose to skip password verification for the next 1 hour after a successful verification. -
When disabled:
For all custom buttons and approval workflows that require login password verification, users must verify their password each time before proceeding.
Was this document helpful?