Trigger Mode – Trigger by Date Field
Select a date or datetime field from the worksheet (e.g., contract expiration date, client visit time). The system will automatically activate the Time Monitoring Engine. When the server time reaches the datetime specified in a record, the predefined workflow is triggered instantly — enabling time-driven automation.
Use Case 1: In the employee worksheet, each employee’s birthday is recorded. At 9:00 AM on an employee’s birthday each year, the system automatically sends them a birthday greeting SMS.
Use Case 2: In a visit plan worksheet, a datetime field specifies when to visit a client. The system automatically sends a reminder to the salesperson 2 hours before the scheduled visit time.
Configuration Steps
1. Create a Date-Triggered Workflow
Learn how to create a workflow
2. Configure the Trigger Node
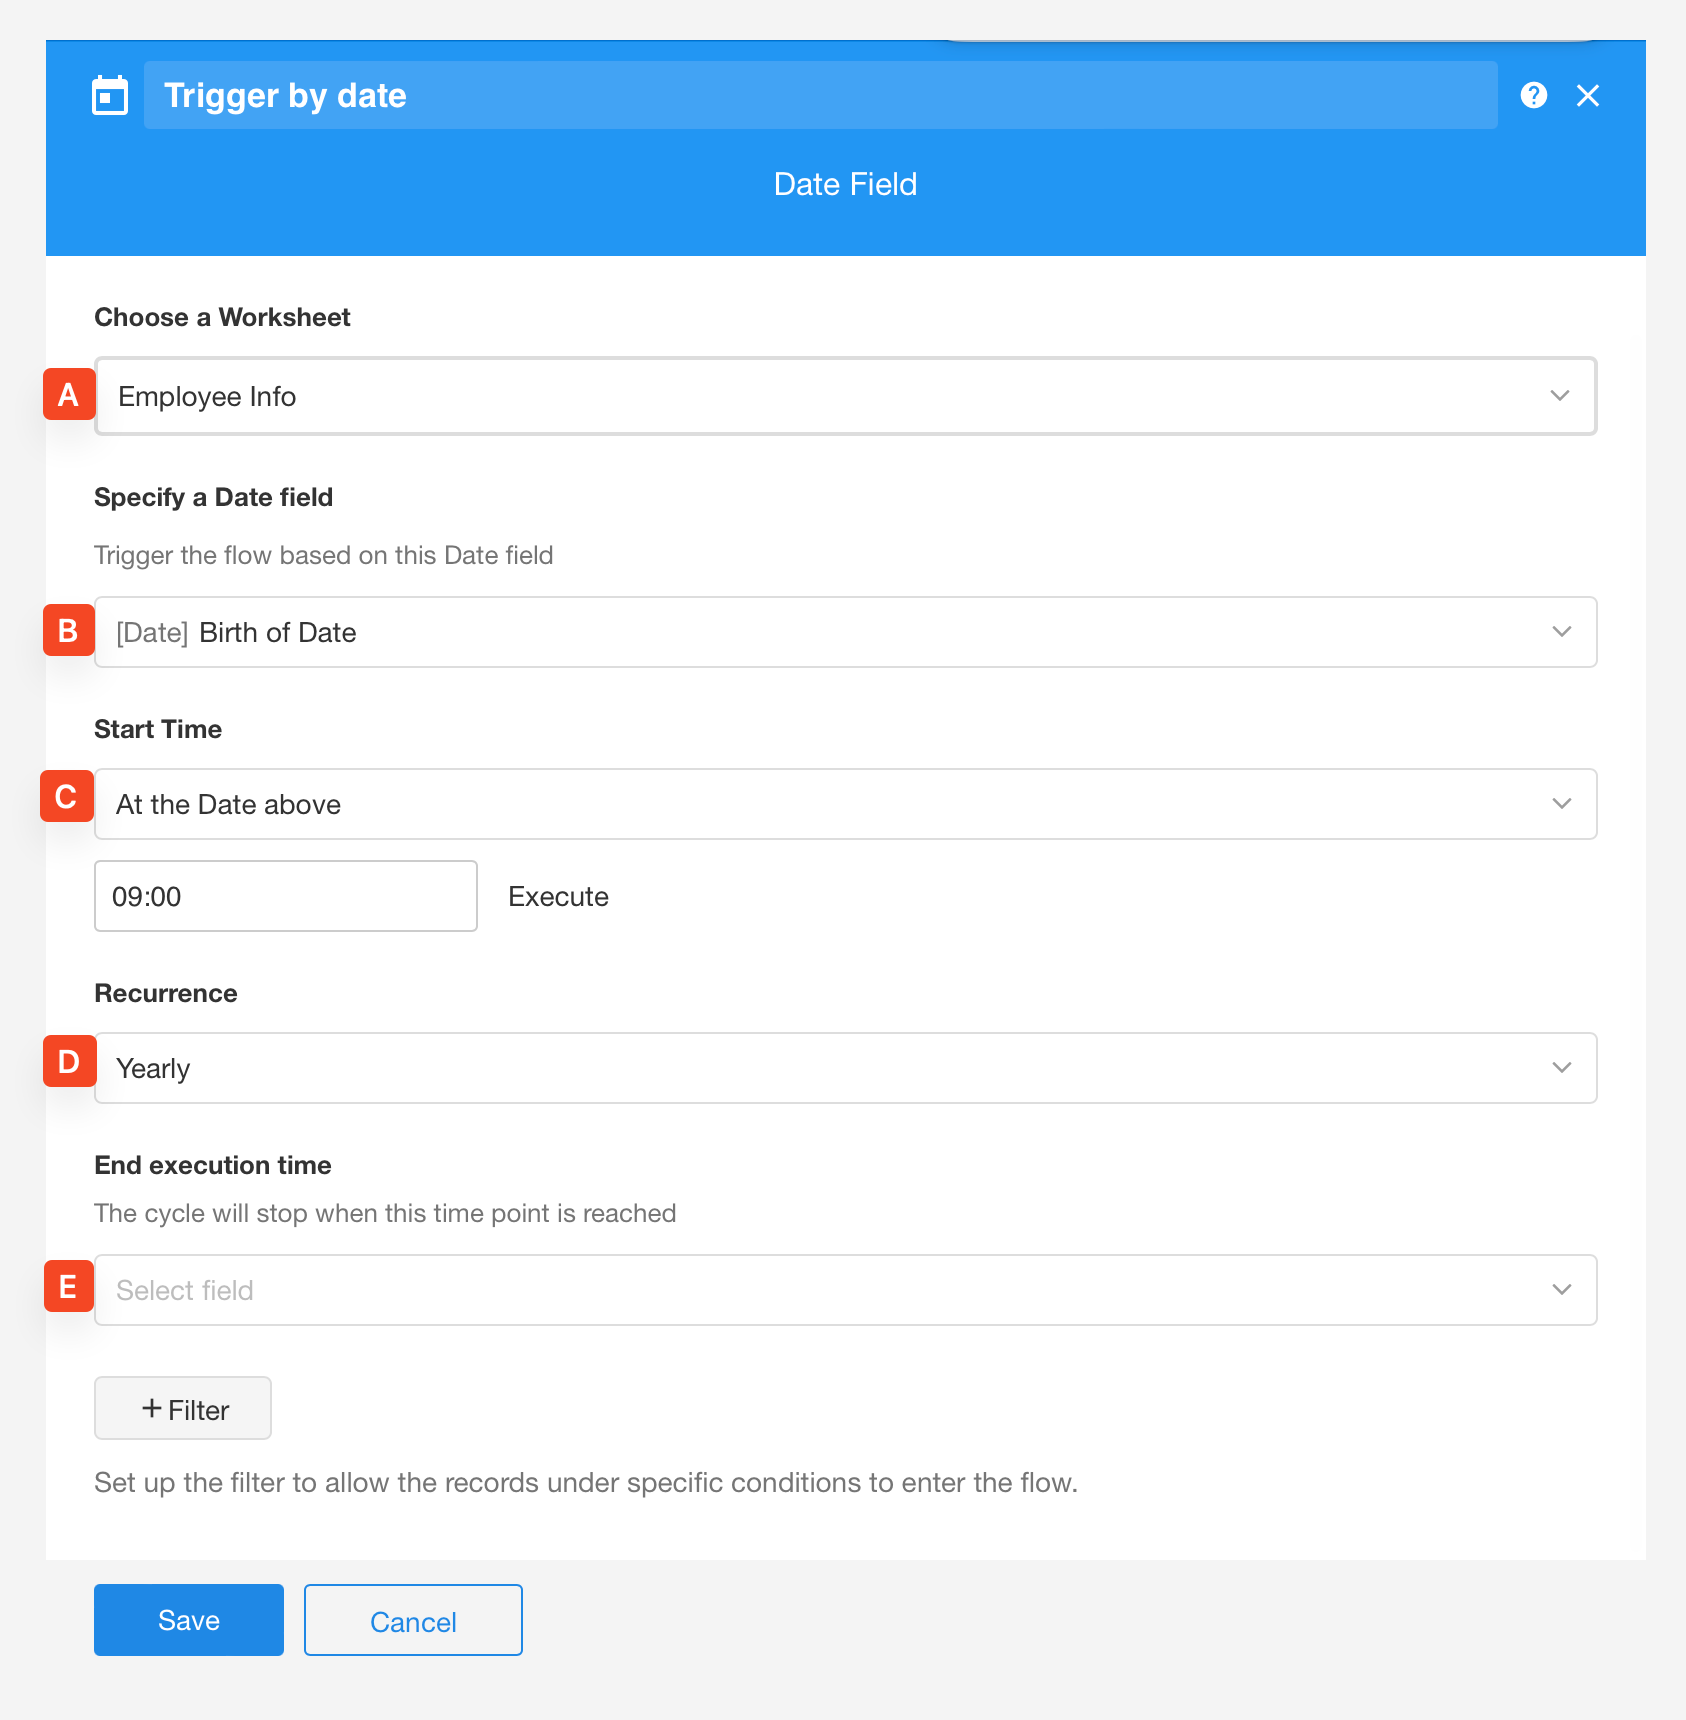
A. Select the Target Worksheet
All worksheets under the current app are available. In this example, we select the “Employee Info” worksheet for monitoring.
B. Specify a Date Field
Choose a date or datetime field — the system will monitor this field across all records in the worksheet.
Note: If the field value is modified, the trigger will re-schedule based on the updated date/time.
C. Set the Execution Start Time
This defines when the workflow will first be executed. Configuration differs between date and datetime fields:
-
Date Field
Since date fields do not include time, a specific trigger time must be manually defined. The trigger time can be a few days before, after, or exactly on the selected date.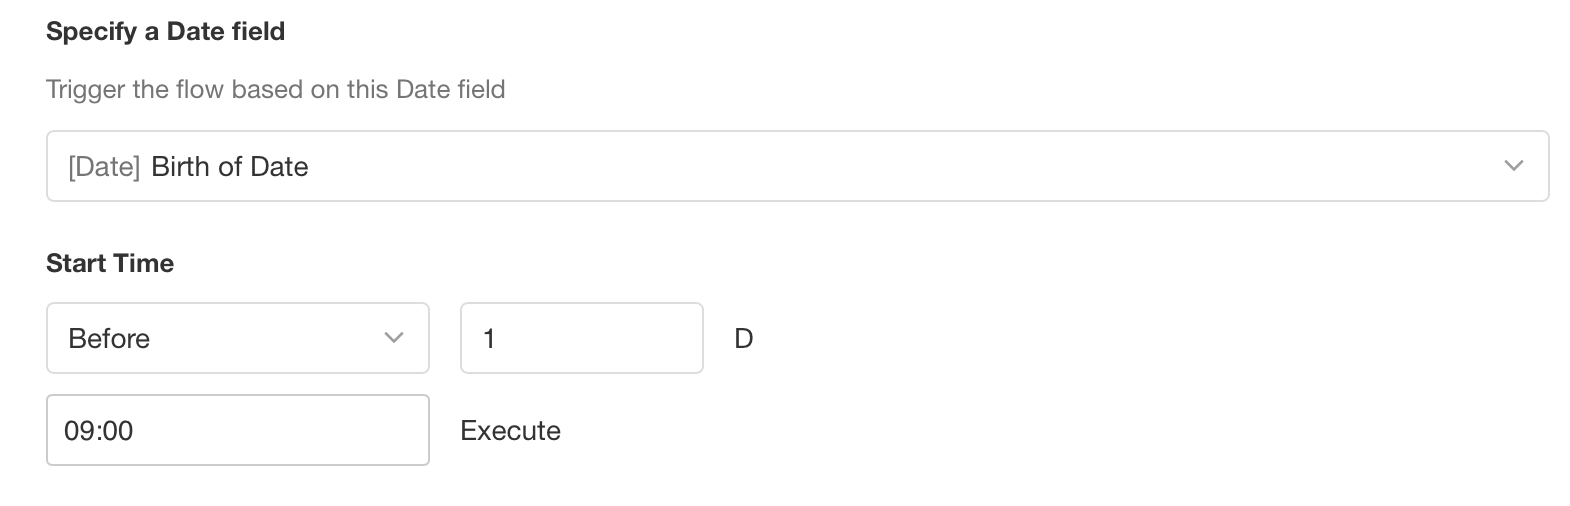
-
Datetime Field
Since this field includes time, you do not need to specify an execution time manually. You can simply configure the workflow to trigger N minutes/hours/days before or after the specified datetime.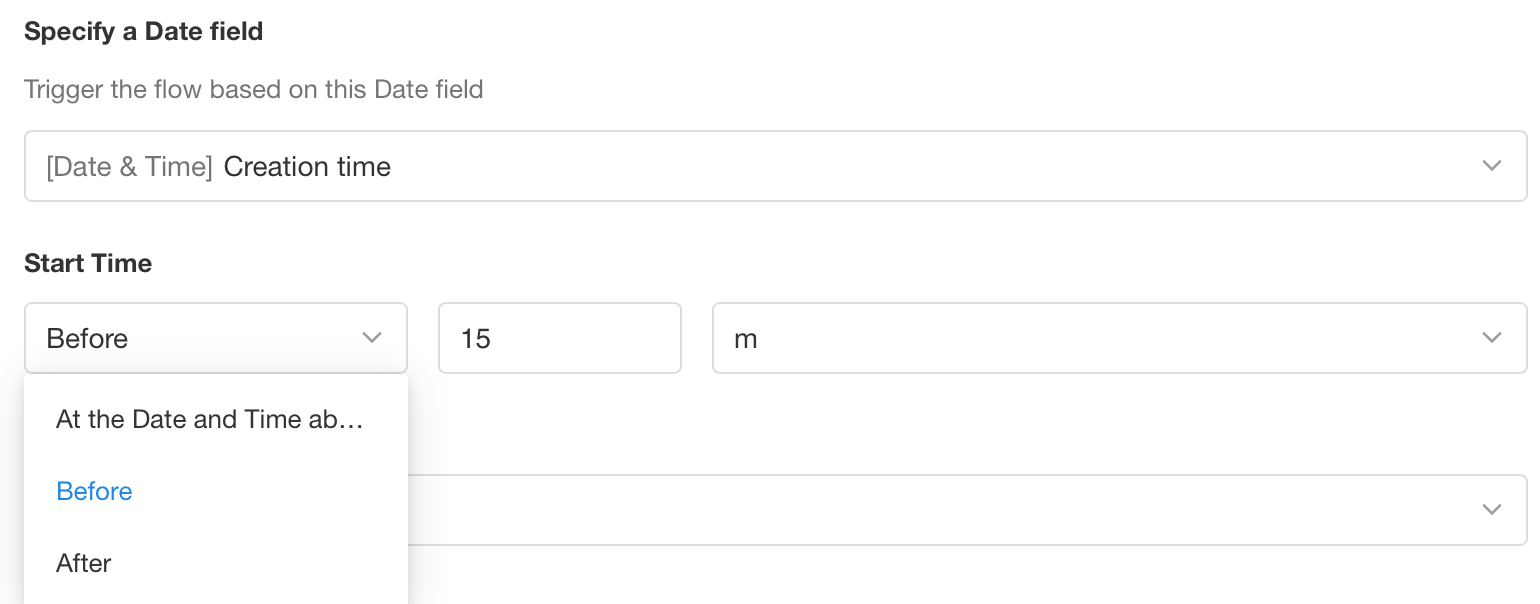
D. Recurrence
Decide whether the workflow should repeat and how often. Options include:
- Repeat yearly
- Repeat monthly
- Repeat weekly
- No repeat
For example, if you use the "Date of Hire" field and set the recurrence to "Yearly", then for an employee hired on August 22, 2018, the workflow will trigger every year on August 22.
E. Execution End Time
In some cases, you may not want the workflow to repeat indefinitely. You can define an end time for execution. After this time, the record will no longer trigger the workflow.
This option is only applicable for recurring workflows.
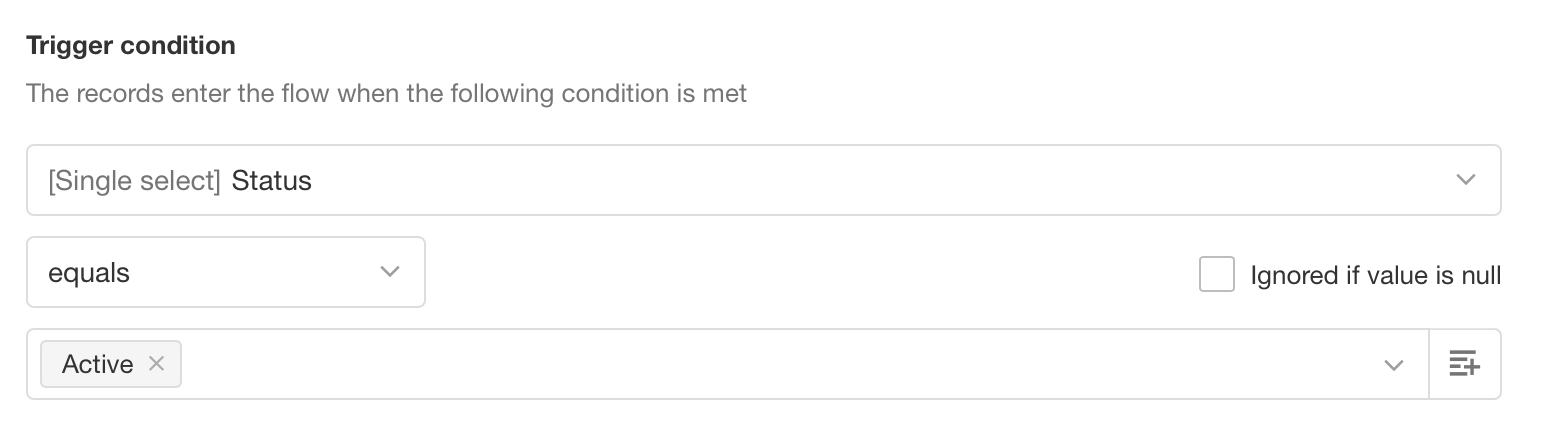
3. Set Filter Conditions
Only records that meet the specified conditions will trigger the workflow. If the conditions are not met, the workflow will not be triggered even when the date arrives.
For example, when sending an employment anniversary SMS to employees, only employee records with the status "Active" should trigger the workflow.
4. Configure Subsequent Action Nodes
Once the trigger node is configured, you can define the actions to be executed. Simply add and configure the necessary action nodes.
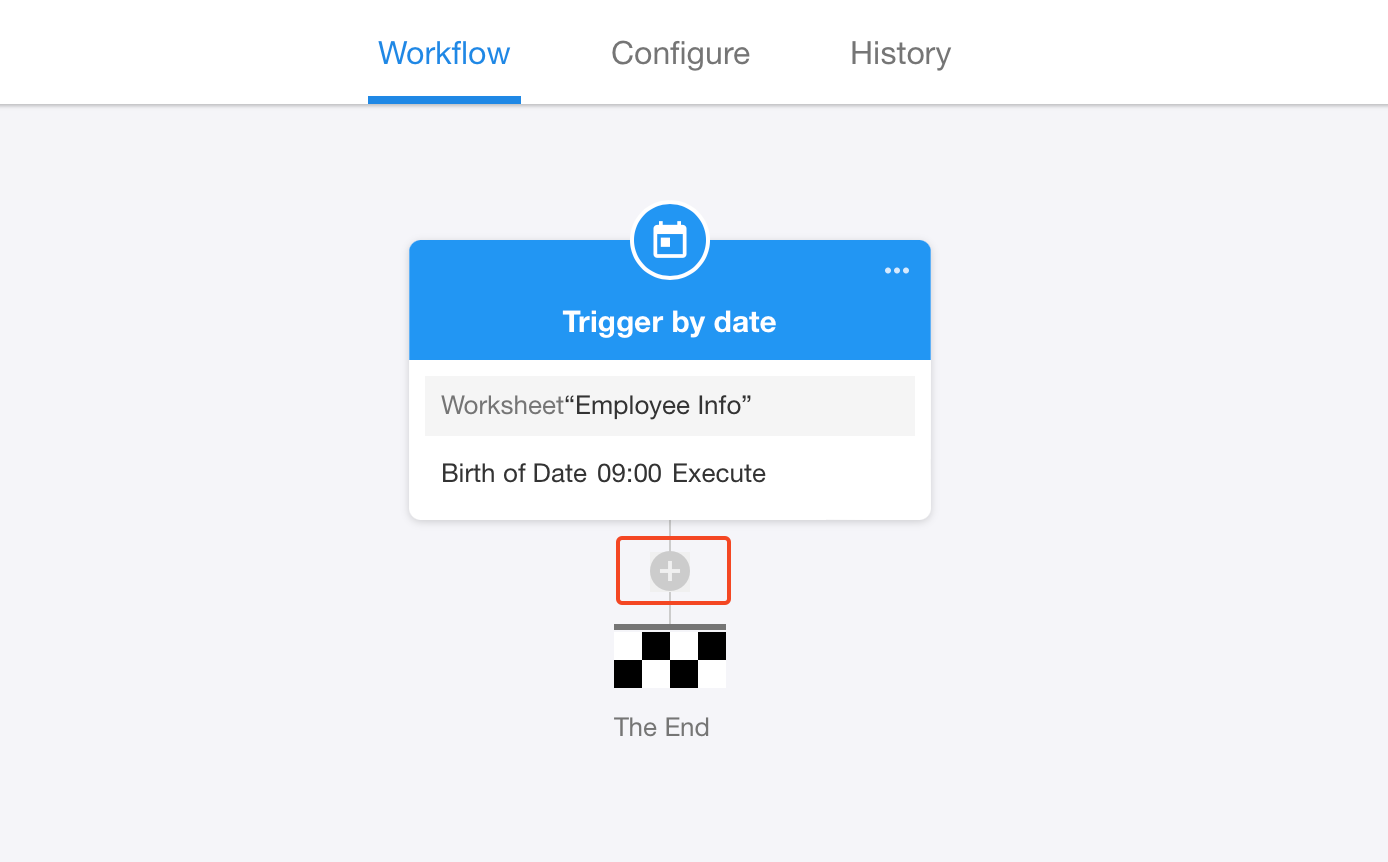
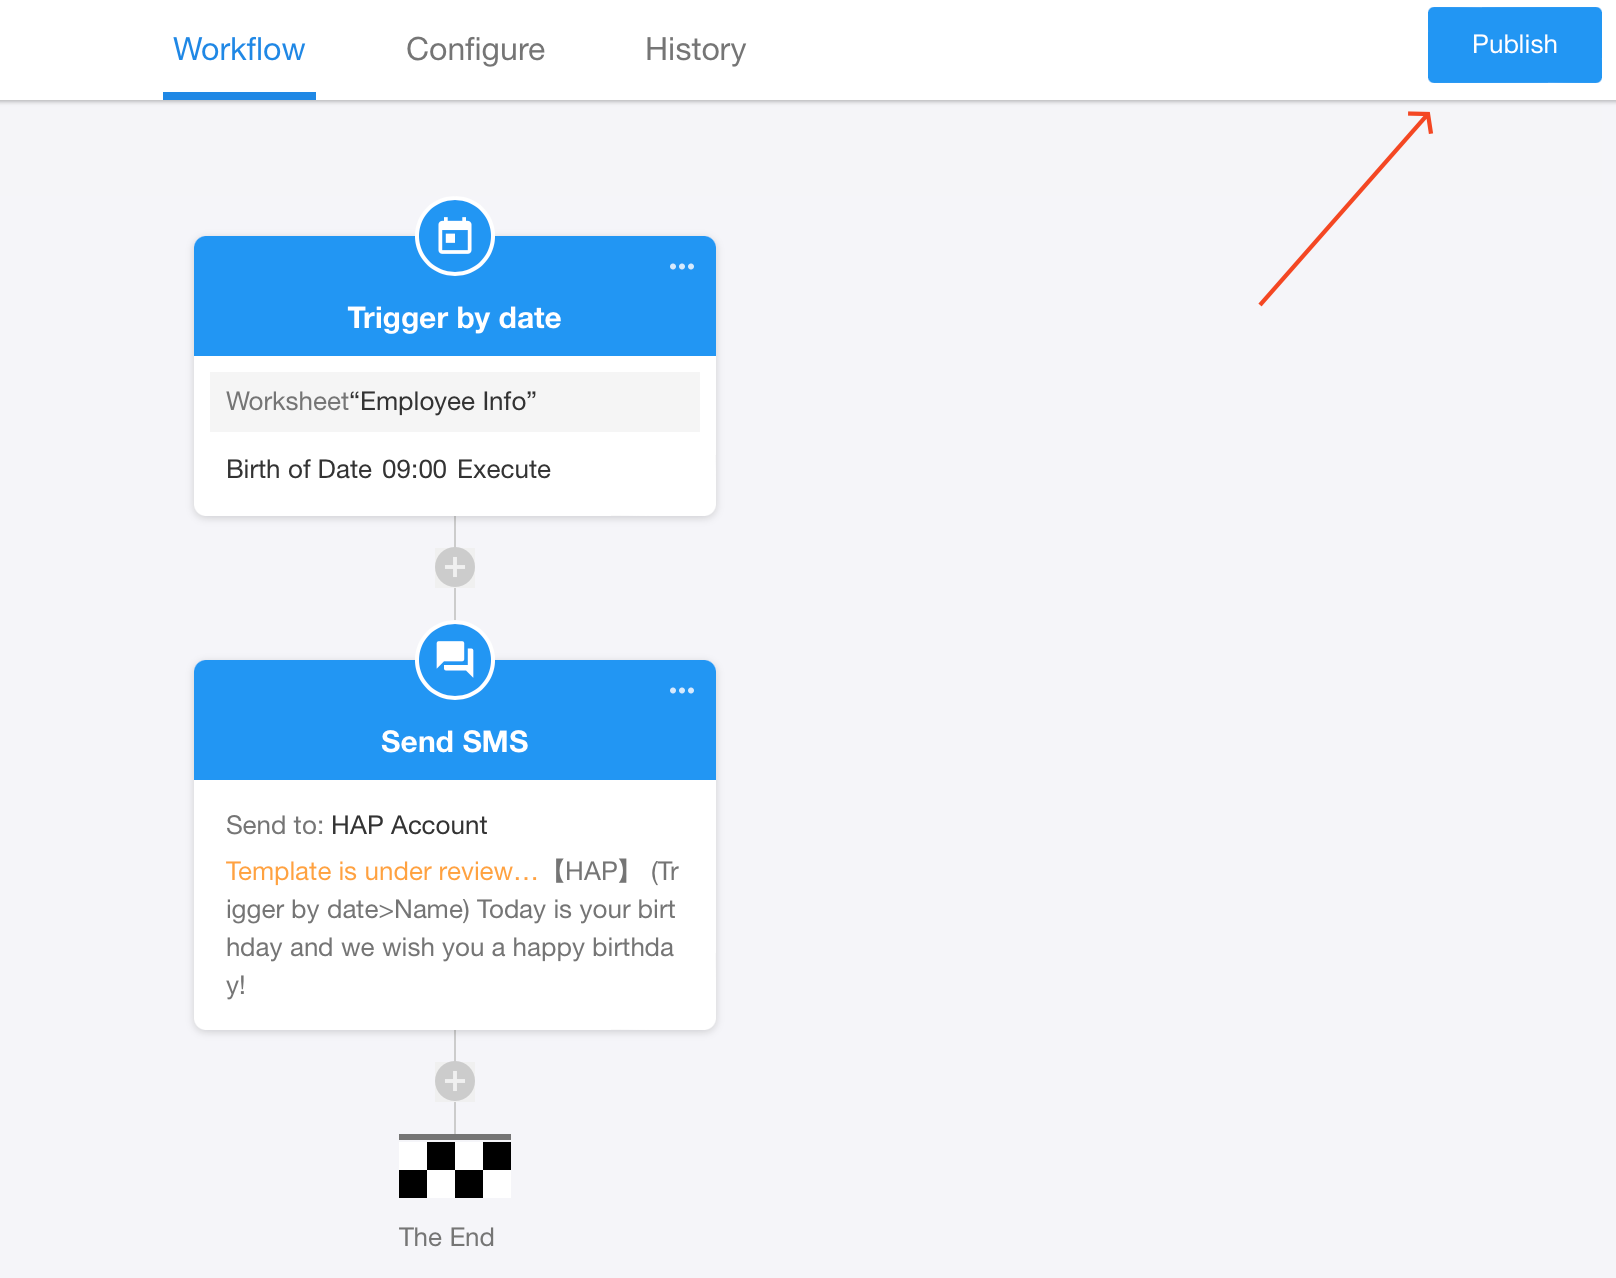
Example 1: Send Birthday Greeting SMS to Active Employees at 9 AM on Their Birthday
1. Configure the Trigger Node

Note:
In the above setup, the trigger field is the employee’s birthday field, which is of Date type (without a time component). Therefore, you must specify a trigger time manually.
- Start Execution Date: By default, it's the same date as in the date field (i.e., the employee's birthday).
- Execution Time: Defaults to 08:00 AM. You can modify this as needed.
- End Execution Time: Leave this blank.
- Recurrence: Yearly
- Trigger Condition: Only employee records where the status is “Active” will trigger the workflow.
2. Configure the Action Node
Add and configure a Send SMS node to send birthday greeting SMS.

3. Publish the Workflow
Example 2: Remind Salesperson 2 Hours Before a Scheduled Client Visit
1. Configure the Trigger Node
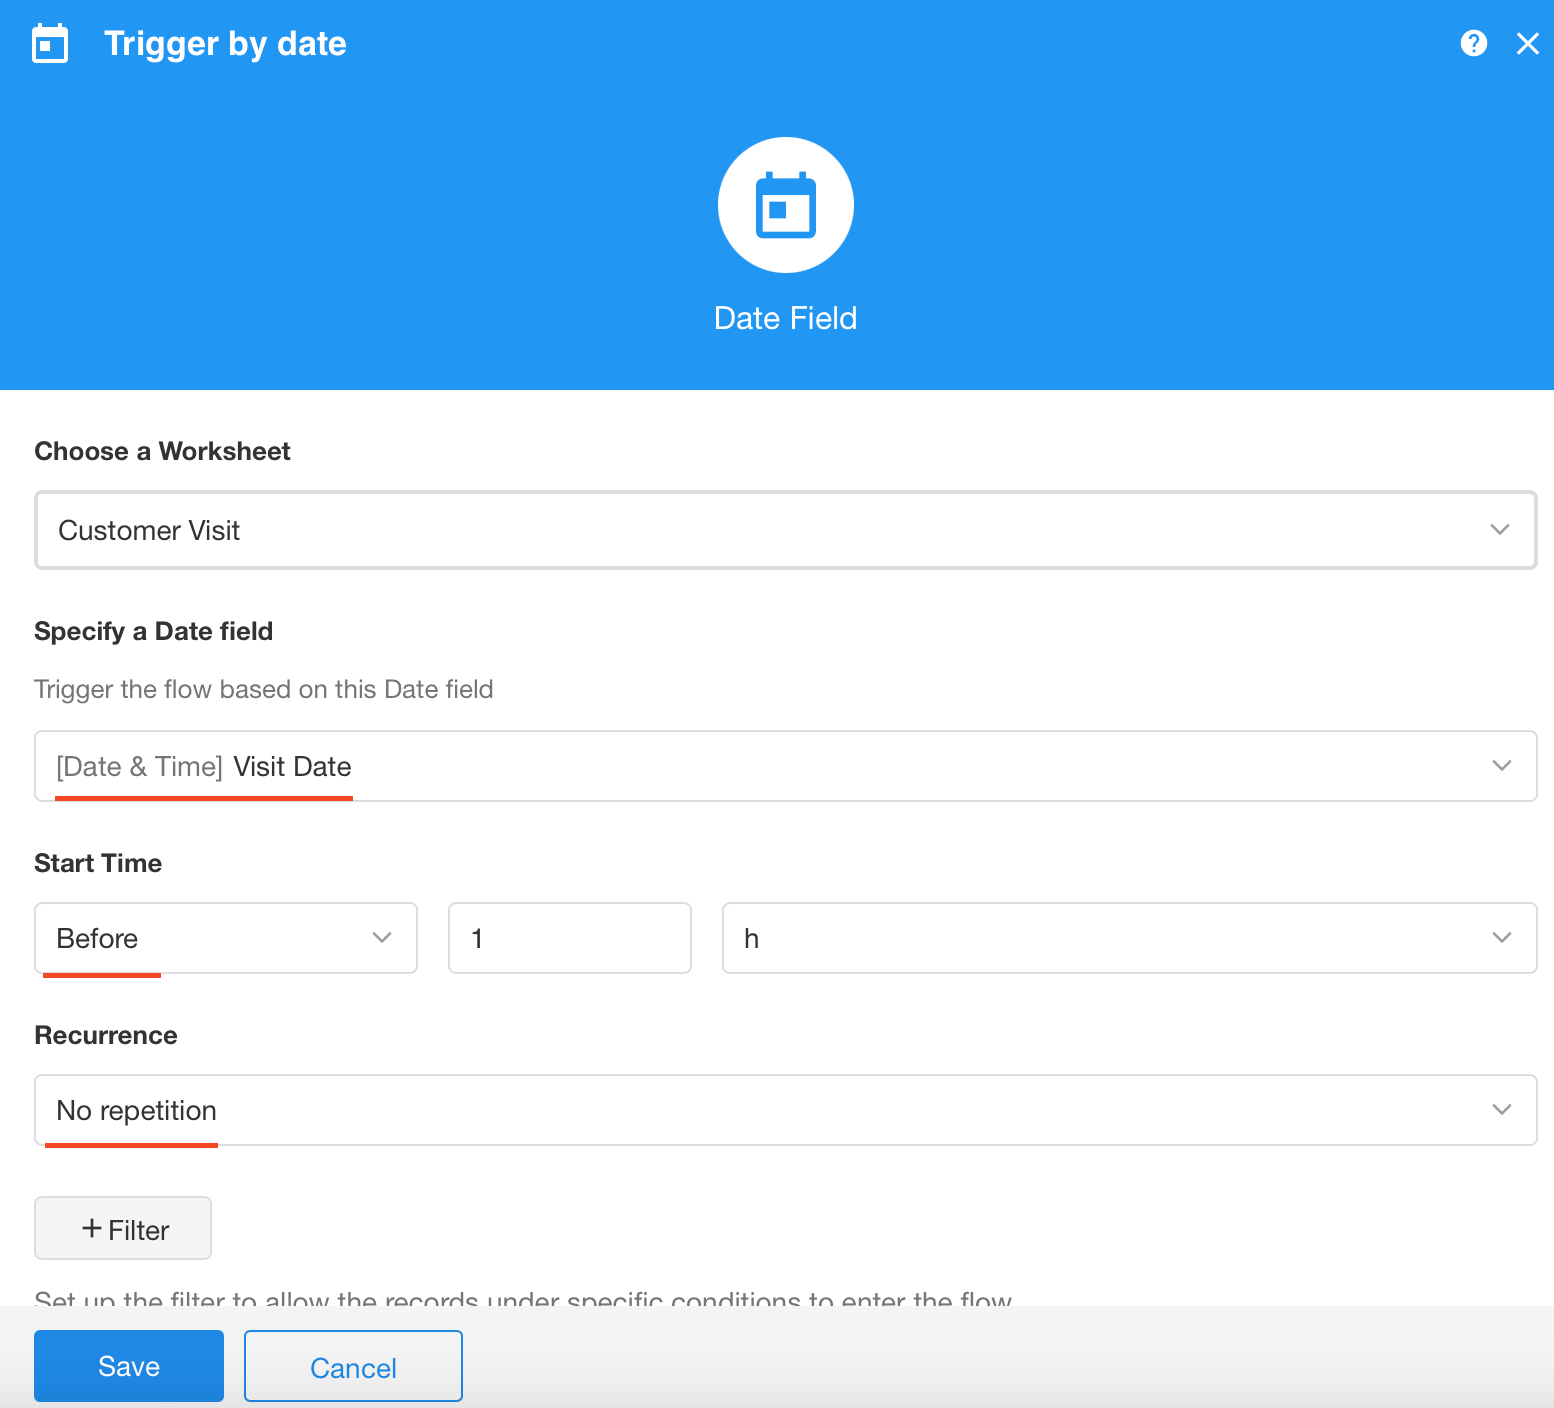
- Execution Start Time: Since the trigger field is of Datetime type, the exact time is already defined.
- You can choose to trigger the workflow at the specified time or set it to trigger a defined number of minutes/hours/days before or after the scheduled time.
2. Configure Notification Node
Add a Send Internal Notification node to alert the salesperson. (Configuration steps not shown here.)
Was this document helpful?