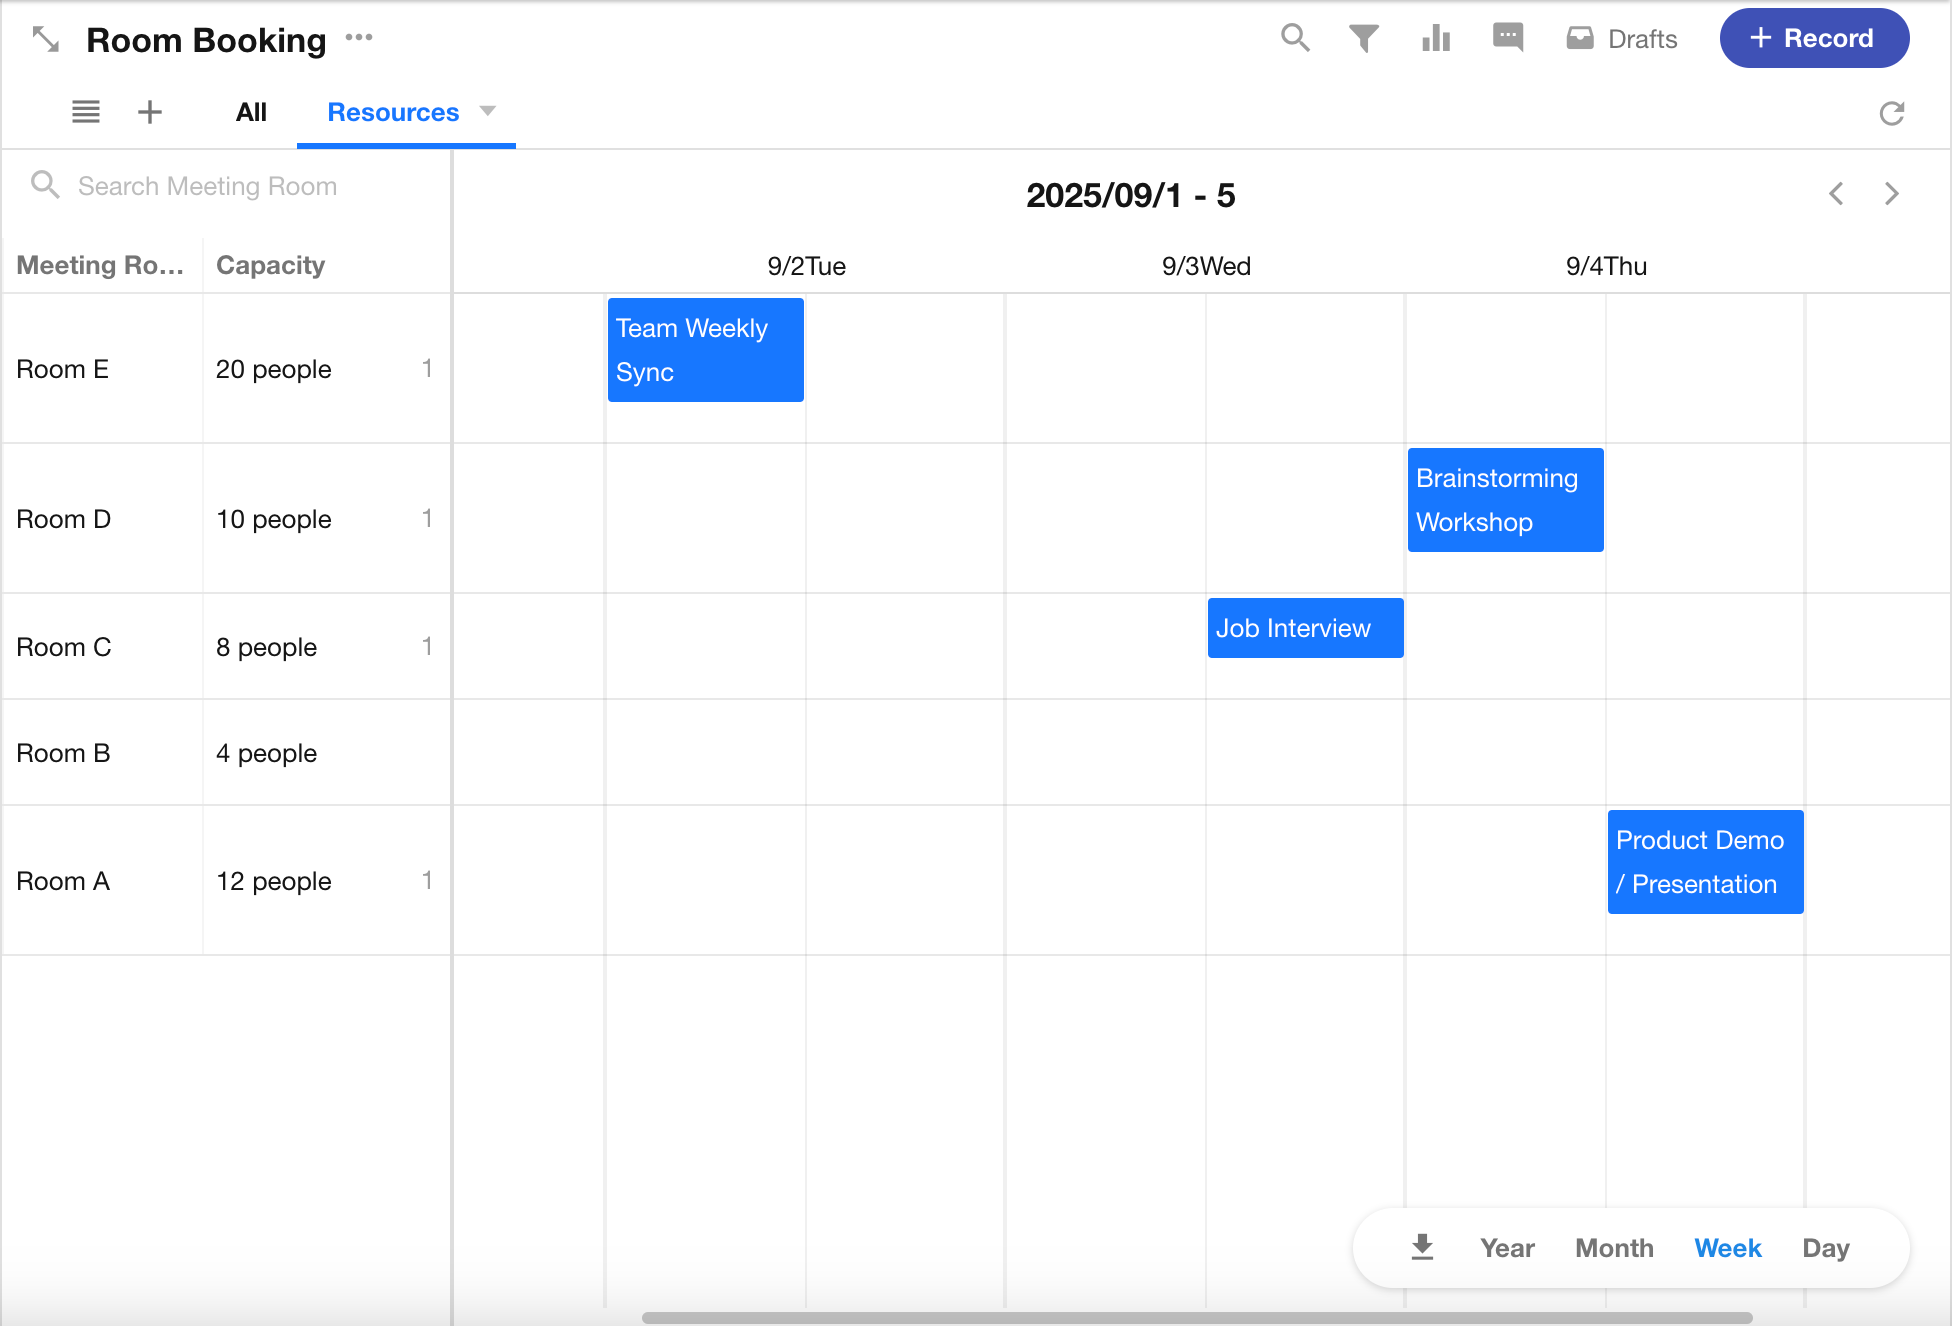
Resources View
In enterprise resource management, there are often scheduling, allocation, and coordination needs—such as booking meeting rooms, dispatching vehicles, or assigning employee shifts. The Resources View is a time-based visualization tool that displays resource allocation in a list format within a calendar. This allows you to quickly identify which resources are available or occupied and make appropriate scheduling decisions.
Meeting Room Booking Example:
Resource Management
A resources view typically consists of two key components: the resource entity and the time allocation.
-
Resource Entities
Resources can be people, business objects, or specific statuses of those objects. The following field types are supported as resource fields:
-
Members, Department, and Org-Roles fields
-
Single-Select, Multi-Select, and Level fields
-
Relationship fields (single/multiple records in card/dropdown format)
-
Foreign fields (data storage)
-
-
Time Allocation
Two date/time fields are required to define the start and end times for each resource assignment—for example, the start and end time of a room booking. These will be visualized as bars on the calendar.
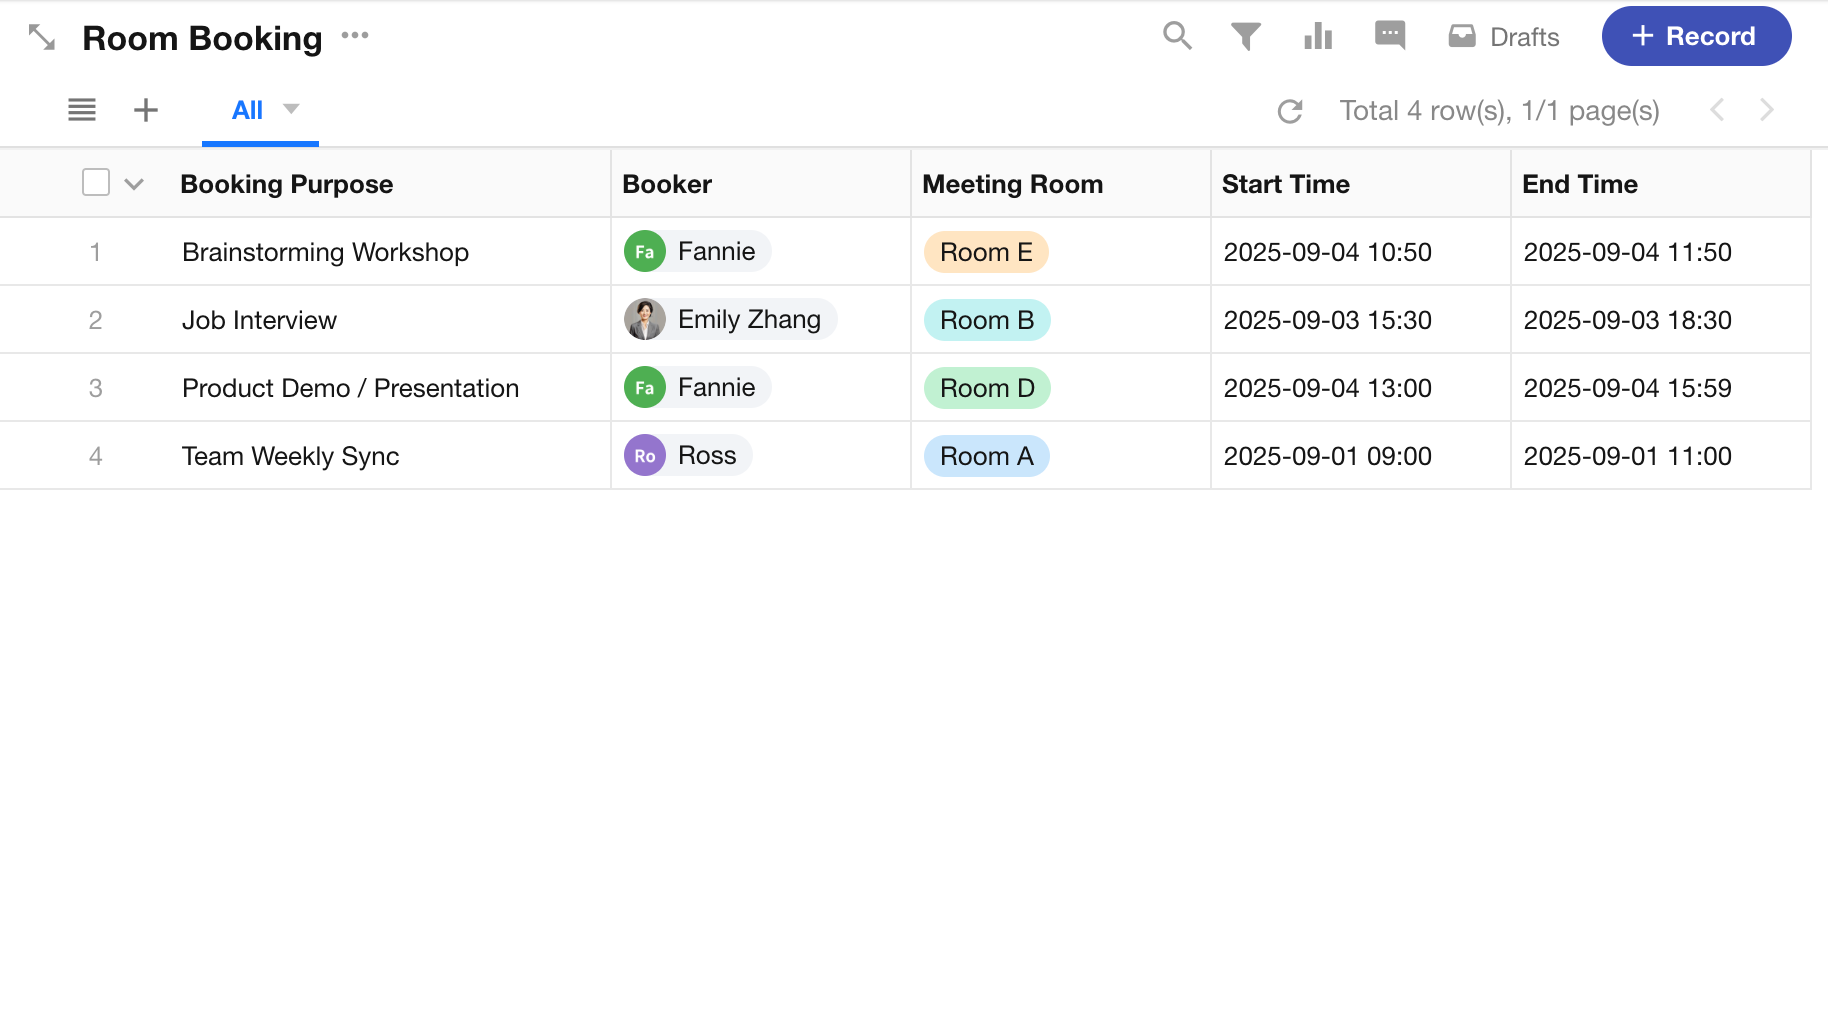
Example: Meeting Room Booking
This example demonstrates how to use the resources view for managing and reserving meeting rooms.
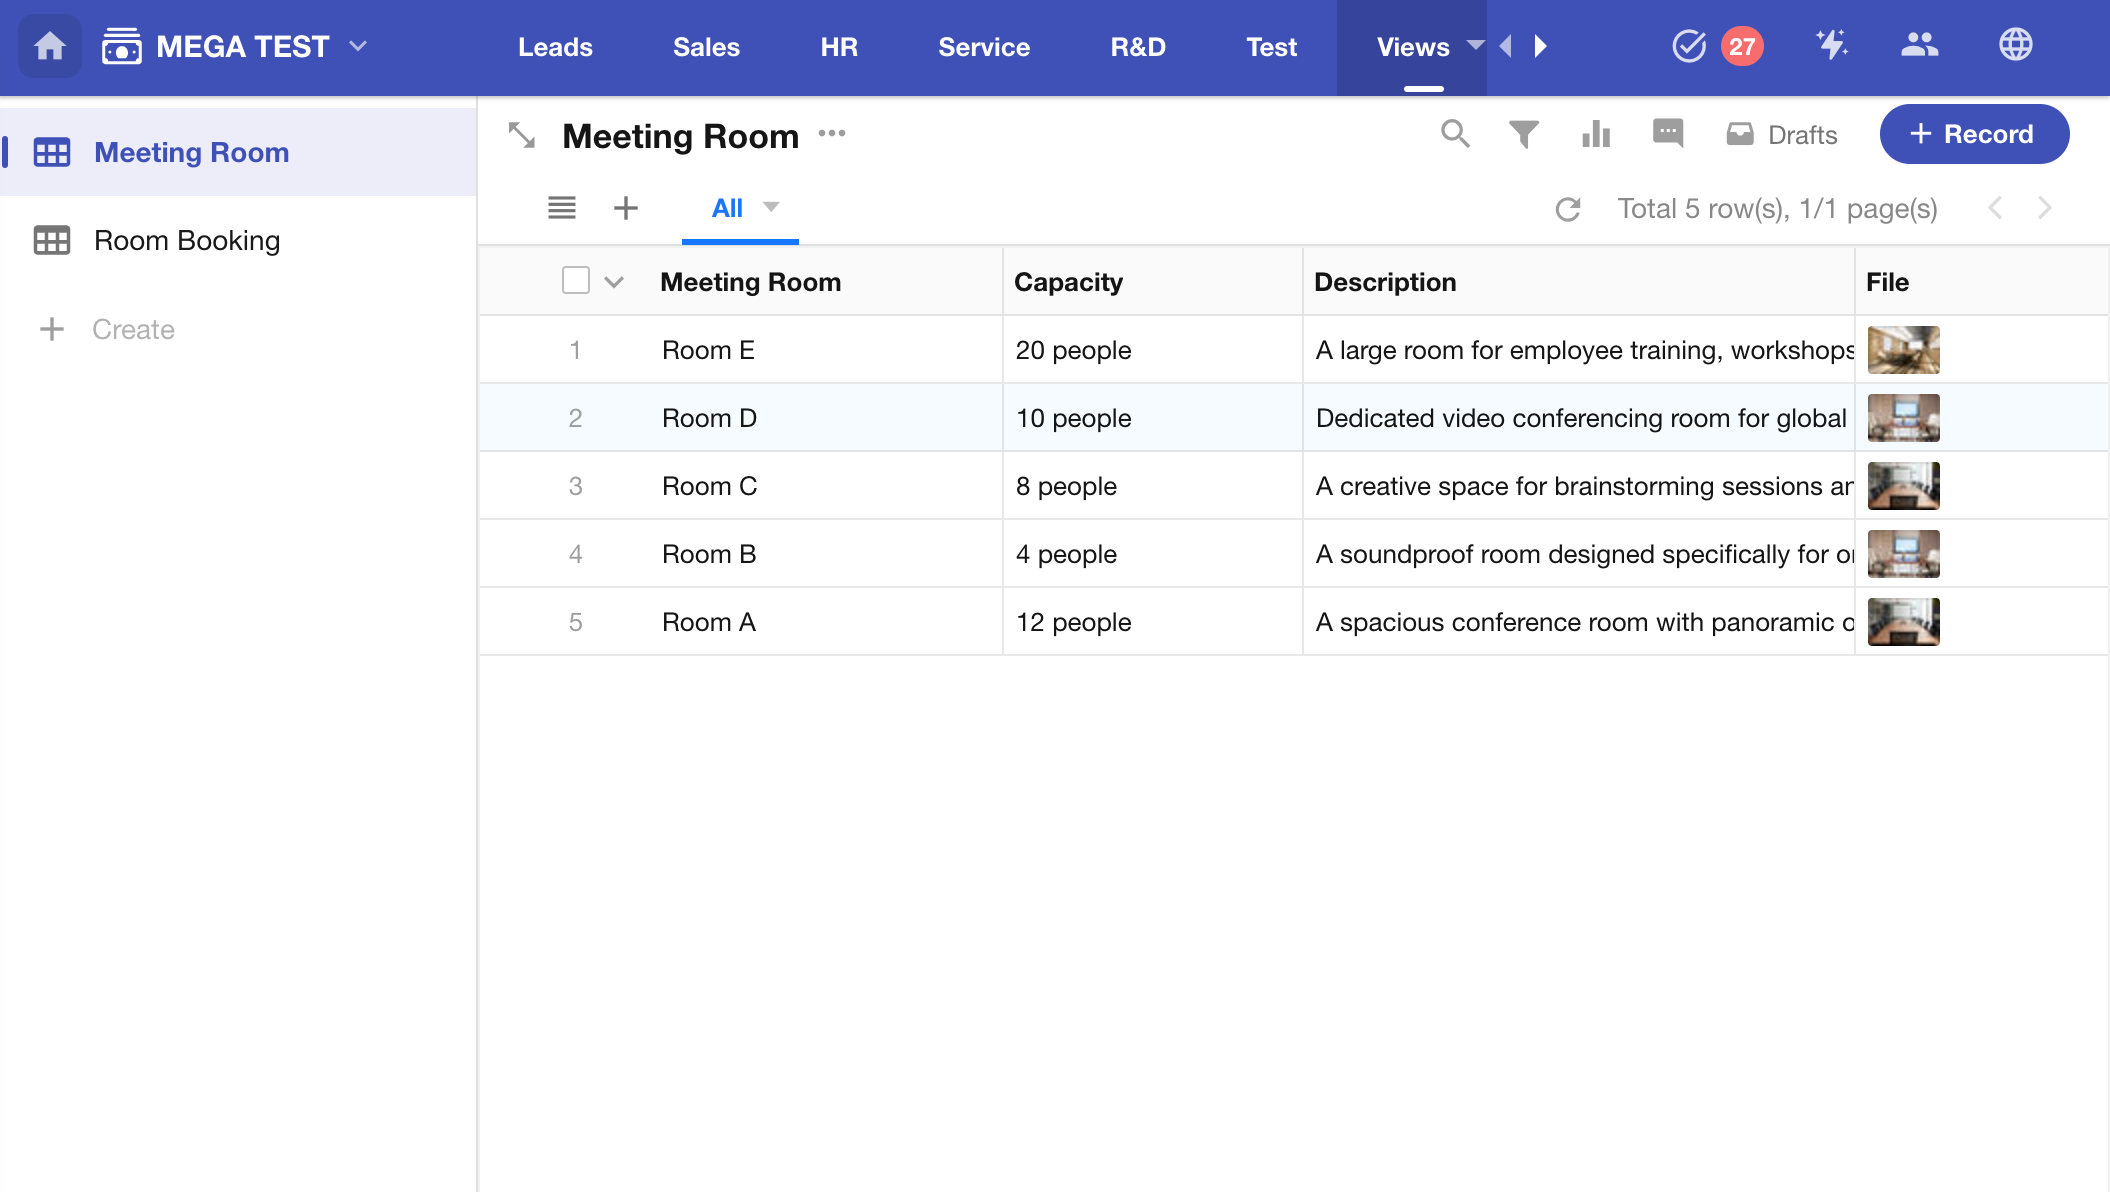
1. Create a Resource Worksheet – Meeting Room Worksheet
Start by creating a worksheet for managing meeting room data.
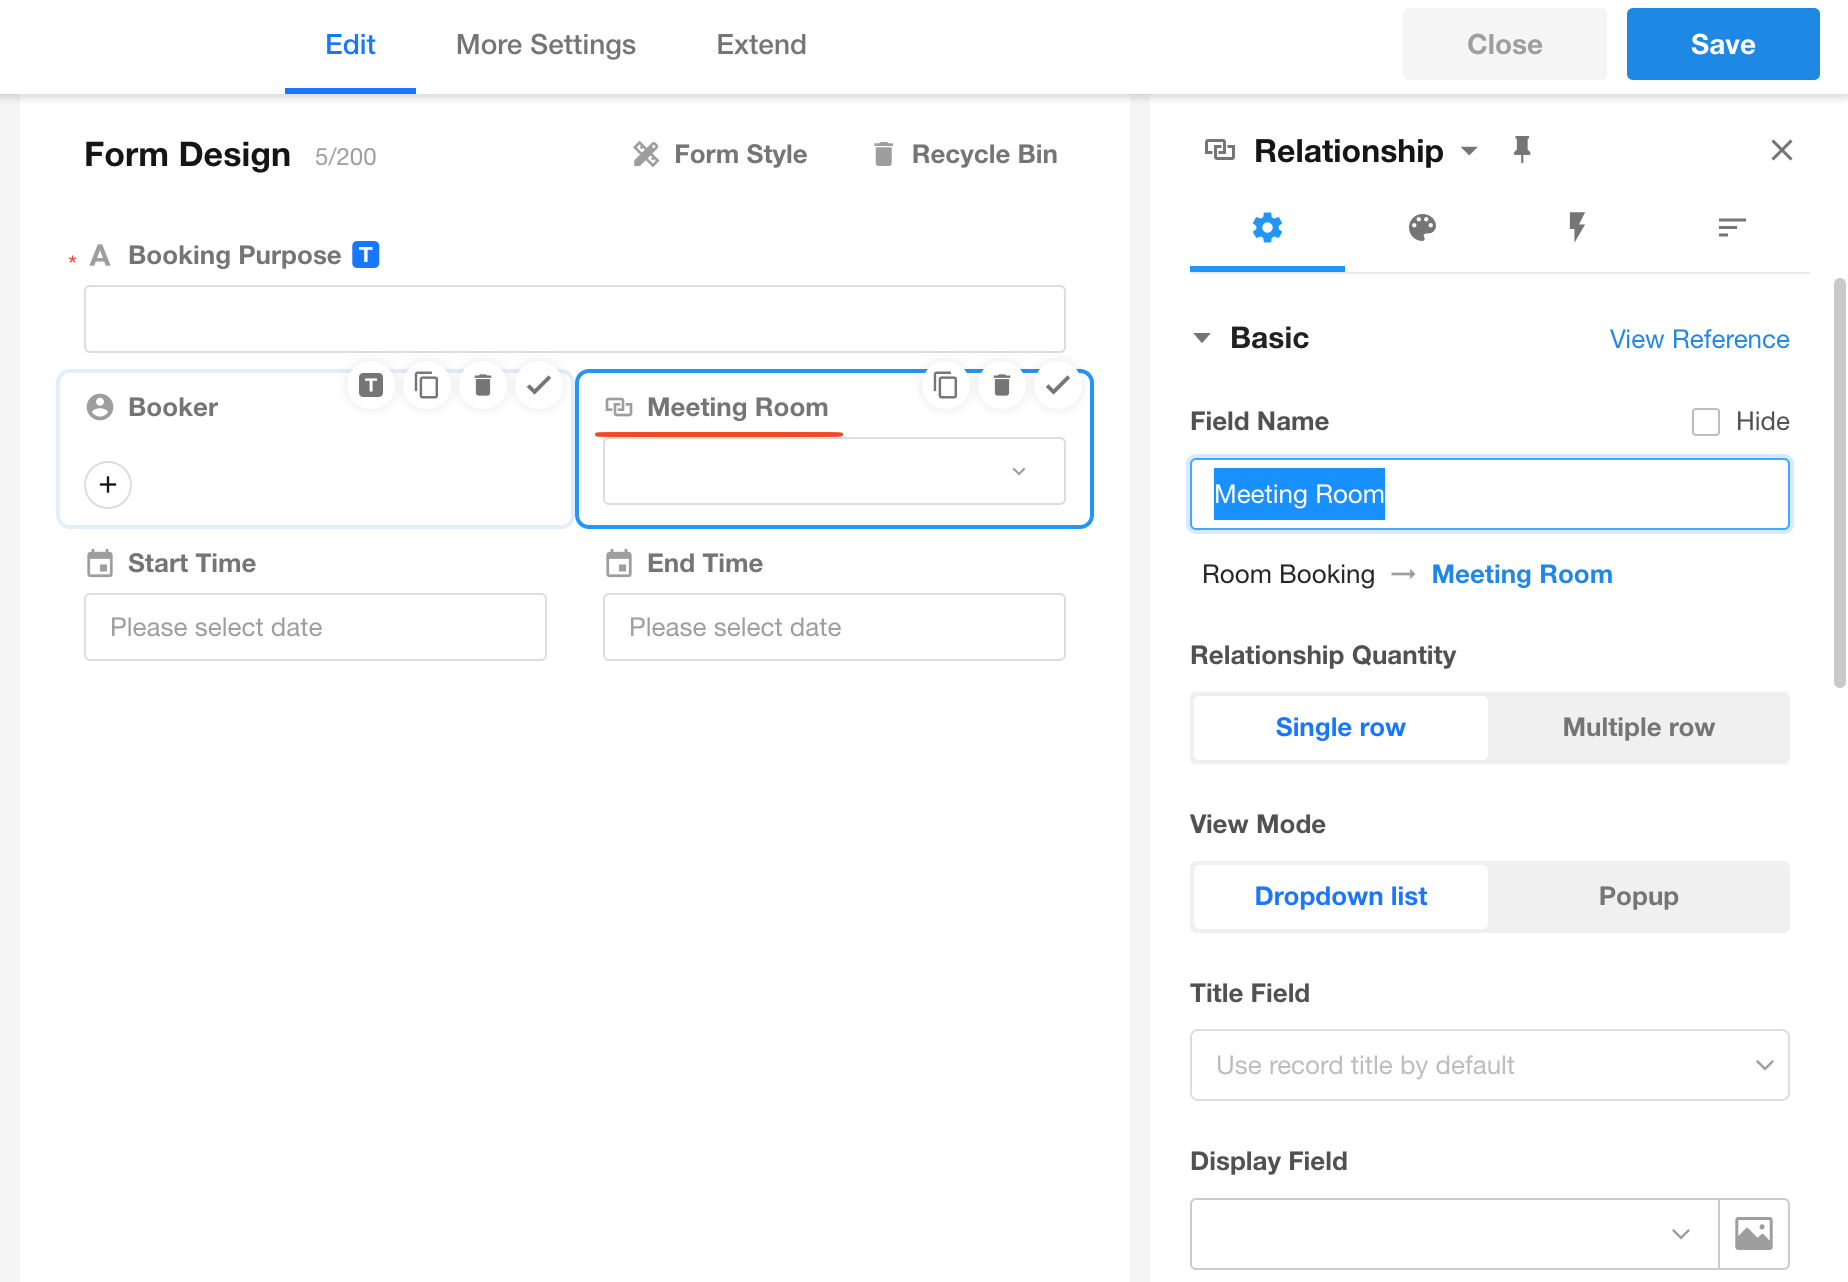
2. Create a Booking Worksheet – Meeting Room Booking Worksheet
In this worksheet, configure the following fields:
-
Booking Purpose
-
Booker (person)
-
Resource Field: e.g., Meeting Room, related to the Meeting Room worksheet (can be single or multiple records)
-
Time Fields: Start and End times for the meeting
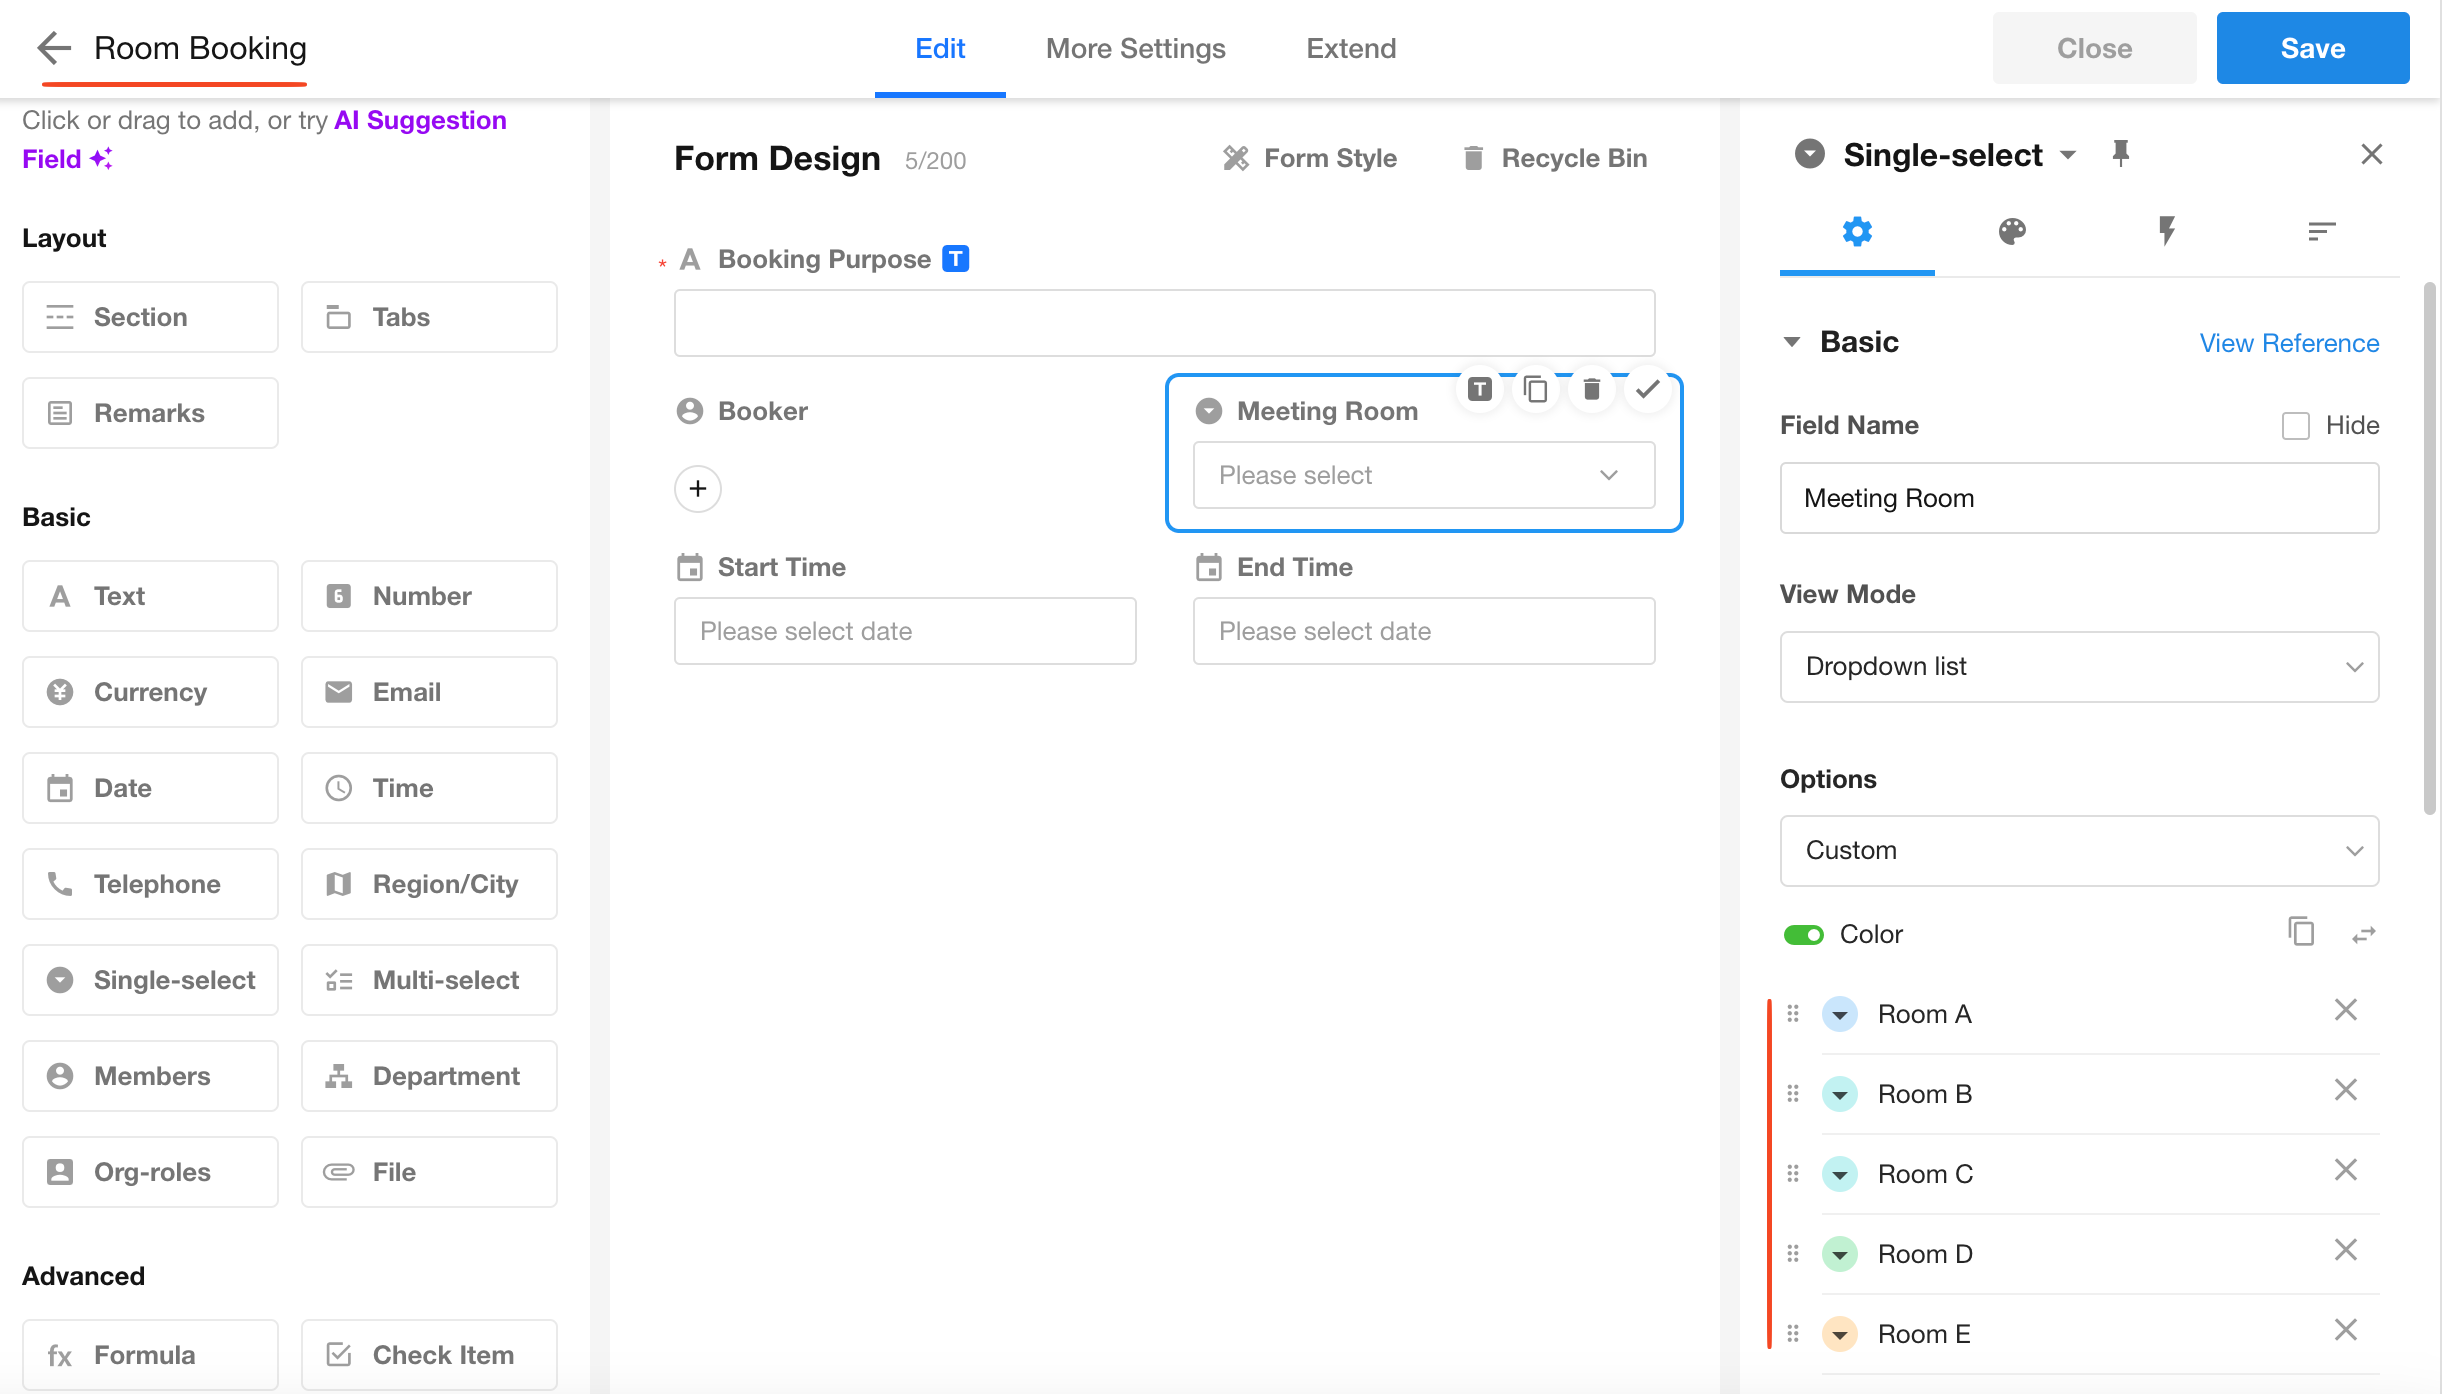
If you only need to display the meeting room name during booking and don’t require additional meeting room details, you can use a Single Select field instead of creating a separate meeting room worksheet.
3. Add Records
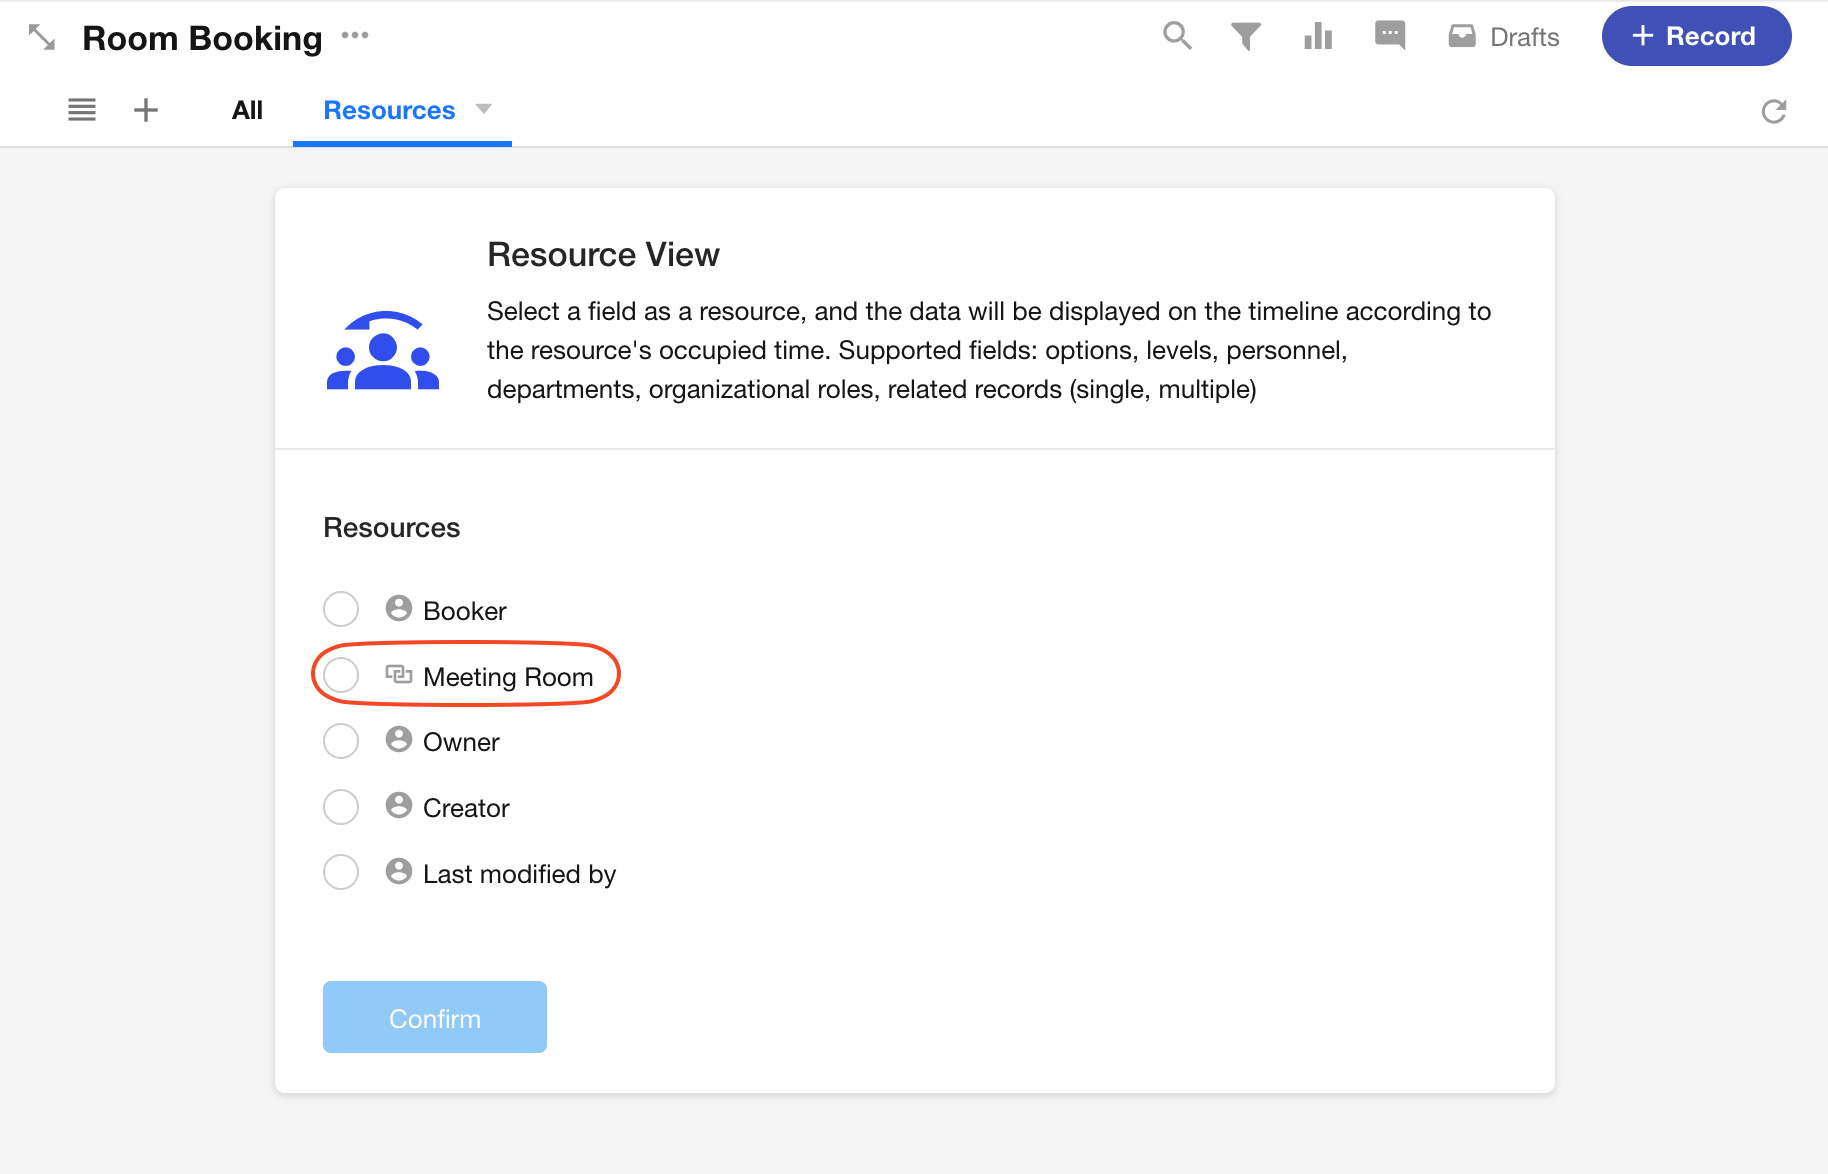
4. Create a New Resource View
Click the "+" button to add a new view, and select Resources View.
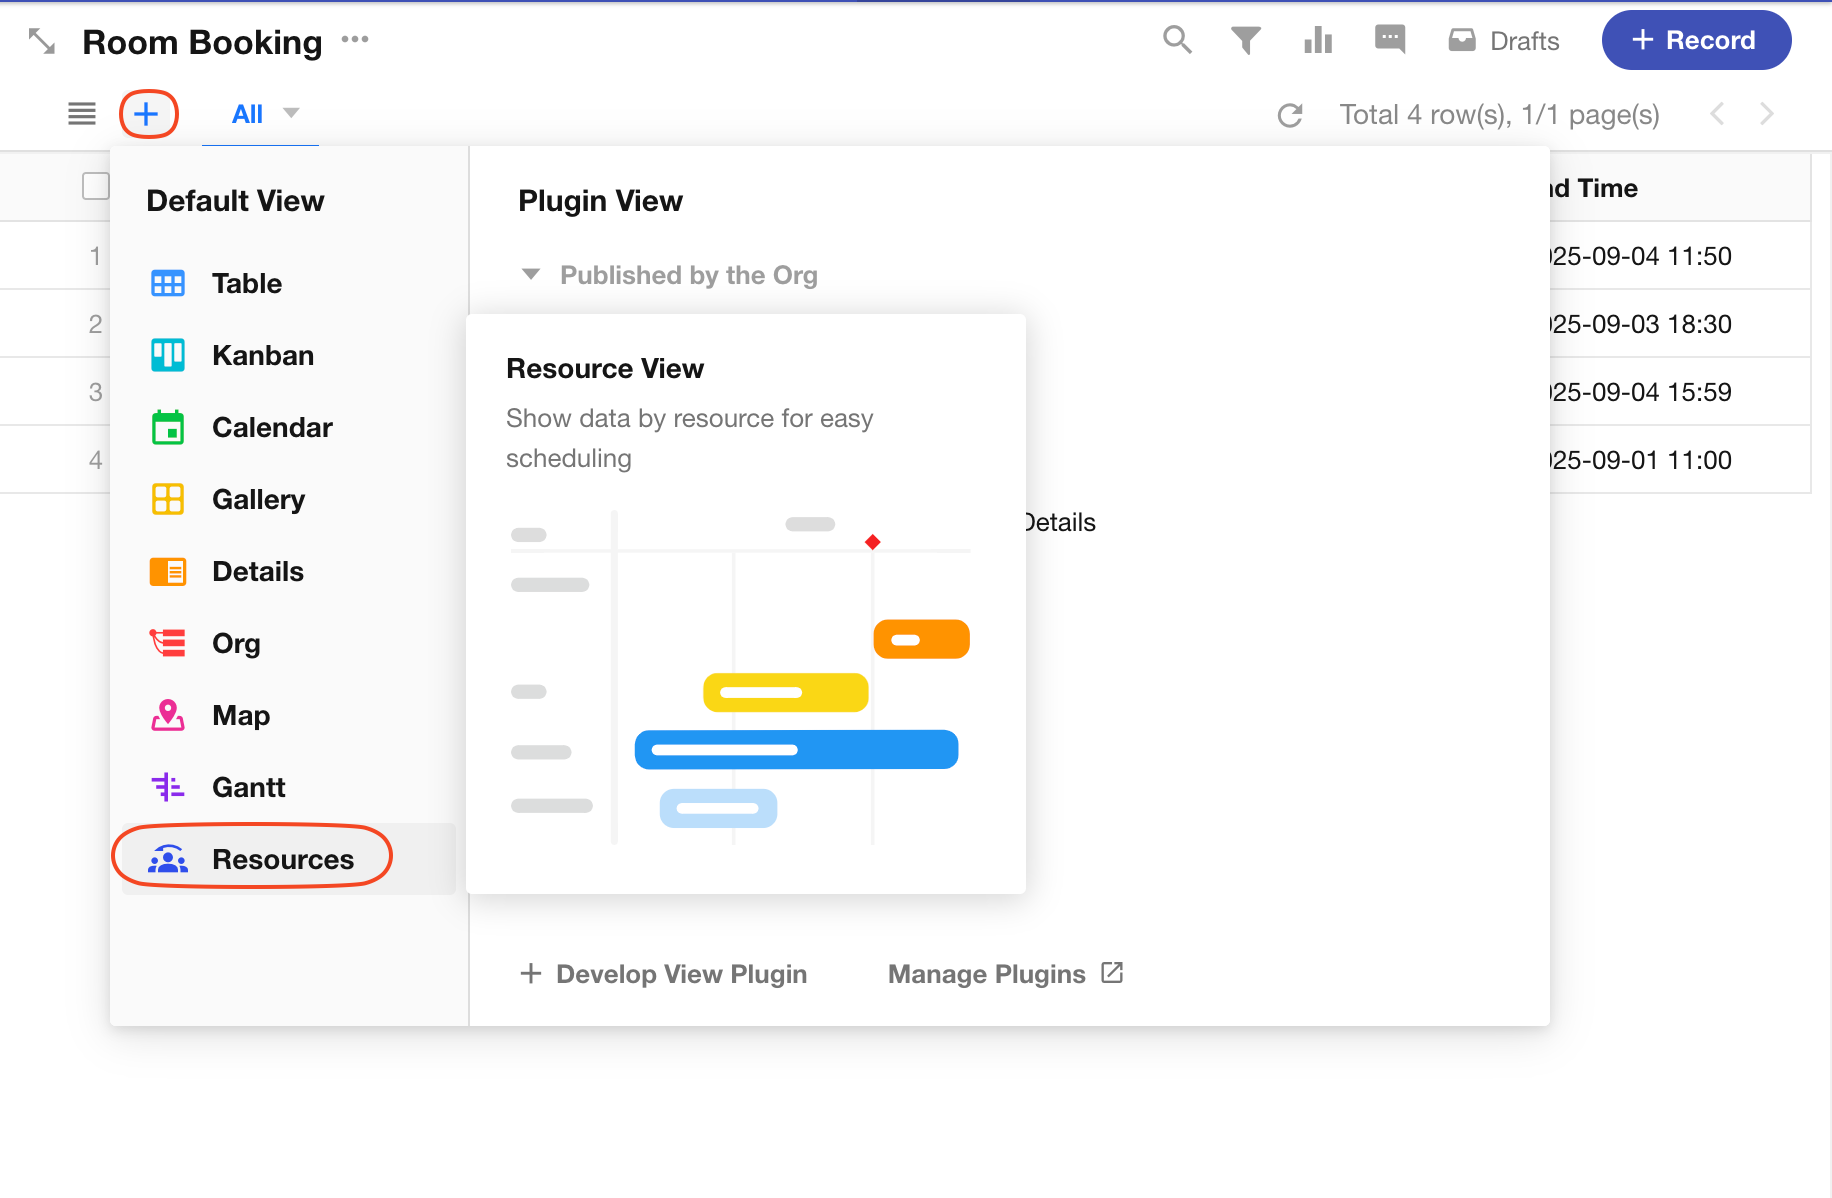
Select the related meeting room field as the resource field.
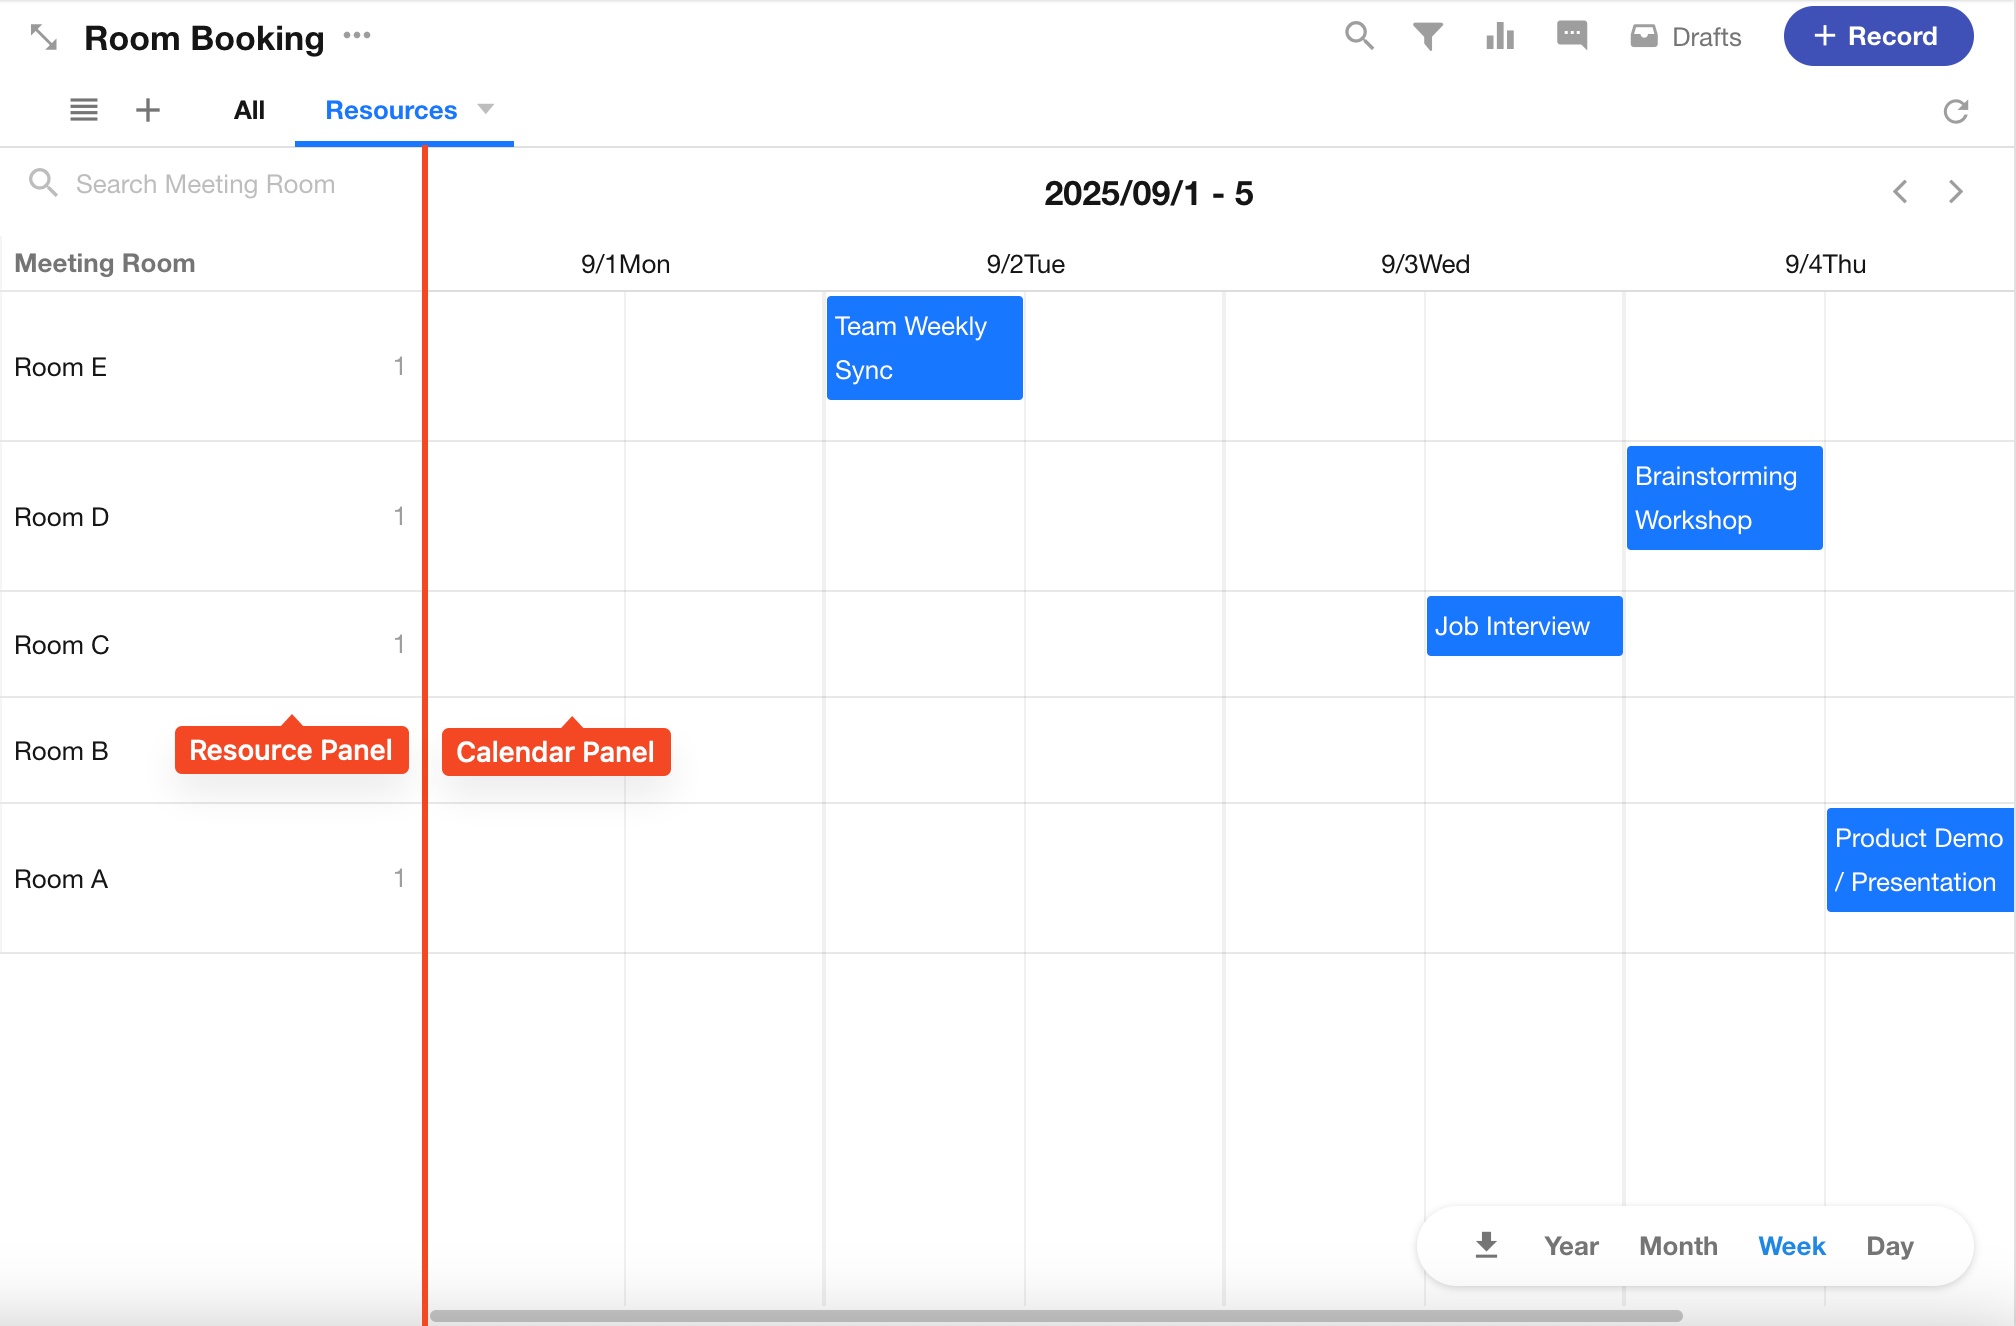
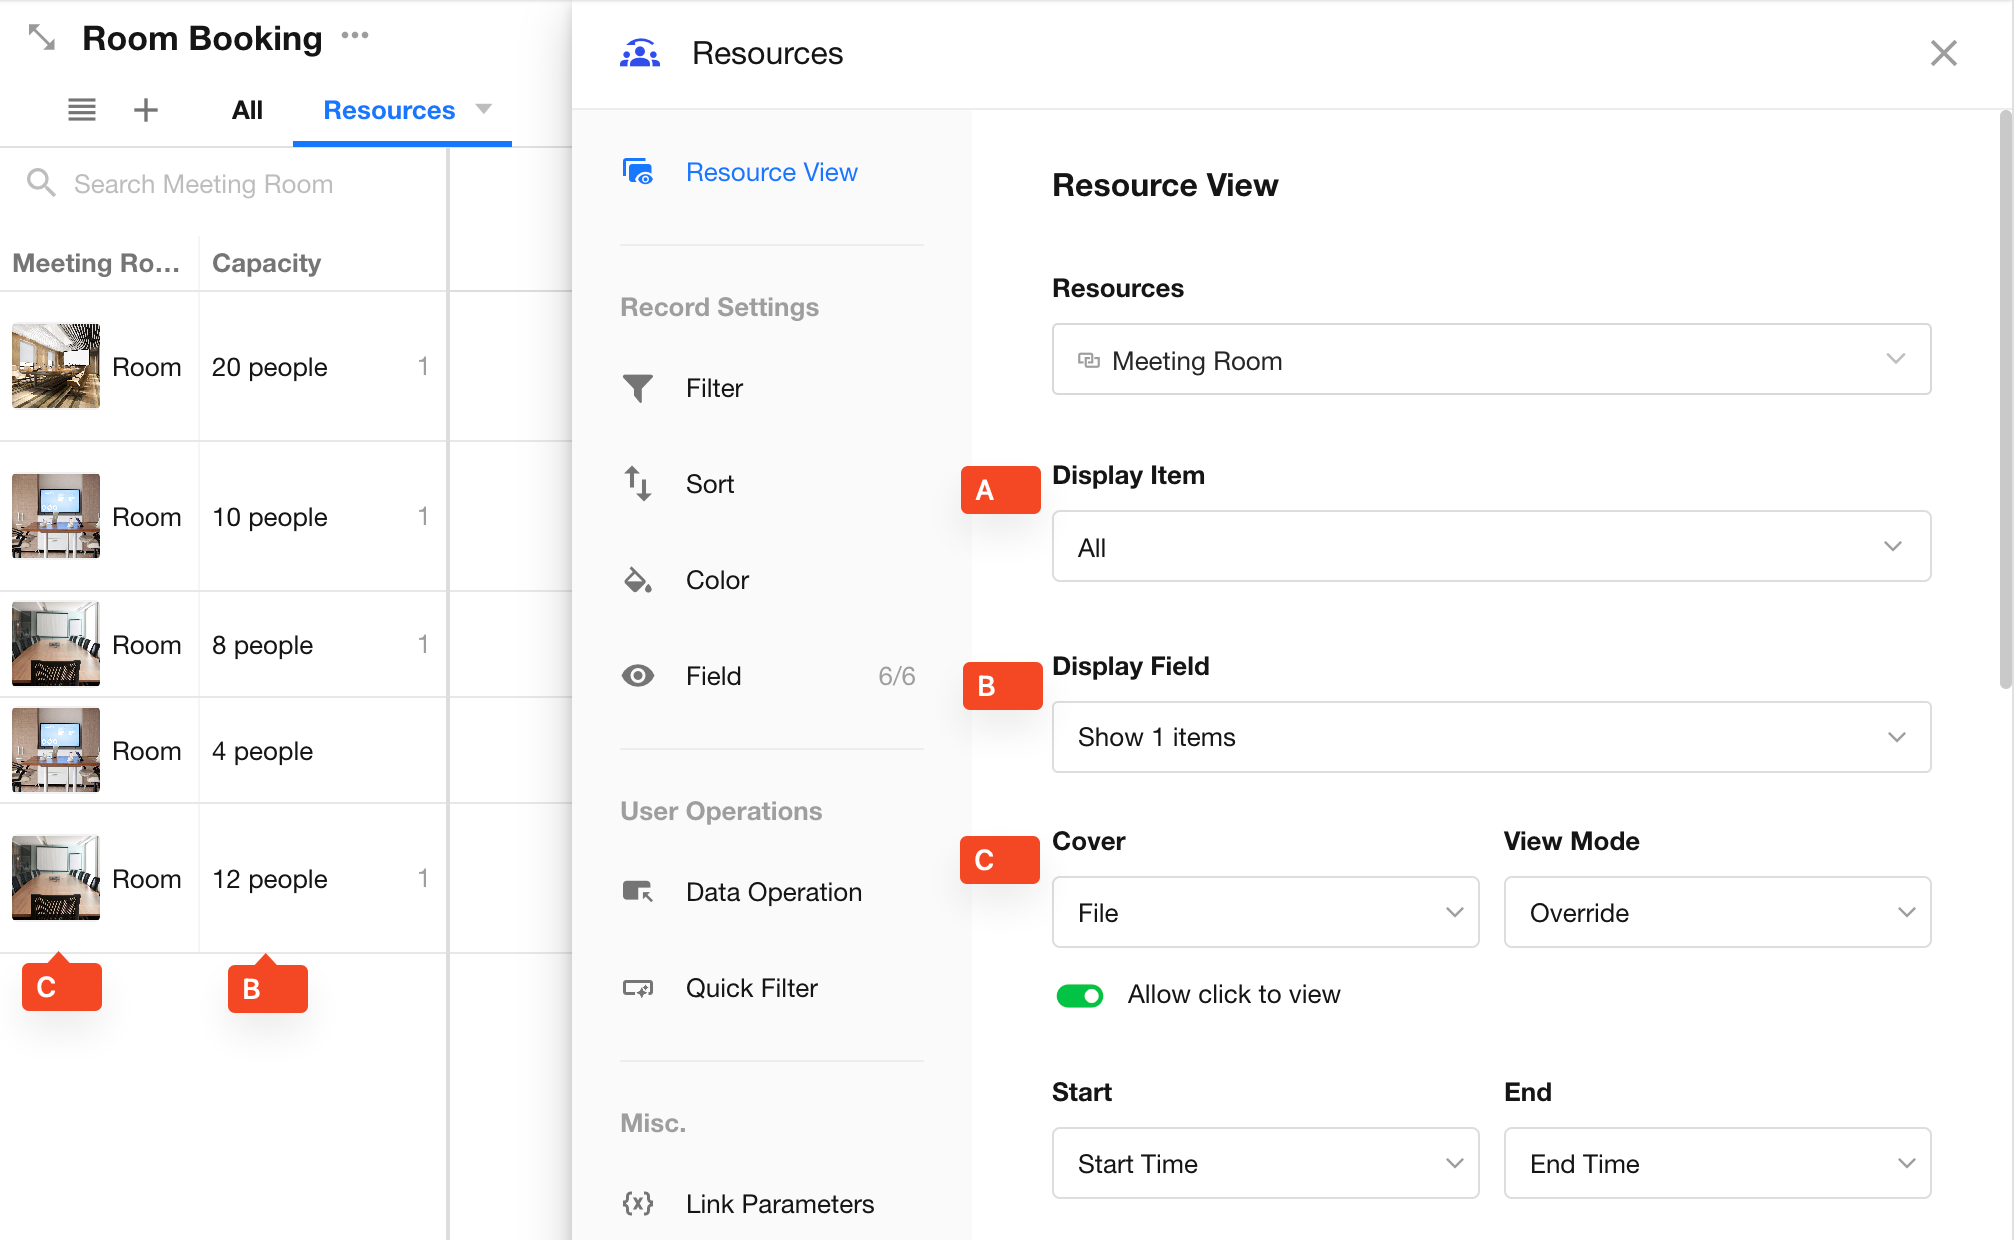
Configuring the Resources View
The resources view includes a Resource Panel on the left and a Calendar Panel on the right.
Resource Panel Settings
-
Display Items
Choose which resources to show (e.g., only show specific meeting rooms or those in a certain status). Up to 50 resources can be displayed.
-
Display Fields
In addition to the title field, you can choose to show extra information, such as capacity or available equipment.
-
Cover Image
Shown to the left of the title. You can select how it is displayed and whether clicking it opens the record details.
Calendar Panel Settings
-
Start and End Fields
Specify which date/time fields to use for the time bar display.
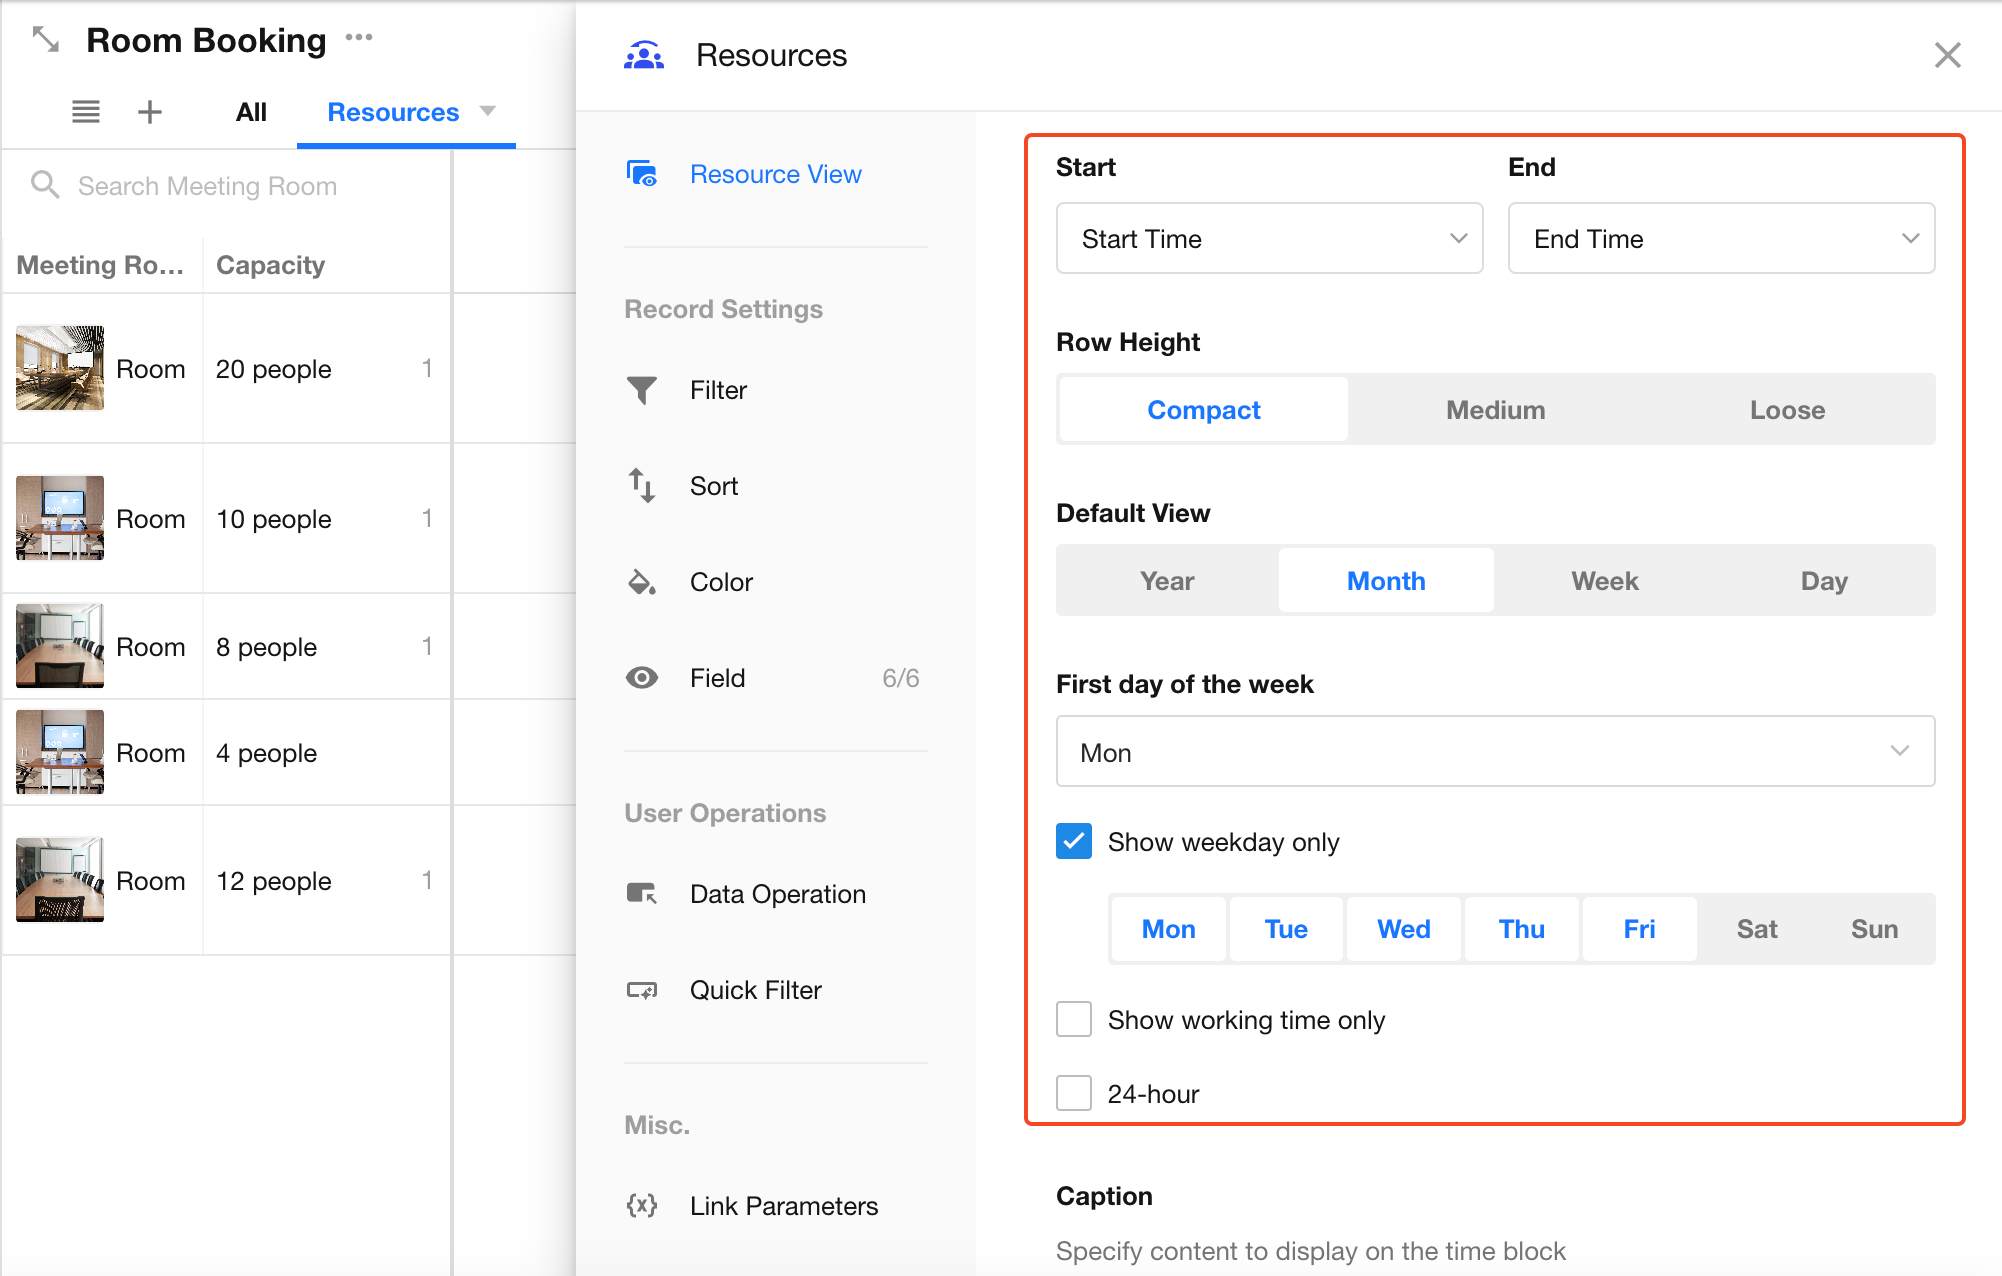
-
Default View
The calendar supports Year, Month, Week, and Day views. You can set the default view and allow users to toggle manually.
-
First Day of the Week
In weekly view, choose whether to start the week on Monday, Sunday, etc.
-
Show Weekdays Only
For example, in meeting room scheduling, weekends might not be used. You can configure the view to only show Monday to Friday.
-
Show Work Hours Only
Define business hours to improve visibility and exclude off-hours.
-
24-Hour Format
Determines whether time is shown in 24-hour format or AM/PM.
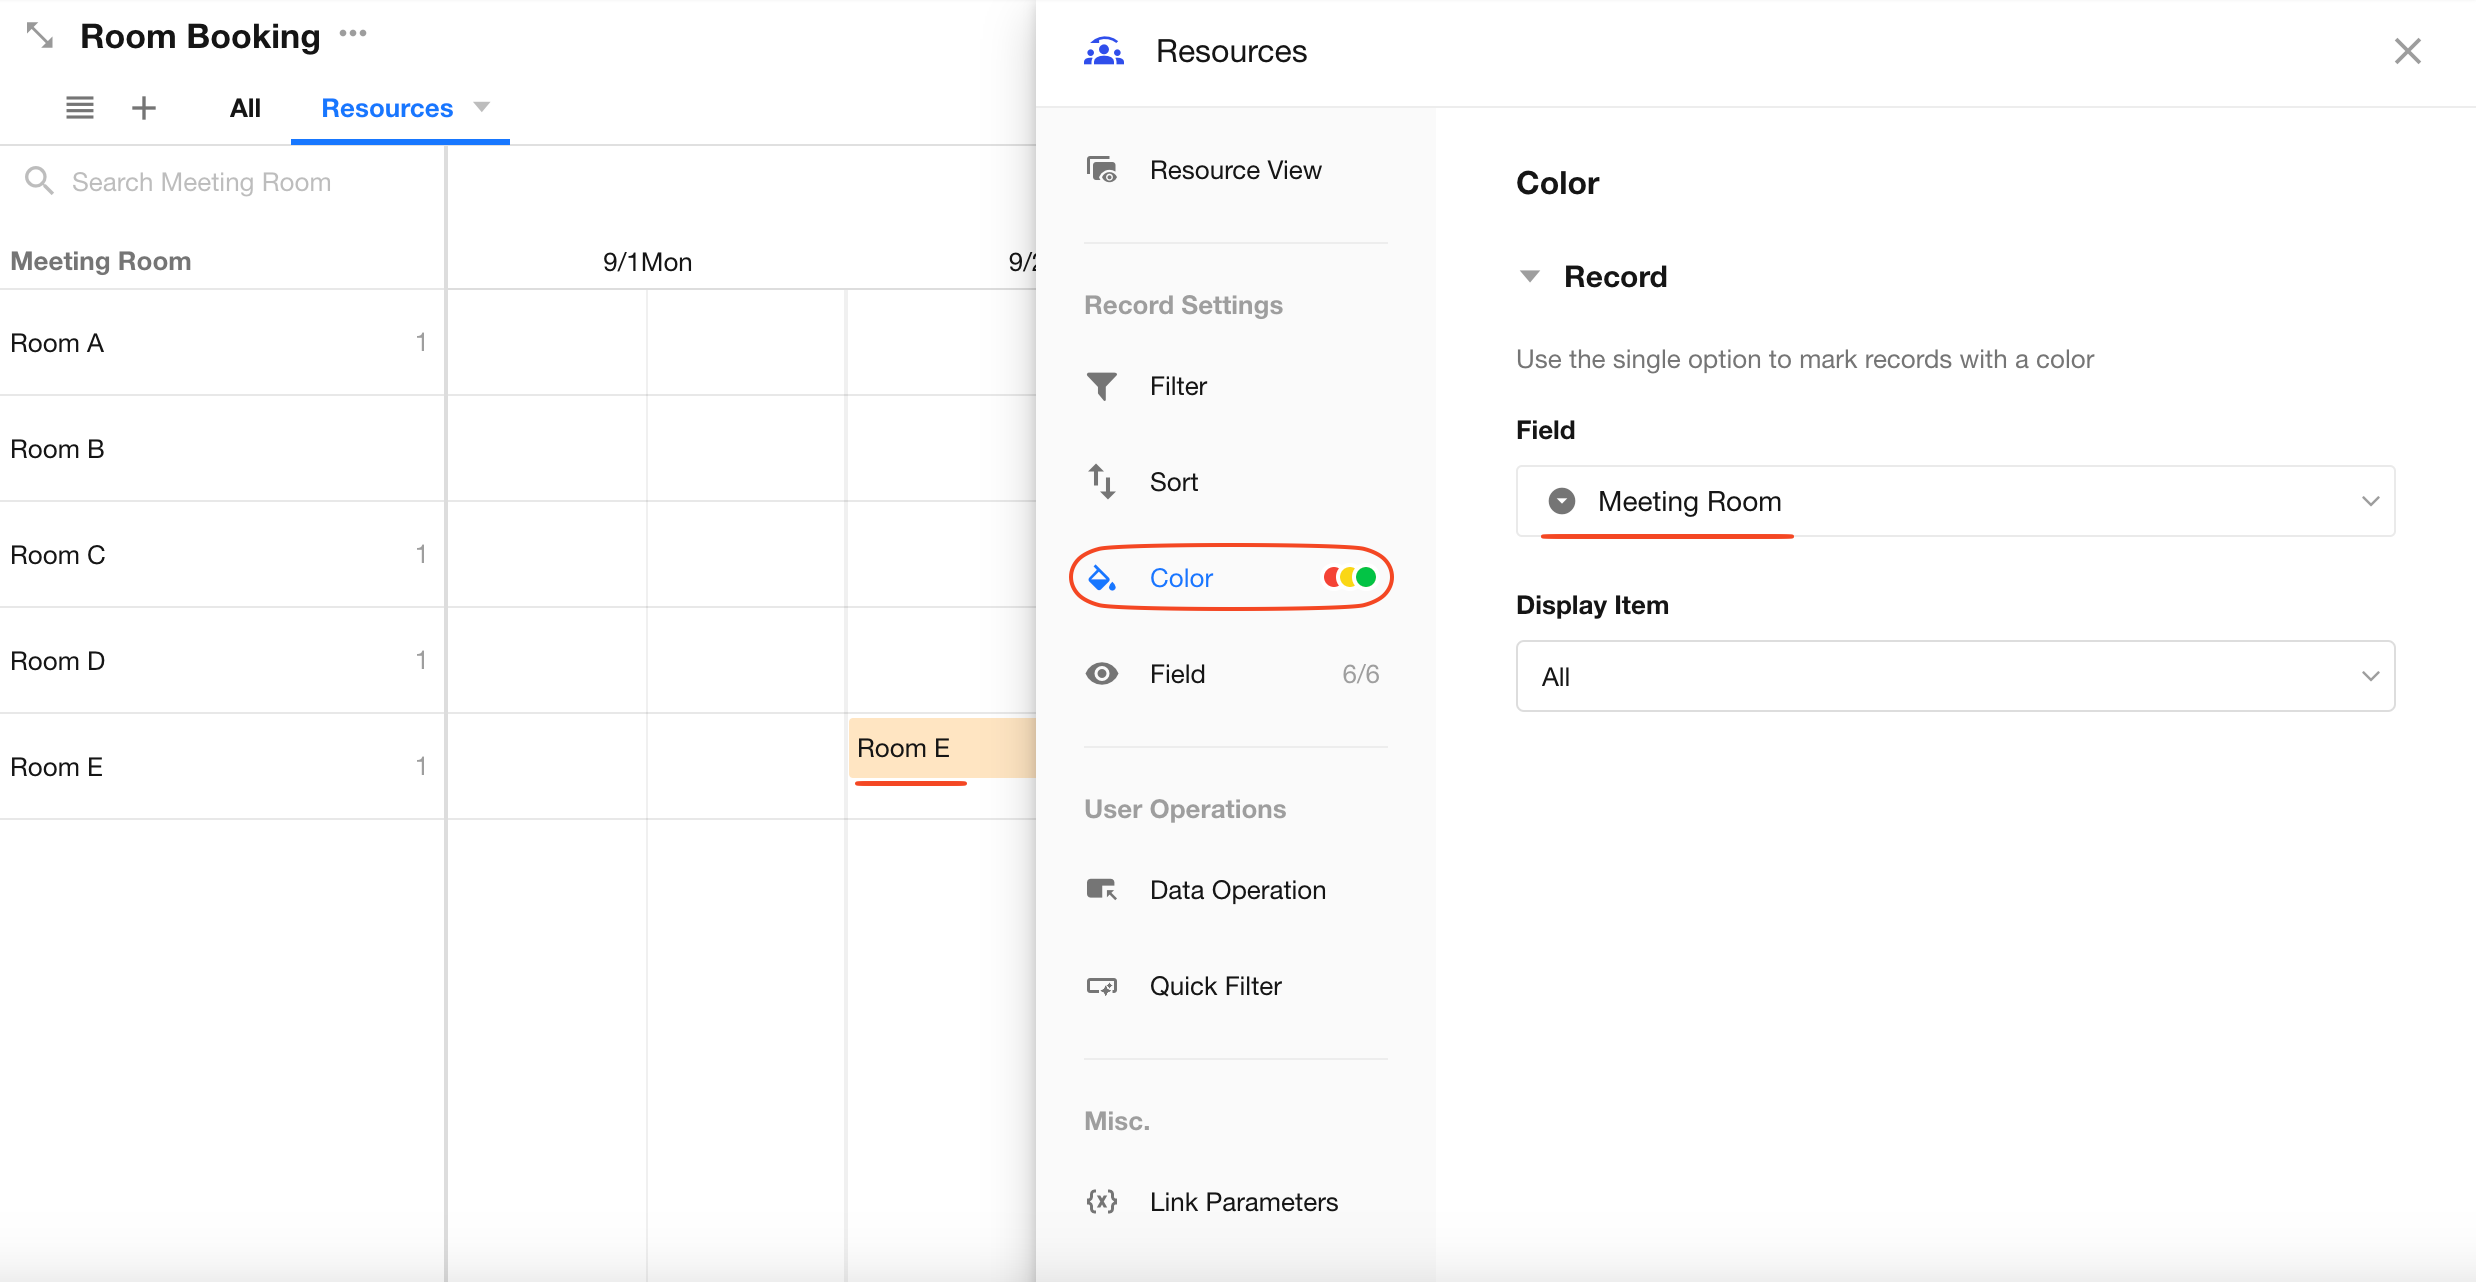
Record Color
By default, time bars are displayed in blue. If the record includes a Single Select field, its color will reflect the selected option.
Quick Actions
-
Click the add button next to a resource to quickly create a record.
-
Drag the divider between the resource and calendar panels to resize the resource panel.
-
Drag the left/right edges of a time bar to modify start/end times. Drag the whole bar to move the schedule or reassign it to a different resource.
-
Click arrows to navigate to the next or previous time period (e.g., next week).
-
Export the current view as a PNG image.
-
Switch calendar display modes (Day/Week/Month/Year).

Was this document helpful?